GIRBAU COIN control User manual

Cod. 429373
Rev. 02/0606
Operation Instructions
for washers
COIN CONTROL
GIRBAU, S.A.
Crta de Manlleu, km. 1
08500 VIC (Barcelona) •SPAIN
Tel. 34 93 8861100
Fax 34 93 8860785
www.girbau.com
For USA & CANADA:
CONTINENTAL GIRBAU Inc.
2500 State Road 44
WI 54904 Oshkosh •USA
Tel. 1(920) 231-8222
Fax 1(920) 231-4666
www.cont-girbau.com
Serial #
Shipping date
COIN
control

Cod. 429373
Rev. 02/0606
Model From serial #
High Speed
HS-6008 2.080.884
HS-6013 2.110.200
HS-6017 2.120.320
EH020 1.430.001
EH030 1.460.021
EH040 1.470.060
Medium Speed
MS-610 2.020.001
MS-613 2.030.001
MS-617 2.040.001
MS-623 2.050.001
EM025 1.370.001
EM030 1.380.001
EM040 1.390.001
EM055 1.400.001

Cod. 429373
Rev. 02/0606
3
Safety Instructions
WARNING!
IMPORTANT SAFETY INSTRUCTIONS
WARNING: To reduce the risk of fire, electric shock or injury to persons when using the washer, follow basic
precautions, including the following:
1. READ all instructions before using the washer and KEEP them in a prominent location for customer use.
2. Do not wash articles that have been previously cleaned in, washed in, soaked in, or spotted with gasoline,
dry cleaning solvents, other flammable, or explosive substances as they GIVE OFF VAPORS that could
ignite or explode.
3. DO NOT ADD gasoline, dry-cleaning solvents, or other flammable, or explosive substances to the wash
water. These substances give off vapors that could ignite or explode.
4. Under certain conditions, hydrogen gas may be produced in a hot water system that has not been used for
two weeks or more. HYDROGEN GAS IS EXPLOSIVE. If the hot water system has not been used for
such a period, before using the washing machine, turn on all hot water faucets and let the water flow from
each for several minutes. This will release any accumulated hydrogen gas. As the gas is flammable, do
not smoke or use an open flame during this time.
5. Do not allow children to play on or in the washer. CLOSE SUPERVISION of children is necessary when
the washer is used near children.
6. Before the washer is removed from service or discarded, REMOVE the door.
7. DO NOT TRY TO OPEN THE WASHER’S DOOR if the drum is moving.
8. Do not install or store the washer where it will be exposed to the WEATHER.
9. DO NOT TAMPER with controls.
10. DO NOT REPAIR OR REPLACE any part of the washer or attempt any servicing, unless specifically
recommended in the user instructions or in published user-repair instructions that you understand and
have the skills to carry out.
11. DO NOT BY-PASS any safety device. It is NOT ACCEPTED ANY electric or mechanic MODIFICATION
OR MANIPULATION. DO NOT INSTALL foreign components inside the machine.
12. All SAFETY INSTRUCTIONS included in the Instruction Handbooks, should be reprinted and posted in the
laundry room.
13. Failure to install and operate this machine according to the Instruction Handbooks or to work safety and
hygiene standards and common sense, may result in conditions which CAN PRODUCE bodily injury or
loss of life.
14. The DANGER, WARNING, CAUTION and IMPORTANT instructions appearing in the Instruction
Handbooks are not meant to cover all possible conditions and situations that may occur. It must be
understood that common sense, caution and carefulness are factors which cannot be built into this
machine. These factors MUST BE supplied by the person(s) transporting, installing, maintaining, or
operating the machine.
15. All connections for electrical power and plumbing MUST comply with the statutory safety standards
applicable to each country, and be made by Licensed Installers only (refer to note 3).

Cod. 429373
Rev. 02/0606
4
Safety Instructions
16. WARNING!
MACHINE INSPECTION, FILTER CLEANING, MAINTENANCE, SERVICE OR PARTS REPLACEMENT.
Before attempting any service or inspection of the washing machine:
Close and mechanically interlock the water supply valves and check that machine has COMPLETELY
drained, parts have cooled down and that no pieces are in movement through inertia.
To reduce the risk of electrical shock:
•COMPLETELY disconnect the machine from the original power source and check for accidental
reconnection. MOVING THE ON SWITCH TO THE OFF POSITION IS NOT SUFFICIENT.
•Disconnect the electrical power of the external dosing to the washing machine. These circuits are
independent of the washer’s supply.
•Wait a minimum of (5) five minutes after disconnection to ensure the elimination of residual voltage within
the machine.
Failure to comply with this warning may result in serious injury.
17. NEVER operate the machine without the panels and guards correctly in place and secured.
18. The room SHALL comply with the environment conditions (air venting, temperature, humidity...) specified in
the Installation Instruction Handbook. NEVER INSTALL THE WASHING MACHINE in very humid
environments or with water splashes.
19. DO NOT OPERATE the machine if it is suspected to be faulty, either visually, by noise or smell, or with
missing or broken parts.
20. Machine start-up SHALL be made by Authorised Service Technicians (refer to note 2).
21. Machine SHALL BE USED by qualified personnel (refer to note 1), wholly familiar with the machine’s
operation.
22. DO NOT allow children or people with handicaps incompatible to machine use to operate machine.
23. To minimise the possibility of creating a fire, take SPECIAL care, KEEP appliance area free from
combustible materials and fire extinguishers should be easily ACCESSIBLE to all laundry staff.
24. Delimitate danger areas and PREVENT public access to them with machine in operation.
25. On completion of the day's work, TURN OFF the manual supply valves and DISCONNECT the electrical
power by the External Automatic Switch.
26. Always CONTACT an Authorised Service Technician or Licensed Installer (refer to notes 2 & 3) about any
problems or conditions you do not understand.
27. For a safe operation, machine MUST be kept in a good environment, used and maintained properly, and
serviced annually by Authorised Service Technicians (refer to note 2).
28. The Distributor (seller) IS OBLIGED to thoroughly train the operator during the starting-up.
THE MANUFACTURER REFUSES ANY RESPONSIBILITY IF THESE SAFETY INSTRUCTIONS AND ALL
INFORMATION IN THE CORRESPONDING HANDBOOKS ARE NOT FOLLOWED.
SAVE THESE INSTRUCTIONS
NOTES:
(1) Qualified Personnel refers to anyone who has read the Instructions Handbooks, has been trained and has a thorough understanding
of the machine’s operation
(2) An Authorised Service Technician (AST) is one that has successfully completed training on the product by Girbau S.A, or a Girbau,
S.A. Distributor.
(3) An Authorised Licensed Installer is one that is suitably qualified in the procedures and regulations applicable in that country.

Cod. 429373
Rev. 02/0606
5
Safety Instructions
HAZARD SYMBOLS USED ON WASHER LABELS:
Electric risk
Protection guard for electric
components.
Mechanical risk
Protection guard for moving parts
High temperature risk.
Operate with caution.
Use appropriate protections.
Risk of harmful vapours inhalation.
Keep dispenser box closed.
Use appropriate protections.
SYMBOLS USED IN THIS MANUAL
This symbol alerts you to potential
hazards for the user, the machine or the
fabric.
This symbol is used to give relevance to
any precise explanation

Cod. 429373
Rev. 02/0606
6
Safety Instructions
IMPORTANT INSTRUCTIONS FOR USE AND CONSERVATION
1. EXPECTED MACHINE USE AND DON’TS. This machine has been made and designed for washing or
cleansing in a water bath, linen and textile materials without solvent impregnation or explosives. Unless
approved by the manufacturer in writing, it is not considered appropriate FOR OTHER PROCESSES.
2. Machine MATERIALS in contact with wash products are:
•Stainless Steel AISI-304 L.
•Polypropylene PP.
•EPDM and NBR.
•Borosilicate glass.
The chemicals furnisher and the machine owner will be responsible to assure that the products ARE
COMPATIBLE and will not produce machine oxidation or damage.
Notice that the hypochlorite (bleach), in certain conditions of use, generates chlorine gas.
The chlorine is a corrosive and oxidizing substance that, in elevated concentrations and temperature,
deteriorates the stainless steel and elastomers.
There are other highly oxidizing agents, such as the ozone, that can cause the same effect.
3. Periodically CLEAN machine, to prevent metallic parts corrosion, to produce higher output and for a longer
life. To clean the washing machine, use water and detergent, rinse with a damp cloth, and dry.
4. NEVER use harsh products to clean the machine and laundry room. There are products on the market,
which are highly corrosive.
5. If machine is left idle for long periods of time, it must be PROTECTED from humidity and temperature
variations.
6. FOLLOW the fabric care instructions supplied by the manufacturer, GIRBAU S.A., REFUSES ANY
RESPONSIBILITY IN CASE OF TEXTILE WEAR AND TEAR.
7. Failure due to improper machine operation may VOID WARRANTY.
8. Replacing any part of the washer can affect the machine’s security.
Examples:
•Just a screw or bolt of insufficient strength could cause dangerous damage.
•A heater without an internal fuse could provoke a fire.
•An inadequate clamp can be the cause of water leaks and short circuits... etc.
The reason for which ONLY ORIGINAL GIRBAU SPARE PARTS MUST BE USED.
The incompliance of this precaution may result in a washer breakdown, a serious accident, and loss of the
warranty.
9. When asking for information on your machine, MENTION model and serial number (serial plate is located
at the rear side).
10. THE ELECTRICAL DIAGRAM IS LOCATED IN THE UNDERSIDE OF THE WASHER’S TOP COVER.

Cod. 429373
Rev. 02/0606
7
Index
SAFETY INSTRUCTIONS ............................................................................................................ 3
INDEX ........................................................................................................................................... 7
1. DESCRIPTION ......................................................................................................................... 8
1.1 Characteristics ........................................................................................................................ 8
1.2 Expected use of the washer ................................................................................................... 8
2. OPERATION INSTRUCTIONS ............................................................................................... 9
2.1 Control panel .......................................................................................................................... 9
2.2 Loading the washing machine .............................................................................................. 9
2.3 Using the dispenser ............................................................................................................. 10
2.4 Starting a program ................................................................................................................ 11
2.5 Program application and parameters .................................................................................... 12
2.6 Stop modes ............................................................................................................................ 14
2.6.1 End of cycle ................................................................................................................ 14
2.6.2 Interrupting a program ................................................................................................ 14
2.7 Unbalance control ................................................................................................................. 14
3. MODIFICATION MODE. ................................ ......................................................................15
3.1 Access to MODIFICATION mode .........................................................................................15
3.2. Modification of program contents. Pro menu
3.2.1 Master program
3.2.2 Default program contents. CE configuration. All models
3.2.3 Default program contents. USA configuration. EH020, EM025. SP-0 models
3.2.4 Default program contents. USA configuration. EH020, EM025. SP-1 models
3.2.5 Default program contents. USA configuration. Other models
3.2.6 Phases definition
3.2.7 Definition of programmable functions and values for each phase
3.2.8 Modification of a program
3.3. Program price. Single price for each program. CASH Menu ................................................15
3.3.1. Program price programming / modification .................................................................16
3.4. Operation mode with program accelerator. DEMO menu.
3.4.1. Execution of a program in DEMO mode.
3.5. Information menu. Info menu
3.6. Modification of operating parameters. Mod menu
3.6.1 Modification of the parameters
3.7. Modification of access code to modification mode. Ncod menu
4. PROGRAMS PRICE
4.1 Hour menu
4.1.1 Setting clock time and day of the week
4.2 CALE menu
4.2.1 Time programming
4.3 CASH menu
4.3.1 Price of each program according to the three rates
5. TROUBLESHOOTING ........................................................................................................... 17
5.1 What to do when … ............................................................................................................... 17
5.2 System alarms ..................................................................................................................... 18
6. MAINTENANCE ..................................................................................................................... 19
6.1 Operations described …........................................................................................................ 19
6.2 Cleaning the washer ........................................................................................................... 19
6.3 Cleaning the door seal ......................................................................................................... 19
6.4 Cleaning the electrovalve filters ........................................................................................... 19
6.5 Cleaning the dispenser ........................................................................................................ 20
6.6 Cleaning the drain pump ...................................................................................................... 21
6.7 Revising the safety mechanisms .......................................................................................... 22
6.8 General revision .................................................................................................................... 22
6. SERVICE REMOVAL .............................................................................................................. 23
6.1 Dismantling ........................................................................................................................... 23
NOTE
The contents of chapter 3. ADVANCED USE MODE and 4. PROGRAMS PRICE, can be consulted at the manufacturer’s
website: www.girbau.com, (USA/CANADA: www.cont-girbau.com), see Advanced Operation Instructions COIN
CONTROL.

Cod. 429373
Rev. 02/0606
Description 8
1. DESCRIPTION
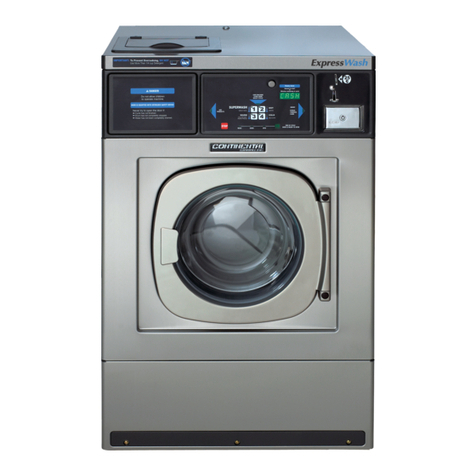
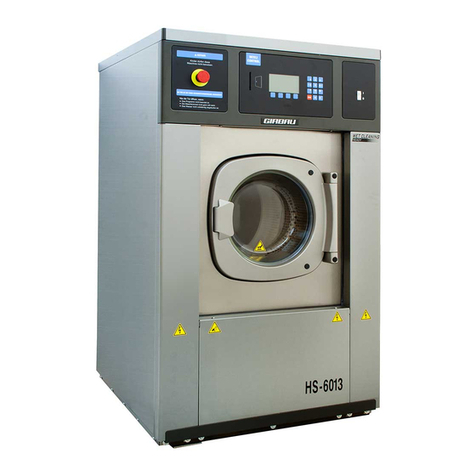
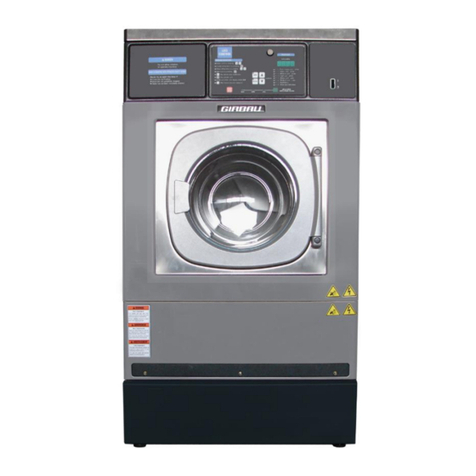
WASHER EXTRACTOR DESIGNED TO WASH OR TREAT FABRIC IN A WATER BATH.
1.1. CHARACTERISTICS
Construction characteristics:
•HIGH SPEED MODELS (HS / EH). washers, capable of extracting with speeds above 350G
(280G in model HS-6008/EH020) without having to be bolted down. The design of its suspension
system: multi-directional springs and shock absorbers to cushion up to 95% of the vibrations produced
during the spin cycle.
•MEDIUM SPEED MODELS (MS / EM). Hard-mount construction. They have to be bolted down to the
floor.
•Stainless steel inner and outer drum. The openings in the drum blades promote the uniform
distribution of bath water and improve the yield of the washer both during the wash and the rinse cycles.
•The drum rotation is produced by an asynchronous motor of alternating current controlled by inverter.
•Hot and cold water connections with a safety mechanism to prevent contaminating by back-flowing into
the general potable water system.
•Large capacity drain valve. (Option for pump drainage in models HS-6008/EH020).
•Water inlets and all product dispensers done using a common collector with an anti-siphon mechanism.
•Option for heating the bath using electric heaters or steam injection.
Functional characteristics:
•Operation control of the washer by microprocessor.
•Operation of the washer adaptable to the possibilities of the installation and the needs of the user.
•Washing programs: availability of 4 pre-programmed programs. Each program allows for: pre-wash,
wash with a maximum temperature of 80ºC (176ºF) and four rinse phases with a final spin at high speed.
•Great versatility in individually modifying the content of each program. (More information about the
Programming Mode in the manual of Advanced Operation Instruction COIN CONTROL on the
manufacturer website: www.girbau.com, (USA/CANADA: www.cont-girbau.com)).
•Temperature control in the wash phase done by hot and cold water mixer in accordance
with the programmed temperature and the activation of the heating system. Precision of +/- 2ºC
(+/- 3.5ºF).
•Level control done with an electronic pressure transmitter.
•communication via series between the washer microprocessor and the inverter control of the
motor. This communication takes advantage of all the features offered by inverter technology which
results in a significant energy savings and an optimal management of the spin cycle. This in turn implies
a significant reduction in noise, vibration and wear on the washer components.
•Multiple controls that assure the safe use of the washer.
•The programs are activated by the introduction of coins or tokens into the washing machine’s meter.
•Programming programs price
1.2. EXPECTED USE OF THE WASHER
This machine has been made and designed for industrial washing or cleansing in a water bath, linen and
textile materials. Any other use will be considered contraindicated without the written authorization of the
manufacturer.
The washer should not be filled with a load which is much smaller or greater load than the nominal load.
Laundry should not be washed when loaded in bags. If necessary, load the machine to its nominal value.
It is not recommended to spin carpeting, canvas or waterproof fabrics.

Cod. 429373
Rev. 02/0606
Operation 9
2. OPERATION
2.1. Control panel
fig. 1
KEYS
A: Washing program selection keys.
Each key corresponds to a program. The selection of a program is registered by the key led
G: Program stop.
LIGHT SIGNAL of a program start sequence:
B: Washer loading and program selection
C: Wash products loading
D: Payment of the program value
E: LEDs indicating the phase of the program in progress.
F: Program time remaining.
Main reports that appear on the display:
REPORT MEANING
door Washer with door open. Machine ready to start a program
Pr-* Program selected.
C** / F*** Bath temperature (machines with heating)
Cash Price of the program / number of tokens to be inserted
8888 Wash program time left
End End of program. Door unlocked. Machine in idle mode.
2.2 Loading the washing machine
Group the fabrics to be washed in homogeneous loads, trying to reach the nominal value of the load. Empty
all pockets, fasten buttons, close zippers and remove accessories that are not machine-washable. It is not
recommend mixing whites with other colors.
Open the door and load the machine. The LED of washer loading and program selection blinks.
We recommend filling the drum to its nominal load. Do not overload the machine; the door must be able to
close easily.
While the door is open, the display reads door, indicating that the door must be closed in order for the
program to begin.
STOP
G

Cod. 429373
Rev. 02/0606
Operation 10
2.3 Using the dispenser
Fill the compartments with the corresponding products, according to these symbols:
- Powdered detergent for pre-wash.
- Powdered detergent for wash.
∆- Liquid bleach (chlorine, bleach...)
@- Liquid softener / neutraliser.
PRE-WASH CANCELLATION
Some washing machines don’t carry out the pre-wash phase. To avoid the dispenser to get cogged
up it is important to warn the operator about the correct use of the dispenser.
fig. 2 fig. 3
EH & EM models only.
fig. 2a fig. 3a

Cod. 429373
Rev. 02/0606
Operation 11
ALWAYS CLOSE THE DISPENSER DRAWER OR COVER BEFORE STARTING THE WASH CYCLE.
NEVER OPEN THE DISPENSER DURING THE WASHING CYCLE.
SUDS CONTROL.
The mechanical action of front-loading washing machines improves the quality of the wash but
encourages creation of suds.
Remember that a suds bath always reduces the efficiency of your wash. ALWAYS USE
CONTROLLED SUDS DETERGENT.
Oversudsing causes an increase in the pressure inside the machine and decreases the efficiency of
the sealing systems.
Repeated washing with a large amount of suds considerably reduces the life of seals and bearings.
THIS CIRCUMSTANCE IS NOT COVERED BY THE MACHINE’S WARRANTY.
2.4 Starting a program
•Close the door. The door report on display changes to SEL. (if SEL does not appear on the display,
repeat the door closing operation).
•Select the desired program with the corresponding keys. (For information on the characteristics of each
program, refer to section 2.5. Wash Programs). The selected program will be shown on the display and
the led associated to the key will light.
•Place the washing products in the dispenser and close it (refer to section 2.3). The led indicating the
program payment will light.
•After displaying the program number, the display will show the report CASH and next the price of the
program or the number of tokens to be introduced.
•Insert the amount showed in the display. The display will show the price or the number of tokens left to
start the selected program. Each coin or token introduced will deduct its value from the final value.
•It is possible to change the programme selection while inserting the coins or tokens. The price of the
program adapts according to the new selection and the value of the coins or the number of tokens
introduced will remain in the memory. The newly selected program will be displayed on the LED relating
to the key.
•When the introduced value reaches the program value, the washing program will start.
•Door lock. A 30 second security time is initiated from when the machine is set in motion, during which
time the drum rotation and water inlet is in small impulses and the door remains unlocked. At the end of
the 30 second locking delay, the locking mechanism is set and the wash cycle begins.
•Throughout the program’s duration, the door remains locked until the LED indicating the end of the
program lights.

Cod. 429373
Rev. 02/0606
Operation 12
2.5. Program application and parameters
In the default configuration, the program parameters are defined as indicated in the following charts:
General application programs.
HS & MS models.
PROGRAM WASH RINSES FINAL SPIN
num application estimated
time rotation ºC min num ∆Ctype min
1 VERY HOT
White cotton 31 min heavy
duty 60 10 3
high 6
2 WARM
Color-fast. perm press 31 min heavy
duty 50 10 3
high 6
3 COOL
Normal 29 min heavy
duty 30 8 3
high 6
4 COLD
Delicate 26 min normal 20 8 3 medium 3
USA / CANADA programs.
EH020 & EM025 models. SP-0.
PROGRAM WASH RINSES FINAL SPIN
num application estimated
time rotation ºF / ºC min nº ∆Ctype min
1 SUPER WASH
Heavy soil 23 min heavy
duty 104 / 40 7 3 high 4
2 HOT
White 17 min heavy
duty 104 / 40 4 2 high 4
3 WARM
Color-fast. perm press 17 min normal 86 / 30 4 2 high 4
4 COLD
Delicate 16 min normal 68 / 20 4 2 medium 3
USA / CANADA programs.
EH020 & EM025 models. SP-I, SP-2, SP-3.
PROGRAM WASH RINSES FINAL SPIN
num application estimated
time rotation ºF / ºC min nº ∆Ctype min
1 SUPER WASH
Heavy soil 32 min heavy
duty 80 / 27 7 3 high 5
2 HOT
White 28 min heavy
duty 80 / 27 7 2 high 5
3 WARM
Color-fast. perm press 28 min heavy
duty 80 / 27 7 2 high 5
4 COLD
Delicate 25 min normal 68 / 20 7 2 medium 3

Cod. 429373
Rev. 02/0606
Operation 13
USA / CANADA programs.
Other models
PROGRAM WASH RINSES FINAL SPIN
num application estimated
time rotation ºF / ºC min nº ∆Ctype min
1 SUPER WASH
Heavy soil 24 min heavy
duty 140 / 60 7 3 high 6
2 HOT
White 24 min heavy
duty 122 / 50 7 3 high 6
3 WARM
Color-fast. perm press 23 min heavy
duty 86 / 30 6 3 high 6
4 COLD
Delicate 20 min normal 68 / 20 6 3 medium 3
The parameters of each program can be modified: See the Advanced Operation Instructions COIN
CONTROL at the manufacturer’s website: www.girbau.com, (USA/CANADA: www.cont-girbau.com).

Cod. 429373
Rev. 02/0606
Operation 14
2.6 Stop modes
2.6.1 End of cycle
The buzzer and the LED indicating the end of the cycle inform that the program has finished and the door lock
is released.
2.6.2 Interrupting a program
A. Press the key for interrupting a washing program. The drum rotation stops and the bath drains.
At the end of the safety delay, the buzzer informs that door lock is unlocked and display shows STOP –
PUSH – Pr-* (number of program being executed) .
From this moment on, a pushing on the key corresponding to the programme currently being executed
resumes the cycle.
Opening the door cancels the cycle.
B. Disconnecting the external automatic switch or the general emergency stop of the laundry (refer to
Installation handbook).
We do not recommend these stop modes, except in an emergency. As long as the door remains closed, the
machine will understand that there has been a power failure. When the power is switched back on, the
machine will resume the program in progress.
On machines with pumped drain (HS-6008/EH020 models), the emergency stop and the disconnection
of the external automatic switch do not allow the bath drain.
When a washing program is interrupted by electrical power failure or activating the general
Emergency Stop of the installation, the door lock mechanism stops being controlled by the microprocessor
and the opening of the door is thermally delayed. In these circumstances, it is normal to have a washer delay
or inactive time of about 3 minutes.
Risk of entrapment
To avoid the risk that, while playing, a child gets entrapped inside a washer IT IS CAUTIONED THAT:
•After giving the start order, a safety delay of 30 seconds starts during which the drum rotation and the
entry of water operate at short impulses and the door remains unlocked (see section 2.4)
•All the mechanisms that interrupt a program described in this section:
- stop the washer motor
- open the drain valve
- disconnect the door lock which can be opened after approximately 3 minutes.
2.7. Unbalance control
Before starting spin, the control of the washing machine checks the correct distribution of the load.
If it detects that the load is not well distributed and that can cause an excessive unbalance during the spin, a
new positioning of the clothes will be carried out.
If there’s still unbalance during the spin of the last phase, the washer can end the washing cycle reducing the
spin speed. If this is the situation, the report End/bAL will be showed alter the delay of the door opening.
Unbalance control with micro-switch. Activates only in cases of extreme unbalance.
To improve the efficency of the spin of the washer it’s advisable to:
•Load the washer until its nominal value.
•Load the washer with homogeneous loads
STOP

Cod. 429373
Rev. 02/0606
Modification 15
3. MODIFICATION mode
The MODIFICATION mode offers some menus, which allow the modification of programs contents, the price
management of the programs, the modification of operating parameters …
The MODIFICATION mode is made up of the menus defined in the following chart.
To program or modify the price of the programs, follow the instructions on this book.
For a description in detail of the other menus, refer to the Advanced Operation Instructions COIN CONTROL,
on the manufacturer’s website (www.girbau.com) (USA/CANADA: www.cont-girbau.com).
MENU PURPOSE SECTION
Pro Modification of program contents www.girbau.com
CASH Programming and/or modifying each program price Section 3.3 on this book
DEMO Operation mode with program accelerator www.girbau.com
INFO Information menu www.girbau.com
Mod Modification of the operating parameters www.girbau.com
Ncod Modification of access code www.girbau.com
CALE Prices allocation according to hour band www.girbau.com
HOUR Adjust the system time www.girbau.com
3.1. Access to MODIFICATION mode
Connect the washer and open the door. The display shows door.
Push and hold down 1key until the Cod report appears on the display.
Enter the access code to the menus pressing, without interruption, the sequence of eight keys of the code. In
basic configuration (when the machine is delivered) the access code to MODIFICATION is: 12341234
If the sequence set is correct, the display will show Pro, corresponding to the first menu.
Keys 2and 4allow the selection of the precedent table menus. The menu selected is showed in the display
following its keyword. To enter in it, press the 1key when displaying it.
If wished to skip the MODIFICATION mode, press and machine will return to program execution
mode.
3.2. Modification of program contents. Menu Pro.
Refer to Advanced Operation Instructions COIN CONTROL www.girbau.com
(USA/CANADA: www.cont-girbau.com).
3.3. Program price. Single price for each program. CASH Menu.
The CASH menu allows allocating a price, individually, to each program. This price can be the value in coins
or in tokens, depending on the coin meter in the machine.
Token counter meter: The price of each program is fixed by the number of tokens to be introduced to start
the program. The programming or modification of the program price will always be in units.
Coin counter meter: The price of each program is set by its value in coins. The programming or
modification of the program price will always be a multiple of the coin used. For meters accepting coins of
different values, the program value will always be a multiple of the less valuable coin accepted by the coin
meter.
Price programming = 0000 allows the free use of the washing machine. When selecting a washing program,
the report FrEE is showed in the display and the washing program is started pushing the key.
STOP
STOP

Cod. 429373
Rev. 02/0606
Modification 16
3.3.1. Program price programming / modification.
Access to MODIFICATION mode. Section 3.1. Display shows Pro.
Push the 2 key. Display shows CASH.
Push the 1 key to access the management price menu . Display shows Pr-1 (selected program)
Keys 2/ 4allow the selection of the program number desired in a cyclical way.
Push 1 key to modify the selected program price. The display will show the current price of the selected
program.
Push 2key to increase or 4key to reduce the program price.
Push 1key to validate the price displayed in the display.
Pr-* is showed in the display. Next program.
1key allows the price modification of the new program displayed
key allows the access to the higher programming level. Display shows CASH. Keys 2/ 4allow the
selection of another menu.
To leave the MODIFICATION mode push the key twice in display Pr-*
For the price management in washing machines with the clock option set, see Advanced Operation
Instructions COIN CONTROL, at the web of the manufacturer: www.girbau.com,
(USA/CANADA: www.cont-girbau.com).
STOP
STOP

Cod. 429373
Rev. 02/0606
Troubleshooting 17
5. TROUBLESHOOTING
Some of the washing machine’s operating problems can be solved through the intervention of the user.
These problems are detailed below.
Should you have any questions, remember to consult the Authorised Technical Service.
5.1 What to do when…
....the wash cycle ends with the report: END/BAL
This report indicates that the final spin cycle is not possible because the load is unbalanced.
•Unload the machine and load it again.
•Begin the wash cycle and accelerate the program to the last phase.
•The washing machine will repeat the last spin cycle without refilling with water.
•If the problem persists, or occurs often, contact the Authorised Technical Service.
….the machine makes a strange noise during the spin cycle.
•Check the levelling of the machine. See Instruction Manual for Installation.
•Tighten the locking screws on the outside panels.
•If the problem persists, contact the Authorised Technical Service.
....the door may have a leak
•Clean the door seal of any possible deposits or remains of cloth
....there is water leaks inside the washer cabinet.
•Check the outlet draining pipe.
•Check the seals on the water inlet hoses; tighten the connection couplings.
•Check the condition of the door seal and if there are any ruptures.
•Check the coupling of the filter and the draining pump (section 6.6)
•if the problem persists, seal all of the water inlets and contact the Authorised Technical Service.
….you have forgotten the access code for the advanced operating mode
•Contact the Authorised Technical Service.
....the clock (option) stops working correctly
•Possible battery failure. Contact the Authorised Technical Service to have it replaced.

Cod. 429373
Rev. 02/0606
Troubleshooting 18
5.2. System alarms
The safety of the washing machine use requires that the machine itself precisely monitor any possible
anomalies. These anomalies are reported in the form of alarms.
On the washing machine’s display, the ALM message will appear, alternating with the specific alarm report.
Below are possible causes of alarms and the steps to follow.
REPORT ON THE
DISPLAY PROBABLE CAUSE WHAT TO DO
Faulty water inlet
Check water input pressure.
Check manual water inlet valves.
Check the status of the filters in the
electrovalves (see section 6:
Maintenance).
ALM/A-*
Defect in the electrovalves.
Defect in the level control system. Call Service
Machines with pump drain: obstruction of
the draining pump. Call Service
ALM/E Anomaly in the drain system.
Erroneous drain configuration.
Check the status of the washing bath’s
output hoses.
Call Service
ALM/HOT
Inadequate stop of the washing machine
with bath at high temperature.
Excess of temperature with machine
stopped.
Anomaly in the heating system.
Close the door of the washing machine to
allow opening of cold water valve.
Press STOP key to drain the bath and
access to the door opening.
Repeat this operation until the alarm report
disappears.
If the alarm report does not disappear after
five attempts, disconnect the general
power supply and close water inlet manual
valves.
Call Service
ALM/L Leakage in the electrovalve.
Bath level with machine idle. Close manual water inlet valves
Call Service
ALM/SL Bath level exceeded. Close manual water inlet valves
Call Service
ALM/C Defect in the temperature probe.
Erroneous heating configuration.
Defect in the heating circuit. Call Service
ALM/Prob Defect in the temperature probe. Call Service
ALM/BAL Defect in the unbalance control switch. Call Service
ALM/VAR* Disconnection of the motor’s thermal
protection.
Alarm set off by the inverter. Call Service
ALM door Faulty door lock Call Service
Hot Interruption of the program by STOP key
with bath at high temperature.
The washing machine will automatically
accept cold water and will not allow door
unlock.
When the bath temperature is below 45ºC
(133F) the bath will drain and the safety
door lock will be unlocked.
door Badly closed door Open and close the door

Cod. 429373
Rev. 02/0606
19
Maintenance
6. MAINTENANCE
-Before performing any work on the washing machine, disconnect and mechanically lock the
external switch, and close and mechanically lock the manual water inlet valves.
-Check the temperature of the parts to be handled, to avoid the risk of burns.
-The dispenser may contain residues of chemical products. When handling this component, avoid
direct contact with the skin and use eye protection.
-The draining pump and valve may contain residual water. When handling these components,
avoid direct contact with the skin and use eye protection.
-Remember to reassemble ALL of the panels and place them correctly after any maintenance work.
6.1 Operations described
•Cleaning the washer (section 6.2)
•Cleaning the door seal (section 6.3).
•Cleaning the electro valve filters (section 6.4)
•Cleaning the dispenser (section 6.5)
•Cleaning the draining pump (models HS-6008/EH020)(section 6.6)
6.2. Cleaning the washer
•We recommend periodic cleaning of the outside of the washing machine. Use a damp cloth or sponge.
•To remove traces of grease, use mild soap and rinse as required.
•Never use abrasive products or tools that could scratch or damage the surface of the washing machine.
6.3. Cleaning the door seal
•Use a damp cloth or sponge.
•Be especially careful to remove traces of laundry products or pieces of fabric that could be caught
between the folds of the seal.
•Never use abrasive products or tools that could cut or damage the seal.
6.4. Cleaning the electro valve filters
Tools required:
•Disassembly of the fittings: Slip-joint plier or pipe wrench diam. 1-½ in. (35 mm).
•Disassembly of the filter supports: wrench 1-3/8 in. (34 mm).
•Disassembly of the filtres: pliers.
Steps to follow
•Disconnect and mechanically lock the external switch. Close and mechanically lock the manual water
inlet valves.
•Check the temperature of the hot water inlet hose, so as to avoid the risk of burns.
•Disassemble the fittings that connect the hoses to the washing machine.
•Disassemble the filter supports (following models).
•Remove the filters from their housings and clean the filters with pressurised water. Place them back into
their housings.
•Assemble the supports to the electrovalves (following models).
•Assemble the hoses in their corresponding inputs. Tighten the fittings.
•Connect the external switch, open the manual water input valves and check the water tightness of the
coupling.

Cod. 429373
Rev. 02/0606
20
Maintenance
6.5. Cleaning the dispenser
•Disconnect and mechanically lock the external switch. Close and mechanically lock the manual water
inlet valves
•Clean the dispenser by using a cloth or sponge dampened with water. Warm water makes cleaning
easier. Never use abrasive products or tools that could scratch or damage the dispenser.
Once the dispenser cleaning and assembly operations are finished:
•Connect the external switch and open the manual water inlet valves.
•Start a washing program that uses a bleaching agent and softener and check that both compartments
drain properly.
fig. 4 fig. 5
WASHERS WITH FRONT DISPENSER.
Tools required:
Disassembly of the fastening tabs: Torx. T20 screwdriver.
Disassembly and assembly:
•Open the dispenser drawer and loosen the screws on the retaining tabs visible along the bottom (fig. 4).
•Completely remove the drawer and dismount the siphon tubes from the liquid compartment by pulling
them upwards.
Once the cleaning operations are over:
•Replace the siphon tubes and place the drawer in its housing.
•Remount the fastening tabs and check that the drawer can not be completely removed.
WASHERS WITH TOP DISPENSER.
Disassembly
•Open the fastening clasps on the top cover. The dispenser is now accessible.
•Dismount the siphon tubes from the liquid compartment by pulling them upwards.
•Models EH & EM: disassemble the dispenser volume reducer by pulling upwards.
•To clean the lower basin, remove the leak seal and separate the two dispenser bodies by separating the
side lips (fig. 5).
Once the cleaning operations are over:
•Remount the two dispenser bodies and check that the side lips fasten both pieces.
•Replace the siphon tubes.
•Check that the dispenser is set well in its bracket.
•Check condition of top cover seal. If seal is damaged, deformed or has lost elasticity, call Service for
replacement.
•Replace the seal. Assemble the top cover. Close the locks.
This manual suits for next models
14
Table of contents
Other GIRBAU Washer manuals

GIRBAU
GIRBAU HS-6013 User manual

GIRBAU
GIRBAU HS-6013 User manual

GIRBAU
GIRBAU HS-6008 Quick setup guide

GIRBAU
GIRBAU LOGI CONTROL Instruction Manual

GIRBAU
GIRBAU HS-5008 Manual

GIRBAU
GIRBAU HS-5008 User manual

GIRBAU
GIRBAU HS-6008 User manual

GIRBAU
GIRBAU HS-5008 User manual

GIRBAU
GIRBAU HS-6085 User manual

GIRBAU
GIRBAU HS-6008 User manual

GIRBAU
GIRBAU EH020 Instruction Manual

GIRBAU
GIRBAU RMS610 Instruction Manual

GIRBAU
GIRBAU HS-6013 User manual

GIRBAU
GIRBAU LS-307 User manual

GIRBAU
GIRBAU HS-4055 User manual

GIRBAU
GIRBAU HS-5008 User manual

GIRBAU
GIRBAU HS-4007 User manual

GIRBAU
GIRBAU RMS628 User manual

GIRBAU
GIRBAU HS-6013 Service manual

GIRBAU
GIRBAU HS-5008 User manual