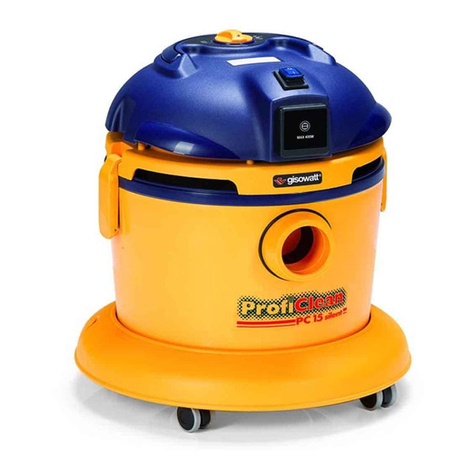
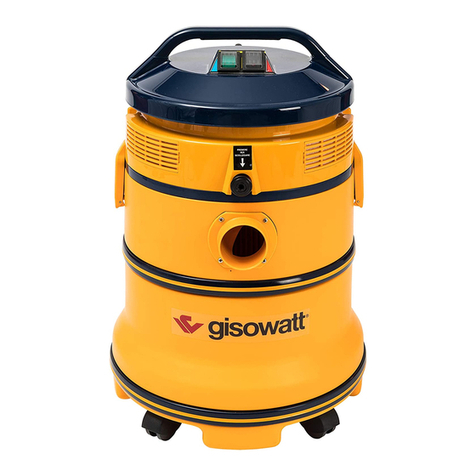
Gisowatt ProfiClean PC 20 User manual

Cod. 88 700B0V - Ed. 10/2009
RU
GR
PL
RO
NL
PT
ES
FR
DE
EN
IT
Istruzioni per l’uso e la manutenzione
Instruction manual
Gebrauchs- und Wartungsanleitungen
Instructions d’utilisation et d’entretien
Instrucciones de uso y mantenimiento
Instruções de uso e manutenção
Aanwijzingen voor gebruik en onderhoud
Instrucţiuni de folosire şi întreţinere
Használati utasítás
Podręcznik użytkowania i konserwacji
Oδηγίες χρήσης και συντήρησης
Инструкции по использовании иуходу RU
GR
PL
RO
NL
PT
ES
FR
DE
EN
IT pagina.................... 7
page....................... 13
Abb. ....................... 19
page....................... 25
página ................... 31
página.................... 37
pagina.................... 43
pagină.................... 49
oldal....................... 55
strona..................... 61
σελίδα................... 67
страница............... 73
OOOOOOOIIIIIIOOOIIIIIIIIO IO
OOOOOOOIIIIIIOOOIII
OOOOOOOIIIIIIOOOIIIIIIIIO IO
OOOOOOOIIIIIIOOOIIIIIII
OOOOOOOIIIIIIOOOIIIIIIIIO IO
OOOOOOOIIIIIIOOOIIIIIIIIO
OOOOOOOIIIIIIOOOIIIIIIIIO IO
OOOOOOOIIIIIIOOOIIIIIIIIO
OOOOOOOIIIIIIOOOIIIIIIIIO IO
OOOOOOOIIIIIIOOOIIIIII
OOOOOOOIIIIIIOOOIIIIIIIIO IO
OOOOOIIIIIIOOOIIIIIIO IO
OOOOOOOIIIIIIOOOIIIIIIIIO IO
OOOOIIIIIIOOOIIIIIIO IO
OOOOIIIIIIOOIIIIIIO IO
OOOIIOOOIIIIIIIIO IO
OOOOIIIIIIOOOIIIIIO IO
OOOOOOOIIIOOOIIIIIIO IO
OOOOOIIIIIIOOIIIIIO IO
OOOOOIIIIIOOIIIIIIO IO
OOOIIIIOOOIIIIIIIIO IO
OOOOIIIIOOOIIIIIIIO IO
OOOOOIIIIIIOOIIIIII IO
OOOOOIIIOOOIIIIIIIIO IO
OOOOIIIOOOIIIIIIO IO
OOOOOOOIIIIIIOOOIIIIIIIIO
OOOOOIIIIIIOOIIIIIIO IO
OOOOOOIIIIIOOIIIIIIIO IO
OOOOOIIIIIIOOIIIIIIIO IO
OOOOOOOIIIIIIOOOIIIIIIIIOIO
OOOOOOOIIIIIIOOOIII
OOOOOOOIIIIIIOOOIIIIIIIIOIO
OOOOOOOIIIIIIOOOIIIIIII
OOOOOOOIIIIIIOOOIIIIIIIIOIO
OOOOOOOIIIIIIOOOIIIIIIIIO
OOOOOOOIIIIIIOOOIIIIIIIIOIO
OOOOOOOIIIIIIOOOIIIIIIIIO
OOOOOOOIIIIIIOOOIIIIIIIIOIO
OOOOOOOIIIIIIOOOIIIIII
OOOOOOOIIIIIIOOOIIIIIIIIOIO
OOOOOIIIIIIOOOIIIIIIOIO
OOOOOOOIIIIIIOOOIIIIIIIIOIO
OOOOIIIIIIOOOIIIIIIOIO
OOOOIIIIIIOOIIIIIIOIO
OOOIIOOOIIIIIIIIOIO
OOOOIIIIIIOOOIIIIIOIO
OOOOOOOIIIOOOIIIIIIOIO
OOOOOIIIIIIOOIIIIIOIO
OOOOOIIIIIOOIIIIIIOIO
OOOIIIIOOOIIIIIIIIOIO
OOOOIIIIOOOIIIIIIIOIO
OOOOOIIIIIIOOIIIIIIIO
OOOOOIIIOOOIIIIIIIIOIO
OOOOIIIOOOIIIIIIOIO
OOOOOOOIIIIIIOOOIIIIIIIIO
OOOOOIIIIIIOOIIIIIIOIO
OOOOOOIIIIIOOIIIIIIIOIO
OOOOOIIIIIIOOIIIIIIIOIO
HU HU
1
1
4
7
10
13
2
5
8
11
14
3
6
9
12
15
Pennello
Brush
Pinsel
Pinceau
Pincel
Pincel
Penseel
Pensulą
Ecset
Okrćgãa
яѢѦىѤѨ
˷ļ²
b
c
x
y
a
b
a
b
c
b
b
b
2
Dati tecnici - Technical speciÀcations -Technische Daten -Donnees techniques -Datos Técnicos - Dados técnicos
Technische Gegevens - Date Tehnice - MĦszaki adatok - Dane techniczne - ȉİȤȞȚțİȢ ʌȡȠįȚĮȖȡĮijİȢ -
¥¨ª¤ ¨£¥£¤¥
- Tensione di alimentazione elettrica... Power supply voltage
Stromversorgungsspannung............. Tension d’alimentation électrique
Tensión de alimentación eléctrica..... Tensão de alimentação eléctrica
Elektrische voedingsspanning
........ Tensiune de alimentare electricą
Elektromos táplálási feszültség ....... Napiĕcie zasilania
ђوѫѠ ѠѤўѣѬѩѢѣيѪ ѬѩѨѮѨѝѨѫًњѪ .... ²ÁÂѸ·¿º· Ͻ·¼ÄÂÀÁºÄ²¿ºÑ
- Frequenza......................................... Frequency
Frequenz........................................... Fréquence
Frecuencia........................................ Frequência
Frequentie......................................... Frecvenŏa
Frekvencia ....................................... Czĕstotliwoŋþ
ёѭѯѦٌѬѠѬњ ...................................... ©²ÃÄÀIJ
- Potenza............................................. Power rating
Leistung............................................ Puissance
Potencia............................................ Potência
Vermogen ......................................... Putere
Teljesítmény ..................................... Moc
шѫѯٍѪ ............................................... ÀË¿ÀÃÄÎ
- Portata d’aria MAX. ca....................... MAX. airÁow approx.
Lufttragfähigkeit MAX. ca ................. Débit d’air MAX. approx.
Caudal de aire MÁX aprox ................ Fluxo de ar MÁX. aprox.
MAX. werkelijke luchtstroom ca
.... Debit de aer MAX cca
MAX. levegŃszállítás kb ................... MAKS przepãyw powietrza ok.
яњѩѨѯي њىѩњ ырѕ ўѩًѨѭ ........... £. ²ÃÇÀ¶ ´À¹¶ÅDz À¼À½À
- Contenitore realizzato in.................... Drum made of
Behälter aus ...................................... Récipient réalisé en
Depósito realizado en ....................... Recipiente fabricado de
Vat verwezenlijkt in
........................ Recipient realizat din
A tartály az ábrán látható anyagból készült
Pojemnik-zbiornik wykonany z
уѨѯўًѨ ѣњѬњѫѣўѭњѫѥىѦѨ њٌ ........ ÀÂÁÅà º¹µÀÄÀ´½·¿ º¹
- Motore tipo
Motor type
Motortyp
Moteur type
Motore tipo
Motor tipo
Motor type
Motor tip
Motor típusa
Silnik typu
ђٍѨѪ ѣѢѦѠѬيѩњ
¤ºÁ ¶´ºµ²Ä·½Ñ
230V~
PC 20 PC 22
230V~
50/60 Hz 50/60 Hz
By-pass monostadio
Single-stage bypass
Bypass einstuÀg
By-pass à un étage
By-pass monoestadio
By-pass único estágio
By-pass Monostadium
By-pass monostadiu
Egyfázisú by-pass
By-pass jednostopniowy
By-pass ѥѢњѪ ћњѡѥًѝњѪ
LJƽdžLJNJNjnjLj. ƺƹǂLjƹNJ
165 m3/h 210 m3/h
IEC
1100 W
MAX
1200 W
IEC
1000 W
MAX
1100 W
PC 20 PC 22
by-pass bistadio
two-stage bypass
Bypass zweistuÀg
By-pass à double étage
By-pass dos tiempos
By-pass duplo estágio
By-pass bistadium
By-pass bistadiu
Kétfázisú by-pass
By-pass dwustopniowy
By-pass ѝٍѨ ћњѡѥًѝѱѦ
ƽƻnjǎNJNjnjLj. ƺƹǂLjƹNJ

3
Dati tecnici - Technical specifications -Technische Daten -Donnees techniques -Datos Técnicos - Dados técnicos
Technische Gegevens - Date Tehnice - Műszaki adatok - Dane techniczne - Τεχνικες προδιαγραφες -
ТЕХНИЧЕСКИЕ ХАРАКТЕРИСТИКИ
* Secondo Direttiva europea 1999/44/EC
In accordance with european Directives 1999/44/EC
Laut europäischer Richtlinie 1999/44/EC
Conformément à la directive européenne 1999/44/CE
Según directiva europea 1999/44/EC
“Segundo a directiva europeia 1999/44/EC”
Volgens de Europese Richtlijn 1999/44/EC
In baza directivei europene 1999/44/EC
Az 1999/44/EK európai irányelv szerint
“Zgodnie z dyrektywąeuropejską1999/44/EC”
“Σύμφωνα με την ευρωπαϊκή οδηγία 1999/44/EC”
Всоответствии собщеевропейской директивой1999/44/EC
- Capacità del contenitore-bidone
(nominale)
Drum capacity
(nominal)
Fassungsvermögen des Behälters (Eimer)
(nominal)
Capacité du récipient (bidon)
(nominale)
Capacidad del depósito-bidón
(nominale)
Capacidade do recipiente bidão
(nominal)
Inhoud van de containerbak
(nominaal)
Capacitatea recipientul bidon
(nominal)
Tartály kapacitása
(névleges)
Pojemność pojemnika-zbiornika
(znamionowa)
Χωρητικότητα δοχείου-κάδου
(ονομαστική)
Емкость корпуса-сборника
(номинальная)
- Depressione MAX ca......................... MAX suction approx.
MAX. Unterdruck ca........................... Dépression MAX. approx.
Depresión MÁX. aprox ...................... Depresión MÁX. aprox
Onderdruk MAX ca. ......................... Depresiune MAX cca
MAX. vákuum kb. .............................. MAKS podciśnienie ok.
Υποπίεση MAX περίπου ................... МАКС. разрежение около
- Classe isolamento apparecchio ........ Appliance insulation class
Isolierklasse des Geräts .................... Classe d’isolement de l’appareil
Clase de aislamiento aparato ........... Classe de isolamento aparelho
Isolatieklasse van het apparaat ......... Clasăde izolaţie aparat
Készülék szigetelési osztály .............. Klasa izolacji urządzenia
Κλάση μόνωσης συσκευής ............ Класс изоляции аппарата
- Peso apparecchio (*) .........................
Appliance weight
(*)
Gewicht des Geräts (*) ..................... Poids de l’appareil (*)
Peso aparato (*) ................................ Peso do aparelho (*)
Gewicht apparaat (*) ........................ Greutate aparat (*)
A berendezés súlya* ......................... Waga urządzenia (*)
Βάρος συσκευής* ........................... Вес прибора*
20 l
PC 20 PC 22
20 l
19 KPa 21 KPa
7,0 Kg 8,6 Kg

4
Accessori - Accessories - Zubehör - Accessoires - Accesorios - Acessórios
Hulpstukken - Accesorii - Kiegészítők - Akcesoria - Εξαρτήματα - ПРИНАДЛЕЖНОСТИ
- Tubo flessibile completo di impugnatura ergonomica
- Flexible hose with ergonomic grip
- Schlauch mit ergonomischem Griff
- Tube flexible avec poignée ergonomique
- Tubo flexible con empuñadura ergonómica.
- Tubo flexível equipado com cabo ergonómico
-
Slang compleet met ergonomische handgreep
- Tub flexibil prevăzut cu mâner ergonomic
- Ergonomikus markolattal ellátott hajlékony cső
- Przewód giętki z ergonomicznym uchwytem
- Εύκαμπτος σωλήνας με εργονομική χειρολαβή
- Гибкая труба сэргономической ручкой
Cod.
01 300B0N
PC 20 PC 22
Cod.
01 300B0N
- Prolunghe rigide in acciaio inox
- Stainless steel extension wands
- Verlängerungsrohre aus Edelstahl
- Rallonges rigides en acier inox
- Tubos rígidos de acero inox
- Extensões rígidas de aço inoxidável
-
Verlengbuizen uit roestvrij staal
- Tuburi de extindere rigide din oţel inoxidabil
- Merev hosszabbítók rozsdamentes acélból
- Sztywne przedłużacze ze stali nierdzewnej
- Άκαμπτες προεκτάσεις από ανοξείδωτο χάλυβα
- Жесткие удлинители из нержавеющей стали
Cod.
40 035BHM
Cod.
40 035BHM
- Bocchetta per imbottiti con felpa raccoglifili
- Upholstery nozzle with thread collector felt
- Polsterdüse mit Fadenaufnahmefilz
- Suceur pour rembourrés avec feutre ramasse-fils
- Boca para acolchados con felpa recoge hilos
- Bocal para estofos com felpa para recolha de fios
-
Spleetzuigmond voor draadopzuigen van vullingen met pluche
- Gurăpentru bucăţi care adunăfirele
- Toldalék kárpitozott bútorokhoz szálacska gyűjtőfilccel
- Ssawka do tapicerki ze zbieraczem włókien
-
Στόμιο για ταπετσαρίες με βελούδο συλλογής κλωστών
- Насадка для мягкой мебели снитесборником
ø36 mm
Cod.
60 257B0N
Cod.
60 257B0N
- Bocchetta a lancia
- Crevice tool
- Fugendüse
- Embout long
- Boquilla de lanza
- Bocal de lança
-
Spleetzuigmond
- Duzăîngustă
- Hosszú toldalék
- Ssawka szczelinowa
- Στόμιο σε μορφή λόγχης
- Щелевая насадка
Cod.
60 250B0N
Cod.
60 250B0N

5
Accessori - Accessories - Zubehör - Accessoires - Accesorios - Acessórios
Hulpstukken - Accesorii - Kiegészítők - Akcesoria - Εξαρτήματα - ПРИНАДЛЕЖНОСТИ
- Spazzola a pennello
- Round brush
- Pinselbürste
- Brosse à pinceau
- Cepillo circular
- Escova pincel
-
Ronde borstelkop
- Perie pensulă
- Ecset kefe
- Szczotka okrągła
- Βούρτσα σε πινέλο
- Щетка-кисть
Cod.
60 256B0N
PC 20 PC 22
Cod.
60 256B0N
- Spazzola snodata per pavimenti e moquette
- Swivel brush for hard floors or carpets
- Gelenk-Steckbürste für Hartböden und Teppichböden
- Châssis pour brosse combinée sols et moquettes
- Cepillo articulado para pavimentos y moquetas.
- Escova articulada para pavimentos e alcatifas
- Soepele borstel voor vloeren/vaste vloerbedekkingen
- Duzăpentru tapiţerii cu velur pentru colectarea scamelor
- Csuklós kefe padlókhoz és padlószőnyegekhez
- Szczotka z główkąprzegubowądo podłóg i wykładzin
dywanowych
- Αρθρωτό πέλμα για δάπεδα και μοκέτες
- Шарнирная щетка для пола ипаласа
Cod.
60 003B0N
Cod.
60 003B0N
- Telaio spazzola combinata
- Combi brush holder
- Rahmengestell für Kombibürste
- Châssis pour brosse combinée
- Bastidor para cepillo combinado
- Quadro para escova combinada
-
Houder voor gecombineerde borstel
- Duzăcombinatăcu perie
- Kombinált kefe váz
- Uchwyt do szczotki kombi
- Πλαίσιο συνδυασμένου πέλματος
- Каркас комбинированной щетки
ø36 mm
Cod.
60 281B0N
Cod.
60 281B0N
- Racla per liquidi
- Squeegee for liquids
- Gummilippe für Nasssaugbetrieb
- Racle pour liquides
- Escurridor para líquidos
- Raspador para líquidos
-
Rakel voor vloeistoffen
- Racletăpentru lichide
- Lehúzó spatulya
- Nasadka do płynów
- Σπάτουλα για υγρά
- Скребок для жидких отходов
Cod.
60 278B0N
Cod.
60 278B0N

6
Sistemi filtranti - Filter systems - Filtersysteme - Systemes filtrants - Filtros - Sistemas de filtragem -Filtersystemen
Sisteme filtrante - Szűrési rendszer ek - Systemy filtrowania - Συστήματα φιλτραρίσματος - ИЛЬТРУЮЩИЕ СИСТЕМЫ
- Elemento filtrante a cartuccia
- Cartridge filter element
- Filterpatrone
- Élément filtrant à cartouche
- Filtro de cartucho
- Elemento de filtragem de cartucho
-
Filterpatroonelement
- Element filtrant cu cartuş
- Szűrőbetétes szűrőelem
- Element filtrujący z wkładem
- Στοιχείο φιλτραρίσματος σε φυσίγγιο
- Патронный фильтрующий элемент
Cod.
83 200B0G*
PC 20 PC 22
Cod.
83 200B0G*
- Filtro-mousse per aspirare le sostanze liquide
- Foam filter to vacuum liquids
- Schaumstofffilter für den Nasssaugbetrieb
- Filtre mousse pour aspiration des liquides
- Filtro espuma para aspirar sustancias líquidas
- Filtro-esponja para aspirar substâncias líquidas
-
Schuimfilter om vloeistoffen op te zuigen
- Filtru-spumăpentru aspirarea substanţelor lichide
- Hab-szűrőa folyékony anyagok felszívásához
- Filtr piankowy do zasysania płynów
- Αφρώδες φίλτρο για απορρόφηση υγρών ουσιών
- Фильтр для сбора пенистых жидкостей
Cod.
83 035BHB
Cod.
83 035BHB
- Sacco in carta filtro orizzontale
- Horizontal filter paper bag
- Waagrechter Papierfilterbeutel
- Sac en papier filtre horizontal
- Bolsa de papel filtro horizontal
- Saco de papel filtro horizontal
-
Horizontale papieren filterzak
- Sac de hârtie filtru orizontal
- Szűrőpapírból készült vízszintes zsák
- Papierowy worek filtrowy poziomy
- Χάρτινος σάκος φίλτρο οριζόντιο
- Горизонтальный мешок из фильтровальной бумаги.
ø36 mm
Cod.
83 140B0K*
Cod.
83 140B0K*
* Codice confezione - * Pack code - * Bestellnummer der Verpackung - * Code de la confection - * Código paquete
* Código da embalagem - * Code verpakking - * Cod ambalaj -* Csomagolás kód - * Kod zestawu - * Κωδικός συσκευασίας - * Код узла
- Post filtro elettrostatico aria in uscita
- Outlet air electrostatic post-filter
- Elektrostatischer Nachfilter, Luftausgang
- Post-filtres électrostatiques sur l’air en sortie
- Post-filtro electroestático aire en salida
- Pós-filtro electrostático do ar à saída
-
Elektrostatische post-afvoerfilters
- Post-filtru electrostatic aer la ieşire
- Elektrosztatikus szűrőa kimenetben
- Elektrostatyczny filtr końcowy na wylocie powietrza
- Ηλεκτροστατικό μετα-φίλτρο εξερχόμενου αέρα
- Электростатический постфильтр воздуха на выходе
Cod.
83 021B8X*

Italiano
7
Conservare con cura il presente libretto istruzioni.
✓Un apparecchio elettrico non è un giocattolo. Utilizzarlo e riporlo fuori dalla portata dei bambini.
✓Questo apparecchio non è stato realizzato per essere utilizzato da persone inclusi i bambini, con
ridotte capacità fisiche, sensoriali e mentali, o che non abbiano prima letto il presente libretto
istruzioni.
✓I componenti dell’imballaggio (eventuali sacchi in , protezioni
in PSE, ecc.) devono essere tenuti lontani dalla portata dei
bambini.
✓Questo apparecchio è concepito per funzionare unicamente a
corrente alternata. Prima di metterlo in funzione assicurarsi che
la tensione di rete corrisponda a quella indicata sulla targa dati.
✓Collegare l’apparecchio SOLO a prese di corrente aventi
portata minima 10A.
✓
Non tirare il cavo di alimentazione o l’apparecchio stesso per
togliere la spina dalla presa di corrente.
✓Accertarsi che l’impianto elettrico di rete sia provvisto di inter-
ruttore differenziale (tipo salvavita).
✓Svolgere completamente il cavo di alimentazione elettrica prima
di mettere in funzione l’apparecchio.
✓Utilizzare una prolunga elettrica solo se in perfetto stato e assicurarsi che la sezione sia appropriata
alla potenza dell’apparecchio.
✓Non lasciare mai scorrere il cavo di alimentazione su spigoli taglienti ed evitare di schiacciarlo.
✓Non lasciare mai l’apparecchio in funzione senza sorvegliarlo.
✓Non lasciare l’apparecchio esposto ad agenti atmosferici (pioggia, gelo, sole, etc.).
✓Non utilizzare mai l’apparecchio:
- con le mani bagnate o umide;
- se è caduto e presenta evidenti rotture o anomalie di funzionamento;
- se la spina o il cavo di alimentazione elettrica è difettoso.
✓Togliere SEMPRE la spina dalla rete di alimentazione elettrica immediatamente dopo l’uso
e prima di eseguire qualsiasi intervento di pulizia o manutenzione.
✓Le eventuali riparazioni devono essere eseguite solo da specialisti che dispongano dei pezzi di
ricambio originali forniti dal fabbricante. Riparare da se l’apparecchio può essere estremamente
pericoloso.
✓Nel rispetto delle normative vigenti, un apparecchio fuori uso deve essere reso inutilizzabile,
tagliando il cavo di alimentazione elettrica, prima di buttarlo.
✓Non aspirare sostanze infiammabili, esplosive o corrosive.
✓Non utilizzare l’apparecchio in ambienti saturi di gas.
✓Pulire l’apparecchio utilizzando solo acqua.
Non usare trielina, solventi o detersivi abrasivi.
La casa costruttrice declina ogni responsabilità per uso improprio
o non conforme alle istruzioni fornite e per manomissione
nonchè manutenzione inadeguata dell’apparecchio.
AVVERTENZE
NO!
NO!
230V~ 50/60Hz

8
Italiano
UTILIZZO DELL’APPARECCHIO
- SGANCIO DELL’UNITA’ MOTORE
- Per liberare l’unità motore. - Per agganciare l’unità motore.
A
A1
- AVVIAMENTO
- Interruttore in posizione “O” ....... OFF (apparecchio a riposo)
- Interruttore in posizione “I”......... ON (apparecchio in funzione)
A2
B
B1
SISTEMI FILTRANTI
- IMPIEGO DEL SACCO RACCOGLIPOLVERE
(Cod. 83 140B0K*)
-Utilizzare il sacco insieme alla cartuccia filtro.
- Introdurre il sacco in carta filtro nel contenitore-bidone (fig.“1”).
- Inserire la flangia in plastica (x) sul raccordo entrata aria (y) evitando durante l’operazione
di danneggiare il sacco (fig.“2”).
- Il sacco garantisce il recupero delle polveri aspirate in condizioni di igiene.
-Evitarne l’uso per materiali taglienti oppure umidi.
-
Cambiare il sacco quando i materiali aspirati hanno raggiunto i 3/4 circa della sua capienza.
- Il sacco non può essere riutilizzato ma si DEVE sostituire.
* Codice confezione
“OFF”
PC20
“ON”
PC22
“OFF” “ON”

Italiano
9
- IMPIEGO DELL’ELEMENTO FILTRANTE
(Cod. 83 200B0G*)
- Posizionare l’elemento filtrante (b) sul supporto motore (c) (fig.“3”).
- Inserire il disco adattatore in plastica (a) sull’elemento filtrante (b)
(fig.“4”).
- L’impiego dell’elemento filtrante é particolarmente consigliato per la raccolta di
polveri particolarmente fini e, può essere utilizzato insieme al sacco in carta filtro il
quale oltre ad evitarne l’intasamento, offre il vantaggio di trasferire in modo rapido
ed igienico i materiali aspirati.
-Non utilizzare per materiali taglienti oppure umidi.
- IMPIEGO DEL FILTRO-MOUSSE (Cod. 83 035BHB)
- Per aspirare sostanze liquide utilizzare SEMPRE il filtro-mousse
(fig.“5”).
- POST-FILTRI ARIA IN USCITA
- I post-filtri garantiscono che l’aria reimmessa nell’ambiente sia priva
di impurità.
IMPIEGO DELL’APPARECCHIO
- COME ASPIRAPOLVERE
- L’elemento filtrante deve sempre essere utilizzato (fig.“3” e “4”).
Mantenere pulito l’elemento filtrante.
Sostituire se incrostato o consumato.
- Per aspirare polveri particolarmente fini (cemento, talco, etc.) è indispensabile utilizzare
l’elemento filtrante insieme al sacco raccoglipolvere.
- COME ASPIRALIQUIDI
- Togliere sempre l’elemento filtrante (fig.“6”).
Utilizzare il filtro-mousse (fig.“5”).
- Quando nel contenitore-bidone i liquidi aspirati raggiungono il massimo livello consentito,
l’aspirazione viene automaticamente bloccata dal galleggiante di sicurezza.
L’utente viene avvertito dall’incremento del numero di giri del motore e, dall’assenza di
B2
B3
B4
C
C1
C2
* Codice confezione

10
Italiano
aspirazione.
Fermare immediatamente l’apparecchio e svuotare il contenitore-bidone.
- COME ASPIRARE GRANDI QUANTITA’ DI LIQUIDI
- Non immergere completamente la bocchetta a lancia onde assicurare un parziale afflusso
d’aria (fig.“7”).
MANUTENZIONE
-
Prima di compiere qualsiasi manutenzione (anche per la pulizia
o sostituzione dei sistemi filtranti) togliere sempre la spina del
cavo di alimentazione elettrica.
- SACCO RACCOGLIPOLVERE (Cod. 83 140B0K*)
- Il sacco non deve essere riutilizzato ma deve sempre
essere sostituito.
- Staccare la flangia in plastica dal raccordo entrata aria
(fig.“8”).
- Estrarre il sacco in carta filtro (fig.“9”).
- Chiudere la flangia con l’apposito tappo (fig.“10”).
- ELEMENTO FILTRANTE (Cod. 83 200B0G*)
- Rimuovere l’elemento filtrante (b) dal supporto motore (c) (fig.“6”).
- Pulirefrequentementel’elemento filtrante(b) conunpennello asetole
morbide (fig.“11”).
- Per pulire a fondo l’elemento filtrante indirizzare un getto d’acqua
dall’interno verso l’esterno (fig.“12”).
- Quando l’elemento filtrante è bagnato maneggiarlo con cura (fig.“13”).
- Prima di riapplicare l’elemento filtrante assicurarsi che sia ben asciutto.
- Sostituire se consunto.
- FILTRO-MOUSSE (Cod. 83 035BHB)
- Lavare con acqua il filtro mousse SENZA utilizzare detersivi
(fig.“14”).
- Sostituire se consunto o strappato.
D
D1
C3
D2
D3
* Codice confezione

Italiano
11
D4
- POST-FILTRI ARIA IN USCITA
- Sostituire periodicamente i post-filtri (fig.“15”).
- PULIZIA DEL CONTENITORE-BIDONE
- Controllare la quantità dei materiali aspirati.
- Vuotare il contenitore una volta riempito a metà.
- Asciugare il contenitore-bidone e gli accessori dopo aver aspirato dei liquidi.
- SOSTITUZIONE DEL CAVO DI ALIMENTAZIONE
- Se il cavo di alimentazione elettrica è danneggiato rivolgersi ad un
centro di assistenza tecnica autorizzato (vedere elenco allegato)
perché sono necessari utensili speciali.
DICHIARAZIONE DI CONFORMITA’ CE
Il costruttore dichiara
che i prodotti descritti
nel presente libretto istruzioni d’uso
mod. PC 20 – Type GSW 3
mod. PC 22 – Type GSW 6
rispondono ai requisiti essenziali delle direttive europee
LVD 2006/95/CE - 2004/108/CE
e sono conformi alle norme
EN 60335-1:2002 + A11:2004 + A1:2004 + A12:2006 + A2:2006
EN 60335-2-2:2003 + A1:2004 + A2:2006
EN 50366:2003 + A1:2006
Questa dichiarazione è stata redatta nel mese di Ottobre 2009.
D5
D6
E
C.A.T.

12
Italiano
EFFETTI
• L’apparecchio non si avvia.
• La polvere esce dalle griglie
uscita aria.
• Diminuzione di rendimento.
• Il motore aumenta note-
volmente il numero dei giri.
CAUSE
• Mancanza di corrente.
• Cavo di alimentazione elettrica,
interruttore o motore difettosi.
• Filtri sporchi.
• Contenitore-bidone troppo pieno.
• Elemento filtrante sporco o
incrostato.
• Tubi o accessori otturati.
• Contenitore-bidone troppo pieno.
• Elemento filtrante sporco o
incrostato.
• Tubi o accessori otturati.
AVETE DELLE DIFFICOLTA’ ?
F
RIMEDI
• Verificare la presa di corrente.
• Rivolgersi al centro di assistenza
tecnica (vedere elenco allegato).
• Pulire o sostituire se consumati .
• Vuotare il contenitore-bidone.
• Pulire o sostituire l’elemento
filtrante.
• Controllare il tubo flessibile o gli
accessori.
• Controllare il contenitore-bidone.
• Pulire o sostituire l’elemento
filtrante.
• Controllare il tubo flessibile o gli
accessori.
Solo per Paesi UE
Ai sensi dell’ articolo 13 del Decreto Legislativo 25 Luglio 2005 n. 151 “attuazione delle direttive 2002/96/
CE e 2003/108/CE, relative allo smaltimento dei rifiuti” il simbolo del cassonetto barrato riportato sulla targa
dati dell’apparecchio indica che lo stesso alla fine della propria vita deve essere raccolto separatamente
dagli altri rifiuti.
L’utente dovrà, pertanto, conferire l’apparecchiatura giunta a fine vita agli idonei centri di raccolta
differenziata dei rifiuti elettronici ed elettrotecnici (consultare il sito www.apiraee.it).
L’adeguata raccolta differenziata per l’avvio successivo dell’apparecchiatura dismessa al riciclaggio,
al trattamento e allo smaltimento ambientalmente compatibile, contribuisce ad evitare possibili effetti
negativi sull’ambiente e sulla salute e favorisce il reimpiego e/o riciclo dei materiali di cui è composta
l’apparecchiatura.
Lo smaltimento abusivo del prodotto da parte dell’utente comporta l’applicazione delle sanzioni
amministrative previste dalla normativa vigente.

English
13
Keep this instruction manual with care.
✓An electrical appliance is not a toy. Use it then store it well out the reach of children.
✓This appliance is not designed for use by persons (including children) with reduced physical,
sensory or mental capabilities, or that have not first read this instructions manual.
✓All packaging ( , plastic bags, PSE pods, etc…) must be kept
out of reach of children.
✓Thisappliance has been designedto operate onlywith alternating
current. Before use, make sure that the mains voltage rating
corresponds to the value on the data plate.
✓ONLY connect the appliance to an electric socket with a
capacity of at least 10A.
✓Do not pull the power cable to remove the plug from the
socket.
✓Make sure that the electricity main is equipped with a differential
circuit-breaker (safety type).
✓Completely unwind the electric power cord before turning on the
appliance.
✓Only use an electric extension cord in perfect condition. Make
sure that the cable section suits the power required by the
appliance.
✓Never drag the power cable over sharp corners and do not crush it.
✓Never leave the operating appliance unattended.
✓Never leave the appliance outdoors where it can be exposed to adverse weather conditions (rain,
frost, sun, etc.).
✓Never use the appliance:
- with wet or damp hands;
- if it has been dropped, is obviously broken or operates abnormally.
- if the electric power plug or cable is defective.
✓ALWAYS unplug the unit immediately after use and before carrying out any cleaning or
servicing operations.
✓If needed, repairs must only be carried out by specialists using genuine spare parts supplied by
the manufacturer. It can be very dangerous to repair the appliance by yourself.
✓In compliance with enforceable legislation, an appliance no longer required for service must be
rendered unusable by cutting off the electric power cord before the appliance itself is thrown
away.
✓Do not inhale the fumes of inflammable substances,
explosives or corrosives.
✓Do not use the appliance in gas-filled environments.
✓Use only water to clean the equipment.
Do not use trichloroethylene, solvents or abrasive detergents.
The manufacturer declines all responsibility for improper use,
use that fails to comply with the supplied instructions, tampering and inadequate
maintenance of the appliance.
CAUTION
NO!
NO!
230V~ 50/60Hz

14
English
USE OF THE APPLIANCE
-
HOW TO RELEASE THE MOTOR UNIT
-
To release the motor unit.
-
To connect the motor unit.
A
A1
-
START
- Switch in “O” position ................ OFF (appliance off)
- Switch in “I” position.................. ON (appliance switched on)
A2
B
B1
FILTERING SYSTEM
- USE OF THE DUST BAG
(Cod. 83 140B0K*)
-Use the bag with the filter cartridge inserted.
- IInsert the paper filter bag in the waste drum. (fig.“1”).
- Fittheplastic flange (x) ontothe air inlet union(y).Takecare not to damagethebag during
this operation (fig.“2”).
- The paper filter bag ensures the hygienic dust collection during vacuuming.
-Do not use the bag to vacuum sharp or wet materials.
- Replace the bag once 3/4 of its vacuum capacity has been reached.
- Never reuse the bag: it MUST always be changed.
* Pack code
“OFF”
PC20
“ON”
PC22
“OFF” “ON”

English
15
- USE OF THE FILTER ELEMENT
(Cod. 83 200B0G*)
- Place the filter element (b) onto the motor support (c) (fig. “3”).
- Place the plastic adaptor disk (a) on the filter element (b) (fig.“4”).
- Use of the filter element is particularly recommended for cleaning up very fine dust.
It can be used with the paper bag that, besides preventing from clogging, has the
advantage of rapidly and hygienically transferring the vacuumed dirt.
- Do not use the bag to vacuum sharp or wet materials.
- USE OF THE FOAM FILTER (Cod. 83 035BHB)
- To vacuum liquids, ALWAYS use the foam filter (fig.“5”).
- EXHAUST POST-FILTERS
- The post-filters ensure that the air blown back into the room is free
from impurities.
USE OF THE APPLIANCE
- USE AS A DRY CLEANER
-The filter element must always be used (fig.“3” and “4”).
Keep the filter element clean.
Replace it if caked or worn.
- To suck up particularly fine dust (cement, talc etc) the filter unit must always be used
together with the powder collection bag.
- USE AS A WET CLEANER
- Always remove the filter element (fig.“6”).
Use the foam-filter (fig.“5”).
- When the vacuumed liquids reach the maximum level in the drum, suction is automatically
stopped by the safety float.
The user is warned by an increase in the rpm rate of the motor and the absence of
B2
B3
B4
C
C1
C2
* Pack code

16
English
vacuum.
Immediately turn off the appliance and empty the drum container.
- HOW TO CLEAN UP LARGE AMOUNTS OF LIQUID
- Do not fully immerse the mouth of the crevice tool in order to ensure partial air flow
(fig.“7”).
MAINTENANCE
-
Before performing any maintenance operations (even cleaning
orreplacingthefilter systems) always remove the plug from the
power supply.
- DUST BAG (Cod. 83 140B0K*)
-The bag must never be reused but should always be
replaced.
- Pull the plastic flange out of the dust collector air(fig.“8”).
- Pull the paper filter bag out (fig.“9”).
- Fasten the plastic flange with the corresponding lid
(fig.“10”).
- FILTER ELEMENT (Cod. 83 200B0G*)
- Remove the filter element (b) from the motor support (c) (fig.“6”).
- Clean the filter element (b) frequently using a soft bristle brush
(fig.“11”).
- To clean the filter element thoroughly, use a jet of water from the
inside directed outwards (fig.“12”).
-When the filter element is wet handle it with care (fig.“13”).
- Before refitting the filter element, make sure it is perfectly dry.
- Replace if worn.
- FOAM FILTER (Cod. 83 035BHB)
- Wash the mousse filter with water and DO NOT use detersives
(fig.“14”).
- Replace it if worn or ripped.
D
D1
C3
D2
D3
* Pack code

English
17
D4
- EXHAUST POST-FILTERS
- Replace the post-filter periodically (fig.“15”).
- CLEANING THE DRUM CONTAINER
- Check the quantity of material vacuumed.
- Empty the drum when it is half full.
- Dry the drum and accessories after vacuuming liquids.
- POWER CORD REPLACEMENT
- Contact your nearest authorized technical assistance centre (see
enclosed list) if the power cord has been damaged as special tools
are required to change it.
EC DECLARATION OF CONFORMITY
The manufacturer declares
that the products described
in these instructions
mod. PC 20 – Type GSW 3
mod. PC 22 – Type GSW 6
comply with the essential requisites of European Directives
LVD 2006/95/CE - 2004/108/CE
and is in accordance with standards
EN 60335-1:2002 + A11:2004 + A1:2004 + A12:2006 + A2:2006
EN 60335-2-2:2003 + A1:2004 + A2:2006
EN 50366:2003 + A1:2006
This declaration was written up in October 2009.
D5
D6
E
C.A.T.

18
English
FAULTS
•
The appliance fails to
start.
•
Dust comes out of the
exhaust filter.
•
Reduced efficiency.
•
The motor rate increases
to a notable extent.
CAUSES
•
No power.
•
Defective power cord, switch or
motor.
•
Filter dirty.
•
Drum container full.
•
Filter element is dirty or caked.
•
Clogged tubes or accessories.
•
Drum container full.
•
Filter element is dirty or caked.
•
Clogged tubes or accessories.
TROUBLESHOOTING’ ?
F
REMEDIES
•
Check the socket.
•
Contact the technical assistance
centre (see attached list).
•
Clean or replace if wore out.
•
Empty the drum container.
•
Clean or replace the filter
element.
•
Check the swivel hose or
accessories.
•
Check the drum container.
•
Clean or replace the filter
element.
•
Check out the hose pipe or
attachments.
Only for EU countries
Do not dispose of electrical appliances with household waste!
In compliance with European Directives 2002/96/EC and 2003/108/EC on waste electrical and electronic
equipment (WEEE) and its implementation in accordance with national law, electric tools that have rea-
ched the end of their lifecycle must be collected separately and returned to an environmentally compatible
recycling facility.

Deutsch
19
Diese Gebrauchsanleitung sorgfältig aufbewahren.
✓
Ein elektrisches Gerät ist kein Spielzeug. Außerhalb der Reichweite von Kindern benutzen und aufbewahren.
✓Dieses Gerät darf nicht von Personen (einschließlich Kindern) mit verminderten körperlichen,
sensoriellen und geistigen Fähigkeiten oder von Personen, die das vorliegende Handbuch nicht
gelesen haben, verwendet werden.
✓DasVerpackungsmaterial(etwaigeBeutelin ,PSE-Schutzfolien
usw.) außerhalb der Reichweite von Kindern aufbewahren.
✓Dieses Gerät darf lediglich mit Wechselstrom betrieben
werden. Bevor man es einschaltet, ist sicherzustellen, dass die
Netzspannung mit der Spannung übereinstimmt, die auf dem
Typenschild angegeben ist.
✓Das Gerät NUR an Steckdosen mit Mindestbelastbarkeit von
10A anschließen.
✓Nicht am Stromversorgungskabel oder am Gerät selbst
zerren, um den Stecker aus der Steckdose zu ziehen.
✓Stellen Sie sicher, dass das Stromnetz, an den das Gerät
angeschlossen wird, über einen Fehlerstrom-Schutzschalter
verfügt (eine Art Sicherung).
✓Vor der Inbetriebnahme des Geräts das Netzkabel vollständig
abwickeln.
✓Ein Verlängerungskabel darf nur dann verwendet werden, wenn es einen einwandfreien Zustand
aufweist; sicherstellen, dass der Kabelquerschnitt der Geräteleistung angemessen ist.
✓Unbedingt beachten, dass das Stromversorgungskabel nie über scharfe Kanten gezogen wird
und dass es nicht gequetscht wird.
✓Das Gerät niemals unbeaufsichtigt laufen lassen.
✓Das Gerät vor Witterungseinflüssen (Regen, Frost, Sonne usw.) schützen.
✓Benutzen Sie das Gerät nie:
- mit nassen oder feuchten Händen;
-
wenn es heruntergefallen ist und offensichtliche Beschädigungen oder Funktionsstörungen aufweist
- wenn der Stecker oder das Stromversorgungskabel defekt ist.
✓Ziehen Sie IMMER den Gerätestecker sofort aus der Steckdose, wenn es nicht mehr benutzt
wird und bevor beliebige Reinigungs- oder Wartungsarbeiten ausgeführt werden.
✓Etwaige Reparaturen müssen vom Fachmann vorgenommen werden, der die vom Hersteller
gelieferten Originalersatzteile verwendet. Der Versuch, das Gerät selbst zu reparieren, kann
äußerst gefährlich sein.
✓
NachdenaugenblicklichgeltendenNormenmusseinGerät,dasnichtmehrgebrauchtwird,unbrauchbar
gemacht werden, indem man das Elektrokabel durchschneidet, bevor man das Gerät weggibt.
✓Keine, feuergefährlichen, explosionsfähigen oder korrosiven
Substanzen aufsaugen.
✓Benutzen Sie das Gerät nicht in mit Gas gesättigten
Räumen.
✓Verwenden Sie nur Wasser zur Reinigung des Geräts.
Weder Trichloräthylen, noch Lösungsmittel oder scheuernde
Reinigungsmittel verwenden
Der Hersteller übernimmt keine Haftung im Falle von einem bestimmungswidrigen oder
den von den gelieferten Anweisungen abweichenden Gebrauch, bei der Manipulation
und der unsachgemäßen Wartung des Geräts.
HINWEISE
NEIN!
230V~ 50/60Hz
NEIN!

20
Deutsch
* Bestellnummer der Verpackung
VERWENDUNG DES GERÄTES
-
LOSLÖSEN DER MOTOREINHEIT
-
Um die Motoreinheit loszulösen.
-
Um die Motoreinheit anzuschließen.
A
A1
-
INBETRIEBNAHME
- Schalter auf Position „O“ ........... OFF (Gerät in Ruhestellung)
- Schalter auf Position „I“.............. ON (Gerät in Funktion)
A2
B
B1
FILTERSYSTEME
- VERWENDUNG DES STAUBBEUTELS
(Best.-Nr. 83 140B0K*)
-Den Staubbeutel mit der eingesetzten Filterpatrone be-
nutzen.
- Den Papierfilterbeutel in den Behälter-Eimer einsetzen (Abb.„1“).
- Den Kunststoffflansch (x) in die Lufteintrittsöffnung (y) einsetzen und dabei darauf achten,
dass die Filtertüte nicht beschädigt wird (Abb.„2“).
- DerBeutel gewährt, gemäß Hygienebedingungen,das Sammeln der angesaugtenStaub-
partikel.
-Vermeiden Sie den Gebrauch für schneidende oder feuchte Materialien.
- Sobald das angesaugte Material den Beutel bis drei Viertel gefüllt hat, den Beutel austau-
schen.
- Von einer Wiederverwendung des Beutels wird abgeraten, er MUSS ausgewechselt wer-
den.
„OFF”
PC20
„ON”
PC22
„OFF” „ON”
This manual suits for next models
1
Table of contents
Languages:
Other Gisowatt Vacuum Cleaner manuals

Gisowatt
Gisowatt Lavamatic TI GSW 5 User manual

Gisowatt
Gisowatt ProfiClean PC 35 User manual

Gisowatt
Gisowatt ProfiClean PC 35 Tools Evolution User manual

Gisowatt
Gisowatt Industrial 30 User manual

Gisowatt
Gisowatt ProfiClean PC P20 User manual

Gisowatt
Gisowatt ProfiClean PC 15 silent User manual

Gisowatt
Gisowatt TechnoCleaner 15 User manual
Popular Vacuum Cleaner manuals by other brands

Hydro-Force
Hydro-Force Stylus m1200 operating manual

vacuubrand
vacuubrand DCP 3000 Instructions for use

Vax
Vax C91-MX SERIES instruction manual

Renfert
Renfert Vortex compact 3L instruction manual

pullman Ermator
pullman Ermator S-Line Series operating instructions

Panasonic
Panasonic MC-E871K operating instructions