manuals.online logo
Brands
  1. Home
  2. •
  3. Brands
  4. •
  5. GiveBest
  6. •
  7. Heater
  8. •
  9. GiveBest HPU15A-E User manual

GiveBest HPU15A-E User manual

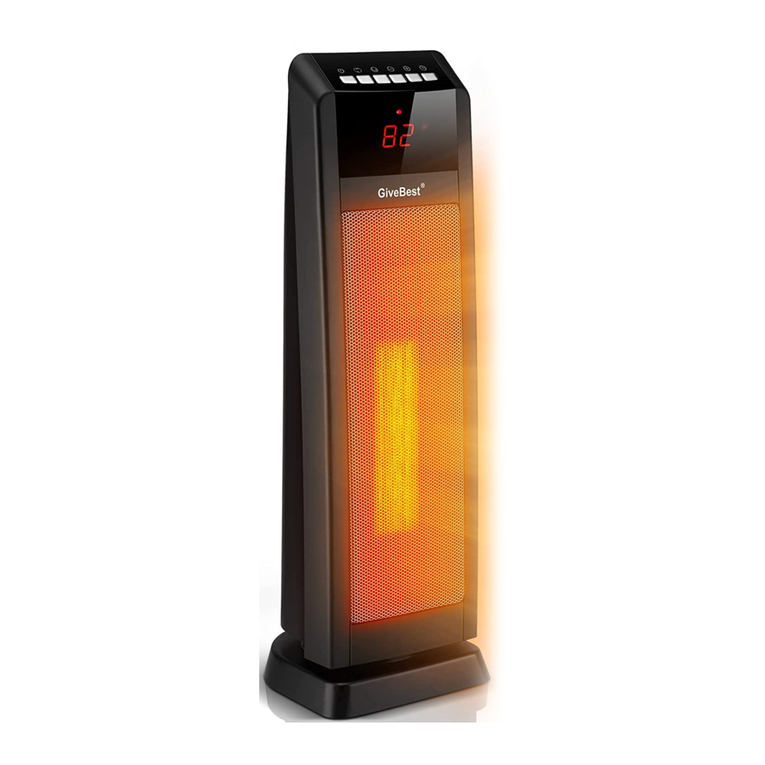
Digital Ceramic HeaterDigital Ceramic Heater
With Remote Control
Owner's Manual
Model: HPU15A-E
GiveBest
2
3
Parts of the Heater
1.
2. LED Display
3. Safety Grille
4. Base
5. Remote Control
6. Power Light
Control Panel
Symbols
1. Place the heater on a firm, level surface, after assembling per
this manual. Plastic or rubber tabs, like the feet on this unit, may
stick to furniture surfaces and/or hardwood floors. The unit may
leave a residue that could darken, stain or leave permanent
blemishes on the finish of certain furniture surfaces, including
wood surfaces, and/or hardwood floors.
2. Plug the cord set into a 120 volt AC outlet. Be sure that the
plug fits tightly into outlet. When plugs fit loosely into
receptacles, they may slip partially or completely out of the
receptacle with only the slight movement of the attached cord.
Receptacles in this condition may overheat and pose a serious
fire hazard; if covered by a curtain or drape, the fire hazard is
even greater.
3. When the heater is initially plugged in, there will be a "beep"
and the
Power Light
will come on indicating that there is power
to the unit. The
Power Light
will remain lit until the heater is
unplugged from the electrical outlet. (Figure 2)
4. Turn the heater ON by pressing the
Power Button
.
GH heat.
H heat.
(Figure 2)
Power Button
H/L Heat Button
High Temperature Setting Button
Low Temperature Setting Button
Timer Button
Figure 2
Operation
(Figure 1)
Figure 1
2
3
1
4
6
4
6.
Upon turning the heater on, the unit will be in HI
Press the button to switch over LOW or HIG
5.
To turn the heater OFF, press the
Power Button
. The
unit will first turn off the heating elements, the fan will be shut
down 30 seconds later. Unplug the unit by pulling the plug from
the electrical outlet only after the fan stopped.
7.
Oscillation
Pressing the
Oscillation Button
will allow the heater to
oscillate back and forth. To stop the oscillation, press the
Oscillation Button
again. When the heater is in Automatic
Temperature Control, the oscillation function will stop when the
set temperature is reached and resume when the heater turns
back on.
Figure 3
Figure 4
5
Timer Function (Figure 3)
The timer function may be activated when the heater display is in
any function. This function allows you to set the length of time
the heater will run before turning itself off, from 1 hour to 8 hours.
Pressing the
Timer Button
will increase the length of time
by 1 hour each time this button is pressed. After the display
reflects 8 hours, pressing the
Timer Button
once more will
reset the heater to run continuously. The heater will turn off when
the set time has elapsed. The unit can be turned back on by
pressing the
Power Button
.
Automatic Temperature Control (Figure 4)
1. To set the room at a specific temperature, press the or
buttons to the desired temperature. The heater is now in Auto
Temperature Mode and the indicator will glow on the
LED
display
.
2. When the display shows the temperature at which you want to
set the unit, the set temperature will flash several times and then
the display will return to indicate the current room temperature
and will gradually change as the room temperature changes.
NOTE: The temperature display does not indicate the
temperature of the heated air being emitted by the heater.
3. Once the room temperature reaches 2 degrees above the set
temperature, the heater will shut off. Once the room temperature
reaches 2 degrees below the set temperature, the heater will
turn back on and continue to cycle off and on to maintain the set
temperature.
4. This function will cancel if the button is pressed.
NOTE: It is normal for the heater "fan" to run for approximately
30 seconds when the heater shuts off after reaching the set
temperature.
Figure 5
Remote Control (Figure 5)
The remote control uses two (2) "AAA" batteries (not included)
for operation.
Note: Change the batteries with new and same types if the
remote control does not operate well. Otherwise your remote
control may not operate properly. Remove the batteries out of the
remote control if you won't use the remote control for a long time.
Remaining batteries may damage your remote control.
Note: Do not mix old and new batteries. Do not mix alkaline,
standard (carbon-zinc), or rechargeable (nickel-cadmium)
batteries.
Battery Disposal - Please dispose of the used battery per
municipal or provincial law.
This heater is equipped with a safety tip-over switch, which is
located on the bottom of the heater. This feature cuts the main
power to the heater if it gets knocked over. If the heater does tip
over, simply stand it upright in order to resume operation.
This heater includes an Overheat Protection System that shuts
the unit off when a potential overheat temperature is reached. If
this occurs, the heater can only resume its normal operation after
resetting it. To reset the heater:
1. Unplug the heater and wait 10 minutes for the unit to cool down.
2. After the 10 minutes, plug the unit in again and operate
normally.
6
1. Perform the cleaning procedures described above.
2. Wipe all parts dry.
3. Pack the heater in a plastic bag and store it in a cool, dry place.
We recommend that you store the heater in its original carton.
If your heater fails to operate:
Make sure the electrical outlet or circuit breaker is working.
Check for obstructions. If you find an obstruction, turn the
heater OFF, and UNPLUG THE UNIT. Carefully remove the
obstruction and follow the reset instructions.
1. Press the Power Button to turn the heater OFF and unplug
the heater before moving or cleaning.
2. Interior dust can often be removed by using a vacuum cleaner
with a crevice tool attachment.
3. To clean the enclosure, use a clean, soft and lightly damp
cloth to gently wipe off the dirt from the surface of the unit. Be
sure not to wet the Heating Element and the switches. Allow the
unit to dry completely before use.
4. Do not use cleaning liquid or other chemicals to spray on the
unit.
7
8
Brand family: Brightown, Givebest
[email protected]
US +1 (888) 550 1319
Mon-Fri 8AM-10PM(EST)
For customer service and warranty, contact us here
de Torre con Control Remoto
Español
Calentador Digital Cerámico
Manual del Propietario
Modelo: HPU15A-E
GiveBest
2
3
2
3
1
4
6
4
, presione el
Botón de Encendido
.
. Primero la unidad apagará los elementos de calefacción y
30 segundos después el ventilador. Desenchufe la unidad
. Para apagar el calentador
Figura 3
Figura 4
5
Oscilación
Presionando el
Botón de Oscilación
presione el
Botón de Oscilación
otra vez. Cuando el
.
Función de Temporizador (Figura 3)
Presionando el
Botón de Temporizador
al presionar el
Botón de T
establecido. La unidad se puede volver a encender presionando
el
Botón de Encendido
.
Control Automático de Temperatura (Figura 4)
presione los botones o para establecer la temperatura
Pantalla LED
.
2. Cuando la pantalla muestra la temperatura a la cual desea
temperatura ambiente.
NOTA: La pantalla de temperatura no indica la temperatura del
aire calefaccionado que emite el calentador.
por encima de la temperatura establecida, el calentador se
mantener la temperatura establecida.
4. Esta función se cancelará si presiona el botón (alta/baja).
NOTA: Es normal que el "ventilador" del calentador funcione
aproximadamente durante 30 segundos cuando el calentador se
emporizador
Figura 5
Sobrecalentamiento que apaga la unidad cuando la misma
alcanza una temperatura de sobrecalentamiento potencial. Si
esto ocurre, el calentador puede volver a funcionar normalmente
. Para reiniciar el
calentador:
1. Desenchufar el calentador y esperar 10 minutos para que la
como de costumbre.
. Esta
se cayera. Si el calentador se cayera, simplemente vuelva a
colocarlo de pie para reactivar su funcionamiento.
Control Remoto ( 5)
Figura
El control remoto utiliza dos (2) pilas "AAA" (no se incluyen)
para su funcionamiento.
Nota: Reemplace las pilas con pilas nuevas y del mismo tipo si
el control remoto no funciona bien. De otra manera, su control
remoto puede no funcionar correctamente. Quite las pilas del
Nota:
, eliminar las pilas usadas
6
7
8
Contacta con nosotros
Marcas:
[email protected]
Brightown, Givebest

Other manuals for HPU15A-E

1

Other GiveBest Heater manuals

GiveBest HPQ15C-EA User manual

GiveBest

GiveBest HPQ15C-EA User manual

GiveBest MH-04 User manual

GiveBest

GiveBest MH-04 User manual

GiveBest HPU15A-E User manual

GiveBest

GiveBest HPU15A-E User manual

GiveBest PTC-1901 User manual

GiveBest

GiveBest PTC-1901 User manual

GiveBest PTC-905 User manual

GiveBest

GiveBest PTC-905 User manual

GiveBest PTC-905E User manual

GiveBest

GiveBest PTC-905E User manual

GiveBest PTC-903 User manual

GiveBest

GiveBest PTC-903 User manual

GiveBest HPQ15J-E1 User manual

GiveBest

GiveBest HPQ15J-E1 User manual

Popular Heater manuals by other brands

Heat Outdoors Shadow Diffusion Safety instructions and operation manual

Heat Outdoors

Heat Outdoors Shadow Diffusion Safety instructions and operation manual

Dimplex XMS718N Installation and operating instructions

Dimplex

Dimplex XMS718N Installation and operating instructions

Japidi Energy DELUXE 500 Guide to installation

Japidi Energy

Japidi Energy DELUXE 500 Guide to installation

German pool EFB-326H user manual

German pool

German pool EFB-326H user manual

Go-On TSE-20A instruction manual

Go-On

Go-On TSE-20A instruction manual

CO/Tech CH241 Original instructions

CO/Tech

CO/Tech CH241 Original instructions

Shizuoka Seiki VAL6 EPX owner's manual

Shizuoka Seiki

Shizuoka Seiki VAL6 EPX owner's manual

VOGEL&NOOT ARUN-T Assembly and operating manual

VOGEL&NOOT

VOGEL&NOOT ARUN-T Assembly and operating manual

MrHeater MHVFRD10NG Operating instructions and owner's manual

MrHeater

MrHeater MHVFRD10NG Operating instructions and owner's manual

Shizuoka Seiki VAL6 MPX owner's manual

Shizuoka Seiki

Shizuoka Seiki VAL6 MPX owner's manual

MrHeater MHVFDF20BFT Operating instructions and owner's manual

MrHeater

MrHeater MHVFDF20BFT Operating instructions and owner's manual

Shizuoka Seiki VAL6 MPX5 Service manual

Shizuoka Seiki

Shizuoka Seiki VAL6 MPX5 Service manual

Pur Line HOTI OR1500D user manual

Pur Line

Pur Line HOTI OR1500D user manual

EcoHeater NA400S Use and care instructions

EcoHeater

EcoHeater NA400S Use and care instructions

Red Stone FH16P-DM owner's manual

Red Stone

Red Stone FH16P-DM owner's manual

Concept2 KS3004bc manual

Concept2

Concept2 KS3004bc manual

Casa Fan CasaTherm S1800 Gold Mounting and operating manual

Casa Fan

Casa Fan CasaTherm S1800 Gold Mounting and operating manual

German pool HTD-89H operating instructions

German pool

German pool HTD-89H operating instructions

manuals.online logo
manuals.online logoBrands
  • About & Mission
  • Contact us
  • Privacy Policy
  • Terms and Conditions

Copyright 2025 Manuals.Online. All Rights Reserved.