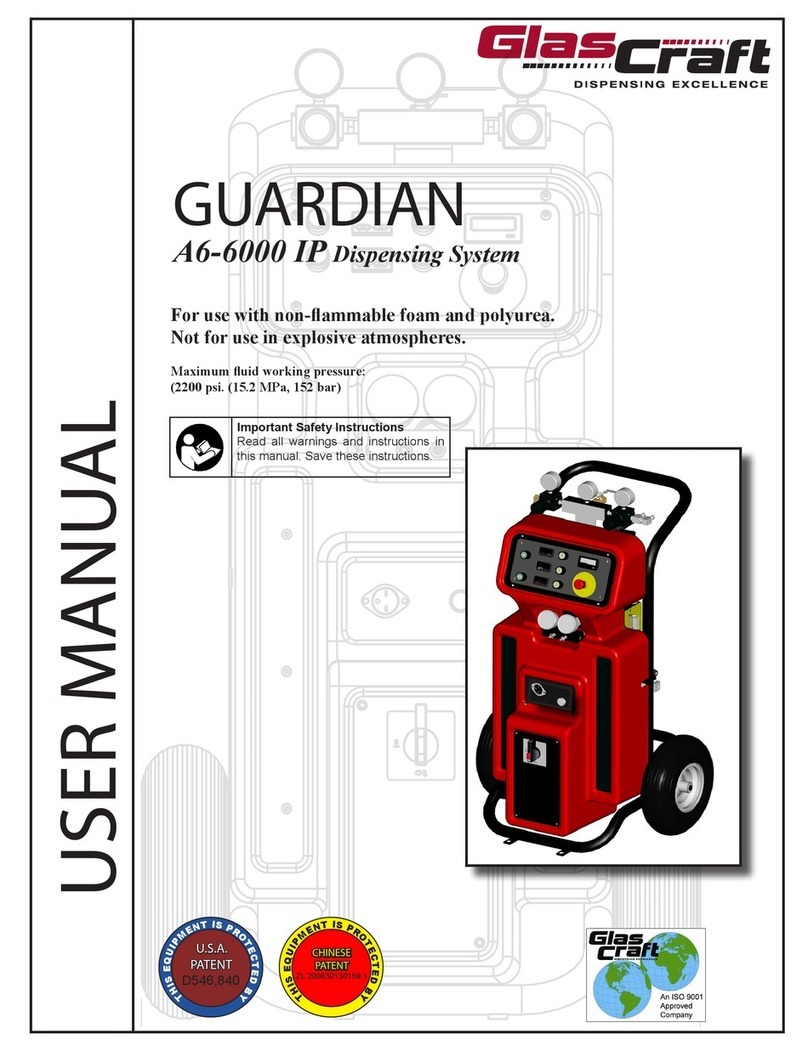
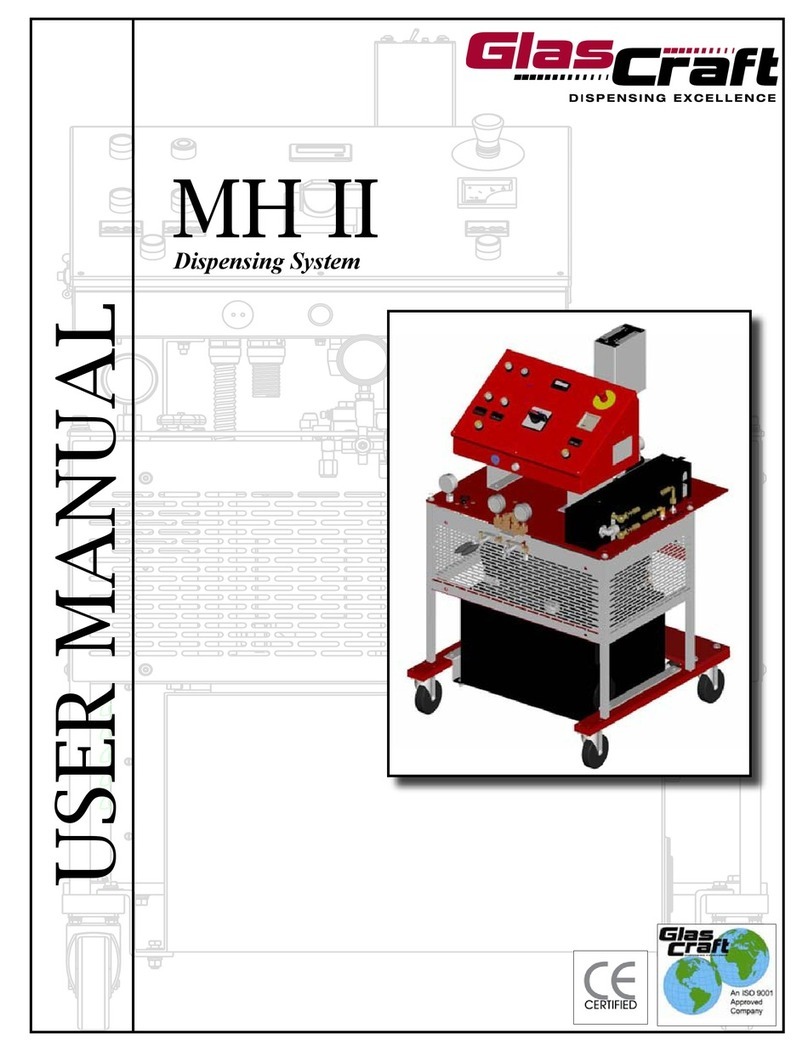
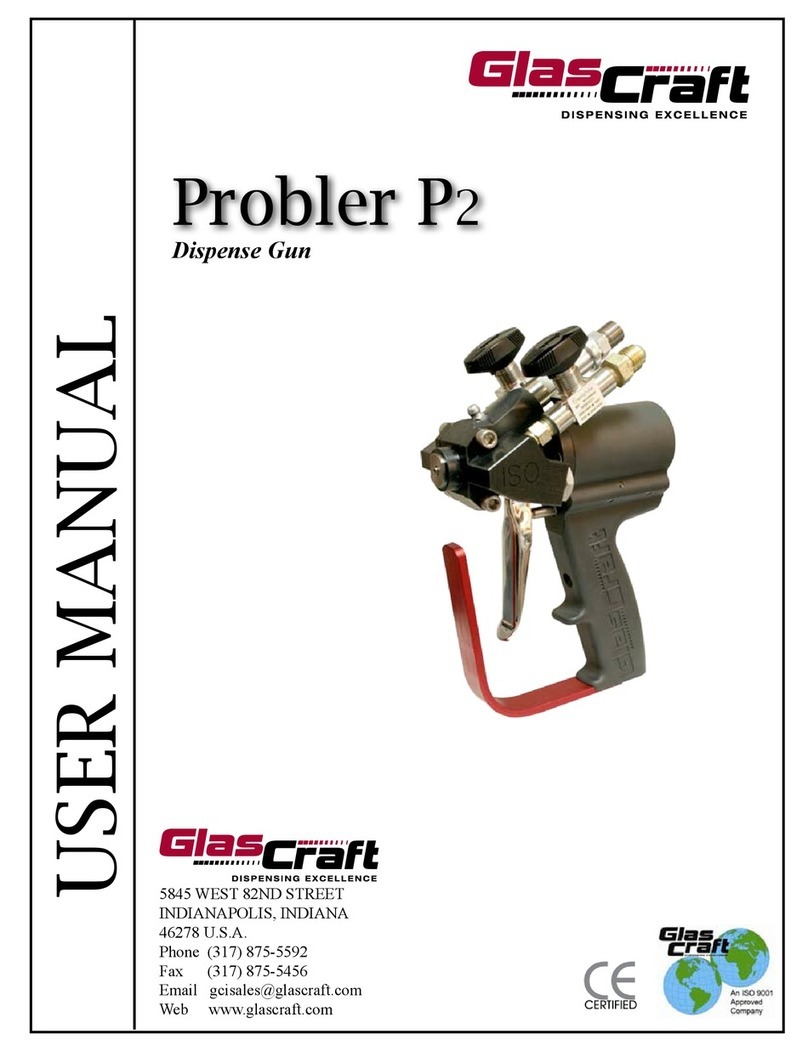
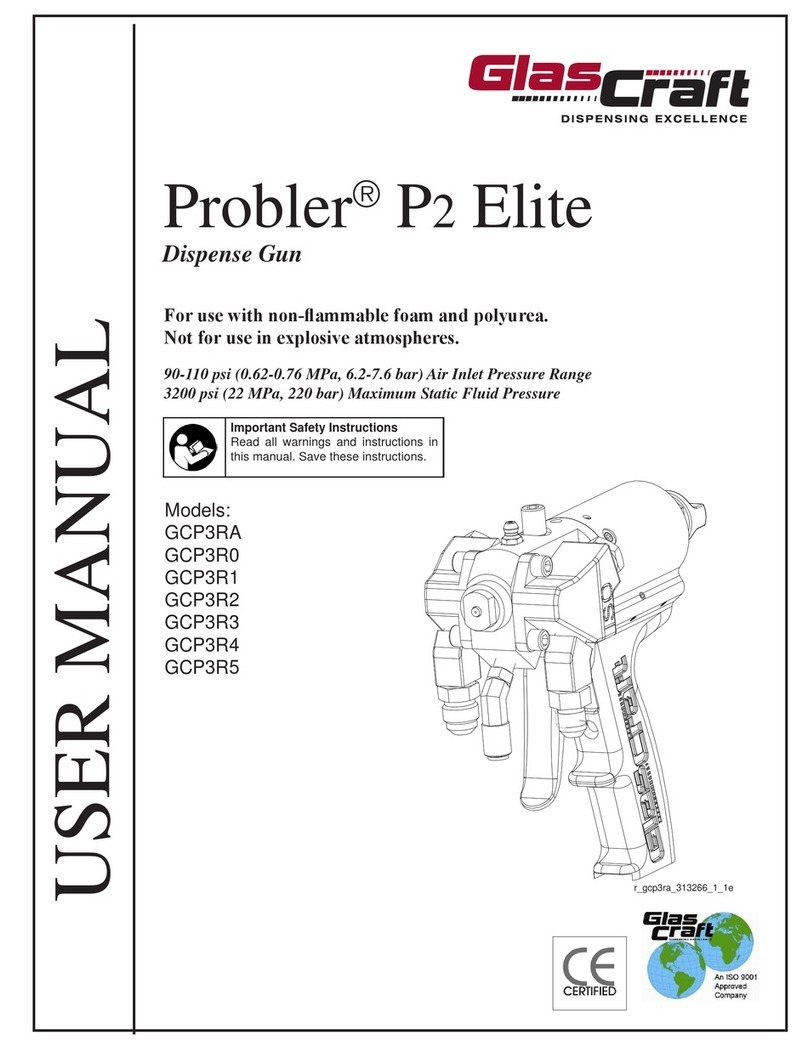
Glas Craft Auto Probler P2 User manual

Auto Probler P2
Dispense Gun
USER MANUAL
For use with non-ammable foam and polyurea.
Not for use in explosive atmospheres.
90-110 psi (0.62-0.76 MPa, 6.2-7.6 bar) Air Inlet Pressure Range
3500 psi (24.1 MPa, 241 bar) Maximum Static Fluid Pressure
Important Safety Instructions
Read all warnings and instructions in
this manual. Save these instructions.
Models:
GCP4RA
GCP4R0
GCP4R1
GCP4R2
GCP4R3
GCP4R4
GCP4R5
24X636
g
ti19820a

Table Of Contents
Section 1 Installation
Warnings ............................................................................................................................................................ 3
Introduction ........................................................................................................................................................ 7
Standard Equipment .......................................................................................................................................... 8
Equipment Assembly ......................................................................................................................................... 9
Section 2 Operation
Start-up Instructions ........................................................................................................................................... 11
Section 3 General Information
Assembly Drawings ............................................................................................................................................. 13
Maintenance ........................................................................................................................................................ 15
Options ................................................................................................................................................................ 20
Section 4 Warranty and Reference Information
Limited Time Warranty ........................................................................................................................................ 25
Technical Assistance ........................................................................................................................................... 26
For Your Reference ............................................................................................................................................. 27
2

3
Warnings
The following warnings are for the setup, use, grounding, maintenance, and repair of this equipment. The exclama-
tion point symbol alerts you to a general warning and the hazard symbols refer to procedure-specic risks. When these
symbols appear in the body of this manual or on warning labels, refer back to these Warnings. Product-specic hazard
symbols and warnings not covered in this section may appear throughout the body of this manual where applicable.
WARNING
TOXIC FLUID OR FUMES HAZARD
Toxic uids or fumes can cause serious injury or death if splashed in the eyes or on skin, inhaled or swal-
lowed.
• Read Safety Data Sheet (SDS) for handling instructions and to know the specic hazards of the uids
you are using, including the effects of long-term exposure.
• When spraying, servicing equipment, or when in the work area, always keep work area well ventilated
and always wear appropriate personal protective equipment. See Personal Protective Equipment
warnings in this manual.
• Store hazardous uid in approved containers, and dispose of it according to applicable guidelines.
PERSONAL PROTECTIVE EQUIPMENT
Always wear appropriate personal protective equipment and cover all skin when spraying, servicing equip-
ment, or when in the work area. Protective equipment helps prevent serious injury, including long-term ex-
posure; inhalation of toxic fumes, mists or vapors; allergic reaction; burns; eye injury and hearing loss. This
protective equipment includes but is not limited to:
• A properly tting respirator, which may include a supplied-air respirator, chemically impermeable gloves,
protective clothing and foot coverings as recommended by the uid manufacturer and local regulatory
authority.
• Protective eyewear and hearing protection.
SKIN INJECTION HAZARD
High-pressure uid from dispensing device, hose leaks, or ruptured components will pierce skin. This may
look like just a cut, but it is a serious injury that can result in amputation. Get immediate surgical treatment.
• Do not point dispensing device at anyone or at any part of the body.
• Do not put your hand over the uid outlet.
• Do not stop or deect leaks with your hand, body, glove, or rag.
• Follow the Pressure Relief Procedure when you stop dispensing and before cleaning, checking, or
servicing equipment.
• Tighten all uid connections before operating the equipment.
• Check hoses and couplings daily. Replace worn or damaged parts immediately.
BURN HAZARD
Equipment surfaces and uid that is heated can become very hot during operation. To avoid severe burns:
• Do not touch hot uid or equipment.

Warnings
4
WARNING
FIRE AND EXPLOSION HAZARD
Flammable fumes, such as solvent and paint fumes, in work area can ignite or explode. Paint or solvent
owing through the equipment can cause static sparking. To help prevent re and explosion:
• Use equipment only in well ventilated area.
• Eliminate all ignition sources; such as pilot lights, cigarettes, portable electric lamps, and plastic drop
cloths (potential static sparking).
• Ground all equipment in the work area.
• Never spray or ush solvent at high pressure.
• Keep work area free of debris, including solvent, rags and gasoline.
• Do not plug or unplug power cords, or turn power or light switches on or off when ammable fumes are
present.
• Use only grounded hoses.
• Hold gun rmly to side of grounded pail when triggering into pail. Do not use pail liners unless they are
anti-static or conductive.
• Stop operation immediately if static sparking occurs or you feel a shock. Do not use equipment until
you identify and correct the problem.
• Keep a working re extinguisher in the work area.
EQUIPMENT MISUSE HAZARD
Misuse can cause death or serious injury.
• Do not operate the unit when fatigued or under the inuence of drugs or alcohol.
• Do not exceed the maximum working pressure or temperature rating of the lowest rated system compo-
nent. See Technical Data in all equipment manuals.
• Use uids and solvents that are compatible with equipment wetted parts. See Technical Data in all
equipment manuals. Read uid and solvent manufacturer’s warnings. For complete information about
your material, request Safety Data Sheet (SDS) from distributor or retailer.
• Do not leave the work area while equipment is energized or under pressure.
• Turn off all equipment and follow the Pressure Relief Procedure when equipment is not in use.
• Check equipment daily. Repair or replace worn or damaged parts immediately with genuine manufac-
turer’s replacement parts only.
• Do not alter or modify equipment. Alterations or modications may void agency approvals and create
safety hazards.
• Make sure all equipment is rated and approved for the environment in which you are using it.
• Use equipment only for its intended purpose. Call your distributor for information.
• Route hoses and cables away from trafc areas, sharp edges, moving parts, and hot surfaces.
• Do not kink or over bend hoses or use hoses to pull equipment.
• Keep children and animals away from work area.
• Comply with all applicable safety regulations.
PRESSURIZED ALUMINUM PARTS HAZARD
Use of uids that are incompatible with aluminum in pressurized equipment can cause serious chemical
reaction and equipment rupture. Failure to follow this warning can result in death, serious injury, or property
damage.
• Do not use 1,1,1-trichloroethane, methylene chloride, other halogenated hydrocarbon solvents or uids
containing such solvents.
• Do not use chlorine bleach.
• Many other uids may contain chemicals that can react with aluminum. Contact your material supplier
for compatibility..

Important Isocyanate (ISO)
Information
Isocyanates (ISO) are catalysts used in two component
materials.
Isocyanate Conditions
Spraying or dispensing uids that contain isocyanates creates potentially harmful mists, vapors, and atom-
ized particulates.
• Read and understand the uid manufacturer’s warnings and Safety Data Sheet (SDS) to know spe-
cic hazards and precautions related to isocyanates.
• Use of isocyanates involves potentially hazardous procedures. Do not spray with this equipment un-
less you are trained, qualied, and have read and understood the information in this manual and in
the uid manufacturer’s application instructions and SDS.
• Use of incorrectly maintained or mis-adjusted equipment may result in improperly cured material.
which could cause off gassing and offensive odors. Equipment must be carefully maintained and ad-
justed according to instructions in the manual.
• To prevent inhalation of isocyanate mists, vapors and atomized particulates, everyone in the work
area must wear appropriate respiratory protection. Always wear a properly tting respirator, which may
include a supplied-air respirator. Ventilate the work area according to instructions in the uid manufac-
turer’s SDS.
• Avoid all skin contact with isocyanates. Everyone in the work area must wear chemically impermeable
• gloves, protective clothing and foot coverings as recommended by the uid manufacturer and local
regulatory authority. Follow all uid manufacturer recommendations, including those regarding han-
dling of contaminated clothing. After spraying, wash hands and face before eating or drinking.
• Hazard from exposure to isocyanates continues after spraying. Anyone without appropriate personal
protective equipment must stay out of the work area during application and after application for the
time period specied by the uid manufacturer. Generally this time period is at least 24 hours.
• Warn others who may enter work area of hazard from exposure to isocyanates. Follow the recommen-
dations of the uid manufacturer and local regulatory authority. Posting a placard such as the follow-
ing outside the work area is recommended:
5
Warnings

Material Self-ignition
Some materials may become self-igniting if applied to thick.
Read material manufacturer’s warnings and Safety Data
Sheet (SDS).
Keep Components A and B
Separate
Cross-contamination can result in cured material in uid
lines which could cause serious injury or damage equip-
ment. To prevent cross-contamination:
• Never interchange component A and component B
wetted parts.
• Never use solvent on one side if it has been contami-
nated from the other side.
Moisture Sensitivity of
Isocyanates
Exposure to moisture (such as humidity) will cause ISO to partially
cure, forming small, hard, abrasive crystal that become suspend-
ed in the uid. Eventually a lm will form on the surface and the
ISO will begin to gel, increasing in viscosity.
NOTICE
Partially cured ISO will reduce performance and the life of all
wetted parts.
• Always use a sealed container with a desiccant dryer in
the vent, or a nitrogen atmosphere. Never store ISO in
an open container.
• Keep the ISO pump wet cup or reservoir (if installed)
lled with appropriate lubricant. The lubricant creates a
barrier between the ISO and the atmosphere.
• Use only moisture-proof hoses compatible with ISO.
• Never use reclaimed solvents, which may contain mois-
ture. Always keep solvent containers closed when not in
use.
• Always lubricate threaded parts with an appropriate lubri-
cant when reassembling.
NOTE: The amount of lm formation and rate of crystallization
varies depending on the blend of ISO, the humidity, and the tem-
perature.
Foam Resins with 245 fa
Blowing Agents
Some foam blowing agents will froth at temperatures abov 90 F
(33 C) when not under pressure, especially if agitated. To reduce
frothing, minimize preheating in a circulation system.
Changing Materials
NOTICE
Changing the material types used in your equipment requires
special attnetion to avoid equipment damage and downtime.
• When changing materials, ush the equipment multiple
times to ensure it is thoroughly clean.
• Always clean the uid inlet strainers after ushing.
• Check with your material manufacturer for chemical
compatibility.
• When changing between epoxies and urethanes or
polyureas, disassemble and clean all uid components
and change hoses. Epoxies often have amines on the B
(hardener) side. Poluureas often have amines on the B
(resin) side.
6
Warnings

Section 1 - Installation: Introduction
Introduction
Before operating, maintaining or servicing any Glas-
Craft system, read and understand all of the technical
and safety literature provided with GlasCraft products.
If you do not have the proper or related manuals and
safety literature for your GlasCraft system, contact your
GlasCraft distributor.
In this GlasCraft technical and safety publication, the
following advisories will be provided where appropriate:
Information about the procedure in progress.
Indicates a hazardous situation that can result in death
or serious injury.
The information in this document is intended only to indi-
cate the components and their normal working relationship
typical use. Each assembly should be directed by a Glas-
Craft distributor or made from the GlasCraft Assembly
instructions provided.
This manual provides information for the assembly, opera-
tion, maintenance and service of this GlasCraft product as
used in a typical conguration. While it lists standard speci-
cations and procedures, some deviations may be found.
In order to provide our users with the most up-to-date
technology possible, we are constantly seeking to improve
products. If a technological change occurs after a prod-
uct is on the market, we will implement that technology in
future production and, if practical, make it available to cur-
rent users as a retrot, update or supplement. If you nd
a discrepancy between your unit and the available docu-
mentation, contact your GlasCraft distributor to resolve the
difference.
Careful study and continued use of this manual will pro-
vide a better understanding of the equipment and process,
resulting in more efcient operation, longer trouble-free
service and faster, easier troubleshooting.
7
WARNING

8
Standard Equipment
Part
Number Description
GCP4RX Auto Probler P2 Dispense Gun
313267 User Manual
Section 1 - Installation: Standard Equipment

How The Gun Works
The air on / off ports actuate the gun’s piston. When air is
applied to the “on” port the air pressure forces the piston
towards the rear of the gun, simultaneously closing off the
purge air and moving the mixing chamber to a position
where the mixing chamber orices are aligned with the
orices in both, the side block seal and check valve assem-
blies.
The proper alignment of the orices is determined by
the setting of the adjustment nut, located on the pis-
ton lock assembly. This adjustment nut determines
the length of travel of the air piston and has been
preset at the factory and should not require adjust-
ment. (SEE MAINTENANCE SECTION)
The two uids (isocyanate and polyol) then ow through
the material shut-off valves, seal, and check valve assem-
blies and into the mixing chamber. The two uids impinge
against one another and exit the mixing chamber in a swirl-
ing, conical spray pattern.
When the trigger is released, the mixing chamber returns
to its original position and purge air ows into the mixing
chamber housing. The front tip o-ring, keeps air purge in-
side the gun head, forcing all of the air through the orices
in the mixing chamber, for a complete, total and constant
purge.
This purge air continues to ow through the mixing cham-
ber until the air switch is pulled up to shut-off all air to the
gun; or until the trigger is pulled again.
Piston Lock
Engage piston lock whenever you stop spraying, to avoid
accidental triggering.
Always use piston lock in conjunction with uid ball valves
to avoid accidental triggering.
Read warnings, page 3.
To engage Piston lock: push knob in and turn clockwise.
If engaged, gun will not actuate.
To disengage piston lock: push knob in and turn coun-
terclockwise until it pops out. There will be a gap between
knob and gun body.
See page 19 for piston lock adjustment or installation.
Loss of Air Pressure
In event of loss of air pressure, gun will continue to spray.
To shut off gun, do one of the following:
• Push in piston lock, see Engage piston lock.
• Close ball valves A and B.
9
Section 1 - Installation: Equipment Assembly
WARNING
r_257826_313266_1_1b
r_257826_313266_1_2b

10
Section 1 - Installation: Equipment Assembly
GlasCraft Equipment
Air Hose is 1/4” in. NPS
JIC and SAE Fittings DO NOT require the use of PTFE
tape.
Once the ttings are attached and tight, refer to system
manuals for start-up instructions.
*Fitting GC2394 is an unattached part that may need to be
connected to the air hose rst, and then connected to the
gun, depending on the air hose tting.
Installing Auto Probler P2on other
Equipment
Do not place any part of the body in the path of the
material spray. Do not point the gun at or near other
personnel. Do not look into the mixing chamber ori-
ce at any time. Because of the hazardous materials
used in this equipment, it is recommended that the
operator use an air mask, goggles, protective cloth-
ing, and other safety equipment as prescribed by
current regulations, recommendations of the chemi-
cal suppliers, and the laws in the area where the
equipment is being used.
If original equipment does not require the use of an un-
heated whip hose or isolation hose, the P2 can be directly
installed on to the material hose.
1. Remove the ttings from the original gun.
2. Remove swivel ttings from ball valves. Ball valves
are 1/8 in. NPT female. Remove swivel tting from
air slide valve. The air slide valve is a ¼ in. NPSM.
3. Install the original ttings into ball valves.
It is recommended to use a non-permanent thread
lock on the 1/8 in. NPT threads to assist as a sealant
and keep the ttings from twisting with gun move-
ment.
4. Install the gun on the original hoses.
Relieve ALL system uid and air pressure according
to manufacturer’s instructions.
WARNING
WARNING
ISO
*AIR
POLY
AIR “ON”
AIR “OFF” ti19821a
ti19822a

11
Refer to specic system user manuals for complete
system installation.
Pre operation Checklist
Check that all ttings are tight and air regulators are
turned to “zero pressure”.
Do not place any part of the body in the path of the material
spray.
Do not point the gun at or near other personnel.
Do not look into the mixing chamber orice at anytime.
Because of the hazardous materials used in this equip-
ment, it is recommended that the operator use an air mask,
goggles, protective clothing, and other safety equipment
as prescribed by current regulations, recommendations of
the chemical suppliers, and the laws in the area where the
equipment is being used.
Operating Requirements
• 8 - 10 CFM at 90 -110 psi (0.62-0.76 MPa,
6.2-7.6 bar)
• MAXIMUM Static Fluid Pressure - 3500 psi
(24.1 MPa, 241 bar)
The GlasCraft Auto Probler P2 Gun is designed and manu-
factured to operate at a maximum static uid pressure not
to exceed 3500 psi (24.1 MPa, 241 bar). When attached
to a GlasCraft proportioning system, this pressure will not
be exceeded. However, if the GlasCraft Probler P2 Gun is
installed on any other manufacturer’s self-designed equip-
ment, great care must be taken to ensure that the maxi-
mum static uid pressure not be exceeded.
If the gun is being used for short periods of spraying,
GlasCraft recommends that the purge air be left ON.
If purge air is to be turned OFF, BOTH MATERIAL SHUT-
OFF VALVES, MUST BE TURNED TO THEIR “OFF” POSI-
TION AND PISTON-LOCK ENGAGED BEFORE TURNING
“OFF” THE PURGE AIR !
Failure to follow this procedure will possibly result in the
gun head becoming encased with mixed product.
For proper purging following use, the air switch must be left
OPEN for at least 15 SECONDS after the trigger has been
released.
The ow of material into the mixing chamber is controlled
by the ON or OFF position of the two material shut-off
valves.
Both material shut-off valves must be FULLY OPEN
and piston lock DISENGAGED during dispens-
ing and must be FULLY CLOSED and piston lock
ENGAGED during service or extended shut-down
periods.
BOTH MATERIAL SHUT-OFF VALVES, MUST BE
TURNED TO THEIR “OFF” POSITION AND ALL FLUID
PRESSURE RELIEVED BEFORE REMOVING SIDE
BLOCK SCREWS!!
Failure to follow this procedure will possibly result in the
gun head becoming encased with mixed product.
ON OFF
Refer to system manuals for start-up and
shut-down procedures.
Section 2 - Operation: Start-Up Instructions
WARNING
WARNING
WARNING
WARNING
ti19823a

12
Section 2 - Operation: Start-Up Instructions
Spray Technique
Always operate safely and follow all safety procedures out-
lined.
To achieve the optimum spray pattern for each application,
the appropriate mixing chambers are available in seven
round and six at spray sizes.
The standard mixing chamber supplied with your gun will
be adequate for all but the smallest and largest applica-
tions.
Foam rise and cure times will vary according to the mate-
rial and substrate temperature. Higher material or substrate
temperature will increase rise and cure times; lower mate-
rial or substrate temperatures will decrease rise and cure
times. Consult your chemical manufacturer’s data speci-
cation sheets for their recommended spray temperatures.
Under most circumstances, both components will be used
at identical temperatures.
Higher pressures and temperatures may be used to in-
crease material break-up, improve mixing and speed rise
times. With hose lengths over 50 ft.(15.25 m), or when ma-
terial viscosities are high, higher material pump pressures
may be necessary.
The gun air switch assembly MUST BE OPENED (down
position) prior to spraying to provide air for piston operation
and purge air when the piston is released.
When spraying, the gun piston may be activated continu-
ously, or deactivated at the end of each stroke. A smooth,
even layer is best achieved by moving the gun back and
forth in a slow, even motion, overlapping the previous pass
about 50 to 75 percent. DO NOT SPRAY OVER RISING
FOAM! The ideal gun-to-surface distance is about 18 to 24
inches. Be sure to point the gun directly at the surface to
be sprayed. Spraying at an angle to the surface will cause
the foam to be rough and will generate overspray.

5
13
Section 3 - General Information: Auto P2 Dispense Gun
56
37
11
42
14 44
16
15
43
30
45
36
49
12
53
46
38
24
48
23
22 35
34
32 21 18
5
A
B
1a_
51
54
54
17
10
31
40
35
47
8
35
31
10
33
20
7
51
1b_
4
25
22
35
34
32
21
19
Part A B Kit
GCP4RA GC250A GC251A GC1948
GCP4R0 GC2500 GC2510 GC1947
GCP4R1 GC2501 GC2511 GC1947
GCP4R2 GC5202 GC2512 GC1947
GCP4R3 GC2503 GC2513 GC1947
GCP4R4 GC2504 GC2514 GC1947
GCP4R5 GC2505 GC2515 GC1947
24X636 GC2501 17P754 - - - - - -
Apply permanent thread locker and torque to 35-40 in-lbs
(4-4.5 N•m).
Apply liberal coating of lubricant (Part No. 118665) to
seals and surfaces specied.
Adjust counter-clockwise until it bottoms out.
1
2
3
56c
56f
56a
56e
56d
56b
1
2
2
3
r_257826_313213_1_1b
r_gcp4ra_313267_1_4e
ti19824a
31

14
Ref. Part Description Qty.
1a _256459 VALVE, BALL, ISO 1
1b _256460 VALVE, BALL, POLY 1
4 117634 SWIVEL, UNION 1
5 117635 SWIVEL, UNION 1
7 117724 O-RING 2
8 GC0128 SWITCH, ASSY, AIR
(includes 5a - 5d)
1
8a 106555 O-RING 1
8b 110242 O-RING 2
8c GC0126 TUBE, SWITCH, AIR 1
8d GC0127 SPOOL, SWITCH, AIR 1
9* 15B772 AIR HOSE, 1/4 NPSM (FBE)
(18 in.)
1
10 GC0259 BALL, 1/4 DIA, SST 3
11 GC0498 FITTING, CONNECTOR 2
12 100846 FITTING, LUBE 1
14 24Z770 SST, PISTON, AIR 1
GC1898 PISTON, AIR 1
15 GC1899 PISTON, AIR 1
16 GC1900 SPACER, CYLINDER 1
17 GC1901 INSERT, VALVE, AIR 1
18 17P755 SST, BLOCK, SIDE, ISO 1
16N599 BLOCK SIDE, ISO 1
19 17P758 SST, BLOCK, SIDE, POLY 1
16N600 BLOCK, SIDE, POLY 1
20 16P010 FILTER, VALVE, CHECK 2
21 GC2494 SEAL 2
22 GC2495 HOUSING, SEAL 2
23 GC1914 AIR CAP 1
24 GC2520 BLOCK, AUTOMATIC 1
25 17P726 SST, PROBLER P2 HEAD 1
GC1916 PROBLER P2 HEAD 1
30 GC1921 RING, RETAINING, INTERNAL 1
31 X GC1922 SPRING 3
32 GC1923 SPRING 2
33† X GC2496 SCREEN, FILTER, 40 MESH 2
34 GC2498 SEAL, SIDE 2
35 248128 O-RING (Qty: 6) 4
36 248131 O-RING (Qty: 6) 1
37 C20988 O-RING 1
38 GC2056 O-RING, FLUOROELASTOMER 1
40 GC2057 O-RING, FLUOROELASTOMER 1
42 108833 O-RING 1
43 107563 O-RING 1
44 GC2059 O-RING, FLUOROELASTOMER 1
Section 3 - General Information: Auto P2 Parts List
Ref. Part Description Qty.
45 C20207 O-RING 1
46 GC2060 O-RING, FLUOROELASTOMER 1
47 GC2079 SCREW, SET 1
48 GC2081 SCREW, SET, SST 4
49 GC2187 SCREW, SHDC 2
51 15U395 ADAPTER , 1/8 NPT 2
53 GC2243 SCREW, SET 1
54 GC2248 SCREW, SHDC 4
56 258761
24Z769
PISTON LOCK ASSEMBLY
(includes 49a-49f)
1
56a AIR CAP 1
56b ♦ STOP SHAFT 1
56c ♦ PISTON STOP 1
56d ♦ COMPRESSION SPRING 1
56e ♦ O-RING 1
56f ADJUSTMENT NUT 1
* 118665 HIGH ADHESION, WATER
RESITANT, LITHIUM GREASE
(4 OZ.)
1
* 117773 LOW VISCOSITY GREASE
(3 OZ.)
1
* 117792 GREASE GUN
(3 OZ. CARTRIDGE)
1
† 100 mesh lter, GC2497 is also available.
♦ Included with kit 258762.
X Available in bulk kits, see page 20.
* Not shown.
_ Replacement handles are available in kit 24W375.

Pressure Relief Procedure:
Before attempting to perform any maintenance on
this gun, relieve All Fluid and Air Pressures!
• To relieve uid and air pressures:
• Turn OFF all air supplies at system except gun trigger
air.
• Trigger the gun until all uid pressures have been
relieved.
• Turn OFF the gun trigger air at the system.
• Turn proportioner off.
• Trigger the gun until all trigger air pressure has
been relieved.
Perform Gun maintenance as follows:
1. Check for leaking seals (Ref. 27):
• Engage piston lock.
• Turn OFF the gun incoming air by closing gun air
switch.
Air Switch
• Wait approximately 10 - 20 seconds, then turn ON
the incoming air by opening Gun Air Switch.
• Repeat two or three times.
• If any material has been purged from the gun, the
seals (Ref. 27) are leaking, or o-ring (Ref. 28).
• Correct leaks by replacing the seals or o-rings and
re-checking.
2. Check the material valves, p/n 256459 AND 256460 for
any leaks:
• Turn OFF both material valves.
• Disengage piston lock.
• Activate and deactivate the gun several times.
• Wait approximately 10-20 seconds.
• Activate and deactivate the gun several times.
• If additional material is purged, the material valves
are leaking.
• Correct the leaks by loosening the set screw and
removing red or blue handle. Turn the valve packing
nut clockwise in 1/8-turn increments until leak is
corrected. Re-check.
3. Check side blocks
• Turn OFF the air switch on the gun.
Before removing the side blocks make certain that both
material valves are in the OFF positions! Also activate and
activate several times to relieve uid pressure in the gun.
If the material valves are on when the side blocks are re-
moved the gun will quickly become encased in urethane!
Point gun side blocks down, away from all personnel.
Existing uid pressures could cause material to exit the
side blocks with considerable force.
15
Section 3 - General Information: Maintenance
WARNING
WARNING
WARNING
ti19825a
1/8
ti19008a
ti21615a

16
• Take the side blocks off by removing screws.
• Examine the sides of the mixing chamber for scratch
es and/or material build-up. Carefully, without
scratching the seal surfaces (sides), remove any
accumulated material. Solvent can be used to wash
accumulated material off of chamber, side blocks, etc.
Keep the gun chamber tilted toward the ground so
that solvent does not run back into gun. Certain
solvents will attack o-rings on chamber shaft causing
swelling and deterioration of o-rings.
• Place generous amounts of high quality, white lithium
grease (Part No. 117773) in each side of the gun
front housing and on the side block seals.
• Use correct size drill bit to clean out the mixing
chamber exit passage. Use correct size drill bit to
clean the inlet side holes of the mixing chamber tak
ing care not to scratch the mixing chamber’s polished
surfaces (refer to the drill chart in this manual).
• Re-assemble the side blocks and tighten the screws.
Grease should appear at the tip of the mixing cham-
ber.
DO NOT open the air switch on the gun because this
will purge grease from the gun. The grease should
be allowed to remain in the gun overnight.
Section 3 - General Information: Maintenance
ti21616a
ti21616a

17
Daily Shut-Down
For experienced users
Once you have used the gun with a product and system,
and you have become comfortable with techniques on
how all the variables are affecting your operations and
maintenance requirements, Daily, Weekly, and Monthly
maintenance requirements can be addressed specic to
your operation.
1. Turn the ball valves off, activate and deactivate the gun
5 - 6 times to purge residual pressure.
2. Engage piston lock.
3. Drill out the chamber insert snout with correct size drill
bit for insert (see drill chart).
4. Pull slide valve halfway back to limit the air purge.
Air Switch
5. Use grease gun (Part No. 117792) to inject white lithium
grease (Part No. 117773) into zerk tting until a light
mist of grease is purged through the snout. Shut off the
air purge.
6. Remove the air cap and set to side. If solvent soaking
is required, remove the o-ring before soaking.
7. Remove the snout insert and soak in solvent until next
usage.
Daily Start-Up
8. Clean the snout insert. Be sure both, the face and bot-
tom at are clean. Drill the snout bore out with the cor-
rect size bit for snout (see drill chart).
9. Clean the inner bore of the chamber. Drill out the cham-
ber snout inlet bore as required.
10. Install the snout insert.
11. Install the air cap on to the chamber. Tighten nger
tight until the cap bottoms out. Snug down with a ½
in. wrench. This does not require high torque. Over
tightening can result in chamber damage.
Section 3 - General Information: Maintenance
ti19825a
ti21615a
Zerk Fitting ti21615a
Insert
Air Cap
O-ring
ti21617a

18
Refer to specic system user manuals for complete
system installation.
Parts Replacement Procedure
Before attempting to perform any maintenance on this
gun OR before removing the side blocks, make certain
that both gun material valves are in the OFF positions!
Also activate and deactivate several times to relieve
uid pressure in the gun.
If the material valves are on when side blocks are
removed, the gun will quickly become encased in ure-
thane!
1. Read each procedure entirely before beginning and
refer to the illustrations as needed.
2. Flush and clean all chambers and passages as they
become accessible.
3. Clean all parts before assembly.
4. Replace all o-rings and seals with new parts from the
appropriate kit.
5. Inspect all parts for wear or damage and replace as re
quired with new genuine GlasCraft replacement parts
from your authorized GlasCraft distributor.
6. Inspect all threads for wear or damage and replace as
required.
7. Tighten all threaded parts securely, but not excessively,
upon assembly.
8. Lightly lubricate all o-rings and threads with
grease (Part No. 118665).
9. Check all springs for resilience. They should return
quickly to their original (new) length.
Routine Care
Before attempting to perform any maintenance on this
gun OR before removing side blocks, make certain that
both Gun material valves are in the fully OFF positions!
Also activate and deactivate several times to relieve
uid pressure in the gun.
If the material valves are on when side blocks are
removed, the gun will quickly become encased in ure-
thane!
It is recommended that the following service be performed
on a daily basis.
1. Clean the gun using a brush and an appropriate clean
solvent.
2. Inspect the side block seals making certain they are
clean and free of scratches, nicks or foreign material.
Clean and replace as required.
3. Remove, clean or replace the lter screen.
4. Maintain a reasonable stock level of “wear” items such
as seals and o-rings. (see Service & Repair Parts Kits
listed in Parts & Illustrations section.)
5. Grease gun daily to prevent 2 component curing and
keep uid passages clean. Purge air carries grease
mist through air chamber and impingement ports then
out the mix chamber nozzle, coating all surfaces. Use
Part No. 117773 grease.
Section 3 - General Information: Maintenance
WARNING
WARNING

19
Piston Lock Adjustment and Installation
Procedure
The P2 gun piston throw is factory set and as a rule, should
not require adjustment. The piston throw refers to how far
back the air piston will travel when the gun is triggered.
Proper throw adjustment will align the mixing chamber side
ports with the side block seal thru port.
Determine if the piston throw is correct:
1. Follow the pressure relief procedure on page 15 and
disconnect material hoses from the gun.
2. Turn the material ball valves to the OFF position.
3. Verify that the piston lock cap has been tightened and
fully threaded into the gun.
4. Remove the side blocks.
5. Remove one of the side block seal housings, from side
block. Leave the seal (34) in housing and rinse with
suitable solvent.
6. Place the side seal housing in the gun head so the face
of the seal sets against the mix chamber.
If the material valves are on when side blocks are
removed, the gun will quickly become encased in ure-
thane!
7. Turn the gun trigger air supply on , then trigger the gun.
The purge air will not shut off with the side block
removed.
8. If the impingement port is not fully visible through the
side seal housing turn the trigger-air off and trigger the
gun to relieve pressure. Use a 9/16 in. open-end
wrench to adjust the adjustment nut in the appropriate
direction. Repeat steps 7 and 8 until it is
adjusted properly.
9. If the impingement port on the mix chamber is fully
visible through the side seal housing (either on
center or slightly forward), the piston lock adjustment
nut is properly aligned.
Non-permanent thread locker can be applied to the
adjustment nut if necessary.
10. Reassemble the gun.
Before each use: Verify that the piston lock assembly is
installed and working properly.
• Engage piston lock.
• Pressurize the system to working pressure.
• Open material ball valves.
• Point the gun in a safe direction and trigger gun. No
material should ow from gun tip.
• DO NOT USE IF IT IS NOT WORKING PROPERLY.
Section 3 - General Information: Maintenance
WARNING
ti19825a
ti21616a
ti21618a

Service & Repair Kits
20
GC1949 Hardware Kit 04-05
Part Description Qty.
GC0086 3/16” Ball Driver 1
GC0087 5/32” Ball Driver 1
GC0175 Pin Vise 1
GC2496 Screen Filter 2
GC0075 Drill Bit 1
GC0076 Drill Bit 1
117517 O-Ring 1
111450 O-Ring 2
GC2212 37 Deg. Connector
Fitting 1
GC2334 45 Deg. Connec-
tor Fitting 1
GC2394 Adapter Fitting 1
GC1950 Premium Repair Kit
Part Description Qty.
GC1931 O-Ring 1
111516 O-Ring 1
113137 O-Ring 2
111316 O-Ring 2
118594 O-Ring 1
117724 O-Ring 2
117517 O-Ring 1
GC1932 O-Ring 3
GC1933 O-Ring 1
GC1934 O-Ring 1
GC1935 O-Ring 1
GC1936 O-Ring 1
117610 O-Ring 1
GC1937 Standard Repair Kit
Part Description Qty.
C20988 O-Ring 1
GC2056 O-Ring 1
110242 O-Ring 2
106555 O-Ring 2
GC2057 O-Ring 1
GC2058 O-Ring 3
108833 O-Ring 1
107563 O-Ring 1
GC2059 O-Ring 1
C20207 O-Ring 1
GC2060 O-Ring 1
GC0043 O-Ring 2
GC044 O-Ring 2
111450 O-Ring 2
117517 O-Ring 1
GC1946 Side Seal Kit
Part Description Qty.
GC2498 SST Side Seal 2
111450 O-Ring 2
GC1947 Hardware Kit 00-03
Part Description Qty.
GC0086 3/16” Ball Driver 1
GC0087 5/32” Ball Driver 1
GC0175 Pin Vise 1
GC2496 Screen Filter 2
GC0068 Drill Bit 1
GC0069 Drill Bit 1
GC0070 Drill Bit 1
GC0072 Drill Bit 1
GC0073 Drill Bit 1
GC0074 Drill Bit 2
GC0077 Drill Bit 1
GC0083 Drill Bit 1
GC2212 37 Deg. Connector Fitting 1
GC2334 45 Deg. Connector Fitting 1
117517 O-Ring 1
248128 O-Ring 6
GC2394 Adapter Fitting 1
GC194 Hardware Kit -AA
Part Description Qty.
GC0082 Drill Bit 1
GC0081 Drill Bit 1
GC0086 3/16” Ball Driver 1
GC0087 5/32” Ball Driver 1
GC0175 Vise Pin 1
GC1924 Filter Screen 2
111450 O-Ring 2
117517 O-Ring 1
Section 3 - General Information: Options
258762, Piston Lock Repair Kit
Part Description Qty.
Stop Shaft 1
Piston Stop 1
Compression Spring 1
O-Ring 1
Gun Cover
244914 Covers
Keeps gun clean while spraying. Pack of 10.
Lubricant for Gun Rebuild
248279, 4 oz (113 gram) [10]
High adhesion, water resistant, lithium-based lubricant.
MSDS sheet available at www.graco.com.
Grease Cartridge for Gun Shutdown
248280 Cartridge, 3 oz [10]
Specially formulated low viscosity grease ows easily
through gun passages, to prevent 2 component curing
and keep uid passages clean.
Bulk Kits
24R894, 40 Mesh Filter Screens Kit
Ref Part Description Qty.
26 GC2496 Filter Screen, 40
mesh
10
24R895, 100 Mesh Filter Screens Kit
Ref Part Description Qty.
(26) GC2497 Filter Screen, 100
mesh
10
24R896, Springs Kit
Ref Part Description Qty.
24 GC1922 Spring 12
Other manuals for Auto Probler P2
1
This manual suits for next models
8
Table of contents
Other Glas Craft Dispenser manuals

Glas Craft
Glas Craft Guardian A5-6000 IP User manual

Glas Craft
Glas Craft MH II User manual

Glas Craft
Glas Craft Guardian A6-6000 IP User manual

Glas Craft
Glas Craft MH II User manual

Glas Craft
Glas Craft GCP3RA User manual

Glas Craft
Glas Craft GUARDIAN A5-3000 IP User manual

Glas Craft
Glas Craft GUARDIAN User manual

Glas Craft
Glas Craft Probler P2 User manual

Glas Craft
Glas Craft Probler User manual