manuals.online logo
Brands
  1. Home
  2. •
  3. Brands
  4. •
  5. Globo
  6. •
  7. Toilet
  8. •
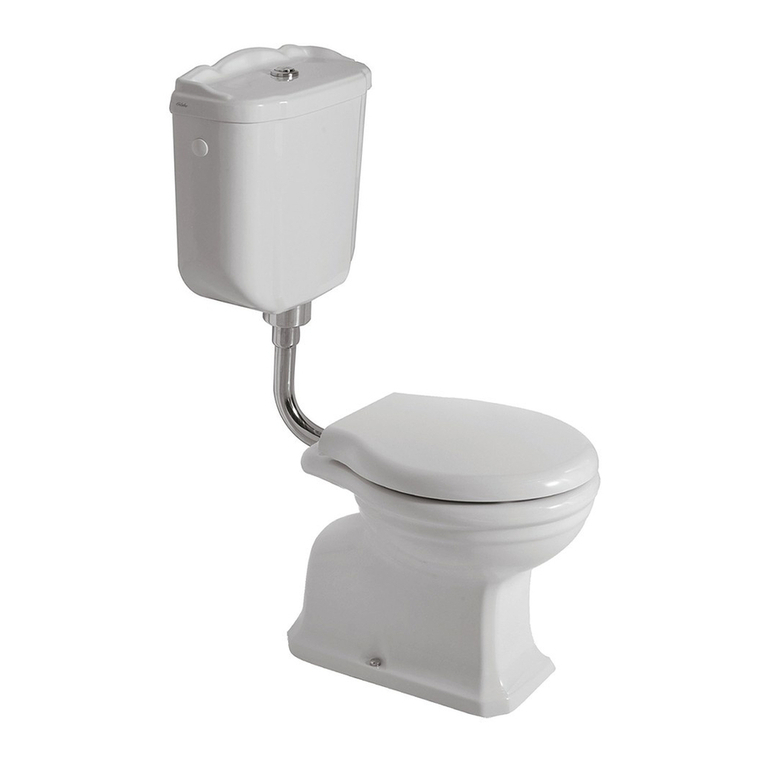
  9. Globo PA025.BI User manual

Globo PA025.BI User manual

ISTRUZIONIÊ DIÊ MONTAGGIOÊ/Ê ASSEMBLYÊ INSTRUCTIONS
CASSETTAÊ MONOLITOÊ PAESTUM
PAESTUMÊ CLOSEÊ COUPLEÊ CISTERN
710
430
370
320
370
260
140 570
160
76
54
410
250
180
930
440
195
180
350
460
830 380
115 115
Ingresso acqua posteriore
Back water inlet
710
430
370
320
370
260
140 570
160
76
54
410
250
180
930
440
195
180
350
460
830 380
115 115
Ingresso acqua posteriore
Back water inlet
Cassetta monolito per vaso cod. PA025.BI. Completa di meccanismo
di scarico cromato dual flush scarico 6/3,5 lt GEBERIT. Entrata acqua
posteriore dx/sx.
Monolith cistern to be matched with pan cod. PA025.BI. Provided with
chromium-plated GEBERIT dual-ush discharge mechanism 6/3,5 lt.
Rh/Lh rear water inlet.
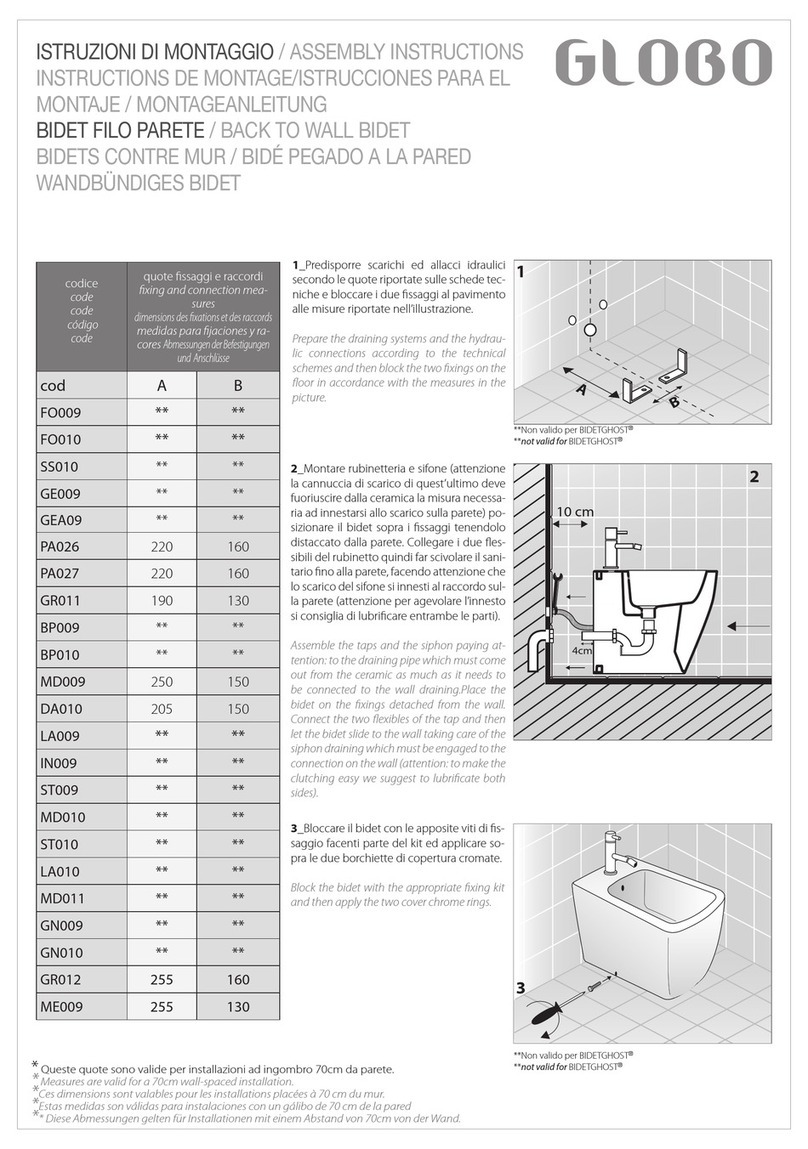
1_Predisporre gli scarichi secondo le quote riportate sulle schede tecniche e bloccare i due fissaggi al pavimento secondo le misure riportate nell’illu-
strazione. E’ importante nel caso di installazione con scarico a pavimento bloccare la curva di scarico (art. VA 079) alla parete per mezzo dell’apposita
barra filettata facente parte del kit.
Prepare the draining systems and the hydraulic connections according to the technical schemes and then block the two xings on the oor in accordance with
the measures in the picture. In case of “S” trap installation it is important to block the draining curve (art. VA 079) to the wall with the appropriate threated bar
supplied with the kit.
2_Segnare sulla parete alle quote indicate, i 4 punti da forare.
Mark the 4 points to drill on the wall according to the given di-
mensions.
710
430
370
320
370
260
140 570
160
76
54
410
250
180
930
440
195
180
350
460
830 380
115 115
Ingresso acqua posteriore
Back water inlet
3_Bloccare la cassetta nella par-
te bassa con le 2 viti e i tasselli
forniti in dotazione nel kit. Pro-
cedere bloccandola alla parete
tramite le due staffe come ri-
portato in figura 3A. Collegare il
tubo di scarico.
Plug up the plastic cistern in the
bottom by means of the two
screws provided. Fix it to the wall
using the two brackets as shown
in gure 3A. Connect the drain
pipe.
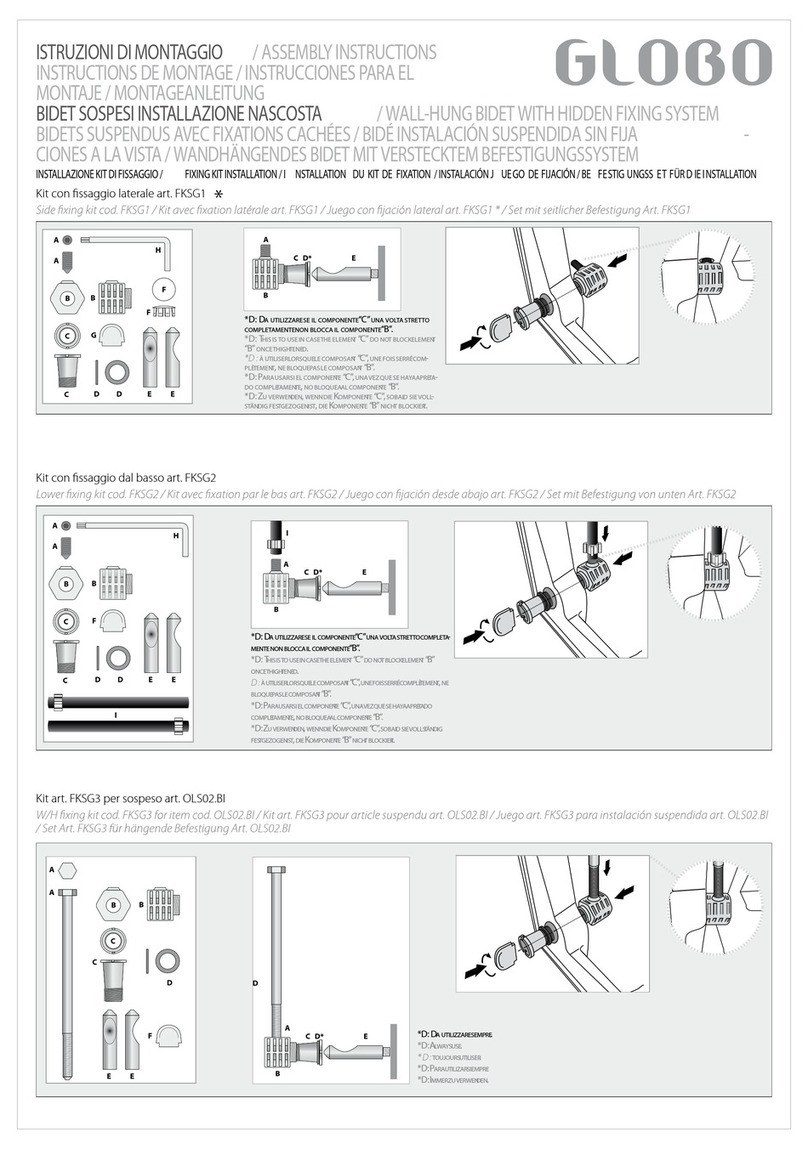
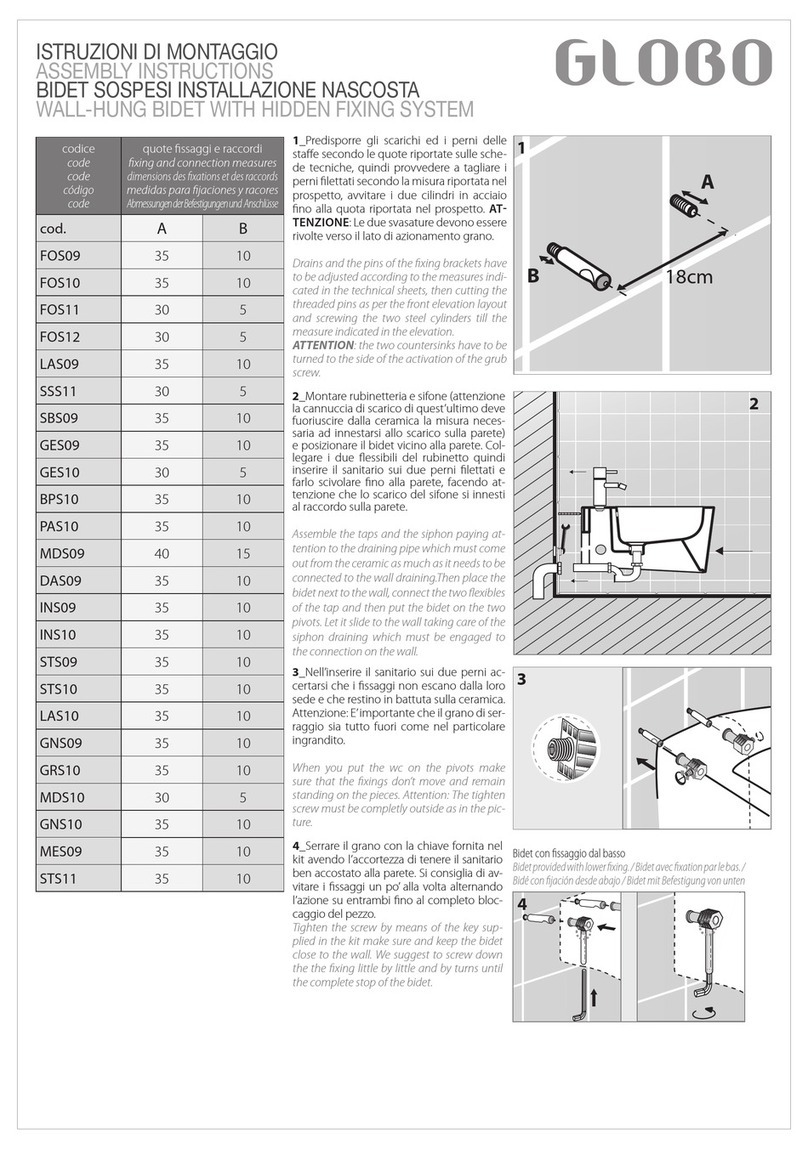
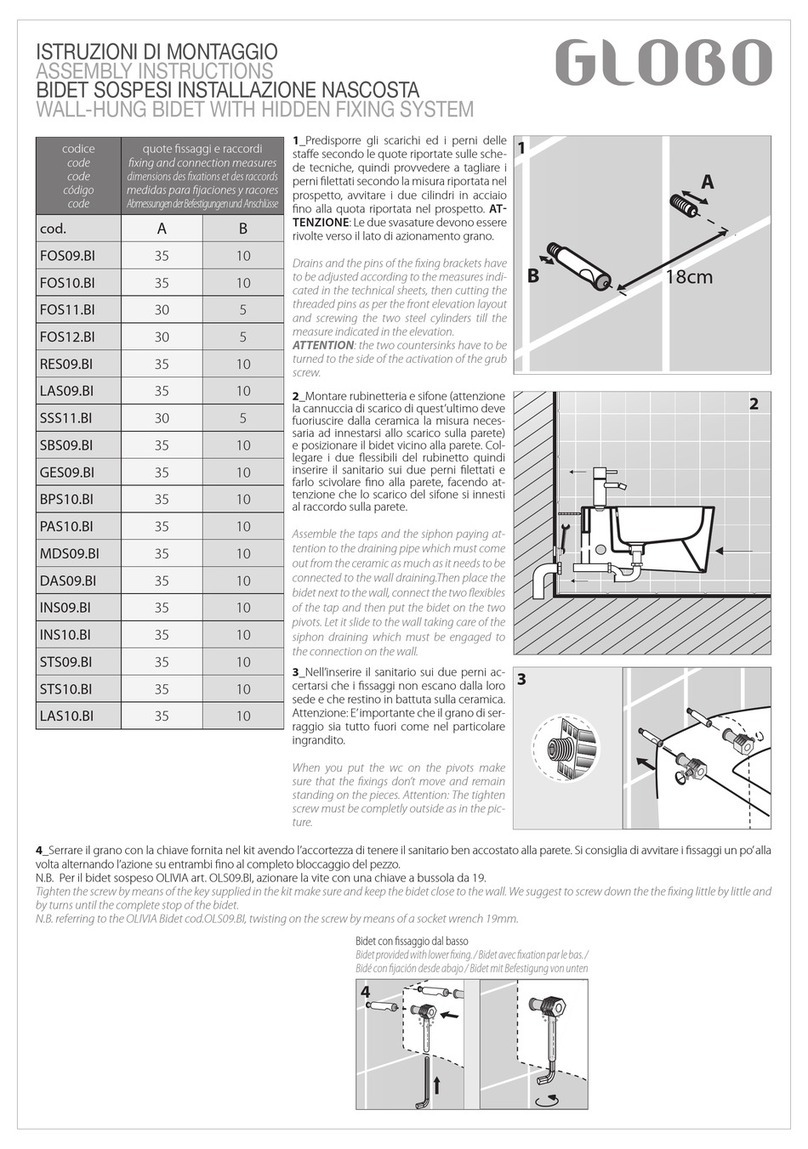
Installazione VA 079
1_Innestare la curva tecnica sullo scarico a pavimento all’altez-
za di 180 mm centro foro di scarico.
Connect the curve to the oor draining 180mm height from the
outlet hole centre.
2_Ancorare alla parete la piastra in metallo a cinque fori fornita
nel kit con il foro centrale filettato in asse con lo scarico ed alla stessa altezza delle due
alette di bloccaggio sopra la curva.
Fix the 5 holes anchor plate to the wall so that the threaded central hole is in axis with the
outlet and at the same height as the two locking tongues on the curve.
3_Tagliare il perno filettato alla misura necessaria per collegare la curva con il supporto
sulla parete ed avvitarlo su quest’ultimo.
Cut the threaded pivot to the dimension required to connect the curve to the wall anchor and
screw it down.
4_Innestare il perno sulle due alette della curva tecnica e provvedere al bloccaggio con
il dado e controdado forniti nel kit.
Connect the pivot to the two tongues of the curve and screw it down by means of the nuts
supplied in the kit.
360
360
160 160
Scarico parete
"P" trap
Scarico pavimento
"S" trap
180
VA 079
Ingresso acqua dx o sx
Water inlet dx or sx
360
360
160 160
Scarico parete
"P" trap
Scarico pavimento
"S" trap
180
VA 079
Ingresso acqua dx o sx
Water inlet dx or sx
1
855
475
240
380
Ingresso Acqua
posteriore
Back water inlet
245
23
ISTRUZIONIÊ DIÊ MONTAGGIOÊ/Ê ASSEMBLYÊ INSTRUCTIONS
CASSETTAÊ MONOLITOÊ PAESTUM
PAESTUMÊ CLOSEÊ COUPLEÊ CISTERN
200
350
4_Prima di serrare il tutto ve-
rificare che le quote (altezza
e profondità del tubo di sca-
rico) corrispondano a quelle
in figura. A questo punto col-
legare l’ingresso acqua all’im-
pianto.
Before tightening everything
check that the quotas (height
and depth of the drain pipe).
Correspond to those in the -
gure. At this point connect the
plant water inlet.
5_Inserire i due dispositivi in nylon
sui fori presenti sui lati della cas-
setta monolite in ceramica. Po-
sizionare la cassetta monolite di
fronte alla parete, allineandola alla
cassetta in plastica. Spingerla fino
al muro e fissarla tramite le due viti
ai dispositivi in Nylon.
Insert the two nylon devices onto the
holes present on the sides of the mo-
nolith ceramic cistern. Position the
monolith cistern in front of the wall,
aligning it with the plastic cistern.
Push it up to the wall and x it to the
nylon devices.
7_Bloccare il vaso con le apposite
viti di fissaggio facenti parte del kit
ed applicare sopra le due borchiet-
te di copertura cromate.
Block the wc with the appropriate -
xing kit and then apply the two cover
chrome rings.
MECCANISMO DI SCARICO
FLUSHING MECHANISM
ceramica
ceramics
dispositivi in Nylon
Nylon devices
Supporti di bloccaggio
blocking supports
cassetta in plastica
plastic cistern
A_Sbloccare la slitta
utilizzando la leva blu.
Release the slide valve using
the blue lever.
B_Alzare la slitta al massimo come riportato nel
prospetto, e lasciarla sporgere dalla cassetta.
Lift the slide valve to maximum as shown in the
image, and leave it projecting from the cistern.
D_Togliere di nuovo il coperchio e
bloccare la slitta con l’apposita leva.
Remove the lid again and block the
slide valve using the relevant lever.
C_Prendere il coperchio in ceramica posizionarlo
sulla slitta ed effettuare una leggera pressione,
quindi abbassarlo fino alla posizione giusta.
Take the ceramic lid, position it on the slide valve
and apply slight pressure, then lower it to the correct
position.
E_Posizionare di nuovo il
coperchio sulla cassetta ed
avvitare il pulsante.
Position the lid back on the cistern
and screw in the button.
6_Nel caso di installazione con
scarico a parete posizionare il rac-
cordo di scarico secondo la mi-
sura riportata nell’illustrazione. A
questo punto posizionare il vaso
sopra i due fissaggi a pavimento.
Farlo scivolare fino alla cassetta
monolito facendo attenzione che
i due raccordi s’innestino perfet-
tamente (ATTENZIONE: per age-
volare l’operazione si consiglia di
lubrificare entrambe le parti).
In the case of drain installation on
the wall. Position the drain connec-
tion according to the measurement
stated in the illustration. At this
point, position the bowl on the two
oor xtures. Slide it towards the
monolith cistern, paying attention
that the two connections are en-
gaged perfectly (ATTENTION: it is re-
commended to lubricate both parts
in order to ease the operation).
250
290
180
Scarico pavimento
“S” trap
250
290
180
Scarico parete
“P” trap
4 5
6
7

Other Globo Toilet manuals

Globo SENZABRIDA FO004 User manual

Globo

Globo SENZABRIDA FO004 User manual

Globo FOS09 User manual

Globo

Globo FOS09 User manual

Globo FOS09.BI User manual

Globo

Globo FOS09.BI User manual

Globo RE003.BI User manual

Globo

Globo RE003.BI User manual

Globo FOS11.BI User manual

Globo

Globo FOS11.BI User manual

Globo FISSAGGIOGHOST MD002 User manual

Globo

Globo FISSAGGIOGHOST MD002 User manual

Globo FO009.BI User manual

Globo

Globo FO009.BI User manual

Globo FO009 User manual

Globo

Globo FO009 User manual

Globo PA001.BI User manual

Globo

Globo PA001.BI User manual

Popular Toilet manuals by other brands

Kohler REACH K-8433T-S installation instructions

Kohler

Kohler REACH K-8433T-S installation instructions

WimTec NSIDE Installation and operating instructions

WimTec

WimTec NSIDE Installation and operating instructions

Project Source MT-25005L installation instructions

Project Source

Project Source MT-25005L installation instructions

CORONA 251618 installation instructions

CORONA

CORONA 251618 installation instructions

Cinderella Comfort NA owner's manual

Cinderella

Cinderella Comfort NA owner's manual

Luxart LX750 INSTALLATION INSTRUCTIONS CARE AND MAINTENANCE

Luxart

Luxart LX750 INSTALLATION INSTRUCTIONS CARE AND MAINTENANCE

Kohler K-1843 Homeowner's guide

Kohler

Kohler K-1843 Homeowner's guide

Toto WASHLET+ RX CWT4474047CMFGA MS Series installation manual

Toto

Toto WASHLET+ RX CWT4474047CMFGA MS Series installation manual

Camargue PARIS 2.0 instructions

Camargue

Camargue PARIS 2.0 instructions

Woodbridge BID 02 installation manual

Woodbridge

Woodbridge BID 02 installation manual

SAT OptimFlush SATOFSHFS3 installation instructions

SAT

SAT OptimFlush SATOFSHFS3 installation instructions

Coway BA13-AR Product installation document

Coway

Coway BA13-AR Product installation document

Kallista P70083 installation instructions

Kallista

Kallista P70083 installation instructions

FV Ginebra E149 installation instructions

FV

FV Ginebra E149 installation instructions

DURAVIT SensoWash i Plus Mounting instructions

DURAVIT

DURAVIT SensoWash i Plus Mounting instructions

Reece Laufen Pro A 1813059 installation instructions

Reece

Reece Laufen Pro A 1813059 installation instructions

Progetto EV105 Installation instructions & user manual

Progetto

Progetto EV105 Installation instructions & user manual

Foremost TL-8257-WL1 instructions

Foremost

Foremost TL-8257-WL1 instructions

manuals.online logo
manuals.online logoBrands
  • About & Mission
  • Contact us
  • Privacy Policy
  • Terms and Conditions

Copyright 2025 Manuals.Online. All Rights Reserved.