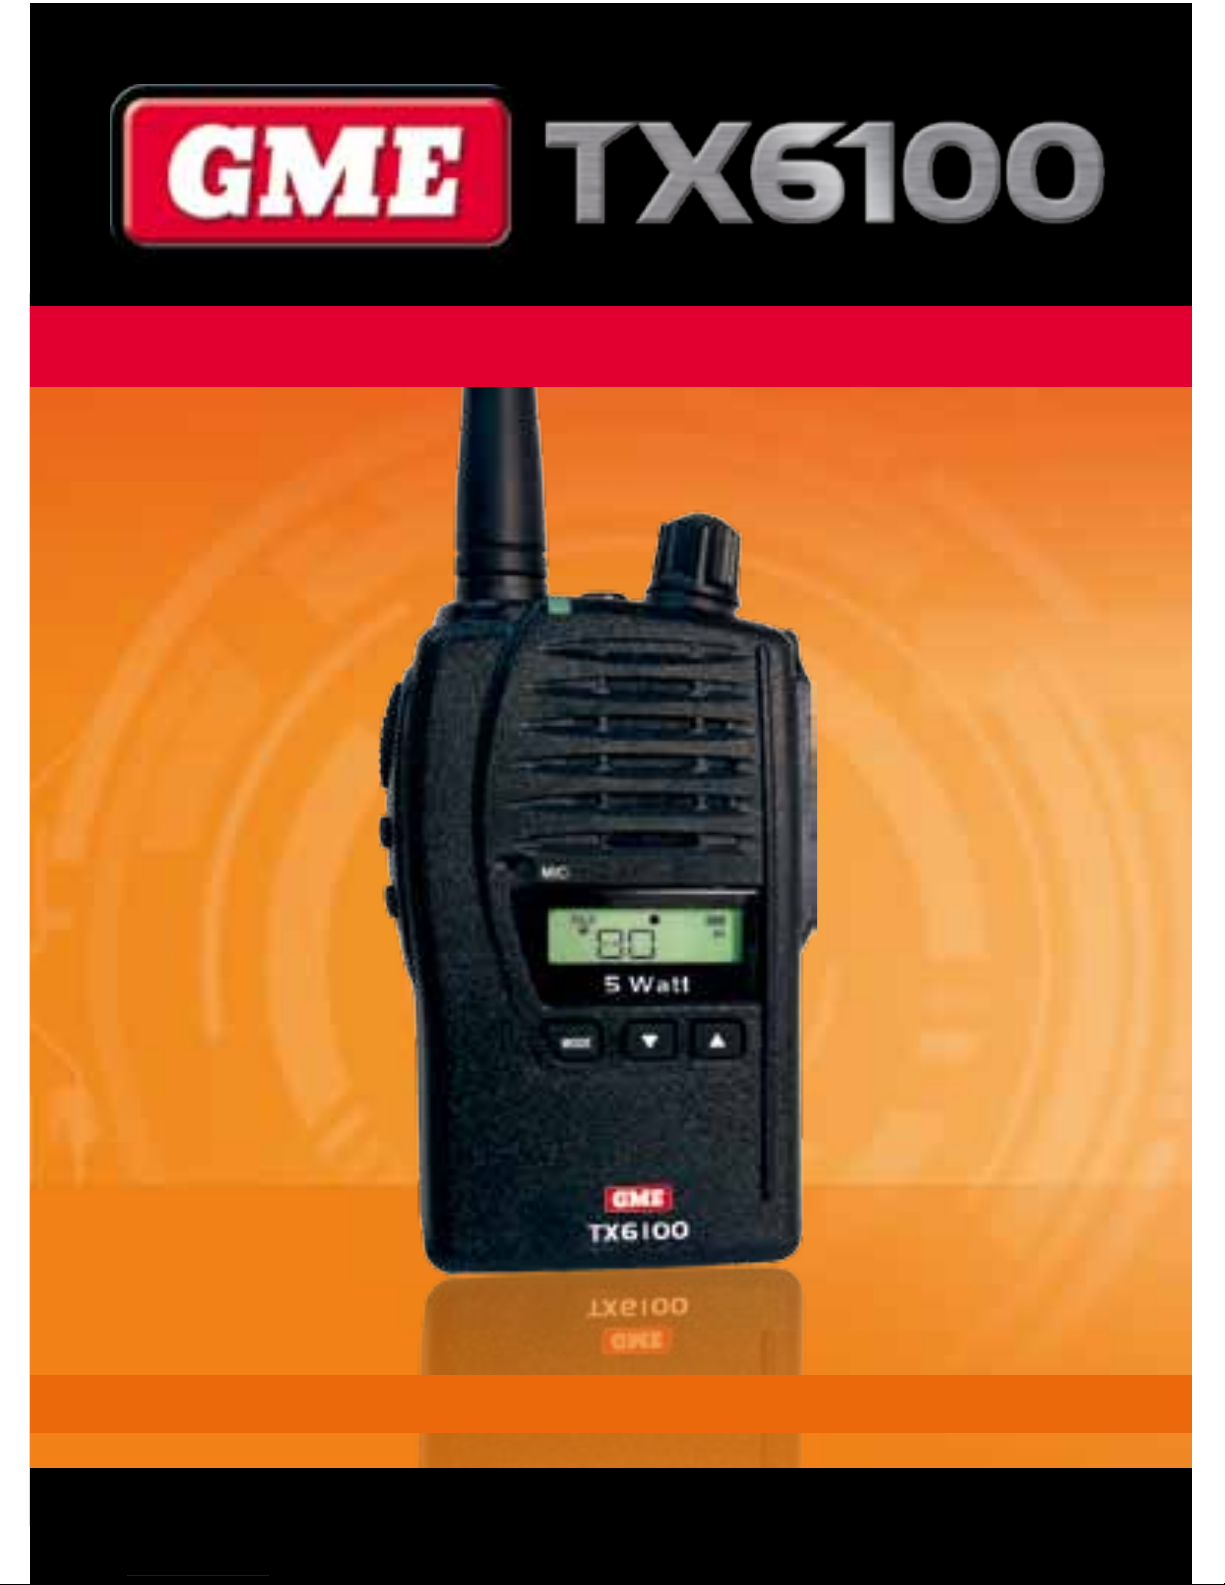
PAGE 8 INSTRUCTION MANUAL TX6100 TX6100 INSTRUCTION MANUAL PAGE 9
Charging the battery pack
Your TX6100 is supplied with an AC
adaptor and desktop fast charger. The
charger will charge a fully discharged
1700 mAh battery pack to full capacity in
around 1-2 hours.
1. Plug the charger into a standard 240
volt AC outlet.
2. Plug the lead from the charger into the
charging cradle.
3. Place the TX6100 into the cradle.
The RED LED will light to indicate the
battery is charging.
4. When the battery has charged, the
LED will change to GREEN.
Battery low alert
When the battery icon blinks on the
display, the battery level is low and the
battery pack should be recharged. If the
battery is not charged, an audio tone
will then sound to warn the user that the
battery is almost discharged.
Battery usage
The time taken to discharge the battery
pack will depend on how you use the
TX6100. The 1700 mAh battery pack
supplied is powerful enough for a full days
use under average conditions.
Conserving battery power
The TX6100 has built-in power saving
features to help you get the maximum
amount of time between charges from
your Li-Ion battery pack. If you need to
operate your TX6100 in a situation where
you require maximum battery life (e.g. a
remote site where there is no convenient
recharging facility nearby) the following
hints can greatly reduce the amount of
power drawn from the battery pack.
Standby mode
The TX6100 will automatically enter
‘Standby’ mode when it is inactive (i.e.
not transmitting or receiving signals.
While in Standby mode it will still check
for incoming signals but it will draw
considerably less power from the battery
pack. As soon as a signal is heard or the
keys are pressed the TX6100 will ‘wake
up’ again. This Standby mode is automatic
and by itself can extend the battery life by
many hours.
Using CTCSS
If you are expecting to receive signals on
a busy channel, you can program that
channel for CTCSS operation and get the
other person to call you using the same
CTCSS tone. Your radio will then remain
in Standby and ignore all other signals
until your selected CTCSS tone is received.
Scanning
The TX6100 draws more power from
the battery pack when scanning than
when monitoring a single channel. This
is because it must ‘wake up’ more often
to monitor each channel for activity. You
can squeeze that extra bit of life from the
battery pack by avoiding any unnecessary
scanning. In addition, scanning increases
the chance of nding a signal thereby
keeping the receiver ‘awake’ and the
squelch open more often.
Low Transmit Power Settings
The transmitter has both high and
low power settings. If you are only
operating over short distances, are in
a reasonably high location or are close
to a local repeater, try using the Low
transmitter power setting. This reduces
the transmitter power from 5 watts to 1
watt effectively doubling the talk time
available.
GENERAL OPERATION
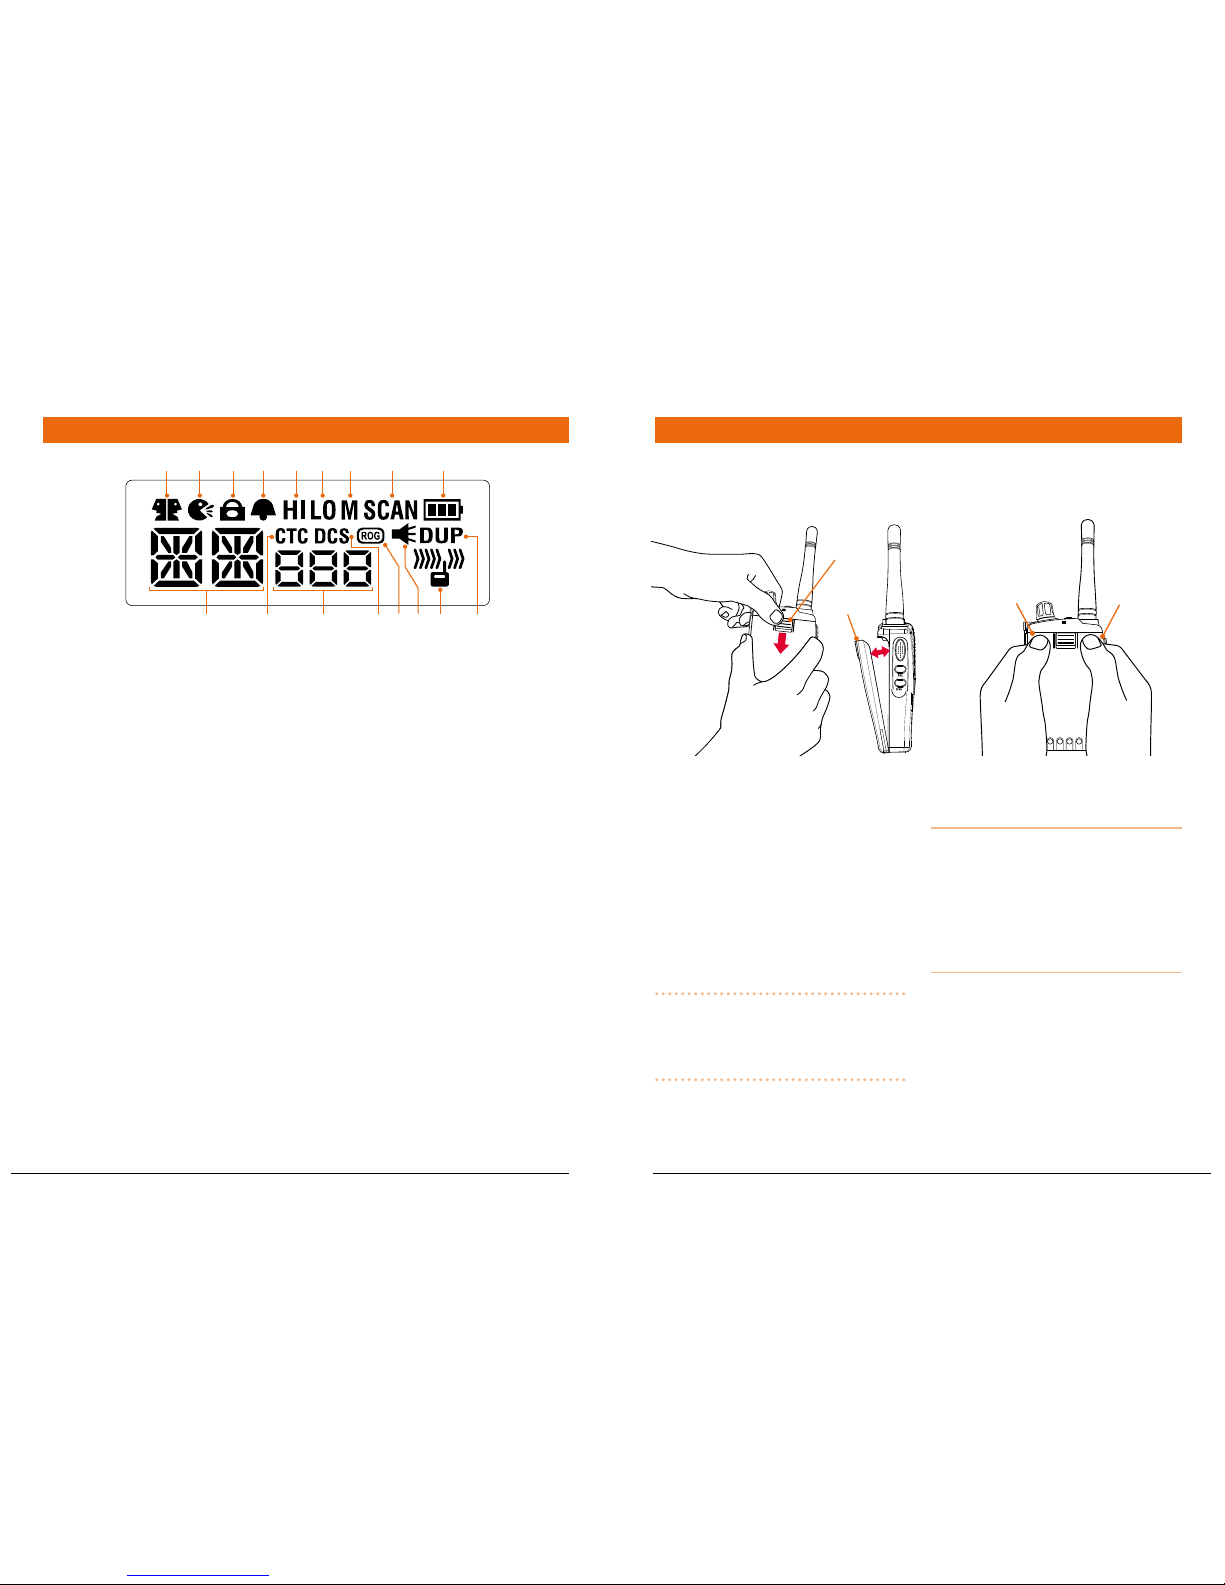
Power on/off
Rotate the Volume control clockwise past
the ‘click’ to turn the radio on. Rotate the
control counter-clockwise past the click to
turn the radio off again.
Adjusting the Volume
With the unit powered on, rotate the
Volume control clockwise to increase the
volume and counter-clockwise to decrease
the volume.
disPlAy lighting
The LCD backlighting activates
automatically whenever a key is pressed
and turns off automatically after about 5
seconds.
receiVing signAls
While the TX6100 is not receiving signals,
it will remain in the Standby mode to
conserve battery power.
When a signal is received, the LED
indicator on the upper edge of the radio
will light GREEN and the icon will
appear on the display. Adjust the volume
control for a comfortable listening level.
If the incoming signal is encoded with a
CTCSS tone that matches the one set in
your radio, the LED indicator will light
ORANGE and you will be able to hear the
signal in the speaker.
If the LED indicator lights green and the
icon appears but you cannot hear
the signal, it is likely that your radio has
CTCSS enabled and the incoming signal
is not using your selected CTCSS tone
(see Mode Settings on page 12 for more
details on CTCSS settings).
If no further signals are received, the unit
will return to standby mode.
trAnsmitting
To transmit, press and hold the Push-To-
Talk (PTT) switch. The other radio you
are talking to must be set to the same
channel (and CTCSS code if applicable).
Hold the TX6100 approximately 5 to 8
cms from your mouth with the antenna
vertical and speak into the built-in
microphone.
While the PTT switch is pressed, the LED
indicator on the upper edge of the radio
will light RED and the icon will appear
on the LCD.
When you have nished speaking, release
the PTT switch to receive incoming signals
(it is not possible to transmit and receive