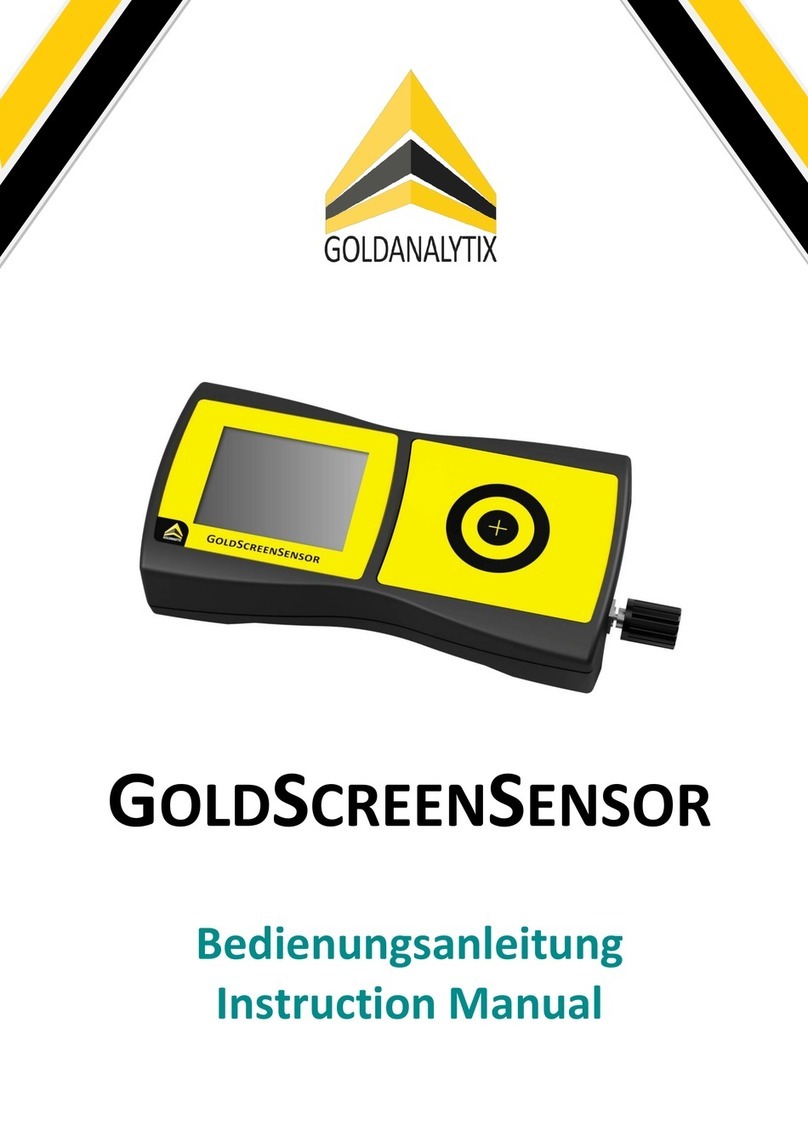
Goldanalytix GoldScreenBox User manual

GOLDSCREENBOX
Instruction Manual

November 2020, Rev 3, 05/21
© 2020 MARAWE GmbH & Co. KG, All rights reserved. Printed in the EU.
All product names in this manual are trademarks of the respective holders.

1
Table of Contents
1. About Goldanalytix / Contact .......................................................................................................2
2. Introduction ..................................................................................................................................2
3. Scope of Supply.............................................................................................................................3
4. Measurement Principle.................................................................................................................3
5. Safety Instructions for optimal Measurement Conditions ...........................................................4
6. Operation and Display Elements ..................................................................................................5
7. Starting the Device and Performing a Measurement...................................................................5
8. Evaluation and Interpretation of the Results ...............................................................................9
9. Important Hints for Measuring with the GoldScreenBox...........................................................12
10. Special case small coins and bars ...............................................................................................15
11. A1. Overview of the conductance for typical alloys in investment objects ...............................21
12. A2. Overview of Conductance of more Precious Metal Alloys and Metals................................23
13. More non-destructive Gold-Testing Devices by Goldanalytix....................................................24

2
1. About Goldanalytix / Contact
Goldanalytix, established in 2010, is the leading provider of precious metal testing methods in
Germany. In our team we are working on the development of safe and reliable testing methods
for each kind of precious metal. The GoldScreenBox has been developed and is manufactured
completely in Regensburg/Germany. Thanks to the close synergy of analytics know-how and
device development, we are always up to date. Due to continuous improvements we achieve and
guarantee highest standards of quality.
Do you need support with product data, service assistance or customer service? Feel free to
contact us through one of the following channels:
Homepage: www.gold-analytix.com
E-Mail: [email protected]
Phone: +49 941 29020439
We are looking forward to your contact!
2. Introduction
Congratulations on your purchase of the Goldanalytix GoldScreenBox. The Goldanalytix
GoldScreenBox is an easy, fast-to-use and non-destructive testing device for the determination of
the electrical conductance of precious metal mouldings. This device was especially developed to
test the authenticity of precious metal coins and bars up to ca. 50 grams.
The Goldanalytix GoldScreenBox allows for a fast and unequivocal statement within seconds.
Interpretations of the results are no longer necessary. The measuring principle of the
GoldScreenBox is based on a non-contact, inductive method that allows not only for measuring
the electrical conductance at the surface but also up to a depth of 650 µm.
Please read these operating instructions carefully prior to the first use in order to use the
GoldScreenBox properly.
Please note: The development of improved counterfeits is the goal of each forger. In order to stay
up to date on this dynamic field we recommend informing yourself on our website at
www.gold-analytix.com/goldscreenbox under “Downloads”. There you can always find the most
recent version of the instruction manual.

3
3. Scope of Supply
Your GoldScreenBox set is delivered with the following elements:
In the unlikely event that something is damaged or missing please contact Goldanalytix
immediately (for contact data see page 2).
4. Measurement Principle
The GoldScreenBox utilises the electrical conductance of metals for its measurement principle.
Every metal exhibits a characteristic conductance value (unit: Megasiemens per meter [MS/m]),
which enables the identification of falsifications. Due to similar densities, the most used metals for
falsifications like tungsten, lead or tantalum usually differ significantly in their conductivity
compared to precious metals or gold alloys.
The patented, inductive testing method uses low-frequency, electromagnetic alternating fields,
whose penetration depth depends on the applied frequency and the electrical conductance of the
testing sample. The frequency of the GoldScreenBox was adjusted in a manner, that chemically or
galvanically plated metal layers of falsifications are totally pervaded. The penetration depth
depends on the conductance of the testing sample and ranges from approximately 250 µm (pure
silver, highest conductance) up to 650 µm (gold alloys, e.g. Krugerrand, lower conductivity range;
pure gold: ca. 350 µm, middle conductivity range).
The sensor as well as the evaluation unit is situated inside the compact casing of the battery-
powered device allowing the use of the GoldScreenBox as a mobile device.
GoldScreenBox
Charger
Calibration piece (Copper)
Instruction manual
Small suitcase
Cardboard box

4
5. Safety Instructions for optimal Measurement Conditions
Please be aware of the following remarks while performing measurements:
Please use the enclosed charger only (Charging time approx. 4 hours when empty, no
charging symbol is displayed while charging). Inferior products can cause incorrect
measurements or damage the internal electronic components of the GoldScreenBox.
Do not use the testing device in the presence of explosive gases, vapours or dust, or in wet
environment.
Please operate the device at room temperature and not in proximity of heat sources (e.g.
fan output of your laptop). The measured values are temperature dependent and
linearised by best fit algorithms, but the best accuracy is achieved at room temperature.

5
6. Operation and Display Elements
#
Description
①
LCD Colour Screen
②
Sensor Field (Ø 20 mm)
③
Control knob to control and select the desired metal /
alloy in the menu
④
Connector for charger
⑤
Indicator on charge level of battery
⑥
Display of measurement result (green, yellow and red
range) as well as display of the conductance in MS/m
⑦
Additional information for specific alloys
Table 1 –Description of the operation and display elements
7. Starting the Device and Performing a Measurement
Starting the device:
In order to switch the device on please push the control knob ③.
Step
Screen
Description
1
After activating the device you will see the
main menu. If you want to change the
previously set language, please turn the
control knob so that the red dot is next to
“Language selection” and confirm your
selection by pressing the control knob.
②
①
②
③
④
⑤
⑥
⑦
⑤
⑥

6
2
If you have decided to change the language,
the language selection menu will be shown.
You can choose a language with the control
knob. After selecting you will automatically be
brought back to the menu. On demand, we
also can provide the GoldScreenBox with
other language packages.
3
If you would like to verify an object please
choose “Metal selection” in the menu. Move
the red dot to the desired alloy. Au stands for
gold (lat. Aurum), Ag for silver (Argentum), Pt
for Platinum, Pd for Palladium and Rh for
Rhodium.
The number behind the two letters tells you
the ratio of the metal in the chosen alloy (e.g.
999: 999 of 1000 parts), the other parts are
copper (Cu). However, there are two
exceptions: The alloy 916 (B) consists of 916
parts gold, 54 parts copper, and 30 parts silver
(“American Gold Eagle alloy”). The 916 (C)
alloy has equal parts of copper and silver
added to the 916 parts gold.
4
In the top part of the Metal selection you can
switch to Page 2, where you will find more
values. This is especially important for small
objects (1/10 ounce gold coins, 5 g, 2/2.5 g
and 1 g gold bars), because the conductivity
value is slightly smaller than for objects of
more than ¼ ounce (details see Special case
small coins). Please always place the coins in
the center of the sensor field. By pressing
‘Menu’you will come back to the main menu.
5
For a measuring example we chose one ounce
pure gold, so we selected Gold 999. Next to
“DES.” you can see the desired conductance
(at 20 °C) of the selected alloy (here: “45.0” –
because Gold 999 has a conductance of 45
MS/m at 20 °C). Different factors like
embossing depths / knurls / scratches / air
gaps etc. will change the conductance slightly
(other than a perfectly plain gold plate, which
would be at 45). This is absolutely normal and
does not impede a good measurement. This is
why each alloy has a tolerance range around
the theoretically desired value, where the
result is supposed to be (the green part of the

7
measuring scale, see Evaluation and
Interpretation of the Results).
6
The device is now ready for measuring: Place
the test object (e.g. the 1 ounce gold coin with
the stamping Au 999) in the center of the
sensory field ②. This is especially important
for small objects (< ¼ ounce, see “Evaluation
and Interpretation of the Results”).
The measured conductance is immediately
displayed numerically in Megasiemens per
meter (MS/m) next to “VAL.” and is shown
graphically as a black cursor in the coloured
scale. The spot of the cursor shows, if the
object is in the tolerance range. When we test
a 1 ounce gold coin, the result could look
similar to the screen on the left. This means
that the conductance of the object is in the
tolerance range for the selected alloy.
Please note: After switching on, the device
might show a “VAL” which does not remain
stable within the first five minutes of
operation (whereas a certain variance in the
range of ± 0.3 MS/m is usual), but declines
during this “warming-up time” while the
testing object is placed on the device. This
change can be several digits. During this time
the device cannot be calibrated. After an
operating time of five minutes this effect is no
longer observable and the values remain
stable.
7
For a fake coin (e.g. made of a tungsten alloy)
the result might look like the picture on the
left.
8
Your GoldScreenBox gets calibrated precisely
before shipping. This means the GSB does not
need to be calibrated by the user prior to the
first measurement. If you need to perform a
calibration you can select calibration in the
menu. Possible reasons could be wrong values
[Value in yellow or red area, even though
object is propably not fake] or an elevated
temperature in the measuring environment.

8
For calibration please use the copper
calibration piece, that you got together with
your GoldScreenBox [more precisely: Cu-DHP;
it contains a small amount of phosphorus
(0.015-0.040%) leading to a conductance of
only ca. 46-50 MS/m instead of approx. 58
MS/m for pure copper]. Place the calibration
piece on the sensor field and confirm
“Calibration”. After the process is finished, the
device will signal “OK”.
Please be aware, that all desired values are
programmed for a temperature of 20-22° C
(see “Important Hints” in the Instruction
Manual). If you measure during summer at
30° C, we recommend calibrating the device at
30° C. Please only do this, if measuring at
20° is not possible and be aware, that
deviations in measured values are possible.
9
In the menu you also have the option to
choose the “Free measuring mode”. In this
mode, the device acts like a pure conductivity
measuring device without given set values.
That means that you can establish the
conductivity of the inside of any metal and
compare this established value ("VAL") with
those in the tables of this instruction manual.
The shown value is the electrical conductivity
of the object in megasiemens per meter
[MS/m] up to the corresponding penetration
depth (which is also dependent on the
conductivity of the metal).
Put your metallic object on the measurement
circle ②and keep the object there for a
moment - the conductivity will be shown as a
value as well as graphically in the coloured bar
(in the bottom part of the screen). The
measuring bar corresponds to the scale of the
electric conductivity of metals (0 to 65 MS/m).
The "free measure mode" allows you to find
out, which material you could be facing and
measure other metals and alloys like gold,
platinum, silver or palladium, respectively.
This is practical, if you want to establish the
conductivity of precious metals like rhodium,
rhenium, ruthenium or iridium (now available
as bullion bars or coins). In the case of
recycling companies or auction houses it can
9
be used in order to identify unknown metal
objects.
Push the button to get back to the menu.
8. Evaluation and Interpretation of the Results
The following chapter gives you hints for the interpretation of the established conductivity in the
"precious metal measure mode".
In order to test the most common bullion precious metals for their correct conductivity in the core
(up to the corresponding penetration depth!), you can use this mode for the corresponding set
values and a graphical interpretation through a “traffic-light” bar.
The value next to "DES" shows the reference conductivity (current conductivity) of the desired
metal or alloy at 20 °C in Megasiemens per metre [MS/m]. Ideally, the established value ("VAL") is
identical. However, small deviations can occur in case of bullion precious metals and are
completely normal. This can have the following reasons:
Scratches
Blisters & bars / other packages
Temperature effects (temperature of the device differs from the one of the measured
object, etc)
Striking on coins or bars
Bends and deformations
Uncommon coins or impurities with ferromagnetic material
This is why there is a green tolerance range around the set value for genuine precious metals. If
the value is inside the green one, you can feel confident: the conductivity of this metal is near the
set value of the desired material. PLEASE NOTE: This step is not a guarantee that your object is not
a fake. The GoldScreenBox is a penetrating eddy current measuring device and no independent
fake detector, because it is possible to develop and produce an alloy with e.g. the same electric
conductivity as gold (e.g. copper with low silver content), but in this case, the dimensions and
weight of the coins or bars won't be correct. We recommend the usage of various measuring
methods to detect falsifications.
In case of coins, we recommend the following procedure:
Step 1: Establish the weight with a precision balance –does it correspond with the set value? In
many cases, fakes are already detected here.
Step 2: Compare the dimensions (thickness and diameter) with the set values of the desired coins
with an electronic slide gauge (can be purchased at specialist shops) or stencils.
If 1and 2correspond exactly with the set values (easy to find on the Internet), it can only be a fake
with material of the same density –in case of gold, these are for example metals like tungsten or

10
uranium (the latter can be ruled out for obvious reasons) or in case of silver, e.g. mixture of lead
and tin or even molybdenum.
Step 3: Detection of lower alloys and counterfeits made of e.g. molybdenum, tantalum or
tungsten, tungsten alloys, tungsten carbide, brass, copper and so on up to a penetration depth of
about 250 µm (in case of silver) up to 650 µm (in case of Krügerrand) with our GoldScreenBox
(pure gold: ca. 350 µm).
Just to be clear: There is no individual method which can give you a reliable answer to whether
the tested precious metal is genuine or not. In case of anybody tells you something else this
person is definitely not honest or does not know it better! The reason is that any physical property
(i.e. conductivity, density, sound, etc.) of any precious metal can be imitated relatively easy with
certain materials. However, materials –especially for precious metals –which are identical in 2 or
more properties are significantly more difficult or almost impossible to produce (if, as seen above,
the density corresponds, there are only a few possibilities left - and those are e.g. identified by
their current conductivity). This is also true vice versa: In case of having the same conductivity, the
density for example will be different. We know for instance about PAMP-gold bars made of a
copper-steel alloy plated with a very thin layer of gold leading to an almost identical conductivity
like pure gold. These counterfeits must be examined thoroughly with other methods or can be
detected by their differing thickness or width relatively easily.
Please also have a look at our website www.gold-analytix.com/knowledge in order to get further
information about the correct procedure with the non-destructive tests of precious metals.
Absolute certainty, especially about the exact composition, can only be achieved with a
destructive, total chemical analysis.
Please don't be deterred by this information - the GoldScreenBox detects most of the current
counterfeits of bullion metals. For example, the current frequently and very well faked ¼, ½ and 1
ounce tungsten bars and coins are easily identified. We want to point out the conscientious
handling of the interpretations of the results.

1
GREEN RANGE
In the case of being in this range (i.e. the black measuring bar is in front of the green background
and the "VAL" is green), you know that up to the corresponding penetration depth, the material is
in the target range of a genuine precious metal. This normally excludes foreign metal cores (as
long as they do not have the same conductivity).
YELLOW RANGE
In case of the measuring bar being in the upper or lower yellow zone, there might be something
wrong with the object - but that’s not necessarily the reason. It could also be a slightly bent coin or
bar (the air gap between the coil and objects will be bigger), there might be scratches in the object
(change of the eddy current induction), the blister/capsule or the packaging around the object
might be too thick or the coin might have impurities. There are various reasons for a result in the
yellow zone which do not automatically hint on a falsification. However, if the measured value is in
the yellow zone and if you chose the correct metal (always make sure!), you should be careful.
Exact inspection and further examination are inevitable.
A special case is the Krugerrand silver coin: Our tests have shown that even genuine coins with
.999 alloy can sometimes be in the lower green or even yellow zone (our theory is that the 1/1000
foreign metal is ferromagnetic, but this has still to be proven). It may be that some other coins
behave in a similar way - we personally know this phenomenon only for the Krugerrand silver coin.
RED RANGE
When the coin is barely in the red zone, this might be due to the same effects as in the "YELLOW
RANGE". This is however rare - measured values in the red zone and especially those who are
deeply in the red zone should tell you everything you need. The established conductivity in this
case is far away from the set value. If all circumstances have been respected (the object covers the
measuring circle completely / at least 1 mm thickness - except ducats, correct calibration, etc.), it
is most probable that you see a fake material.

12
9. Important Hints for Measuring with the GoldScreenBox
We recommend dropping all your mobile devices (i.e. smartphone, mobile phone or flash drive
with wireless access) at least 1 m far away from the testing device due to the inductive eddy
current principle of the device. The relatively high radiation density which is especially high during
connection setup can lead to false measurements. The latter can be recognized by strong
deviations or oscillations of the value. After restarting the device can be used without further
restrictions. Wireless LAN / Wifi or Bluetooth do not influence the measurement.
When using the regular measuring mode the objects should cover the measuring circle
completely. Our measurements have shown that coins of the size of the Vreneli and also ¼ ounce
coins still work very well. For 1/10 ounce coins and 1, 2/2.5 and 5 gram bars you should use the
measuring modes on page 2 of the precious metal selection (see “Special case small coins and
bars”).
Old coins / bars (“old” defined as before World
War II) and especially objects of the 19th century
may partly differ in their composition. That
means that the gold content is right but the
composition of the remaining amount of some
coins deviates. In terms of .900 gold, those coins
should consist of 900 parts gold and 100 parts
copper. However, due to non-optimized
production processes and analysis conditions
those coins are contaminated with foreign metals
which change the conductivity. Moreover, the
gold used for procuding these coins has not been
100% pure so that further impurities got into the molten metal and finally into the alloy. For
instance, gold was obtained by various raids and expeditions during those times (at ca. 1800 and
later on). Therefore, please be aware: We only can offer set values of correctly produced coins
(mainly precious metal-copper alloys, sometimes nickel).
The range of possible impurities and their consequences can not be comprehended entirely. With
our testing experience we found, that some Vrenelis 20 CHF sometimes have 10 to 20 times
higher iron content than their cleanly produced “colleagues” of the same year. The gold content
was correct in all of those coins (90%), however besides copper and silver some coins showed
significantly higher iron contents in XRF-analysis. This means that Vreneli coins from 1922
sometimes were minted inaccurately and that not all components were controlled properly.
Through its highly accurate measuring system the GoldScreenBox recognizes those impurities,
which leads to lower conductivity values for the measured coins (iron lowers the conductance).
Old coins that fall into this category are not to be considered as fake but rather as variations of the
coin. In this case we highly recommend combining more methods like a density test, gold testing
acids or a XRF-test, to gain more data and find out if the coin contains the right amount of gold (or
less, which happens quite often, too) or if its just an impurity, that changes the conductance.

13
Important: Always wait 2-3 seconds between measurements, so the GoldScreenBox has time to
autocalibrate. If the coins are placed too quickly, the values might deviate. If you are not sure
whether the measured value is correct, just take the object off the measuring field, wait a few
more seconds, and measure again.
Penetration depth of the GoldScreenBox: Depending on the conductivity of the material, the
GoldScreenBox penetrates differently deep into the precious metals. This is in relation with the
particular procedures during the induction of eddy currents. In case of highly conductive materials
like silver, the penetration will not be as deep as in case of metals of the middle zone (pure gold or
.986 gold) and the low conductivity zone (e.g. Krugerrand alloys at 9.7 MS/m). In case of silver, you
can expect about 250 µm penetration depth, whereas in case of the Krugerrand alloy the
penetration depths is up to 650 µm (0.65 mm). However, this is relatively deep, if you keep in
mind that most gold- or silver-plated layers are only 10 to 60 µm thick. It depends on these
numbers, up to which size the precious metal objects can be measured. Generally speaking, you
can measure 1 kg silver bar with this device - there will be a conductivity value. However, in case
of such big objects, it is very possible that the forgers apply much thicker precious metal layers
around the fake core. Then the GoldScreenBox will not give you a reliable answer. "Smaller"
objects are normally penetrated completely by the magnetic induction field - in case of bigger
ones (from 50 to 100 g, according to their geometry), forgers would have to use very little
amounts of fake material in order to not get caught. It is questionable if this is lucrative for them -
however, it is possible that from this size onwards, there are objects with a deeper core. This is
why you should always use more than one suitable testing method. In case of bigger bars, you
should definitely use ultrasound as well.
Testing objects should exhibit a thickness of at least 1 mm (an exception are the Austrian gold
ducats - see type B in the following conductivity table, for thinner objects see “Special case small
coins and bars.)
Blisters and capsules can have a thickness of up to 3 mm. Not every material shields in the same
manner. If there are metallic components in the supposed plastic package, no reliable or
convincing measurement can be guaranteed. Our test measurements with e.g. NGC packages have
shown that they are too thick because there are several millimeter air gaps between the object
and the packaging. Unfortunately, this kind of package cannot be measured. In this case you have
to either open the package or the objects cannot be measured with the GoldScreenBox.
The striking and the height of the edge (especially in case of coins) can lead to a deviation into the
"orange-red" range, even though it is not a fake. Always put all your objects with the front- and
the backside on the device.
Fine silver coins with a silver content of .9999 (Maple Leaf or Kangaroo) feature a higher
conductivity value than .999 coins. This sensitivity has an influence especially on the mentioned
deep embossings or high edges. That´s why .9999 silver coins and bars, respectively, are in the
range of 62 to 64 MS/m –these values are beyond the set value of silver, but because of the
measurement configuration, this is no reason to be worried about.

14
The Krugerrand silver 1 oz is an exception: Our tests have shown that the .999 silver coins result in
the lower green or sometimes even in the yellow range. That means that for that coin values of
about 58 and 59 MS/m are also an indication of a genuine material.
Please keep the temperature of the device and coins in mind - ideally, they should be about 20 °C
(+/- 2°C) - the conductivity values depend on the temperature. All set values are indicated for a
temperature of 20 degrees Celsius. So make sure that you do not hold the coins and bars in your
hand for too long before performing the measurement, as they would be too warm and the
measurement results can therefore be false.
The GoldScreenBox is a perfect device for the establishment of the conductivity values of metals
and genuine precious metals - but in the end, you are the one responsible for your final
transactions. We do not assume any responsibility for any financial losses that result from the use
of the GoldScreenBox. An absolute security can only be provided by a total chemical analysis. The
GSB can "only" show you if the conductivity of the measured material in the set value at room
temperature. We recommend combining several methods for maximum certainty. Please also
have a look at our website www.gold-analytix.com.
An unambiguous differentiation of jewellery gold alloys is difficult with eddy current test devices.
This is not the device's fault - the correct conductivity value will always be established. However,
the interpretation of the result is very difficult because of the closely situated current conductivity
values of the gold alloys with a gold content of under .750 (i.e. 18k). These are simply laws of
nature. Additionally, every manufacturer mixes different metals into the gold, which makes the
interpretation more difficult. But you can use these results to compare pure red gold alloys (gold
and copper) and other only 2 component alloys and to collect hints (see tables below). You can
also discover jewellery fakes made of tungsten carbide, etc. –but please keep in mind that for
plausible results, the measurement circle always has to be covered completely (this is why rings
cannot be tested with the GSB, use the Goldanalytix GoldScreenPen for this purpose).

15
10.Special case small coins and bars
General
A measuring unit with a clearly defined diameter is built into the GoldScreenBox below the
measuring surface. For material-specific measurements, this result in the necessity that the spread
or the diameter of the objects placed on its surface must correspond approximately to the size of
the measuring unit. However, there is no clear dividing line, since slightly different behavior can
occur depending on the geometry of the object (rectangular bar or round coin). Nevertheless, it
can be stated that gold bars above 5 g and coins from around 4-6 g (e.g. German Empire coins 10
marks, Vreneli 20 CHF etc.) can be measured with the material-specific values.
But what about smaller objects such as 1/10 ounce gold coins or 1, 2, 2.5 or 5 gram gold bars? Can
these also be easily determined and examined on the GoldScreenBox? The answer is yes - albeit
with a few noteworthy restrictions.
Measurement of small coins
Let us explain the facts of the matter with a simple example - we want to measure both, a 1 ounce
Philharmonic Gold 9999 coin and its little sister, the 1/10 ounce Philharmonic.
The following table shows the relevant characteristics of these two embossings:
Name & Size
Fineness
[‰]
Weight
Diameter
Thickness
Philharmonic 1 Oz
999.9
31.10 g
37 mm
2 mm
Philharmonic 1/10 Oz
999.9
3.121 g
16 mm
1.2 mm
When we place the 1-ounce coin on the 20 mm wide measuring circle of the Goldscreenbox, we
obtain almost the standard reference conductance of pure gold at 20 °C [45.0 MS/m]. This is
logical, as the 37 mm wide coin covers the measuring circle completely. How does the 16 mm wide
1/10 ounce coin behave? Here we get a value of about 41 MS/m! How can this be? In both cases it
is pure gold!
The explanation is quite simple: Since the measuring circle is not completely covered, in addition
to the gold content on the covered surface, measurements are also made against air of the
uncovered surface to a certain extent (see figure on next page). This of course means that the
pure conductance of the precious metal is no longer achieved, but a slightly lower one.
It is crucial that the coin or bar is absolutely centred and always placed directly on the measuring
surface. Hereinafter, you will find information about the measurement and the special features of
1/10 coins.

16
1.) 1/10 Au 999
Our measurements with various 1/10 ounce coins have shown, for example, that the target value
for 1/10 ounce pure gold is around 41 MS/m. This means that if the coins have a diameter of 16 to
approx. 16.9 mm, the target value is around 41 MS/m. Very important: Nevertheless, the value is
of course material-specific in relation to the respective size - an equally small piece of tungsten,
for example, would also be lower than its respective standard reference value, so that the
distinction to foreign metals is maintained. Please also note that, due to the slightly different
diameters, the measurements may be more susceptible to fluctuations to a certain extent than
the values of the large coins, which cover the measuring circle completely. A special and in
Germany very frequent case, which is exactly at the transition to the mode "Au 999", are the so-
called 20 Euro Goldeuros. These are mainly known in the series "German Forest" and "Native
Birds". They are 1/8 ounce coins with a weight of 3.89 g and a diameter of 17.5 mm. These are
mostly in the range of 43 to 43.5 MS/m - and therefore in the lower range of the "Au 999"
measuring mode and in the upper range of the "1/10 Au 999" measuring mode. Coins of this size
therefore represent a borderline case. Taking this explanation into account, it is ultimately up to
you in which mode you measure the coin. As long as the value is within the mentioned range, you
know that at least the electrical conductance corresponds to the real object up to the penetration
depth. The larger specimens of the Goldeuros (50 €, 100 € and 200 €) can of course be measured
in the normal mode "Au 999".

17
In the following table you can see the dimensions and the measured values obtained by us of
the most common 1/10 ounce coins.
Name
Fineness
[‰]
Diameter
Thickness
Weight
Conductance
[MS/m]
Measuring
mode
Lunar II (from 2008)
999
17.1 mm
1 mm
3.11 g
43.5
Au 999
Panda
999
17.39 mm
1.05 mm
3.11 g
44.8
Au 999
Britannia (from 2013)
999
16.5 mm
1.17 mm
3.11 g
41.2
1/10 Au 999
Buffalo
999
16.5 mm
1.19 mm
3.11 g
41
1/10 Au 999
Kangaroo
999
16.5 mm
1.5 mm
3.11 g
41
1/10 Au 999
Libertad
999
16 mm
1 mm
3.11 g
40.9
1/10 Au 999
Lunar I (until 2007)
999
16.1 mm
1.5 mm
3.11 g
40.5
1/10 Au 999
Philharmonic
999.9
16 mm
1.2 mm
3.11 g
40.2
1/10 Au 999
Maple Leaf
999.9
16.1 mm
1.13 mm
3.11 g
41
1/10 Au 999
Krugerrrand
916
16.55 mm
1.25 mm
3.39 g
9.5
1/10 Au 916 A
American Eagle
916
16.5 mm
1.19 mm
3.393 g
10.9
1/10 Au 916 B
Britannia (until 2012)
916
-
-
3.392 g
11.8
1/10 Au 916 C
It can already be seen from the table, that there are some exceptions: Since the Chinese Panda has
a diameter of even more than 17.3 mm, the standard conductance of pure gold is reached with
this coin (almost 45 MS/m) - so you can measure this coin in the usual "Au 999" mode. Basically,
coins from 16 to 16.9 mm should be measured in the mode "1/10 Au 999" on page 2 and coins
with diameters of more than 17 mm can usually be measured in the mode "Au 999" (with
corresponding limiting cases - a coin with 16.9 mm may well already be in the range of "Au 999",
the transition between the two measuring modes "Au999" and "1/10Au999" is fluent).
2.) 1/10 Au 916 (A)
For coins with a composition of 916 parts gold + 84 parts copper, with the well known Krugerrand
as an example, the situation is similar to Au999, but with the difference that the values are even
closer to the reference value of the material. The reason is very simple: By adding copper to the
pure gold (this is done for reasons of durability and scratch resistance) the 1/10th ounce has the
same fineness in gold, but is of course a bit heavier overall and therefore usually a bit wider. In
addition, the conductance is significantly lower (9.7 vs. 45.0 MS/m), so that in this case the
percentage deviation in absolute figures is less noticeable.
In order to illustrate the similarities and differences of the 1 ounce and 1/10 ounce Krugerrand
coin please have a look on the following table:
Name & Size
Fineness
[‰]
Gold content
Diameter
Thickness
Krugerrand 1 Oz
916
31.10 g
32.8 mm
2 mm
Krugerrand 1/10 Oz
916
3.121 g
16.55 mm
1.25 mm

18
Please note that special cases, which we do not know so far, can lead to deviations. However, the
coins mentioned in the table should cover about 95% of the worldwide trade volume of 1/10
ounce coins. We would be glad to receive feedback from the customer on further coins and will
include those in the tables.
3.) 1/10 Au 916 (B)
This category includes the 1/10th coins of the composition 916 parts gold, 54 parts copper and 30
parts silver with their most famous and by far the most common representative, the so-called
"American Eagle" coin. As already mentioned in 2.) the value is very close to the reference value of
the material anyway. In order to avoid confusion, we have listed this value as a separate selection
point, but the Eagle, for example, would actually be measurable in the normal "Au 916 (B)" mode.
However, there are few other coins of this composition for which the 1/10 mode is necessary. For
the alloy "Au 916 Gold (C)" we have decided not to list the measured value of the 1/10 ounce
separately, because by far the most common and only representative we know of this type, the
1/10 Britannia of the years 1990 to 2012, is measurable in the normal "Au 916 (C)" mode and is at
11.8 MS/m.
4.) .900 coins
Even coins made of .900 gold alloy (for all alloys described here the additional component is
exclusively copper!) can still be measured with relatively small fine weights. Please note that these
are determined in the normal "Au 900" measuring mode on page 1 of the precious metal
selection. Of course, in this case it depends on the geometry of the coin, which coins can be
measured. However, the most common historical and current coins are easily detectable. Please
refer to the table below for the various objects we have measured - it can be assumed with a high
degree of certainty that .900 coins of similar dimensions and weights should also show
corresponding behaviour on the GoldScreenBox.
Name
Fineness
[‰]
Diameter
Thicknes
s
Weight
Conductance
[MS/m]
German Empire 10 marks
900
19.4 mm
1 mm
3.96 g
9.2
Russian gold coin imperial age 5 rubles
900
18.4 mm
1.1 mm
4.3 g
9.5
10 francs Vreneli
900
18.9 mm
0.8 mm
3.226 g
9
In order to make your practical work easier, we recommend our digital calliper gauge for precise
determination of dimensions and our precision scales for weight determination.
Measurement of bars of 1 g, 2 g, 2.5 g and 5 grams
Similar to coins, the previous information and restrictions are also valid to bars. If these are so
small in their dimensions that the measuring unit is not completely covered other, new reference
values result. However, it should be noted that in the case of bars, the range of different objects
and dimensions is slightly larger than for coins, while the weight remains the same. While for coins
only diameter and thickness are variables, for bars it is necessary to consider width, length and
Table of contents
Other Goldanalytix Analytical Instrument manuals

Goldanalytix
Goldanalytix GoldScreenCard User manual

Goldanalytix
Goldanalytix GOLDSCREENPEN User manual

Goldanalytix
Goldanalytix 06-03-00015 User manual

Goldanalytix
Goldanalytix CARATSCREENPEN User manual

Goldanalytix
Goldanalytix CARATSCREENPEN User manual

Goldanalytix
Goldanalytix GOLDSCREENSENSOR User manual

Goldanalytix
Goldanalytix GOLDSCREENSENSOR User manual