Grace Continuum II Quick setup guide
1
Copyright February 23, 2022
Grace Company
(Reproduction Prohibited)
Version 1.1
Accessory Idler Rail Assembly & Use

2
2 ft Rail
Section
8 Foot
Rail
Coupler
Non-ratcheting
Rail Section
Non-ratcheting
Rail Section
Non-ratcheting
Rail Section
Non-ratcheting
Rail Section
Non-ratcheting
Rail Section
Non-ratcheting
Rail Section
Non-ratcheting
Rail Section
Rail
Coupler
Rail
Coupler
Rail
Coupler
Rail
Coupler
Rail
Coupler
2 ft Rail
Section
2 ft Rail
Section
5 ft Rail
Section
Non-ratcheting
Rail End
Non-ratcheting
Rail End
Non-ratcheting
Rail End
10 Foot
12 Foot
4 Foot
5 Foot
Idler Rail Configurations
Idler Rail Congurations...............................................................................................................2
Included Parts & Tools .................................................................................................................3
8 Foot Frame ..............................................................................................................................4
10 Foot Frame ............................................................................................................................9
12 Foot Frame ..........................................................................................................................15
4 Foot ......................................................................................................................................21
4 Foot ......................................................................................................................................21
5 Foot ......................................................................................................................................25
Setting the Rail Height............................................................................................................... 29
Installing the Fabric...................................................................................................................30
Contents
3
Rail Coupler (x3)
CNT-08-11865
2 ft Rail Section (x2)
MET-04 -11397
Non-Ratcheting Rail Section 4 ft (x2)
CII- 09-14638
Why does my Accessory Idler Rail come with so many pieces?
To accommodate the three available sizes of Continuum 2 frame (8 foot, 10 foot, and 12 foot), the
Continuum 2 Idler Rail kit you’ve purchased may include more parts than your frame requires. Do
not discard the extra parts; you may need them if you choose to upgrade your frame in the future.
CII- 04-14510 CII-04 -14601
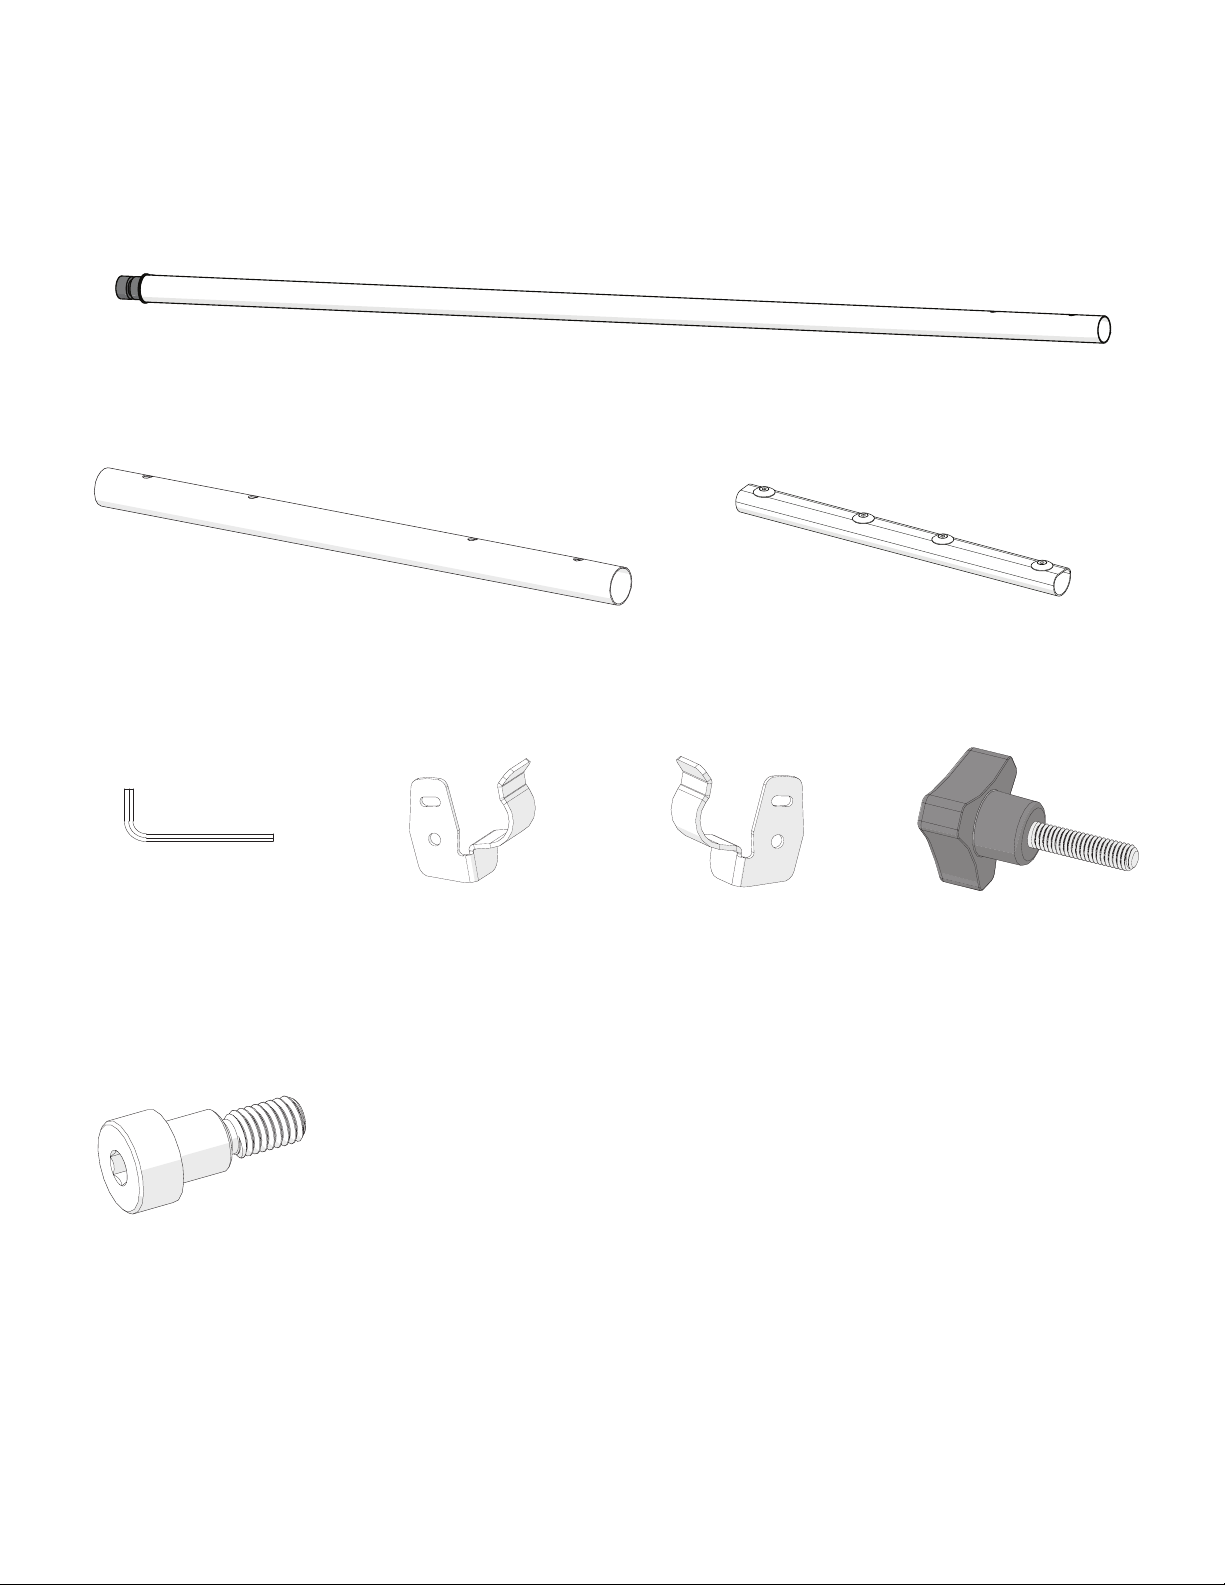
Included Parts & Tools
Please make sure all pieces are included in your kit.
Left Idler Rail Mount Right Idler
Rail Mount
HDW-03-10167
Allen Wrench 4 mm
14
17
HDW-03-14608
HDW-03-14873
3-Armed Knob (x2)
Shoulder Bolt
M6 (x2)

4
8 Foot Frame
Parts & Tools Needed:
Non-ratcheting rail Section 4 ft (x2)
Rail Coupler Allen Wrench 4 mm
14
17
Left Idler Rail Mount Right Idler
Rail Mount 3-Armed Knob (x2) Shoulder Bolt
M6 (x2)
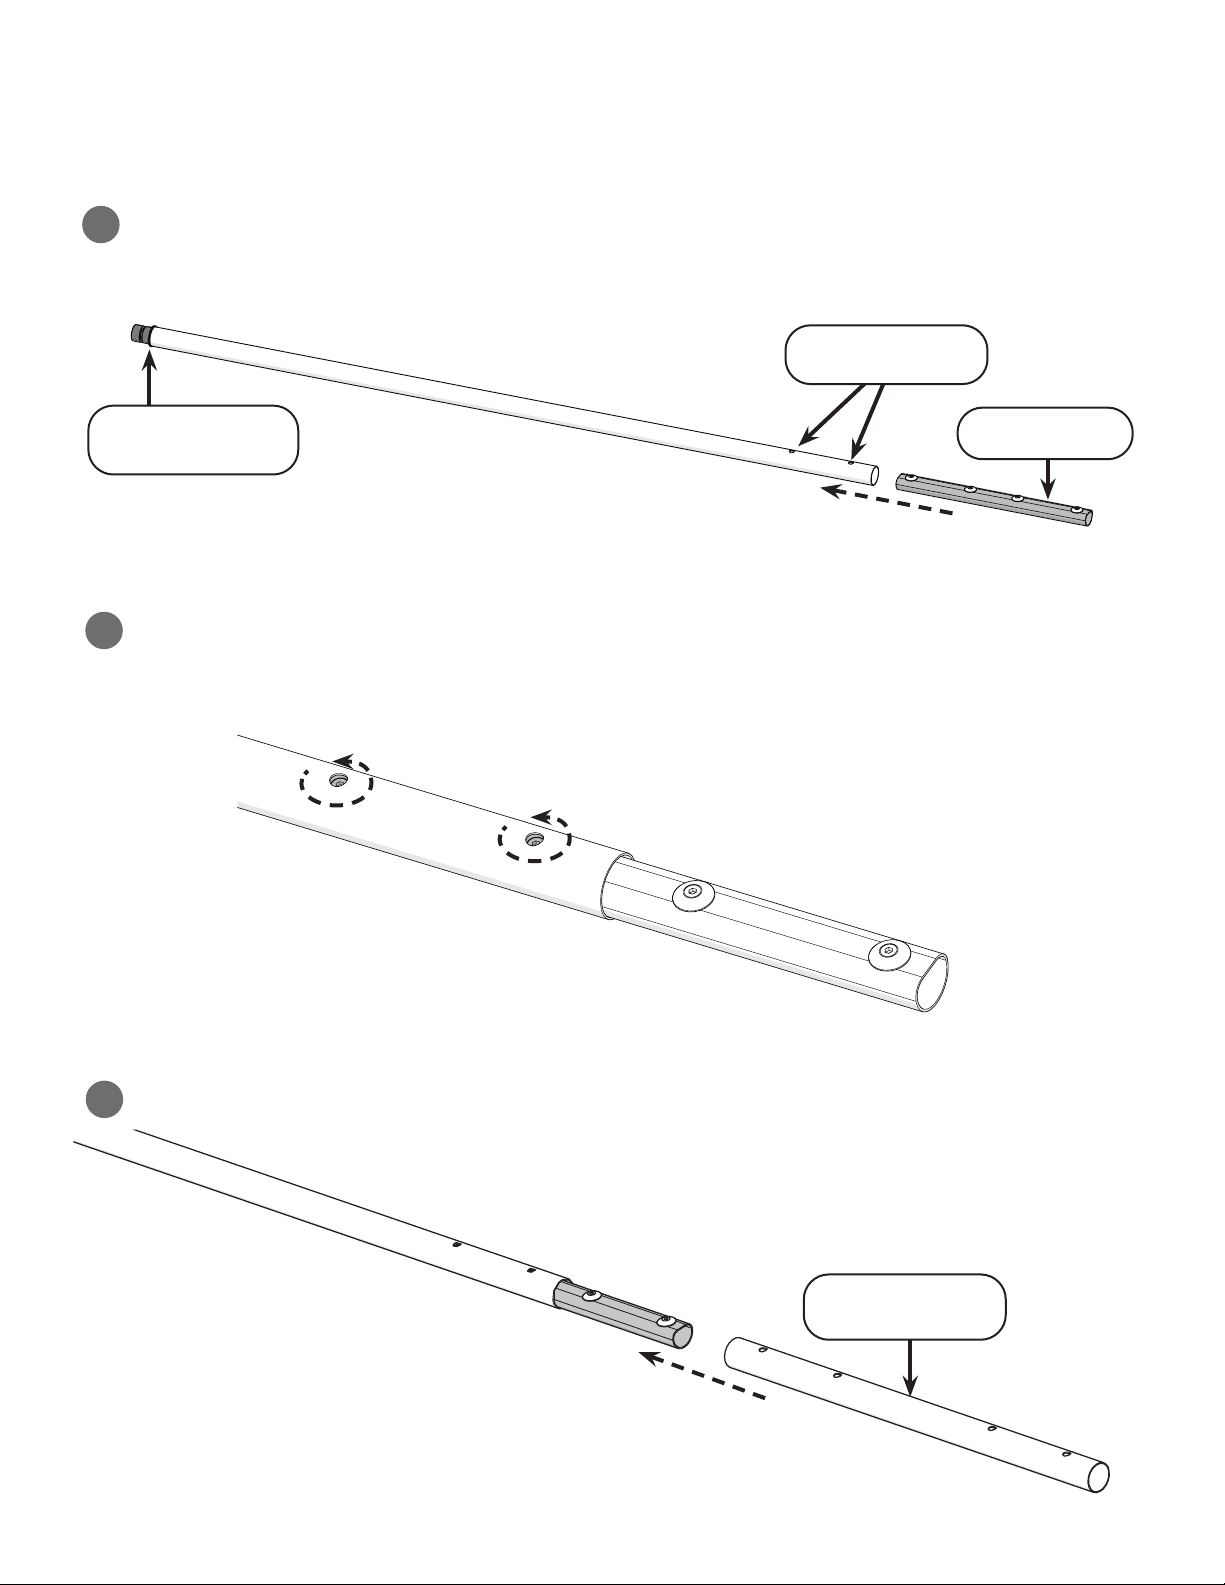
5
Instructions
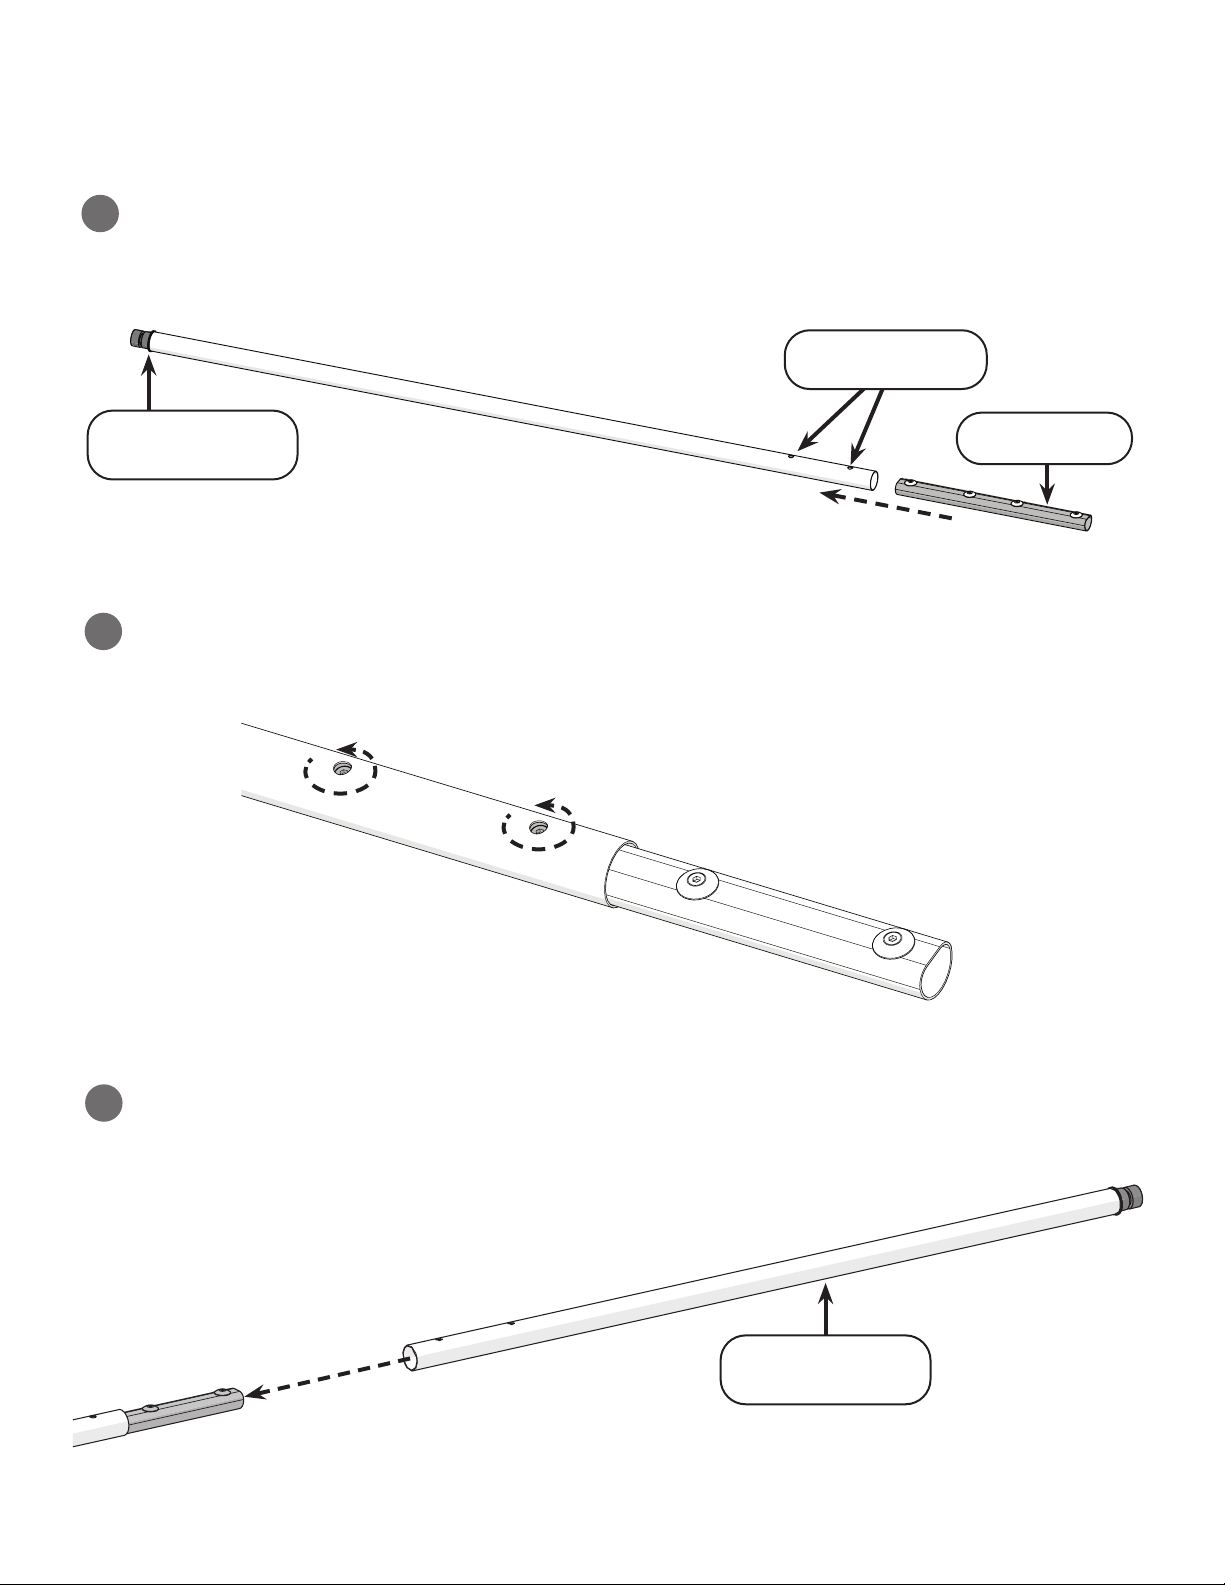
To assemble and install the idler rail on the 8 foot frame, take the following steps:
Slide a rail coupler into one of the non-ratcheting rail sections. Line up the screws on the
coupler with the holes on the rail.
1
Rail Screw Holes
Non-ratcheting rail
Section Rail Coupler
3Slide the remaining non-ratcheting rail section onto the other side of the rail coupler.
Use a 4 mm Allen wrench to turn the screws inside the rail counter-clockwise until they press
rmly against the rail.
2
Non-ratcheting rail
Section
Idler Rail - 8 Foot Frame

6
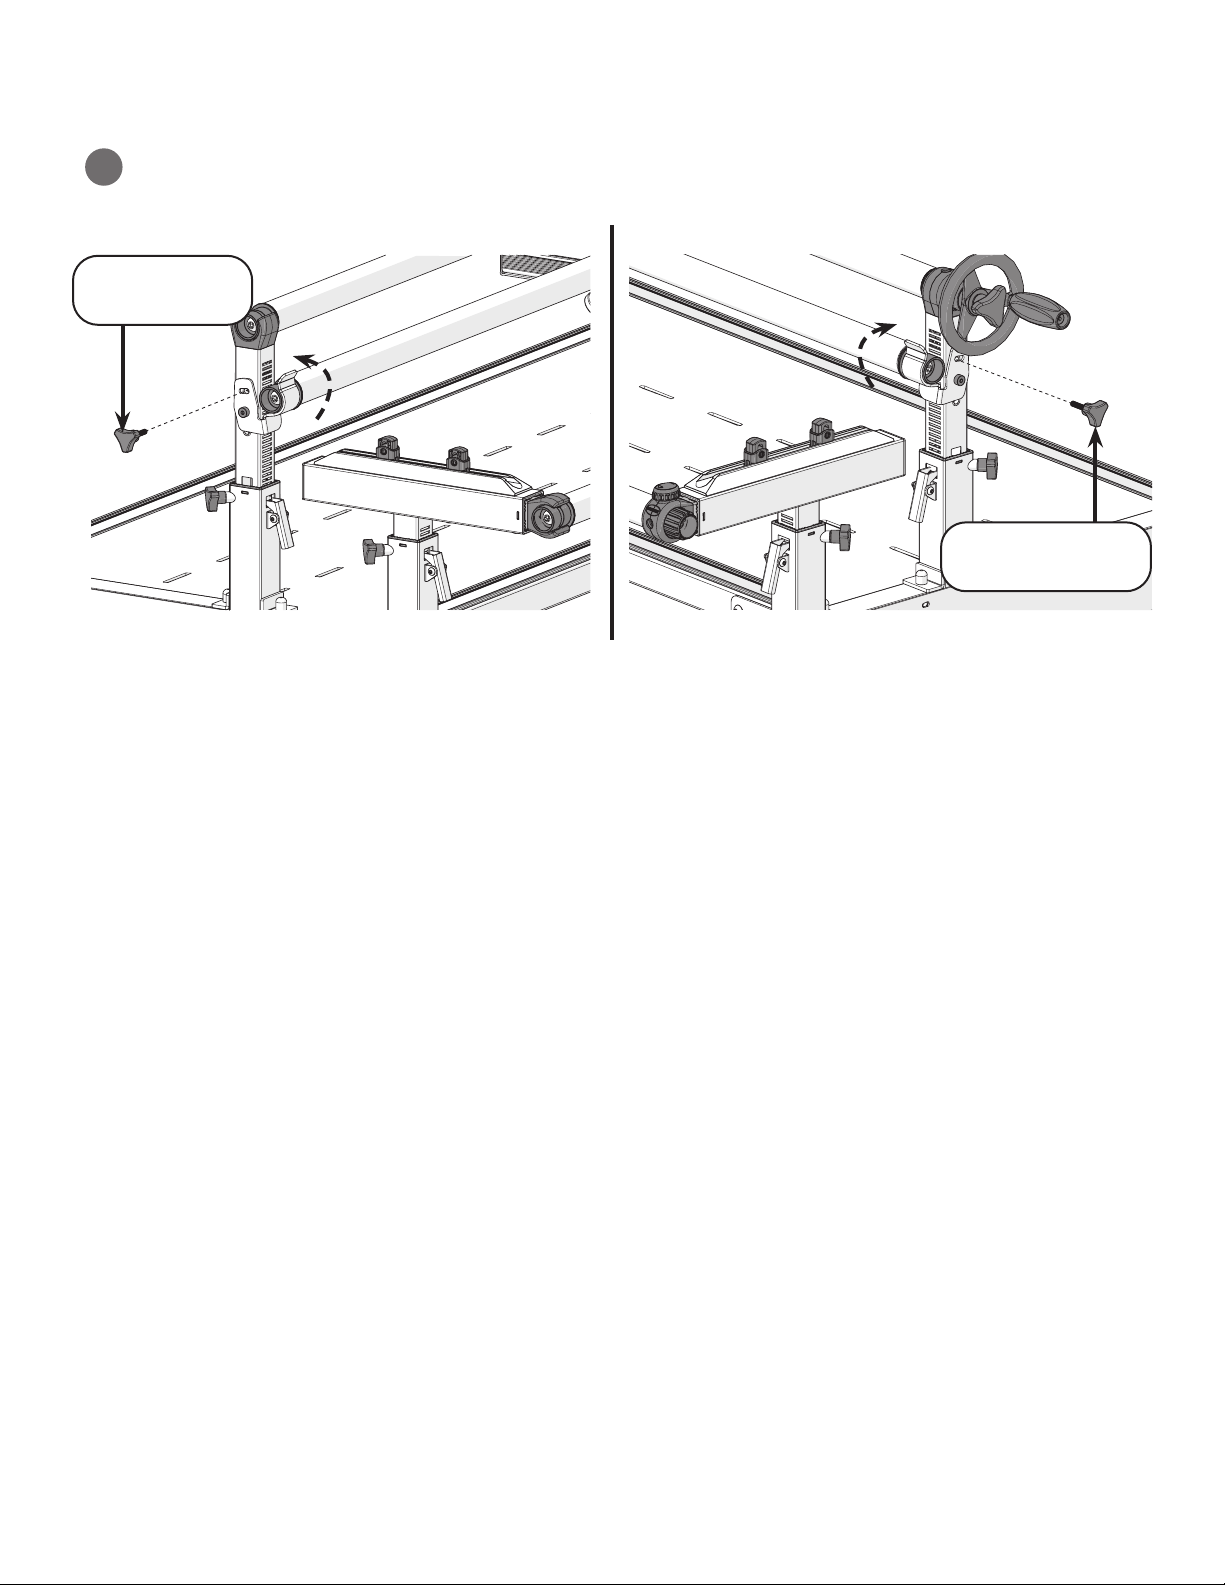
Press in the levers on each of the take-up rail arms, then fully raise the take-up rail.
Loosen the 3-armed knobs on the take up rail arms on both sides of the frame.
Align the holes with the coupler screws and turn the screws counter-clockwise with the 4 mm
Allen wrench until they press rmly against the inside of the rail.
4
Idler Rail - 8 Foot Frame
5
6

7
Pass the idler rail through the throat of the machine and place each end into the mounts.
The mount holding the idler rail is installed on two of the 3 holes on the take-up rail arm.
Choose whether to install the mount on the top two or bottom two holes by considering the size
of your machine.
7
9
Use the shoulder bolt and 4 mm Allen wrench to screw the idler rail mounts to each arm.
8
Idler Rail - 8 Foot Frame
Q’nique 15, 19
Installation Spot
Q’nique 21
Installation Spot
Shoulder Bolt
M6
Shoulder Bolt
M6
Left Idler Rail
Mount
Right Idler Rail
Mount
8
Push in on the mount and install the 3-armed knob. To remove the frame in the future,
simply loosen the 3-armed knob and lift the rail out of the mounts.
10
3-Armed Knob
3-Armed Knob
Idler Rail - 8 Foot Frame
Set the rail height. For instructions, see page 29.

9
2 ft Rail Section
Left Idler Rail Mount Right Idler
Rail Mount 3-Armed Knob (x2) Shoulder Bolt
M6 (x2)
10 Foot Frame
Parts & Tools Needed:
Non-ratcheting rail Section 4 ft (x2)
Rail Coupler (x2) Allen Wrench 4 mm
14
17
10
Instructions
To assemble and install the idler rail on the 10 foot frame, take the following steps:
Slide a rail coupler into one of the non-ratcheting rail sections. Line up the screws on the
coupler with the holes on the rail.
1
Rail Screw Holes
Non-ratcheting rail
Section Rail Coupler
2
3Slide one of the 2 ft rail sections onto the other side of the rail coupler.
2 ft Rail Section
Use a 4 mm Allen wrench to turn the screws inside the rail counter-clockwise until they press
rmly against the rail.
Idler Rail - 10 Foot Frame
Other manuals for Continuum II
1
Table of contents
Other Grace Sewing Machine Accessories manuals


