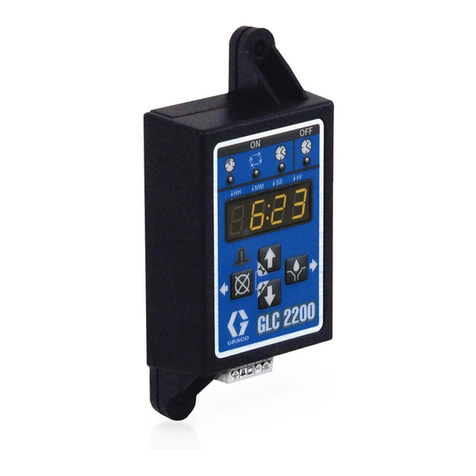
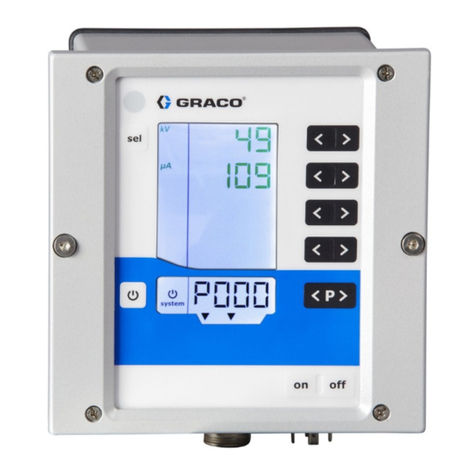
Graco 26A814 User manual

3A7031A
EN
Instructions
GLC X Lubrication
Controller
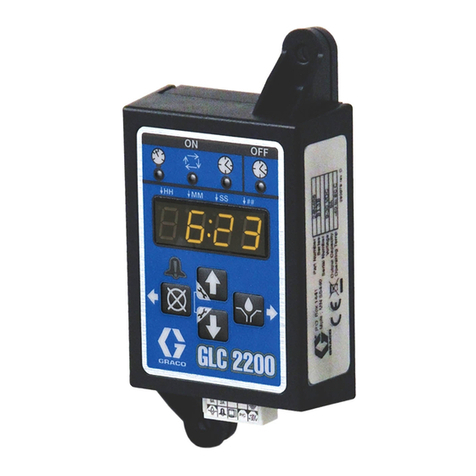
For controlling and monitoring an automated lubrication system. For professional use
only.
Not approved for use in explosive atmospheres or hazardous (classified) locations.
Model: 26A814
Important Safety Instructions
Read all warnings and instructions in this
manual and in the pump manual before
using the equipment. Save these
instructions.

Table of Contents
23A7031A
Table of Contents
Warnings . . . . . . . . . . . . . . . . . . . . . . . . . . . . . . . . . . 3
Component Identification . . . . . . . . . . . . . . . . . . . . 4
Typical Installation . . . . . . . . . . . . . . . . . . . . . . . . . . 6
Installation. . . . . . . . . . . . . . . . . . . . . . . . . . . . . . . . . 7
Mounting . . . . . . . . . . . . . . . . . . . . . . . . . . . . . . . 7
Wiring. . . . . . . . . . . . . . . . . . . . . . . . . . . . . . . . . . 7
System Configuration . . . . . . . . . . . . . . . . . . . . . . . 8
Injector System . . . . . . . . . . . . . . . . . . . . . . . . . . 8
Divider Valve . . . . . . . . . . . . . . . . . . . . . . . . . . . . 9
Wiring Diagram . . . . . . . . . . . . . . . . . . . . . . . . . 10
Sensor Wiring Configurations. . . . . . . . . . . . . . . . 11
Setup . . . . . . . . . . . . . . . . . . . . . . . . . . . . . . . . . . . . 12
Navigating Setup and Data Entry. . . . . . . . . . . . 12
Change Settings . . . . . . . . . . . . . . . . . . . . . . . . 12
Low Level. . . . . . . . . . . . . . . . . . . . . . . . . . . . . . 13
Lock . . . . . . . . . . . . . . . . . . . . . . . . . . . . . . . . . . 14
Start Up . . . . . . . . . . . . . . . . . . . . . . . . . . . . . . . 14
Output 2 . . . . . . . . . . . . . . . . . . . . . . . . . . . . . . . 14
System . . . . . . . . . . . . . . . . . . . . . . . . . . . . . . . . 14
Additional Advanced Features . . . . . . . . . . . . . . 14
Program Settings . . . . . . . . . . . . . . . . . . . . . . . . 15
Operation. . . . . . . . . . . . . . . . . . . . . . . . . . . . . . . . . 16
Main Screens . . . . . . . . . . . . . . . . . . . . . . . . . . . 16
Test Mode . . . . . . . . . . . . . . . . . . . . . . . . . . . . . 17
Alarms . . . . . . . . . . . . . . . . . . . . . . . . . . . . . . . . 17
Alarm Types . . . . . . . . . . . . . . . . . . . . . . . . . . . . 18
Maintenance . . . . . . . . . . . . . . . . . . . . . . . . . . . . . . 20
Recycling and Disposal at End of Life . . . . . . . . 20
Troubleshooting . . . . . . . . . . . . . . . . . . . . . . . . . . . 21
Accessories . . . . . . . . . . . . . . . . . . . . . . . . . . . . . . 22
Dimensions . . . . . . . . . . . . . . . . . . . . . . . . . . . . . . . 22
Mounting Hole Layout . . . . . . . . . . . . . . . . . . . . . . 23
Technical Specifications . . . . . . . . . . . . . . . . . . . . 24
Compliance . . . . . . . . . . . . . . . . . . . . . . . . . . . . . . . 25
Radio Frequency Approvals. . . . . . . . . . . . . . . . 25
California Proposition 65 . . . . . . . . . . . . . . . . . . 25
Graco Standard Warranty . . . . . . . . . . . . . . . . . . . 26
Warnings
3A7031A 3
Warnings
The following warnings are for the set up, use, grounding, maintenance, and repair of this equipment. The
exclamation point symbol alerts you to a general warning and the hazard symbols refer to procedure-specific risks.
When these symbols appear in the body of this manual or on warning labels, refer back to these Warnings.
Product-specific hazard symbols and warnings not covered in this section may appear throughout the body of this
manual where applicable.
WARNING
EQUIPMENT MISUSE HAZARD
Misuse can cause death or serious injury.
• Do not operate the unit when fatigued or under the influence of drugs or alcohol.
• Do not exceed the maximum working pressure or temperature rating of the lowest rated system
component. See Technical Specifications in all equipment manuals.
• Use fluids and solvents that are compatible with equipment wetted parts. See Technical
Specifications in all equipment manuals. Read fluid and solvent manufacturer’s warnings. For
complete information about your material, request Safety Data Sheets (SDSs) from distributor or
retailer.
• Do not leave the work area while equipment is energized or under pressure.
• Turn off all equipment and follow the Pressure Relief Procedure found in the related pump manual
when equipment is not in use.
• Check equipment daily. Repair or replace worn or damaged parts immediately with genuine
manufacturer’s replacement parts only.
• Do not alter or modify equipment. Alterations or modifications may void agency approvals and create
safety hazards.
• Make sure all equipment is rated and approved for the environment in which you are using it.
• Use equipment only for its intended purpose. Call your distributor for information.
• Route hoses and cables away from traffic areas, sharp edges, moving parts, and hot surfaces.
• Do not kink or over bend hoses or use hoses to pull equipment.
• Keep children and animals away from work area.
• Comply with all applicable safety regulations.

Component Identification
43A7031A
Component Identification
A System LED
B Low Level Status LED
C Display
D UP Arrow
EDOWNArrow
F RIGHT Arrow / ENTER
G LEFT Arrow / Reset
H Connector
(A) System LED
(B) Low Level Status LED
(D and E) UP and DOWN Direction Arrows
Press and hold both the UP and DOWN ARROW keys
simultaneously for 3 seconds to enter SETUP.
(F) RIGHT Direction Arrow / MANUAL RUN /
ENTER
In SETUP the RIGHT Arrow saves the entry or selects a
menu choice.
When not in SETUP, the RIGHT Arrow starts the pump
for one complete lubrication event.
Holding down both the RIGHT Arrow and the LEFT
Arrow simultaneously for 3 seconds starts TEST MODE.
(G) LEFT Direction Arrow / Reset
In SETUP the LEFT Arrow moves the cursor in the
display one field to the left. It also navigates back to the
previous screen and cancels parameter change.
If the pump is lubricating, pressing this button cancels
the event and the pump stops lubricating.
In ALARM, press the LEFT Arrow once to clear the
buzzer. Press and hold for 3 seconds to clear the alarm.
For more information, see Alarms, page 17.
Holding down both the RIGHT Arrow and the LEFT
Arrow simultaneously for 3 seconds starts TEST MODE.
NOTICE
To prevent damage to soft key buttons, do not press
the buttons with sharp objects such as pens, plastic
cards, screwdrivers, or fingernails.
FIG. 1: GLC X Controller Front
D
F
H
E
G
B
A
C
Light Status
Red (solid) Normal and ON
Orange (solid) Controller is in system SETUP and
lubrication program is paused
Red (flashing) System is in alarm
Light Status
Orange (solid) Low level alert
Flashing Another alarm in addition to a low
level alert

Component Identification
3A7031A 5
FIG. 2: GLC X Controller Back
Identification
Label

Typical Installation
63A7031A
Typical Installation
The installation shown in FIG. 3 is only a guide for selecting and installing system components.
Key:
A Lubrication Controller
B Solenoid Value
C Pump Module
D Ignition Switch
E High Pressure Lubricant Supply Lines
F Injector Banks
G In-line 15A Fuse
H Power Source
J Pressure Sensor
K Level Sensor
FIG. 3: Typical Installation
H
D
G
A
F
E
C
B
J
K

Installation
3A7031A 7
Installation
Mounting
1. Select a flat surface to install the Lubrication
Controller. Drill mounting holes, refer to Mounting
Hole Layout, page 23.
2. Align the junction box with the pre-drilled holes (FIG.
4). Secure the junction box to the mounting surface
with three screws (not provided).
Wiring
The Lubrication Controller Connector (H) is rated for 240
VAC, 17 A (FIG. 5).
• Output voltage is the same as the input voltage.
• The Lubrication Controller is designed to power a
pump or to provide an enable signal to a pump.
•Sensor Wiring Configurations are located on
page 11.
•Wiring Diagram is located on page 10.
AUTOMATIC SYSTEM ACTIVATION HAZARD
Unexpected activation of the pump lubrication system
could result in serious injury, including skin injection
and amputation.
The Lubrication Controller has an automatic timer
that activates the pump lubrication system when
power is connected or when exiting this device’s
programming function. Before you install or remove
the Lubrication Controller from the system,
disconnect and isolate all system power supplies and
relieve pressure for all system components.
NOTICE
Pre-drill and use only designated mounting holes in
Lubrication Controller box. Failure to use designated
mounting holes can cause circuit board damage.
FIG. 4 Pre-drilled holes
FIG. 5: Lubrication Controller Connector
NOTICE
The pump is designed for 10 A. The auxiliary outputs
are designed for 10 A.
The entire system, however, is only capable of
delivering a total of 15 A.
Therefore, if the pump is a 10 A load, the sensors and
auxiliary output must not exceed 5 A.
H

System Configuration
83A7031A
System Configuration
To determine the required configurations needed, refer to the following pages.
Injector System
FIG. 6 Injector System Configuration

System Configuration
3A7031A 9
Divider Valve
FIG. 7 Divider Valve System Configuration

System Configuration
10 3A7031A
Wiring Diagram
Wiring Key
FIG. 8: Wiring Diagram
Pin Description Polarity
1 Pump / Motor +
2 Auxiliary / Alarm +
3 Auxiliary / Alarm ground -
4 Sensor power 1 +
5 Sensor power 2 +
6 Voltage source +
7 Pump / Motor ground -
8 Input 2 ground -
9 Input 2 (LOW LEVEL) Input
10 Voltage source ground -
11 Input 3 (CYCLE) Input
12 Input 4 (MACHINE COUNT) Input
13 Input 1 ground -
14 Input 1 (PRESSURE) Input

Sensor Wiring Configurations
3A7031A 11
Sensor Wiring Configurations
Dry Contact Switch
Analog Sensor
Source/PNP Switch (2 or 3 Wire Type)
FIG. 9
FIG. 10
FIG. 11

Setup
12 3A7031A
Setup
Navigating Setup and Data Entry
UP and DOWN Arrows:
• Press both the UP and DOWN Arrows
simultaneously for 3 seconds to enter
SETUP.
• Use the UP and DOWN Arrows to
navigate screens in the up or down
direction.
• Use these buttons to adjust parameters and data
values.
RIGHT Arrow:
• Use this button to move the cursor to
the right or to select menu items.
• Use this button to save any parameter
changes.
LEFT Arrow:
• Use this button to move the cursor to
the left.
• Use this button to navigate to the
previous screen. This cancels any parameter
change made.
Change Settings
Press both the UP and DOWN Arrow buttons
simultaneously for three seconds to enter SETUP and to
change settings.
Note: Setting changes are not saved until Accept is
selected.
While in SETUP, if a button is not pushed for 1 minute
the Lubrication Controller returns to idle.
Mode
Choose either Interval or End On, but both must be set
up before the Lubrication Controller will be configured
for your application.
Interval
Configures how frequently the GLC X lubricates the
product.
• Select either Timer Interval or Machine Count
Interval.
Timer Interval
This sets up how frequently lubrication occurs.
• Interval: defines the time between lubrication
events.
The idle time shows interval time minus the
lubrication time. If the interval time is 30 minutes
and the lubrication time is 1 minute, then after a
lubrication event the idle time is 29 minutes. The
lubrication events will then be spaced by 30 minutes
(Interval Time).
Machine Count Interval
This configures the device to wait for a specific
number of machine actions between lubrication
events.
The actions must be presented to the device as a
machine count input. This is a digital signal input,
similar to a proximity switch that would be used for
Cycle mode.
• Timeout Option: enables/disables an interval
backup timeout.
• Interval: when timeout is enabled, this feature
defines the backup timeout for machine count.
• Timeout Action: select the action taken (either Lube
or Alarm) when a machine count timeout occurs.
Lube: the lubrication event starts if the target
machine counts do not occur within the user defined
time.
Alarm: an alarm occurs if the targeted machine
counts do not occur within the user defined time.

Setup
3A7031A 13
End On
Configures when a lubrication event ends. Selects the
method the controller uses to transition from lubrication
to idle.
End on, Pressure Sensor
The lubrication event ends when the system reaches a
specific pressure. This is commonly used with Single
Line Parallel (Injector) systems using a pressure switch.
• Alarm: defines maximum time to reach target
pressure.
• Type: select the type of pressure sensor output: 0-5
V, 1-5 V, 0-10 V, and 4-20 mA.
• Units: select the units used for the pressure
measurement: kPa, Percent, PSI, and bar.
• Full Scale: the maximum sensor output reading. For
example, if a 0-10 V sensor is 5000 psi at full scale,
then 10 V = 5000 psi.
• Threshold: the target pressure the system must
reach to end the lubrication event.
End on, Pressure Switch
The lubrication event ends when the system reaches a
specific pressure. This is commonly used with Single
Line Parallel (Injector) systems using a pressure switch.
The pressure switch must be physically set to the
appropriate target pressure.
• Alarm Timeout: defines the maximum allowable
time to reach target pressure.
End on, Cycles
The lubrication event ends after a number of pulsed
inputs from a cycle counter. This is commonly used
with Series Progressive (Divider Block) systems.
• Count: defines the number of cycle inputs required
per lubrication event.
• Alarm Timeout: defines the maximum allowable
time to accumulate cycle counts.
• Solenoid Failure Alarm: if enabled, an alarm
displays if cycle inputs are detected during idle time.
End on, Timer
The lubrication event ends after a specified amount of
time.
• Timeout: defines the amount of time that the system
is lubricating.
Low Level
The pump stops lubricating when low level is detected.
To define low level, enter SETUP, select low level, and
then select Type: Paddle, Switch, or Sensor.
Paddle
Used with “paddle-style” low level sensors, e.g., Graco
G3 grease units.
• Alert: Number of low level triggers to cause Alert.
Recommended setting for Alert is 10 triggers.
• Alarm: Number of low level triggers to cause alarm.
Recommended setting for Alarm is 80 triggers.
Note: Disable the Low Level Alert or Alarm by
setting the threshold to zero.
• Auto-Clear: when in a Low Level Alarm state, the
controller attempts to lubricate automatically upon
powering up.
If within 30 seconds of entering run mode a low level
trigger is not detected, the count resets to 0.
Switch
Defines the low level input as a dry-contact (or source
style) switch that triggers when a low level is detected.
• Type: defines the actions upon low level detection.
Alert: the low level LED turns on. Output two turns
on.
Alarm: enters an alarm state and stops lubricating.
The low level LED turns on and the screen shows
an alarm screen.

Setup
14 3A7031A
Sensor
Defines the low level input as a continuous monitoring
sensor.
• Sensor Type: select the type of pressure sensor
output: 0-5 V, 1-5 V, 0-10 V, and 4-20 mA.
• Threshold: the level that triggers the low level action.
Alert: the low level LED turns on. Output two turns
on.
Alarm: enters an alarm state and stops lubricating.
The low level LED flashes, and the screen shows an
alarm screen.
Note: Disable the Low Level Alert or Alarm by
setting the threshold to zero.
Lock
The controller does not require a PIN to access the pro-
gramming features of the unit. However, an option for
adding PIN lock out is available.
Enable a Lock out PIN
Navigate to the menu item lock.
• Lock: toggles on/off Lock out PIN protection.
• PIN: enter a 4 digit code to unlock the device.
If a lockout PIN is enabled, a PIN must be used to
change settings.
Entering a PIN
When entering SETUP, the PIN entry screen appears
with the first digit highlighted. Use the arrow buttons to
enter the PIN.
After entering the last digit, press the RIGHT
ARROW button to accept the PIN.
If the PIN is correct, the device enters SETUP.
If the PIN is incorrect, the device returns to the main
screen.
Start Up
Navigate to the menu item start up.
• Pre-lube: configures the GLC X to start a lubrication
event once powered on.
• Delay: enables a delay between when the device is
powered on and when the controller resumes.
- Delay Time: if applicable, configures the delay
time.
Output 2
Assign as alarm output or vent valve output.
System
In addition to date and time, enabling Bluetooth®and
disabling an audible alarm are found under this heading.
Date and Time
Navigate to the menu item time.
• Date: defines today’s date.
• Time: defines the current time. This clock runs on a
24 hour clock. (9 a.m. = 9, 2 p.m. = 14)
Additional Advanced Features
Advanced features are accessible through the mobile
app, gracoautolube, available for Android®and Apple®
devices in the app store.
• Generic alarm input: assign unused input to trigger
an alarm.
• Pulsed output: pulses pump output during
lubrication event. Typically used with single stroke
pumps.

Setup
3A7031A 15
Program Settings
Feature Description
Modes of Operation Maximum/Minimum
and Additional Comments
Interval, page 12
Mode Timer Machine Count
Machine Count 1 to 10,000
Machine Count Options - Action to start lubrication or alarm when timeout
expires
- Enable a backup timeout
Interval HH:MM (00:01 to 99:59)
Defines time between lubrication events
End On, page 13
Mode Timer, Pressure Switch, Pressure Sensor, Cycle
Timeout HH:MM:SS (00:00:10 to 03:00:00)
Pressure Type 0-5V, 0-10V, 1-5V, 4-20mA
Pressure Sensor Units PSI, kPa, bar, %
Pressure Sensor Full Scale 1 to 20,000
Requires: Threshold is less than or equal to Full Scale
Pressure Sensor Threshold 1 to 20,000
Requires: Threshold is less than or equal to Full Scale
Pressure Sensor Target 1 to 20,000
Requires: Threshold is less than or equal to Full Scale
Cycles 0 to 100
Cycle Option Solenoid Alarm Enables alarm when cycles are detected during idle time
Low Level, page 13
Low Level Type Paddle, Low Level Switch, Low Level Sensor
Paddle Low Level Alert
Threshold
Recommended: 10
00 to 99
Requires Alarm > Alert
Setting of zero disables low level alert threshold
Paddle Low Level Alarm
Threshold
Recommend: 80
00 to 99
Requires: Alarm > Alert
Setting of zero disables low level alarm threshold
Paddle Alarm Auto-Clear Enables a feature that will automatically clear a low level
alarm and start a lubrication event to check if the reservoir is
still empty
Level Switch Type Sets low level behavior as low level Alert or low level alarm
Sensor Type 0-5V, 0-10V, 1-5V, 4-20mA
Sensor Alert Threshold 0 - 100
Requires: Alarm < Alert
Setting of zero disables low level alert threshold
Sensor Alarm Threshold 0 - 100
Requires: Alarm < Alert
Setting of zero disables low level alarm threshold
Start Up, page 14 Delay Time MM:SS (00:01 to 59:59)
Output 2, page 14 Output Type Activated pm Alarm, only, Alert only, Alarm and Alerts, or to
close Vent Valve
System, page 14
Date Month: 1 - 12
Day: 1 - 31
Year: 18 - 99
Time 00:00:00 to 23:59:59
24-hour time

Operation
16 3A7031A
Operation
Main Screens
Refer to the following illustrations for examples of typical operation screens.
FIG. 12 Lubrication Event: Pressure Switch
FIG. 13 Lubrication Event: Pressure Sensor
FIG. 14 Lubrication Event: Cycle
FIG. 15 Lubrication Event: Time
FIG. 16 Idle: Timer
FIG. 17 Idle: Machine Count

Operation
3A7031A 17
Test Mode
On the main screen press and hold both the LEFT and
RIGHT ARROWS simultaneously for 3 seconds to enter
TEST MODE.
While in TEST MODE the controller:
TEST MODE ends after 10 lubrication events. TEST
MODE is canceled by pressing the LEFT ARROW
button.
Alarms
During an alarm:
• Pump operation is immediately disabled
• The system LED flashes red
• An alarm screen displays
• An audible alarm sounds
• Output 2 turns on
Press the reset button (LEFT ARROW
button) once to clear the buzzer. Press
and hold the reset button for 3
seconds to clear the alarm and switch
the controller to idle.
Low Level Alert State
• Run mode continues
• Low level LED is on (B, FIG. 1)
• System LED is on (A, FIG. 1)
• Output 2 in ON
Low Level Alarm State
• Pump operation is immediately disabled
• Low level LED is on (B, FIG. 1)
• System LED flashes red (A, FIG. 1)
• Output 2 is ON
• Audible alarm
• Screen shows alarm information
Clear Alarm Buzzer
Press reset (LEFT ARROW button) to silence the
buzzer.
The buzzer sounds again after 4 hours if the low level
condition is not resolved. The buzzer also sounds again
when power is cycled.
Clear Low Level Alarm
Filling the reservoir resolves a low level sensor and low
level switch condition, and the level sensor and level
switch will self-clear.
Hold the reset button for at least 5 seconds to remove
the low level alarm from the controller.
For more details regarding a specific alarm, see Alarm
Types, page 18 and Troubleshooting, page 21.
End Configuration ON time (min) OFF time (min)
Pressure System 7 1
Timer System 2 1
Cycle System 2 1

Operation
18 3A7031A
Alarm Types
Alarm ID Alarm Type Alarm Icon Cause Solution
A13 Level Empty There is a low
lubricant level
Fill the reservoir.
A11 Cycle
Timeout
The time out
expired before
receiving
programmed
number of cycle
counts.
Inspect the lubrication system for broken or
plugged lines.
Confirm that the pump is operating correctly.
Inspect the cycle and proximity switch and
wiring.
Confirm that sufficient time was programmed
for the environmental conditions (e.g. slow
system response in cold temperatures).
Confirm that the programming is correct.
A15 Pressure
Timeout
The time out
expired prior to
receiving pressure
switch input.
Inspect the lubrication system for broken or
plugged lines.
Confirm that the pump is operating correctly.
Confirm that the vent valve is operating
correctly
Inspect the wiring, pressure, switch, and
sensor.
Confirm that sufficient time was programmed
for the environmental conditions (e.g. slow
system response in cold temperatures).
Confirm that the programming is correct.
A16 Pressure
not vented
The vent valve
failed to relieve
power to the
system.
Fix the cabling to the vent valve.
Ensure that enough power is being delivered
to the vent valve.
Confirm that the controller settings are correct.
Inspect the wiring, pressure switch and
sensor, and check for short circuits.
Replace the vent valve if it is broken.
A19 (Pin 2)
A20 (Pin 1)
A21 (Pin 4)
A22 (Pin 5)
Output
Overcurrent
Output load is
drawing too much
current
Inspect the wiring.
Confirm that the pump is operating correctly
and not drawing more current than expected.

Operation
3A7031A 19
Alarm ID Alarm Type Alarm Icon Cause Solution
A17 (INPUT 1)
A18 (INPUT 2)
Sensor
Fault
Sensor input is out
of range for given
type
Inspect the sensor and wiring.
Confirm that the programming is correct.
A14 Machine
Count
Timeout
The machine use is
low.
Confirm that the controller settings are correct
for machine usage.
The cabling to
machine count is
broken.
A23 Solenoid
Failure
No Symbol The solenoid valve
used to control the
lubrication flow has
failed.
Replace the solenoid valve used to control
lubrication flow.
A12 Generic
Input
No Symbol The user defined
input is active and
requires attention.
Resolve the system issue. Clear the alarm
when the system issue is resolved.

Maintenance
20 3A7031A
Maintenance
Recycling and Disposal at End
of Life
At the end of the product’s useful life, dismantle and
recycle it in a responsible manner.
Dismantle and recycle:
• Remove motors, circuit boards, LCDs (liquid crystal
displays), and other electronic components. Recycle
according to applicable regulations.
• Do not dispose of electronic components with
household or commercial waste.
• Deliver remaining product to a recycling facility.
Table of contents
Other Graco Controllers manuals

Graco
Graco 24N468 User manual

Graco
Graco InvisiPac User manual

Graco
Graco GLC 4400 User manual

Graco
Graco Pro Xpc 24Y307 User manual

Graco
Graco 238889 Operation manual

Graco
Graco Trabon LC-1000 User manual

Graco
Graco Matrix PAC 247436 User manual

Graco
Graco 3A7639A User manual

Graco
Graco 15J753 User manual

Graco
Graco Series B User manual

Graco
Graco 104815 Operation manual

Graco
Graco Advanjet Diaphragm-Jet HV-2000 Manual instruction

Graco
Graco Series A User manual

Graco
Graco 311595C Parts list manual

Graco
Graco 217075 Operation manual

Graco
Graco IPH-25 Series Guide

Graco
Graco Harrier EZ-Batch User manual

Graco
Graco 257528 User manual

Graco
Graco 24W482 User manual

Graco
Graco 25T478 Parts list manual