manuals.online logo
Brands
  1. Home
  2. •
  3. Brands
  4. •
  5. Graco
  6. •
  7. Controllers
  8. •
  9. Graco G Series Operation manual

Graco G Series Operation manual

307–212
Rev. T
Supersedes Rev. R
and PCN T
First
choice when
quality counts.

INSTRUCTIONS-PARTS
LIST
INSTRUCTIONS
This
manual contains important
warnings and information.
READ AND KEEP FOR REFERENCE.
STAINLESS STEEL, WATERBASE COMPATIBLE
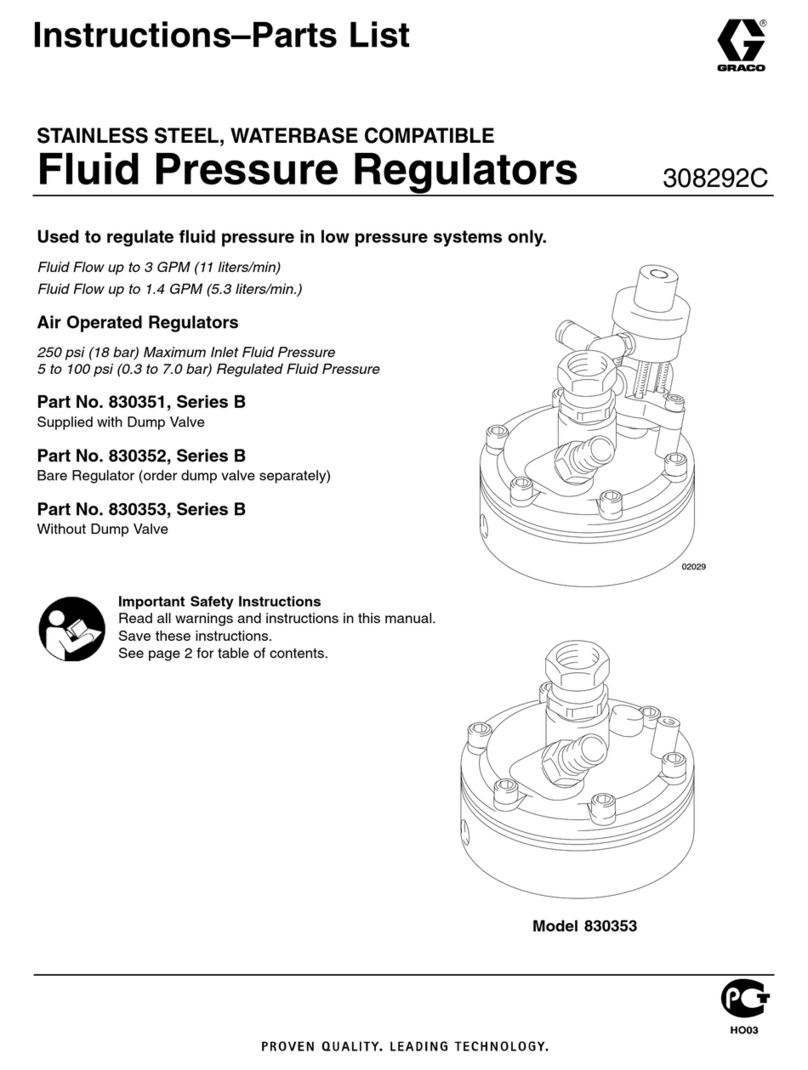
Fluid
Pressure Regulators
For Use In Low Pressure Systems Only
Fluid Flow up to 3 GPM (11 liters/min.)
SPRING OPERATED REGULATORS
250
psi (1.8 MPa, 18 bar) Maximum Inlet Pressure
5–100 psi (34–700 kPa, 0.3–7.0 bar) Regulated Pressure
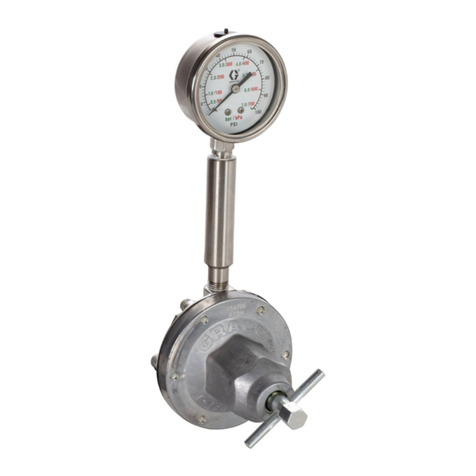
Model 214–895, Series G
Without
Pressure Gauge and Gauge Mounting T
ube
Model 214–706, Series G
With
SST Gauge, 0–100 psi (0–0.7 MPa, 0–7 bar) Range
SPRING OPERATED REGULATORS
250
psi (1.8 MPa, 18 bar) Maximum Inlet Pressure
20–160 psi (0.14–1.1 kPa, 1.5–1
1.0 bar) Regulated Pressure
Model 217–314, Series E
With
SST Gauge, 0–300 psi (0–2.1 MPa, 0–21 bar) Range
221–118, Series D
Without
Gauge
AIR OPERATED REGULATORS
30
psi (210 kPa, 2.1 bar) Maximum Regulate Air Pressure*
250 psi (1.8 MPa, 18 bar) Maximum Inlet Pressure
0–30 psi (0–210 kPa, 0–2.1 bar) Regulated Pressure
*Regulated
pressures higher than 30 psi (210 kPa, 2.1 bar)
may be used if a higher rated pressure gauge is installed.
Model 214–980, Series E
With
Chrome Plated Gauge, 0–30 psi (0–210 kPa, 0–2.1 bar) Range
CAUTION
The fluid supply system’
s main line pressures often
exceed the pressure range of the gauge supplied
with regulator 214–706. Exposing this gauge to
excessive pressure can damage the gauge, causing
inaccurate readings and the needle will not return to
zero. This damage is not covered by the Graco
warranty.
GRACO INC. P.O. BOX 1441
MINNEAPOLIS, MN
55440–1441
COPYRIGHT
1978, GRACO INC.
Graco
Inc. is registered to I.S. EN ISO 9001
307–212
Table
of Contents
Warnings 2.
. . . . . . . . . . . . . . . . . . . . . . . . . . . . . . . . . . . . .
Installation 3
. . . . . . . . . . . . . . . . . . . . . . . . . . . . . . . . . . . .
Operation 5
. . . . . . . . . . . . . . . . . . . . . . . . . . . . . . . . . . . . .
Troubleshooting 7
. . . . . . . . . . . . . . . . . . . . . . . . . . . . . . . .
Service 8
. . . . . . . . . . . . . . . . . . . . . . . . . . . . . . . . . . . . . . .
Parts 11
. . . . . . . . . . . . . . . . . . . . . . . . . . . . . . . . . . . . . . . .
Dimensions 14
. . . . . . . . . . . . . . . . . . . . . . . . . . . . . . . . . . .
Technical
Data
14.
. . . . . . . . . . . . . . . . . . . . . . . . . . . . . . .
Performance
Charts
15.
. . . . . . . . . . . . . . . . . . . . . . . . . .
Warranty 16
. . . . . . . . . . . . . . . . . . . . . . . . . . . . . . . . . . . . .
Graco
Phone Number
16.
. . . . . . . . . . . . . . . . . . . . . . . . .
Symbols
Warning Symbol
WARNING
This
symbol alerts you to the possibility of serious
injury or death if you do not follow the instructions.
Caution Symbol
CAUTION
This
symbol alerts you to the possibility of damage to
or destruction of equipment if you do not follow the
corresponding instructions.
WARNING
PRESSURIZED EQUIPMENT HAZARD
Spray
from the gun, hose leaks, or ruptured components can splash fluid in the eyes or on the skin
and cause serious injury
.
D
Do not stop or deflect fluid leaks with your hand, body
, glove, or rag.
D
Follow the
Pressure Relief Procedure
on page 5 whenever you: are instructed to relieve the
pressure; stop spraying; clean, check, or service the equipment; and install or clean the fluid
nozzle.
DT
ighten all the fluid connections before operating the equipment.
D
Check the hoses, tubes, and couplings daily
. Replace worn, damaged, or loose parts immediately
.
Permanently coupled hoses cannot be repaired; replace the entire hose.
INSTRUCTIONS
EQUIPMENT MISUSE HAZARD
Equipment
misuse can cause the equipment to rupture, malfunction, or start unexpectedly and result
in a serious injury
.
D
This equipment is for professional use only
.
D
Read all the instruction manuals, tags, and labels before operating the equipment.
D
Use the equipment only for its intended purpose. If you are uncertain about usage, call your Graco
distributor.
D
Do not alter or modify this equipment. Use only genuine Graco parts and accessories.
D
Check the equipment daily
. Repair or replace worn or damaged parts immediately
.
D
Do not exceed the maximum working pressure of the lowest rated system component.
D
Use fluids that are compatible with the equipment wetted parts. See the
T
echnical Data
section of
all the equipment manuals. Read the fluid manufacturer
’
s warnings.
D
Route the hoses away from traffic areas, sharp edges, moving parts, and hot surfaces. Do not
expose Graco hoses to temperatures above 180
_F (82_
C) or below –40
_F (–40_C).
D
Comply with all applicable local, state, and national fire, electrical, and other safety regulations.
3307–212
Installation
FLUID
SUPPL
Y
INLET BALL V
ALVE
OUTLET BALL V
ALVE
PIPE NIPPLES
BACK
PRESSURE
VALVE
FLUID RETURN
AIR FIL
TER
& REGULATOR
Spring Operated Installation
Models 214–895, 214–706,
217–314, and 221–1
18
Pilot Regulator Air Supply Line
Air Operated Installation
Model 214–980 only
OUTLET
BALL V
ALVE
AIR SUPPL
Y
AIR FIL
TER
MOISTURE SEP
ARATOR
& REGULATORS
INLET BALL V
ALVE
Fig.
1
Fig. 2
4307–212
Installation
Fluid pressure regulators are used for accurate, posi
-
tive control of the fluid pressure to spray guns, dis
-
pensing valves or atomizing heads.
Regulators installed at circulating line take-of
fs or
pumps are used to reduce main line pressure and
maintain the desired fluid pressure to the spray gun or
atomizing head.
Before Installing the Fluid Regulator
1. Determine
where to locate the regulator
.
2.
Install a ball valve for the regulator inlet and outlet.
3.
Install temporary plumbing between the ball
valves.
4.
Thoroughly flush the system to remove metal
chips and other contaminants and to check for
leaks.
Installing the Fluid Regulator
1. Remove
the temporary plumbing and install one
regulator for each spray gun. See the
Dimension-
al Drawing
on page 14 for regulator dimensions.
Mount the regulator in a vertical position, as shown
above, for the best flow and minimum pigment
settling. The gauge, if used, must be mounted
vertically
. If the regulator is mounted horizontally
,
an elbow must be used so the gauge will be
vertical.
2.
Put the sealer on threaded connections, except on
swivel unions as it interferes with the swivel action.
3.
Flush and test the entire system. Be sure to follow
the flushing procedure on page 5.
5307–212
Operation
CAUTION

The new system must be cleaned and tested
thoroughly before admitting fluid to the regulator
to avoid contaminants clogging or damaging the
regulator.

Always use the lowest possible air and fluid
pressures for your application. High pressures
cause premature spray nozzle and pump wear
.
NOTE:
Reference numbers and letters in parentheses
in the text refer to the Figs. and Parts Drawing.
Pressure Relief Procedure
WARNING
INJECTION
HAZARD
Fluid under high pressure can be in
-
jected through the skin and cause
serious injury
. T
o reduce the risk of an
injury from injection, splashing fluid, or moving
parts, follow the
Pressure Relief Procedure
whenever you:

are instructed to relieve the pressure,

stop spraying,

check or service any of the system equipment,

or install or clean the spray tip.
1.
Shut of
f the pump.
2.
Close the fluid regulator
’
s inlet ball valve. Refer to
Fig. 1.
3.
Relieve fluid pressure in the fluid regulator by
triggering the spray gun.
Flushing Procedure
1. Flush
the regulator with a compatible solvent
whenever the rest of the system is flushed.
2.
Remove the gauge if the fluid pressure will exceed
the gauge range.
3.
Spring Operated Regulators Only
a.
Shut of
f the pump and relieve fluid pressure in
the system by opening the back pressure
valve or other bypass valve. See Fig. 1.
b. T
urn the external hex (B) of the adjusting key
(24) counterclockwise to open the regulator
valve. See Fig. 3.
4.
Air Operated Regulator Only
a.
Make sure the air pressure going to the regula
-
tor is shut off and any air pressure in the line is
relieved.
b.
Make sure the air bleed hole in the air line
fitting (29) is not plugged. See Fig. 4.
5.
Flush until thoroughly clean. Always use the lowest
possible pressure when flushing.
6.
Spring Operated Regulators Only
After flushing, turn the key (24) clockwise to the
previous setting. See Fig. 3.
6307–212
Operation
Regulating Fluid Pressure
Spring
Operated Regulator
1.
Close the regulator: engage the internal hex (A) of
the key (24) with the adjusting screw (12) and turn
it counterclockwise to relieve the spring tension.
See Fig. 3.
2.
Start the pump and open the fluid regulator
’
s inlet
ball valve to admit fluid to the regulator
. See Fig. 1.
3. T
urn the key (24) clockwise to increase fluid pres
-
sure. See Fig. 3. Adjust for the desired spray
pattern. Before reducing the regulator pressure,
partially relieve pressure in the gun hose to ensure
the correct gauge reading.
Air Operated Regulator
1.
Start the pump and open the fluid regulator
’
s inlet
ball valve to admit fluid to the regulator
. See Fig. 2.
2.
Increase the air pressure to obtain the desired fluid
pressure. before reducing the regulator pressure,
partially relieve pressure in the gun hose to ensure
the correct gauge reading.
NOTE:
Make sure the air bleed hole in the air line
fitting (29) is not plugged. Refer to page 8.
For the best results, use an air regulator with at least a
two inch diameter diaphragm to control this fluid regu
-
lator.
12
24
B
A
Fig. 3
7307–212
Troubleshooting
WARNING
T
o reduce the risk of serious injury whenever you
are instructed to relieve pressure, always follow the
Pressure Relief Procedure
on page 5.
Before servicing this equipment always make sure to
Relieve the Pressure
.
Check all possible remedies in the T
roubleshooting
Chart before disassembling the fluid regulator
.
Problem Cause Solution
No pressure regulation
Damaged or clogged air regulator or
line (214–980 only)
Clear obstruction in line, service regu
-
lator if necessary
.
Damaged diaphragm (22)
Replace diaphragm.
Fluid leaks from under cap
Loose cap (7)
T
ighten screws (1) in sequence
shown in Service section.
W
orn gasket (26)
Replace gasket.
Pressure creeps above setting
Damaged or clogged air regulator or
line (214–980 only)
Clear obstruction in line, service regu
-
lator if necessary
.
Damaged diaphragm (22)
Replace diaphragm.
Seat leaking (16)
Replace ball (20), seat, and gasket
(15).
Pressure drops below setting
Damaged or clogged air regulator or
line (214–980 only)
Clear obstruction in line, service regu
-
lator if necessary
.
Empty/clogged supply line Fill/flush supply line.
Clogged air spray gun or fluid dis
-
pensing valve.
Replace, see gun or valve manual for
service instructions.
Using regulator beyond its rated flow
capacity
, see the T
echnical Data on
Page 14.
Install additional regulators.
8307–212
Service
WARNING
T
o reduce the risk of serious injury whenever you
are instructed to relieve pressure, always follow the
Pressure Relief Procedure
on page 5.
1.
Shut of
f the pump.
2.
Close the ball valve at the regulator
’
s air inlet.
Refer to Fig. 2.
3.
Release all the air and fluid pressure in the regula
-
tor and disconnect the air and fluid lines.
4.
Remove the swivel union (23) and spring (40) from
the regulator body
.
5.
Remove the ball (20), seat (16), and gasket (15).
See Fig. 4.
CAUTION
Use special care when handling the hard carbide ball
(20) and seat (16) to avoid damaging them.
6.
Remove the six cap screws (1) while holding the
regulator cap (7) to the housing (6).
7.
Remove the retaining screw (10), jam nut (13) and
washer (17) from the stem housing (18).
8.
Remove the diaphragm (22) and gasket (26).
9.
Remove the spring (3), valve stem (9), and gasket
(21) from the stem housing (18).
10.
Thoroughly clean and inspect all parts. Replace
any parts that appear to be worn or damaged.
11.
One at a time, place the gasket (26), diaphragm
(22) –
white side down toward the bottom
housing,
and washer (17) on the stem housing
(18). Secure them with the jam nut (13). T
orque
the jam nut onto the stem housing to 21–35 ft-lb
(28–47 N
Sm).
12.
Install the valve stem (9), spring (3), gasket (21),
and retaining screw (10) in the stem housing (18).
T
orque the retaining screw into the housing to
90–1
10 in-lb (10–12 N
Sm).
13.
Install the assembled parts in the housing (6).
14. T
ighten the air line fitting (29) into the cap (7).
T
orque to 21–35 ft-lb (28–47 N
Sm).
15.
Install the cap (7). T
ighten the six cap screws (1) in
the sequence shown in Fig. 4,
Bottom V
iew
, and
to the torque noted.
16.
Install the gasket (15), valve seat (16), and ball
(20) into the housing (6).
NOTE:
Seat may be turned upside down and reused.
17.
Screw the swivel union (23), with the o-ring at
-
tached and the spring (40) in place, into the inlet.
T
orque to 23–27 ft-lb (31–36 N
Sm).
29
10
13
23
7
117
22
26
18
9
15
16
4
20
40
621 3
NOTE: Numbers indicate tightening sequence. T ighten
evenly
to 7–10 in-lb (0.8–1.1 N
S
m), then retorque to
125
in-lb (14 N
S
m) three times, consecutively
, to com
-
pensate
for diaphragm relaxation.
Model 214–980
5
2
4
6
1
3
BOTTOM VIEW
Air
Bleed Hole
Fig.
4
1
3
2
Torque
to
21–35 ft-lb
(28–47
N
Sm)
1
1
Torque
to 90–1
10 in-lb
(10–12
N
Sm) 2
Torque
to
23–27 ft-lb
(31–36
N
Sm)
3
PTFE
9307–212
Service
Service of the Spring Operated Regulators
WARNING
To
reduce the risk of serious injury whenever you
are instructed to relieve pressure, always follow the
Pressure Relief Procedure
on page 5.
1.
Shut of
f the pump.
2.
Close the ball valve at the regulator
’
s air inlet. See
Fig. 1.
3.
Release all the air and fluid pressure in the regula
-
tor and disconnect the fluid line.
4.
Remove the regulator from the system.
5.
Close the regulator by engaging the internal hex
portion of the key (24) with the adjusting screw
(12) and turning it counterclockwise all the way
.
See Fig. 3.
6.
Remove the swivel union (23) from the regulator
inlet.
7.
Remove the ball (20), valve seat (16), and gasket
(15). See Fig. 5.
CAUTION
Use special care when handling the hard carbide ball
(20) and seat (16) to avoid damaging them.
8.
Remove the six cap screws (1) while holding the
cap (7) to the housing (6).
9.
Remove the cap, adjusting screw (12) and spring
(5).
10.
Remove the stem retaining screw (10), ham nut
(13), and washer (17) from the stem housing (18).
11.
Remove the diaphragm (25) –
on Models 217–314
and 221–1
18 only
,
diaphragm (22), and gasket
(26).
12.
Remove the spring (3), valve stem (9) and gasket
(21) from the stem housing.
13.
Thoroughly clean and inspect all parts. Replace
any parts that appear to be worn or damaged.
14.
One at a time, place the gasket (26), diaphragm
(22) –
white side down toward bottom
housing,
diaphragm (25) –
on Models 217–314
and 221–1
18 only
,
and washer (17) on the stem
housing (18). Secure them with the jam nut (13).
NOTE:
On Models 217–314 and 221–1
18,
align the
holes on the diaphragms (25 & 22) before tightening
the jam nut (13).
Models 214–895 and 214–706 Only
T
orque the jam nut (13) onto the stem housing to
21–35 ft-lb (28–47 N
Sm).
Model 217–314 and 221–1
18 Only
T
orque the jam nut (13) onto the stem housing (18) to
21–35 ft-lb (28–47 N
Sm).
15.
Install the valve stem (9), spring (3), gasket (21)
and retaining screw (10) in the stem housing (18).
Models 214–895 and 214–706 Only
T
orque the retaining screw (10) into the housing to
90–1
10 in-lb (10–12 N
Sm).
Model 271–814 and 221–1
18 Only
T
orque the retaining screw (10 into the housing to
21–25 ft-lb (28–34 N
Sm).
16.
Coat the outer surfaces of the spring (5) with no. 2
lithium base grease.
17.
Install the spring, adjusting screw (12) and cap on
the housing (6). T
ighten six capscrews (1) in the
sequence shown in Fig. 5,
Bottom V
iew
, and to
the torque noted.
18.
Install the gasket (15), valve seat (16), and ball
(20) into the housing (6).
NOTE:
Seat may be turned upside down and reused.
19.
Screw the swivel union (23), with the o-ring (4)
attached, into the inlet. T
orque to 23–27 ft-lb
(31–36 N
Sm).
PTFE
10 307–212
Service
10
Models 217–314
and 221–118
Models 214–895
and 214–706
21
12
13
22
25
17
26
3
15
16
23
40
6
9
18
4
20
1
7
10
21
12
13
22
17
26
3
15
16
23
40
6
9
18
4
20
1
7
5
2
4
6
1
3
BOTTOM VIEW
Mylarr
NOTE: Numbers indicate tightening sequence. T ighten
evenly
to 7–10 in-lb (0.8–1.1 N
S
m), then
retorque
to
125 in-lb (14 N
S
m) three times, consecutively
,
to
compensate for diaphragm relaxation.
Fig.
5
1
3
4
2
5
Torque
to 21–25 ft-lb
(28–34 N
Sm)
1
Torque
to
21–35 ft-lb
(28–47
N
Sm)
2
2
Torque
to
23–27 ft-lb
(31–36
N
Sm)
3
Torque
to 90–1
10
in-lb
(10–12
N
Sm)
4
r
side down
toward housing (6)
5
5
3
PTFE
11307–212
Parts
24
7
19
14
12
11
5
10
*21
*3
*9
27
28 23
4*
*15
*16
*20
40*
1
6
18
26*
22*
17
13
Model 214–895, Series G
Without
gauge. Includes items 1–26, 40
Model 214–706, Series G
With
gauge. Includes items 1–40
Model
214–706 only
Ref
No. Part No. Description Qty.
1 100–644 SCREW
, soc hd cap;
0.25”–20 x 0.75”
6
3* 111–736 SPRING, compression 1
4* 104–319 O-RING, 1
5 105–291 SPRING, compression 1
6 187–880 HOUSING; stainless steel 1
7 176–135 CAP
, regulator
1
9* 187–851 STEM, valve 1
10 188–004 SCREW
, retaining
1
11 171–855 NUT
, adjustment
1
12 176–691 SCREW
, adjustment
1
13 171–858 NUT
, jam; special
1
14 176–692 WASHER, flat 1
15* 171–860 GASKET
, seat
1
16* 185–467 SEAT
, valve; tungsten carbide
1
17 171–862 W
ASHER, diaphragm
1
Ref
No. Part No. Description Qty.
18 187–879 HOUSING, stem 1
19 176–136 SCREW
, adjustment
1
20* 102–922
BALL; tungsten carbide
1
21* 171–867 GASKET 1
22* 171–868 DIAPHRAGM; 
with nylon
fabric/Buna-N base
1
23 235–209 UNION, swivel 1
24 215–393 KEY
, regulator
1
26* 172–132 GASKET
; cellulose fibre
1
27 187–874 GAUGE, pressure; stainless steel;
100 psi (0.7 MPa, 7 bar)
(214–706 only)
1
28 187–877 TUBE, riser
(
214–706 only)
1
40* 111–858 SPRING, compression 1
* Included in Repair Kit 222–651.
PTFE
PTFE
12 307–212
Parts
24
7
19
14
12
11
5
10
*21
*3
*9
27
28
23
4*
*15
*16
*20
40*
1
6
32
18
26*
25*
17
13
Model
221–1
18 only
Model 217–314, Series E
With
gauge. Includes items 1–32, 40
Model 221–1
18, Series D
Without
gauge. Includes items
1–26, 32–40
22*
Model
217–31
4
only
39
Model
217–314
only
Ref
No. Part No. Description Qty.
1 100–644 SCREW
, soc hd cap;
0.25”–20 x 0.75”
6
3* 111–736 SPRING, compression 1
4* 104–319 O-RING, 1
5 106–480 SPRING, compression 1
6 187–880 HOUSING; stainless steel 1
7 176–135 CAP
, regulator
1
9* 187–851 STEM, valve 1
10 188–004 SCREW
, retaining
1
11 171–855 NUT
, adjustment
1
12 176–691 SCREW
, adjustment
1
13 171–858 NUT
, jam; special
1
14 176–692 WASHER, flat 1
15* 171–860 GASKET
, seat
1
16* 185–467 SEAT
, valve; tungsten carbide
1
17 171–862 W
ASHER, diaphragm
1
18 187–879 HOUSING, stem 1
Ref
No. Part No. Description Qty.
19 176–136 SCREW
, adjustment
1
20* 102–922
BALL; tungsten carbide
1
21* 171–867 GASKET 1
22* 180–052 DIAPHRAGM; 1
23 235–209 UNION, swivel 1
24 215–393 KEY
, regulator
1
26* 172–132 GASKET
; cellulose fibre
1
27 187–876 GAUGE, pressure; stainless steel;
300 psi (2.1 MPa, 21 bar)
(217–314 only)
1
28 187–877 TUBE, riser (
214–706 only)
1
32 235–207
ADAPTER, straight union
(217–314 only)
1
39 111–697
PLUG, pipe; 1/4 npt(m);
(221–1
18 only)
1
40* 111–858 SPRING, compression 1
* Included in Repair Kit 222–652.
PTFE
PTFE
13307–212
Parts
Model 214–980 Series E
Includes
items 1–40
*9
7
29
10
*21
*3
27
28
*15
*16
*20 40*
4*
23
1
18
26*
22*
17
13
6
Ref
No. Part No. Description Qty.
1 100–644 SCREW
, soc hd cap;
0.25”–20 x 0.75”
6
3* 111–736 SPRING, compression 1
4* 104–319 O-RING, r1
5 106–480 SPRING, compression 1
6 187–880 HOUSING; stainless steel 1
7 176–135 CAP
, regulator
1
9* 187–851 STEM, valve 1
10 188–004 SCREW
, retaining
1
13 171–858 NUT
, jam; special
1
15* 171–860 GASKET
, seat
1
16* 185–467 SEAT
, valve; tungsten carbide
1
17 171–862 W
ASHER, diaphragm
1
Ref
No. Part No. Description Qty.
18 187–879 HOUSING, stem 1
20* 102–922
BALL; tungsten carbide
1
21* 171–867 GASKET 1
22* 171–868 DIAPHRAGM; r with
nylon fabric/Buna-N base
1
23 235–209 UNION, swivel 1
26* 172–132 GASKET
; cellulose fibre
1
27 187–875 GAUGE, pressure; stainless steel;
30 psi (210 kPa, 2.1 bar)
1
28 187–877 TUBE, riser 1
29 176–463
FITTING, air line
1
40* 111–858 SPRING, compression 1
* Included in Repair Kit 222–651.
PTFE
PTFE
14 307–212
Dimensions
4.94”
(125.5 mm)
1.76” (44.7 mm)
1.8” (46 mm)
3/8 npsm INLET
3.65” (93 mm) DIA.
3/8 npt(f) OUTLET
1/4 npt
GAUGE PORT
10.25”
(260 mm)
1/4 npt AIR INLET
(Model 214–980 only)
3/8 npt(m) ADAPTER OUTLET
(Model 217–314 only)
Technical
Data
Category Data
Maximum
Fluid Inlet Pressure
250 psi (1.8 MPa, 18 bar)
Regulated Fluid Pressure Range
Model 217–314 & 221–1
18
Model 214–706 & 214–895
Model 214–980
20–160 psi (0.15–1.1 MPa, 1.5–1
1 bar)
5–100 psi (30–700 MPa, 0.3–7.0 bar)
0–30 psi (0–210 kPa, 0–2 bar)
Maximum Flow Capacity
3 gpm (1
1 liters/min) with 70 cps fluid at 200 psi (1.4 MPa, 14 bar)
inbound pressure
W
etted Parts
T
ungsten Carbide, Acetal Resins,
r
, 304 & 316 Series Stain
-
less Steel, Nylon
*
and Mylar
r
Manual
Change Summary
DThis
manual was revised to include the changes from PCN T
.
PTFE
PTFE
15307–212
Performance
Chart
0
10
20
30
40
50
60
70
80
90
100
110
120
130
140
150
160
012345
FLUID FLOW
kPa
bar
psi
gpm
liters/min
0
10
20
30
40
50
60
70
80
90
100
012345
3.82 7.62 11.42 15.22 22.10
liters/min
3.82 7.62 11.42 15.22 22.10
gpm
FLUID FLOW
MODELS
217–314
AND 221–1
18
MODELS
214–706,
214–895,
AND 214–980
kPa
bar
psi
250
PSI INLET
,
600 CPS
250 PSI INLET
,
65 CPS
250 PSI INLET
,
65 CPS
100 PSI INLET
,
600 CPS
100 PSI INLET
,
65 CPS
250 PSI INLET
,
600 CPS
250 PSI INLET
,
65 CPS
100 PSI INLET
,
600 CPS
100 PSI INLET
,
65 CPS
250 PSI INLET
,
600 CPS
250 PSI INLET
,
65 CPS
100 PSI INLET
,
600 CPS
100 PSI INLET
,
65 CPS
250 PSI INLET
,
600 CPS
250 PSI INLET
,
65 CPS
0.7
1.4
2.1
2.8
3.4
4.1
4.8
5.5
6.2
7.0
0.7
1.4
2.1
2.8
3.4
4.1
4.8
5.5
6.2
7.0
7.7
8.4
9.1
9.8
10.4
11.1
700
620
550
480
410
345
280
210
140
70
1110
1040
980
910
840
770
700
620
550
480
410
345
280
210
140
70
16 307–212
The
Graco W
arranty
Graco
warrants all equipment listed in this manual which is manufactured by Graco and bearing its name to be free from defects in
material
and workmanship on the date of sale by an authorized Graco distributor to the original purchaser for use. With the exception
of
any
special extended or limited warranty published by Graco, Graco will,
for a period of twelve months from the date of sale, repair or
replace
any part of the equipment determined by Graco to be defective. This warranty applies only when the
equipment is installed,
operated
and maintained in accordance with Graco’
s written recommendations.
This
warranty does not cover
, and Graco shall not be liable
for general wear and tear
, or any malfunction, damage or wear caused by
faulty installation, misapplication, abrasion, corrosion, inadequate or improper maintenance, negligence, accident, tampering, or
substitution
of non-Graco component parts. Nor shall Graco be liable for malfunction, damage or wear caused by the incompatibility of
Graco
equipment with structures, accessories, equipment or materials not supplied by Graco, or the
improper design, manufacture,
installation,
operation or maintenance or structures, accessories, equipment or materials not supplied by Graco.
This
warranty is conditioned upon the prepaid return of the equipment claimed to be defective to an authorized Graco distributor for
verification
of the claimed defect. If the claimed defect is verified, Graco will repair or replace free of charge any defective parts. The
equipment
will be returned to the original purchaser transportation prepaid. If inspection of the equipment does not disclose any defect
in
material or
workmanship, repairs will be made at a reasonable charge, which charges may include the costs of parts, labor
, and
transportation.
Graco’s
sole obligation and buyer
’
s sole remedy for any breach of warranty shall be as set forth above.
The buyer agrees that no other
remedy (including, but not limited to, incidental or consequential damages for lost
profits,
lost sales, injury to person or property
, or any
other incidental or consequential loss) shall be available. Any action for breach of warranty must be brought within two
(2)
years of the
date
of sale.
GRACO
MAKES NO W
ARRANTY
, AND DISCLAIMS ALL
IMPLIED W
ARRANTIES OF MERCHANT
ABILITY AND FITNESS FOR
A
P
ARTICULAR PURPOSE IN CONNECTION WITH ACCESSORIES, EQUIPMENT
, MA
TERIALS OR COMPONENTS SOLD BUT
NOT MANUFACTURED BY GRACO. These items sold, but not manufactured by Graco (such as electric motors, gas engines,
switches,
hose, etc.), are subject to the warranty
, if any
, of their manufacturer
. Graco will provide purchaser with reasonable assistance
in
making any claim for breach of these warranties.
In
no event will Graco be liable for indirect, incidental, special or consequential damages resulting from Graco supplying equipment
hereunder,
or the furnishing, performance, or use of any products or other goods sold hereto, whether due to a breach of contract,
breach
of warranty
, the negligence of Graco, or otherwise.
FOR
GRACO CANADA CUST
OMERS
The
parties acknowledge that they have required that the present document, as well as all documents, notices and legal proceedings
entered into, given or instituted pursuant hereto or relating directly or indirectly hereto, be drawn up in English. Les parties
reconnaissent
avoir convenu que la rédaction du présente document sera en Anglais,
ainsi que tous documents, avis et procédures
judiciaires
exécutés, donnés ou intentés à la suite de ou en rapport, directement ou indirectement, avec les procédures concernées.
Graco
Phone Number
TO
PLACE AN ORDER
, contact your Graco distributor
, or call this number to identify the distributor closest to you:
1–800–367–4023 T
oll Free.
All
written and visual data contained in this document reflects the latest product information available at the time of publication.
Graco reserves the right to make changes at any time without notice.
Sales Offices:
Minneapolis, Detroit, Los Angeles
Foreign Offices:
Belgium, Canada, England, Korea, France, Germany
, Hong Kong, Japan
GRACO INC. P.O. BOX 1441
MINNEAPOLIS, MN
55440–1441
PRINTED
IN U.S.A. 307–212 May 1975, Revised June 1997

Other manuals for G Series

2

This manual suits for next models

7

Other Graco Controllers manuals

Graco Series A User manual

Graco

Graco Series A User manual

Graco 25R487 Parts list manual

Graco

Graco 25R487 Parts list manual

Graco InvisiPac User manual

Graco

Graco InvisiPac User manual

Graco 248921 310798D Parts list manual

Graco

Graco 248921 310798D Parts list manual

Graco 217314 Operation manual

Graco

Graco 217314 Operation manual

Graco BDS Operation manual

Graco

Graco BDS Operation manual

Graco 25T478 Parts list manual

Graco

Graco 25T478 Parts list manual

Graco LineLazer 25A493 User manual

Graco

Graco LineLazer 25A493 User manual

Graco P20-VM User manual

Graco

Graco P20-VM User manual

Graco 311595C Parts list manual

Graco

Graco 311595C Parts list manual

Graco 24H002 A Series Operation manual

Graco

Graco 24H002 A Series Operation manual

Graco C Series User manual

Graco

Graco C Series User manual

Graco 115123 Datasheet

Graco

Graco 115123 Datasheet

Graco GLC 4400 User manual

Graco

Graco GLC 4400 User manual

Graco ProMix 2KS Operating instructions

Graco

Graco ProMix 2KS Operating instructions

Graco 214895 Operation manual

Graco

Graco 214895 Operation manual

Graco 26A814 User manual

Graco

Graco 26A814 User manual

Graco SERIES F Operation manual

Graco

Graco SERIES F Operation manual

Graco 238889 Operation manual

Graco

Graco 238889 Operation manual

Graco 308950 Operation manual

Graco

Graco 308950 Operation manual

Graco ProControl 1KS Instruction Manual

Graco

Graco ProControl 1KS Instruction Manual

Graco 24E025 Operation manual

Graco

Graco 24E025 Operation manual

Graco 237160 User manual

Graco

Graco 237160 User manual

Graco 24F472 Instruction Manual

Graco

Graco 24F472 Instruction Manual

Popular Controllers manuals by other brands

Omron TRAJEXIA-PLC manual

Omron

Omron TRAJEXIA-PLC manual

AMX ProLink PRO-DP8 instruction manual

AMX

AMX ProLink PRO-DP8 instruction manual

Sunricher SR-2812 user manual

Sunricher

Sunricher SR-2812 user manual

Renson TouchDisplay user manual

Renson

Renson TouchDisplay user manual

Fubag MICRO 80/12 Operator's manual

Fubag

Fubag MICRO 80/12 Operator's manual

hotset hotcontrol C248 operating instructions

hotset

hotset hotcontrol C248 operating instructions

Dimplex CABC1 Installation and operating instructions

Dimplex

Dimplex CABC1 Installation and operating instructions

Victron energy BlueSolar manual

Victron energy

Victron energy BlueSolar manual

LINK-MI LM-TV10 user manual

LINK-MI

LINK-MI LM-TV10 user manual

Lumens VS-KB30 user manual

Lumens

Lumens VS-KB30 user manual

ASCO Numatics 342 Series Installation & maintenance instructions

ASCO Numatics

ASCO Numatics 342 Series Installation & maintenance instructions

Sentera Controls SD Mounting and operating instructions

Sentera Controls

Sentera Controls SD Mounting and operating instructions

Martin Audio MX5 - V2 manual

Martin Audio

Martin Audio MX5 - V2 manual

Grape Solar GS-PWM-20A user manual

Grape Solar

Grape Solar GS-PWM-20A user manual

Hastings VT manual

Hastings

Hastings VT manual

Minikits M1 manual

Minikits

Minikits M1 manual

Carrier UC Open XP Installation and startup guide

Carrier

Carrier UC Open XP Installation and startup guide

Larson Electronics PTB-1-M-30C-4C instruction manual

Larson Electronics

Larson Electronics PTB-1-M-30C-4C instruction manual

manuals.online logo
manuals.online logoBrands
  • About & Mission
  • Contact us
  • Privacy Policy
  • Terms and Conditions

Copyright 2025 Manuals.Online. All Rights Reserved.