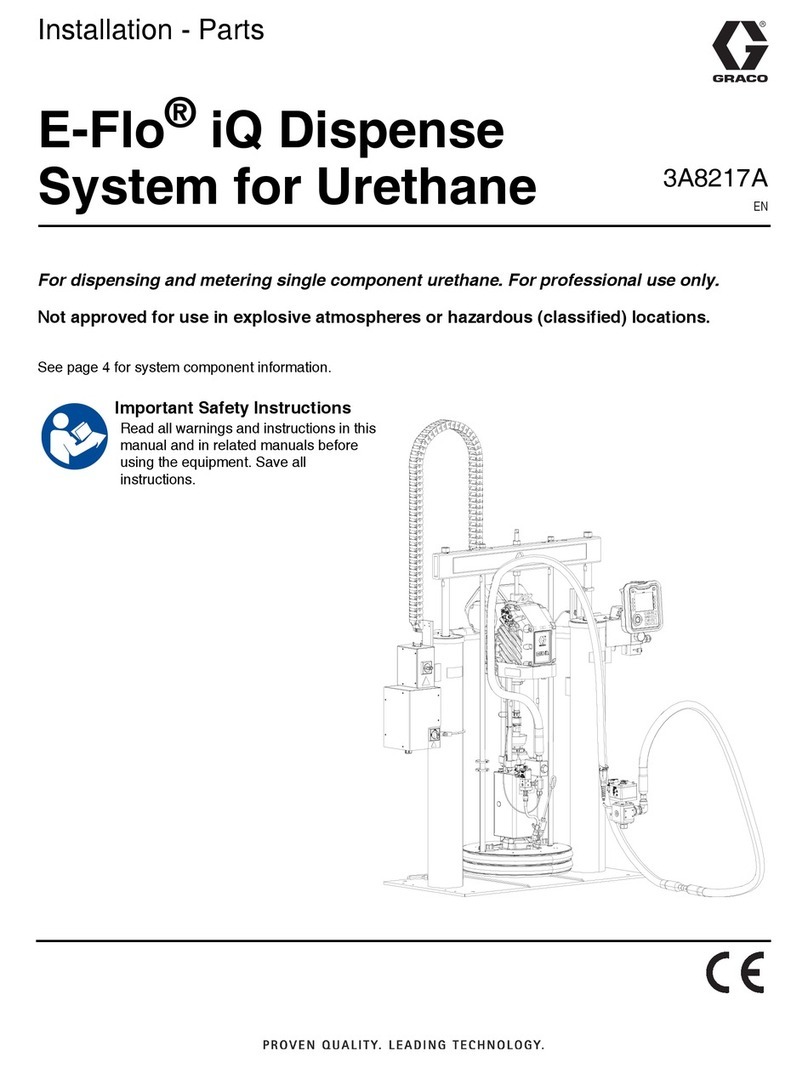
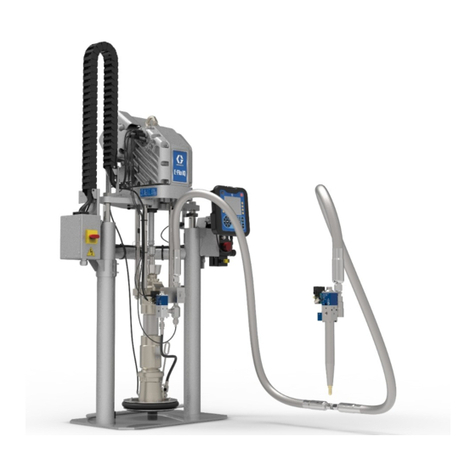
Graco E-Flo 333587D Instruction Manual

333587D
EN
Operation
E-Flo® iQ Dispense
System
For dispensing and metering sealants, adhesives, and other medium to high viscosity
fluids. For professional use only.
Not approved for use in explosive atmospheres or hazardous (classified) locations.
See page 5 for system component information.
Important Safety Instructions
Read all warnings and instructions in
this manual and in all related manuals
before using the equipment. Save all
instructions.

2 333587D
Contents
Related Manuals . . . . . . . . . . . . . . . . . . . . . . . . . . . . 3
Dispense System Configurator . . . . . . . . . . . . . . . . 4
Dispense System Components. . . . . . . . . . . . . . . . 5
iQ Ram Supply Units . . . . . . . . . . . . . . . . . . . . . . 5
iQ Dispense Valves . . . . . . . . . . . . . . . . . . . . . . . 6
Hose Options . . . . . . . . . . . . . . . . . . . . . . . . . . . . 6
Dispense System Pressure . . . . . . . . . . . . . . . . . . . 7
Warnings . . . . . . . . . . . . . . . . . . . . . . . . . . . . . . . . . . 8
Dispense System Component Identification . . . . 11
Tandem Ram . . . . . . . . . . . . . . . . . . . . . . . . . . . 12
Supply Unit Component Identification . . . . . . . . . 13
iQ Ram Supply Unit . . . . . . . . . . . . . . . . . . . . . . 13
Power Disconnect . . . . . . . . . . . . . . . . . . . . . . . 14
Integrated Air Controls (AG) . . . . . . . . . . . . . . . . 15
Integrated Air Line Accessories . . . . . . . . . . . . . 15
Advanced Display Module (ADM) . . . . . . . . . . . 16
ADM Display Details. . . . . . . . . . . . . . . . . . . . . . . . 17
ADM LED Status Descriptions . . . . . . . . . . . . . . 19
ADM Icons . . . . . . . . . . . . . . . . . . . . . . . . . . . . . 19
ADM Soft Keys. . . . . . . . . . . . . . . . . . . . . . . . . . 20
iQ Menu . . . . . . . . . . . . . . . . . . . . . . . . . . . . . . . . . . 22
Setup . . . . . . . . . . . . . . . . . . . . . . . . . . . . . . . . . . . . 23
System Setup Screen . . . . . . . . . . . . . . . . . . . . 23
Style Definitions . . . . . . . . . . . . . . . . . . . . . . . . . 24
Pump Settings . . . . . . . . . . . . . . . . . . . . . . . . . . 26
Heat Settings . . . . . . . . . . . . . . . . . . . . . . . . . . . 28
Advanced Setup . . . . . . . . . . . . . . . . . . . . . . . . 32
Connect Light Tower Assembly . . . . . . . . . . . . . 34
Startup. . . . . . . . . . . . . . . . . . . . . . . . . . . . . . . . . . . 35
Flush the Pump . . . . . . . . . . . . . . . . . . . . . . . . . 35
Load Material . . . . . . . . . . . . . . . . . . . . . . . . . . . 36
Tandem Priming when Changing Drums . . . . . . 38
Operation. . . . . . . . . . . . . . . . . . . . . . . . . . . . . . . . . 39
Ram Run Screen . . . . . . . . . . . . . . . . . . . . . . . . 39
Tandem Run Screen. . . . . . . . . . . . . . . . . . . . . . 40
Run Screen Editing Mode . . . . . . . . . . . . . . . . . 43
Heat Run Screen . . . . . . . . . . . . . . . . . . . . . . . . 44
Job Log . . . . . . . . . . . . . . . . . . . . . . . . . . . . . . . 46
Events and Errors. . . . . . . . . . . . . . . . . . . . . . . . 47
Pressure Relief Procedure. . . . . . . . . . . . . . . . . . . 48
Shutdown the System . . . . . . . . . . . . . . . . . . . . . . 49
Maintenance . . . . . . . . . . . . . . . . . . . . . . . . . . . . . . 50
Pump Maintenance Screen 1. . . . . . . . . . . . . . . 50
Pump Maintenance Screen 2. . . . . . . . . . . . . . . 51
Diagnostics . . . . . . . . . . . . . . . . . . . . . . . . . . . . . . . 52
Pump Diagnostics Screen . . . . . . . . . . . . . . . . . 52
Heat Diagnostics Screen . . . . . . . . . . . . . . . . . . 52
Pressure Diagnostics Screen . . . . . . . . . . . . . . . 53
Troubleshooting . . . . . . . . . . . . . . . . . . . . . . . . . . . 54
View Errors . . . . . . . . . . . . . . . . . . . . . . . . . . . . . 54
Troubleshoot Errors . . . . . . . . . . . . . . . . . . . . . . 55
Error Codes . . . . . . . . . . . . . . . . . . . . . . . . . . . . 56
USB Data . . . . . . . . . . . . . . . . . . . . . . . . . . . . . . . . . 65
Download Procedure . . . . . . . . . . . . . . . . . . . . . 65
USB Logs . . . . . . . . . . . . . . . . . . . . . . . . . . . . . . 65
Event Log . . . . . . . . . . . . . . . . . . . . . . . . . . . . . . 65
Job Log . . . . . . . . . . . . . . . . . . . . . . . . . . . . . . . 66
Automation Log . . . . . . . . . . . . . . . . . . . . . . . . . 66
System Configuration Settings. . . . . . . . . . . . . . 66
Custom Language File . . . . . . . . . . . . . . . . . . . . 66
Create Custom Language Strings . . . . . . . . . . . 67
Upload Procedure . . . . . . . . . . . . . . . . . . . . . . . 67
Integration . . . . . . . . . . . . . . . . . . . . . . . . . . . . . . . . 68
Discrete Inputs/Outputs . . . . . . . . . . . . . . . . . . . 68
Job Cycle Timing Diagram . . . . . . . . . . . . . . . . . 70
Discrete Timing Diagram . . . . . . . . . . . . . . . . . . 71
Communications Gateway Module (CGM). . . . . 72
Prime Diagram . . . . . . . . . . . . . . . . . . . . . . . . . . 92
Depressurize Diagram . . . . . . . . . . . . . . . . . . . . 93
System Enable - Remote Start Diagram . . . . . . 94
Acknowledge - Clear Error Diagram. . . . . . . . . . 95
Manual Crossover Diagram . . . . . . . . . . . . . . . . 96
Data Exchange Diagram. . . . . . . . . . . . . . . . . . . 96
Power Reset Diagram. . . . . . . . . . . . . . . . . . . . . 97
Heat CGM Timing Diagram . . . . . . . . . . . . . . . . 97
Heat Module Acknowledge-Clear Error Diagram 98
Heat Zone Acknowledge-Clear Error Diagram . . 99
Heat CGM Data Exchange Diagram. . . . . . . . . 100
Connection Details . . . . . . . . . . . . . . . . . . . . . . 101
Gateway Setup Screens. . . . . . . . . . . . . . . . . . 104
Integration Feedback Screens . . . . . . . . . . . . . 107
Technical Specifications . . . . . . . . . . . . . . . . . . . 108
Recycling and Disposal . . . . . . . . . . . . . . . . . . . . 109
End of Product Life. . . . . . . . . . . . . . . . . . . . . . 109
California Proposition 65 . . . . . . . . . . . . . . . . . . . 109
Graco Standard Warranty. . . . . . . . . . . . . . . . . . . 110
Related Manuals
333587D 3
Related Manuals
Related manuals in English:
Manual Description
333585 iQ Dispense Valves, Instructions-Parts
333586 E-Flo iQ Dispense System, Installation-Parts
3A6321 ADM Token In-System Programming
312493 Light Tower Kit Instructions
3A1244 Graco Control Architecture Module
3A6482 APD20 Advanced Precision Driver
313138 Supply System Communications Gateway
Module Installation Kit

Dispense System Configurator
4 333587D
Dispense System Configurator
The E-Flo iQ dispense system provides the flexibility to configure a complete system to meet your specific needs.
This includes offering multiple combinations of the following components:
• iQ Ram Supply Units
• iQ Dispense Valves
• Hoses and connectors
For dispense system component information, see Dispense System Components on page 5.
KEY:
First,
Second
and
Third
Digit
Fourth
Digit Fifth
Digit Sixth Digit
Seventh
Digit
Eighth Digit
Ninth Digit
Digits Ten
through
Seventeen
Digits
Eighteen
through
Twenty Seven
Ram Supply Unit Options
Single or
Tandem
Heat
Option
Platen
Valve
Option Size
Drum
Size
Pump
Materia
l
Seal
Material
Fieldbus
Option
EQC
E-Flo iQ
System
Revision SSingle HHeated YYes
A3 in.
20 L
(5 Gal) CS EPDM
AEther-
Net/IP Hose
Options for
Tandem
Hoses (Dig-
its 10-13)
and Sup-
ply Hoses
(Digits
14-17)
(See Hose
Options on
page 6)
Valve Options
(See the iQ
Dispense
Valves Instruc-
tions - Parts
manual for
valve model
options)
TTan-
dem
AAmbient
B3 in.
20 L
(5 Gal) CS
Neo-
prene
BPROF-
INET
C3 in.
20 L
(5 Gal) CM EPDM
CPROFI-
BUS
D3 in.
20 L
(5 Gal) CM
Neo-
prene
DDevi-
ceNet
F3 in.
200 L
(55 Gal) CS EPDM
NNone
G3 in.
200 L
(55 Gal) CS
Neo-
prene
H3 in.
200 L
(55 Gal) CM EPDM
J3 in.
200 L
(55 Gal) CM
Neo-
prene
K6.5 in.
200 L
(55 Gal) CS EPDM
M6.5 in.
200 L
(55 Gal) CS
Neo-
prene
N6.5 in.
200 L
(55 Gal) CM EPDM
P6.5 in.
200 L
(55 Gal) CM
Neo-
prene
CS = Carbon Steel Severe Duty®
CM = Carbon Steel MaxLife®

Dispense System Components
333587D 5
Dispense System Components
NOTE: The Heated option for the E-Flo iQ system is for warm melt applications with a maximum temperature of 70° C
(158° F).
iQ Ram Supply Units
Check the identification plate (ID) on the back of the ram post near the Power Junction Box (AJ) for the seven-digit part
number of the iQ ram supply unit. Use the following matrix to define the construction of the unit, based on the seven dig-
its. For example, Part No. EZC2422 represents an electric supply unit (EZ), a carbon steel Check-Mate 200 Severe Duty
displacement pump (C2), a 3 in. ram (4), a 5-gallon platen with a neoprene seal (2), and an ADM (2).
The digits in the following matrix do not correspond to the reference numbers in the Parts drawings and lists.
KEY:
EZ C2 4 2 2
First
and
Second
Digit
Third and Fourth Digit Fifth Digit Sixth Digit
Seventh
Digit
Check-Mate Pump Options Ram Options Platen and Seal Options
Interface
Options
Size
Pump
Material
Heated/
Ambient Nam
e Size
Drum
Size Style
Platen
Size
Platen
Materia
l
Seal
Material Wiper
Heated/
Ambient
Interfac
e
EZ
(Electric
Supply
System)
C1 200cc CS Ambient
1D60 3 in.
20 L
(5 Gal)
Ambi-
ent 1
20 L
(5 Gal) CST/AL Neoprene
Single
Ring Ambient 2 ADM
C2 200cc CS Heated
<70° C 2D200 3 in.
200 L
(55 Gal)
Ambi-
ent 2
20 L
(5 Gal) CST/AL Neoprene
Single
Ring
Heated
<70° C 4 No ADM
C3 200cc CM Ambient
3D200s 6.5 in.
200 L
(55 Gal)
Ambi-
ent 3
20 L
(5 Gal) CST/AL EPDM
Single
Ring Ambient
C4 200cc CM Heated
<70° C 4D60 3 in.
20 L
(5 Gal)
Heated
<70° C 4
20 L
(5 Gal) CST/AL EPDM
Single
Ring
Heated
<70° C
5D200 3 in.
200 L
(55 Gal)
Heated
<70° C 5
200 L
(55
Gal) AL Neoprene
Double
Ring Ambient
6D200s 6.5 in.
200 L
(55 Gal)
Heated
<70° C 6
200 L
(55
Gal) AL Neoprene
Double
Ring
Heated
<70° C
7
200 L
(55
Gal) AL EPDM
Double
Ring Ambient
8
200 L
(55
Gal) AL EPDM
Double
Ring
Heated
<70° C
CS = Carbon Steel Severe Duty
CM = Carbon Steel MaxLife
CST/AL = Carbon Steel/Aluminum
AL = Aluminum

Dispense System Components
6 333587D
iQ Dispense Valves
Check the identification plate on the valve for the ten-digit part number of the iQ dispense valve. Use the following
matrix to define the construction of the valve, based on the ten digits. For example, Part No. V25AB060BA
represents a valve (V) with 1/4 in. NPT inlet ports (25), NPT tip (A), ball/seat type (B), 60 mm outlet block length
(060), solenoid (B), with no heat (A).
*Remote solenoid supplied by customer.
NOTE: Refer to the iQ Dispense Valves Instructions-Parts manual for additional information about iQ Dispense
Valves. See Related Manuals on page 3.
Hose Options
First
Digit
Second and
Third Digit Fourth Digit Fifth Digit
Sixth, Seventh,
and Eighth Digit Ninth Digit Tenth Digit
Size Tip Size Type
Outlet Block
Length Action Heat
V
25 1/4 in. NPT A1/4 in. NPT BBall/Seat 000 NA B
Valve
Mounted
Solenoid
ANone
C0.6 mm SSnuff-Back 060
60 mm
D
*Remote
Solenoid
Block
BHeated
D1.0 mm TTip Seal 200 200 mm
F1.3 mm
G1.7 mm
Part No. JIC Dash Size Length Heat
Working
Pressure
Temperature
Rating
04 19M404 -10 (5/8 in, 15.9 mm) 6 ft Heated
4000 psi (28
MPa, 276 bar) at
-65° F - 212° F
(-54° C - 100° C)
3000 psi (21
MPa, 207 bar) at
213° F - 400° F
(101° C - 204°
C)
05 19M405 -10 (5/8 in, 15.9 mm) 10 ft Heated
06 19M406 -10 (5/8 in, 15.9 mm) 15 ft Heated
07 19M407 -10 (5/8 in, 15.9 mm) 20 ft Heated
08 19M408 -10 (5/8 in, 15.9 mm) 25 ft Heated
11 19M411 -12 (3/4 in, 19.0 mm) 6 ft Heated
12 19M412 -12 (3/4 in, 19.0 mm) 10 ft Heated
13 19M413 -12 (3/4 in, 19.0 mm) 15 ft Heated
14 19M414 -12 (3/4 in, 19.0 mm) 20 ft Heated
15 19M415 -12 (3/4 in, 19.0 mm) 25 ft Heated
16 19M416 -16 (1 in, 25.4 mm) 6 ft Heated
17 19M417 -16 (1 in, 25.4 mm) 10 ft Heated
18 19M418 -16 (1 in, 25.4 mm) 15 ft Heated
19 19M419 -16 (1 in, 25.4 mm) 20 ft Heated
20 19M420 -16 (1 in, 25.4 mm) 25 ft Heated
65 17K265 -10 (5/8 in, 15.9 mm) 6 ft Ambient
4000 psi (28
MPa, 276 bar) at
-65° F - 400° F
(101° C - 204°
C)
66 17K266 -10 (5/8 in, 15.9 mm) 10 ft Ambient
67 17K267 -10 (5/8 in, 15.9 mm) 15 ft Ambient
68 17K268 -10 (5/8 in, 15.9 mm) 20 ft Ambient
69 17K269 -10 (5/8 in, 15.9 mm) 25 ft Ambient
72 17K272 -12 (3/4 in, 19.0 mm) 6 ft Ambient
73 17K273 -12 (3/4 in, 19.0 mm) 10 ft Ambient
74 17K274 -12 (3/4 in, 19.0 mm) 15 ft Ambient
75 17K275 -12 (3/4 in, 19.0 mm) 20 ft Ambient
76 17K276 -12 (3/4 in, 19.0 mm) 25 ft Ambient
77 17K277 -16 (1 in, 25.4 mm) 6 ft Ambient
78 17K278 -16 (1 in, 25.4 mm) 10 ft Ambient
79 17K279 -16 (1 in, 25.4 mm) 15 ft Ambient
80 17K280 -16 (1 in, 25.4 mm) 20 ft Ambient
81 17K281 -16 (1 in, 25.4 mm) 25 ft Ambient
00 No Hose N/A N/A N/A
Part No. JIC Dash Size Length Heat
Working
Pressure
Temperature
Rating

Dispense System Pressure
333587D 7
Dispense System Pressure
Due to factors such as the dispense system design, the
material being pumped, and the flow rate, the dynamic
pressure will not reach the rated working (stall) pressure
of the system.
Pump Working (Stall) Pressure Max Dynamic (Run) Pressure
Lower Size psi bar MPa psi bar MPa
Check-Mate
200CS/CM 4,000 290 29.0 3,905 269 26.9

Warnings
8 333587D
Warnings
The following warnings are for the setup, use, grounding, maintenance, and repair of this equipment. The
exclamation point symbol alerts you to a general warning and the hazard symbols refer to procedure-specific risks.
When these symbols appear in the body of this manual or on warning labels, refer back to these Warnings.
Product-specific hazard symbols and warnings not covered in this section may appear throughout the body of this
manual where applicable.
DANGER
SEVERE ELECTRIC SHOCK HAZARD
This equipment can be powered by more than 240 V. Contact with this voltage will cause death or
serious injury.
• Turn off and disconnect power at main switch before disconnecting any cables and before servicing
equipment.
• This equipment must be grounded. Connect only to grounded power source.
• All electrical wiring must be done by a qualified electrician and comply with all local codes and
regulations.
WARNING
SKIN INJECTION HAZARD
High-pressure fluid from dispensing device, hose leaks, or ruptured components will pierce skin. This
may look like just a cut, but it is a serious injury that can result in amputation. Get immediate surgical
treatment.
• Do not point dispensing device at anyone or at any part of the body.
• Do not put your hand over the fluid outlet.
• Do not stop or deflect leaks with your hand, body, glove, or rag.
• Follow the Pressure Relief Procedure when you stop dispensing and before cleaning, checking, or
servicing equipment.
• Tighten all fluid connections before operating the equipment.
• Check hoses and couplings daily. Replace worn or damaged parts immediately.

Warnings
333587D 9
MOVING PARTS HAZARD
Moving parts can pinch, cut or amputate fingers and other body parts.
• Keep clear of moving parts.
• Do not operate equipment with protective guards or covers removed.
• Equipment can start without warning. Before checking, moving, or servicing equipment, follow the
Pressure Relief Procedure and disconnect all power sources.
FIRE AND EXPLOSION HAZARD
Flammable fumes, such as solvent and paint fumes, in work area can ignite or explode. Paint or
solvent flowing through the equipment can cause static sparking. To help prevent fire and explosion:
• Use equipment only in well-ventilated area.
• Eliminate all ignition sources; such as pilot lights, cigarettes, portable electric lamps, and plastic
drop cloths (potential static sparking).
• Ground all equipment in the work area. See Grounding instructions.
• Never spray or flush solvent at high pressure.
• Keep work area free of debris, including solvent, rags and gasoline.
• Do not plug or unplug power cords, or turn power or light switches on or off when flammable fumes
are present.
• Use only grounded hoses.
• Hold gun firmly to side of grounded pail when triggering into pail. Do not use pail liners unless they
are anti-static or conductive.
•Stop operation immediately if static sparking occurs or you feel a shock. Do not use equipment
until you identify and correct the problem.
• Keep a working fire extinguisher in the work area.
EQUIPMENT MISUSE HAZARD
Misuse can cause death or serious injury.
• Do not operate the unit when fatigued or under the influence of drugs or alcohol.
• Do not exceed the maximum working pressure or temperature rating of the lowest rated system
component. See Technical Specifications in all equipment manuals.
• Use fluids and solvents that are compatible with equipment wetted parts. See Technical
Specifications in all equipment manuals. Read fluid and solvent manufacturer’s warnings. For
complete information about your material, request Safety Data Sheets (SDSs) from distributor or
retailer.
• Turn off all equipment and follow the Pressure Relief Procedure when equipment is not in use.
• Check equipment daily. Repair or replace worn or damaged parts immediately with genuine
manufacturer’s replacement parts only.
• Do not alter or modify equipment. Alterations or modifications may void agency approvals and
create safety hazards.
• Make sure all equipment is rated and approved for the environment in which you are using it.
• Use equipment only for its intended purpose. Call your distributor for information.
• Route hoses and cables away from traffic areas, sharp edges, moving parts, and hot surfaces.
• Do not kink or over bend hoses or use hoses to pull equipment.
• Keep children and animals away from work area.
• Comply with all applicable safety regulations.
WARNING

Warnings
10 333587D
SPLATTER HAZARD
Hot or toxic fluid can cause serious injury if splashed in the eyes or on skin. During blow off of platen,
splatter may occur.
• Use minimum air pressure when removing platen from drum.
TOXIC FLUID OR FUMES HAZARD
Toxic fluids or fumes can cause serious injury or death if splashed in the eyes or on skin, inhaled, or
swallowed.
• Read Safety Data Sheets (SDSs) to know the specific hazards of the fluids you are using.
• Store hazardous fluid in approved containers, and dispose of it according to applicable guidelines.
BURN HAZARD
Equipment surfaces and fluid that is heated can become very hot during operation. To avoid severe
burns:
• Do not touch hot fluid or equipment.
PERSONAL PROTECTIVE EQUIPMENT
Wear appropriate protective equipment when in the work area to help prevent serious injury, including
eye injury, hearing loss, inhalation of toxic fumes, and burns. Protective equipment includes but is not
limited to:
• Protective eyewear, and hearing protection.
• Respirators, protective clothing, and gloves as recommended by the fluid and solvent manufacturer.
WARNING

Dispense System Component Identification
333587D 11
Dispense System Component Identification
NOTE: Figure 1 shows a typical E-Flo iQ dispense
system installation with an iQ ram supply unit, hoses,
connectors, and an iQ dispense valve. Some
installations may require only one hose depending on
the needs of the system.
Key:
A iQ Ram Supply Unit
B iQ Dispense Valve
C First Hose from Supply System
D Second Hose to iQ Dispense Valve
E Ram Supply System Fitting to First Hose
F First Hose Fitting to Second Hose
G Second Hose Fitting to Swivel
H Swivel Fitting
J Swivel to Valve Fitting
* Applies to heated hoses only.
FIG. 1: E-Flo iQ Dispense System
A
B
C
D
E
H
G
J
F
*Circular
Electrical
Connection
*Square
Electrical
Connection
*Circular
Electrical
Connection
*Square
Electrical
Connection

Dispense System Component Identification
12 333587D
Tandem Ram
NOTE: FIG. 2 shows a typical E-Flo iQ dispense system
installation with a Tandem iQ ram supply unit, hoses,
connectors, and an iQ dispense valve. Some
installations may not require Supply Hose 2 (D) to iQ
Dispense Valve (B) depending on the needs of the
system.
Key:
A iQ Ram Supply Unit 1
B iQ Dispense Valve
C Supply Hose 1
D Supply Hose 2
E Tandem Block Fitting to Supply Hose 1
F Supply Hose 1 Fitting to Supply Hose 2
G Supply Hose 2 Fitting to Swivel
H Swivel Fitting
J Swivel Fitting to Valve
K iQ Ram Supply Unit 2
L Tandem Hose 1
M Tandem Hose 2
N Ram Supply Unit 1 Fitting to Tandem Hose 1
P Ram Supply Unit 2 Fitting to Tandem Hose 2
R Tandem Block
S Ball Valves
* Applies to heated hoses only.
FIG. 2: Tandem E-Flo iQ Dispense System
A
B
M
D
F
G
H
J
K
L
R
C
E
N
P
*Circular
Electrical
Connection *Square
Electrical
Connection
*Circular
Electrical
Connection
*Square
Electrical
Connection
*Circular
Electrical
Connection
S
S

Supply Unit Component Identification
333587D 13
Supply Unit Component Identification
iQ Ram Supply Unit
D200 3 in. Dual Post Shown
Key:
AA Ram Assembly
AB Electric Driver
AC Displacement Pump
AD Platen
AE Fluid Check Valve
AF Advanced Display Module (ADM)
AG Integrated Air Controls (see Figure 6)
AH Platen Bleed Port
AJ Power Junction Box
AK Power Junction Box Switch
AL Platen Lift Rod
AM Pump Bleed Valve
AN Wet Cup
AR Air Line (not supplied)
AS Air Line Drain Valve (not supplied)
AT Air Filter (not supplied)
AU Bleed Type Air Shutoff Valve (required) (not supplied)
AV Level Sensors
AW Outlet Pressure Transducer
AX *Heat Control Box
AY Platen Valve Kit (optional)
AZ Disconnect Switch (See Power Disconnect on page 14)
ZA *Pump Heater
ZB Recirculation Hose
ZC Pump Relief Valve
* Parts on heated systems only.
FIG. 3: iQ Ram Supply Unit
AU
AT
AS
AA
ZC
AV
AF
AG
AR
AN
AM
AD
AJ
AK
*AX
AL
*ZA
AZ
AY AC
AE
AW
ZB
Ambient System
AZ
Heated System
AZ
AK
AH
AB

Supply Unit Component Identification
14 333587D
Power Disconnect
Every E-Flo iQ Dispense System has a red and yellow
Disconnect Switch which shuts off power to the entire
system. The location of the switch is different for
ambient and heated systems. See Figure 4.
On ambient systems, the Disconnect Switch (AZ) is
located on the Power Junction Box (AJ).
On heated systems, the Disconnect Switch (AZ) is
located on the Heat Control Box (AX). Heated systems
also have a red and black Power Junction Box Switch
(AK) located on the Power Junction Box (AJ). The
Power Junction Box Switch (AK) removes power to
everything EXCEPT heat. The Disconnect Switch (AZ)
removes power to the entire system, including heat.
FIG. 4. Power Disconnect
AK
AZ
Heated System
AZ
Ambient System

Supply Unit Component Identification
333587D 15
Integrated Air Controls (AG)
The integrated air controls include:
•Main Air Slider Valve (BA): turns air on and off to
the system. When closed, the valve relieves pres-
sure downstream.
•Ram Air Regulator (BB): controls Ram up and
down pressure and blowoff pressure.
•Ram Director Valve (BC): controls Ram direction.
•Exhaust Port with Muffler (BD)
•Blowoff Button (BE): turns air on and off to push
the Platen (D) out of an empty drum.
Integrated Air Line Accessories
See FIG. 3.
•Air Line Drain Valve (AS): removes condensed
water from the air line. Not supplied.
•Air Line Filter (AT): removes harmful dirt and mois-
ture from the compressed air supply. Not supplied.
•Second Bleed-type Air Valve (AU) (required): iso-
lates Air Line accessories for servicing. Locate
upstream from all other Air Line accessories. Not
supplied.
FIG. 5. Integrated Air Control Module
BA
BB
BC
BE
BD
BD
1/4 NPT
Plug

Supply Unit Component Identification
16 333587D
Advanced Display Module (ADM)
Front and Rear Views
Key:
CA Startup/Shutdown
Starts up or shuts down the system. Toggles
between Active and Inactive system.
CB System Status Indicator LED
CC Pump Soft Stop
Stops all pump processes and disables the pump.
Also stops all heating processes and disables the
heat. This is not a safety or emergency stop.
CD Soft Keys
Defined by the icon on the screen next to the soft
key. Performs the specific operation for that icon
when pressed.
CE Cancel
Cancels a selection or number entry while in the
process of entering a number or making a
selection. Cancels the pump processes. Exits a
screen without saving changes.
CF Enter
Select to update a field, accept a selection or value,
acknowledge an event, enter a screen, and toggle
selected items.
CG Lock/Setup
Toggles between Run screens and the iQ Menu.
CH Directional Keypad
Navigate within a screen or to a new screen.
CJ Numeric Keypad
Input numeric values.
CK Part Number Identification Label
CL USB Interface
CM CAN Cable Connection
Power and communication.
CN Module Status LEDs
Visual indicators to show the status of the ADM.
CP Token Access Cover
Access cover for blue software token.
CR Battery Access Cover
CS Light Tower Connection
NOTE: If using a Tandem system, the AMD is only
included with the iQ Ram Supply Unit 1 (A)
FIG. 6: ADM Component Identification
CA
CB
CC
CD
CE
CF
CG
CH
CP
CK
CN CM
CL
CJ
CR
CS

ADM Display Details
333587D 17
ADM Display Details
Use the Blue Token
The E-Flo iQ system includes a blue token that must be
inserted into the ADM to initiate the E-Flo iQ software.
1. Remove the ADM from the bracket.
2. Use a hex wrench to remove the screws from the
token access cover (CP).
3. Remove the access cover (CP).
4. Insert and press the blue software token firmly into
the slot.
5. Replace the token access cover (CP) and insert and
tighten the screw that holds it in place.
6. Mount the ADM on the bracket.
Power Up Screen
This screen appears when the ADM is powered up.
Five seconds after the E-Flo iQ blue token is inserted
into the ADM, the Graco power up screen switches to
the E-Flo iQ power up screen. This screen remains on
while the ADM runs through initialization and
establishes communication with other modules in the
system.
Menu Bar
The Menu Bar appears at the top of each screen (the
following image is only an example).
Date and Time
The date and time are always displayed in one of the
following formats. The time is always displayed as a
24-hour clock.
•DD/MM/YY HH:MM
•YY/MM/DD HH:MM
•MM/DD/YY HH:MM
Navigation Arrows
The left and right arrows are only visible when screen
navigation is allowed.
CP
Blue Token
Date and Time Navigation
Arrows
Screen Menu
Status
System Mode

ADM Display Details
18 333587D
Screen Menu
The screen menu indicates the currently active screen,
which is highlighted. It also indicates the associated
screens that are available by scrolling left and right.
System Mode
The current system mode is displayed in the lower left
of the Menu Bar. System modes include: Pump Active,
Pump Inactive, Job in Cycle, Pre-charge, Heat Inactive,
Heat Off, Heat Soak, Heat at Temp, Heat in Setback.
Status
The current system status is displayed in the lower right
of the Menu Bar.
Alarm/Deviation
The current system error is displayed in the middle of
the Menu Bar. There are four possibilities.
Soft Keys
Icons next to the soft keys indicate which mode or
action is associated with each soft key. Soft keys that
do not have an icon next to them are not active in the
current screen. See Advanced Display Module on
page 16 and ADM Soft Keys on page 20.
Navigating the Screens
There are two types of screens:
Run screens control operations and display system
status and data.
Setup screens control system parameters and
advanced features. These screens are accessed
through the iQ Menu.
Press on any Run screen to switch to the iQ Menu
screens. If the system has a password lock, the
Password screen is displayed. If the system is not
locked (password is set to 0000), iQ Menu Screen 1 is
displayed. Refer to iQ Menu on page 22 for additional
information.
Press on any Setup screen to return to the Run
screen.
Press the Enter soft key to activate the editing
function on any screen.
Press the Exit soft key to exit the editing function
and save any changes.
Use the other soft keys to select the function adjacent
to them.
Use to exit a screen. Using this key while in
editing mode will exit the screen without saving
changes.
Use the keys on the ADM to move through the
settings on a screen or drop down menu and to scroll
through multiple screens on the right side of the
display.
Use the key to choose a field to update, to make a
selection, to save a selection or value, to enter a
screen, or to acknowledge an event.
Set Password
You can set passwords to protect access to some
selections on the iQ Menu screens. See iQ Menu on
page 22. It can also be used when changing from
Remote to Local control mode to protect against
inadvertently changing control modes. To set or
remove the password, select Advanced from iQ Menu
2. See Advanced Setup Screen 2 on page 32. Multiple
levels of passwords can be set up.
Icon Function
No Icon No information or no error has occurred
Advisory
Deviation
Alarm
NOTICE
To prevent damage to the soft key buttons, do not
press buttons with sharp objects such as pens,
plastic cards, or fingernails.

ADM Display Details
333587D 19
ADM LED Status Descriptions
ADM Icons
LED Conditions Description
System Status Green Solid Run Mode, System On
Green Flashing Setup Mode, System On
Yellow Solid Run Mode, System Off
Yellow Flashing Setup Mode, System Off
USB Status (CL) Green Flashing Data recording in progress
Yellow Solid Downloading information to USB
Green and Yellow Flashing ADM is busy, USB cannot transfer information
when in this mode
ADM Status (CN) Green Solid Power applied to module
Yellow Flashing Active Communication
Red Steady Flashing Software upload from token in progress
Red Random Flashing or Solid Module error exists
Icon Function
Alarm - See Troubleshooting, page 54
for more information.
Deviation - See Troubleshooting, page
54 for more information.
Advisory - See Troubleshooting, page
54 for more information.
Target for primary pressure and flow.
Only displayed in priming mode.
Communication Error
No issues found with parameter or
setting value
Missing or unexpected parameter or
setting value
System is processing request
(animated)
Pump position (animated). The pump
coupler will move up and down in real
time and indicate the approximate
position of the pump. The pump will
need to complete one full down stroke
upon each power cycle before the
position is valid.
Zone setpoint temperature showing the
temperature the zone heats too when
the heat is turned on.
Zone setback temperature showing the
setback the zone goes to when the heat
is in setback mode.
Icon Function

ADM Display Details
20 333587D
ADM Soft Keys
Icon Function
Pump Operation Icon
Green: Start the Pump
Inverted Green: Stop the Pump
Red with Border (enabled): Indicates
that the pump cannot be started due to
an alarm.
Red with No Border (not enabled):
Indicates that the system is not enabled
and the pump cannot be started.
Yellow: Indicates that the pump has an
active alarm but still allows the valve
and platen to be depressurized. The
pump can still be primed only if it is a
“pump not primed” alarm.
Enter or exit editing mode for a
particular screen.
Access the Style Definitions screens.
Access the Pump Setup screens.
Access the Heat Setup screens.
Access the Diagnostics function.
Access the Events logs.
Access the Errors logs.
Access the Job Log.
Access the Troubleshooting function.
Access the System Setup screen.
Access the Advanced System Setup
screens.
Access the Maintenance function.
Access the Fieldbus Gateway Setup
screens.
Access the Integration Feedback
screens.
Globalize selection. Apply a style
setting to all of the styles in Style
Definitions or a heat setting to all of the
heat zones in Heat Settings.
Confirm globalizing a setting.
Cancel globalizing a setting.
Access a keyboard screen to create or
change a style name.
Reset offsets to zero when calibrating
pressure transducers.
Tandem systems only. Toggle between
Pump 1 and Pump 2.
Local / Remote control toggle.
Pump is locked in remote control via
fieldbus interface.
Enter or exit pump priming mode. A “1”
or “2” will show on the icon in Tandem
systems to indicate which pump will be
primed.
Enter or exit drum depressurization
mode. (If equipped with optional fluid
solenoid.) A “1” or “2” will show on the
icon in Tandem systems to indicate
which pump will be depressurized.
Enter or exit valve depressurization
mode.
Turn heat zones on and off.
Icon Function
Table of contents
Other Graco Dispenser manuals

Graco
Graco PR70 Series Troubleshooting guide

Graco
Graco 239706 User manual

Graco
Graco 220107 A Series Operation manual

Graco
Graco E-flo iQ 26B543 User manual

Graco
Graco E-Flo User manual

Graco
Graco GX-16 User manual

Graco
Graco E-Flo iQ User manual

Graco
Graco 17F837 User manual

Graco
Graco 226289 User manual

Graco
Graco PCF Parts list manual

Graco
Graco ProMix PD2K Instruction Manual

Graco
Graco PR70 Series Use and care manual

Graco
Graco 17B587 User manual

Graco
Graco PR70e User manual

Graco
Graco REACTOR E-XP2 User manual

Graco
Graco Fluid Automation 633 Instruction Manual

Graco
Graco 24G769 User manual

Graco
Graco PCF Parts list manual

Graco
Graco 1093 Troubleshooting guide

Graco
Graco Reactor 2 H-30 User manual