manuals.online logo
Brands
  1. Home
  2. •
  3. Brands
  4. •
  5. Graff
  6. •
  7. Bathroom Fixture
  8. •
  9. Graff 8711 User manual

Graff 8711 User manual

IOG 5368.87 1
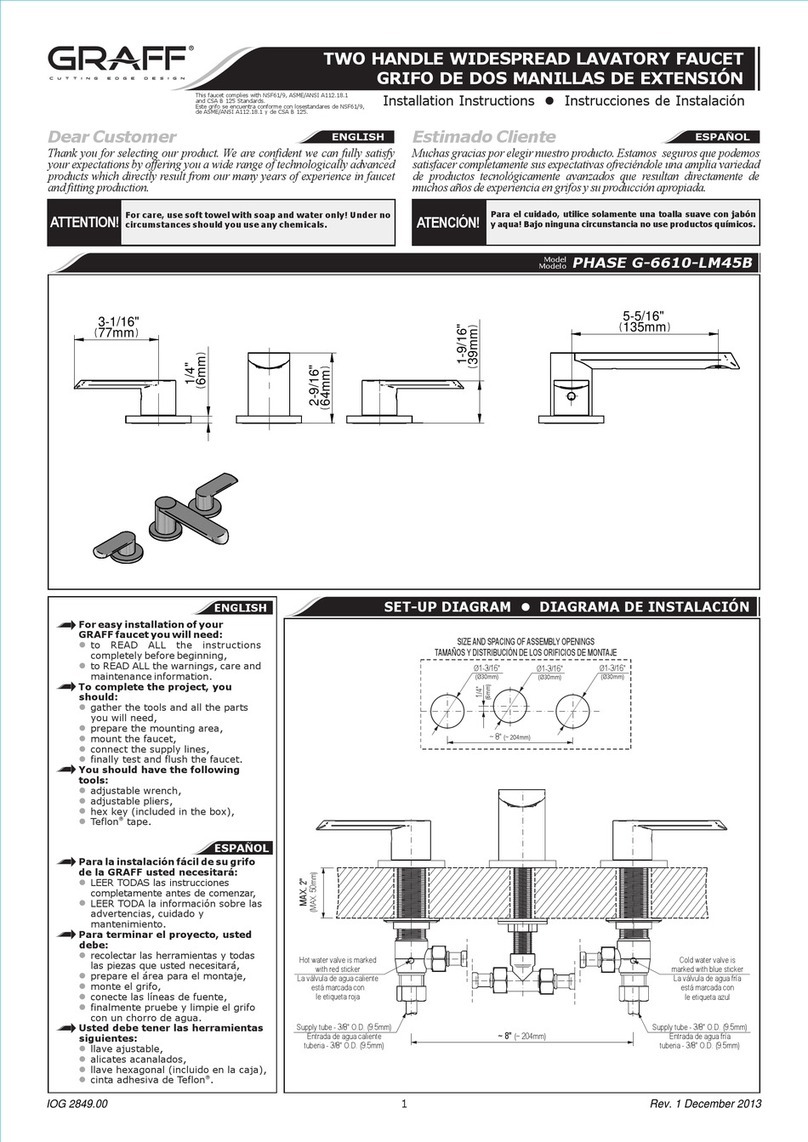
Dear Customer Estimado Cliente
Thank you for selecting our product. We are confident we can fully satisfy Muchas gracias por elegir nuestro producto. Estamos seguros que podemos
your expectations by offering you a wide range of technologically advanced satisfacer completamente sus expectativas ofreciéndole una amplia variedad
products which directly result from our many years of experience in faucet de productos tecnológicamente avanzados que resultan directamente de
and fitting production. muchos años de experiencia en grifos y su producción apropiada.
ENGLISH ESPANOL
This product complies with NSF 1 , AS E ANSI A11 .1 .1
an S tandards.
Este producto se encuentra conforme con losestandares de NSF 1 ,
de AS E ANSI A11 .1 .1 y d S .
Installation Instructions • Instrucciones de Instalación
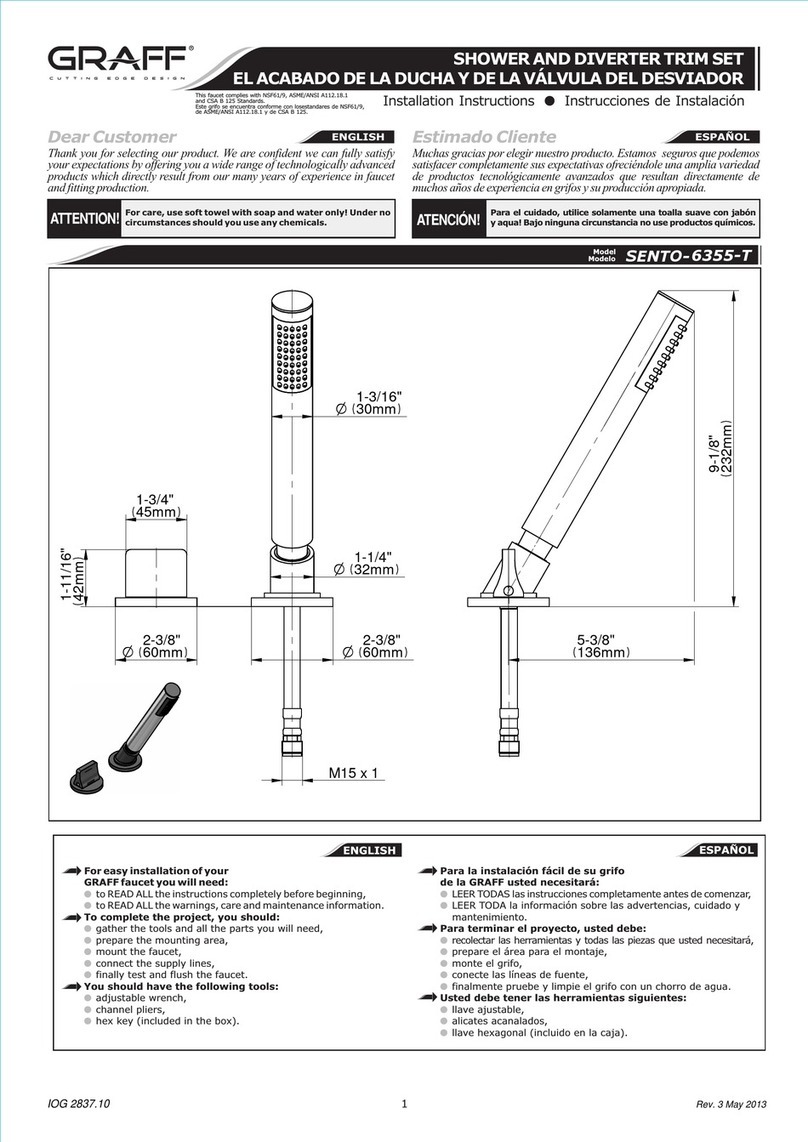
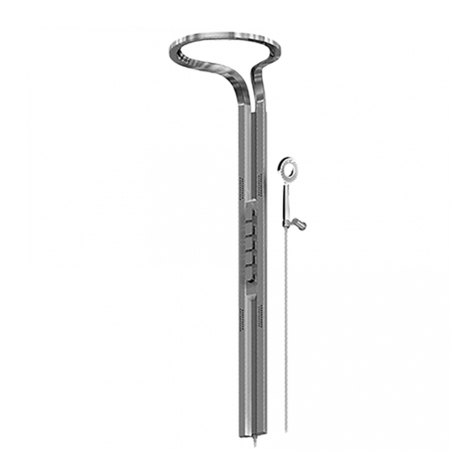
SHOWER SET
CONJUNTO DUCHA
For easy installation of your
GRAFF product you will need:
to READ ALL the instructions completely before beginning,
to READ ALL the warnings, care and maintenance information.
You should have the following tools:
carbide drill bit,
electric drill,
Philips screwdriver,
level.
•
•
•
•
•
•
Para la instalación fácil de su producto
de la GRAFF usted necesitará:
LEER TODAS las instrucciones completamente antes de comenzar,
LEER TODA la información sobre las advertencias, cuidado
y mantenimiento.
Usted debe tener las herramientas siguientes:
broca de carburo de
toladro electrico,
destornillador Phillips,
nivel.
•
•
•
•
•
•
ENGLISH ESPANOL
For care, use soft towel with soap and water only! Under no
circumstances should you use any chemicals.
ATTENTION! ATENCIÓN! Para el cuidado, utilice solamente una toalla suave con jabón
y aqua! Bajo ninguna circunstancia no use productos qu micos.
Model
Modelo 8711
1
Rev. 2 August 2019
27-11/16”
(703mm)
2-5/8”
(66mm)
O2-3/16”
(56mm)
O2-3/16”
(56mm)
2-7/16”
(61mm)
1-7/8”
(47mm)
13/16”
(20mm)
O
2-3/4”
(70mm)
23-1/32
(585mm)
IOG 5368.87 2
This product complies with NSF 1 , AS E ANSI A11 .1 .1
an S tandards.
Este producto se encuentra conforme con losestandares de NSF 1 ,
de AS E ANSI A11 .1 .1 y d S .
Installation Instructions • Instrucciones de Instalación
SHOWER SET
CONJUNTO DUCHA
Rev. 2 August 2019
6
3
5
Taking the user’s needs into account, select an appropriate place for
the installation of the wall holder. Pay attention to the furthest
locations of the shower handle and location of shower hose to the
water supply.
Loose the mounting screws to remove the mounting plate (4), and
mark the mounting plate (4) outline on the wall at the installation
location on the wall.
Mark the holes for the mounting screws (2). If the wall is finished
with ceramic tiles, try to mark the holes on the tile joints, if
possible.
Drill the holes on the screw marks with a Ø6mm concrete bit. Drill
the Ø6 mm holes, then install the wall plugs (1) flush with the wall
surface.
Fasten the mounting plate (4) in the wall plugs.
Install the remaining components of the mounting plate (3) so that
the locating pins engage the respective holes. Tighten the mounting
screws (6).
1.
2.
3.
4.
5.
6.
2
2
4
Escoja el sitio adecuado en la pared para el mango tomando en
cuenta las necesidades de sus usuarios. Considere las posiciones
extremas del mango del cabezal y el lugar de conectar la ducha a
la alimentación.
Quite los tornillos de montaje para extraer la placa de montaje (4)
y marque el contorno de la placa de montaje en la pared, en el
lugar previsto para la instalación.
Marque los agujeros para los tornillos de montaje (2). Si la pared
esta revestida de azulejos de cerámica intente marcar los agujeros
en las juntas de los azulejos en el caso de que sea posible.
Haga los agujeros en las marcas de los tornillos con una broca para
hormigón de Ø6mm. Haga los agujeros de Ø6 mm, a continuación
instale los enchufes empotrados (1) en la superficie de la pared.
Apriete la placa de montaje (4) los enchufes de pared.
Instale los restantes componentes de la placa de montaje (3) de
acuerdo con el dibujo de forma que los pernos de sujeción encajen
en los respectivos agujeros. Apriete los tornillos de montaje (6).
1.
2.
3.
4.
5.
6.
1/4”
(6mm)
Ø
2.1 2.2
2.3
IOG 5368.87 3
This product complies with NSF 1 , AS E ANSI A11 .1 .1
an S tandards.
Este producto se encuentra conforme con losestandares de NSF 1 ,
de AS E ANSI A11 .1 .1 y d S .
Installation Instructions • Instrucciones de Instalación
SHOWER SET
CONJUNTO DUCHA
Rev. 2 August 2019
G1/2"
G1/2"
G1/2"
G1/2"
G1/2"
D
C
E
B
G
F
Finished wall
Pared de acabado
H
A
3
ENGLISH
~
ESPANOL
2
CARE AND MAINTENANCE •CUIDADO Y MANTENIMIENTO
ENGLISH
~
ESPANOL
•GARANTÍA
All dimensions and drawings are for reference only. For details, please refer to actual products.
Todas las dimensiones y dibujos sirven nicamente de referencia. Para consultar detalles, ver los productos.
our Graff product is designed and engineered in accordance with the
highest and performance standards. sure not to damage the
finish during installation. should be given to the cleaning of this
product. Although its finish is durable, it can be damaged by
harsh abrasives or polish. Never use cleaners, acids,
solvents, to clean any Graff To clean,
a and dry a soft
Warranty conditions and warranty registration card are outlined on a
separate sheet.
Su producto de la Graff esta dise ado y dirigido acuerdo con los estándares
de funcionamiento y calidad más altos. Este seguro no da ar las
terminaciones del grifo durante la instalación. uide el producto
manteniendolo siempre limpio. Aun ue su acabado es e tremadamente
durable, puede ser da ado por los abrasivos o pulientes ásperos. Nunca
utilice lim iadores a rasivos, ácidos, solventes, el etc ara lim iar
cual uier roducto de la Graff Para lim iar, sim lemente use un
a o medo y se ue con una toalla suave
Las condiciones de la gar y la tarjeta del registro de la gar se
encuentran en una pagina separada.
INSTALLATION OF ANGLE JOINT (fig. 3)
Slide the cover (D) with o-ring onto the longer end of the angle
joint (A) .
Wrap the teflon tape around the threaded end 1/2" of the angle
joint and screw into the supply elbow (B), paying attention to the
correct positioning of the joint (A) .
1.
2.
ENGLISH
~
ESPANOL
INSTALACIÓN DEL EMPALME ANGULAR (dis. 3)
Meta la tapa (D) con junta tórica en un racor más largo del
empalme angular (A).
Envuelva la cinta de teflon alrededor del extremo roscado 1/2"
del empalme angular y atorníllelo en el codo de la instalación de
alimentación (B) sin olvidar de colocar el empalme (A) en la
posición correcta.
1.
2.
INSTALLATION OF HAND SHOWER (fig. 3)
Place the gasket (C) in the hose nut (F). Carefully fit the hose nut
(F) on the threaded connector of the angle joint (A). Tighten the
nut by hand.
Place the gasket (E) in the conical hose nut (G). Carefully fit the
hose end (G) on the threaded connector of the hand shower (H).
Tighten the nut by hand. Place the hand shower (H) in the holder.
1.
2.
ENGLISH
~
ESPANOL
INSTALACIÓN DE LA REGADERA (dis. 3)
Coloque la junta (C) en la tuerca de la manguera (F). Con
cuidado enrosque la tuerca de la manguera (F) en el racor
roscado del empalme angular (A). Apriete la tuerca a mano.
Coloque la junta (E) en la tuerca cónica de la manguera (G). Con
cuidado enrosque el extremo de la manguera (G) en el racor
roscado de la regadera (H). Apriete la tuerca a mano. Luego
coloque la regadera de la ducha (H) en el asa de pared .
1.
2.
www.graff-designs.com

Other Graff Bathroom Fixture manuals

Graff Vignola E-7045-LM60N Operator's manual

Graff

Graff Vignola E-7045-LM60N Operator's manual

Graff JAVA E-7070-LM54W Operator's manual

Graff

Graff JAVA E-7070-LM54W Operator's manual

Graff Ametis G8750WTBK User manual

Graff

Graff Ametis G8750WTBK User manual

Graff PHASE G-6355-LM45B T Series User manual

Graff

Graff PHASE G-6355-LM45B T Series User manual

Graff Terra 5557800 Operator's manual

Graff

Graff Terra 5557800 Operator's manual

Graff MUS92 User manual

Graff

Graff MUS92 User manual

Graff EX-11170 Operator's manual

Graff

Graff EX-11170 Operator's manual

Graff M.E.25 6156-LM41B-T User manual

Graff

Graff M.E.25 6156-LM41B-T User manual

Graff ONDA E-6305-LM61L Series Operator's manual

Graff

Graff ONDA E-6305-LM61L Series Operator's manual

Graff GX-6170-LM3F User manual

Graff

Graff GX-6170-LM3F User manual

Graff G-8220 User manual

Graff

Graff G-8220 User manual

Graff Tephi TEP15-NO Operator's manual

Graff

Graff Tephi TEP15-NO Operator's manual

Graff AMETIS G-8760 User manual

Graff

Graff AMETIS G-8760 User manual

Graff AQUA-SENSE G-8201-SP User manual

Graff

Graff AQUA-SENSE G-8201-SP User manual

Graff E-7081-T Operator's manual

Graff

Graff E-7081-T Operator's manual

Graff E-7057 Operator's manual

Graff

Graff E-7057 Operator's manual

Graff TEP92 User manual

Graff

Graff TEP92 User manual

Graff 9083 User manual

Graff

Graff 9083 User manual

Graff Aqua-Sense Operator's manual

Graff

Graff Aqua-Sense Operator's manual

Graff E-11160D-LM54 Operator's manual

Graff

Graff E-11160D-LM54 Operator's manual

Graff AMETIS G8760BK User manual

Graff

Graff AMETIS G8760BK User manual

Graff AMETIS E-8755 Operator's manual

Graff

Graff AMETIS E-8755 Operator's manual

Graff G-8231 User manual

Graff

Graff G-8231 User manual

Graff PESARO 1500-LM10 User manual

Graff

Graff PESARO 1500-LM10 User manual

Popular Bathroom Fixture manuals by other brands

Black & Decker Price Pfister SAXTON RT6 Series quick start guide

Black & Decker

Black & Decker Price Pfister SAXTON RT6 Series quick start guide

RUBINETTERIE BELLOSTA BRUNSIN 5711/1AL Installation instruction

RUBINETTERIE

RUBINETTERIE BELLOSTA BRUNSIN 5711/1AL Installation instruction

Dornbracht 28 649 626-FF Assembly instructions

Dornbracht

Dornbracht 28 649 626-FF Assembly instructions

Croydex Flexi-Fix quick start guide

Croydex

Croydex Flexi-Fix quick start guide

Hans Grohe Talis Sportive 32012000 manual

Hans Grohe

Hans Grohe Talis Sportive 32012000 manual

Spectrum Brands Pfister Bellance LF-049-BLL Quick installation guide

Spectrum Brands

Spectrum Brands Pfister Bellance LF-049-BLL Quick installation guide

Hans Grohe AXOR Terrano 37145 Series manual

Hans Grohe

Hans Grohe AXOR Terrano 37145 Series manual

Kohler 16359IN-A-CP installation instructions

Kohler

Kohler 16359IN-A-CP installation instructions

Franke MIRANIT F5SM2025 Installation and operating instructions

Franke

Franke MIRANIT F5SM2025 Installation and operating instructions

Ronbow E032439-WH Installation and care guide

Ronbow

Ronbow E032439-WH Installation and care guide

Hans Grohe Raindance Select S 150 28587 Series Assembly instructions

Hans Grohe

Hans Grohe Raindance Select S 150 28587 Series Assembly instructions

KWC CHRX676N Installation and operating instructions

KWC

KWC CHRX676N Installation and operating instructions

Technoform Techno Design Inspiration ITD60 installation manual

Technoform

Technoform Techno Design Inspiration ITD60 installation manual

Hans Grohe ShowerTablet 350 13104009 Instructions for use/assembly instructions

Hans Grohe

Hans Grohe ShowerTablet 350 13104009 Instructions for use/assembly instructions

Suncast Brilliant by Design Vista BMS7702 Assembly instructions

Suncast

Suncast Brilliant by Design Vista BMS7702 Assembly instructions

Home Decorators Collection Sturgess 19111-VS49-WT Assembly instructions

Home Decorators Collection

Home Decorators Collection Sturgess 19111-VS49-WT Assembly instructions

newform X-STEEL 316 69655X instructions

newform

newform X-STEEL 316 69655X instructions

THE SHOWER LAB VR01S20 manual

THE SHOWER LAB

THE SHOWER LAB VR01S20 manual

manuals.online logo
manuals.online logoBrands
  • About & Mission
  • Contact us
  • Privacy Policy
  • Terms and Conditions

Copyright 2025 Manuals.Online. All Rights Reserved.