Grammer MSG 90.6PG Operating instructions

November 2017
Material no. 1153450_c
Repair Manual GRAMMER Seat MSG 90.6PG Commercial Vehicles, Omnibuses
Page 1 of 7
END
TABLE OF CONTENTS
Preliminary remarks
1 Description
1.1 Safety instructions
1.2 Seat types (example of seat models)
1.3 Rating plate
2 Diagnosis
2.1 Overview of components
2.2 Functional test
2.3 Overview of faults
2.4 Fault diagnosis

November 2017
Material no. 1153450_c
Repair Manual GRAMMER Seat MSG 90.6PG Commercial Vehicles, Omnibuses
Page 2 of 7
END
TABLE OF CONTENTS
3 Repair work
3.1 Seat cushion in position for repair – lifting off and attachment
3.2 Seat cushion and lever for seat angle and seat depth adjustment – removal and installation
3.3 Seat cushion cover – removal and installation
3.3.1 Seat cushion cover – removal and installation
3.3.2 Seat cushion cover – removal and installation (seat with climate control system)
3.4 Left covering in position for repair – removal and attachment
3.5 Entire covering – removal and attachment
3.6 Bellows – removal and installation
3.7 Bowden pull wire and button for quick lowering of the seat – removal and installation
3.8 Bowden pull wire for seat height adjustment – inspection and adjustment
3.9 Bowden pull wire and handle support for seat height adjustment – removal and installation
3.10 Bowden pull wire for vertical shock absorber adjustment – inspection and adjustment
3.11 Bowden pull wire and lever for vertical shock absorber adjustment – removal and installation

November 2017
Material no. 1153450_c
Repair Manual GRAMMER Seat MSG 90.6PG Commercial Vehicles, Omnibuses
Page 3 of 7
END
TABLE OF CONTENTS
3.12 Bowden pull wire for backrest adjustment – inspection and adjustment
3.13 Bowden pull wire and lever for backrest adjustment – removal and installation
3.14 Bowden pull wire for locking the fore/aft isolator – inspection and adjustment (delivery option)
3.15 Bowden pull wire for locking the fore/aft isolator – removal and installation (delivery option)
3.16 Bowden pull wire for seat angle adjustment – inspection and adjustment
3.17 Bowden pull wire for seat angle adjustment with locking mechanism – removal and installation
3.18 Handle rail – removal and installation
3.19 Heater switch – removal and installation
3.19.1 Heater switch – removal and installation
3.19.2 Heater switch – removal and installation (seat with climate control system)
3.20 Heater and belt tensioner cable – removal and installation (delivery option)
3.21 Cable for electro-pneumatic gearshift (EPS) – removal and installation
3.22 Air hose set – removal and installation

November 2017
Material no. 1153450_c
Repair Manual GRAMMER Seat MSG 90.6PG Commercial Vehicles, Omnibuses
Page 4 of 7
END
TABLE OF CONTENTS
3.23 Valves for lumbar support and lateral support adjustment – removal and installation
3.24 Armrests – removal and installation (delivery option)
3.25 Operator console and armrest for electro-pneumatic gearshift (EPS) – removal and installation (delivery option)
3.26 Backrest cover and seat belt – removal and installation
3.27 Lap belt – removal and installation
3.28 Belt buckle with belt buckle cable – removal and installation (delivery option)
3.29 Secondary belt – removal and installation
3.30 Backrest – removal and installation
3.31 Backrest cover – removal and installation
3.31.1 Backrest cover – removal and installation
3.31.2 Backrest cover – removal and installation (seat with climate control system)

November 2017
Material no. 1153450_c
Repair Manual GRAMMER Seat MSG 90.6PG Commercial Vehicles, Omnibuses
Page 5 of 7
END
TABLE OF CONTENTS
3.32 Bearing support with backrest locking mechanism and hook-in function – removal and installation
3.33 Lumbar support – removal and installation
3.34 Lateral support adjuster – removal and installation
3.35 Vertical shock absorber – removal and installation
3.36 Air spring – removal and installation
3.37 Fore/aft isolator – removal and installation (delivery option)
3.38 Level control – removal and installation
3.39 Supporting structure – removal and installation
3.39.1 Supporting structure and contact strip – removal and installation (Actros)
3.39.2 Supporting structure – removal and installation (Atego, Axor)
3.39.3 Supporting structure – removal and installation (bus seat)

November 2017
Material no. 1153450_c
Repair Manual GRAMMER Seat MSG 90.6PG Commercial Vehicles, Omnibuses
Page 6 of 7
END
TABLE OF CONTENTS
3.40 Seat fore/aft adjuster – removal and installation
3.40.1 Seat fore/aft adjuster – removal and installation (Actros)
3.40.2 Seat fore/aft adjuster and contact strip – removal and installation (Atego, Axor)
3.40.3 Seat fore/aft adjuster – removal and installation (bus seat)
3.41 Guides – removal and installation
3.42 Air hose for compressed-air quick coupling – removal and installation (delivery option)
3.43 Seat frame – removal and installation
3.44 Seat suspension – removal and installation
3.45 Swinging structure – disassembly and assembly
3.46 Worn parts – removal and installation
3.47 Swivel, complete – removal and installation (driver’s seat with swivel, e.g. bus seat)
3.47.1 Swivel and linkage – removal and installation
3.47.2 Cylinder for swivel – removal and installation
3.47.3 Key and valve for swivel – removal and installation
3.47.4 Air hose set – removal and installation

November 2017
Material no. 1153450_c
Repair Manual GRAMMER Seat MSG 90.6PG Commercial Vehicles, Omnibuses
Page 7 of 7
END
TABLE OF CONTENTS
3.48 Bowden pull wire and bearing for ideal backrest adjustment – removal and installation
3.49 Cable harness for backrest – removal and installation (seat with climate control system)
3.50 Cable harness heater switch – removal and installation (seat with climate control system)
3.51 Cable harness for vehicle connection – removal and installation (seat with climate control system)
3.52 Radial fan for backrest – removal and installation (seat with climate control system)
3.53 Control module for climate control system – removal and installation (seat with climate control system)
3.54 Cable harness for microphone – removal and installation (seat with climate control system)
3.55 Microphone support – removal and installation (seat with climate control system)
3.56 Play in the backrest locking mechanism – inspection and adjustment

Repair Manual MSG 90.6PG Commercial Vehicles, Omnibuses – November 2017
Material no. 1153450_c
Preliminary remarks
Page 1 of 4
TABLE OF CONTENTS
Notes on these instructions
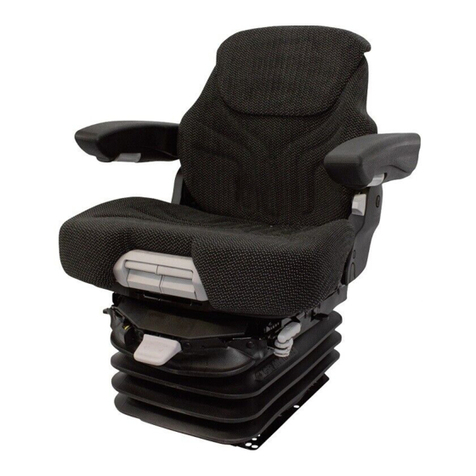
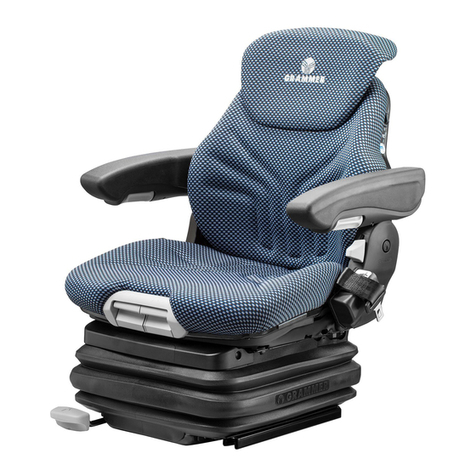
This repair manual includes information and instructions on how to perform repair work on the GRAMMER Seat MSG 90.6 PG
of the following seat models:
•Actros
•Atego, Axor
•Bus seat
•Seat with climate control system
The seat Actros forms the basis for illustrations in this repair manual. In general, the seat is illustrated with a mechanism for
quick lowering of the seat, and not with a swivel.
In the case of technical deviations in work procedures (due to different seat models), refer to the current text or individual
chapters of the manual.
The functions can either be on the left-hand or right-hand side of the seat. The only difference between the commercial vehicle
type with a quick lowering mechanism and the bus seat is the missing swivel. For this reason, the repair work on the bus seat
is identical to that on the vehicle of type Actros and is to be performed laterally reversed. The repair work concerning the
swivel
is described in a separate chapter.
Each chapter starts with a list of all preparatory work to be completed before starting repair. These preparations are described
in separate chapters and shall be carried out without the preparatory steps described there.

Repair Manual MSG 90.6PG Commercial Vehicles, Omnibuses – November 2017
Material no. 1153450_c
Preliminary remarks
Page 2 of 4
TABLE OF CONTENTS
At the beginning of each description for repair you will find an overview diagram. All parts included in the overview diagrams
within one chapter are consecutively numbered starting with "1". Each component is referred to by the same number
throughout the document.
With the help of these overview diagrams, an experienced technician will gain a quick overview.
For spare part orders, please use the numbers stated in the latest issue of the relevant spare parts catalogue.
The description of the work steps refers to the dismounted seat. Depending on the individual installation situation, some work
may also be performed on the installed seat. For this reason, check the environment of the installed seat for this possibility
before starting work. The safety instructions of the specific vehicle manufacturer and those stated in Chapter 1.1 of this repair
manual must be strictly observed.
This repair manual also includes some information on delivery options, if these require further explanation. Since the scope of
delivery depends on the specific customer order, the actual seat design may deviate from the descriptions and illustrations in
this manual.
The illustrated repair steps refer to the driver's seat (left-hand drive). Different work steps are to be performed laterally
reversed when repairing the passenger seat or in the case of vehicles with right-hand drive.
If not stated otherwise, the directional indications "front, back" and "right, left" refer to the installed seat regarded in the driving
direction of the vehicle.
The document layout is suitable for later use of this repair manual via CD-ROM / INTERNET / INTRANET. A navigation line
was entered below the heading for this. This navigation line includes the Chapter titles and it allows the user to jump directly to
these Chapters after the corresponding hyperlinks have been set.
Repair Manual MSG 90.6PG Commercial Vehicles, Omnibuses – November 2017
Material no. 1153450_c
Preliminary remarks
Page 3 of 4
TABLE OF CONTENTS
Basic information about the seat
The seat is provided with a long-lasting lubrication (approx. 10 years). The lubricating points must be re-greased only after
repair work, using an acid-free multi-purpose lubricant.
In the description of the present repair manual, not all fastening parts might be mentioned. After repair, it might be necessary
to check fastening parts regarding their factory-made laying, support and securing and to correct them respectively, if required.
Bowden pull wires, cables and air hoses may only be fastened with cable ties at the defined spots by hand (loose). Make sure
that in the case of a vertical seat adjustment, they are not squeezed or distorted when the seat is moved.
Replace all removed old parts with enclosed new ones. If there is no new part included, the old one is to be cleaned and
checked for its suitability for re-use. Defective parts and worn parts must be replaced by new ones.
GRAMMER AG rejects any warranty claims if damaged or worn parts and assemblies are not replaced by spare parts
released by GRAMMER AG.
Qualified personnel
These instructions offer basic information on proper technical seat repair. The contents of the work procedures described are
intended for professionally educated technicians with profound product knowledge. This level of knowledge is an imperative
requirement when performing the work and procedures described in this document.

Repair Manual MSG 90.6PG Commercial Vehicles, Omnibuses – November 2017
Material no. 1153450_c
Preliminary remarks
Page 4 of 4
TABLE OF CONTENTS
In order to avoid bodily injury, reduced operational safety or damage to the seat resulting from improperly performed work, all
information and instructions, in particular the safety instructions stated in Chapter 1.1, must be read carefully and strictly
observed.
As an inevitable matter of fact, GRAMMER AG cannot evaluate all situations and consequences that may bear a risk of injury
for the persons involved in the described work procedures. For this reason it is absolutely necessary that every person who
carries out repair work at a seat uses his/her professional knowledge to make sure that his/her own safety will not be put at
risk
and that the selected type of repair will not cause any negative effects, in particular with regard to technical safety.
For this reason, GRAMMER AG disclaims liability for any possible damage of this kind.
We point out explicitly that all work steps and procedures described are to be performed with consideration to the applicable
directives and regulations stipulated by the relevant local authorities and in compliance with the provisions on health
protection, prevention of accidents and environmental protection.
Change notification and copyright
The seats are subject to continuous development. Please understand that we must reserve the right to make changes in
shape, equipment and technical design. For this reason, the contents of this repair manual cannot be used to substantiate any
possible claims.
Reprint, translation and copies of this manual or parts thereof are admissible only after written approval.
GRAMMER AG ⋅Postfach 14 54 ⋅D-92204 Amberg Delivery and factory address:
Phone +49 (0) 96 21 / 66-6822 GRAMMER AG
www.grammer.com Köferinger Str. 9-13 ⋅D-92245 Kümmersbruck

Repair Manual MSG 90.6PG Commercial Vehicles, Omnibuses – November 2017
Material no. 1153450_c
1 Description
Page 1 of 1
END
TABLE OF CONTENTS
1.1 Safety instructions
1.2 Seat types (example of seat models)
1.3 Rating plate
Note:
Please refer to the applicable seat operating instructions for further details.

Repair Manual MSG 90.6PG Commercial Vehicles, Omnibuses – November 2017
Material no. 1153450_c
1.1 Safety instructions
Page 1 of 3
TABLE OF CONTENTS
1 All inspection, test and repair work must be performed exclusively by adequately trained personnel.
2 All work steps and procedures described are to be performed with consideration to the applicable directives and regulations
stipulated by the relevant local authorities and in compliance with the provisions on health protection, prevention of
accidents and environmental protection.
3 Special notes in this repair manual are highlighted as follows:
WARNING … indicates possible risks for persons and their prevention.
ATTENTION ... indicates possible damage or destruction of material and their prevention.
Note: ... introduces an additional explanation for better understanding the work to be carried out.
Installation note: ... introduces an additional explanation for better understanding the installation work to be carried out.
4 Prior to all repair work, the following work has to be carried out:
•Disconnect the seat from the power supply.
•Bleed air out of the compressed-air system.
•Move the seat down to the end stops.

Repair Manual MSG 90.6PG Commercial Vehicles, Omnibuses – November 2017
Material no. 1153450_c
1.1 Safety instructions
Page 2 of 3
TABLE OF CONTENTS
5 The seat position for repair is "seat lowered (no pressure applied)". If it is necessary to bring the seat to a higher position for
repair work, this position must be secured with suitable spacers (wooden block, fixation with screws or similar structure).
Disregard of these safety measures bears the risk of an accident!
6 When using oil, grease and other chemical substances, the relevant safety regulations for the handling and use of these
products must be observed.
7 WARNING Be careful when removing/installing seats with pyrotechnic belt tensioners:
•Belt tensioners may only be removed /installed/ contacted when the battery is disconnected and the ignition key
removed.
•After an accident, the belt tensioner must be checked for external damage, defects and for being triggered. Defective or
damaged components are immediately to be replaced with new ones. It is not allowed to repair defective or damaged
components of the belt tensioner.
•Install the belt tensioner immediately after it has been brought from the storage room. Not installed units may, in no case,
be stored in the workshop without being supervised by an adequately trained person. If the installation work was
interrupted, belt tensioners must be kept closed or brought back to the storage room.
•Do avoid the contact of belt tensioners with grease, oil or cleaning supplies.
•Always protect belt tensioners from flying sparks and naked flames. Do not expose them to temperatures above 100 °C,
not even for a short time.

Repair Manual MSG 90.6PG Commercial Vehicles, Omnibuses – November 2017
Material no. 1153450_c
1.1 Safety instructions
Page 3 of 3
TABLE OF CONTENTS
•Belt tensioners, which have fallen down from a height of more than 0.5 m must be replaced and must
by no means be installed in the vehicle.
•When replacing damaged components such as belt tensioners and lines, the inspection may only be performed using
approved testing equipment and only when those components are installed.
The use of unapproved measuring devices bears the risk of an undesired triggering.
•Attention must be paid to the following when an external power source or battery is connected for the first time:
1. The ignition is on
2. No personnel in the passenger compartment
3. External power source or battery is connected
•In the Federal Republic of Germany, belt tensioners must be detonated prior to scrapping according to the respective
regulations for the prevention of industrial accidents. This makes it impossible to remove pyrotechnic devices from the
scrap yard for re-use or repair.
These safety measures are necessary to prevent possible injuries resulting from improper activation of pyrotechnic devices.
A significant risk is involved in the waste disposal site when not detonated components are flame cut, smelted or thrown
into fire or smouldering fire.
When detonating, make sure a safe distance of at least 10 m is maintained!
•To prevent costly additional work, we recommend you to order the scrapping work be done by a scrap dealer who is able to
perform this work according to the required safety standards for pyrotechnic devices. When handing over those
components, the scrap dealer must sign a declaration committing him to scrap pyrotechnic devices according to the
respective regulations for the prevention of industrial accidents.

Repair Manual MSG 90.6PG Commercial Vehicles, Omnibuses – November 2017
Material no. 1153450_c
1.2 Seat types (example of seat models)
Page 1 of 1
TABLE OF CONTENTS
(A) Actros
(B) Atego, Axor
(C) Bus seat, right
(function with swivel)
(D) Kingman (sales)
2256
B
A
C
D

Repair Manual MSG 90.6PG Commercial Vehicles, Omnibuses – November 2017
Material no. 1153450_c
1.3 Rating plate
Page 1 of 11
TABLE OF CONTENTS
Actros type of seat
The rating plate from the manufacturing
plant (A1) is located on the rear right of
the seat frame.
The rating plate shows the following
information (example):
(A) Country of manufacture
= MADE IN XXXXXXX
(B) Designation = MSG 90.6 PG.LI
(C) INVENTORY NO. = 01133179
(D) Year / CW / Assembly
= 0747 049
•Year of manufacture = 07 (2007)
•Built in week = 47 (November)
•Assembly = 049
(E) ORDER NO. = XX 00000001234
•Country indicator = XX
•serial production number
= 00000001234
MSG 90.6 PG.LI
01133179
0 0 0 0 0 0 0 1 2 3 4
SACH-NR.
0747049
XXXXXXX
XX
B
C
D
E
A
FG
I
H
A9439105102 00005C38
NR. GAG.: 1051726
FHR.SITZ MSG90.5PG LI.
27.11.07
A1
A2
2271

Repair Manual MSG 90.6PG Commercial Vehicles, Omnibuses – November 2017
Material no. 1153450_c
1.3 Rating plate
Page 2 of 11
TABLE OF CONTENTS
The rating plate for delivery (A2) is
located on the back of the supporting
structure.
The rating plate shows the following
information (example):
(F) Number = A9439105102 00005C38
•Actros seat type = A943
•Colour code = 5C38
(G) Date of manufacture = 27/11/07
(H) Designation = MSG 90.6 PG.LI
•Seat type = MSG 90.6 PG
•Left seat = LI
(I) Inventory no. (GAG no.) = 1051726
Notes:
•When orders are placed, the correct
number (F) and GAG no. (I) on the rating
plate always have to be quoted.
•In case of complaints, the delivery date
is also to be quoted.
MSG 90.6 PG.LI
01133179
0 0 0 0 0 0 0 1 2 3 4
SACH-NR.
0747049
XXXXXXX
XX
B
C
D
E
A
FG
I
H
A9439105102 00005C38
NR. GAG.: 1051726
FHR.SITZ MSG90.5PG LI.
27.11.07
A1
A2
2271

Repair Manual MSG 90.6PG Commercial Vehicles, Omnibuses – November 2017
Material no. 1153450_c
1.3 Rating plate
Page 3 of 11
TABLE OF CONTENTS
The rating plate (A3) of the level control
is located on the upper right side.
The rating plate shows the following
information (example):
(A) Inventory no. = 1 126 814
= SPC/050320
(B) Working pressure = p = 6.5 .. 10 bar
(C) SERIAL NO. = 000 381
(D) L6D = Production code
Note:
When orders are placed, the correct
inventory no. (A) on the rating plate is
always to be quoted.
2272
p = 6,5 ... 10 bar
Lfd-Nr. 000 381
1 126 814
L6D
01126814000381
CD
B
A
SPC/050320
A3

Repair Manual MSG 90.6PG Commercial Vehicles, Omnibuses – November 2017
Material no. 1153450_c
1.3 Rating plate
Page 4 of 11
TABLE OF CONTENTS
Atego, Axor seat types
The rating plate from the manufacturing
plant (Atego, Axor = B1) is located on the
rear right of the seat frame.
The rating plate shows the following
information (example):
(A) Country of manufacture
= MADE IN XXXXXXX
(B) Designation = MSG 90.6 PG.LI
(C) INVENTORY NO. = 01133179
(D) Year / CW / Assembly
= 0747 049
•Year of manufacture = 07 (2007)
•Built in week = 47 (November)
•Assembly = 049
(E) ORDER NO. = XX 00000001234
•Country indicator = XX
•serial production number
= 00000001234
MSG 90.6 PG.LI
01133179
0 0 0 0 0 0 0 1 2 3 4
SACH-NR.
0747049
XXXXXXX
XX
B
C
D
E
A
FG
I
H
A9739105102 00005C38
NR. GAG.: 1051726
FHR.SITZ MSG90.5PG LI.
27.11.07
B1
B2 B3
2273
Table of contents
Other Grammer Car Seat manuals

Grammer
Grammer PRIMO EL Plus User manual

Grammer
Grammer PRIMO M User manual

Grammer
Grammer ACTIMO M User manual

Grammer
Grammer MSG45/421 Operating instructions

Grammer
Grammer PRIMO XL Plus User manual

Grammer
Grammer PRIMO XL User manual

Grammer
Grammer MSG95 User manual

Grammer
Grammer KINGMAN User manual

Grammer
Grammer LINEA User manual

Grammer
Grammer MSG95EAC/741 User manual