manuals.online logo
Brands
  1. Home
  2. •
  3. Brands
  4. •
  5. GRAUPNER
  6. •
  7. Toy
  8. •
  9. GRAUPNER YAK 11 RENO User manual

GRAUPNER YAK 11 RENO User manual

Other GRAUPNER Toy manuals

GRAUPNER HoTT Deluxe 9932.100 User manual

GRAUPNER

GRAUPNER HoTT Deluxe 9932.100 User manual

GRAUPNER Krabbe TON 12 User manual

GRAUPNER

GRAUPNER Krabbe TON 12 User manual

GRAUPNER PITTS S12 Instruction Manual

GRAUPNER

GRAUPNER PITTS S12 Instruction Manual

GRAUPNER MAXIE SPORT 490 Instruction Manual

GRAUPNER

GRAUPNER MAXIE SPORT 490 Instruction Manual

GRAUPNER ALPINA 3001 ELEKTRO User manual

GRAUPNER

GRAUPNER ALPINA 3001 ELEKTRO User manual

GRAUPNER 4469.400 User manual

GRAUPNER

GRAUPNER 4469.400 User manual
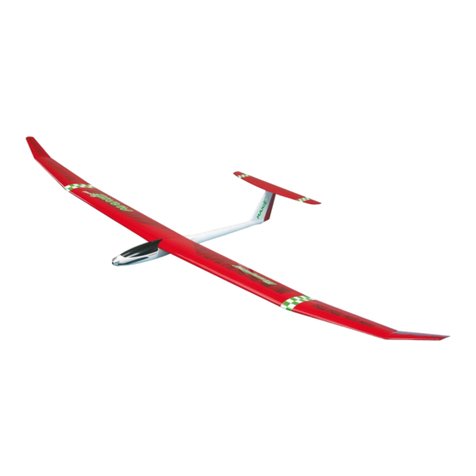
GRAUPNER EPIC Victory S User manual

GRAUPNER

GRAUPNER EPIC Victory S User manual

GRAUPNER PIAGGIO P 149 D User manual

GRAUPNER

GRAUPNER PIAGGIO P 149 D User manual

GRAUPNER Smaragd Instruction Manual

GRAUPNER

GRAUPNER Smaragd Instruction Manual

GRAUPNER North American Harvard AT 6 Instruction Manual

GRAUPNER

GRAUPNER North American Harvard AT 6 Instruction Manual

GRAUPNER GF-5 User manual

GRAUPNER

GRAUPNER GF-5 User manual

GRAUPNER 9545 Instruction Manual

GRAUPNER

GRAUPNER 9545 Instruction Manual

GRAUPNER ROMMEL User manual

GRAUPNER

GRAUPNER ROMMEL User manual

GRAUPNER AMIGO IV User manual

GRAUPNER

GRAUPNER AMIGO IV User manual

GRAUPNER WEGA User manual

GRAUPNER

GRAUPNER WEGA User manual

GRAUPNER Elektro-Rookie QR ARTF User manual

GRAUPNER

GRAUPNER Elektro-Rookie QR ARTF User manual

GRAUPNER U-16 EMDEN User manual

GRAUPNER

GRAUPNER U-16 EMDEN User manual

GRAUPNER Junior Line Series User manual

GRAUPNER

GRAUPNER Junior Line Series User manual

GRAUPNER POWERKAT X User manual

GRAUPNER

GRAUPNER POWERKAT X User manual

GRAUPNER CHIP Instruction Manual

GRAUPNER

GRAUPNER CHIP Instruction Manual

GRAUPNER Wave Explorer User manual

GRAUPNER

GRAUPNER Wave Explorer User manual

GRAUPNER Husky 1800S User manual

GRAUPNER

GRAUPNER Husky 1800S User manual

GRAUPNER micro 47G indoor User manual

GRAUPNER

GRAUPNER micro 47G indoor User manual

GRAUPNER HoTT-FAN User manual

GRAUPNER

GRAUPNER HoTT-FAN User manual

Popular Toy manuals by other brands

FUTABA GY470 instruction manual

FUTABA

FUTABA GY470 instruction manual

LEGO 41116 manual

LEGO

LEGO 41116 manual

Fisher-Price ColorMe Flowerz Bouquet Maker P9692 instruction sheet

Fisher-Price

Fisher-Price ColorMe Flowerz Bouquet Maker P9692 instruction sheet

Little Tikes LITTLE HANDIWORKER 0920 Assembly instructions

Little Tikes

Little Tikes LITTLE HANDIWORKER 0920 Assembly instructions

Eduard EF-2000 Two-seater exterior Assembly instructions

Eduard

Eduard EF-2000 Two-seater exterior Assembly instructions

USA Trains EXTENDED VISION CABOOSE instructions

USA Trains

USA Trains EXTENDED VISION CABOOSE instructions

Modellbau Laffont Z1601 Assembly instructions

Modellbau Laffont

Modellbau Laffont Z1601 Assembly instructions

NOCH 12905 instruction manual

NOCH

NOCH 12905 instruction manual

Eduard Ki-61-Id quick start guide

Eduard

Eduard Ki-61-Id quick start guide

Viessmann Vollmer 45616 Mounting instruction

Viessmann

Viessmann Vollmer 45616 Mounting instruction

Vollmer 42004 Mounting instruction

Vollmer

Vollmer 42004 Mounting instruction

Phoenix Model CLASSIC-EP instruction manual

Phoenix Model

Phoenix Model CLASSIC-EP instruction manual

H-KING Sopwith Camel British WW1 Fighter instruction manual

H-KING

H-KING Sopwith Camel British WW1 Fighter instruction manual

MODSTER Predator 4x4 Crawler user manual

MODSTER

MODSTER Predator 4x4 Crawler user manual

DHK Hobby 8136 User instruction manual

DHK Hobby

DHK Hobby 8136 User instruction manual

THUNDER TIGER Raptor 50 V2 kit manual

THUNDER TIGER

THUNDER TIGER Raptor 50 V2 kit manual

Timberkits Skateboarder instructions

Timberkits

Timberkits Skateboarder instructions

Hangar 9 Funtana 125 Assembly manual

Hangar 9

Hangar 9 Funtana 125 Assembly manual

manuals.online logo
manuals.online logoBrands
  • About & Mission
  • Contact us
  • Privacy Policy
  • Terms and Conditions

Copyright 2025 Manuals.Online. All Rights Reserved.

GRAUPNER GmbH & Co. KG D-73230 KIRCHHEIM/TECK GERMANY
Modifications reserved. No liability for printing errors 04/2011
1
Order No. 9392
9392.MX
Instructions
YAK 11 RENO
For glow and petrol engines up to 26 cc capacity
This model requires a six-function radio control system
GRAUPNER GmbH & Co. KG D-73230 KIRCHHEIM/TECK GERMANY
Modifications reserved. No liability for printing errors 04/2011
2
Specification
Wingspan approx. 1720 mm
Fuselage length excl. spinner approx. 1480 mm
Wing area approx. 60 dm²
All-up weight according to fittings approx. 4700 g
Longitudinal dihedral approx. 0.5°
Centre of Gravity approx. 160-170 mm aft of wing leading edge,
measured at fuselage centreline
Caution: this model is not a toy!
If you are a beginner to this type of powered model, please ask an ex-
perienced model flyer for help and support. If you attempt to operate the aero-
plane without knowing what you are doing, you could easily injure yourself or
some-body else. Please keep your safety and well-being in mind at all times.
Important: before you start construction
Even if you have already built a large number of RC models please read right
through these instructions and check that all the kit components are actually
present. We have taken great trouble to keep construction as simple as pos-
sible, without making any compromises in the area of safety.
Note regarding the film covering
Minor creases or bubbles may develop in the film covering due to major
fluctuations in weather conditions (temperature, humidity etc.); in rare cases
you may even find a slight warp in a component. These minor faults are in the
nature of film-covered built-up wooden structures, and can easily be corrected
using a heat gun, as commonly used for modelling.
Creases: Blow warm air over the area and rub down with a soft cloth.
Wing warp: Hold the panel twisted gently in the opposite direction to the
warp, and apply warm air to remove the creases from the covering.
Caution! do not heat the film more than is absolutely necessary. If the air or
the iron is too hot, the film may melt and holes may be formed.
This aeroplane is highly pre-fabricated and can be built in a very short time.
However, the work which you have to carry out is important and must be done
carefully. The model will only be strong and fly well if you complete your tasks
competently - so please work slowly and accurately.
When self-tapping screws have to be screwed into wood, apply a little
white glue to prevent them shaking loose: just squirt white glue into the
hole before fitting the screw.
GRAUPNER GmbH & Co. KG D-73230 KIRCHHEIM/TECK GERMANY
Modifications reserved. No liability for printing errors 04/2011
3
Notes on building the model
•Before you start building the aircraft it is essential to read right through the in-
structions.
•Please bear in mind the dangers inherent in the handling of tools.
•When preparing the wiring, be sure to use cable capable of carrying the currents
likely to flow when the model is flying.
•Deploy the receiver aerial as far away as possible from high-current cables (at
least 3 cm).
•Remove all traces of grease from the joint surfaces of components which are to
be glued. A good method is to sand lightly before wiping with a non-greasy liquid
detergent solution. The same applies to surfaces which are to be painted,
otherwise the paint will not adhere permanently. Before gluing any GRP parts,
and GRP fuselages in particular, the joint surfaces must be sanded thoroughly
using fine-grit abrasive paper before de-greasing with a solvent such as acetone.
This is the only method of obtaining durable glued joints involving GRP parts.
Additional items required
Engine and accessories
Engine
Order No.
Capacity
cc
Silencer
Order No.
Propeller
Order No.
OS MAX FS
120
SURPASS III
1886
19.96 1886.33 38 x 20 cm
1318.38.20
OS MAX FS
120
SURPASS-E
1848
19.96 1886.33 38 x 20 cm
1318.38.20
OS MAX 120
AX
2703
20.0 2703.33 and
spacer 2703.36A
38 x 25 cm
1318.38.25
G 26
petrol engine
1903
26 1556 and
manifold 1556.2
with Teflon hose 1556.3
and spring clips 1556.4
45 x 20 cm
1318.45.20
Radio control system
The RC system must feature at least six control functions and eight servos; the
transmitter should also include a servo reverse facility.
We particularly recommend mc-22S to mc-24 computer systems. The model is
designed for standard-sized servos.
We recommend the following receiver battery: 2/2500 7.4 V G 3.5 20C LiPo,
Order No. 7633.2, which needs to be maintained carefully before and after each
flying session. As ON / OFF switch for the receiving system we recommend the PRX-
3A, Order No. 4135.
GRAUPNER GmbH & Co. KG D-73230 KIRCHHEIM/TECK GERMANY
Modifications reserved. No liability for printing errors 04/2011
4
You will need five extension leads, Order No. 3935.18, to connect the aileron, landing
flap and retract servos to the receiver.
Each aileron servo lead requires an extension lead, Order No. 3935.32, while the
landing flap leads require extension leads, Order No. 3935.11.
Foam rubber is required for protecting the receiver and battery from shock damage.
Adhesives
Fast-setting epoxy, e.g. UHU plus schnellfest, Order No. 962
Slow-setting epoxy, e.g. UHU plus endfest 300, Order No. 950.15
Wood glue, e.g. UHU Holzleim express, Order No. 958.60
UHU hart, e.g. Order No. 534.35
UHU ALLESKLEBER Kraft, Order No. 1096
Cyano-acrylate, e.g. Order No. 5821
Thread-lock fluid, e.g. Order No. 952
Items required to fly the model (not included)
Fuel based on synthetic oil, to suit engine
Fuel filter, e.g. Order No. 1650.1
Fuel tubing, e.g. Order No. 1643.1L for glowplug engines
Fuel tubing, e.g. Order No. 1325.2 for petrol engines
Manual fuelpump, e.g. Order No. 6870
Glowplug energizer battery with plug clip, e.g. Order No. 3248
Electric starter, e.g. Order No. 1628
Starter battery, e.g. Order No. 2592
Tools required (not included)
Set of cross-point screwdrivers, pointed-nose pliers, flat-nose pliers, side-cutters,
balsa knife or razor blade, set of twist drills, universal glowplug spanner, pencil or felt-
tip pen, fine-tip soldering iron.
Assembling the YAK 11 RENO
Please don’t start assembling the model until you have checked the kit components
and the building instructions, and are familiar with the construction procedure. If you
are not happy with any component, kindly inform your model shop without delay.
GRAUPNER GmbH & Co. KG D-73230 KIRCHHEIM/TECK GERMANY
Modifications reserved. No liability for printing errors 04/2011
5
Assembling the fuselage and tail panels
Attach the control surfaces to the wing panels, the tailplane and the fin by inserting
the hinges in the slots. Apply a drop of adhesive (cyano) to both sides of each hinge
before pushing the control surface into place, leaving an even gap around 0.5 mm
wide.
Drill holes for the horns at the marked points in the elevators and rudder. You can
avoid drilling right through the control surfaces by clamping a collet on the drill as
shown in the photo. Remove a disc of covering film the same size as the horn base
from the area around the horn holes,
Tip: a good method of cutting a neat circle in the film is to use a length of brass tube
whose inside diameter (I.D.) is the same as the outside diameter (O.D.) of the horn
base: sharpen one end of the tube, and twist it gently into the film. Fit the screw in the
horn base until it is flush with the underside, add the locknut, and secure it with UHU
thread-lock fluid.
GRAUPNER GmbH & Co. KG D-73230 KIRCHHEIM/TECK GERMANY
Modifications reserved. No liability for printing errors 04/2011
6
The horns can now be glued permanently in the control surfaces: ensure that the
flange of the aluminium socket rests flat on the surface. Wipe off excess adhesive.
The next step is to glue the tailplane and fin to the fuselage. Place both components
on the fuselage and position them accurately, i.e. the tailplane should be at right-
angles to the fuselage centreline, and the fin should engage fully in the slot in the
former. In this position mark the outline of the fuselage on the underside of the
tailplane, and the outline of the fin base on the top of the tailplane.
GRAUPNER GmbH & Co. KG D-73230 KIRCHHEIM/TECK GERMANY
Modifications reserved. No liability for printing errors 04/2011
7
Remove the tailplane and fin, and run the tip of a hot soldering iron just inside the
marked lines on the tailplane to melt the film. Remove the superfluous film as shown.
The tailplane and fin can now be glued to the fuselage: position the tailplane as
described earlier, and tape it in place to prevent it shifting as the glue dries.
While the glue is hardening, press the rubber grommets and metal spacer sleeves
into the servo mounting lugs. Place the servos in the servo plate, and drill 1.5 mm Ø
pilot-holes for the servo retaining screws.
Mount the elevator, rudder and throttle servos in the servo plate as shown in the
photos below.
GRAUPNER GmbH & Co. KG D-73230 KIRCHHEIM/TECK GERMANY
Modifications reserved. No liability for printing errors 04/2011
8
Mount the swivel pushrod connector in the output arm of the throttle servo using the
screw and nuts, and check that it rotates smoothly, without noticeable slop. Secure
the nuts with a drop of UHU thread-lock fluid to prevent the connector working loose.
Open up the linkage holes in the elevator servo output arm to 1.8 mm Ø.
Connect the clevises to the rudder and elevator horns as shown in the photo.
Set the control surfaces to neutral, centre the servos from the transmitter, and
connect the pushrods to the servo output arms. Repeat the procedure with the
pushrod between the rudder and the tailwheel. When the rudder is at centre, the
tailwheel must be at neutral, otherwise the model will not roll straight on the ground.
GRAUPNER GmbH & Co. KG D-73230 KIRCHHEIM/TECK GERMANY
Modifications reserved. No liability for printing errors 04/2011
9
Assembling and installing the fueltank
Cut a piece of fuel tubing and push it onto the fueltank clunk pick-up. Push the free
end of the fuel tubing onto one of the tubes in the fueltank stopper, and check that
the pick-up will be able to move freely inside the tank without binding or jamming
when the stopper is in place. Use a heat-gun or match to heat the other two plastic
tubes gently, so that they can be curved: one should face down (later used to fill the
tank); the second faces up (serves later as overflow when the tank is filled).
Now push the tank stopper, complete with pick-up and pre-formed tubes, into the
throat of the fueltank, and tighten the cross-point screw to clamp the stopper in place.
It is essential to tighten the screw to the point where the tank is completely sealed.
You can check this by holding the tank under water and blowing hard into the fuel
tubes: any air bubbles indicate a leak which must be eliminated.
Connect a further length of fuel tubing to each stub tube projecting from the fueltank
stopper.
Mark the individual fuel lines so that you can identify which is the fuel feed (to the en-
gine), which is the overflow, and which is the filler line.
Working from the wing saddle area, push the fueltank into the tank compartment,
passing the three fuel lines through the hole in the bulkhead.
Glue the cross-piece in place aft of the fueltank, so that it cannot shift in flight.
If you intend to install a petrol engine, a petrol-proof fueltank stopper, e.g. Order No.
133, must be fitted in place of the standard stopper. For the same reason replace the
silicone fuel tubing with petrol-proof tubing, e.g. Order No.1325.2.
GRAUPNER GmbH & Co. KG D-73230 KIRCHHEIM/TECK GERMANY
Modifications reserved. No liability for printing errors 04/2011
10
Installing the engine
This section describes the installation of the OS MAX 120 AX, but the general
procedure is the same for any other power plant.
The engine should be screwed to the arms of the two-part engine mount in such a
way that the distance between firewall and the front of the propeller driver is around
140 mm.
Screw the engine mount to the firewall, positioned so that the engine is located
centrally on the firewall: mark the position of the screw-holes on the firewall, then drill
the holes to suit the captive nuts. Fix the engine mount to the firewall using the four
cheesehead screws and captive nuts supplied in the kit. Apply UHU thread-lock fluid
to the screws to prevent them working loose.
The throttle arm on the carburettor must be removed in order to fit the throttle
pushrod. Drill a 3.5 mm Ø hole in the firewall in the appropriate location for the
throttle pushrod. Slip the throttle pushrod and guide tube through the firewall and into
the fuselage; the plain end must pass through the hole in the former and then
through the cross-hole in the swivel pushrod connector mounted on the throttle servo.
Fix the throttle arm on the carburettor throttle barrel in such a way that it is parallel to
the axis of the carburettor when the throttle barrel is exactly half-open.