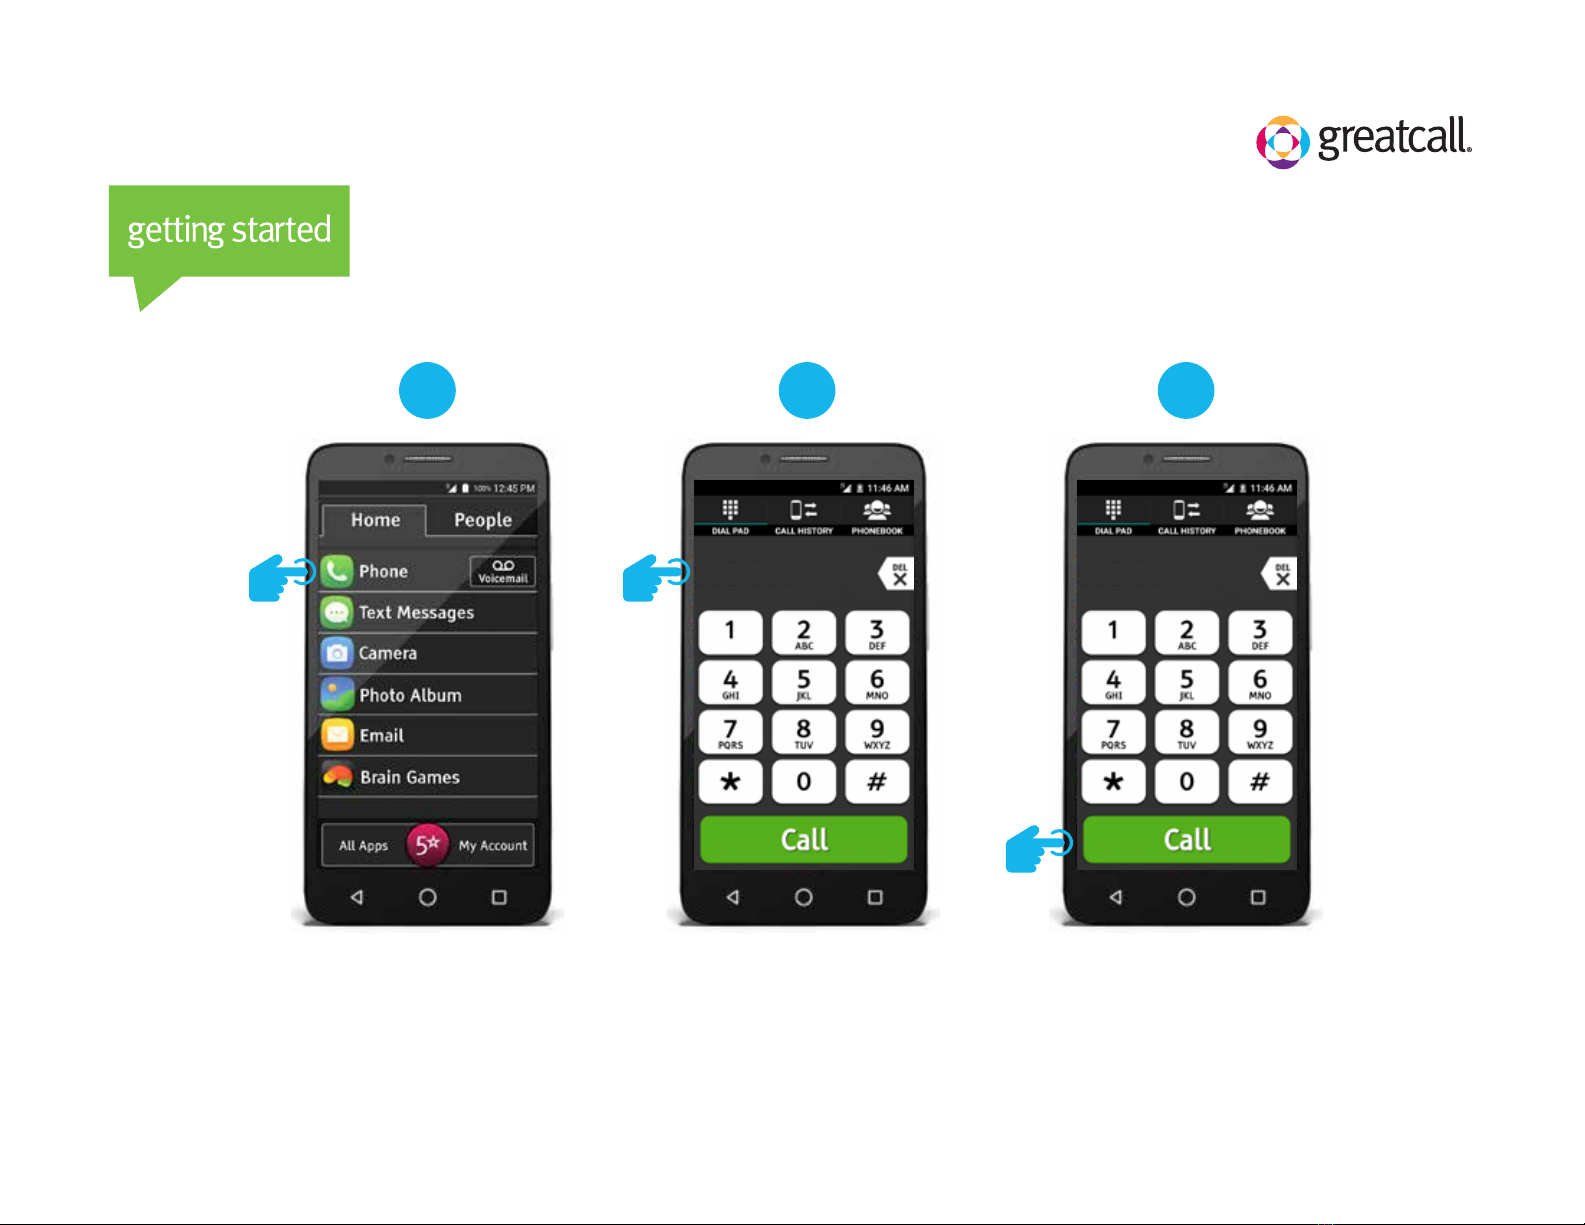
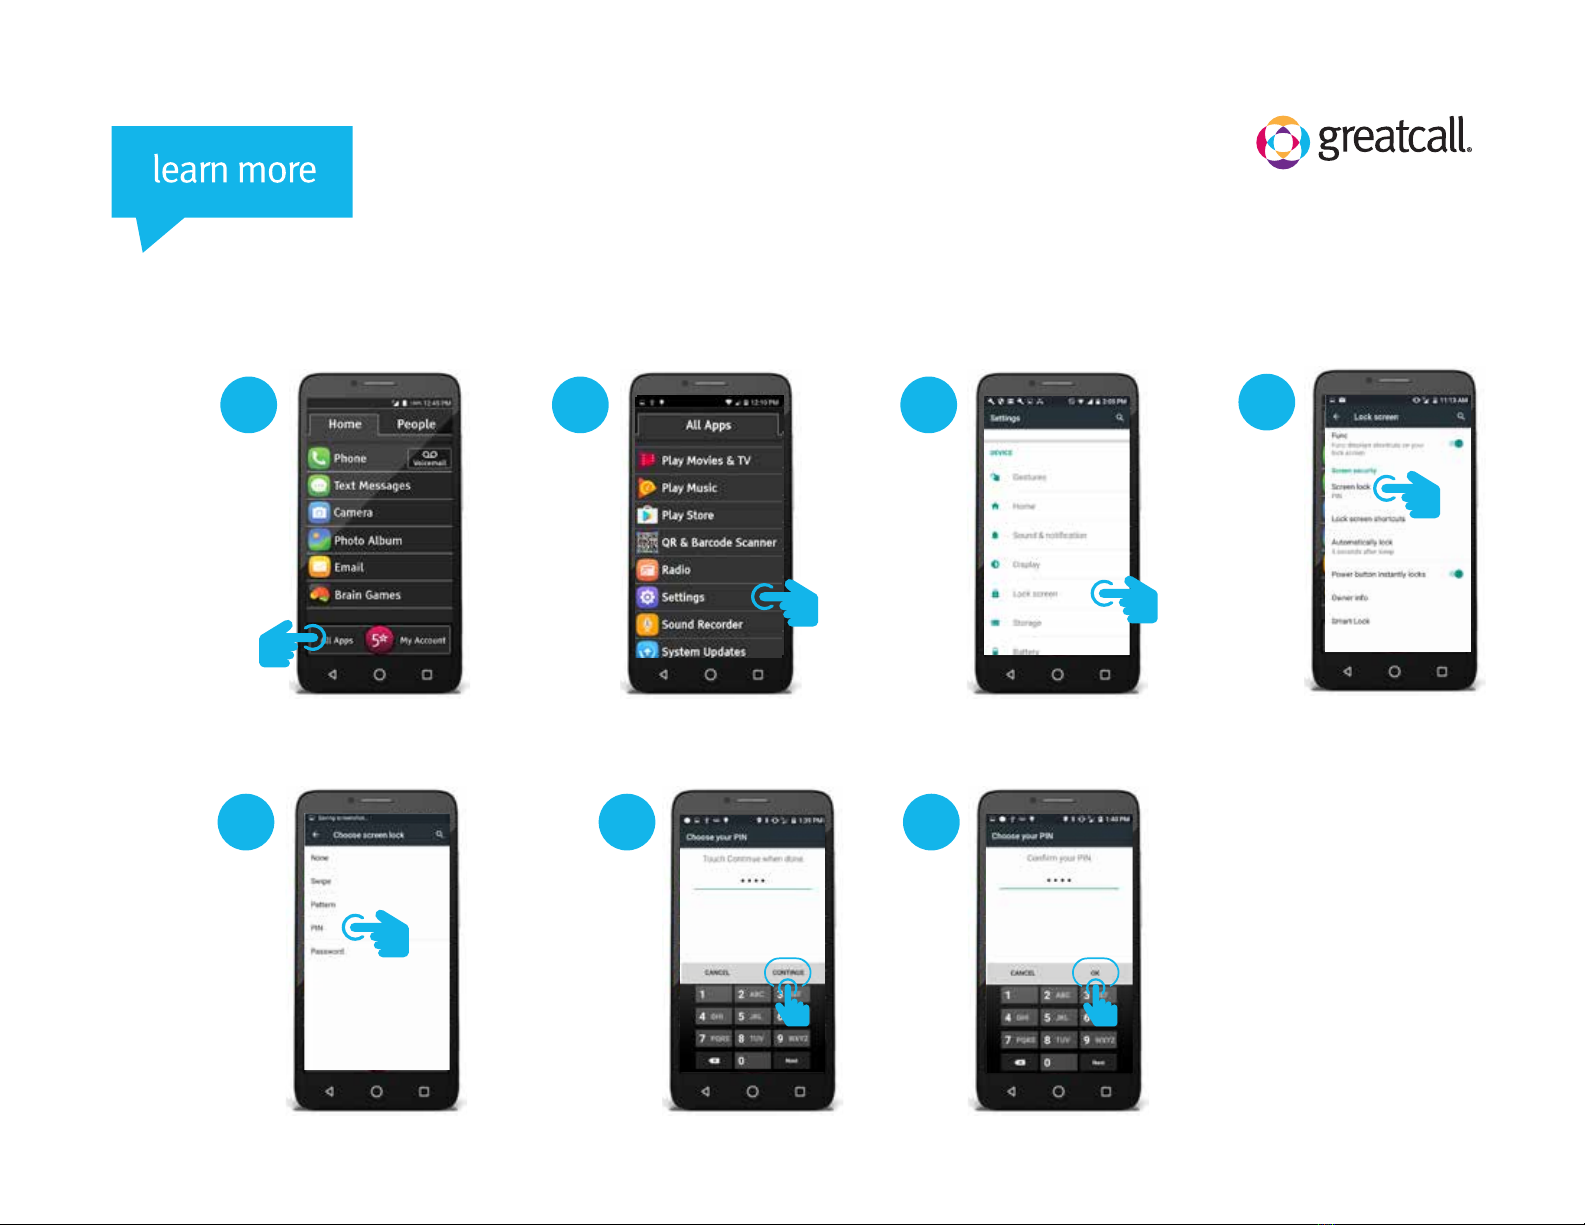
GreatCall jitterbug smart User manual
Other GreatCall Cell Phone manuals

GreatCall
GreatCall jitterbug smart User manual

GreatCall
GreatCall Jitterbug User manual

GreatCall
GreatCall Jitterbug Touch User manual

GreatCall
GreatCall Jitterbug Flip User manual

GreatCall
GreatCall Jitterbug User manual

GreatCall
GreatCall Jitterbug5 User manual

GreatCall
GreatCall Jitterbug5 User manual

GreatCall
GreatCall Jitterbug User manual

GreatCall
GreatCall Jitterbug Administrator Guide