Grundig GUD1500 User manual

IMPORTANT: Please read all instructions
carefully before use and keep for future reference.
GUD1500 Digital Box
Instruction Manual
grundig gud1500 v3.indb 1 13/08/2009 15:31:33

2
A Digital Box lets you access the free
digital channels that are broadcast in
the UK. It uses a digital signal, received
through your normal aerial and lets you
watch it through your existing television.
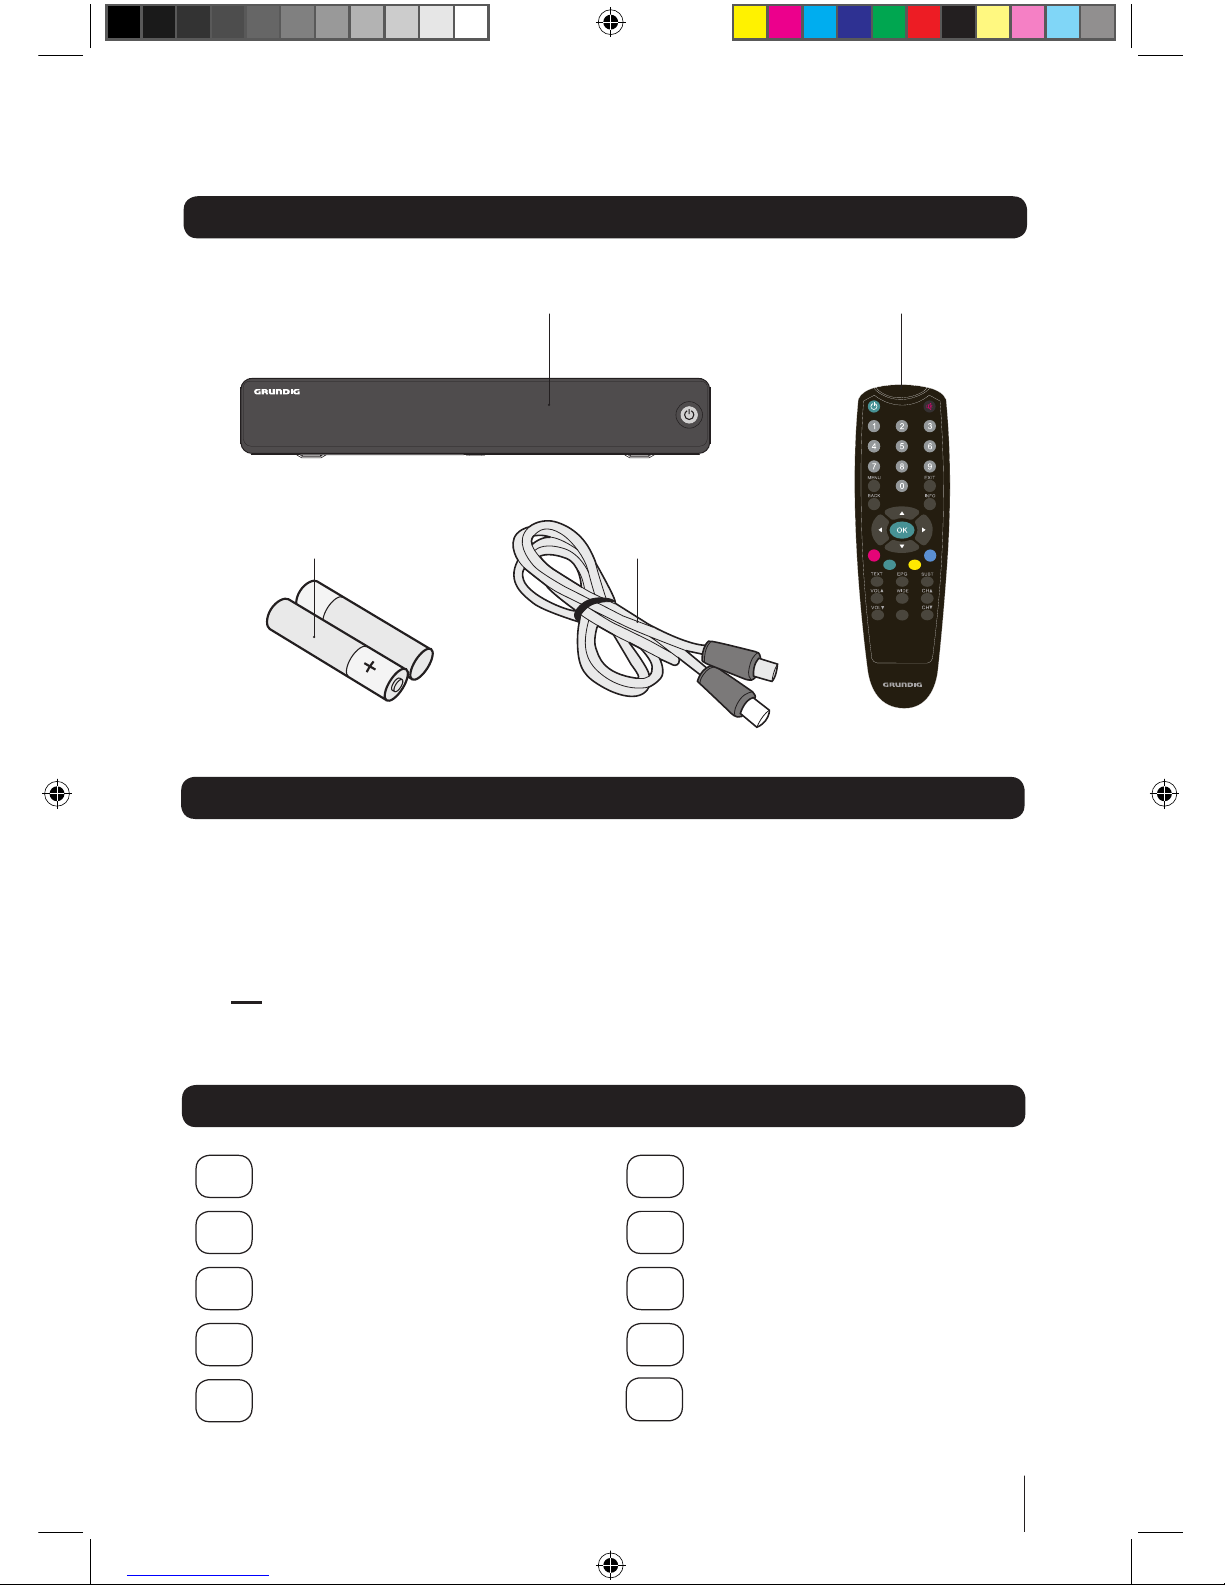
Thank you for choosing this GUD1500 Digital Box.
Not only can it receive over 50 digital TV channels, but you can also listen to
up to 24 digital radio stations, all at the touch of a button.
Introduction
IMPORTANT: Use of any electrical equipment should be undertaken with care. Please
read the safety section on page 19-20 before using your Digital Box. This appliance is
for household use only.
Over 50 digital TV channels.
Up to 24 digital radio stations.
No subscription, no contract, no fuss.
No installation, easy set up.
Red button interactive services.
Coverage
Check coverage in your area.
Text your postcode, followed by your house number or name to 83331*.
Or visit www.freeview.co.uk
*e.g. NW9 6NY (Costs no more than a normal text.)
The FREEVIEW service is subject to coverage. An aerial upgrade may be required. The FREEVIEW, FREEVIEW+,
FREEVIEW+ HD words and logos are trade marks of DTV Services LTD. DTV Services Ltd 2002, 2008.
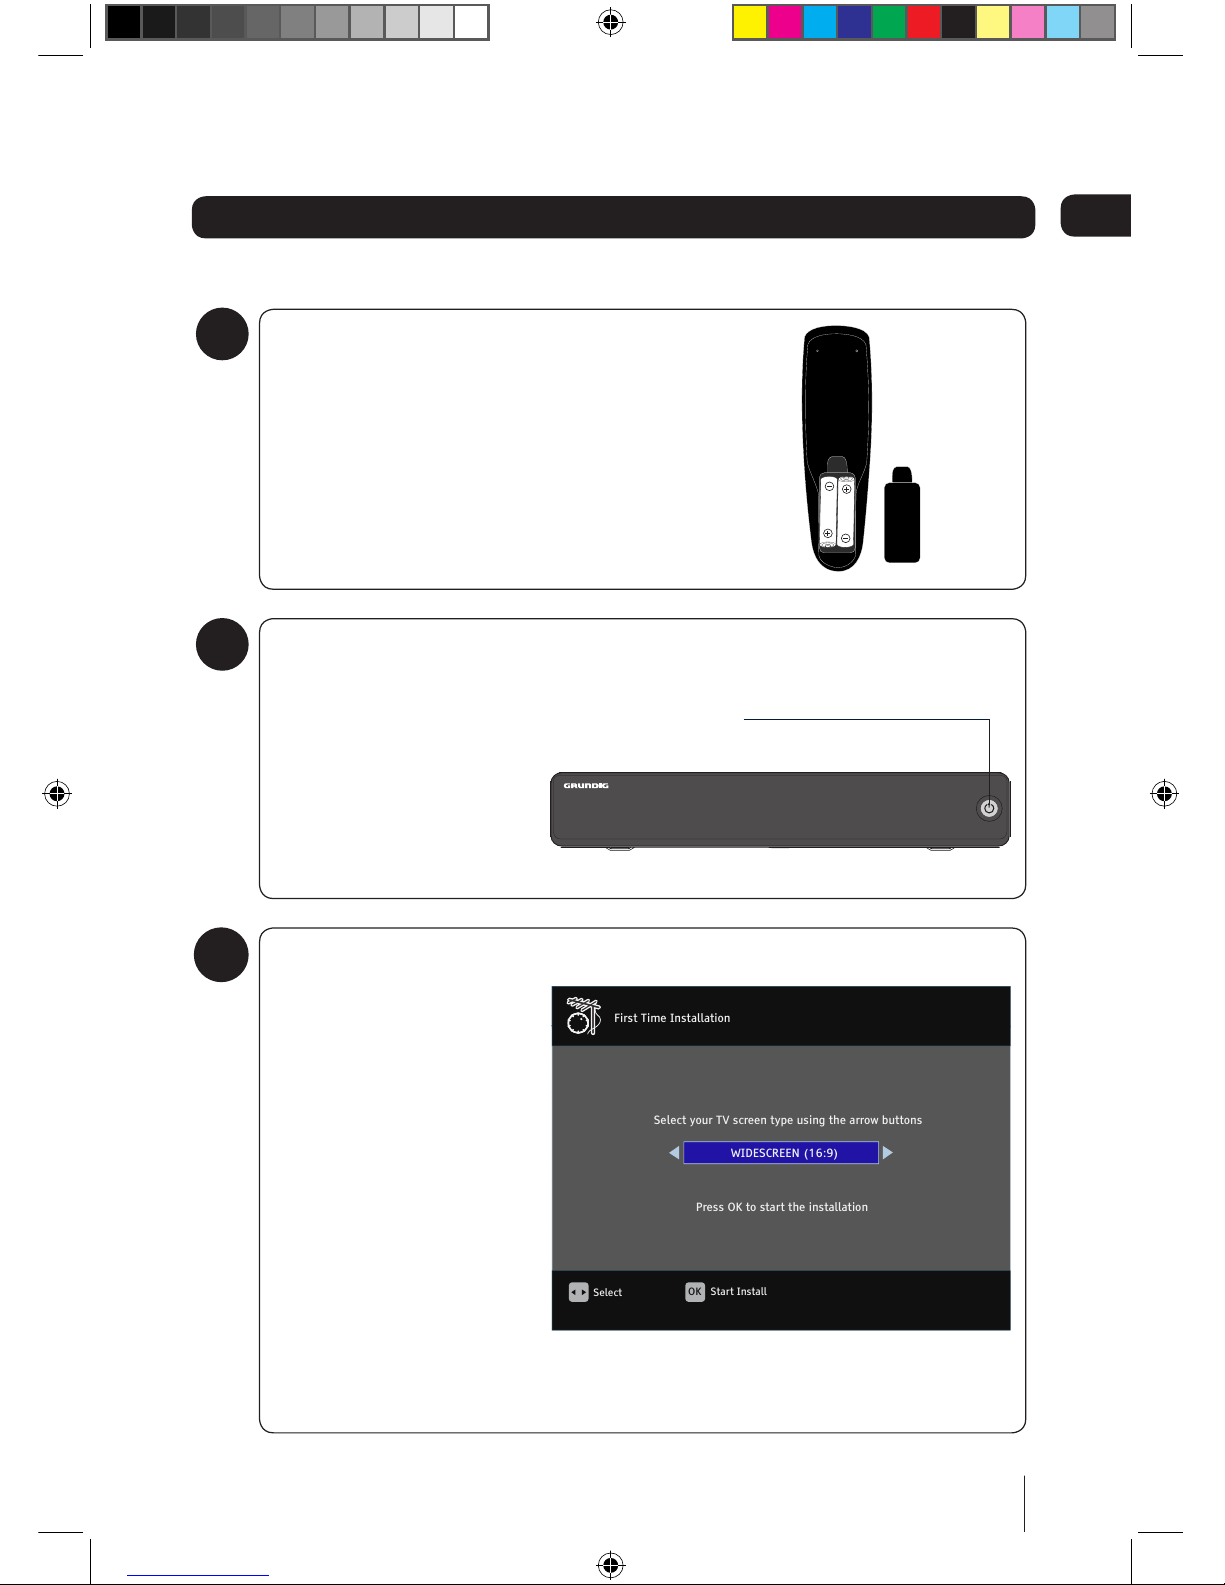
IMPORTANT: The screens and illustrations shown in this instruction manual are
for reference and instruction purposes only, and may not exactly represent the final
product.
grundig gud1500 v3.indb 2 13/08/2009 15:31:33

3
01 Your Digital Box...................4
02 Your remote control ............5
03 Connecting up.....................6
04 Getting started....................7
05 Daily use....................... 9-11
06 Advanced features...... 13-15
07 Re-tuning..........................16
08 Troubleshooting ................17
09 Specifications ...................18
10 Safety......................... 19-20
TV VC/R
What’s in the box?
Your new Digital Box Remote control
2x AAA Batteries RF lead
Other things you will need
Roof top aerial
It is recommended that you use a wideband rooftop aerial in order for your Digital Box to work
properly. For more information visit www.digitaluk.co.uk.
Scart cable
You will need a Scart cable to connect between your Digital Box and your TV. If you want to
connect a DVD recorder to your Digital Box, you will require an additional Scart cable.
grundig gud1500 v3.indb 3 13/08/2009 15:31:34

4
Front view
Back view
Your Digital Box01
Standby button
Aerial Input.
Connect the aerial
to this socket
Composite Video
Aerial Output.
Connect the supplied
RF cable to the TV.
Right Audio Out
Left Audio
Out
Serial port
(Service use only)
TV Scart
Connection to TV
AUX Scart
for connection to a VCR
or a DVD Recorder
Coaxial Digital
grundig gud1500 v3.indb 4 13/08/2009 15:31:35

5
TV VC/R
STANDBY Power On/Standby.
NUMBER PAD Enter values and
select the channel directly by
entering its number.
WIDE Adjust the aspect ratio
of the video output.
EPG Display the EPG
Electronic Program Guide.
INFO Display the Info bar.
NAVIGATION
Navigate up/down/left/right
in menus/on screen displays.
OK Confirm selection in menu/on
screen displays.
COLOUR BUTTONS
For interactive function
CHANNEL UP/DOWN
TEXT Display Digital Teletext
where available.
SUBTITLE
Cycle through the available subtitles
for the current broadcast.
Your remote control 02
MUTE Turns the volume on and off.
VOLUME UP/DOWN
EXIT Closes the on screen menus.
BACK Navigate one step
backwards in menus/on screen
displays
MENU Opens the menu so that you
can change the settings of your
Digital Box.
TV/VCR
Change between the TV and VCR
Scart connections.
grundig gud1500 v3.indb 5 13/08/2009 15:31:36

6
Connecting up03
TV
TV
DVD/RECORDER
TV
TV
DVD/RECORDER
Connecting to the TV and DVD recorder with SCART
TV
TV
DVD/RECORDER
SCART Cable*
RF Cable* RF Cable
RF Cable*
SCART Cable*
SCART Cable*
RF Cable*
RF Cable
Connecting a Hi-Fi system
Audio L/R Cable*
Getting connected
Other connections
Connecting to the TV with SCART
* Not included in the box
grundig gud1500 v3.indb 6 13/08/2009 15:31:40

7
Getting started
Install batteries in remote
Remove the battery cover. Insert two size AAA
batteries so that the ‘+’ and ‘-’ marks on the
batteries match the ‘+’ and ‘-’ marks inside the unit.
Replace the battery cover.
1
2
3
Plug in and switch on
Insert the Digital Box mains plug into a mains
socket. Press the standby button to turn the unit on.
Switch your TV on.
The Easy install screen
The first time installation will
appear on screen. Select the
aspect ratio (screen size),
using the left and right arrow
buttons to move between
the options: NORMAL and
WIDESCREEN.
Press the OK button to start
the installation. The Digital
Box will automatically
begin to tune.
Select Start Install
OK
WIDESCREEN (16:9)
First Time Installation
Press OK to start the installation
Select your TV screen type using the arrow buttons
04
grundig gud1500 v3.indb 7 13/08/2009 15:31:41

8
Tuning in
When your digital box is
tuning in, you will see the
channels that have been
found during the installation
listed. This screen also shows
you, the signal strength and
quality that is being received.
It will take a few minutes for
your digital box to find all the
channels.
4
5
6
Installation complete
When installation is successfully completed, the channel at the top of the channel
list will be shown on your TV. The information banner will be shown on screen for
a few seconds.
Problems installing?
If steps 1 to 5 have not installed your digital box, there are a couple of things that
you should retry.
1. Check all connections to your digital box and TV, making sure that they are
secure and connected to the correct sockets. See page 6.
2. Try the installation again;
Press the MENU button on your remote control.
Select ‘Retune’ using the up and down arrows.
Then press the OK button.
Getting started
Signal
10:00-11:30 Saturday Kitchen Best Bites
11:30-12:00 Eating in the Sun
1 BBC ONE S Sat 08 Aug 10:06
EPGMHEG DVB
Transmitter : London.
Progress 40%
Signal 37%
Channels Found : 84
Channels
Retune
Dave
smileTV
E4+1
SKY THREE
Sky Spts News
Sky News
Quit
Select EXIT
04
grundig gud1500 v3.indb 8 13/08/2009 15:31:41

9
Daily use
Commonly used features
As with most of your electrical goods, there
will be functions you use everyday, and
others that you need only occasionally.
We’ve put the most commonly used
functions in this section so you can get your
Digital Box up and running as quickly as
possible.
We suggest you read this section carefully,
then use the other sections to dip in to
whenever you need some extra details or
some guidance for settings.
Using the Main Menu
Main Menu Thurs 06 Aug 12:25
Channel Organiser
Retune
Settings
Games
System Information
Select Confirm Return Quit
OK BACK EXIT
The main menu gives you access to all the
functions and features of your new digital
box.
To view the main menu press the MENU
button on your remote control.
Use the buttons to select an option,
and then press OK to open it.
To go back to the previous screen or menu,
press the BACK button; to close a menu
press the EXIT button.
Using the EPG
8 Day View Sat 08 Aug 10:03
EXIT
MENU
OK
10:00- 11:30 Saturday Kitchen Best Bites Lifestyle
Channels Programme on Sat 08/08, 10:00-12:00
James Martin looks back at his favourite recipes
and moments from the previous year on
Saturday Kitchen, including recipes by Michel
Roux, Madhur Jaffrey and Glynn Purnell
BBC ONE
BBC TWO
FIVE
BBC THREE
BBC FOUR
Select Watch More Now/Next Quit
-2 Hours +2 Hours -24 Hours +24 Hours
i
10:00-11:30 Saturday Kitchen Best Bites
11:30-12:00 Eating in the Sun
The Electronic Programme Guide, or EPG,
is an on-screen TV guide. It shows all
scheduled programmes in advance for every
tuned in channel. Press the EPG button on
the remote control to access the guide.
You can use the buttons to select a
different channel. Press OK to watch the
selected channel in the preview window.
To watch the programme in full screen
and close the EPG window, press the EXIT
button.
You can use the coloured buttons on your
remote control to change the EPG to a
different time. The red button will move
backwards 2 hours, the green button will go
forwards 2 hours, the yellow button will go
back 24 hours and the blue button will go
forwards 24 hours.
If you want to see extra information about a
programme, press the right arrow button to
select it, and then press the INFO button.
grundig gud1500 v3.indb 9 13/08/2009 15:31:42

10
Daily use
Now and Next
You can change the view of the EPG to a
now and next format by pressing the MENU
button when the EPG is open.
Now/Next Sat 08 Aug 10:05
EXIT
MENU
OK
10:00- 11:30 Saturday Kitchen Best Bites Lifestyle
Channels Programme on Sat 08/08, 10:00-12:00
James Martin looks back at his favourite recipes
and moments from the previous year on
Saturday Kitchen, including recipes by Michel
Roux, Madhur Jaffrey and Glynn Purnell
BBC ONE
BBC TWO
FIVE
BBC THREE
BBC FOUR
Select Watch More Now/Next Quit
i
Saturday Kitchen Bes ...
Transmission Impossi...
Mobil 1 The Grid
This is BBC THREE
This is BBC FOUR
Eating in the Sun
Young Dracula
Mean Machines: Bu
This is BBC THREE
This is BBC FOUR
The now and next view is handy if you
looking for a programme to watch.
Both EPG views also contains digital radio
channels. These are usually saved to the
higher numbers, starting at around channel
700.
Changing the channel
You can select the channel you want to
watch by using the CH and CH buttons
on the remote control.
As you change the channel the information
bar will be shown on screen for a few
seconds.
Signal
10:00-11:30 Saturday Kitchen Best Bites
11:30-12:00 Eating in the Sun
1 BBC ONE S Sat 08 Aug 10:06
EPG
MHEG DVB
This shows details of the currently showing
and the next programme for the selected
channel.
Alternatively you can use the number
buttons to key in the channel number.
Changing the volume
You can change the volume of your Digital
Box by using the VOL and VOL buttons
on the remote control. VOL will increase
the volume and VOL will decrease the
volume.
DON’T FORGET! You may need to check the
volume setting on your TV, as this volume
control changes the digital box only.
To turn the volume off, press the mute
button on the remote control. To turn it back
on, press the mute button again.
Using subtitles
To use subtitles, press the SUBT button on
the remote control. When subtitles have
been turned on, the panel shown below left
will be displayed and the subtitle text will
start to display on screen.
Press the SUBT button again to turn off
subtitles. The panel shown below right will
be displayed and the subtitle text will no
longer be displayed.
Subtitle OffSubtitle On
DON’T FORGET! Subtitles are only shown
when they are broadcast with the
programme. Not all programmes have
subtitles.
05
grundig gud1500 v3.indb 10 13/08/2009 15:31:42

11
Daily use
The info banner
The info banner can be accessed when your
are watching a TV programme, by pressing
the INFO button.
Signal
10:00-11:30 Saturday Kitchen Best Bites
11:30-12:00 Eating in the Sun
1 BBC ONE S Sat 08 Aug 10:06
EPG
MHEG DVB
The info banner shows you the date, time
and signal strength, and also shows you
details of the programme your watching and
the next programme following it.
If you press the INFO button again, you
will see an extended view, with further
information about the programme.
Thurs 06 Aug 13:39
13:30 - 14:30 Nanny 911
Unable to cope with their children, the Dirks have consigned them
to daycare for 10 hours a day. Can Nanny Stella sort them out? To
catch up, go to www.itv.com/itvplayer.
Select QuitEXIT
Extended EPG (Now)
Using digital text
Many digital channels also provide digital
text. For example this could be information
about programmes, the weather, news and
many other topics.
To use digital text, press the TEXT button on
the remote control. An example is shown
below.
DON’T FORGET! Not all channels have
digital text.
05
grundig gud1500 v3.indb 11 13/08/2009 15:31:43

12
05 Daily use
Setting a reminder
You can set your TV to remind you when a
programme you want to watch is about to
start.
1Press the EPG button.
2Scroll to the programme you want to be
reminded about using the arrow buttons.
3Press the OK button.
4A clock icon has now been placed
adjacent to the selected programme.
The reminder has now been set. Press
the EXIT button to go back to the
programme you were watching.
5When the reminder time has been
reached a pop up box will appear.
Use the left and right arrow keys to
choose ‘YES’ to go to the programme,
‘NO’ to delete the reminder, or ‘DELAY’
to remind you again in a few minutes.
Press the OK button to confirm.
6If a reminder clashes with the start
time of a reminder already set, a
warning pop up window will be
shown.
7Press the red button to delete the
old reminder and replace it with the
new one, or press the green button, to
cancel the new reminder and keep the
existing one.
8 Day View Sat 08 Aug 10:03
EXIT
MENU
OK
14:00- 16:30 Racing from Acot: Shergar Cup Sports
Channels Programmes on Sat 08/08, 16:00-18:00
Rishi Persad and Willie Carcon present the final
four races of the Shergar Cup from Ascot
which take place at 2:20pm, 2.55pm, 3.30pm
and 4:05pm. [S]
BBC ONE
BBC TWO
FIVE
BBC THREE
BBC FOUR
Select Reminder More Now/Next Quit
-2 Hours +2 Hours -24 Hours +24 Hours
i
14:00- 16:30 Racing from Acot: Shergar Cup
11:30-12:00 Eating in the Sun
Reminder
Yes No Delay
Requested Reminder
Americaís Got Talent 08/08/2009 16:30 - 17:00
Overlaps with existing reminder
Flog It! 08/08/2009 16:30 - 17:30
Replace existing reminder
Cancel requested reminder
Overlapping reminders
grundig gud1500 v3.indb 12 13/08/2009 15:31:43

13
Advanced features
Organising your channels
You can lock, skip, delete and move channels
in your channel list.
1Press the MENU button.
2Select ‘Channel Organiser’ and then
press the OK button.
3The channel list will be shown, see
below. From this menu you can press
the green button to lock the selected
channel, press the yellow button to
skip the channel (when using the
CH and CH buttons), press the red
button to delete the selected channel
and the blue button to move the
channel up or down the list.
4When a channel is Locked or tagged
to be skipped, an icon will be placed in
the list to indicate these facts. Locked
items cannot be moved or deleted
while in these states. When an item is
deleted it will be permanently removed
from the list and will no longer be
accessible until re-tuned.
5To move a channel, use the
buttons to select the channel and then
press the blue button. The channel
name will be highlighted grey. Use the
buttons to move to the position
where you want to relocate the channel
and then press the OK button.
DON’T FORGET! You can re-tune your
Digital Box to retrieve channels you have
deleted. See Re-tuning on page 16.
Settings menu
The settings menu lets you alter the default
settings of your Digital Box.
1Press the MENU button to display the
main menu.
2Select ‘Settings’ and then press the OK
button.
3The settings menu will be displayed.
The Settings menu has four sub
menus as shown below.
Channel Organiser
Channels Lock Skip
EXIT
BACK
OK
Select Confirm Return Quit
Delete Lock Skip Move
BBC ONE
BBC TWO
FIVE
BBC THREE
BBC FOUR
SKY THREE
Yesterday
Film4
QVC
4 Music
Dave
1
2
5
7
9
11
12
15
16
18
19
1 BBC ONE
Sat 08 Aug 10:03
Main Menu Thurs 06 Aug 12:25
Channel Organiser
Retune
Settings
Games
System Information
Select Confirm Return Quit
OK BACK EXIT
Main Menu Thurs 06 Aug 12:25
Channel Organiser
Retune
Settings
Games
System Information
Select Confirm Return Quit
OK BACK EXIT
05
grundig gud1500 v3.indb 13 13/08/2009 15:31:45

14
Advanced features
Display settings
This function allows you to set the items
shown in the window below that displays
when you select Display Settings and press
the OK button
The Aspect Ratio function lets you select the
screen display to be 16:9, 4:3 or AUTO. The
latter will automatically reformat according
to the program format.
The Video Output function lets you choose
to use RGB or CVBS (composite) video. RGB
will give a picture than CVBS.
The OSD Theme option lets you choose from
three different colour schemes for the on-
screen and menu displays, theme 1, 2 and 3.
The only difference is the colour.
Parental lock
The Parental Lock function allows you to set
a password function on or off. It also lets you
change the password.
1Use the up down buttons to highlight
‘Parental Lock’ and then press the
OK button. Use the buttons to select,
confirm, return or quit according to the
button labels along the bottom of the
Parental Lock window to carry out any
changes you require.
2Make sure you have noted the new
password if one has been set.
DON’T FORGET! You will need to enter your
password when you want to run Factory
Reset, even when Parental Lock is Off.
Factory reset
This function resets all settings to the factory
default settings.
1To reset your Digital Box to the original
factory settings, select the ‘Factory
Reset option in the menu.
2Select ‘YES’ in the box that displays
and then press the OK button.
Warning
Warning all settings and channels
stored will be erased?
Yes No
!
3If the Parental Lock is set to on, then
to carry out a reset you will need
to enter the correct password in
the password box when it displays.
Use the numerical buttons on the
remote control.
4After the correct 4-digit password
has been entered your Digital Box
will reset all settings to the default
settings and re-tune all channels.
06
Settings Thurs 06 Aug 12:25
Select Confirm Return Quit
Display Settings
Parental Lock
Factory Reset
Pref. Language
OK BACK EXIT
Aspect Ratio
Video Output
OSD Theme
AUTO
RGB
Theme 1
grundig gud1500 v3.indb 14 13/08/2009 15:31:45

15
Advanced features
Preferred Language
You can choose from the selection of
languages provided for on-screen display.
You can select from: English, Gaelic, Welsh
and Irish.
Games menu
This menu gives you access to two games,
‘Snake’ and ‘Tetris’.
1Select Games and press the OK button
and the following window will open.
2Use the buttons to select the game
you wish to play and press OK to start
the game.
Snake
Tetris
3Use the arrow buttons on the remote
control to play the games, following
the instructions on screen. To exit
games, press the EXIT button.
System Information
The ‘System Information’ window gives
you information about your Digital Box,
see below. It is useful to have this
information if you need to contact the call
centre for help.
System Information
Manufacturer: Grundig
Model Number: GUD1500
H/W Version: 5162v1.1
S/W Version: A2YST10_16_010B
Transmitter: Sudbury
Subtitle Status: OFF
Language Status: English
Helpline Number: 0871 230 1777
Signal: 90%
Quality: 83%
No of Channels Found: 87
Quit
EXIT
DON’T FORGET! The information shown
on your screen may differ to the one
shown below.
06
grundig gud1500 v3.indb 15 13/08/2009 15:31:45

16
Retuning your Digital Box
As digital switchover happens in your
region, and extra channels and services are
launched, you will need to retune your Digital
Box.
1Press the MENU button.
2Select ‘Retune’ and then press the OK
button.
3When you see the warning popup
screen, select ‘Yes’ using the arrow keys
on your remote control, and then press
the OK button.
Warning
All channels will be retuned
Yes No
!
DON’T FORGET! You will need to enter your
password when Parental Lock is On.
4The re-tuning progress screen will be
displayed (below) showing you how
many channels have been found and
saved. Scanning may take several
minutes to complete.
Transmitter : London.
Progress 40%
Signal 37%
Channels Found : 84
Channels
Retune
Dave
smileTV
E4+1
SKY THREE
Sky Spts News
Sky News
Quit
Select EXIT
5When finished, the following message
will be displayed briefly.
Information
Please Wait ...
6The first channel in the channel list will
then be displayed. Its Info banner will
also be displayed for a short time.
7Your Digital Box has now been retuned.
Re-tuning
07
grundig gud1500 v3.indb 16 13/08/2009 15:31:45

17
08Troubleshooting
Problem Possible cause What to do
Standby light not lit Mains lead unplugged
Mains fuse blown
Check mains lead
Check fuse
No signal found Aerial is disconnected
Aerial is damaged/misaligned
Out of digital signal area
Check aerial lead
Check aerial
Ensure that you are capable of receiving
Digital TV
No picture or sound Tuned to digital teletext channel Switch to another channel
Scrambled channel
message
Channel is scrambled This Digital Box is not able to decode
scrambled channels
No response to remote control Digital Box is switched off
Handset not aimed correctly
Front panel obstructed
Remote batteries exhausted
Plug in and turn on plug
Aim remote at the front panel
Check for obstructions in front of the Digital Box
Replace the remote batteries
Forgotten PIN code Contact the helpline
You have moved your
TV and you find you are
no longer able to receive
digital channels
The aerial feed maybe sent through a
distribution system which can/may reduce
the digital signal now received by the
Digital Box
Try a signal booster or a direct feed from the
aerial
Please note indoor aerial are not recommended for use with this product (this
includes loft aerials) otherwise you may experience problems with reception
or picture break ups on some channels.
Need extra help?
If you have a technical enquiry or a
problem with this Digital Box, just call
0871 230 1777
grundig gud1500 v3.indb 17 13/08/2009 15:31:46

18
Tuner and channel • RF input connector
(IEC-TYPE, IEC169-2, female)
• RF output connector
(IEC-TYPE, IEC169-2, male)
• Frequency range:
470MHz ~862MHz (UHF)
Decoder
• Transport stream
• Profile level
• Input rate
• Video format
• Audio format
• Video output
MPEG-2 ISO/IEC 13818
MAX. 15Mbit/s
MPEG-2 Main profile @main level
4:3/16:9 Switchable
MPEG Layer I & II, 32 / 44.1 / 48KHz
RGB, CVBS
Connection
• Main power cable
• Tuner
• Video
• Audio
• Data port
Fixed type
Aerial input
Composite video output, twin scart
Stereo audio output, digital coaxial audio output
RS-232 (for service use only)
Power supply
• Input voltage
• Power consumption
AC 230V ~50Hz
MAX. 5W/standby <1W
Specifications09
IMPORTANT: Due to continual revision and improvements to our products design,
specifications are subject to change without notice.
grundig gud1500 v3.indb 18 13/08/2009 15:31:46

19
Electrical Information
This Digital Box is fitted with a BS1363/A 13 amp plug. If it is not suitable for your supply
sockets it must be removed and replaced with an appropriate plug. If the plug becomes
damaged and/or needs to be replaced please follow the wiring instructions below. The plug
removed must be disposed of immediately. It must not be plugged into a supply socket as
this will be an electrical hazard. If the fuse needs to be replaced it must be of the same
rating and ASTA approved to BS1362. If the plug is changed, a fuse of the appropriate rating
must be fitted in the plug, adapter or at the distribution board. If the fuse in a moulded plug is
replaced, the fuse cover must be refitted before the appliance can be used.
Wiring Instructions
The supply cable will be either 2-core or 3-core. Follow the appropriate wiring instructions
given below. In both cases ensure that the outer sheath of the cable is firmly held by the
cable clamp.
2- Core plug
WARNING: Do not connect either wire
to the earth terminal.
This symbol indicates that this 2-core appliance is
Class II and does not require an earth connection.
The wire coloured blue must be connected to the terminal
marked with the letter N or coloured black.
The wire coloured brown must be connected to the terminal
marked with the letter L or coloured red.
Fuse
Brown (Live)Blue
(Neutral)
Green & yellow
(Earth)
Fuse
Brown (Live)Blue
(Neutral)
3- Core plug
The wire coloured green and yellow must be connected to the
terminal marked with the letter E, or by the earth symbol ,
or coloured green or green and yellow.
The wire coloured blue must be connected to the terminal
marked with the letter N or coloured black.
The wire coloured brown must be connected to the terminal
marked with the letter L or coloured red.
WARNING: This appliance must be earthed.
grundig gud1500 v3.indb 19 13/08/2009 15:31:46

20
• Unqualified attempts to repair this Digital
Box will invalidate the warranty.
• Refer repairs to this Digital Box to a
qualified service personnel only.
• Do not disassemble this Digital Box.
• There are dangerous-voltage parts inside
that may cause electric shock even after
power is disconnected.
• Store your Digital Box in a clean, dry
environment.
• Unplug the Digital Box immediately if
it gets wet, and consult a servicing
technician.
• Always unplug the Digital Box before
cleaning it.
• Wipe dust off the cabinet of the Digital Box
with a clean, dry and soft cloth.
• Do not place any objects on top of the
Digital Box.
• Avoid exposing your Digital Box directly to
sunlight or other heat sources.
• Put your Digital Box in a well-ventilated
area away from high humidity.
• Do not expose this Digital Box to rain or
moisture, dripping or splashing.
• For stubborn stains use a damp (not
dripping) cloth.
• Do not use any cleaning solutions on this
Digital Box.
Safety Tips
If smoke, abnormal noise or odour comes
out of this Digital Box, unplug from the mains
supply immediately and contact the retailer.
Never try to repair the Digital Box on your
own. Always contact the dealer for repairs.
Note
This manual contains for-reference-only
graphics and information that are subject to
change without notice.
WEEE
This appliance is labelled in
accordance with European Directive
2002/96/EG concerning used
electrical and electronic appliances
(waste electrical and electronic
equipment - WEEE). The guideline
determines the framework for
the return and recycling of used
appliances as applicable throughout
the EU.
Warnings
grundig gud1500 v3.indb 20 13/08/2009 15:31:47
Table of contents
Other Grundig Set-top Box manuals

Grundig
Grundig GSTB3111BR User manual

Grundig
Grundig freeview GSTB4100FV User manual

Grundig
Grundig GSTB3103HD User manual

Grundig
Grundig GUD1600TS1G User manual

Grundig
Grundig GSTB3110DVD User manual

Grundig
Grundig GSTB4101FVE User manual

Grundig
Grundig GSTB3106HD User manual

Grundig
Grundig GSTB3105HD User manual