manuals.online logo
Brands
  1. Home
  2. •
  3. Brands
  4. •
  5. GT
  6. •
  7. Bicycle
  8. •
  9. GT Laguna User manual

GT Laguna User manual

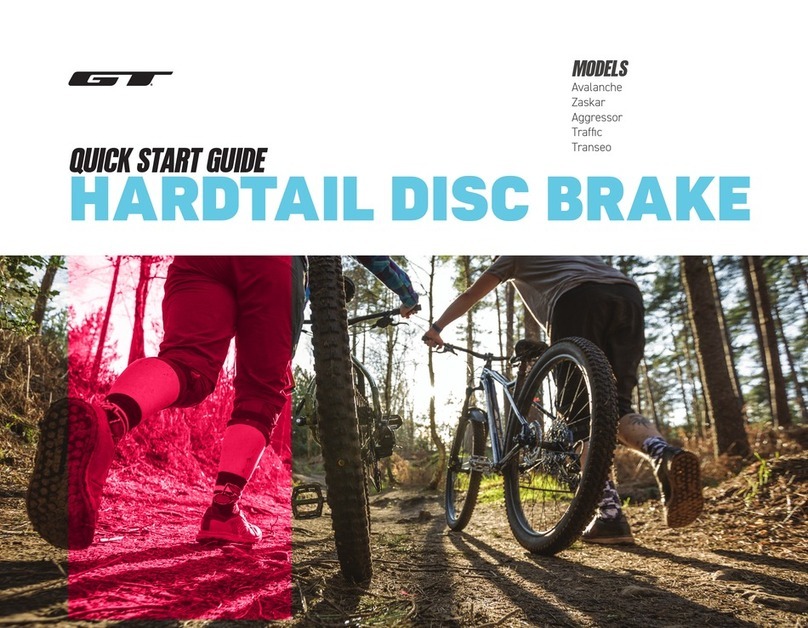
HARDTAIL RIM BRAKE
QUICK START GUIDE
MODELS
Laguna
Palomar
SETUP STEP 1 STEP 2 STEP 3 STEP 4 CONGRATS!
WELCOME TO
THE GT FAMILY
Ok, let’s get to the point….We want to get you out riding your new GT. Our simple
assembly process makes it possible to use your skills to assemble your GT on your
own, and it’s even easier to do with a friend. This guide will walk you through the steps,
and you can also follow along with a video as you build your bike, visit: help.gtbicycles.com
Still have questions? GT rider support staff are ready to help you. Feel free to
give ‘em a ring at (800) 245-3872 a great source of help is at your local GT retailer or other professional
bicycle retailer.
Don’t forget to tag #gtbicycles in your social media when your new bike is all
assembled and ready to ride. We can’t wait to check it out.
This is a Quick Start Guide, intended to
accompany the assembly video, not an
Owner’s manual.
Bicycling is an active sport with inherent
risk. A wide range of injuries are possible.
Due to the nature of bicycle riding, the
situations you encounter while riding,
you will be exposed to the risk of serious
injury, paralysis or death. This risk cannot
be eliminated. You can minimize the
risk in many ways. Begin by reading the
complete GT Bicycle Owner’s manual
accompanying this bike and available
online at www.gtbicycles.com.
THE 4 MAJOR STEPS TO GETTING
YOUR BIKE READY TO RIDE
1. INSTALL HANDLEBARS 2. INSTALL SEAT POST 3. INSTALL THE FRONT WHEEL 4. INSTALL PEDALS
SETUP STEP 1 STEP 2 STEP 3 STEP 4 CONGRATS!
1.
2.
3.
4.
+This video applies to assembling most
GT hardtail mountain bikes equipped
with rim brakes.
+First, open the box with a screwdriver.
Be careful of the staples. Pull the seat
out and set it aside for later.
TOOLS NEEDED
GETTING YOUR
BIKE READY FOR
ASSEMBLY
Inside the box, you’ll find a smaller
box of parts, tools and manuals.
Once you have assembled the bike,
but before you ride, please read the
owner’s manual.
• Pliers or Screwdriver
• Philips head Screwdriver
• Boxcutter
• Cable Cutters or Scissors
• Torque Wrench
• Allen keys
• Pedal Wrench
SETUP STEP 1 STEP 2 STEP 3 STEP 4 CONGRATS!
+
+
+ First, remove the front wheel from the
packaged bike by removing the zip
ties and/or velcro. Then remove all
additional packaging.
+Lift the bike up and set the rear wheel
inside of the box, with the fork hanging
off the frame.
KEY PARTS OF THE BIKE REFERENCED IN THIS GUIDE
SETUP STEP 1 STEP 2 STEP 3 STEP 4 CONGRATS!
SEATPOST
SADDLE HANDLEBARS
FRONT AXLE
STEM
1. Using the included Allen wrench, remove the bolts
and the faceplate from the stem. The stem is what
connects the handlebar to the fork. Set them aside
together, so you don’t lose anything.
2. Insert the handlebar into the stem, and put the
faceplate back on, loosely tightening one of the bolts.
3. Screw in the remaining three bolts in a crosswise
fashion. Don’t tighten them down fully yet.
Roll the handlebars into a comfortable position, then
hand-tighten the stem bolts with the Allen key. We’ll
fully tighten these later.
4. Ensure that the gap on the faceplate is the same on
the top and the bottom of the bar.
STEP 1
INSTALL
HANDLEBARS
1
1
3
4
2
SETUP STEP 1 STEP 2 STEP 3 STEP 4 CONGRATS!
Ensure that the brake and the shifter cables
wrap around the frame in the correct
manner. You don’t want any kinks or twists.
Center your handlebar in the stem using the
markings on the bar.
STEP 2
INSTALL
THE SEATPOST
1. Insert the seatpost into the frame. Locate the
minimum insertion line on the seatpost. Insert
the seatpost into the frame, taking care insert
it beyond the minimum insertion line. Align the
seat with the top tube.
2. Tighten the seat collar snugly for now.
SETUP STEP 1 STEP 2 STEP 3 STEP 4 CONGRATS!
1
2
STEP 3
INSTALL THE
FRONT WHEEL
1
1
2
3
SETUP STEP 1 STEP 2 STEP 3 STEP 4 CONGRATS!
1. First, make room for the tire by squeezing the brakes
together and releasing the brake cable. This will spread
them open to allow the tire to slide in easily.
2. In the parts box, you’ll find the quick-release skewer.
The quick release has an adjusting nut, two springs,
and the quick release lever.
Unscrew the adjusting nut on the end and remove
one spring.
3. Determine the direction that the tire is supposed to
spin, by looking at the side wall of the tire for the
direction arrow.
Insert the quick-release skewer through the left-
hand side of the wheel. Reinstall the spring, ensuring
the small end faces inside, then lightly screw on the
adjusting nut.
The order should be: adjusting nut, spring, the wheel,
another spring and the quick release lever.
STEP 3
INSTALL THE
FRONT WHEEL
1
4
5
6
SETUP STEP 1 STEP 2 STEP 3 STEP 4 CONGRATS!
4. Roll the tire into the fork and set the fork dropouts
down onto the axle. Ensure the quick-release lever is
on the left-hand side of the bike.
5. If it’s too loose, open the quick release lever back up,
tighten the adjusting nut more and then close the quick
release lever again. Make sure the quick-release lever
is below and behind the fork.
6. Re-attach the brakes by squeezing them together, then
sliding the cable back into place.
Give the brakes a quick check, then slide the rubber
protector back into place.
STEP 4
INSTALL
PEDALS
1. Next, install the pedals. Locate the left and right
stickers on the crank, and also on the pedals.
2. Screw the pedals in the direction of the front wheel.
3. Tighten both pedals very firmly using the pedal wrench
included in the box.
SETUP STEP 1 STEP 2 STEP 3 STEP 4 CONGRATS!
Pedals may or may not be included with your bike’s build.
1
2
3
CONGRATULATONS!
YOUR NEW GT
BIKE IS NOW
ASSEMBLED
1
1
3
4
2
SETUP STEP 1 STEP 2 STEP 3 STEP 4 CONGRATS!
Before you ride, it’s important to perform a few pre-ride
checks.
1. Double-check the tightness of your seatpost clamp and adjust if needed.
You’ll know it’s tight enough when you have to push it firmly for it to
close.
2. The proper height of your bicycle seat is about where your hip is. Stand
next to the bike, loosen the quick-release collar, then pull the saddle up
or down, so it’s about where your hip is, and tighten it up. The saddle
will probably be the same height as your stem.
3. Sit on the bike to verify saddle height, holding the brakes to make sure
that it doesn’t move. When your leg is fully extended, it should have a
slight bend in it.
4. Using the provided torque wrench, tighten the stem. First, select the
correct bit and install it into the wrench.
Tighten each stem bolt in that same crosswise fashion as before. Look
for the torque specification markings located on the front and back of
the stem, as well as on the seatpost.
If these markings are absent, torque all stem bolts and seatpost
bolts to 7 Nm.
CONGRATULATONS!
CONTINUED...
1
5
8
7
SETUP STEP 1 STEP 2 STEP 3 STEP 4 CONGRATS!
5. Double check that your quick release is tight. When you close the quick
release lever it should leave a mark on your hand.
6. Make sure your reflectors are tight and positioned correctly.
The rear must point straight back, and the front must be
perpendicular to the ground.
7. Next, secure the front wheel between your legs and twist the
handlebars with your hands. If the handlebars and the front wheel move
independently, your stem fixing bolts are not quite tight enough.
8. Check the front brakes to ensure that they don’t pull back too far. There
should be a gap between a fully compressed brake lever and the grip.
Ensure that the brakes are functioning properly by rolling the bike back
and forth slightly while squeezing the brakes, making sure they grip.
9. Inflate the tires to the manufacturer’s recommended pressure, which is
marked on the side wall of the tire.
Finally, give the bike a final bounce to make sure nothing is loose.
Have Fun!
OUR STORY
Since 1972 GT Bicycles has proudly been
developing bikes, for every type of rider,
with a consistent mission. That mission is
the same reason everybody throws a leg
over their very first bike – pure fun, plain
and simple. GT Bicycles remains true to
sharing the stoke on two wheels which the
brand was founded on because, after all,
you can’t have Good Times without ‘GT’!
Foow Us On
@gtbicycles / @gtbmxfreestyle

This manual suits for next models

1

Other GT Bicycle manuals

GT Force 27.5 User manual

GT

GT Force 27.5 User manual

GT Traffic User manual

GT

GT Traffic User manual

GT Avalanche User manual

GT

GT Avalanche User manual

GT Tachyon User manual

GT

GT Tachyon User manual

GT Kids Laguna User manual

GT

GT Kids Laguna User manual

GT Street Machine GT Operating instructions

GT

GT Street Machine GT Operating instructions

GT Force User manual

GT

GT Force User manual

GT Grade Carbon 2020 Configuration guide

GT

GT Grade Carbon 2020 Configuration guide

GT ROAD Grade User manual

GT

GT ROAD Grade User manual

GT Freestyle Team Signature User manual

GT

GT Freestyle Team Signature User manual

Popular Bicycle manuals by other brands

Flyer Gotour 6 Translation of the original instruction manual

Flyer

Flyer Gotour 6 Translation of the original instruction manual

A/O Bicycle ROSA Assembly guide

A/O Bicycle

A/O Bicycle ROSA Assembly guide

RKS TNT-15 user manual

RKS

RKS TNT-15 user manual

Scott Solace Disc user manual

Scott

Scott Solace Disc user manual

Kinderkraft RUNNER user manual

Kinderkraft

Kinderkraft RUNNER user manual

EG Venice 750FX owner's manual

EG

EG Venice 750FX owner's manual

Junction Victoria user manual

Junction

Junction Victoria user manual

Specialized Roubaix Instruction guide

Specialized

Specialized Roubaix Instruction guide

BERG Freestyler 2WD user manual

BERG

BERG Freestyler 2WD user manual

Specialized MOUNTAIN Assembly guide

Specialized

Specialized MOUNTAIN Assembly guide

Apollo 2013 Owner's manual & technical handbook

Apollo

Apollo 2013 Owner's manual & technical handbook

Giant BOWERY 84 datasheet

Giant

Giant BOWERY 84 datasheet

Retrospec AMOK Assembly instructions

Retrospec

Retrospec AMOK Assembly instructions

LeMond Bicycle owner's manual

LeMond

LeMond Bicycle owner's manual

FAZUA RIDE 60 Service manual

FAZUA

FAZUA RIDE 60 Service manual

Estate FOLD EST-EFLDBIKE quick start guide

Estate

Estate FOLD EST-EFLDBIKE quick start guide

CSAWP LEMON user manual

CSAWP

CSAWP LEMON user manual

redtoys Cruiser Assembly instruction

redtoys

redtoys Cruiser Assembly instruction

manuals.online logo
manuals.online logoBrands
  • About & Mission
  • Contact us
  • Privacy Policy
  • Terms and Conditions

Copyright 2025 Manuals.Online. All Rights Reserved.