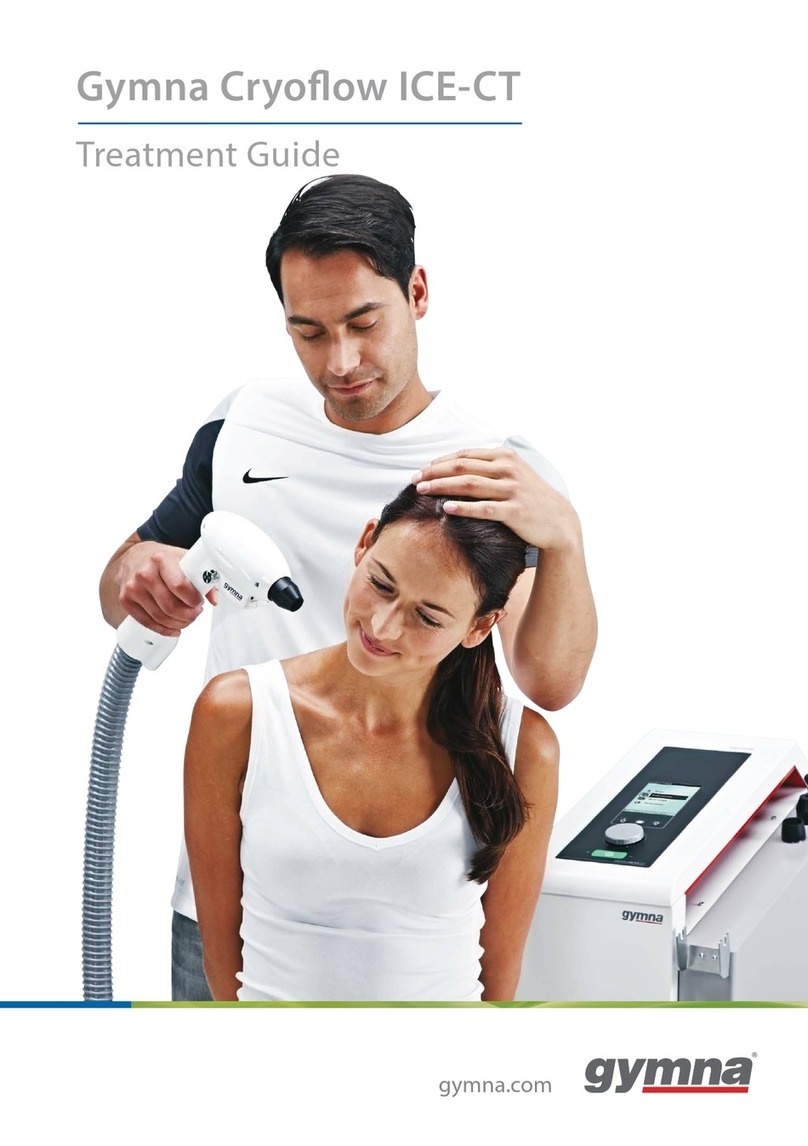
Gymna CRYOFLOW ICE-CT User manual

User Manual
CRYOFLOW ICE-CT

ELCR007-AUM001-V10 Operating instructions CRYOFLOW ICE-CT (2014-11-03)1
Your specialist dealer:

ELCR007-AUM001-V10 Operating instructions CRYOFLOW ICE-CT (2014-11-03)2
Copyright© GymnaUniphy NV, 2014
The unauthorised partial or total reproduction of any supplied software is strictly prohibited and will be prosecuted.
Worldwide distributor
GymnaUniphy NV
Pasweg 6A, 3740 Bilzen, Belgium
Tel +32 (0)89 510 510 Fax +32 (0)89 510 511
www.gymna.com e-mail: info@gymna.com
Manufacturer:
Uniphy Elektromedizin GmbH & Co. KG
Neuendorfstr. 19b, 16761 Hennigsdorf, Germany

ELCR007-AUM001-V10 Operating instructions CRYOFLOW ICE-CT (2014-11-03)3
CONTENTS
1INTRODUCTION.................................................................................................4
2DESCRIPTION OF CONTROLS, DISPLAYS, EQUIPMENT PARTS...................5
3GENERAL INFORMATION..................................................................................7
3.1 Device .................................................................................................................7
3.2 Installation of the device after delivery .................................................................7
3.3 Directive for medical devices ...............................................................................8
3.4 ESD guidelines....................................................................................................8
4SHORT OPERATING INSTRUCTIONS...............................................................9
5COMMISSIONING.............................................................................................10
5.1 Inspection on delivery........................................................................................10
5.2 Connection to the power supply.........................................................................10
5.3 Switch on and Switch off....................................................................................10
5.4 System setup.....................................................................................................11
6TREATMENT.....................................................................................................12
6.1 Operating mode selection..................................................................................12
6.2 Timed operation.................................................................................................13
6.3 Continuous operation.........................................................................................14
6.4 Thermo feedback...............................................................................................15
6.4.1 Automatic operation...........................................................................................16
6.4.2 Manual operation...............................................................................................17
6.4.3 Indications .........................................................................................................18
6.4.4 Objectives..........................................................................................................19
6.4.5 Skin Temperature..............................................................................................19
7DE-ICING ..........................................................................................................20
8DRAINING THE WATER TANK.........................................................................21
9USING CRYOTHERAPY...................................................................................22
9.1 Physiological effect of the cryotherapy...............................................................22
9.2 Significant medical effects .................................................................................22
9.3 Therapy advice as regards the use of cold air....................................................22
9.4 Indications selected for local cryotherapy...........................................................22
9.5 Contraindications...............................................................................................23
10 SAFETY INSTRUCTIONS FOR THE OPERATION OF THE DEVICE...............24
11 FAULTS, SERVICE, GUARANTEE ...................................................................26
11.1 Faults.................................................................................................................26
11.2 Service ..............................................................................................................27
11.3 Guarantee..........................................................................................................28
11.3.1 Guarantee conditions.........................................................................................28
11.3.2 Limitation of liability of the manufacturer............................................................28
11.4 Handling the treatment hose/IR cableFaults ......................................................29
11.5 Handling the supporting arm..............................................................................30
11.6 Relocating the device.........................................................................................31
12 MAINTENANCE AND CLEANING.....................................................................32
12.1 CLEANING THE COOLER ................................................................................32
13 DECOMMISSIONING AND DISPOSAL.............................................................34
14 TECHNICAL SPECIFICATIONS........................................................................35
15 ACCESSORIES.................................................................................................36
15.1 Scope of delivery...............................................................................................36
15.2 Optional accessories:.........................................................................................36
16 NOTES ON ELECTROMAGNETIC COMPATIBLITY (EMC)..............................37
ELCR007-AUM001-V10 Operating instructions CRYOFLOW ICE-CT (2014-11-03)4
17 SERVICE ADDRESS.........................................................................................40
18 EXPLANATION OF SYMBOLS..........................................................................41
1 INTRODUCTION
Congratulations on the purchase of your new CRYOFLOW ICE-CT!
You have opted for the CRYOFLOW ICE-CT, a cold air therapy device with high levels of performance, an attrac-
tive and user-friendly design, and of the highest quality. The CRYOFLOW ICE-CT has already proven to be ex-
cellent in physiotherapy centres, local practices and clinics.
The CRYOFLOW ICE-CT determines the surface temperature of the skin without touching it, and maintains the
set value as a condition for the application of the cold treatment. The patient will find that the control of the skin’s
surface temperature feels very comfortable, thus minimising the occurrence of cold pain. Combined with the sup-
porting arm, longer treatments may be administered without incurring fatigue. The cold can penetrate the tissue
deeply and evenly, without it being too unpleasant for the patient.
We have placed special emphasis on high levels of reliability, safety, ease of operation and extended service life.
Please read carefully these Operating Instructions before using the CRYOFLOW ICE-CT to ensure its proper
application.
We wish you and your patients every success in your treatment with the CRYOFLOW ICE-CT.

ELCR007-AUM001-V10 Operating instructions CRYOFLOW ICE-CT (2014-11-03)5
2 DESCRIPTION OF CONTROLS, DISPLAYS, EQUIPMENT PARTS
1 Power supply cord
2 Filter mat
3 Power switch
4 Valve for water tank
5 Label
6 Mains fuses
8Nozzle feed
9Nozzle that is screwed on the nozzle feed
10 LED “SELECT”, yellow, select active
11 “DEFROST”button
12 “SYSTEM”button
13 “MAIN MENU”button
14 LED “POWER”, green, treatment active
15 “START/STOP”button
16 Knob, parameter setting
17 Display
18 Connection cable for the IR sensor
19 Supporting arm (option)
20 Handle, pivoting, with IR sensor, for the treatment hose (27)
22 M8x30 star grip on the handle holder
23 Support mounted on the CRYOFLOW ICE-CT for the supporting arm
24 Flange on the device for connecting the treatment hose (26) or (27)
25 Socket for the connection cable of the IR sensor
27 Treatment hose, for the handle with IR sensor (20)
28 Ventilation plate (unscrew to clean the cooler)

ELCR007-AUM001-V10 Operating instructions CRYOFLOW ICE-CT (2014-11-03)6

ELCR007-AUM001-V10 Operating instructions CRYOFLOW ICE-CT (2014-11-03)7
3 GENERAL INFORMATION
Purpose
Cryotherapy devices, with and without infrared option for manual cryotherapy, have been developed for the
treatment of orthopaedic diseases, or treatment of traumatology, as well as those relating to sports medicine.
Cold air is generated by a cooling unit and heat exchanger, and delivered in doses by means of a fan (controlled
in thermofeedback mode) via a nozzle to the place of treatment on the patient. The therapy occurs either in con-
tinuous or timed operation.
Cryotherapy devices are used for pain relief, anti-inflammation, relaxation, to reduce swelling or bleeding, as well
as to reduce nerve conduction velocity on joints, tendons, muscles and nerves.
For specific indications and contraindications, please refer to Chapters 9.4 and 9.5 of these Operating Instruc-
tions.
3.1 Device
As a therapy device, the CRYOFLOW ICE-CT is not intended for the mobile or emergent use
Careful: Cryotherapy devices should be used exclusively by personnel trained or skilled in the fields of physio-
therapy or other similar background, and the treatment must be monitored by this personnel!
The device is not intended to drive over obstacles, with the exception of transport to the destination for initial as-
sembly. The movable rollers are only used for a better position change to optimize treatment in the room. The
brakes on the two braked rollers must be released to change position and be locked again.
The device sucks in the ambient air via a filter mat (2) and cools it down to -32 °C. The ambient air looses humidi-
ty during cooling. The dried cold air passes through a nozzle (9) to the body part to be treated. The cold air flow is
adjustable in 10 steps and may be changed even during the treatment.
Using the CRYOFLOW ICE-CT, the surface temperature can be selected and maintained automatically at a con-
stant level.
Various nozzles (9) may be screwed on the angled nozzle feed (8) of the 360° pivoting handle (7) or (20).
The flexible hose with the pivoting handle (7) or (20) and the additional 2nd joint on the flange (24), ensures a
fatigue-free treatment for the user and a really wide range of action.
A supporting arm can be fitted on the device. It makes long treatments easier.
The easy adjustment and clear display of the parameter on the panel (17) allow for a straightforward treatment of
the patient.
The nozzles (9) should not be touched during the treatment of a patient. The cold air flow could be considerably
restricted or completely interrupted.
3.2 Installation of the device after delivery
The device is delivered completely assembled. If the optional supporting arm is included in the delivery, then it
must be placed on the device on the holder for the supporting arm (23) and attached using the star grip (22).
If, in this context, a threshold crossing is required, this must be done with the aid of optional accessories "thresh-
old ramp" (see Item 15 Accessories).
At the back of the device, open the valve (4) for the water tank and check that the tank is in its proper place. Any
bits of paper or foam used to ensure a safe transport should be removed.
After unpacking the device, and before connecting it to the power supply, it is essential to make sure that no con-
densation remains and that the temperature of the device has been adjusted to the room temperature. In any
case, you should wait at least 1 hour before switching it on. Please also refer to Item 5 "Commissioning“.
The device should be transported lying down, so to avoid any potential damage to the cooling circuit or to the
compressor. After placing the device, wait at least 30 minutes before turning it on.
Careful! The device is not intended to be fitted or used in an environment that is rich in oxygen or in presence of
anaesthetic gases (AP/APG environment)!

ELCR007-AUM001-V10 Operating instructions CRYOFLOW ICE-CT (2014-11-03)8
3.3 Directive for medical devices
The CRYOFLOW ICE-CT complies with the requirements outlined in Directive 93/42/EWG on medical devices.
The device may only be operated in accordance with the purpose described in these Operating Instructions.
We recommend that a safety-related inspection of the device be carried out every 2 years, by an authorised ser-
vice (Item 11.3)
3.4 ESD guidelines
The following measures must be taken during installation:
Before making the electrical connection, please touch only once the housing of the medical device in or-
der to discharge it.
Use no other accessories than those mentioned in the Operating Instructions.
We recommend that you train all relevant persons in matters of general ESD protection measures.

ELCR007-AUM001-V10 Operating instructions CRYOFLOW ICE-CT (2014-11-03)9
4 SHORT OPERATING INSTRUCTIONS
Careful: Before applying cryotherapy, first check that the patient does not have any potential intolerance and/or
allergy!
First treatment
1 Switch on the power supply (3)
2 Select the operating mode, continuous operation, timed operation or thermofeedback, knob (16)
3 Select the parameters, knob (16), to set air stages and/or treatment time and/or temperature, or to Item 4.
Short Operating instructions
4 Start the treatment, Start/Stop button (15)
5 Adjust the air stages to the sensitivity of the patient using the knob (16)
(In thermofeedback operating mode, it is not possible to set programmes or have automatic mode.)
6 Treatment ends when:
Timed operation: -Automatic after expiry of the set treatment time
-Interruption during the treatment when activating the Start/Stop button (15)
Continuous operation: -Start/Stop button (15)
Thermofeedback: - Automatic operation, such as timed operation
- Manual operation, such as continuous operation
- Set programme (indications), such as timed operation
Upon the regular conclusion of the treatment or the interruption of the treatment using the Start/Stop button
(15), the display of Figure 2 “Operating mode selection”can be brought up using the Main Menu button (13),
Item 2 short operating instructions
Other treatments
7 Return to Item 3 Short Operating Instructions (Operating mode is selected)
8 Return to Item 4 Short Operating Instructions (Parameters are selected)
Changing the operating mode
Press the Main Menu button (13), Figure 2 “Operating mode selection”appears, then proceed according to
Item 2 Short Operating Instructions.
Recommended
Switch on the device 5 to 10 minutes prior to the treatment (3).
Do not switch the device off for treatment pauses shorter than 30 minutes.
This enables a pre-cooling of the heat exchanger and the air exiting nozzle (9) at the start of the treatment is
significantly colder.
The device is in standby mode.
System setup (see Item 5.4)
Press on the system button (12) and change the settings with the knob (16), for example the language,
sound of the button, sound volume, contrast of the Display (17), or temperature unit in °C or °F.
Return by pressing on the Main Menu button (13) in Figure 2 “Operating mode selection”.
De-icing (see Item 7.)
On Display (17), if stars appear at the bottom or the air flow is significantly reduced, the heat exchanger is ic-
ing up.
Press on the Defrost button (11). The “De-icing”process (Figure 6) will end automatically and the device will
then switches to the standby mode.
Emptying the water tank (see Item 8.)
Figure 7 will appear on the Display (17) when the water tank is full.
Turn off the device with the power switch (3). Open the valve (4) for the water tank, remove and empty the
container.
Replace the container in the device and close the valve (4).
Cleaning the cooler (see Item 12)
After an operating time of 500 hours, a notice will appear on the Display (17) regarding the cleaning of the
cooler.
The ventilation plate (28) must be unscrewed and then you should proceed as per Item 12.

ELCR007-AUM001-V10 Operating instructions CRYOFLOW ICE-CT (2014-11-03)10
5 COMMISSIONING
Careful!
The device should not be used in explosive atmospheres.
There is a risk of explosion if the device is used in areas where flammable gases are present, or where they may
be released during the operation of the device (e.g. anaesthesia rooms that use easily flammable anaesthetics).
5.1 Inspection on delivery
Check that the device has not been damaged during transport and that the accessories are intact and complete
(see Item 15. Accessories and the delivery note).
In case of damages or defects, please promptly notify your supplier. In case of serious damage, do not turn the
device on.
5.2 Connection to the power supply
The device is intended to be connected to a power supply of 230 V +/- 10 %, 50/60 Hz; special models may also
be connected to 115 V +/- 10 %, 50/60 Hz.
Please refer to the information on the label (5) at the back of the device. Before connecting to the existing power
supply, check its compliance with the label (5).
Connecting to the wrong power supply can damage the device.
The connection must be made using only the firmly connected power supply cord (1) that comes with the basic
equipment, to a properly fitted grounded power outlet. As regards fuses in the associated installation, we recom-
mend using 16 A slow-blow fuse at 230 V and 20 A slow-blow fuse at 115 V.
Please also consider Item 3.2 “Installation of the device after delivery”.
Careful: Only the accessories specified in Chapter 15 should be used!
Caution! Avoid trapping & bruising during operation, and pay attention to the risk of jabbing or stabbing the pa-
tient when moving the supporting arm! Please refer to instructions in Item 11.4 “Handling the treatment
hose/IR Cable”and in Item 11.5 “Handling the supporting arm”.
5.3 Switch on and Switch off
Switch on the device using the power switch (3) at the back of the CRYOFLOW ICE-CT. The Display (17) will
briefly show the name of the device and its relevant software version. During that time, a device test will be per-
formed. After this device test, the device goes into standby mode. The Display (17) shows Figure 2 “Operating
mode selection”(see Item 6.1). The compressor will be switched on. There is then a pre-cooling phase of the
heat exchanger. Upon reaching the preset minimum temperature, the compressor switches off, and on again
when it reaches the preset maximum temperature.
This process is repeated and will be called standby mode. The device can remain in that mode during treatment
pauses.
Should the patient stop requiring treatments for longer periods of time, such as after work, during holidays or in
case of need, then the device can be switched off using the power switch (3). Please refer to Items 11 and 12 of
these Operating Instructions.
When the power switch (3) is “ON”, the light is green. When it is “OFF”, there is no light.
The device must be switched off for maintenance and service work, and the power plug of the power supply cord
(1) must be pulled out of the power supply.

ELCR007-AUM001-V10 Operating instructions CRYOFLOW ICE-CT (2014-11-03)11
5.4 System setup
You can change the language, contrast of the Display (17) and the volume of the sound of the button, as well
as turn the sound of the button on or off.
Using the system button (12), you can go from Figure 2 “Operating mode selection”(see Item 6.1) in the system
setup (Figure 1). By turning the knob (16) either on the right or on the left, you can select the parameters to set.
Pressing the knob (16) will activate this parameter and you can adjust it again by turning right or left. By pressing
the knob (16) again, the set value will be saved.
Activating the Main Menu button (13) will get you back to Figure 2 “Operating mode selection”(see Item 6.1).
In the CRYOFLOW ICE-CT, you can select the unit for the temperature, either °C or °F. The sound at the end of
the treatment is always activated by the CRYOFLOW ICE-CT.
Figure 1.: “System setup”

ELCR007-AUM001-V10 Operating instructions CRYOFLOW ICE-CT (2014-11-03)12
6 TREATMENT
6.1 Operating mode selection
After the device initialisation, the CRYOFLOW ICE-CT starts with the Main menu, in which the desired operating
mode can be selected. The choices will be determined by whether the device is operated with or without an IR
sensor (see Figure 2). The yellow LED (10) lights up. By turning the knob (16) right or left, you can choose be-
tween a timed operation, continuous operation or thermofeedback. The selected operating mode is highlighted on
the Display (17). Pressing the knob (16) will switch on the selected operating mode.
Figure 2: Operating mode selection with contact
with IR sensor

ELCR007-AUM001-V10 Operating instructions CRYOFLOW ICE-CT (2014-11-03)13
6.2 Timed operation
The green LED (14) lights up. The Display (17) will show the values that were last selected for time and air flow. It
is now possible to start the treatment. You can also set up the treatment time in 1-minute increments and the air
flow in 10 steps. To set up, use the knob (16), turn it (selection) and press it (activation).
Activating the Start/Stop button (15) will start the treatment.
It is also possible to interrupt the treatment by activating that button.
During the treatment, the air flow can be adjusted to the patient’s sensitivity to the cold using the knob (16). The
strongest sensitivity to cold may occur, for most patients, at air stages 5 to 6 with the smallest possible distance
of the largest nozzle (9) from the skin surface.
The end of the treatment time is indicated by a short visual and acoustic signal (can be switched off, see Item
5.4). The output picture will appear again on the Display (17) before the start of the treatment. A new treatment
can be started.
After stopping the treatment, Figure 2 “Operating mode selection”can be called up again (see Item 6.1) by acti-
vating the Main Menu button (13).
Figure 3: “Timed operation”

ELCR007-AUM001-V10 Operating instructions CRYOFLOW ICE-CT (2014-11-03)14
6.3 Continuous operation
The green LED (14) lights up. The Display (17) will show the values that were last selected for the air flow. It is
now possible to start the treatment. You can also set the air flow in one of the 10 steps. To set up, use the knob
(16), turn it (selection) and press it (activation).
Activating the Start/Stop button (15) will start the treatment. It is also possible to interrupt the treatment by activat-
ing this button (15). The time will be reset to zero and a new treatment can be started.
During the treatment, the air flow can be adjusted to the patient’s sensitivity to the cold using the knob (16). The
strongest sensitivity to cold may occur, for most patients, at air stages 5 to 6 with the smallest possible distance
of the largest nozzle (9) from the skin surface.
At the end of the treatment, Figure 2 “Operating mode selection”can be called up again by activating the Main
Menu button (13) (see Item 6.1).
Figure 4: “Continuous operation”

ELCR007-AUM001-V10 Operating instructions CRYOFLOW ICE-CT (2014-11-03)15
6.4 Thermo feedback
Thermo feedback is the possibility to perform a controlled application of the cold air while determining and display
the surface of the body part to be treated without any contact.
In Figure 5.1, you can choose between the operating mode with freely adjustable parameters (freely selectable)
and the operating mode with preset parameters (indications, goals). To go the desired programmes, use the knob
(16), turn it (selection) and press it (activation). In the “Freely selectable”operating mode, you can choose be-
tween the manual operation (manual) and automatic operation (automatic) (Figure 5.2).
Use the knob (16), turn it (selection) and press it (activation) to go to the “automatic”operating mode in Figure
5.3 (Item 6.4.1) and to the “manual”operating mode in Figure 5.5 (Item 6.4.2).
Figure 5.1: “Thermofeedback”Figure 5.2: “Operating mode”

ELCR007-AUM001-V10 Operating instructions CRYOFLOW ICE-CT (2014-11-03)16
6.4.1 Automatic operation
The green LED (14) lights up. The Display (17) will show the values that were last selected for time and tempera-
ture. The red LED on the handle also lights up. The red ray of light serves for the topographic orientation of the IR
sensor. The optimal distance for determining the skin temperature (as reference value) in the cold air flow is a
distance ranging between 3 cm and 8 cm from the nozzle (9) to the skin surface.
It is possible to start the treatment. You can also set up the treatment time in 1-minute increments and the tem-
perature in 1-degree increments. To set up, use the knob (16), turn it (selection) and press it (activation).
The treatment temperature can be adjusted between 12 °C and 25 °C.
Activating the Start/Stop (15) will start the treatment.
It is also possible to interrupt the treatment by activating this button.
During the treatment, the air flow is automatically controlled. If the preset surface temperature (reference value) is
reached, it switches itself off and when it exceeds this temperature, it switches itself back on. The end of the
treatment time is indicated by a short visual and acoustic signal. The Display (17) shows again the output picture
just as it did at the start of the treatment. A new treatment can be started.
After the end of the treatment, or when the treatment is stopped, Figure 2.2 “Operating mode selection”can be
called up again by activating the Main Menu button (13) (see Item 6.1).
Figure 5.3: “Automatic operation”“ Figure 5.4: “Automatic operation”, START

ELCR007-AUM001-V10 Operating instructions CRYOFLOW ICE-CT (2014-11-03)17
6.4.2 Manual operation
The green LED (14) lights up. The Display (17) will show the values that were last selected for time and air flow.
The red LED on the handle also lights up. It shows the detection area of the IR sensor. The optimal distance for
determining the skin temperature (as reference value) in the cold air flow is a distance ranging between 3 cm and
8 cm from the nozzle (9) to the skin surface.
It is now possible to start the treatment. You can also set up the treatment time in 1-minute increments and the air
flow in 1 to 10 steps. To set up, use the knob (16), and turn it (selection) and press it (activation).
Activating the Start/Stop button (15) will start the treatment.
It is also possible to interrupt the treatment by activating that button.
During the treatment, the air flow can be adjusted to the patient’s sensitivity to the cold. The strongest sensitivity to
cold may occur, for most patients, at air stages 5 to 6 with the smallest possible distance of the largest nozzle (9)
from the skin surface.
The end of the treatment time will be indicated by a short visual and acoustic signal. The Display (17) shows again
the output picture just as it did at the start of the treatment. A new treatment can be started.
Upon conclusion of the treatment or when the treatment is stopped, Figure 2.2 “Operating mode selection”can be
called up again by activating the Main Menu button (13) (see Item 6.1).
Figure 5.5: “Manual operation”
Careful! Do not point the red LED light towards the eyes!
Careful! It is not recommended to remove or insert the IR plug connection when in operation.

ELCR007-AUM001-V10 Operating instructions CRYOFLOW ICE-CT (2014-11-03)18
6.4.3 Indications
Indications are suggestions of treatments for cases that are usually at the acute, sub acute and chronic stages.
It is not possible to change individual parameters.
In each individual case, the treating specialist or treating physician must be the one deciding of the application of
these indications.
You can access each programme by using the knob (16), turning it (selection) and pressing it (activation).
Activating the Start/Stop button (15) will start the treatment.
It is also possible to interrupt the treatment by activating this button.
Figure 5.6: “Indications”Figure 5.7: “Treatment suggested for
achillodynia - acute”

ELCR007-AUM001-V10 Operating instructions CRYOFLOW ICE-CT (2014-11-03)19
6.4.4 Objectives
Objectives are suggestions of treatments for cases that are usually at the acute, sub acute and chronic stages.
It is not possible to change individual parameters.
In each individual case, the treating specialist or treating physician must be the one deciding of the application of
these indications.
You can access each programme by using the knob (16), turning it (selection) and pressing it (activation).
Activating the Start/Stop button (15) will start the treatment.
It is also possible to interrupt the treatment by activating this button.
Figure 5.8: “Shock wave therapy”Figure 5.9: treatment suggestion “Shock wave therapy”
6.4.5 Skin Temperature
The skin temperature has an average (under the normal conditions) of 34°C. At a more acute phase, there are
more inflammatory phenomenona and of course a higher skin temperature.
With use of the rotating knob (16) it is possible by turning it (selection) in Figure 5.1 and pressing it (confirm) to
“Skin Temperature”.
Point the IR-sensor at the area that needs to be evaluated. The optimal distance for temperature determining lies
between 3 and 8 cm between Nozzle (9) and skin surface, the optimal is circa 6 cm. The temperature will be
shown automatically in the Display (17).
In this manner the evolution of the therapy can be followed.
Other manuals for CRYOFLOW ICE-CT
1
Table of contents
Other Gymna Medical Equipment manuals

Gymna
Gymna ShockMaster 300 User manual

Gymna
Gymna Combi 400 User manual

Gymna
Gymna ShockMaster 500 Installation instructions

Gymna
Gymna Pulson 100 User manual

Gymna
Gymna ShockMaster 300 User manual

Gymna
Gymna CRYOFLOW ICE-CT User manual

Gymna
Gymna Pulson 330 User manual

Gymna
Gymna ShockMaster 300 User manual

Gymna
Gymna V-ACTOR II User manual

Gymna
Gymna ShockMaster 500 User manual