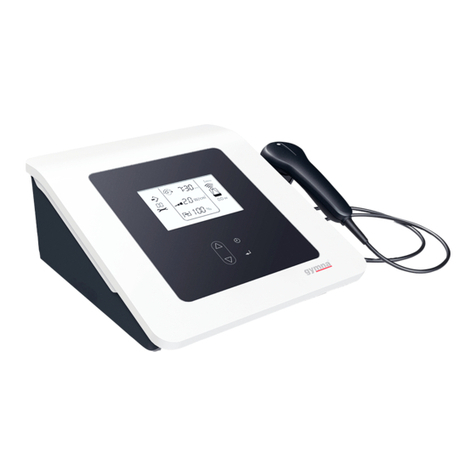
Gymna Pulson 330 User manual

1. Contents
1. Contents ..........................................................1
2. Preface ...........................................................1
3. Introduction ......................................................3
4. Important remarks .................................................4
5. General technical data. ...........................................6
6. Block diagram. ....................................................7
7. Operation panel ...................................................8
8. Right side panel. ................................................10
9. Power supply. ....................................................11
10. Microcontroller circuits. .......................................13
10.1 The microprocessor (µp).......................................13
10.2 Microprocessor guard components...............................13
10.3 I²C bus.......................................................13
10.4 Relay 4 (RLY4)................................................14
10.5 Microprocessor (µp) pin description...........................14
11. Keyboard. .......................................................17
12. US power and output stage. ......................................19
12.1 Measuring and displaying US power.............................19
12.2 Automatic power density limitation............................20
12.3 Switched mode power supply....................................20
12.4 The ADDA convertor............................................20
12.5 Output frequency generation...................................21
12.6 Relay drivers.................................................21
13. US output stage .................................................23
13.1 Output voltage and current measurement........................24
13.1.1 Voltage measurement. ......................................24
13.1.2 Current measurement. ......................................24
13.2 Relay circuits................................................24
13.3 Contact control...............................................25
13.4 Cable fraction detection......................................25
14. The display circuit. ............................................28
14.1 Display circuits..............................................28
14.2 Display warnings..............................................28
15. Error codes. ....................................................30
16. Measuring points. ...............................................31
17. Replacement procedures. .........................................32
17.1 Bottom plate..................................................32
17.2 Main PC board (ELUL 004-L100-V20).............................32
17.3 Ultrasound PC board (ELUL 004-L300-V30).......................32
17.4 Display PCB (ELUL 004-L400-V20)...............................32
17.5 Power transformer.............................................33
18. Repairing PC boards. ............................................34
18.1 Which tools are necessary ?...................................34
18.2 Which procedure has to be followed?...........................34
19. Storage and transport. ..........................................35
20. Microprocessor versions and upgrades. ...........................36
20.1 The upgrade routine...........................................36
20.2 Microprocessor software versions..............................36
21. The ultrasound heads. ...........................................37
22. Returning defective parts. ......................................39
22.1 Guarantee claims..............................................39
22.2 Defective parts...............................................39
22.3 Filling out the ‘Request Return Defective Parts’ form.........39
23. PCB layouts. ....................................................42
24. Spare parts. ....................................................46
2. Preface
As in every field, technology moves fast in the area of electro-
medical equipment.
Both electronically and medically, immense progress has been made over
the last couple of years.
Page 1

It goes without saying that comprehensive technical knowledge of the
product is needed more than ever.
This manual aims to meet this ever increasing need by giving you a
complete and accurate picture of the pulson 330, an advanced micro-
computer controlled ultrasound apparatus.
In doing so, it will hopefully help you to reach your goal: to form a
correct diagnosis and to solve the client’s problem as thoroughly as
possible.
If you have any questions or if you need additional information about
this manual or about the use of the pulson 330, please do not hesitate
to contact us.
Page 2

3. Introduction
The Pulson 330 is a modern micro-controlled apparatus, intended for
ultrasound therapy.
It is a member of the Gymna family, and thus built according to the
newest requirements concerning the European security standards.
The unit is portable and can therefore be used for in-house treatments
as well as for domestic use.
The unit provides following possibilities: continuous and pulsed
ultrasound at frequencies of 1 Mhz or 3 Mhz.
Combination therapy is possible and useful with following Gymna
apparatus:
Interdia 200
Interdia NST
Duo 400
Duo 410
Two different or equal treatment heads can be connected at the same
time, with the possibility to switch between.
Following heads are available:
1 Mhz head 5 cm²
3 Mhz head 0.8 cm²
The heads are insulated against parasitic side radiation and
waterproof, which makes them suitable for underwater treatments.
Thanks to a built in efficiency resistor, the heads are fully
interchangeable, without the need of recalibration of the output
stage.
The treatment heads are also interchangeable with the Combi 410 unit .
Page 3

4. Important remarks
4.1 Safety aspects
To understand and practice all procedures described in this manual a
good technical background is a must.
Gymna will not be held responsible for any actions executed on the
unit by unauthorized persons, or for executing any procedures not
prescribed in this manual.
All information in this manual has a Gymna copyright.
4.2 Data registration.
The distributor must be able to provide the following data for each
unit:
• Instrument data: Part and serial number.
Gymna has the original configuration of each unit.
The Pulson 330 has following critical parts:
Main board: part number: 10555
Display board: part number: 10578
Output stage board: part number:10558
Main power transformer: part number:9677
Inlet filter: part number:8552
These parts have a serial number which has to be filed in case of a
configuration
change.
• Customer data: Name, full address and date of delivery.
Service activities: All service activities must be filed.
If any critical parts are changed, we also expect the distributor
to file
the new serial numbers of these part(s).
To file this data, a data registration document is available on next
page.
Page 4

Data registration document
Information
Distributor name Distributor address
Customer name Customer address
Instrument name: Pulson 330 Serial number:
Date of delivery:
Service activities
Date:
Error complaint:
Service action
Critical spare parts exchange list
Critical part name Old serial number New serial number
PCB Display.
PCB Main.
PCB.Ultrasound
Power transformer.
Ac inlet.
Date:
Error complaint:
Service action
Critical spare parts exchange list
Critical part name Old serial number New serial number
PCB Display.
PCB Main.
PCB.Ultrasound
Power transformer.
Ac inlet.
Page 5

5. General technical data.
• Treatment unit
Mains voltage: 115/230 Vac +- 10%
Frequency: 50/60 Hz
Mains fuses: 1A type L
Current consumption: maximum 500 mA
Dimensions 413 ✕280 ✕100 mm
Weight: 5 kg.
Labels Hazard warning label
Serial number label
Type identification label
Fuse value label
Bauartzulassungs Nr.
Manufacturer, mains, Voltage
Frequency and power consumption
Class according to IEC601-1: I
Type according to IEC601-1: BF
Limits test values according to IEC 601-1:
Earth leakage current: IEC requirement < 500 µA
Earth leakage single fault: IEC requirement < 1 mA
Enclosure leakage current normal: IEC requirement < 100 µA
Enclosure leakage single fault: IEC requirement < 500 µA
Patient leakage normal: IEC requirement < 100 UA
Patient leakage single fault: IEC requirement < 500 µA
Patient leakage mains on applied part sfc: IEC requirement < 5
mA
Patient auxiliary current normal: IEC requirement < 10 µA
Patient auxiliary single fault: IEC requirement < 50 µA
Earth resistance: typical 0.12 Ω
Number of channels: 2
Continuous use: Yes
Useable in explosive environment: No
• Treatment heads
1 Mhz, large: Surface: 5 cm²
Max output power: 10 W
3 Mhz, small: Surface: 0.8 cm²
Max output power: 1.6 W
Page 6

6. Block diagram.
• Reference list:
Microcontroller circuits: page 13
Guard components: page 13
Display: page 27
Keyboard: page 16
ADDA-convertor: page 19
Amplitude generation circuit: page 18
Frequency generation: page 20
Output stage: page 22
Output relays: page 23
Harmonic filter: page 22
Treatment heads: page 37
Voltage info: page 23
Current info: page 23
Efficiency factor info: page 18
Cable fraction info: page 24
Page 7

7. Operation panel
1. US- power display. The intensity is displayed in W/cm².
2. Treatment time display.
Displayed in Min & Sec. Maximum treatment time is 30 minutes.
The timer runs only when the contact control is sufficient.
3. Intensity up key. Maximum intensity is 2 W/cm•.
4. Intensity down key. Minimum intensity is 0.1 W/cm•
5. Output mode switch.
There are 4 output modes
1 continuous
3 pulsed
The modulation frequency is fixed at 100 Hz for all pulsed US-
outputs.
There is only a difference in duty cycle.
Page 8

6. 1/3 MHz head selection key.
Is a key to switch from the 1MHz to the 3MHz head and back.
For a good understanding, some important notes have to be taken into
consideration:
The right side panel has 2 US-output connections, CON2 and CON3.
The pulson 330 is designed in such a way that it always detects
which head is
connected to which output gate.
In other words, both heads can be connected to both outputs, and it
is of no
importance whether one ore two heads are connected.
The following examples may illustrate this:
If both heads are connected and you switch on the instrument, it
will always
select the 1MHz head. If only the 3MHz head is connected, there
is no other choice,
so this one will be selected.
If you want to switch from 1MHz to 3MHz, there are two
possibilities:
The 3MHz is connected.
Press the 1/3 MHz and the switch is made.
The 3MHz is not connected.
The instrument doesnít find the other head. The 3MHz led
flashes for 10 sec.
after which the 1MHz is selected again.
If only the 1 MHz is connected, and you pull out this head, both
leds start flashing
for about 10 sec., after which they extinguish.
If two heads are connected and you pull ot the 1MHz while using it
for a treatment,
the instrument will immediately switch off the US-power and
select the 3MHz head.
7. Timer down switch.
8. Timer up switch.
The treatment time can be changed in steps of a min. if time > 1
min. If the treatment
time < 1 min. the timer can be changed in steps of a sec.
Page 9

8. Right side panel.
7. Output connector 1 (CON 1). Can be connected to a 1/3 Mhz. head.
8. Output connector 2 (CON 2). Can be connected to a 3/1 Mhz head.
9. Mains entrance.
The pulson 330 must be connected to a wall socket with a earth
contact.
Use only the original cable that is supplied with the apparatus in
the
accessories package.
Check whether the required supply voltage, mentioned on the serial
number plate,
corresponds with the available mains supply ratings.
10. Serial number plate.
On this plate the serial number, as well as the required supply
voltage and
frequency are mentioned.
Also the mains fuses ratings are mentioned.
11. Plug for combination therapy.
Via this plug, the pulson 330 can be linked with another GYMNA
apparatus
in order to perform combination therapy.
12. Power switch.
Will light up when the power is switched on.
13. Mains fuses. 2 Fuses of 1 A type L.
Page 10

9. Power supply.
Main fuses are inserted in the main entrance ( F1 and F2, 1A fast ).
The transformer contains a thermic fuse . It will cut off the primary
winding, when the inside temperature exceeds 120 °C. To switch on
again, transformer temperature has to go below about 60 °C.
For this reason, there is no need for secondary fuses anymore.
The ringcore transformer can be fed either with an incoming voltage of
230V/50Hz ( CON 6 ) or with 115V/60Hz ( CON 5).
There are 2 secondary windings. Output voltage of winding 1 is 22V,
winding 2 produces 8V.
Power supply output voltages:
1. VCC: Is a 5V stabilised voltage, with a maximum output current of
700 mA.
D22 protects U12 during switch off.
2. VEE: Is a -5V stabilised voltage, with a maximum output current of
100 mA.
D21 protects U13 during switch off.
3. V27: Is a non stabilised power supply of approximately 27V.
VLK3: analog ground, connected to the metal cover-shield of pcb 2.
VLK4: analog ground, not connected and can be used for service.
RV1: Varistor. Filters out spikes on the incoming voltage.
Page 11


10. Microcontroller circuits.
10.1 The microprocessor (µp).
The pulson 330 uses a Z86E21, a One Time Programmable (OTP)
microcontroller which controls all sequences necessary for the
apparatus to function.
It has on board ROM (8K), and RAM. Clock speed is defined by an
external crystal, which runs at 12 MHz.
10.2 Microprocessor guard components.
To monitor the proper functioning of the µp, some external components
are added.
1. U2 (MAX1232): µp supervisor IC.
Does constant monitoring of VCC. When it goes below 4.75 V, a
pulse with a fixed length is produced, to assure a good reset
of the µp.
R7 is a pull-up resistance and C3 filters out burst signals
which may possibly disturb the µp.
U2 also monitors the watchdog output of the µp. In case of
processor hang-up,
the same reset pulse is given.
2. U6 (74HC4538): output circuit protection IC.
In case of processor hang-up, the output stage has to be
switched off
immediately.
When the output VUS_EN goes low/high, Q10 switches and AMP_US
goes to
zero. This IC is also controlled by the watchdog output of the
µp.
10.3 I≤C bus
The combination of outputs SCK and SCD forms a serial bus which
follows the I•C protocol.
A maximum of 10 components, each having their own address, can be
connected.
In this case 3 components are connected.
1. U10 (24C16)
This is a 2K eeprom, which can be written during the special
service routine.
It contains the calibration data of the output stage and a
copy of the checksum from the µp ROM. Each time the instrument
is switched on, the µp calculates
the ROM checksum and compares it to the value in the eeprom.
In case of difference an error code will be displayed. Refer
to error codes:
2. U15 (PCF8591)
ADDA IC. Data coming from and going to this IC are sent by the
I•C bus.
For more information refer to US power circuits, page
3. Display.
Connection to the display pcb is made by CON7.
All display data arrive via this bus.
Page 13

10.4 Relay 4 (RLY4).
After the instrument has been switched on , or the 1/3 MHz-key has
been pressed, the µp checks the head sizes of all heads connected.
RLY4 closes the HEAD_SIZE line, and reads the size of all heads
connected to the apparatus.
After reading, RLY4 opens again. This is done in order to obtain a
galvanic separation of
the outputs in case of combination therapy.
10.5 Microprocessor (µp) pin description.
• USD_UP_KEY Input signal. Switches to logic low level when
the ultrasonic density up key is pressed.
• USD_DOWN_KEY Input signal. Switches to logic low level when
the ultrasonic density down key is pressed.
• SELECT_LEFT_KEY Input signal. Switches to logic low level when
the left output mode key is pressed.
• SELECT_RIGHT_KEY Input signal. Switches to logic low level when
the right output mode key is pressed.
• N.U. Not used.
• FREQ_ 1_3_MHZ_KEY Input signal. Switches to logic low level when
the 1/3 MHz. key is pressed.
• TIME_DOWN_KEY Input signal. Switches to logic low level when
the time down key is pressed.
• TIME_UP_KEY Input signal. Switches to logic low level when
the time µp key is pressed.
• WATCH_DOG Output signal. In case of µp hang up, this
signal is at logic high level.
• KEY_SELECT Output signal. Logic low enables hardware
information to
be read in the µp. Logic high level disables
hardware
information and connects the keyboard to the µp.
• VUS_EN US voltage enable. Low/high active. Disables
output stage
in case of µp hang up.
• SCK Serial clock. Clock signal for I•C- bus.
• SDA Serial data. Data signal for I•C- bus.
• SCK_ADDA Clock signal for I•C -bus, connected only to U15
(ADDA)
• SDA_ADDA Data signal for I•C-bus, connected only to
U15(ADDA)
• HEAD_SIZE Input signal. This line is read during
initialising, to let the µp
know the head sizes of the heads connected.
• SERVICE_REQUEST High active. When a jumper is placed on CON1 ,
this line
switches to logic high level and the service
routine is activated.
• ON/OFF Output signal: When this signal is at logic high
level, the
1/3 MHz signals are cut off, which results in 0
W output. This signal will switch on/off at 100 Hz in
case of combination therapy.
• 1/3 MHZ Output signal. When this signal is at logic high
level, the
3 MHz base frequency is selected.
Page 14

• SIZE_DET Output signal, high active. Activates RLY4
during start-up in order to detect head size of all heads
connected to the
instrument.
• US 1/3 Output signal. In case of logic high level, RLY1
is
activated. At this time, RLY 3 , which is
always in opposite position, is inactivated.
• CON 1/2 Output signal. High logic level selects output
connector 2
( CON2 ).
• RESET Low active. In case of µp hang-up, or VCC-
failure, U2 creates a reset pulse.
• BUZZER Buzzer sounds when the output is at logic high
level.
Page 15


11. Keyboard.
The keyboard consists of only 7 keys, which therefore can be directly
coupled to the µp.
C8 filters out all HF-noise, and all diodes prevent keyboard
discharges from entering the processor inputs.
The keyboard is connected to CON4.
Another feature of this circuit is the ability to detect the hardware
version from the apparatus.
There are two possibilities: either the hardware version ( defined by
jumpers on JP1) or the keyboard information is read. The selection is
made by the KEY_SELECT pin.
In case of a high level signal, Q1 opens and the µp reads the keyboard
status. If KEY_SELECT is low, hardware version jumpers are read into
the µp.
When starting up, the µp first reads the hardware version, and then
checks if the present software version corresponds. If not, an error
code is produced.
Hardware and software version may simply be checked by holding a key
when starting up.
Both will be displayed for about 10 seconds, after which the unit
returns to standby.
Page 17


12. US power and output stage.
12.1 Measuring and displaying US power
When the INT_UP key is pressed, a certain output voltage (1 or 3 MHz)
is obtained, and the crystal starts vibrating on resonance frequency.
However, not all electrical power is transformed into acoustical
vibrations. Since the crystal has a certain resistance during
treatment, heat will be produced as well.
Consequently, different crystals may have different efficiency
factors, which can be measured in a test lab. After measurement, each
crystal gets a resistance, which represents this efficiency factor.
The microprocessor is able to read this resistance and to process this
value, in order to display the right output power.
This means that with a low efficiency head, the pulson will display
less output power than with a high efficiency head. This resistance is
therefore soldered into the plug of the treatment head.
Pi is the input power,
calculated by measuring
US_VOLTAGE and US_CURRENT.
Pu is the output power in an ideal medium ( 0% reflections ).
Pu = Pi * ηhead * ηoutput stage
The R_POT value represents the efficiency of the head (ηhead), and is
constantly monitored by the µprocessor. It also makes it possible to
see whether the head is connected or not.
The efficiency of the output stage (ηoutput stage ) is determined
during calibration and its value is saved in the eeprom.
Knowing these values enables the µp to calculate and display the
output power.
Output power is determined in following way:
1. User presses INT_UP key
2. A certain output is obtained.
3. Current and Voltage information are sent to the µp.
4. The µp calculates the output power, thereby taking the efficiency
values into consideration.
5. The user can see the output power displayed and can change it by
pressing the INT_UP/DOWN keys.
In other words, some measurements are performed, the output power is
displayed and the feedback is performed by the user himself ( by
pressing the intensity keys).
Notice that US_VOLTAGE and US_CURRENT are both peak values.
Measuring of these values is done just before the end of the US-pulse,
or in case of the continuous ultrasound mode 32 times per second.
Page 19

12.2 Automatic power density limitation.
The equipment automatically reduces the US output density to about
2W/cm•. When the calculated value exceeds 2.2W/cm•, the equipment
tries to reduce the output power by reducing US_AMPLITUDE, the output
voltage of the ADDA.
12.3 Switched mode power supply.
U1 (MC33166), and the circuits around it, define the switched mode
power supply. By connecting this signal to the output transformer, the
output power is regulated.
Input of U1 is V27, a non stabilised voltage of approximately 27 V.
U1 consists of a Fet and a comparator with a reference voltage of
5.05V.
When the feedback voltage goes below 5.05V, the output fet will switch
on and open. When the feedback voltage exceeds 5.05V, the fet will cut
off the incoming voltage.
Consequently, the addition point of R31//R36, R35+R38 and R34 will
always be kept
at 5.05V.
Since the output of U3 varies between 0 and -3 V and the addition
point is always 5.05 V, the voltage of TP8 can -according to the
output of U3- vary between 0 and 25 V.
The 5V supply connected to R35 has an accuracy of 1%.
When the fet is conducting, L9 as well as C80 will load. At a certain
point, the feedback voltage will surpass the reference and the fet
will be cut off. At this point, L9 sees its incoming voltage go down,
and wants to work against it. L9 becomes supply, D6 starts conducting
and C80 can reload again. When all this energy is consumed by the
output stage, the feedback voltage of the comparator will fall below
the reference value of 5.05V and the fet will reopen the circuit.
Since the inside fet constantly switches you can see a rectangular
waveform at the output of U1. When more power is needed, the frequency
of this waveform will raise as well as the pulse time.
A great advantage of this switched supply is the high efficiency
factor of about 90%.
The instrument consumes less power and the heat production will be
much lower.
12.4 The ADDA convertor.
U15 (PCF8591) is an ADDA convertor, which has 4 multiplexed analog
inputs and one analog output. For a good AD conversion, a very stable
reference voltage is necessary. This reference is derived from V27.
D15 is a zener IC, which gives a 0.1% accurate 5V output.
List of the most important input/output signals:
•US_VOLTAGE: Input signal: Peak value of the measured output
voltage
•US_CURRENT: Input signal: Peak value of the measured output
current.
•RPOT_CON1: Input signal: This voltage represents the value of
the efficiency resistance fixed in the plug of the head
connected at CON1
•RPOT_CON2: Input signal: This voltage represents the value of
the efficiency resistance fixed in the plug of the head
connected at CON2.
•V ref: Input: this is a 0.1% accurate voltage of 5V derived
from V27.
•SCK_ADDA: Is the incoming serial clock of the I•C bus.
•SDA_ADDA: Is the bidirectional I•C data bus.
Page 20
Table of contents
Other Gymna Medical Equipment manuals

Gymna
Gymna ShockMaster 300 User manual

Gymna
Gymna ShockMaster 500 User manual

Gymna
Gymna CRYOFLOW ICE-CT User manual

Gymna
Gymna Combi 400 User manual

Gymna
Gymna V-ACTOR II User manual

Gymna
Gymna CRYOFLOW ICE-CT User manual

Gymna
Gymna ShockMaster 300 User manual

Gymna
Gymna ShockMaster 300 User manual

Gymna
Gymna Pulson 100 User manual

Gymna
Gymna ShockMaster 500 Installation instructions