H.Koenig KUBE KB15 User manual

MANUAL TO USE
MANUEL D'UTILISATION
BEDIENUNGSANLEITUNG
GEBRUIKSAANWIJZING
MANUAL DE USARIO
MANUALE D’USO
ICE CREAM MAKER
MACHINE À GLAÇONS
EISMASCHINE
IJS MACHINE
MÁQUINA DE HIELO
MACCHINA PER GHIACCIO

DANGER
!
WARNING
Your safety and the safety of others are very important.
We have provided many important safety messages manual and your appliance.
Always read and obey all safety massages.
This is the safety alert symbol:
!
All safety messages will follow the safety alert symbol and the word “DANGER” or “WARNING”.
These words mean:
You can be killed or seriously injured if you don’t immediate follow instructions.
All safety messages will tell you what the potential hazard is, tell you how to reduce the chance
of injury, and tell you what can happen if the instructions are not followed.
When using electrical appliances, basic safety precautions should be followed to reduce the
risk of fire, electric shock, and injury to persons or property. Read all instructions before using
any appliance.
Do not operate this,or any other appliance with a damaged cord.
Connect to properly polarized outlets only. No other appliance should be plugged into the
same outlet. Be sure that the plug is fully inserted into the receptacle.
Do not run the power cord over carpeting or other heat insulators. Do not cover the cord.
Keep cord away from traffic areas, and do not submerge in water.
We do not recommend the use of an extension cord, as it may overheat and become a risk
of fire. If you must use an extension cord, use No.14AWG minimum size and rated no less
than 1875 watts.
Unplug the ice maker before cleaning or making any repairs or servicing.
Exercise caution and use reasonable supervision when appliance is used near children.
Do not use your ice-maker outdoors. Place the ice-maker away from direct sunlight and
make sure that there is at least 4 inches of space between the back of your unit and wall.
Keep a minimum distance of 4 inches on each side of your unit free.
Do not use other liquid to make the ice-cube other than water.
Do not clean your ice maker with flammable fluids. The fumes can create a fire hazard or
explosion.
Do not tip over.
If the ice maker is brought in from outside in wintertime, give it a few hours to warm up to
room temperature before plugging it in.
!
IMPORTANT SAFETY TIPS
ENGLISH

CAUTION: Do not touch the evaporator when the product of the ice machine. It may burn
your skin.
CAUTION: Unplug the unit before to ensure maintenance, electrical shock.
In the case where the power supply of the device would be cut off unintentionally during
the ice production cycle or warning lights flash on the control panel and the machine
produces more ice, Turn off the power and unplug the device. Wait a few minutes and then
gently remove the cubes. Refer to the table at the end of the manual for troubleshooting.
WARNING: This appliance must be earthed.
IMPORTANT:
The wires in this mains lead are colored in accordance with the following code:
Green or Green with a strip yellow: Grounding
White: Neutral
Black: Live
To avoid a hazard due to instability of the appliance, it must be placed at a even or flat
surface.
1. Cover: With a transparent window to allow interior visibility.
2. Ice scoop.
3. Ice shovel.
4. Control Panel: Easy to use, visible functions and LCD display setting.
A. LCD display window.
1: Current Clock Time
2: No water diplay,When flashing, means no water in the unit, need to pour water in.
3. Ice-full display, when it display, means the ice basket is full of ice-cube.
4. ON/OFF display, if the unit has been turned off, this symbol will flash; And if the
unit is turned on, this symbol will always display.
5.Clean symbol: when this symbol flashs, means the unit need to be cleaned.
6.Ice-cube size displaying: Small, Medium, and Large.
7.Timer delay time display.
B. ON/OFF button: To start or stop the unit.
C. SELECT button: To select your desired size of the ice-cube:
small, medium,large, three size of the ice-cube can be selected.
Or to change the time digit during the clock or timer setting program.
D. CLOCK button: To set the displayed time to the correct current time.
E. TIMER button: To set or cancel the timer program to let the unit start to run at your
desired time or stop the unit at your desired because of forgetting.
5. Water drain cap: For draining water from water reservoir.
6.Air Outlet
7.Ice basket
GETTING TO KNOW YOUR UNIT

B
E
2
1
6
7
5
3
A
D
4
C
A
1
2
3
4
5
6
7

DANGER
1. Remove the exterior and interior packaging. Check that ice basket and ice scoop is
included. If any parts are missing, please contact our customer service.
2. Clean the interior with lukewarm water and a soft cloth. Take out the ice basket and clean it
3. Find a location for your ice maker that is protected from direct sunlight and other sources of
heat (i.e.: stove, furnace, radiator). Place the ice maker on a level surface. Maker sure that
there is at least 4 inches of space between the back and sides of your ice maker and the
wall.
4. Allow one hour for the refrigerant fluid to settle before plugging ice maker in.
5. The appliance must be positioned so that the plug is accessible.
* Improper use of the grounded plug can result in the risk of electrical shock. If the
power cord is damaged please call our customer service.
1. This unit should be properly grounded for your safety. The power cord of this appliance is
equipped with a three-prong plug which mates with standard three prong wall outlets to
minimize the possibility of electric shock.
2. Plug your appliance into an exclusive, properly installed, grounded wall outlet. Do not under
any circumstances, cut or remove the third (ground) prong from the power cord. Any
questions concerning power and/or grounding should be directed toward a certified
electrician.
3. This appliance requires a standard 220-240volt, 50Hz electrical outlet with three-prong
ground.
Before using your ice maker, it is strongly recommended to clean it thoroughly.
1. Take out the ice basket.
2. Clean the interior with diluted detergent, warm water and a soft cloth.
3. Then use the water to rinse the inside parts, and drain out the water by unplugging the
drain cap on the side.
4. The outside of the ice maker should be cleaned regularly with a mild detergent solution and
warm water.
5. Dry the interior and exterior with a soft cloth.
6. When the machine is not in use for a long time, open water drained cap to drain water
completely from water reservoir.
OPERATING PROCEDURES & MAINTENANCE
UNPACKING YOUR ICE MAKER
CONNECTING YOUR ICE MAKER
!
CLEANING AND MAINTAINING YOUR ICE MAKER

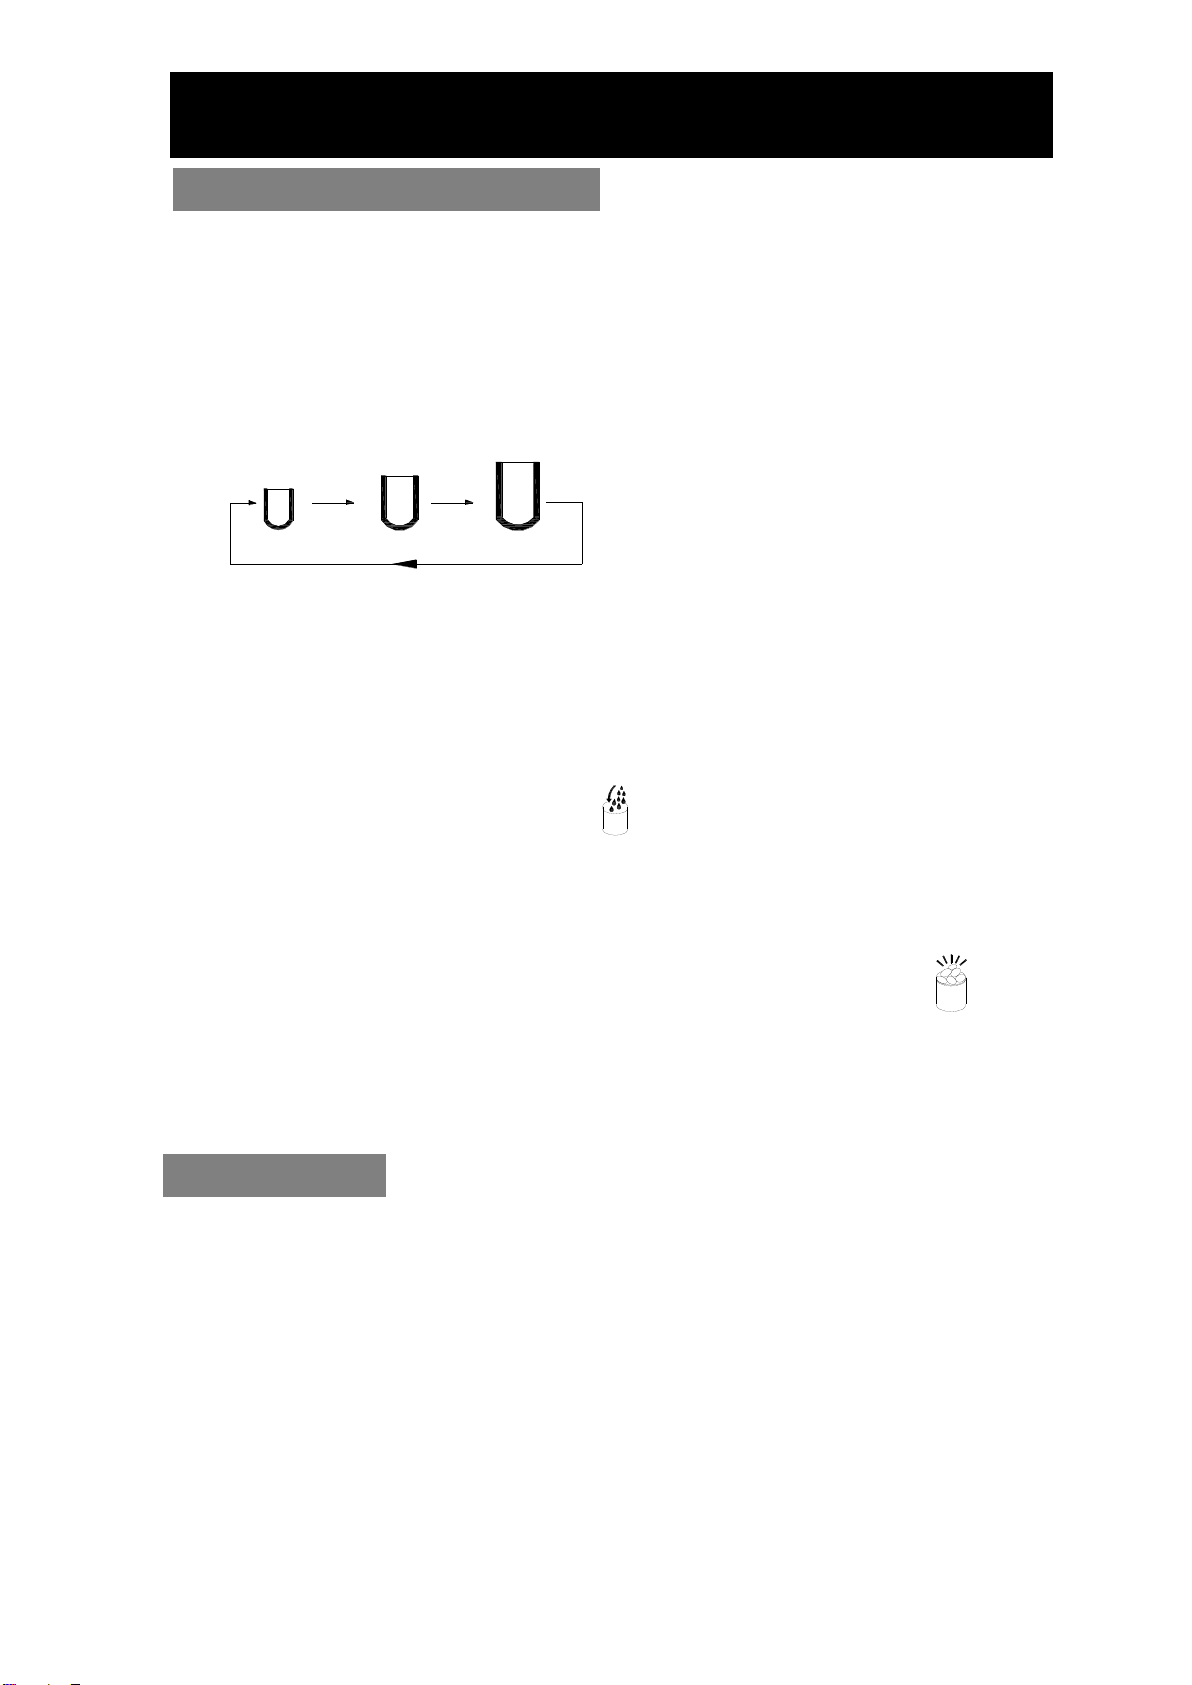
1. Open the cover, remove the ice basket and pour water into water reservoir.
Keep water level below the level mark.
2. Press “ON/OFF” button on the control panel to turn on the unit to begin the ice making
cycle.
3. Select the size of the ice cube by pressing the “Select” button. Three sizes: SMALL,
MEDIUM or LARGE can be selected:
SMALL MEDIUM LARGE
If the room temperature is lower than 60℉, it is recommended to select the small or
medium ice sign button in order to avoid ice sticking together.
4. The ice making cycle lasts 6 to 15 minutes, depending on the size of the ice cube selection
and the ambient temperature. In the extreme hot room temperature, ice-making time
maybe vary a lot.
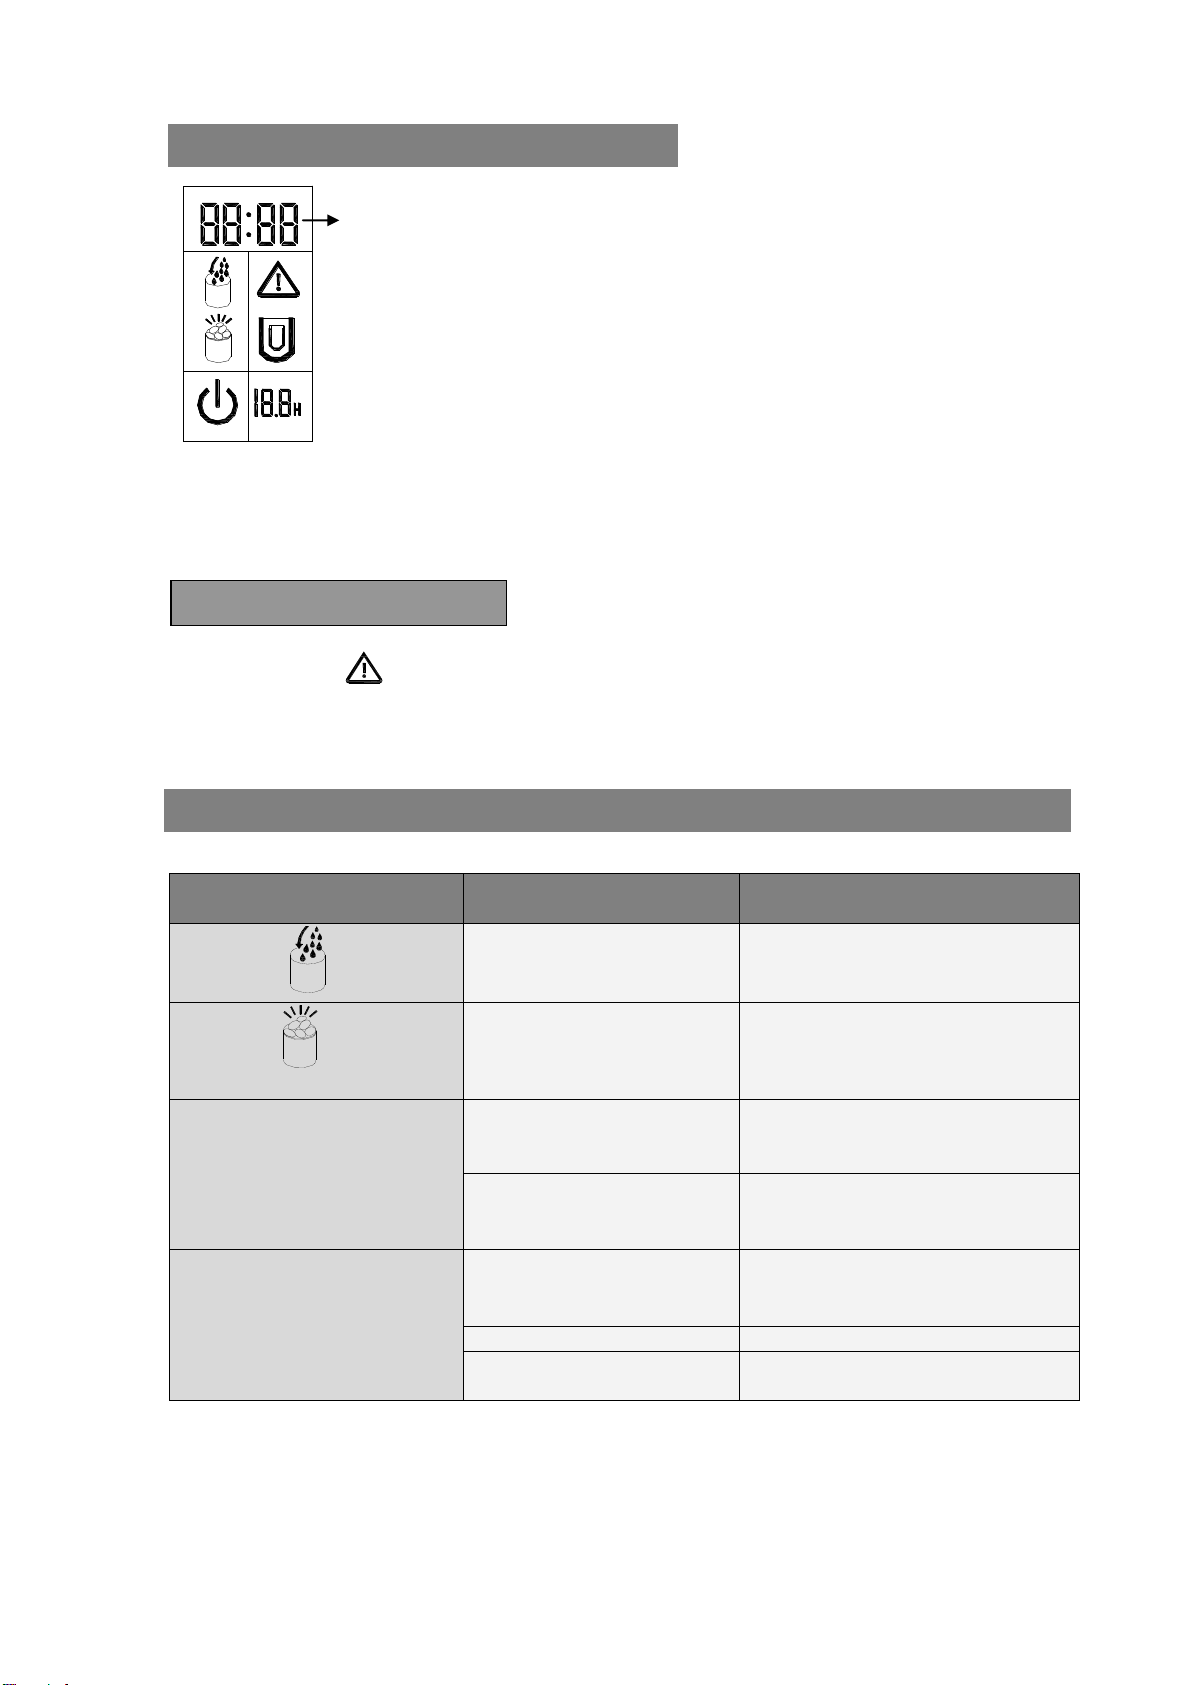
5. While the icemaker is on, verify water level periodically. If water pump can’t inject water, the
ice maker will stop automatically, and the “ ” symbol will flash in LCD display window.
Fill water up to the level mark and press “ON/OFF” button two times again to turn on the
unit again. Allow the refrigerant liquid inside the compressor at least 3 minutes to settle
before restarting.
6. The ice maker automatically stops working when the ice basket is full and the “ ” symbol
will display in the LCD display widow.
7. Change water in the water reservoir every 24 hours to ensure a reasonable hygiene level.
If unit isn’t in use, drain all water left in the tank.
Timer Delay Time Range: 0.5-19.5 hours.
Default Delay Time: 3 hours.
When the unit is running, you can set the unit with OFF-TIMER to let the unit stop running after
your set delay time.
And when the unit is stopped, you can set the unit with ON-TIMER to let the unit start to run
automatically after your set delay time, then when you go back home or have a dinner, you can
enjoy the happy life that this ice-maker give to you.
How to set the timer
Press the TIMER button first, the default “3.0H”delay time will flash in LCD display window,
then press the SELECT button to select your desired delay time. Each press SELECT button
one time, the flashing delay time will increase 0.5 hour, and if you always press the SELECT
button for mor than 3 seconds, the delay time will chang very quickly. Then after 5 seconds
flashing, the delay time digit will change from flashing to always displaying, means the timer
program has been set.
USING YOUR ICE MAKER
START TO MAKE THE ICE-CUBE
TIMER SETTING

How to cancel the timer
When the unit has been set with the timer or during the timer setting process, press the
TIMER button, then the delay time digit will disappear, mean the timer set has been cancelled.
1
2
3
4
5
6
7
When the symbol flashs, means the unit need to be cleaned. And if you have cleaned the
unit, always press the TIMER button for more than 5 seconds, this symbol will disappear from
the LCD display window. And the cleaning timer will reset to Zero and reaccount again.
PROBLEM
POSSIBLE CAUSE
SOLUTION
Symbol“” flashs.
Lack of Water.
Stop the ice maker, fill water, and
press “ON/OFF”button again to
restart the unit.
Symbol“” display in
LCD display window.
There is too much ice.
Remove ice from ice basket.
Ice cubes stick together.
The ice cycle is too long.
Stop the ice maker, and restart it
when the ice blocks melt. Select
the small size ice cube selection.
Water temperature in inner
tank is too low.
Change the water in the inner
Tank. Temperature of water is
better set between 45℉-90℉.
Ice making cycle is normal
but no ice is made.
Ambient temperature or
water temperature in inner
tank is too high.
Please run the ice maker below
90℉and pour colder water into
tank.
Refrigerant liquid leakage.
Verify by a qualified technician.
Pipe in the cooling system
is blocked.
Verify by a qualified technician.
TROUBLESHOOTING
CLOCK DISPLAY & THE CORRECT TIME
This unit is supplied with CLOCK dipalying function.
If the displayed time is not correct, you can adjust it to the
correct digit through the CLOCK and SELECT button.
First press the CLOCK button once, the digit meaning hour will
start to flash first, then you can press SELECT button to change
it, each press will increase 1 hour. Press the CLOCK button
again, the digit meaning minute then will start to flash, and also
press the SELECT to change it. Then press the CLOCK the third
time to confirm it, and now it display the new correct clock. And
during adjusting process, after 5 seconds flashing, the digit will
automaticall change to always displaing, also means the new
clock has been set.
Clock
Time
CLEANING REMINDING

M
Mo
od
de
el
l
K
KB
B1
15
5
K
KB
B1
15
5
P
Pr
ro
ot
te
ec
ct
ti
io
on
n
T
Ty
yp
pe
e
I
I
I
I
P
Po
ow
we
er
r
2
22
20
0-
-2
24
40
0V
V/
/5
50
0H
Hz
z
2
22
20
0-
-2
24
40
0V
V/
/5
50
0H
Hz
z
I
Ic
ce
e
M
Ma
ak
ki
in
ng
g
C
Cu
ur
rr
re
en
nt
t
0
0.
.9
9A
A
0
0.
.9
9A
A
I
Ic
ce
e
H
Ha
ar
rv
ve
es
st
t
C
Cu
ur
rr
re
en
nt
t
1
1.
.4
4A
A
1
1.
.4
4A
A
R
Re
ef
fr
ri
ig
ge
er
ra
an
nt
t
R
R1
13
34
4a
a/
/7
75
5g
g
R
R1
13
34
4a
a/
/7
75
5g
g
N
Ne
et
t
W
We
ei
ig
gh
ht
t
1
12
2.
.5
5K
Kg
g
1
13
3.
.0
0K
Kg
g
E
En
nc
cl
lo
os
su
ur
re
e
P
Pl
la
as
st
ti
ic
c
s
st
ta
ai
in
nl
le
es
ss
s
s
st
te
ee
el
l
Manufactured for and imported by ADEVA SAS
8 rue Marc Seguin –77290 MITRY-MORY –FRANCE
Tél. (+ 33) 1.64.67.00.01 –Fax : (+ 33) 1.64.67.00.05
TECHNICAL SPECIFICATION

DANGER
!
ATTENTION
F
FR
RA
AN
NC
CA
AI
IS
S
De nombreux messages importants de sécurité figurent dans ce manuel et sur votre appareil.
Lisez-les et observez toujours leurs instructions.
Voici un symbole d'alerte de sécurité :
!
Ce symbole d'alerte de sécurité précède tous les messages de sécurité avec le mot “DANGER”
ou “ATTENTION”.
Ces mots signifient que vous risquez d'être tué ou sérieusement blessé si vous ne suivez
pas immédiatement ces instructions.
Tous les messages de sécurité vous indiqueront le risque encouru, comment le réduire et ce
qui se produira si vous ne suivez pas les instructions.
Quand on utilise des appareils électriques, certaines précautions de base doivent être suivies
pour réduire le risque d'incendie, d'électrocution et de dommages aux personnes et aux biens.
Lisez toutes les instructions avant d'utiliser un appareil :
Ne pas utiliser cet appareil ni aucun autre avec un cordon d'alimentation endommagé.
Ne le branchez qu'à une prise convenablement polarisée. Ne branchez aucun autre
appareil sur la même prise. Assurez-vous que la prise mâle est totalement engagée dans
la prise femelle.
Ne laissez pas le cordon sur de la moquette ou autre isolant thermique. Ne recouvrez pas
le cordon. Éloignez-le des zones de passage, et ne le trempez pas dans l'eau.
L'utilisation d'une rallonge électrique est déconseillée, car elle risque de chauffer et de
créer un risque d'incendie. Si vous devez utiliser une rallonge électrique, utilisez-en une de
taille minimale 14 AWG et étalonnée à au moins 1875 Watts.
Débranchez la machine à glace avant de la nettoyer ou d'entamer toute opération de
réparation ou d'entretien.
Faites attention si vous utilisez l'appareil à proximité d'enfants, et surveillez-les.
N'utilisez pas votre machine à glace dehors. Éloignez-la de la lumière du soleil et
INSTRUCTIONS DE SÉCURITÉ IMPORTANTES
PRÉPARATION DE LA MACHINE À GLACE AVANT UTILISATION
!

assurez-vous qu'il y a au moins 10 centimètres entre le dos de l'appareil et le mur.
Maintenez un espace d'au moins 10 centimètres libre de chaque côté de l'appareil.
N'utilisez que de l'eau pou fabriquer vos cubes de glace, et aucun autre liquide.
Ne nettoyez pas votre machine à glace avec un liquide inflammable. Les émanations
peuvent créer un risque d'incendie ou d'explosion.
Ne renversez pas l'appareil.
Si vous avez reçu votre machine à glace de l'extérieur par temps froid, laissez-lui quelques
heures pour revenir à température ambiante avant de la brancher.
Cet appareil ne doit pas être immergé dans de l'eau ou dans tout autre liquide.
Pour éviter tout risque, débranchez immédiatement l'appareil si vous constatez quelque
chose d'inhabituel.
Envoyez l'appareil à un centre de réparation agréé. N’essayez jamais de démonter
l’appareil.
ATTENTION : Ne touchez pas l'évaporateur quand l'appareil produit de la glace. Il risque
de vous bruler la peau.
ATTENTION : débranchez l'appareil avant d'en assurer l'entretien, risque d'électrocution.
Dans le cas où l'alimentation électrique de l'appareil serait coupée par inadvertance
pendant le cycle de production de glace ou si des voyants d'alarme clignotent sur le
panneau de commande et si l'appareil ne produit plus de glaçons, éteigner et débranchez
l'appareil.
Attendez quelques minutes puis enlevez délicatement les glaçons. Reportez vous au
tableau à la fin du manuel pour la résolution des problèmes.
DANGER : Cet appareil doit être relié à la terre.
IMPORTANT :
Les câbles dans le cordon d'alimentation sont colorés suivant le code suivant :
Vert ou Vert avec une bande jaune : Terre
Blanc : Neutre
Noir : Sous tension
Pour prévenir tout risque par suite d'instabilitéde l'appareil, il doit être placé sur une surface
horizontale et régulière.

6
7
5
1. Couvercle : avec une fenêtre transparente pour voir à l'intérieur
2. Cuillère à glaçons
3. Pelle à glaçons
4. Panneau de commande : fonctions visibles et faciles d'emploi, et affichage des
réglages sur écran à cristaux liquides
A. Fenêtre d'affichage à cristaux liquides (LCD)
1. Heure actuelle
2. Affichage d'absence d'eau : quand il clignote, cela signifie qu'il n'y a pas d'eau dans
l'appareil et qu'il faut en verser dedans
3. Affichage plein de glace : quand il s'allume, cela signifie que le panier à glace est
rempli de cubes de glaçons
4. Affichage Marche/Arrêt : si l'appareil est éteint, ce symbole clignote ; s'il est allumé,
ce symbole reste toujours affiché
5. Symbole de nettoyage : quand ce symbole clignote, cela signifie qu'il faut nettoyer
l'appareil
6. Affichage de la taille des glaçons : Petits, Moyens, Grand
7. Affichage du délai de la minuterie
B. Bouton Marche/Arrêt : Pour faire démarrer ou arrêter l'appareil
C. Bouton SELECT : Pour sélectionner la taille que vous désirez pour vos glaçons : Petits,
Moyens, Grand –vous pouvez choisir entre trois tailles de glaçons
ou pour changer l'affichage de l'horloge ou de la minuterie
D. Bouton CLOCK : pour régler le temps affiché à l'heure exacte
E. Bouton TIMER : pour régler ou annuler le programme de minuterie afin que l'appareil
démarre au moment où vous le désirez, ou pour qu'il s'arrête à votre convenance quand
vous ne l'utilisez pas
5. Bouchon du drain : Pour drainer l'eau du réservoir
6. Sortie d'air
7. Panier à glace
1
2
3
4
5
6
7
APPRENEZ À CONNAÎTRE VOTRE APPAREIL
B
E
2
1
3
A
D
4
C
A
7
6
5

DANGER
1. Enlevez l'emballage extérieur et intérieur. Vérifiez que le panier à glaçons et la cuillère à
glaçons sont bien là. S'il manque une pièce, contactez le service après-vente.
2. Nettoyez l'intérieur à l'eau tiède avec un linge doux. Sortez le panier à glaçons et
nettoyez-le.
3. Disposez votre machine à glace à l'abri de la lumière du soleil et de toute autre source de
chaleur (ex. cuisinière, four, radiateur). Placez la machine à glace sur une surface
horizontale. Assurez-vous qu'il y a au moins 10 centimètres d'espace entre le dos et les
parois de la machine et le mur.
4. Laissez le fluide réfrigérant reposer une heure avant de brancher la machine à glace.
5. L'appareil doit être disposé de manière à ce que la prise soit accessible.
* Une mauvaise utilisation de la prise de terre peut entraîner un risque
d'électrocution. Si le cordon d'alimentation est endommagé, appelez le service
après-vente.
1. Cet appareil doit être relié à la terre par sécurité. Le cordon d'alimentation de cet appareil
est équipé d'une prise à trois broches qui correspond aux prises murales à trois broches
standard pour minimiser le risque d'électrochoc.
2. Branchez votre appareil à une prise murale reliée à la terre, convenablement installée et
qui lui sera réservée exclusivement. En aucun cas vous ne devez couper ni enlever la
troisième broche (terre) du câble d'alimentation. Pour toute question concernant
l'alimentation électrique et/ou la prise de terre, adressez-vous à un électricien certifié.
3. Cet appareil exige une prise électrique standard 220-240 volt, 50 Hz à trois broches reliée
à la terre.
Avant d'utiliser votre machine à glace, il est fortement recommandé de la nettoyer à fond.
1. Sortez le panier à glaçons.
2. Nettoyez l'intérieur avec un détergent dilué, de l'eau tiède et un linge doux.
3. Ensuite, utilisez l'eau pour rincer les parties internes puis drainez-la en enlevant le bouchon
du drain situé sur le côté.
4. Il faut régulièrement nettoyer la machine à glace avec une solution détergente douce et de
l'eau tiède.
5. Séchez l'intérieur et l'extérieur avec un linge doux.
6. Si la machine ne doit pas être utilisée pendant longtemps, enlevez le bouchon du drain
pour extraire complètement l'eau du réservoir.
PROCÉDURES OPÉRATOIRES & MAINTENANCE
DÉBALLAGE
BRANCHEMENT
!
NETTOYAGE ET ENTRETIEN

1. Ouvrez le couvercle, enlevez le panier à glaçons et versez de l'eau dans le réservoir.
Le niveau de l'eau doit rester sous la ligne de repère.
2. Appuyez sur le bouton “ON/OFF” du panneau de commande pour allumer l'appareil et
lancer le cycle de fabrication de la glace.
3. Sélectionnez la taille des glaçons en appuyant sur le bouton “Select”. Trois tailles sont
disponibles : PETIT, MOYEN ou GRAND :
SMALL MEDIUM LARGE
Si la température ambiante est inférieure à 15°C, il est recommandé de sélectionner la
taille petite ou moyenne pour éviter que les glaçons collent les uns aux autres.
4. Le cycle de production de glace dure 6 à 15 minutes, en fonction du choix de la taille des
glaçons et la température ambiante. En cas de température ambiante très chaude, le
temps nécessaire pour faire de la glace peut beaucoup varier.
5. Pendant que la machine à glace est allumée, vérifiez périodiquement le niveau d'eau. Si la
pompe ne peut pas injecter d'eau, la machine s'arrête automatiquement et le symbole
clignote sur l'écran LCD.
Versez de l'eau jusqu'au repère puis réappuyez deux fois sur le bouton “ON/OFF” pour
rallumer l'appareil. Laissez le liquide réfrigérant reposer au moins 3 minutes à l'intérieur du
compresseur avant de redémarrer.
6. La machine à glace s'arrête automatiquement quand le panier à glaçons est plein. Le
symbole s'affiche dans l'écran LCD.
7. Changez l'eau dans le réservoir toutes les 24 heures pour garantir un niveau d'hygiène
raisonnable.
Si l'appareil ne doit plus être utilisé, drainez toute l'eau du réservoir.
Gamme de durées de la minuterie : 0,5-19,5 heures.
Durée par défaut : 3 heures.
Quand l'appareil fonctionne, vous pouvez le régler avec le bouton OFF-TIMER pour qu'il
s'arrête à l'issue du délai de consigne.
Et quand l'appareil est arrêté, vous pouvez le régler avec le bouton ON-TIMER pour qu'il
redémarre automatiquement à l'issue du délai de consigne. Ensuite, quand vous serez de
retour à la maison ou quand vous voudrez dîner, vous pourrez profiter de ce que cette machine
à glace vous offre.
UTILISATION
COMMENCER À FABRIQUER DES GLAÇONS
RÉGLAGE DE LA MINUTERIE
PETIT MOYEN GRAND

Comment régler la minuterie
D'abord, appuyez sur le bouton TIMER : le délai par défaut “3.0H”clignote sur l'écran LCD.
Ensuite, appuyez sur le bouton SELECT pour choisir le délai que vous désirez. Chaque fois
que vous appuyez sur le bouton SELECT, le délai augmente de 0,5 heure. Si vous appuyez sur
le bouton SELECT en continu pendant plus de 3 secondes, le délai changera très vite. Après 5
secondes de clignotement, l'affichage s'arrête de clignoter et devient fixe : cela signifie que la
minuterie est réglée.
Comment annuler la minuterie
Quand l'appareil est réglé avec délai, ou pendant le réglage de la minuterie, appuyez sur le
bouton TIMER : l'affichage du délai disparaît, ce qui signifie que le réglage de la minuterie a été
annulé.
1
2
3
4
5
6
7
Quand le symbole clignote, l'appareil a besoin d'être nettoyé. Quand vous aurez nettoyé
l'appareil, appuyez sur le bouton TIMER pendant plus de 5 secondes : ce symbole disparaîtra
de l'écran LCD et le délai avant nettoyage sera réinitialisé.
PROBLEME
CAUSE POSSIBLE
SOLUTION
Le symbole clignote
Pas assez d'eau
Arrêtez la machine à glace,
versez de l'eau et réappuyez
sur le bouton “ON/OFF”pour
redémarrer l'appareil
Le symbole apparaît
sur l'écran LCD
Trop de glace
Enlevez de la glace du panier
à glaçons
Les glaçons collent
ensemble
Le cycle de production de
glace est trop long
Arrêtez la machine à glace et
redémarrez-la quand les
glaçons commenceront à
fondre. Sélectionnez la taille
de glaçons Petite
RÉSOLUTION DES PROBLÈMES
AFFICHAGE ET RÉGLAGE DE L'HEURE
Cet appareil est fourni avec la fonction d'affichage de
l’heure
Si l'heure affichée n'est pas bonne, vous pouvez la régler
grâce aux boutons CLOCK et SELECT.
D'abord, appuyez une fois sur le bouton CLOCK : le chiffre de
l'heure clignote en premier. Ensuite, vous pouvez appuyer sur
le bouton SELECT pour le modifier : Chaque fois que vous
appuyez sur le bouton, vous augmentez de 1 heure. Appuyez
à nouveau sur CLOCK : le chiffre des minutes se met à
clignoter. Appuyez sur SELECT pour le modifier. Appuyez une
troisième fois sur CLOCK pour confirmer le réglage : l'écran
affichera désormais l'heure exacte. Pendant le réglage, après
5 secondes de clignotement, l'affichage s'arrête de clignoter et
devient fixe : cela signifie que l'horloge est réglée.
Heure de
l'horloge
RAPPEL DE NETTOYAGE

M
Mo
od
dè
èl
le
e
K
KB
B1
15
5
T
Ty
yp
pe
e
d
de
e
p
pr
ro
ot
te
ec
ct
ti
io
on
n
I
I
P
Pu
ui
is
ss
sa
an
nc
ce
e
é
él
le
ec
ct
tr
ri
iq
qu
ue
e
2
22
20
0-
-2
24
40
0V
V/
/5
50
0H
Hz
z
C
Co
ou
ur
ra
an
nt
t
d
de
e
p
pr
ro
od
du
uc
ct
ti
io
on
n
d
de
e
g
gl
la
ac
ce
e
0
0,
,9
9A
A
C
Co
ou
ur
ra
an
nt
t
d
de
e
r
ré
éc
co
ol
lt
te
e
d
de
e
g
gl
la
ac
ce
e
1
1,
,4
4A
A
R
Ré
éf
fr
ri
ig
gé
ér
ra
an
nt
t
R
R1
13
34
4a
a/
/7
75
5g
g
P
Po
oi
id
ds
s
n
ne
et
t
1
13
3,
,0
0
k
kg
g
S
St
tr
ru
uc
ct
tu
ur
re
e
d
de
e
l
l'
'a
ap
pp
pa
ar
re
ei
il
l
i
in
no
ox
x
ENVIRONNEMENT
ATTENTION :Vous ne devez pas vous débarasser de cet appareil avec vos
déchets ménagers. Un système de collecte sélective pour ce type de produit est
mis en place par les communes, vous devez vous renseigner auprès de votre
mairie afin d'en connaître les emplacements. En effet, les produits électriques et
électroniques peuvent contenir des substances dangereuses qui ont des effets néfastes
sur l'environnement ou la santé humaine et doivent être recyclés. Le symbole ci-contre
indique que les équipements électriques et électroniques font l'objet d'une collecte
sélective, il représente une poubelle sur roues barrée d'une croix.
Fabriqué pour et importé par :Adeva SAS 8 rue Marc Seguin 77290 Mitry-Mory FRANCE
www.hkoenig.com - contact@hkoenig.com - Tél. 01 64 67 00 01
La température de l'eau
dans le réservoir est trop
basse
Changez l'eau dans le
réservoir. Il vaut mieux régler
la température de l'eau entre
7°C et 32°C
Le cycle de production de
glace est normal, mais
aucun glaçon n'est produit
La température ambiante
ou la température de l'eau
dans le réservoir est trop
élevée
Faites fonctionner la machine
à glace à moins de 32°C et
versez-y une eau plus froide
Fuite de liquide réfrigérant
Faites vérifier par un
technicien qualifié
La tuyauterie du système
de refroidissement est
bouchée
Faites vérifier par un
technicien qualifié
SPÉCIFICATIONS TECHNIQUES

WARNUNG
GEFAHR
D
DE
EU
UT
TS
SC
CH
H
Ihre Sicherheit und die der anderen ist sehr wichtig.
Viele wichtige Sicherheitshinweise werden in diesem Handbuch und dem Gerät enthalten sind.
Lesen Sie sie und sehen Sie denAnweisungen.
Sehen Sie hier ein Warndreieck:
Dieses Warndreieck, vor allen Sicherheits Nachrichten mit dem Wort "GEFAHR" oder
"WARNUNG".
Diese Worte bedeuten, dass man das Risiko, einen Unfall führen, wenn Sie sich nicht an diese
Anweisungen.
Alle sicherheitsrelevanten Meldungen zeigen die Gefahr, dass Sie möglicherweise entstehen,
wie es zu reduzieren und was passiert, wenn Sie nicht folgen Sie denAnweisungen.
Beim Betrieb elektrischer Geräte grundlegende Vorsichtsmaßnahmen sollten weiterhin die
Gefahr von Feuer, Stromschlag oder Schäden an Personen und Sachen zu reduzieren. Lesen
Sie alle Anweisungen, bevor Sie ein Gerät:
Verwenden Sie nicht dieses Produkt oder jedes andere, mit einem beschädigten
Netzkabel. Einfach in eine polarisierte Steckdose. Schließen Sie keine anderen Geräte
in der gleichen Einstellung.Achten Sie darauf, den Stecker vollständig in die Steckdose
eingesteckt.
Das Kabel darf nicht Teppich oder anderen thermischen Isolator. Bedecken Sie nicht
anschließen. Fernhalten von Verkehrsflächen und nicht in Wasser einweichen.
Die Verwendung von Verlängerungskabeln wird nicht empfohlen, weil sie überhitzen
können und ein Feuer verursachen. Wenn Sie ein Verlängerungskabel verwenden
müssen, verwenden Sie ein 14AWG Mindestgröße und bewertet mindestens 1875
Watt.
KENNEN SIE IHRE GERÄTE
VORBEREITUNG DER EISMASCHINE VOR DEM GEBRAUCH
!
!
WICHTIGE SICHERHEITSHINWEISE

Ziehen Sie die Eismaschine vor der Reinigung oder der Durchführung von
Reparatur-oder Wartungsarbeiten.
Seien Sie vorsichtig, wenn Sie das Gerät in der Nähe Kinder und vergessen Sie nicht,
sie zu beobachten.
Verwenden Sie nicht die Eismaschine in offenen Räumen. Setzen Sie auf Sonnenlicht
und stellen Sie sicher, gibt es mindestens 10 cm zwischen der Rückseite des Gerätes
und der Wand. Lassen Sie einenAbstand von mindestens 10 cm frei auf jeder Seite
des Gerätes.
Verwenden Sie nur Wasser Eiswürfel, und nicht andere Flüssigkeiten machen.
Reinigen Sie nicht Ihre Eismaschine mit einer brennbaren Flüssigkeit. Die Dämpfe
können einen Brand oder eine Explosion.
Sie das Gerät nicht fallen.
Wenn Sie Ihre Eismaschine von außen in der kalten Jahreszeit erhalten haben, lassen
Sie ein paar Stunden auf Raumtemperatur, bevor Sie zu erreichen.
Dieses Produkt sollte nicht in Wasser oder andere Flüssigkeiten getaucht werden.
Um jegliches Risiko, trennen Sie das Gerät sofort, wenn Sie etwas Ungewöhnliches
feststellen.
Senden Sie das Gerät zu einem autorisierten Service-Center. Versuchen Sie niemals,
das Gerät selbst zu zerlegen.
Dieses Produkt ist nicht dazu bestimmt, von Menschen mit Behinderung in der
körperlichen, geistigen oder sensorischen Beeinträchtigungen oder Mangel an
Erfahrung oder Wissen (einschließlich Kinder) verwendet werden, es sei denn, Sie
aufgefordert werden, zu überwachen oder bei der Nutzung angewiesen worden, das
Gerät von einer Person für ihre Sicherheit verantwortlich. Kinder sollten beaufsichtigt
werden, um sicherzustellen, dass sie nicht mit dem Gerät spielen.
ACHTUNG: den Verdampfer nicht berühren, wenn das Produkt aus der Eismaschine.
Es kann die Haut verbrennen.
ACHTUNG: Trennen Sie das Gerät vor der Wartung, der einen elektrischen Schlag zu
gewährleisten.
In dem Fall, dass die Stromversorgung des Gerätes würde unbeabsichtigt während der
Eisproduktion geschnitten werden Zyklus oder Warnleuchten blinken auf dem
Bedienfeld und die Maschine produziert mehr Eis, Schalten Sie den Strom ab, trennen
das Gerät.
Warten Sie einige Minuten und dann entfernen Sie vorsichtig die Würfel. Finden Sie in
der Tabelle am Ende des Handbuchs für die Fehlersuche.
WARNUNG: Dieses Gerät muss geerdet werden.
WICHTIG:
Die Drähte im Netzkabel sind in Übereinstimmung mit den folgenden Kennfarben:
Grün oder grün mit gelben Streifen: Erd
Weiß: Neutral
Schwarz: Low Voltage

Um jegliches Risiko der Instabilität des Geräts, muss es auf einer horizontalen Fläche und
regelmäßige platziert werden.
1. Kappe: mit einem klaren Fenster nach innen zu sehen.
2. Löffel für eis
3. Ice Catcher
4. Control Panel: sichtbaren Merkmale und einfach zu bedienen und Setup-Bildschirm LCD.
A. Flüssigkristallanzeige (LCD)
1. Aktuelle Zeit
2. Unsere Mangel an Wasser: Wenn sie blinkt, es gibt kein Wasser in das Gerät und befüllt
werden.
3. Beachten sie ist voller Eis: wenn Sie wiederum bedeutet, dass der Korb mit Eis gefüllt ist.
4. Note On / Off: Wenn der Computer ausgeschaltet ist, dieses Symbol blinkt, wenn aktiviert,
bleibt dieses Symbol auf.
5. Notice of Reinigung: Wenn dieses Symbol blinkt, bedeutet, dass Sie das Gerät reinigen.
6. Größe des Eises: klein, Mittel, groß
7. Beispiel minütige Verzögerung der Zeit
B. On / Off-Taste: Zum Starten oder Stoppen des Gerätes
C. SELECT: Um die gewünschte Größe für Ihr Eis wählen: Small, Medium, Large - Sie können
zwischen drei Größen von Eiswürfeln zu wählen oder das Display derArmbanduhr oder Uhr zu
ändern.
D. CLOCK-Taste: zum Einstellen der Uhrzeit.
E. TIMER: zu setzen oder deaktivieren Sie den Timer-Programm für das Gerät, wenn Sie
starten wollen oder zu stoppen, wenn sie nicht in Gebrauch ist.
5. DieAblassschraube: Um den Tank Wasserablauf
6. Luftaustritt
7. Basket von Eis
BETRIEBS UND WARTUNGSARBEITEN

GEFAHR
1. Entfernen Sie die äußeren und inneren Verpackung. Prüfen Sie, ob Eis legen und Eis
Schaufel ist. Wenn fehlende Teil, kontaktieren Sie bitte Kundenservice.
2. Reinigen Sie das Innere mit warmem Wasser und einem weichen Tuch. Entfernen Sie das
Eis legen und reinigen.
3. Legen Sie die Eismaschine weg vom Sonnenlicht oder anderen Wärmequellen (zB Herd,
Backofen, Heizung). Legen Sie die Eismaschine auf eine horizontale Fläche. Vergewissern Sie
sich, mindestens 10 Zentimeter Raum zwischen der Rückseite und die Seiten der Maschine
und die Wand.
4. Lassen Sie den Rest Kältemittel für eine Stunde, bevor Sie die Eismaschine einschalten.
5. Das Gerät sollte so platziert werden, dass der Stecker zugänglich ist.
* Falsche Verwendung von Erdung kann einen elektrischen Schlag verursachen.
Wenn das Kabel beschädigt ist, rufen Sie unseren Customer Service.
1. Dieses Gerät muss für die Sicherheit geerdet werden. Das Netzkabel dieses Geräts ist mit
dreipoligen Steckdosen, die dem Standard entspricht drei Beinen, um das Risiko eines
elektrischen Schlags zu minimieren ausgestattet.
2. Schließen Sie das Gerät an eine Steckdose geerdet ist, ordnungsgemäß installiert und
ausschließlich zu diesem Zweck verwendet werden. Unter keinen Umständen entfernt oder
NUTZUNG
AUSPACKEN
CONNECTION
!

geschnitten werden der dritte Stift (Masse) Netzkabel. Für Fragen im Zusammenhang mit der
Energieversorgung und / oder geerdet, kontaktieren Sie einen Elektriker.
3. Dieses Gerät benötigt eine Standard-Steckdose 220-240v, 50 Hz dreipoligen geerdet.
Bevor Sie Ihr Eismaschine, empfehlen wir eine gründliche Reinigung.
1. Entfernen Sie das Eis Basket.
2. Saubere Innen mit verdünntem Spülmittel, warmem Wasser und einem weichen Tuch.
3. Dann nutzen Sie Wasser, um die inneren Teile und leer nach dem Entfernen der
Ablassschraube nebenan zu reinigen.
4. Reinigen Sie regelmäßig die Eismaschine mit einem milden Reinigungsmittel und warmem
Wasser.
5. Trocknen Sie die Innen-und Außenbereich mit einem weichen Tuch.
6. Wenn das Gerät nicht für längere Zeit nicht benutzt werden, entfernen Sie die
Ablassschraube für alle Wasser aus dem Tank zu entfernen.
1. Öffnen Sie den Deckel, entfernen Sie das Eis legen und gießen Wasser in den Tank.
Der Wasserstand sollte unter die Marke werden.
2. Drücken Sie die "ON / OFF" Control Panel zu aktivieren und starten Sie den
Produktionszyklus des Eises.
3. Wählen Sie die Größe der Eiswürfel durch Drücken der "Select". Es gibt drei Größen
erhältlich: klein, mittel oder groß:
SMALL MEDIUM LARGE
Wenn die Umgebungstemperatur unter 15 ° C wird empfohlen, kleine oder mittlere Größe
auswählen, um Eiswürfel aus aneinander kleben zu verhindern.
4. Der Produktionszyklus dauert 6-15 Minuten von Eis, je nach Wahl der Größe des Eis und der
Umgebungstemperatur. Wenn die Umgebungstemperatur ist zu heiß für Eis beträchtlich
variieren kann.
5. Während der Eismaschine ist, überprüfen Wasserstand regelmäßig. Wenn die Pumpe nicht
spritzen kann das Wasser, stoppt die Maschine automatisch und das Symbol blinkt auf
dem LCD-Bildschirm.
Gießen Sie Wasser zur Marke auf und dann wieder einen Doppelklick auf den Button "ON /
OFF", um das Gerät einzuschalten. Lassen Sie sitzen für Kühlmittel mindestens 3 Minuten im
Inneren des Verdichters vor dem Neustart.
6. Die Eismaschine wird automatisch beendet, wenn der Korb mit Eis gefüllt ist. Das Symbol
erscheint auf dem LCD.
7. Wechseln Sie das Wasser in den Tank alle 24 Stunden auf ein vernünftiges Maß an Hygiene
zu gewährleisten.
Wenn das Gerät nicht mehr verwendet wird, abtropfen lassen alles Wasser aus dem Tank.
REINIGUNG UND PFLEGE
STARTEN SIE ZUM HERSTELLEN VON EISWÜRFELN
Table of contents
Languages:
Other H.Koenig Ice Cream Maker manuals
Popular Ice Cream Maker manuals by other brands

West Bend
West Bend Arctic Pops Maker instruction manual

Royal Catering
Royal Catering RCFI-1O user manual

Oster
Oster FRSTIC-WDB user guide

Cuisinart
Cuisinart Pure Indulgence ICE-30BC Series INSTRUCTION AND RECIPE BOOKLET

Hershey's
Hershey's IC13886 instruction manual

SharkNinja Operating
SharkNinja Operating Ninja CREAMi NC300 Series instructions