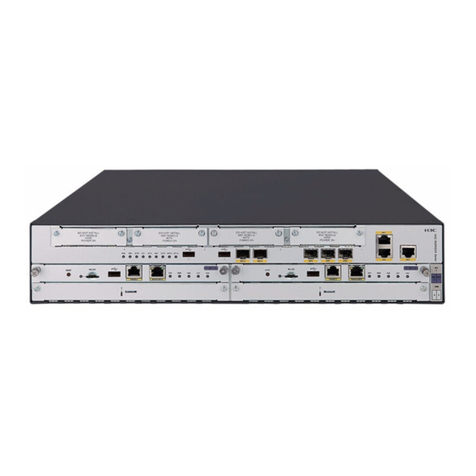
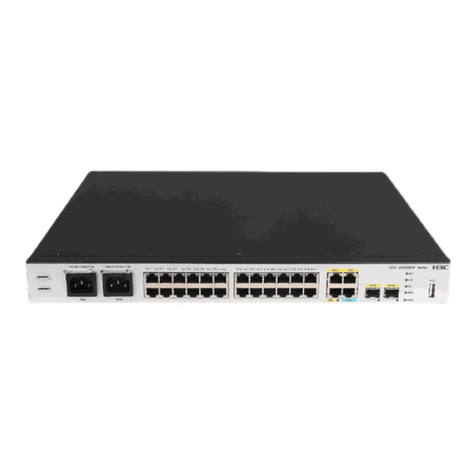
H3C S3100 Series Installation instructions

H3C S3100 Series Ethernet Switches
Command Manual
Hangzhou H3C Technologies Co., Ltd.
http://www.h3c.com
Manual Version: 20091230-C-1.01
Product Version: Release 2209

Copyright © 2009, Hangzhou H3C Technologies Co., Ltd. and its licensors
All Rights Reserved
No part of this manual may be reproduced or transmitted in any form or by any means without prior
written consent of Hangzhou H3C Technologies Co., Ltd.
Trademarks
H3C, , Aolynk, , H3Care,
, TOP G, , IRF, NetPilot, Neocean, NeoVTL,
SecPro, SecPoint, SecEngine, SecPath, Comware, Secware, Storware, NQA, VVG, V2G, VnG, PSPT,
XGbus, N-Bus, TiGem, InnoVision and HUASAN are trademarks of Hangzhou H3C Technologies Co.,
Ltd.
All other trademarks that may be mentioned in this manual are the property of their respective owners.
Notice
The information in this document is subject to change without notice. Every effort has been made in the
preparation of this document to ensure accuracy of the contents, but all statements, information, and
recommendations in this document do not constitute the warranty of any kind, express or implied.
Technical Support
customer_service@h3c.com
http://www.h3c.com

About This Manual
Organization
H3C S3100 Series Ethernet Switches Command Manual is organized as follows:
Part Contents
1 CLI Introduces the commands used for switching between the command
levels and command level setting.
2 Login Introduces the commands used for logging into the Ethernet switch.
3 Configuration File
Management Introduces the commands used for configuration file management.
4 VLAN Introduces the commands used for configuring VLAN.
5 Management VLAN Introduces the commands used for configuring the management
VLAN.
6 IP Address-IP
Performance Introduces the commands used for IP address configuration and IP
performance configuration.
7 Voice VLAN Introduces the commands used for voice VLAN configuration.
8 GVRP Introduces the commands used for GVRP configuration.
9 Port Basic Configuration Introduces the commands used for basic port configuration.
10 Link Aggregation Introduces the commands used for link aggregation.
11 Port Isolation Introduces the commands used for port isolation.
12 Port Security-Port Binding Introduces the commands used for port security configuration and
port binding.
13 DLDP Introduces the commands used for DLDP configuration.
14 MAC Address Table
Management Introduces the commands used for MAC address forwarding table
management.
15 MSTP Introduces the STP-related commands.
16 Multicast Introduces the commands used for multicast configuration.
17 802.1x-System Guard Introduces the commands used for 802.1x-System Guard
configuration.
18 AAA Introduces the commands used for AAA, RADIUS, HWTACACS,
and EAD configuration.
19 MAC Address
Authentication Introduces the commands used for MAC address authentication
configuration.
20 ARP Introduces the ARP-related commands.
21 DHCP Introduces the commands used for DHCP, DHCP-snooping
configuration.
22 ACL Introduces the ACL-related commands.
23 QoS-QoS Profile Introduces the commands used for QoS and QoS profile
configuration.
24 Mirroring Introduces the commands used for port mirroring.
25 Stack-Cluster Introduces the commands used for cluster management.

Part Contents
26 PoE-PoE Profile Introduces the commands used for PoE and PoE profile
configuration.
27 SNMP-RMON Introduces the commands used for SNMP and RMON configuration.
28 NTP Introduces the NTP-related commands.
29 SSH Introduces the commands used for SSH configuration.
30 File System Management Introduces the commands used for file system management.
31 FTP-SFTP-TFTP Introduces the FTP-/SFTP-/TFTP-related commands.
32 Information Center Introduces the commands used for information center configuration.
33 System Maintenance and
Debugging Introduces the commands used for system maintenance and
debugging.
34 VLAN-VPN Introduces the commands used for VLAN VPN configuration.
35 HWPing Introduces the commands used for HWPing configuration.
36 IPv6 Management Introduces the commands used for IPv6 Management configuration.
37 DNS Introduces the commands used for DNS configuration.
38 Smart Link-Monitor Link Introduces the commands used for Smart Link, Monitor Link
configuration
39 ARP and IP Attack
Defense Introduces the commands used for ARP and IP attack defense
configuration.
40 LLDP Introduces the commands used for LLDP configuration.
41 PKI Introduces the commands used for PKI configuration.
42 SSL Introduces the commands used for SSL configuration.
43 HTTPS Introduces the commands used for HTTPS configuration.
44 Web Authentication Introduces the commands used for Web authentication
configuration.
45 Appendix Lists all the commands described in this command manual in an alphabetic
order. The parts and pages where the commands are described are also
given.
Conventions
The manual uses the following conventions:
Command conventions
Convention Description
Boldface The keywords of a command line are in Boldface.
italic Command arguments are in italic.
[ ] Items (keywords or arguments) in square brackets [ ] are optional.
{ x | y | ... }
Alternative items are grouped in braces and separated by vertical bars.
One is selected.
[ x | y | ... ]
Optional alternative items are grouped in square brackets and
separated by vertical bars. One or none is selected.

Convention Description
{ x | y | ... } *
Alternative items are grouped in braces and separated by vertical bars.
A minimum of one or a maximum of all can be selected.
[ x | y | ... ] *
Optional alternative items are grouped in square brackets and
separated by vertical bars. Many or none can be selected.
&<1-n> The argument(s) before the ampersand (&) sign can be entered 1 to n
times.
# A line starting with the # sign is comments.
GUI conventions
Convention Description
Boldface Window names, button names, field names, and menu items are in
Boldface. For example, the New User window appears; click OK.
> Multi-level menus are separated by angle brackets. For example, File >
Create > Folder.
Symbols
Convention Description
Means reader be extremely careful. Improper operation may cause
bodily injury.
Means reader be careful. Improper operation may cause data loss or
damage to equipment.
Means an action or information that needs special attention to ensure
successful configuration or good performance.
Means a complementary description.
Means techniques helpful for you to make configuration with ease.
Related Documentation
In addition to this manual, each H3C S3100 Series Ethernet Switches documentation set includes the
following:
Manual Description
H3C S3100 Series Ethernet Switches
Installation Manual It provides information for the system installation.
H3C S3100 Series Ethernet Switches
Operation Manual It is used for assisting the users in data configurations
and typical applications.
H3C S3100 Series Ethernet Switches
Compliance and Safety Manual
It lists the regulatory compliance statements and
provides the safety information of H3C S3100 series
Ethernet switches.

Obtaining Documentation
You can access the most up-to-date H3C product documentation on the World Wide Web at this URL:
http://www.h3c.com.
The following are the columns from which you can obtain different categories of product documentation:
[Products & Solutions]: Provides information about products and technologies, as well as solutions.
[Technical Support & Document > Technical Documents]: Provides several categories of product
documentation, such as installation, configuration, and maintenance.
[Technical Support & Document > Software Download]: Provides the documentation released with the
software version.
Documentation Feedback
We appreciate your comments.

i
Table of Contents
1 CLI Configuration Commands··················································································································1-1
CLI Configuration Commands·················································································································1-1
command-privilege level··················································································································1-1
display history-command·················································································································1-4
super················································································································································1-4
super authentication-mode··············································································································1-5
super password·······························································································································1-6

1-1
1 CLI Configuration Commands
CLI Configuration Commands
command-privilege level
Syntax
command-privilege level level view view command
undo command-privilege view view command
View
System view
Parameters
level level: Command level to be set, in the range of 0 to 3.
view view: CLI view. It can be any CLI view that the Ethernet switch supports. The S3100 series support
only the CLI views listed in Table 1-1:
Table 1-1 Available CLI views for the view argument
CLI view Description
acl-adv Advanced ACL view
acl-basic Basic ACL view
acl-ethernetframe Layer 2 ACL view, which is supported byonly the S3100-EI
series
aux Aux 1/0/0 port view, that is, console port view
cert-acp PKI certificate attribute-based access control policy view
cert-attribute-group PKI certificate attribute group view
cluster Cluster view
ethernet 100M Ethernet port view
ftp-client FTP client view
gigabitethernet GigabitEthernet port view
gqinq QinQ view, which is supported by only the S3100-EI series
hwping HWPing test group view
hwtacacs HWTACACS view
isp ISP domain view
loopback Loopback interface view
luser Local user view
manage-vlan Management VLAN view

1-2
CLI view Description
mst-region MST region view
mtlk-group Monitor link group view, which is supported by only the
S3100-EI series
null NULL interface view
peer-key-code Public key editing view
peer-public-key Public key view
pki-domain PKI domain view
pki-entity PKI entity view
poe-profile PoE profile view, which is supported by only the
S3100-TP-PWR-EI series
qos-profile QoS profile view, which is supported by only the S3100-EI
series
radius-template RADIUS scheme view
shell User view
smlk-group Smart link group view, which is supported by only the
S3100-EI series
ssl-client-policy SSL client policy view
ssl-server-policy SSL server policy view
system System view
user-interface User interface view
vlan VLAN view
vlan-interface VLAN interface view
command: Command for which the level is to be set.
Description
Use the command-privilege level command to set the level of a specified command in a specified
view.
Use the undo command-privilege view command to restore the default.
Commands fall into four levels: visit (level 0), monitor (level 1), system (level 2), and manage (level 3).
The administrator can change the level of a command as required. For example, the administrator can
change a command from a higher level to a lower level so that the lower level users can use the
command.
The default levels of commands are described in the following table:
Table 1-2 Default levels of commands
Level Name Command
0 Visit level Commands used to diagnose network, such as ping, tracert, and
telnet commands.
1 Monitor level
Commands used to maintain the system and diagnose service fault,
such as debugging, terminal and reset commands.

1-3
Level Name Command
2 System level All configuration commands except for those at the manage level.
3 Manage level
Commands associated with the basic operation modules and
support modules of the system, such as file system,
FTP/TFTP/XMODEM downloading, user management, and level
setting commands.
Note that:
zYou are recommended to use the default command level or modify the command level under the
guidance of professional staff; otherwise, the change of command level may bring inconvenience
to your maintenance and operation, or even potential security problem.
zWhen you change the level of a command with multiple keywords or arguments, you should input
the keywords or arguments one by one in the order they appear in the command syntax. Otherwise,
your configuration will not take effect. The values of the arguments should be within the specified
ranges.
zWhen you configure the undo command-privilege view command, the value of the command
argument can be an abbreviated form of the specified command, that is, you only need to enter the
keywords at the beginning of the command. For example, after the undo command-privilege
view system ftp command is executed, all commands starting with the keyword ftp (such as ftp
server acl, ftp server enable, and ftp timeout) will be restored to the default level; if you have
modified the command level of commands ftp server enable and ftp timeout, and you want to
restore only the ftp server enable command to its default level, you should use the undo
command-privilege view system ftp server command.
zIf you modify the command level of a command in a specified view from the default command level
to a lower level, remember to modify the command levels of the quit command and the
corresponding command that is used to enter this view. For example, the default command level of
commands interface and system-view is 2 (system level); if you want to make the interface
command available to the users with the user privilege level of 1, you need to execute the following
three commands: command-privilege level 1 view shell system-view, command-privilege level
1 view system interface gigabitethernet 1/0/1, and command-privilege level 1 view system quit,
so that the login users with the user privilege level of 1 can enter system view, execute the
interface gigabitethernet command, and then return to user view.
Examples
# Set the level of the tftp get command in user view (shell) to 0, and configure the keywords or
arguments one by one in the order they appear in the tftp get command syntax.
[Sysname] command-privilege level 0 view shell tftp
[Sysname] command-privilege level 0 view shell tftp 192.168.0.1
[Sysname] command-privilege level 0 view shell tftp 192.168.0.1 get
[Sysname] command-privilege level 0 view shell tftp 192.168.0.1 get bootrom.btm
# Restore the default level of the tftp get command. To restore the default levels of the commands
starting with the tftp keyword, you only need to specify the tftp keyword.
[Sysname] undo command-privilege view shell tftp
1-4
display history-command
Syntax
display history-command
View
Any view
Parameters
None
Description
Use the display history-command command to display the history commands of the current user, so
that the user can check the configurations performed formerly.
History commands are those commands that were successfully executed recently and saved in the
history command buffer. You can set the size of the buffer by the history-command max-size
command. When the history command buffer is full for that user, the earlier commands will be
overwritten by the new ones.
By default, the CLI can save 10 history commands for each user.
Related commands: history-command max-size in login module.
Examples
# Display the history commands of the current user.
<Sysname> display history-command
system-view
quit
display history-command
super
Syntax
super [ level ]
View
User view
Parameters
level: User level, in the range of 0 to 3.
Description
Use the super command to switch from the current user level to a specified level.
Executing this command without the level argument will switch the current user level to level 3 by
default.
Note that:
zUsers logged into the switch fall into four user levels, which correspond to the four command levels
respectively. Users at a specific level can only use the commands at the same level or lower levels.

1-5
zYou can switch between user levels after logging into a switch successfully. The high-to-low user
level switching is unlimited. However, the low-to-high user level switching requires the
corresponding authentication. The authentication mode can be set through the super
authentication-mode command.
zFor security purpose, the password entered is not displayed when you switch to another user level.
You will remain at the original user level if you have tried three times but failed to enter the correct
authentication information.
Related commands: super authentication-mode, super password.
Examples
# Switch from the current user level to user level 3, using super password authentication.
<Sysname> super 3
Password:
User privilege level is 3, and only those commands can be used
whose level is equal or less than this.
Privilege note: 0-VISIT, 1-MONITOR, 2-SYSTEM, 3-MANAGE
# Switch from the current user level to level 3, using HWTACACS authentication.
<Sysname> super 3
Username: user@system
Password:
User privilege level is 3, and only those commands can be used
whose level is equal or less than this.
Privilege note: 0-VISIT, 1-MONITOR, 2-SYSTEM, 3-MANAGE
super authentication-mode
Syntax
super authentication-mode { super-password | scheme }*
undo super authentication-mode
View
User interface view
Parameters
super-password: Adopts super password authentication for low-to-high user level switching.
scheme: Adopts Huawei terminal access controller access control system (HWTACACS)
authentication for low-to-high user level switching.
Description
Use the super authentication-mode command to specify the authentication mode used for low-to-high
user level switching.
Use the undo super authentication-mode command to restore the default.
By default, super password authentication is adopted for low-to-high user level switching.
Note that the two authentication modes, super password authentication and HWTACACS
authentication, are available at thesame time to provide authentication redundancy. When both the two

1-6
authentication modes are specified, the order to perform the two types of authentication is determined
by the order in which they are specified, as described below.
zIf the super authentication-mode super-password scheme command is executed to specify the
authentication mode for user level switching, the super password authentication is preferred and
the HWTACACS authentication mode is the backup.
zIf the super authentication-mode scheme super-password command is executed to specify the
authentication mode for low-to-high user level switching, the HWTACACS authentication is
preferred and the super password authentication mode is the backup.
zWhen both the super password authentication and the HWTACACS authentication are specified,
the device adopts the preferred authentication mode first. If the preferred authentication mode
cannot be implemented (for example, the super password is not configured or the HWTACACS
authentication server is unreachable), the backup authentication mode is adopted.
Examples
# Specify HWTACACS authentication as the preferred authentication mode when a VTY 0 user
switches from the current level to a higher level, with the super password authentication as the backup
authentication mode.
<Sysname> system-view
System View: return to User View with Ctrl+Z.
[Sysname] user-interface vty 0
[Sysname-ui-vty0] super authentication-mode scheme super-password
super password
Syntax
super password [level level ] { cipher |simple }password
undo super password [ level level ]
View
System view
Parameters
level level: User level, in the range of 1 to 3. It is 3 by default.
cipher: Stores the password in the configuration file in ciphered text.
simple: Stores the password in the configuration file in plain text.
password: Password to be set. If the simple keyword is used, you must provide a plain-text password,
that is, a string of 1 to 16 characters. If the cipher keyword is used, you can provide a password in either
of the two ways:
zInput a plain-text password, that is, a string of 1 to 16 characters, which will be automatically
converted into a 24-character cipher-text password.
zDirectly input a cipher-text password, that is, a string of 1 to 24 characters, which must correspond
to a plain-text password. For example, The cipher-text password “_(TT8F]Y\5SQ=^Q`MAF4<1!!”
corresponds to the plain-text password 1234567.

1-7
Description
Use the super password command to set a switching password for a specified user level, which will be
used when users switch from a lower user level to the specified user level.
Use the undo super password command to restore the default configuration.
By default, no such password is set.
Note that, no matter whether a plain-text or cipher-text password is set, users must enter the plain-text
password during authentication.
Examples
# Set the switching password for level 3 to 0123456789 in plain text.
<Sysname> system-view
System View: return to User View with Ctrl+Z.
[Sysname] super password level 3 simple 0123456789

i
Table of Contents
1 Login Commands ······································································································································1-1
Login Commands····································································································································1-1
authentication-mode························································································································1-1
auto-execute command···················································································································1-3
copyright-info enable·······················································································································1-4
databits············································································································································1-4
display user-interface ······················································································································1-5
display users····································································································································1-7
display web users····························································································································1-8
free user-interface ···························································································································1-9
header ·············································································································································1-9
history-command max-size ···········································································································1-11
idle-timeout····································································································································1-12
ip http shutdown ····························································································································1-13
lock ················································································································································1-14
parity··············································································································································1-14
protocol inbound····························································································································1-15
screen-length·································································································································1-16
send···············································································································································1-17
service-type···································································································································1-18
set authentication password··········································································································1-19
shell ···············································································································································1-20
speed·············································································································································1-21
stopbits ··········································································································································1-21
telnet··············································································································································1-22
telnet ipv6······································································································································1-23
user-interface·································································································································1-23
user privilege level·························································································································1-24
2 Commands for User Control ····················································································································2-1
Commands for Controlling Logging in Users··························································································2-1
acl····················································································································································2-1
free web-users·································································································································2-1
ip http acl·········································································································································2-2
snmp-agent community···················································································································2-2
snmp-agent group ···························································································································2-3
snmp-agent usm-user······················································································································2-4

1-1
1 Login Commands
Login Commands
authentication-mode
Syntax
authentication-mode {password |scheme [ command-authorization ] | none }
View
User interface view
Parameters
none: Specifies not to authenticate users.
password: Authenticates users using the local password.
scheme: Authenticates users locally or remotely using usernames and passwords.
command-authorization: Performs command authorization on TACACS authentication server.
Description
Use the authentication-mode command to specify the authentication mode.
zIf you specify the password keyword to authenticate users using the local password, remember to
set the local password using the set authentication password command. Otherwise, AUX users
can log in to the switch successfully without password, but VTY users will fail the login. VTY users
must enter the correct authentication password to log in to the switch.
zIf you specify the scheme keyword to authenticate users locally or remotely using usernames and
passwords, the actual authentication mode, that is, local or remote, depends on other related AAA
scheme configuration of the domain.
zIf this command is executed with the command-authorization keyword specified, authorization is
performed on the TACACS server whenever you attempt to execute a command, and the
command can be executed only when you pass the authorization. Normally, a TACACS server
contains a list of the commands available to different users.
By default, the authentication mode is none for AUX users and password for VTY users.
For a VTY user interface, to specify the none keyword or password keyword for login users, make sure
that SSH is not enabled in the user interface. Otherwise, the configuration fails. Refer to the protocol
inbound command for related configuration.

1-2
To improve security and prevent attacks to the unused Sockets, TCP 23 and TCP 22, ports for Telnet
and SSH services respectively, will be enabled or disabled after corresponding configurations.
zIf the authentication mode is none, TCP 23 will be enabled, and TCP 22 will be disabled.
zIf the authentication mode is password, and thecorresponding password has been set, TCP 23 will
be enabled, and TCP 22 will be disabled.
zIf the authentication mode is scheme, there are three scenarios: when the supported protocol is
specified as telnet, TCP 23 will be enabled; when the supported protocol is specified as SSH, TCP
22 will be enabled; when the supported protocol is specified as all, both the TCP 23 and TCP 22
port will be enabled.
Examples
zExample of the password authentication mode configuration
# Configure to authenticate users using the local password on the console port, and set the
authentication password to aabbcc in plain text.
<Sysname> system-view
System View: return to User View with Ctrl+Z.
[Sysname] user-interface aux 0
[Sysname-ui-aux0] authentication-mode password
[Sysname-ui-aux0] set authentication password simple aabbcc
After the configuration, when a user logs in to the switch through the console port, the user must enter
the correct password.
zExample of the scheme authentication mode configuration
# Configure the authentication mode as scheme for VTY users logging in through Telnet.
<Sysname> system-view
System View: return to User View with Ctrl+Z.
[Sysname] user-interface vty 0
[Sysname-ui-vty0] authentication-mode scheme
[Sysname-ui-vty0] quit
# Specify domain system as the default domain, and set the scheme authentication mode to local for
the domain.
[Sysname] domain default enable system
[Sysname] domain system
[Sysname-isp-system] scheme local
[Sysname-ui-vty0] quit
# Configure the local authentication username and password.
[Sysname] local-user guest
[Sysname-luser-guest] password simple 123456
[Sysname-luser-guest] service-type telnet level 2
After the configuration, when a user logs in to the switch through VTY0, the user must enter the
configured username and password.

1-3
auto-execute command
Syntax
auto-execute command text
undo auto-execute command
View
VTY user interface view
Parameters
text: Command to be executed automatically.
Description
Use the auto-execute command command to set the command that is executed automatically after a
user logs in.
Use the undo auto-execute command command to disable the specified command from being
automatically executed.
By default, no command is configured to be executed automatically after a user logs in.
Normally, the telnet command is specified to be executed automatically to enable the user to Telnet to a
specific network device automatically.
zThe auto-execute command command may cause you unable to perform common configuration
in the user interface, so use it with caution.
zBefore executing the auto-execute command command and save your configuration, make sure
you can log in to the switch in other modes and cancel the configuration.
Examples
# Configure the telnet 10.110.100.1 command to be executed automatically after users log in to VTY0.
<Sysname> system-view
System View: return to User View with Ctrl+Z.
[Sysname] user-interface vty 0
[Sysname-ui-vty0] auto-execute command telnet 10.110.100.1
% This action will lead to configuration failure through ui-vty0. Are you sure?[
Y/N]y
After the above configuration, when a user logs onto the device through VTY0, the device automatically
executes the configured command and logs off the current user.

1-4
copyright-info enable
Syntax
copyright-info enable
undo copyright-info enable
View
System view
Parameters
None
Description
Use the copyright-info enable command to enable copyright information displaying.
Use the undo copyright-info enable command to disable copyright information displaying.
By default, copyright information displaying is enabled. That is, the copyright information is displayed
after a user logs into a switch successfully.
Note that these two commands apply to users logging in through the console port and by means of
Telnet.
Examples
# Disable copyright information displaying.
**************************************************************************
* Copyright (c) 2004-2008 Hangzhou H3C Tech. Co., Ltd. All rights reserved.*
* Without the owner's prior written consent, *
* no decompiling or reverse-engineering shall be allowed. *
**************************************************************************
<Sysname> system-view
System View: return to User View with Ctrl+Z.
[Sysname] undo copyright-info enable
# After the above configuration, no copyright information is displayed after a user logs in, as shown
below.
<Sysname>
databits
Syntax
databits { 7 |8 }
undo databits
View
AUX user interface view

1-5
Parameters
7: Sets the databits to 7.
8: Sets the databits to 8.
Description
Use the databits command to set the databits for the user interface.
Use the undo databits command to revert to the default databits.
The default databits is 8.
Examples
# Set the databits to 7.
<Sysname> system-view
System View: return to User View with Ctrl+Z.
[Sysname] user-interface aux 0
[Sysname-ui-aux0] databits 7
display user-interface
Syntax
display user-interface [ type number | number ] [ summary ]
View
Any view
Parameters
type: User interface type, which can be AUX (for AUX user interface) and VTY (for VTY user interface).
number: User interface index.A user interface index can be relative or absolute.
zIn relative user interface number scheme, the type argument is required. In this case, AUX user
interfaces are numbered from AUX0 through AUX7; VTY user interfaces are numbered from VTY0
through VTY4.
zIn absolute user interface number scheme, the type argument is not required. In this case, user
interfaces are numbered from 0 to 12.
summary: Displays the summary information about a user interface.
Description
Use the display user-interface command to display the information about a specified user interface or
all user interfaces. If the summary keyword is not specified, this command displays user interface type,
absolute/relative user interface index, transmission speed, available command level, authentication
mode, and physical position. If the summary keyword is specified, this command displays the number
and type of the user interfaces, including those that are in use and those that are not in use.
Examples
# Display the information about user interface 0.
<Sysname> display user-interface 0
Idx Type Tx/Rx Modem Privi Auth Int Super
Other manuals for S3100 Series
17
Table of contents
Other H3C Network Router manuals

H3C
H3C S3100-52P Installation instructions

H3C
H3C MSR 2600 Operating and maintenance manual

H3C
H3C H3C S3600 Series Installation instructions

H3C
H3C MSR810 Installation manual

H3C
H3C SR6600 SPE-FWM Installation manual

H3C
H3C S5500-HI Switch Series User manual

H3C
H3C SR8800-X-S Operating and maintenance manual

H3C
H3C S3100-52P User manual

H3C
H3C H3C S5600 Series User manual

H3C
H3C MSR 3600 User manual