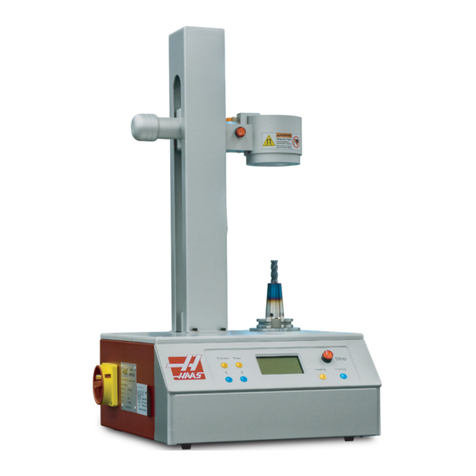
Haas SL-20 User manual

ES0381 rev P 01/08 1
SL-20/30/40 Lathes
STEADY REST OPTION
The steady rest platform provides for increased support of longer shaft turning and boring operations using
various automatic hydraulic aftermarket steady rests. The steady rest mounting platform is manually posi-
tioned along the Z-axis and is locked in place by a mechanical clamp. It can be used in conjunction with the
tailstock option.
Industry standard mounting holes to accept a variety of aftermarket steady rest grippers manufactured by
LMC, Forkhardt, SMW Systems, Rohm, and SMW Autoblock.
NOTE: Some brands and/or models of steady rests may not fit the Haas bolt pattern and
a special adaptor plate would need to be fabricated by the customer.
STEADY REST HEAD INSTALLATION
Install the steady rest on the platform. Do not tighten the mounting bolts as the head unit will need to be
aligned during the part setup. This is described in the following section.
Attach the existing hydraulic hoses, from the lathe, to the steady rest head. These are just inside of the lower
sheetmetal, above the chip tray. The fittings at the end of the hoses are female JIC-4. The hose to clamp
the steady rest is attached to the top tube and the unclamp hose is attached to the lower tube. If necessary,
secure the flexible hoses so they do not come in contact with any chip removal system.
Position the steady rest along the Z-axis by pulling the clamp handle toward the spindle to release the clamp.
Push the steady rest to the desired location and reengage the clamp.

ES0381 rev P 01/08 2
OPERATION
Use the steady rest manufacturer’s operation manual for additional steady rest alignment instructions.
Notes for proper operation:
Do not exceed the recommended maximum pressure for the steady rest.
Check all bolts that secure the steady rest to the platform. Ensure they are torqued properly.
1/2 -13 110 ft-lb. 5/8-11 180 ft-lb.
Keep your hands, loose clothing, tools, etc. away from the steady rest as it closes.
The workpiece must have a smooth, concentric diameter in order to clamp it properly. Do not put rough
material in the steady rest jaws.
Warning
If using the tailstock be aware of the current position of the steady rest
platform, a collision could occur.
Types of Rollers
Different rollers can be used in the steady rest unit. There are two types of rollers, crowned and straight.
Straight rollers are used on standard cylindrical parts and crowned rollers are used on tapered work pieces.
SETTING UPTHE STEADY REST WITHOUT ATAILSTOCK
Mount the steady rest on the platform and snug the mounting bolts. Clamp the workpiece in the chuck and the
steady rest.
NOTE: The hydraulic pressure to the steady rest is adjusted using the pressure regulator
on the left side of the lathe.
Place a dial indicator on the turret and position the tip on the diameter of the part. Rotate the work piece by
hand and check for deflection of the part, deflection should not exceed .001”.
NOTE: Check the pressure to the steady rest. Incorrect pressure routed to the head can
cause deflection in the part.
Correct any deflection and tighten the steady rest mounting bolts.
Open and close the steady rest and check for deflection again.
NOTE: If the pressure to the steady rest unit is changed, the previous steps should be
repeated to verify the part is turning true.
Part accuracy will suffer if the steady rest head is not aligned properly. The misalignment will cause the mate-
rial to not turn true and can lead to the part being thrown from the chuck.
PROGRAMMING
M Codes
M Codes are used to automatically open and close the steady rest.
M59 P1155 to clamp
M69 P1155 to unclamp
NOTE: If the M code commanded is the reverse of what is described, the hydraulic lines
are installed incorrectly. Swap the positions of the hydraulic hoses at the steady
rest head.

ES0381 rev P 01/08 3
MAINTENANCE
Every steady rest unit will need occasional maintenance (daily, weekly, monthly and even as soon as a few
hours could be a maintenance cycle). Lubrication and maintenance schedules are outlined in the manufac-
turer’s manual. Follow those instructions.
Inspect the steady rest rollers daily. Check for play in the bearings. If play is found, replace the roller. Exces-
sive play in the roller will cause the part to not turn true in the jaws. Poor accuracy and the part being thrown
from the chuck is possible. The rollers are a normal wear item and the manufacturer’s manual will describe
how to replace them and list part numbers to order.
STEADY REST PLATFORM ALIGNMENT
The Steady Rest platform may need to be realigned after a crash or if it has been removed. The following are
steps for this procedure.
1. Mount a mag base indicator on the face of the turret. (See the following figure.)
NOTE: Indicate on the same side of the steady rest platform that the steady rest head will
be mounted to. The indicator, in the illustration, is shown this way for clarity.
2. Loosen the four (4) upper base mounting nuts.
3. Sweep the side of the steady rest platform at the location as shown above by moving the turret in the X-
axis. The steady rest platform must be parallel to the X-axis within .001”.
4. Retighten the four (4) upper base mounting bolts when alignment is complete.

ES0381 rev P 01/08 4
In a case of severe misalignment, the lower base may need to be realigned.
1. Verify the alignment by mounting the mag base indicator to the face of the chuck. (See the following figure.)
2. Rotate the chuck manually. Sweep the side of the steady rest platform at the location shown. The steady
rest platform must be perpendicular to the Z-axis within .001”
3. If alignment is necessary, loosen the 8 (16 on the SL40 series) mounting bolts as shown below to align the
platform.
When the alignment is completed and the lower base has been retightened, recheck the alignment of the
upper base and adjust as needed.
NOTE: Indicate on the same side of the steady rest platform that the steady rest head will
be mounted to. The indicator, in the illustration, is shown this way for clarity.

ES0381 rev P 01/08 5
STEADY REST TRAVEL LIMITS
SL-20L, SL-30L
A
B
C
ABC
SL-30L 14.25" (362 mm) 74.00" (1880 mm) 78.87" (2003 mm)
SL-20L 8.50" (216 mm) 39.00" (991 mm) 52.00" (1321 mm)

ES0381 rev P 01/08 6
26.60"
(676 mm)
20.95"
(532 mm)
33.34"
(847 mm)
26.51"
(673 mm)
59.43"
(1510 mm)
26.51"
(673 mm)
47.11"
(1197 mm)
20.95"
(532 mm)
59.43"
(1510 mm)
67.75"
(1721 mm)
47.11"
(1197 mm)
51.75"
(1314 mm)
SL-30 SL-40
41.47" (1053mm)
with tailstock
52.60" (1336 mm)
with tailstock

ES0381 rev P 01/08 7
SL-40 Long Bed
94.89"
(2410 mm)
67.82"
(1723 mm)
94.89"
(2410 mm)
26.50"
(673 mm)
38.02"
(966 mm)
26.50"
(673 mm)

ES0381 rev P 01/08 8
STEADY REST MOUNT PLATFORM
SL-20L
Spindle
Center
2.25"
(57 mm)
0.88"
(22 mm)
2.75"
(70 mm)
3.35"
(85 mm)
2.76"
(70 mm)
4.02"
(102 mm)
3.03"
( 77 mm)
4.33"
(110 mm)
8.66"
(220 mm)
4.135"
(105 mm)
8.27"
(210 mm)
11.09"
(282 mm)
Spindle Centerline
0.25"
(6 mm)
1.30"
(33 mm)
0.82"
(21 mm)
4.47" (114 mm)
1/2-13 UNC-2B x
1.25 DP (16)
&0.56" Thru (4)
Top Section
(Removable)
Bottom View
3.345"
(85 mm)
*R 2.75"
(70 mm)
6.69" (170 mm)

ES0381 rev P 01/08 9
SL-30, SL-30L, SL-30B
308
3.35"
(85 mm)
2.76"
(70 mm)
3.35"
(85 mm)
6.69"
(170 mm)
15.19"
(386 mm)
0.15"
(4 mm)
&.56" Thru (4)
Spindle Centerline
0.68"
(17 mm) 2.25"
(57 mm) 0.88"
(22 mm)
2.75"
(70 mm)
0.62" (16 mm)
2.87" (73 mm)
1/2-13 UNC x 1.25 DP (8)
Spindle Center
Top Section
(Removable)
Bottom View
R 3.18"
(81mm)

ES0381 rev P 01/08 10
SL-20L, SL-30, SL-30B Base Pattern
2.25"
(57 mm)
2.75"
(70 mm)

ES0381 rev P 01/08 11
SL-40, SL-40B, SL-40L
A
A
A
B
B
B
B
A
7.28"
(185 mm)
3.87"
(98 mm)
4.53"
(115 mm)
5.32"
(135 mm)
5.13"
(130 mm)
10.25"
(260 mm)
5.16"
(131 mm)
10.32"
(262 mm)
Spindle Center
308
20.33"
(516 mm)
0.15" (4 mm)
Spindle Centerline
4.00" (102 mm)
2.94" (75 mm)
4.61" (117 mm) 1.06" (27 mm)
0.88" (22 mm)
2.75" (70 mm)
A - 5/8-11 UNC-2B x 1.50 DP (LMC)
B - 1/2-13 UNC-2B x 1.25 DP (LNS)
LEGEND:
&.56" Thru
(4)
Top Section
(Removable)
Bottom View
R 5.18"
(132 mm)

ES0381 rev P 01/08 12
SL-40, SL-40B, SL-40L Base Pattern
2X 2.75"
(70 mm)
4.00"
(102 mm)
4.88"
(124 mm)

ES0381 rev P 01/08 13
STEADY REST ENVELOPE DRAWINGS
SL-20L
Front Sheet Metal
Spindle
Center
15°
13.72"
(348 mm)
18.46"
(469 mm)
30°
Front Sheet Metal

ES0381 rev P 01/08 14
SL-30, SL-30L, SL-30B
15°
14.66"
(372 mm)
Front Sheet Metal
Spindle
Center
30°
Front Sheet Metal
22.53"
(572 mm)

ES0381 rev P 01/08 15
SL-40, SL-40B, SL-40L
19.77"
(502 mm)
25.52"
(648 mm)
300
150
Spindle
Center
Front Sheet Metal
Front Sheet Metal
This manual suits for next models
2
Table of contents
Other Haas Industrial Equipment manuals

Haas
Haas Bar Feeder User manual

Haas
Haas MDC-500 User manual

Haas
Haas GM-2-5AX User manual

Haas
Haas EC-400 Installation instructions

Haas
Haas TR Series User manual

Haas
Haas DT-1 Use and care manual

Haas
Haas Bar Feeder User manual

Haas
Haas ATT-4 User manual

Haas
Haas TSC-300/1K Guide

Haas
Haas Automatic Pallet Changer User manual