manuals.online logo
Brands
  1. Home
  2. •
  3. Brands
  4. •
  5. hager
  6. •
  7. Thermostat
  8. •
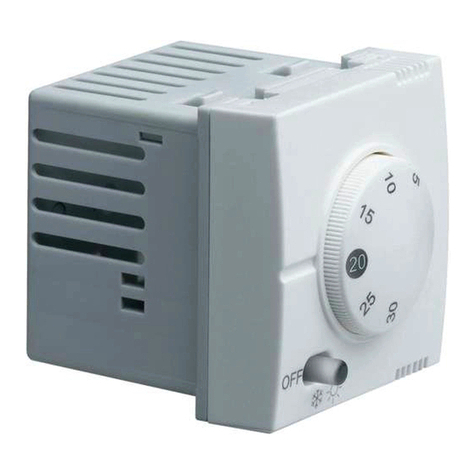
  9. hager essensya WE310 User manual

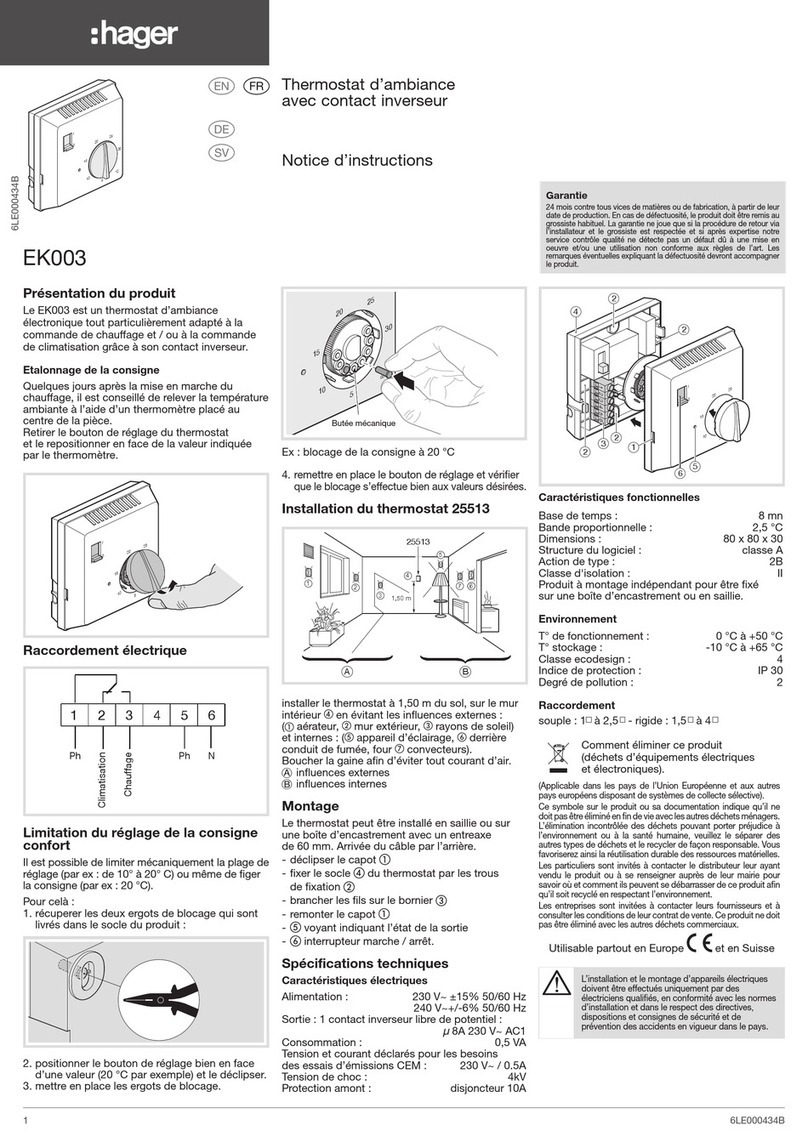
hager essensya WE310 User manual

1
6W 5305.b
WE310
essensya
¢
§
•
FR
Installation (a)
Le thermostat d’ambiance doit être installé
à environ 1,5 m du sol, sur un mur intérieur,
à l’abri du rayonnement solaire direct et de toute
perturbation thermique telle que lampe d’éclai-
rage, téléviseur, tuyau de chauffage, courant
d’air (voir schéma d’installation “a”).
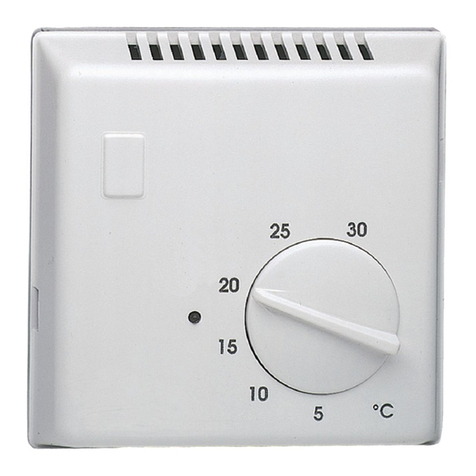
Description (b)
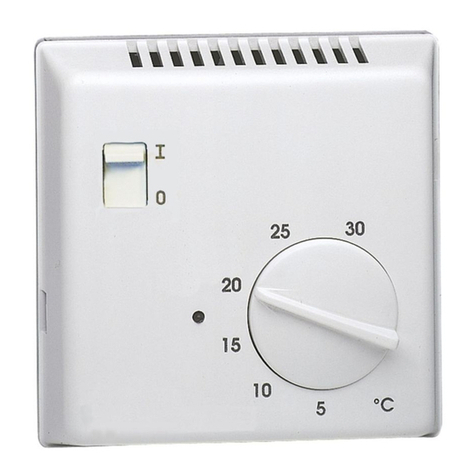
Bouton de réglage de température
Ergot de limitation d’échelle
Disque (bleu et rouge)
Commutateur OFF / (réduit) / ON
Pointeur de température
Le commutateur devient lumineux lorsque
le chauffage / la climatisation est en fonction.
Raccordement électrique (c)
Connecter le chauffage ou la climatisation entre les
bornes 2 & 3 "NO". La logique de commande est
automatiquement inversée en mode climatisation !
Modification du mode de fonctionnement,
climatisation ou chauffage (d)
Le thermostat est livré en mode “chauffage”.
Pour passer en mode “climatisation” suivre
la séquence décrite en (d) :
Pour débuter, placer le commutateur sur OFF
et la température en “butée minimale”.
Placer le commutateur sur ON.
Régler la température en “butée maximale”.
Placer le commutateur sur OFF.
Régler la température en “butée minimale”.
Placer le commutateur sur ON.
A la fin de la séquence, le commutateur clignote
3 fois pour signaler le changement de mode.
Si plus de 15 secondes s’écoulent entre
les différentes étapes il faut recommencer
la séquence à l’étape .
Vérification du mode de fonctionnement
Mode chauffage : si température ambiante infé-
rieure à température de consigne alors le voyant
du commutateur est allumé (inversement en
mode climatisation).
Limitation de la plage de température (e)
La plage de température peut être réduite
de la façon suivante :
1- Enlever le bouton de réglage de température
2- Soulever l’ergot de limitation .
3- Ajuster le disque rouge afin de définir
la température maximale désirée.
4- Ajuster le disque bleu afin de définir
la température minimale désirée.
5- Replacer l’ergot .
6- Replacer le bouton .
Caractéristiques techniques
- Tension d’alimentation : 230 V, 50 Hz
- Plage de réglage : +5 °C à +30 °C
- Température d’utilisation : 0 °C à 50 °C
- Température de stockage : -20 °C à +60 °C
- Relais de sortie 8 A cos φ = 1
- Précision de température ±0,5 °C
- Classe II
- Indice de protection : IP 21
- Capacité de raccordement : 1 x 2,5 mm2
- Mode de fonctionnement mémorisé indéfiniment
- : Réduit = -3 °C chauffage/ +3 °C climatisation
Recommandations
Appareil à installer uniquement par un profes-
sionnel habilité. N’utiliser que les pièces d’ori-
gine. Ne pas utiliser le produit
sans les protections externes.
D
0
A
0
A
B
C
C
B
E
C
B
A
Notice d’instructions
Thermostat d’ambiance
électronique
User instructions
Electronic room
thermostat
ON
25
5
15
10
30
OFF
20
ON
25
5
15
10
30
25
5
15
10
30
OFF
25
5
15
10
30
ON
53
1
0
2
4
20
20
20
20
(d)
WE310
1,50 m
(a)
A
D
C
B
E
(b) (e)
N
L
123NL
NO
L
WE310
(c)
GB
Installation (a)
It has to be installed ideally at about 1,5 m
from the floor, on an inside wall, sheltered from
direct sun radiation and from all thermal distur-
bance, such as lighting lamp, television, hea-
ting pipe, draught (see installation layout “a”).
Description (b)
Temperature adjustment button
Scale limitation lug
Wheel (blue and red)
Change-over switch OFF / (reduced) / ON
Temperature pointer
The switch lights up when the heating / air
conditioning system is in operation.
Electrical connection (c)
Connect heating or air-conditioning system
between terminals 2 & 3 "NO". The control
logic is automatically reversed in air-conditio-
ning mode !
Changing operation mode, air-
conditioning or heating (d)
The product is delivered with thermostat set
to "heating" mode.
Follow instructions below to switch
to "air-conditioning" mode (d) :
For starting, switch OFF and set the tempe-
rature to "minimum stop" position
Switch ON.
Set the temperature to "maximum stop".
Switch OFF.
Set the temperature to "minimum stop".
Switch ON.
At the end of the sequence, the switch blinks
3 times to signal the change of mode. If the
time between the various steps exceeds 15
sec, the sequence shall be run again starting
from step.
Checking the operation mode
Heating mode : if the room temperature is
below the temperature set, the switch indicator
shall be on (and conversely in air-conditioning
mode).
Limitation of the temperature range (e)
The temperature range can be reduced as fol-
lows :
1- Remove the temperature adjustment button
2- Lift the limitation lug .
3- Adjust the red wheel to define the maxi
desired temperature
4- Adjust the blue wheel to define the mini -
desired temperature
5- Put back the lug .
6- Put back the button .
Electrical data
- Supply voltage : 230 V, 50 Hz
- Adjustment range : +5 °C up to +30 °C
- Operating temperature : 0 °C up to 50 °C
- Storage temperature : -20 °C up to +60 °C
- Output relay 8 A cos φ = 1
- Temperature accuracy ±0,5 °C
- Class II
- Degree of protection : IP 21
- Connection capacity : 1 x 2,5 mm2
- The operating mode is stored indefinitely
- : Reduced = -3 °C heating / +3 °C air-
conditioning
Recommendations
This device shall be installed solely
by aprofessional installer.
Use only genuine parts.
Never use the product with external protection
devices removed.
A
B
C
C
B
A
0
0
E
D
C
B
A
6W 5305.b
Hager SAS - 132 bld d’Europe - BP 78 - 67 212 Obernai cedex (FRANCE) - Tél. +333 88 49 50 50 - www.hagergroup.net2
Hager 09.2009
6W 5305.b
6W 5305.b
WE310
essensya
¢
§
•
Gebruiksaanwijzing
Elektronische
kamerthermostaat
ON
25
5
15
10
30
OFF
20
ON
25
5
15
10
30
25
5
15
10
30
OFF
25
5
15
10
30
ON
53
1
0
2
4
20
20
20
20
(d)
WE310
1,50 m
A
D
C
B
E
(b) (e)
N
L
123NL
NO
L
WE310
(c)
Installatie (a)
De thermostaat kan het best op ongeveer 1,5 m
van de vloer in een binnenmuur worden
aangebracht, buiten bereik van direct zonlicht of
andere thermische invloeden zoals lampen, een
televisietoestel, verwarmingspijpen en tocht
(zie installatieschema “a”).
Beschrijving (b)
Temperatuurregelknop
Begrenzing van het instelbereik
(van de thermostaatsokkel te scheiden)
Schijf (blauw en rood)
Schakelaar OFF / (verminderd) / ON
Instelstreep
Wanneer de verwarming of de klimaatbeheersing
werkt is de schakelaar verlicht.
Elektrische aansluiting (c)
Sluit de verwarming of de airconditioning aan
tussen de poolklemmen 2 & 3 "NO".
De bedieningslogica word in airconditioningmo-
dus automatisch omgezet !
Wijziging van de werkingswijze, aircon-
ditioning of verwarming (d)
De thermostaat wordt in “verwarming” modus
geleverd. Om over te gaan in “airconditioning”
modus, volgt u de in (d) beschreven handelin-
genreeks :
Om te beginnen zet u de schakelaar op OFF
de temperatuur op “minimale aanslag”.
Zet de schakelaar op ON.
Stel de temperatuur in op “maximale aanslag”.
Zet de schakelaar op OFF.
Stel de temperatuur in op “minimale aanslag”.
Zet de schakelaar op ON.
Aan het einde van de reeks knippert de schake-
laar 3 keer om de moduswijziging te signaleren.
Wanneer de tijd tussen de verschillende stappen
meer dan 15 seconden duurt, moet u de reeks
opnieuw beginnen bij stap .
Controle van de werkingswijze
Verwarmingmodus : als de kamertemperatuur
lager is dan de consignetemperatuur, is de led
van de schakelaar aan (in airconditioningmodus
is dit omgekeerd).
Begrenzing van het instelbereik (e)
Het temperatuurbereik kan als volgt worden
ingesteld :
1. Temperatuurregelknop verwijderen
2. Stift uittrekken.
3. Gewenste maximum temperatuur
met de rode schijf instellen.
4. Gewenste minimum temperatuur
met de blauwe schijf instellen.
5. Stift weer aanbrengen.
6. Knop terugplaatsen.
Technische gegevens
- Voedingsspanning : 230 V, 50 Hz
- Instelbereik : +5 °C tot +30 °C
- Gebruikstemperatuur : 0 °C tot +50 °C
- Opslagtemperatuur : -20 °C tot +60 °C
- Schakelstroom 8 A cos φ = 1
- Schakeltolerantie ±0,5 °C
- Veiligheidsklasse II
- Veiligheidsnorm : IP21
- Aansluitcapaciteit : 1 x 2,5 mm2
- Werkingswijze onbeperkt gememoriseerd
- : Verminderd = -3 °C verwarming / +3 °C
airconditioning.
Aanbevelingen
Het apparaat mag uitsluitend worden geïnstal-
leerd door bevoegd personeel. Gebruik alleen
oorspronkelijke onderdelen. Gebruik het product
niet zonder de uitwendige beschermingen.
A
B
C
C
B
A
0
0
B
C
D
E
A
NL

Other hager Thermostat manuals

hager EK760 User manual

hager

hager EK760 User manual

hager EK560 User manual

hager

hager EK560 User manual

hager 54185 User manual

hager

hager 54185 User manual

hager EK510 User manual

hager

hager EK510 User manual

hager EK530 User manual

hager

hager EK530 User manual

hager kallysto WUC70 User manual

hager

hager kallysto WUC70 User manual

hager 25113 User manual

hager

hager 25113 User manual

hager WH104405 Series User manual

hager

hager WH104405 Series User manual

hager 58102 User manual

hager

hager 58102 User manual

hager Flash 25620 User manual

hager

hager Flash 25620 User manual

hager 54185 User manual

hager

hager 54185 User manual

hager 25614 Installation instructions

hager

hager 25614 Installation instructions

hager kallysta WK310 User manual

hager

hager kallysta WK310 User manual

hager 58102 User manual

hager

hager 58102 User manual

hager 25501 User manual

hager

hager 25501 User manual

hager EK005, 25505 User manual

hager

hager EK005, 25505 User manual

hager EK053 User manual

hager

hager EK053 User manual

hager EK051 User manual

hager

hager EK051 User manual

hager tebis tx460 User manual

hager

hager tebis tx460 User manual

hager Bocchiotti 25310 User manual

hager

hager Bocchiotti 25310 User manual

hager 25311 User manual

hager

hager 25311 User manual

hager EK004 User manual

hager

hager EK004 User manual

hager EK052 Installation instructions

hager

hager EK052 Installation instructions

hager WE310 User manual

hager

hager WE310 User manual

Popular Thermostat manuals by other brands

Uponor T-25 quick guide

Uponor

Uponor T-25 quick guide

Hunter 44033-01 44272 owner's manual

Hunter

Hunter 44033-01 44272 owner's manual

Friedrich EMWRT-1 instruction manual

Friedrich

Friedrich EMWRT-1 instruction manual

nest Learning Installation &  configuration guide

nest

nest Learning Installation & configuration guide

Giacomini K470H Instruction

Giacomini

Giacomini K470H Instruction

Honeywell TB7220U installation instructions

Honeywell

Honeywell TB7220U installation instructions

Saswell SAS908XWHB-7-RF User manual and warranty card

Saswell

Saswell SAS908XWHB-7-RF User manual and warranty card

RADSON CONTROL BOX Guide for installation and use

RADSON

RADSON CONTROL BOX Guide for installation and use

Braeburn 3000 user manual

Braeburn

Braeburn 3000 user manual

VDH PROBA 5 Compact manual

VDH

VDH PROBA 5 Compact manual

ELEKTROBOCK PT21 operating instructions

ELEKTROBOCK

ELEKTROBOCK PT21 operating instructions

Honeywell T10 Pro Smart installation guide

Honeywell

Honeywell T10 Pro Smart installation guide

Saswell SAS810FCT-2-S Installation and operation instruction

Saswell

Saswell SAS810FCT-2-S Installation and operation instruction

White Rodgers 1E78 installation instructions

White Rodgers

White Rodgers 1E78 installation instructions

Bpt TH 125 Instructions for use

Bpt

Bpt TH 125 Instructions for use

Warmup UCCG Easy programming instructions

Warmup

Warmup UCCG Easy programming instructions

TOTALINE P374-1800 owner's manual

TOTALINE

TOTALINE P374-1800 owner's manual

ClimateMaster CM500 Series Owner's Manual & Installation Instructions

ClimateMaster

ClimateMaster CM500 Series Owner's Manual & Installation Instructions

manuals.online logo
manuals.online logoBrands
  • About & Mission
  • Contact us
  • Privacy Policy
  • Terms and Conditions

Copyright 2025 Manuals.Online. All Rights Reserved.