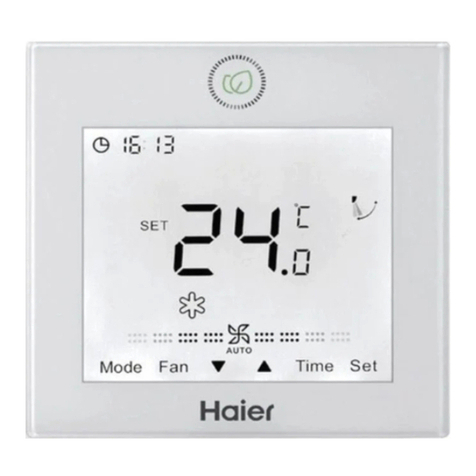
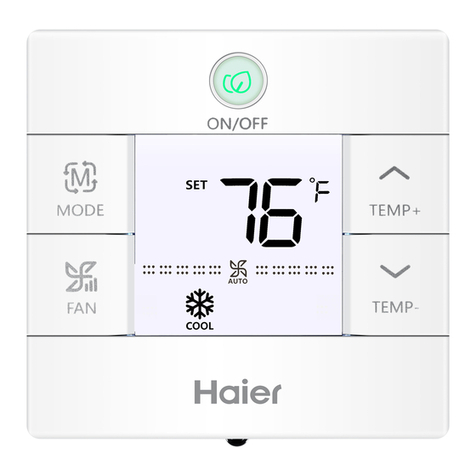
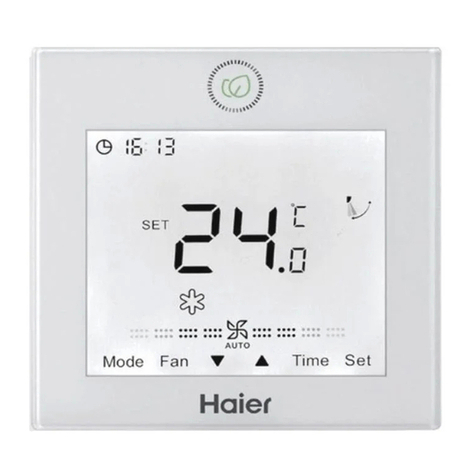
Haier YR-E20 User manual

Wired Controller
Operation & Installation Manual
•Please read this operation manual before using the air conditioner.
•Please keep this manual carefully and safely.
YR-E20
CONTENT
Wired Controller Instruction................................................ 1
Wired Controller Function .................................................. 7
Wired Controller Wiring Connection ................................. 35
ENGLISH
中文

1
Wired Controller Instruction
Interface Display

2
Keys
ON/OFF key
/
Temperature increase/decrease key, it can be used
for the time adjustment of clock, timer and sleeping
time, energy saving parameter adjustment, temp.
compensation parameter adjustment, selecting
function, and energy saving setting with fan speed
key. The adjustment step is 0.5°C. If energy saving
mode is not set,the temperature setting range is
from 16°C to 30°C. If energy saving mode is set,
the lowest temperature limit of cooling/dry and the
highest temperature limit of heating are decided by
the setting of energy saving parameter. The default
setting data is 23°C to be lowest temperature
in cooling/dry mode, and 26°C to be highest
temperature in heating mode.
Note: The wired controller shows the ambient
temperature if the dip switch SW2 is ON. The
controller statically shows the set temperature after
switching on the unit, changing mode, changing
the target temperature, then shift to show ambient
temperature after 3 seconds.

3
Mode key, press this key, the mode is shown in
cycle [intelligent]-[cooling]-[heating]-[fan]-[dry]-
[intelligent]
Note: No heating mode for cooling only unit or if
communication is abnormal.
Fan speed key, press this key to adjust fan speed.
Function key, it is used for clock setting, timer,
swing, fresh, health, electrical heating, sleeping,
energy saving, turbo, quiet function, etc.

4
Clock
Present/history error code inquiry, Energy
saving data display.
Timer on, Timer o, Timer on/o.
Temperature display, the accuracy is 0.5°C.
For example, 25.0°C will be displayed if
the temperature is an integer. It is used for
temperature compensation data display,
sleeping time display. When the ambient
temp.is displayed on the wired controller,
the thermometer on the top-left corner will
display accordingly.
Set, the controller shows this icon when
setting the energy saving data, temperature
compensation data.
Error, this icon appears when
communication error happens or indoor unit
meets error. This icon disappears after the
error is solved.
Swing, this icon is displayed dynamically if
swing is set. No swing is displayed if swing
function is not set.
Icon Instruction

5
Filter cleaning
Fresh, this icon is displayed if fresh is set;
no fresh is displayed if it is not set.
Electrical heating
Health
Sleeping, this icon is displayed after
sleeping is set. The sleeping time is
displayed when the function cycle shift to
sleeping.
Energy saving
Quiet
Turbo,this function is invalid after sleeping
is set. The function will be canceled if you
set sleeping mode after turbo mode.
Lock, this icon is displayed after lock signal
is received from communication. Operation
is invalid after the wired controller is locked.
Defrost

6
dFg (Only valid for part of models)
Child lock, this icon is displayed only after you set
child lock, or it will not display.
Intelligent mode
Cooling mode
Heating mode
Fan mode
Dry mode

7
Wired Controller Function
Dip Switch Instruction
Dip
switch ON OFF Default
SW1 Inverter unit On/O unit OFF
SW2 Ambient temperature
display
Ambient temperature
no display OFF
SW3
Room temperature
sensor on PCB is
valid
Room temperature
sensor on wired
controller is valid
OFF
SW4 Function cycle
(simple version)
Function cycle
(general version) OFF
SW5 Old Protocol Selfadaption OFF
SW6 Reserved Reserved OFF
SW7 No swing Swing OFF
SW8 Electrical heating is
started manually
Electrical heating is
started automatically OFF

8
Setting for Special Function
Pressing function
key in 5 seconds
continuously
Function setting
On (unit is on)+
pressing function
key 10 times
Set the non-volatile memory after the
buzzer sounds 4 times
Cancel the non-volatile memory after the
buzzer sounds 2 times
Press function key
12 times to set the
child lock
Press function key
4 times to cancel
the child lock
1. Set the child lock after the buzzer
sounds 7 times, cancel child lock after
the buzzer sounds 2 times.
2. Child lock can also be set by keep
pressing fan speed key and function
key for 5s together. These two ways
can be used mutually to set or cancel
the child lock.
3. The function key can unlock the child
lock only under child lock mode. The
buzzer can sound once you press the
function key, but no function cycle is
displayed.
O (unit is o)+
function 10 times
The ambient temperature is displayed 5
seconds after the buzzer sounds 3 times.
(SW2 is OFF)

9
Pressing function key in 5
seconds continuously Function setting
Unit is on+ heating mode
+30°C + high speed+ function
6 times (30°C changes to be
the limit highest temperature if
energy saving is set)
After the buzzer sounds 3
times, wired controller send
the “forced defrost” to indoor
unit, the defrost icon ashes 3
times, then disappears.
Unit is on+ cooling mode
+16°C+high speed+ function
8 times (16°C changes to be
the limit lowest temperature if
energy saving is set)
To enter rated cooling mode
after the buzzer sounds 5
times.
Unit is on+ heating mode
+30°C + high speed+ function
8 times (30°C changes to be
the limit highest temperature if
energy saving is set)
To enter rated heating mode
after the buzzer sounds 5
times
Initialization
1. After power on, initialization nishes after wired controller
interface being displayed 5 seconds.
2. Sound indication: the buzzer sounds 2 times quickly after
pressing the ON/OFF key to be on. The buzzer sounds 1
time slowly after pressing the ON/OFF key to be o.

10
Screen Saving
1. In the state of o and non screen saving, keep pressing
and for 5s to set screen saving time, which will be shown
after the top-left colon 88 statically. Press up/down key to
adjust screen saving time and press function key to conrm.
2. Screen saving time should be 0s (backlight always on when
wired controller is on), 15s, 30s, 60s, default value is 15s.
If it is not the rst time of setting, it will display the screen
saving time adjusted last time.
3. In the process of changing screen saving time, press ON/
OFF key to quit screen saving time setting function, it will
recover to screen saving time before adjustment and start-
up the unit.
4. Switch on the unit, the backlight is burning. Switch o the
unit, the backlight is o. The leaf icon is on after switching
on the unit (whatever backlight is on/o). The leaf icon is o
after unit is o.
5. For the convenience of adjusting clock,the backlight is on if
wired controller is o after powering on, when switch on the
wired controller and then switch o,the backlight will be o
normally.
6. Under O state, the backlight is activated only if you press
any key except ON/OFF key, no more operation executed,if
press ON/OFF key,wired controller switch on directly. The
unit is switched on and the backlight is activated once you
press any key include ON/OFF key.

11
7. Under O state, the clock, ambient temperature (if SW2 is
ON) , timer (if you set) and fresh (only in the case of setting
fresh when wired controller is o) is displayed ,you can set
clock, timer, fresh, child lock,temperature compensation
paremeter,ambient temperature display under O state.
Clock Function
1. Press function key, icon is ashing, then press function
key again, and the AM or PM are ashing. You can
press up/down key to change the clock. Press function key
to conrm the adjustment. No pressing of function key or
no adjustment for 10 seconds, the clock will back to the
previous station.
2. Press up/down key, the clock will increase or decrease 1
minute once. Keep pressing the up/down key, the clock can
be adjusted more quickly. It will quit the function circulation
after conrm the clock adjustment or no operation for 10
seconds.
3.The clock range: 12:00 AM to 11:59AM(12:00AM is 0 o’clock
in midnight), 12:00PM to 11:59PM (12:00PM is 12:00 at
noon). The default time is 12:00PM.
4. The clock cannot be changed after you set timer/sleeping.
Clock will not in the function cycle after you set timer/
sleeping function.

12
①When setting timer on, default 12:00PM (previous setting
will be displayed if there is setting before) “ON” and timer
on hour place will ash, adjusting by up/down key. Keep
pressing to accelerate the adjusting speed, the same
as clock time. Pressing fan speed key can shift to “ON”
and minute place of timer on. When nishing adjustment,
press function key to conrm, time and timer icon display
statically on the screen.
Timer
1. Timer mode: timer on, timer o, timer on/o.
2. Time precision: 1 minute/1 hour; Timer clock is based on the
current clock time, when timer clock is over, the timer icon
disappears and execute the timer function.
3. Timer & on/o: timer can be set whenever unit is on/o. The
controller show the timer icon and time whenever the unit is
on/o if you set the timer.
4. Press function key, then press up/down key until ashes.
Press function key to begin time adjustment, timer icon will
display statically when adjusting timer.

13
②When setting timer off, default 12:00PM (previous setting
will be displayed if there is setting before) “ON” and timer
on hour place will flash. Press fan speed key to shift
to “ON” and minute place of timer on. Press fan speed
key again to shift to “OFF” and hour place of timer off,
with default 12:00PM displaying (previous setting will
be displayed if there is setting before), then press up/
down key to adjust time and press fan speed key to shift
to “OFF” and minute place of timer off. When finishing
adjustment, press function key to confirm, time and timer
icon display statically on the screen.
③When setting timer on & o, it displays default 12:00PM
for the rst time (previous setting will be displayed if
there is setting before). Then hour position and “ON” are
ashing; Press fan speed key again, the minute position
and “ON” are ashing; Press fan speed key again, it
displays default 12:00PM for the rst time (previous
setting will be displayed if there is setting before). Then
the hour position and “OFF” are ashing; Press fan
speed key again, the minute position and “OFF” are
ashing; Press fan speed key again, it displays default
12:00PM with ON &OFF for the rst time (previous
setting will be displayed if there is setting before). Then
the hour position and “ON” are ashing. Press up/down
key to adjust the time, minus/add 1 hour a time. Keep
pressing to accelerate the adjusting speed; Press fan
speed key again, the minute position and “ON” are

14
④Timer function cancellation: when in the process of
setting timer, press mode key or ON/OFF key can exit
timer setting, and it will return to previous state; press
mode key to only exit. Press ON/OFF key can exit the
timer setting and power on/off directly. If there is a timer
before, execute the above steps. When pressing fan key
to shift to timer off minute place of timer on&off, and then
press again to cancel the timer.
⑤Timer and clock displaying type: timer is prior to clock.
If there is no setting of timer, time area will display clock
time. When timer is set, timer time will display, then
press function key to check the clock. The clock icon
and time will display statically. If there is no pressing of
up/down,fan, mode or function key for 10 seconds, it
will quit clock checking. It will display previously timer
and if press ON/OFF key, it will quit clock checking and
execute turning on/o unit operation.
ashing; Press fan speed key again, then the hour and
“OFF” are ashing. Press up/down key to adjust the time,
minus/add 1 hour a time. Keep pressing to accelerate the
adjusting speed; Press fan speed key again, the minute
position and “OFF” are ashing. The controller will judge
the order of timer on and o and use the arrow show the
order. First ON then OFF: ON→ OFF; First OFF then
ON: ON←OFF. Press function key to conrm the setting.
If no input for 10s, this setting will be cancelled and the
timer will come back to the previous state.

15
⑥Requirement of timer setting: When the setting time is
the same with current time or timer on is the same with
timer o ,it cannot be conrmed by function key but
remain the current state, buzzer buzzing normally; If
there is no changing operation and no key pressing for
10 seconds, it will quit setting and setting invalid.
⑦Timer on/o and sleeping is independent which can be
executed separately, but sleeping will be cancelled after
turning o the wired controller. When timer on is the
same with the sleeping time, the last setting will not be
conrmed, If there is no changing operation and no key
pressing for 10 seconds, it will quit the last setting and
setting invalid.
Fan speed
Wired controller can execute 3 or 7 fan speeds, which is
determined by the indoor unit.
1. 3 fan speeds
Press , fan speed is changed in cycle: [auto]→[low]→[me
dium]→[high]→[auto].
Fan speed icon:
: Low speed
: Medium speed
: High speed

16
Swing
For part of models, the angle of swing can not be adjusted:
1. Press function key, icon ashes, pressing function key
again to conrm. Swing icon will dynamically display. If
swing function is set, execute the above-mentioned process
to cancel the function, with swing icon disappeared.
2. Swing function is valid only SW7 is OFF,it will not in the
function cycle if SW7 is ON.
2. 7 fan speeds
Press , fan speed is changed in cycle: seventh fan speed
→ sixth fan speed → fth fan speed → fourth fan speed →
third fan speed → second fan speed → rst fan speed →
AUTO → seventh fan speed.
: seventh fan speed
: sixth fan speed
: fth fan speed
: fourth fan speed
: third fan speed
: second fan speed
: rst fan speed
Note:
①AUTO fan is changed in cycle:
[low]→[medium]→[high]→[low].AUTO is displayed under fan
icon.
②There is no auto fan speed in fan mode.

17
3. For part of models, the angle of Up/Down swing can be
adjusted:
Press function key to enter function circulation, the Up/
Down swing icon will ash, then press the function key
again, the angle of the Up/Down swing will ash (if powered
on for the rst time, the default angle will be dierent
according to dierent modes; if not for the rst time ,the
angle of swing will be displayed as last time). At this time,
swing angle can be adjusted by UP/Down key. When
pressing Up/Down key to adjust angle, if no operation in
10s, it will exist angle adjustment and function circulation.
Interface displays the last angle. If you want to set other
function like sleep function, you need to press function key
again to enter function circulation.
The Left/Right swing can be adjusted:
Press function key to enter function circulation, the Left/
Right icon will ash, then press the function key again, the
angle of the Left/ Right swing will ash (if powered on for
the rst time, the default angle is in position 1, the middle
position of Left/Right swing icon; if not for the rst time,
the angle of swing will be displayed as last time). At this
time, swing angle can be adjusted by UP/Down key. When
pressing Up/Down key to adjust angle, if no operation in
10s, it will exist angle adjustment and function circulation.
Interface displays the last angle. If you want to set other
function like sleep function, you need to press function key
again to enter function circulation.

18
Filter Cleaning
When lter cleaning icon displays, press function key ,then
press up/down key to activate , then press function key to
remove lter cleaning icon.
The swing function exit:
Pressing Fan key or Mode key can both exit swing function;
After adjusting angle of swing, press function key to conrm
the angle and exit the swing function; In the adjustment
process, if there is no key pressed for 10s, swing function
will be exited, and swing angle will execute the nal
adjusted angle. In the adjustment process, pressing the
ON/OFF key to power o the wired controller directly, and
swing angle is the nal adjusted swing angle.
Fresh
1. Choose fresh by function and up/down keys, when the
icon ashes, press function key to conrm, then the icon
displays statically. Do same operation again to cancel fresh
function.
2. After you set fresh, it is switched o together with o
commend from wired controller. fresh will be kept once the
unit is switched on . You can set the fresh under unit o
state and keep it when the unit is switched on again. It will
not disappear when changing mode.
3. Fresh is in function cycle only when SW4 is OFF.

19
Electrical Heating
1. Set or cancel by function and up/down keys. You can
nd the electrical heating under heating mode or intelligent
mode heating running only.
2. The electrical heating is switched on automatically if SW8
is OFF, the electrical heating icon displays. You can cancel
this function manually after it is switch on automatically,
then when wired controller is switched on again with
heating mode or changing to heating mode again, electrical
heating function will switch on automatically again. The
electrical heating will be activated manually if SW8 is ON.
When electrical heating is set, it will be kept once the wired
controller is switched on again, but not kept with mode
changing.
3. Under intelligent mode heating running, wired controller
received the heating signal from the indoor unit,then the
electrical heating will be in function cycle, otherwise, you
cannot nd electrical heating in function cycle.
Other Haier Controllers manuals

Haier
Haier RWV05 V2 User manual

Haier
Haier HW-BA101ABT User manual

Haier
Haier QACT17A User manual

Haier
Haier YCZ-A004 User manual

Haier
Haier QACT17A User manual

Haier
Haier QACT17A User manual

Haier
Haier HW-WA101DBT User manual

Haier
Haier YCZ-A001 User guide

Haier
Haier YCZ-A004 User manual

Haier
Haier YR-E17A User manual
Popular Controllers manuals by other brands

Freescale Semiconductor
Freescale Semiconductor CPU32 Reference manual

ASE
ASE DS-7C installation manual

Inova Automation
Inova Automation NICE1000+ user manual

BB&S
BB&S Pipeline 4 Way Controller manual

Samsung
Samsung MCM-A202DN installation manual

SYCLOPE electronic
SYCLOPE electronic TERE'O Touch XL Installation and operating instructions