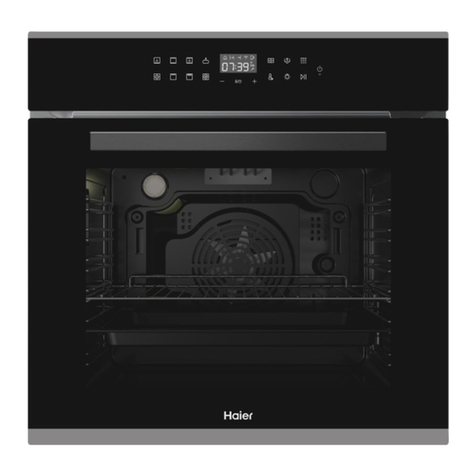
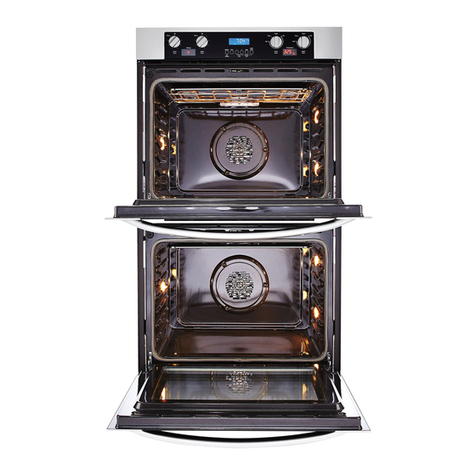
Haier HCO-T10U1 User manual

Built-in Oven
Model:HCO-T10U1
INSTALLATION GUIDE/USER GUIDE

1
CONTENTS
Safety instructions......................................................................................................3
How to save energy.............................................................................................................4
Disposal of the appliance.....................................................................................................4
Unpacking............................................................................................................................4
Description of the appliance...................................................................................6
Installation......................................................................................................................7
Operation.......................................................................................................................10
Prior first use........................................................................................................................10
Electronic programmer.......................................................................................................10
Cleaning and maintenance...................................................................................16
Operation in case of emergency ........................................................................19
Baking in the oven ....................................................................................................20
Technical information ..............................................................................................26

2
Dear Customer,

3
SAFETY INSTRUCTIONS
The appliance is not intended for use by persons(including children) with reduced
physical,sensory or mental capabilities,or lack of experience and knowledge,unless
they have been given supervision for their safety.
The appliance becomes very hot during operation.Take care not to touch the heating
elements inside the oven.
Never put pans weighing over 15Kg on the opened door of the oven.
Children should be supervised to ensure that they do not play with the appliance.
Do not use the oven in the event of a technical fault,once a technical fault caused,
disconnect the power and report the fault to the service centre to repaired.
Do not use harsh abrasive cleaners or sharp metal scrapeis to clean the door glass
as they can scratch the surface,which could then result in the glass shattering.
The rules and provisions contained in this instruction manual should be strictly
observed.Do not allow anybody who is not familiar with the contents of this
instruction manual to operate the oven
Never clean the oven with the high-pressure steam cleaning device,as it may
provoke short circuit.
Care should be taken to avoid touching heating elements.
If the supply cord is damaged,it must be replaced by the manufacturer,its service
agent or similarly qualified persons in order to avoid a hazard.
Children less than 8 years of age shall be kept away unless continuously supervised.
During use the appliance becomes hot. Care should be taken touching heating
elements inside the oven to avoid burns.
WARNING:Accessible parts may become hot during use.
Young children should be kept away
This appliance can be used by children aged from 8 years and above and persons
with reduced physical,sensory or mental capabilities or lack of experience and
knowledge if they have been given supervision or instruction concerning use of the
appliance in a safe way and understand the hazards involved.Children shall not play
with the appliance. Cleaning and user maintenance shall not be made by children
without supervision.
WARNING:Accessible parts may become hot during use.To avoid burns young
children should be kept away.
WARNING:Ensure that the appliance is switched off before replacing the lamp to
avoid the possibility of electic shock.
Mains lead of adjacent appliances may be damaged by hobs or stuck between the
oven doors,and produce short circuit,therefore keep them at safe distance from the
appliance.
WARNING:The appliance and its accessible parts become hot during use.
Use the temperature sensing probe recommended by the oven.
When the input voltage exceeds 270V, the oven will automatically shutdown. User
need to mannually restart the oven.

4
UNPACKING
DISPOSAL OF THE APPLIANCE
HOW TO SAVE ENERGY
I
II
I
I
II
I
II
II
I
II II
I
II
I
I
IIII
II
II III
II
I
I
I
I
I
I
I

5
Old appliances should not simply be disposed of with normal household waste, but should
be delivered to a collection and recycling centre for electric and electronic equipment.
A symbol shown on the product, the instruction manual or the packaging shows that it is
suitable for recycling.
Materials used inside the appliance are recyclable and are labeled with information
concerning this. By recycling materials or other parts from used devices you are making
a significant contribution to the protection of our environment.
Information on appropriate disposal centers for used devices can be provided by your
local authority.

6
Model:HCO-T10U1
DESCRIPTION OF THE APPLIANCE
1
1. Control panel
2. Outlet
5. Oven door handle
3. Side rack
4. Oven door
6. Glove
7. Grill rack
8. Small rack
9. Grill tray
7
9
6
8
1
2
4
5
3

7
INSTALLATION
2
595
595
554
570
547
20
564
600
560
40

8
564
600
560 40
595
595
554
570
547
20
1.0
The means for disconnection from the supply mains having a contact
separation in all poles that provide full disconnection under over voltage
the grounding wire shall be longer than the other wires.
HO5RR-F
fixed wiring in accordance with the wiring rules.

9

10
OPERATION
3
Time /Temperature displayFunction Auxiliary function
Time /Temperature adjustment
On/Off button
Timer
Cooking time
End of cooking time

11
Button
ON/OFF button
Clock Function
Oven lamp
Selector Buttons
Speedcook
Start / pause key After set the temperature and function, touch the button, you can
Explanation
For selection of functional.
For on /off oven lamp; touch the button, the light will turn on
When set the clock, alarm, cooking time,end
After set a functions, touch this type you can set different
temperatures.
of cooking time,touch this key time of addition and
subtraction can be realized
You can start heating without selecting any function.
After the start, press this button for rapid heating.
Used to set the clock, alarm, cooking time,end of cooking time.
Touch the button 3 seconds to turn on / off the oven.
Baking mode
or turn off.
Start or Pause the oven.
Setting the clock
The clock is preset to “00:00” , and will revert to this after apower
failure.
To change the clock time
•Ensure the oven is in standby mode.
•.
•
Touch button “ ” or “ ” to set the clock.
Touch button “ ” to confirm, or it will auto confirm after 5 seconds.
The minute minder can be used when the oven is switched on.
It can be set for up to 23 hours and 59 minutes.
To set the minute minder
•Touch the button “ ” until the “Minute Minder” symbol “ ” appear.
While the “Minute Minder” symbol is still flashing, use the “+or
- keys to scroll the display to the required countdown time.
•”
“ ”
•When the time has elapsed, the oven will beep for
The beep can be turned off by touching the any keys .
The minute minder
•At the end of the countdown, the minute minder will not switch off
the oven. Remember to turn off the oven manually.
•Cancel the minute minder, you must be pause the oven, then touch the button
“ ” until the “Minute Minder” symbol “ ” appear,touch the “-”key set the
minder to “00:00”.
Setting the cooking time
The oven can be set to switch off automatically at apreset time up to a
maximum of 23 hours and 59 minutes from when you set it.

12
any keys.
any keys.
To set acooking time:
•Select the oven function and temperature.
•While the display is still flashing, touch the key repeatedly
until the Cooking Time symbol lights up.
•While the Cooking Time symbol is still flashing, use the + or -
keys to scroll the display to the required cooking time.
Touch the key “ ” to start the cooking.
When the time has elapsed, the oven will turn off and beep .
The beep can be turned off by touching the
Please note :
At the end of the cooking programme, remember to turn off the oven
manually.
Automatic cooking
After the cooking time has been set, the finish time can also be set so
the cooking starts and finishes automatically.
To set an automatic cooking programme:
Select the oven function and temperature.
“ ”
“ ” “ ”
“ ” “ ” “ ” “ ”
•
•
•
•Set the cooking time required by following the instructions in “Setting the cooking
time” above.
•While the display is still flashing, touch the key “ ” repeatedly until the
“Finish Time” symbol lights up.
•While the “Finish Time” symbol “ ” is still flashing, use the “+”or “-”keys to
scroll the display to the required finish time.
•Touch the key “ ” to start the cooking.
•When the time has elapsed, the oven will turn off and beep .
The beep can be turned off by touching the
Please note:
At the end of the cooking programme, remember to turn off the oven manually.
After setting the function, temperature and the time, close the door, touch the key “ ”,
then the cooking starts.
When the oven is working, touch the key “ ” to pause the oven, touch the key “ ”
to adjust the temperature, timer, cooking time and the end of cooking time by touch
touch the key “ ” to start the oven.
“ + ”
or “ - ”key.
You can canclle the working by touching the key “ ”.

13
Booster Function
The oven is equipped with a booster function to heat it up to operating temperature as
fast as possible.
After selecting the oven function and setting the temperature, as above, touch the
key “ ” briefly.
The booster function works with all cooking functions, but is not required with the
pyrolytic function.
When the booster is operating, all three sections of the “Thermometer” symbol
flash together.
The booster will continue until the oven reaches its set temperature, then the oven
will automatically return to normal heating.
Important: Do not put any food in the oven while the booster is operating, wait until
the oven has reached temperature then insert the food containers carefully.
Auto Cut- Off Feature
There is an auto cut-off feature on all cooking functions for added safety.
Whenever the oven is running it will automatically switch off after a set time,
depending on the temperature setting.
Selected Temperature Time to Cut-Off (hours)
20-120℃24 h
121-200℃6 h
201-250℃3 h
Key Lock
The oven is equipped with a key lock to lock the controls.This can be used when
the oven is cooking.
To switch on the key lock
Touch for approximately 3 seconds, until the “Lock” symbol
illuminates and the oven beeps to confirm the key lock is switched on.
To switch off the key lock
s, until the “Lock” symbol
goes out and the oven beeps to confirm the key lock is switched off.
When the key lock is on, any key is not touched except ON/OFF button and
lamp button.
key “ + ”or “ - ”
Touch key “ + ”or “ - ”for approximately 3 second

14
Key lock after power outage.
The key lock can be set to do one of two things after the power to the
oven is cut then re-instated:
Key lock automatically unlocks after power outage
For each cooking function please note:
•After selecting a cooking function and temperature the display flashes for 5 seconds,
then when it stops flashing the function starts to run.
•The slowly raising animation of the “Thermometer” symbol means that the oven is
heating up.
Economy grill (variable)
Use the economy grill to grill or brown small amounts of food. Locate the grill
pan in the 4th or 5thshelf position. pre-heat the grill for 5 minutes before use.
Fan,grill element
top heater
Bottom and top element on
grill
Bottom element
Fan,bottom and top element on

15
Circular heater fan with bottom element
This operates the fan oven with the convection element and the bottom element
allowing for cooking with increased temperature from the bottom of the dish when
using shelf position 3 or 4 . touch the function the default temperature of 220 is
displayed and can be adjusted and button.
Ferment
At this function is ferment mode.
6
6
Circular element fan
Defrost

16
CLEANING AND MAINTENANCE
4
100
Before any maintenance is started involving electrical parts, the appliance must
be disconnected from the power supply .
Changing the bulb
Unscrew the protective cover. We recommend that you wash and dry the
glass cover at this point.
Carefully remove the old bulb and insert the new bulb suitable for high
temperatures (300ºC) having the following specifications: 220-240V,
50Hz, 25W, G9 fitting.
Refit the protective cover.
If the oven has been in use, let the oven cavity and the heating elements cool down
before attempting any maintenance.

17
IMPORTANT
Never use screwdrivers or other utensils to remove the light cover.
This could damage the enamel of the oven or the lampholder . Remove only
by hand.
IMPORTANT
Never replace the bulb with bare hands as contamination from your fingers
can cause premature failure.
Always use a clean cloth or gloves.
Please note:
The bulb replacement is not covered by your guarantee.

18
Press the symbol and outward the plastic latch that is in the corner at the
top of the door. Next take out the glass from the second blocking mechanism and
remove. After cleaning, insert and block the glass panel, and insert in the blocking
mechanism.
“ ”

19
OPERATION IN CASE OF EMERGENCY
5
● Switch off all working units of the oven
● Call the service centre
● Some minor faults can be fixed by referring to the instructions given in the table
Knob is
.
Table of contents
Other Haier Oven manuals

Haier
Haier HWO60S14TPB2 User manual

Haier
Haier HCW3260AES User manual

Haier
Haier QGAS740 User manual

Haier
Haier HWO60SM2F5XH User manual

Haier
Haier HWO60S10TPB2 User manual

Haier
Haier HCW2360AES User manual

Haier
Haier HCW3485AES User manual

Haier
Haier HOA-T10NW7M User manual

Haier
Haier 4 Series User manual

Haier
Haier HWO45NM6OXB1 User manual

Haier
Haier HWO90 User manual

Haier
Haier HWO60S4LMB2 User manual

Haier
Haier HIO-M59CF User manual

Haier
Haier HCW3260AES User manual

Haier
Haier HWO60SM4FE9XHP User manual

Haier
Haier HWO90S10EX2 Operation manual

Haier
Haier HWO60S8EPB2 User manual

Haier
Haier HWO60B7EX2 User manual

Haier
Haier HWO60S4 User manual

Haier
Haier HWO60S4LMX1 User manual