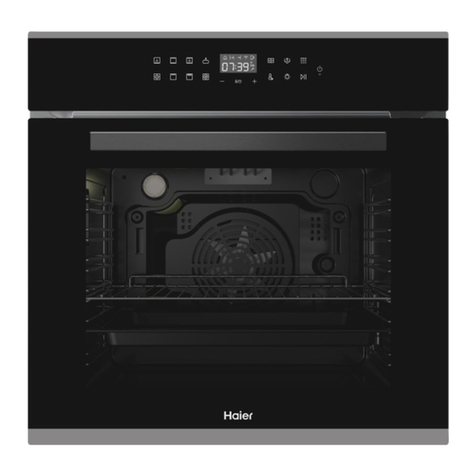
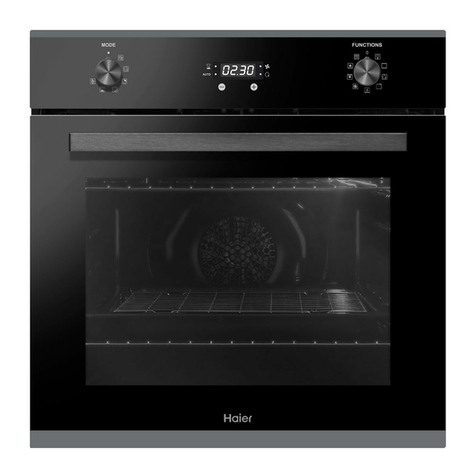
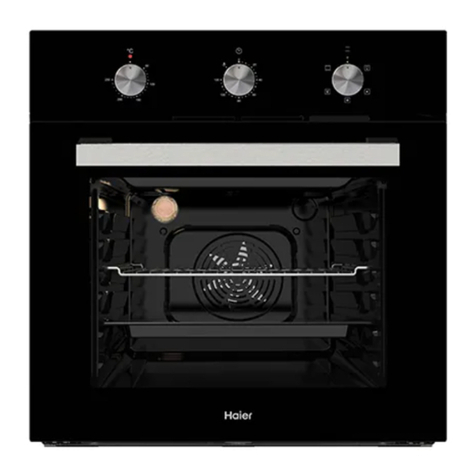
Haier HWO90S10EX2 Operation manual

BUILT-IN OVEN
_______
HWO90S10EX2
90cm model
INSTALLATION & USER GUIDE
NZ AU


CONTENTS
Safety and Warnings 4
Installation Instructions 10
Product Overview 16
User Guide 18
Timer 23
Care and Cleaning 27
Troubleshooting
31
Manufacturer’s Warranty
34
Customer care
36

SAFETY AND WARNINGS
4
Your oven has been carefully designed to operate safely during normal cooking
procedures. Please keep the following safety instructions in mind when you are using it.
⚠WARNING!
Electrical Shock Hazard
Failure to follow this advice may result in electrical shock or death
•Turn the oven off at the wall before replacing the oven lamp or before
carrying out any work or maintenance on it
⚠WARNING!
Fire Hazard
Failure to follow this advice may result in overheating, burning, and
injury.
•Do not place aluminium foil, dishes, trays, water or ice on the oven
floor during cooking, as doing so will irreversibly damage the enamel;
lining the oven with aluminium foil or single use protection available
from stores may even cause fire.
•Never use your appliance for warming or heating the room. Persons
could be burned or injured or a fire could start.
•Storage in or on appliance: flammable materials should not be stored in
an oven or near its surface.
⚠WARNING!
Cut Hazard
Failure to use caution could result in injury or cuts
•Take care during installation of the oven - some edges are sharp.

SAFETY AND WARNINGS
5
⚠WARNING!
Hot Surface Hazard
Failure to follow this advice could result in burns and scalds
•Accessible parts may become hot when in use.
•To avoid burns and scalds, be careful not to touch any hot part and
keep children away.
•Use oven mitts or other protection when handling hot surfaces such as
oven shelves or dishes.
•Use care when opening the oven door. Let hot air or team escape
before removing or replacing food.
•Do not touch heating elements or interior surfaces of the oven. Heating
elements maybe hot even though they are dark in colour.
•Interior surfaces of an oven become hot enough to cause burns.
•During and after use, do not touch, or let clothing or other flammable
materials contact heating elements or interior surfaces of the oven
until they have had sufficient time to cool.
•Other surfaces of the appliance may become hot enough to cause
burns - among these surfaces are the oven vent, the surface near the
oven vent, and the oven door.

SAFETY AND WARNINGS
6
IMPORTANT SAFETY INSTRUCTIONS
WARNING!
To reduce the risk of fire, electrical shock, injury to persons or damage when using the
oven, follow the important safety instructions listed below.
Use the oven only for its intended purpose as described in these instructions.
Read all the instructions before using the oven.
Installation
•Ensure your appliance is properly installed and earthed by a qualified technician.
•Isolating switch: make sure this oven is connected to a circuit which incorporates an
isolating switch providing omnipolar disconnection from the power supply the
device must have contact separation compliant to the requirements for over
voltage category III, must bear the maximum connected load and in must be in line
with current legislation. The switch must be incorporated in the fixed wiring in
accordance to the wiring rules. The yellow-green earth cable should not be
interrupted by the device and must be easily accessible when the appliance is
installed.
•Do not install or operate the appliance if it is damaged or not working properly. If
you receive a damaged product, contact your dealer or installer immediately.
•The appliance must not be installed behind a decorative door in order to avoid
overheating.
Servicing
•User servicing: do not repair any part of the appliance unless specifically recommend
in the manual.
•All other servicing should be referred to a qualified technician.
Fire Hazard
•Do not use water on grease fires. Smother the fire or flame or use a dry chemical or
foam type extinguisher.
•Use only dry oven mitts or potholders. Moist or damp potholders on hot surfaces
could result in burns from steam. Do not let potholders touch hot areas or heating
elements. Do not use a towel or a bulky cloth for a potholder. It could catch fire.
•Do not heat unopened food containers. They can build up pressure that may cause
the container to burst and result in injury.
Food Safety
•Safe food handling: leave food in the oven for as short a time as possible before and
after cooking. This is to avoid contamination by organisms which may cause food
poisoning. Take particular care during warm weather.

SAFETY AND WARNINGS
7
General use
•Caution: Hot air can blow from the vent at the top of the oven as part of the oven's
cooling system.
•Household appliances are not intended to be played with by children.
•Children should not be left alone or unattended in the area where the appliance is
in use. They should never be allowed to sit or stand on any part of the appliance.
•Children of less than 8 years old must be kept away from the appliance unless
continuously supervised.
•This appliance can be used by children aged from 8 years old and above, and
persons with reduced physical, sensory or mental capabilities or lack of experience
and knowledge, if they have been given supervision or instruction concerning the
use of the appliance in a safe way and they understand the hazards involved.
•Cleaning and user maintenance shall not be done by children without supervision.
•Do not place heavy objects on the oven door.
•Wear proper apparel. Do wear loose fitting or hanging garments when using the
appliance.They could ignite or melt if they touch an element or hot surface and you
could be burned.
•Always keep oven vents unobstructed.
•Do not operate your appliance by means of an external timer or separate remote-
control system.
•Placement of oven shelves: always position shelves in the desired location while the
oven is cool (before preheating). If a shelf must be removed while the oven is hot,
do not let the oven mitts or potholder contact hot heating elements in the oven or
the base of the oven.
•When you place the shelf inside, make sure that the stop is directed upwards and in
the back of the cavity. The shelf must be inserted completely into the cavity.
•Do not store things children might want above the oven. Children could be burned
or injured while climbing on the oven to retrieve items.
•Use only bake ware approved for oven use. Follow the bake ware manufacturer's
instructions.
•When inserting the grid tray pay attention that the anti-slide edge is positioned
rearwards and upwards.
•No additional operation/setting is required in order to operate the appliance at the
rated frequencies.
•If the power cable is damaged, it should be substituted with a cable or special
bundle available from the manufacturer or by contacting the customer service
department. The type of power cable must be H05V2V2-F. This operation should be
carried out by a suitably qualified professional. The earth conductor (yellow-green)
must be approximately 10 mm longer than the other conductors. For any repairs,
refer only to the Customer Care Department and request the use of original spare
parts. Failure to comply with the above can compromise the safety of the appliance
and invalidate the warranty.

SAFETY AND WARNINGS
8
Cleaning
•Warning: Never remove the oven door seal.
•Do not clean the oven seal or use any oven-cleaning products on it. It is essential for
a good seal, which ensures that the oven operates efficiently. Care should be taken
not to rub, damage or move it.
•Do not use oven cleaners, harsh/abrasive cleaning agents, waxes, or polishes. No
commercial oven cleaner, ovne liner, or protective coating of any kind should be
used in or around any part of the oven. Do not use harsh/abrasive cleaners,
scourers or sharp metal scrapers to clean the oven door glass since they scratch the
surface, which may result in the glass shattering.
•Clean only the parts listed in this manual.
•Do not use a steam cleaner to clean any part of the oven.
•The oven must be switched off before removing the removable parts. After
cleaning, reassemble them according the instructions.

SAFETY AND WARNINGS
9

INSTALLATION INSTRUCTIONS
10
Product Dimensions
Figure 1
Cabinetry Dimensions –Elevated Cabinet Installation (Wall)
Figure 2

INSTALLATION INSTRUCTIONS
11
Cabinetry Dimensions –Under Counter Installation
Figure 3
Mounting and Securing the Oven
Figure 4
5mm clearance must be
maintained

INSTALLATION INSTRUCTIONS
12
General Instructions
•A suitable location for the product must be identified before starting installation.
•Product must not be installed in places which are under the effect of strong air flow
•Carry the product with minimum two people. Do not drag the product so that floor
isn't damaged.
•Remove all transportation materials inside and outside the product. Remove all
materials and documents from the product.
•Furniture surfaces for mounting and mounting materials to be used must have a
minimum temperature resistance of 100 °C.
•Mounting cabinet must be level and secured and its floor must be flat for product
not to tilt over. Cabinet floor must have a minimum strength that would handle a
load of 60 kg.
•If there is a drawer below the oven, a shelf must be placed between oven and
drawer.
WARNING: Do not install the product next to refrigerators or coolers. The heat emitted
by the product increases the energy consumption of cooling devices.
WARNING: Do not use the oven door and/or handle to carry or move the product.
Important for Cooling
•The oven cooling fan takes extra steam out and prevents outer surfaces of the oven
from overheating during operation. This is a necessary condition for better appliance
operation and better cooking.
•Cooling fan shall continue operation after cooking is finished. Fan shall automatically
stop after cooling is completed.
•A clearance must be left behind the enclosure where you'll place the appliance for
efficient and good operation.
•This clearance shouldn't be ignored as it's required for ventilation system of the
appliance to operate.

INSTALLATION INSTRUCTIONS
13
Technical Specifications
Specifications
90 cm Built-in Oven
Lamp power
15-25 W
Thermostat
50-250 / Max °C
Lower element
2000 W
Upper element
1500 W
Fan element
1 x 2200 W / 2 x 1250 W
Grill element
3250 W
Supply voltage
220-240V AC 50/60 Hz
Electrical Connection
IMPORTANT
•Product must have an appropriate electrical connection at the mounting location. If
not, arrange for an electrician or suitably qualified technician to make the necessary
arrangements.
•Supply voltage must be in accordance with the values provided on the product rating
label
•Product connection must be made in accordance with local and national electrical
requirements.
•Check for any damage on the product before installing it. Do not have product
installed if it's damaged.
•Do not turn on the mains electricity supply until the mounting and installation
process is complete.

INSTALLATION INSTRUCTIONS
14
WARNING
•This oven must be installed and connected correctly according to manufacturer
instructions and by an authorized service technician.
•Appliance must be installed in an oven enclosure providing suitable ventilation.
•Electrical connections of the appliance must be made only via power supply having
an earth system in compliance with local regulations. Contact an authorized
electrician if there is no socket complying with the earthed system where appliance
will be placed.
•Manufacturing company is by no means responsible for damage resulting from
connection of non-earthed sockets to appliance.
•Appliance power supply connection must be located in a place that can be accessed
after installation.
•This oven has been manufactured as 220-240V 50Hz, AC power supply compliant and
requires a 16 Amp fuse. If your power network is different than these indicated
values, refer to an electrician or your authorized service technician.
•If the electrical fuse needs to be replaced, the electrical connection should be made
as follows:
oBrown cable to Phase (to live terminal)
oBlue cable to Neutral terminal
oYellow-green cable to earth terminal
oOven disconnecting switches must be in an accessible place for end user
while oven is in its place.
•Power supply cable must not touch hot parts of the appliance.
•If supply cord is damaged, this cord must be replaced by the appliance manufacturer
or its service agent or an equally competent and qualified personnel to prevent a
hazardous situation.

INSTALLATION INSTRUCTIONS
15
MOUNTING AND SECURING THE OVEN
•Place the oven into the cabin with two or more people.
•Ensure that oven frame and front edge of the furniture match uniformly.
•Supply cord must not be under the oven or squeezed in between oven and furniture
or bend.
•Fix the oven to the furniture by using the screws provided with the product.
•Screws must be mounted as shown in figure 4 by passing them through the plastic
attached to frame of the product. Screws must not be over tightened.
•Check that oven doesn't move after mounting. If oven is not mounted in accordance
with instructions, there is a risk of tilt over during operation.
IMPORTANT
Elevated Cabinet Installation (Wall)
•Cabinet must match the dimensions provided in figure 2 on earlier pages
•The clearances dimensions indicated at the rear part of cabinet as well as upper
and lower sections are necessary so adequate ventilation can be achieved.
Under Counter Installation
•Cabinet must match the dimensions provided in the figure 3 on earlier pages
•A clearance must be provided at the rear part of the cabin as indicated so that
necessary ventilation can be achieved.
•After mounting, the clearance between lower and upper part of the counter is
indicated in figure 4 with "A = 5mm" is for ventilation and should not be
covered.
HANDLING NOTES
•Do not use the door and/or handle to carry or move the appliance.
•Carry out the movement and transportation in the original packaging.
•Pay maximum attention to the appliance while loading/unloading and handling.
•Make sure that the packaging is securely closed during handling and transportation.
•Protect from external factors (such as humidity, water, etc.) that may damage the
packaging.
•Be careful not to damage the appliance due to bumps, crashes, drops,etc. while
handling and transporting and not to break or deform it during operation

PRODUCT OVERVIEW
16
1. Control Panel
5. Roasting Dish
9. Lamp
2. Wire Shelf x 2
6. Oven Door
10. Catalytic Side & Rear Panels
3. Rotisserie
7. Handle
4. Wire Insert
8. Telescopic Guides
10
8
2
3
4
5
7

PRODUCT OVERVIEW
17
ACCESSORIES INCLUDED
Wire shelf
Used for placing foods to be baked or roasted on desired rack.
Roasting dish
Used for cakes, pastry, frozen foods, roasts and foods with high
liquid content.
Wire insert
To be placed into roasting dish when direct contact with tray is not
desired or to allow fat to drip into the roasting dist or prevent
sticking.
Telescopic guides
Trays and wire shelves can be removed and accessed easily thanks
to telescopic guides.
Rotisserie set
Used for roasting large joints of meat, the rotation cooks the meat
evenly in its own juices .

USER GUIDE
18
USING THE OVEN
IMPORTANT: Here are the things you must do before using your oven
•Remove labels or accessories attached inside the oven. The cavity should be empty.
Remove protective film on front side of the appliance if any is present.
•Remove dust and package residues by wiping inside of the oven with a damp cloth.
•Turn the oven “on” from the main isolating switch which should have be fitted by
your electrician
•Set the thermostat button to the highest temperature (250 Max. °C) and run the
oven for 30 minutes with its door closed. Meanwhile a slight smoke and smell might
occur and that’s a normal situation.
•After the oven has cooled down completely, using a clean cloth, wipe down the
inside of the cavity with warm water and a mild detergent.
•The oven is now ready for use.
NOTE:
•The cooling system of the oven will continue to operate after cooking is completed.
•Do not turn off the mains power of the oven in this situation. The cooling fans will
automatically turn off once the oven system and electronics has cooled down.

USER GUIDE
19
OVEN CONTROLS
FUNCTIONS
TIMER
TEMPERATURE
10 - FUNCTIONS
1
Defrost
6
Fan Grill
2
Bake
7
Grill
3
Fan Bake
8
Rapid Heat
4
Fan Forced
9
Rotisserie with Fan Grill (see note)
5
Steam Cleaning
10
Rotisserie with Grill (see note)
TEMPERATURE
•Temperature is in degrees Celsius
•The oven should be preheated for 7-10 minutes before cooking commences
TIMER
•The ditigal timer function can be used to set a cooking duration.
•The digital timer turns the heating elements off and provides an audible beep to
indicate the set cooking duration is complete
•Refer to Timer Instructions on page 23 for details (note child lock is active by default)
NOTE: Rotisserie Function
•The rotisserie function operates on both Fan Grill and Grill Modes when the supplied
rotisserie accessory is fitted into the oven. See instructions on the next page for fitting
the rotisserie accessory.
•The rotisserie will stop rotating when the oven reaches a stable temperature and the
grill element thermostat switches off during the cooking cycle. This is normal and not
an error with the operation.

USER GUIDE
20
USING THE ROTISSERIE
Rotisserie shaft must be inserted into hole at rear of the oven to engage with rotating motor
•Place the rotisserie shaft assembly on the frame
•Slide the frame into the oven on rack position 2, ensure the drive shaft of the
rotisserie is aligned and inserted into the hole in the rear of the oven, in order to
engage with the rotisserie motor which is located in the back of the oven.
•Position a roasting dish or drip pan at the bottom in order to collect any fat
that may drip down.
•Add some water in dripping pan for easy cleaning.
•Do forget to remove all plastic parts from rotisserie.
•After grilling screw the plastic handle to the skewer and take out the food
from the oven.
USING OTHER OVEN FUNCTIONS
BAKE
Uses upper outer and lower elements
Ideal for cakes and foods that require baking for a long time or at low temperatures.
This function is not suitable for multi-shelf cooking.
FAN BAKE
fan plus upper outer and lower elements
Ideal for: single shelf baking that requires less than an hour to cook.
Foods such as muffins, biscuits and cupcakes.
The oven fan circulates hot air from the top outer and the lower elements and distributes
it around the oven cavity.
Food cooked tends to brown quickly.
Table of contents
Other Haier Oven manuals

Haier
Haier HCW2360AES User manual

Haier
Haier HWO60S7EX3 User manual

Haier
Haier HWO60SM2F5XH User manual

Haier
Haier HWO90 User manual

Haier
Haier RTO1400SS User manual

Haier
Haier HWO60S4 User manual

Haier
Haier HWO60B7EX2 User manual

Haier
Haier HOA-T10NW7M User manual

Haier
Haier RTR1200 User manual

Haier
Haier HIO-M59CF User manual

Haier
Haier HWO60S10TX1 User manual

Haier
Haier QGAS740 User manual

Haier
Haier HCW3260AES User manual

Haier
Haier 6 Series User manual

Haier
Haier HWO60S4 User manual

Haier
Haier HCW225LAES User manual

Haier
Haier RTC1700RBSS User manual

Haier
Haier HWO60S4LMX1 User manual

Haier
Haier HWO60S4LMB2 User manual

Haier
Haier HWO60S14EPB4 User manual