Halma Ampac LoopSense Guide

Fire detection and evacuation solutions that save lives.
LoopSense
Installation & Commissioning
MAN 2997-2

MAN2997-2
Responding to a Fire
Access Level 1
Indicators Controls
The OVERRIDE key is pressed to override any delays to outputs
Activating the “SILENCE ALARMS. BRIGADE USE ONLY” Key will silence all Alarm Outputs.
Access Level 2
The EVACUATE key is pressed to turn ON all alarm devices.
The SILENCE/RESOUND key is pressed to silence any silence-able outputs that have been
activated.
The ALARMS LED will be illuminated to indicate that the silence-able outputs have been silenced and
resound is available. The operation of the SILENCE key will be logged.
The RESET key is pressed to reset the fire condition. All outputs activated in response to the
fire will deactivate and the panel will revert to the normal condition providing there are no other abnormal
conditions present. –RESET IS LOGGED.

MAN2997-2
Disabling a Zone
The following example DISABLES a ZONE. Place the Keyswitch in the ENABLED position.
Press
Then to open the “Control” menu. By following the screen prompts select the type of control, 1 to 4.
Once selected simply step through the menu again to implement.
Press to open the “Zone” menu.
Selecting the Zone Control menu prompts the user to
select the zone number using the generic zone point
selection screen followed by the corresponding zone
control menu. (Sounder access is available at Level 3
only)
CONTROL MENU
1►ZONE 3|PANEL
2|DEVICE 4|GLOBAL CONTROL
Zzzz <status>
<zone descriptor>
1:DISABLE INPUTS 2:DISABLE SOUNDERS
3:SILENT WALK TEST 4:WALK TEST DEVICE►

MAN2997-2
4
Contents
1 About This Manual............................................................................................................................... 6
1.1 Introduction ................................................................................................................... 6
1.2 General Requirements.................................................................................................... 6
1.3 References ..................................................................................................................... 6
1.4 Symbols ......................................................................................................................... 6
2 Introduction......................................................................................................................................... 7
2.1 System Overview............................................................................................................ 7
2.2 System Components....................................................................................................... 7
3 Overview & Key Features ..................................................................................................................... 8
3.1 Features......................................................................................................................... 8
1.1.1 Device Alarm LED activation ........................................................................................... 8
1.1.2 Analogue Loops.............................................................................................................. 8
3.1.1 FACP Main Termination Board Inputs & Outputs............................................................. 9
3.1.2 Loop Activation Key Mounting CN7 ...............................................................................10
4 Mechanical .........................................................................................................................................11
4.1 Mounting the Enclosure ................................................................................................11
1.1.1 Enclosure Details...........................................................................................................11
4.1.1 Fixing the Chassis to the Wall ........................................................................................12
4.1.2 PCB Removal / Replacement..........................................................................................13
4.1.3 Removing the Knockouts ...............................................................................................13
5 Electrical .............................................................................................................................................14
5.1 Primary Power Supply ...................................................................................................14
1.1.1 Mains wiring .................................................................................................................14
5.1.1 Connecting the Panel ....................................................................................................14
5.1.2 Connecting the Mains ...................................................................................................15
5.1.3 Earth & Earth Fault ........................................................................................................15
5.2 Battery Charger.............................................................................................................16
1.1.1 Connecting the Stand-By Batteries ................................................................................17
5.2.1 Battery Cable Test..........................................................................................................17
5.2.2 Battery Capacity Test.....................................................................................................17
5.2.3 Charger Voltage Test......................................................................................................18
5.2.4 Charger Fault Test..........................................................................................................19
5.3 Cable Types and Limitations ..........................................................................................19
6 Front Panel Control Card .....................................................................................................................20
6.1 Levels of Access.............................................................................................................20
1.1.1 Passwords .....................................................................................................................21
6.1.1 Misplaced Password......................................................................................................21
6.2 System Controls & Indicators.........................................................................................22
6.3 Front Panel Control Keys................................................................................................27
6.3.1 Trial Evacuation.............................................................................................................27
6.3.2 Silence Alarms Brigade Use Only ...................................................................................27
6.4 Liquid Crystal Display.....................................................................................................28
7 Main Control Card...............................................................................................................................29
7.1 Input / Output System Connections...............................................................................30
8 Wiring to the Main Card......................................................................................................................32
8.1 Introduction ..................................................................................................................32
8.2 Communication Interfaces.............................................................................................32
1.1.1 External RS485 Communications Port (TB1)...................................................................32
8.2.1 Internal Communications Port.......................................................................................33
8.3 Inputs............................................................................................................................33
8.3.1 Supervised Digital Inputs...............................................................................................33
8.4 Fire Detector Analogue Loop Interface TB2....................................................................34

MAN2997-2
5
1.1.1 Detector loop Isolator Installation .................................................................................34
8.5 Outputs.........................................................................................................................36
1.1.1 Supervised Outputs TB3 ................................................................................................36
8.5.1 Relay Outputs TB4.........................................................................................................36
8.5.2 Auxiliary 24VDC Outputs TB1 & 5 ..................................................................................36
8.5.3 Low current outputs TB6 ...............................................................................................36
8.5.4 Debug Connection CN6 & 11 .........................................................................................36
8.5.5 Universal Serial Bus Connection CN6 .............................................................................37
8.5.6 RS 232 Connection CN11 ...............................................................................................37
8.5.7 Earth Monitoring...........................................................................................................37
8.5.8 Signal Generating Device (SGD) Connections (CN1)........................................................38
9 Adding Control and Monitoring Facilities.............................................................................................39
9.1 LED Index ......................................................................................................................39
9.2 Alert / Evacuation Amplifier...........................................................................................40
9.3 SmartTerminal...............................................................................................................43
9.3.1 Overview.......................................................................................................................43
9.3.2 Mechanical....................................................................................................................44
9.3.3 Installation & Cabling ....................................................................................................45
9.3.4 Setting the SmartTerminal Address................................................................................45
9.3.5 Operation......................................................................................................................46
9.3.6 SmartTerminal Controls and Indicators..........................................................................47
9.3.7 SmartTerminal Screen Format .......................................................................................47
10 Battery Capacity Calculation..........................................................................................50
11 Maintenance and Trouble Shooting Chart......................................................................53
11.1 Maintenance.................................................................................................................53
11.2 Trouble Shooting LoopSense..........................................................................................54
11.3 Trouble Shooting SmartTerminal....................................................................................54
12 Compatible Devices.......................................................................................................55
13 Certification Information...............................................................................................57
14 Glossary of Terms..........................................................................................................58
15 Specifications................................................................................................................59
16 Address Setting .............................................................................................................60

6
1About This Manual
1.1 Introduction
This manual contains all the information required to install, commission and operate the LoopSense series
Fire Alarm Control Panel (FACP) and is only available to and for the use of personnel engaged in its
installation, commissioning and operation.
1.2 General Requirements
The LoopSense has been designed and manufactured from high quality commercial components so as to
comply with major world standards. To ensure these standards are not compromised in any way installation
staff and operators should;
➢Be qualified and trained for the task they undertake
➢Be familiar with the contents of this manual prior to the installation, commissioning or operation of
a LoopSense FACP
➢Observe anti-static pre-cautions at all times
➢Be aware that if a problem is encountered or there is any doubt with respect to the operational
parameters of the installation the supplier should be contacted.
1.3 References
LoopSense Operation & On Site Programming Manual
Apollo Detector / Device Manuals
Ampac Product Data Sheets
New Zealand Standard:
NZS4512: 2010 - Maintenance of Fire Protection Systems and equipment - Fire Detection and Alarm
Systems.
1.4 Symbols
Important operational information
Note: Configuration considerations
Observe antistatic precautions
Mains supply earth
DANGER mains supply present

MAN2997-2
7
2Introduction
2.1 System Overview
The purpose of the LoopSense Fire Alarm Control Panel (FACP) is to monitor changes in inputs, report those
changes and update selected outputs as programmed.
The FACP processes changes in inputs such as fire, fault, pre-alarm, emergency, security, user, transparent
and system and has a built-in menu structure to view its status, perform operational tests, and modify the
panel’s configuration and programming.
2.2 System Components
The following illustrates the main components of the system and the connectivity between them.
Main Termination Board
-1-2 Analogue Loops
- 4 Supervised Inputs
- 4 Monitored Outputs
- 3 Relay Outputs
- 2 Aux Outputs
- RS232 / USB Port
- RS485 Port Add Ons
- PSU Interface
Addressable
Loop Device
- Apollo
RS485 Add-on
Modules
Power
Supply Unit
SGD
Front Panel Zicc
- 40 x 4 Line LCD
- LED Indicators
- Buzzer
- Keys
- Parallel Printer Port
- RS485 Port Add Ons
PC
TCP / IP
Serial Modem
- 30 Max per Panel
Figure 1: The LoopSense Concept

MAN2997-2
8
3Overview & Key Features
LoopSense is a 1 - 2 loop Intelligent Analogue / Addressable FACP capable of supporting the following
modules:
➢Apollo protocol - 126 detectors / devices per loop
➢SmartTerminal
➢NZ LED Index
➢2nd. Loop enablement by way of a “Loop Activation Key” and programming
➢Signal Generating Device (SGD)
Note: Only devices compatible with LoopSense should be used in an installation.
3.1 Features
➢The front panel 40 x 4 line LCD, navigation keys , alpha numeric keypad and the Menu/Enter
keys allow the LoopSense to be programmed on site. The same LCD and keys are also used for panel
operation and interrogation
➢4 X supervised input and outputs connections
➢3 X relay outputs
➢Password entry
➢Flush or surface mountable enclosure. A surround is required for the metal cabinet
➢Controls have tactile and audible feedback of operation
➢All terminals cater for 2.5mm cables
3.1.1 Device Alarm LED activation
Due to the limited current available from the analogue loop, the number of alarm LED’s allowed to be
illuminated simultaneously is limited to the first 10 devices in fire on each loop; after this limit is reached
any new devices in fire will not have its alarm LED’s illuminated until the original fires have been cleared on
that loop.
3.1.2 Analogue Loops
Each FACP supports up to 2 loops. The standard configuration is one loop, enabling the second loop involves
obtaining and plugging in the “Loop Activation Key” into CN7 on the main termination board and activating
it within LoopMaster. The number of loops enabled and the protocol used is selectable in the configuration
software and is site configurable.

MAN2997-2
9
3.1.3 FACP Main Termination Board Inputs & Outputs
1 to 4 Supervised Inputs:
➢TB1 6-9.-Programmable digital inputs compatible with voltage free type outputs supervised for
open, short and earth faults. EOL is 10k. I/P4 is only available if a SGD is not fitted. Do not fit the
EOL to I/P4.
➢Inputs default configurations are:
➢IP1 DBA
➢IP2 Door Switch
➢IP3 Fault
➢IP4 SGD Interlock (Reserved when SGD fitted)
1 to 4 Supervised Sounder Outputs:
➢TB3 - Programmable Supervised switched 24VDC output sourcing up to 750mA and supervised for
short, open and earth faults. O/P’s are also supervised for overload when they are ON. EOL is 10K
➢Output default configurations are:
➢Sounder Outputs 1-4.
1 to 2 Open Collector Outputs: (Reserved when SGD fitted)
➢Ancillary Output1 TB6/2 –low current (limited to 30mA); activated when there is a Fire condition
present on the FACP.
➢Ancillary Output2 TB6/3–low current (limited to 30mA); activated when there is a Fault condition
present on the FACP.
1 to 3 Relay Outputs:
➢TB4 –Programmable Voltage free relay contacts. Consists of NC, C and NO contacts.
➢Relay default configurations are:
➢Fire
➢General Purpose
➢Fault
1 to 2 Auxiliary 24VDC Outputs:
➢TB1 3 and 4 & TB5- Programmable, supervised for over current, switched 24VDC output sourcing up
to 1A. Set to continuous as default

MAN2997-2
10
3.1.4 Loop Activation Key Mounting CN7
EXISTING MOUNT
M3 x 6mm SCREW
METAL CABINET SIDE VIEW
BACKPAN
WASHER
LOOPACTIVATION KEY 2 X WASHERS
MAIN BOARD PCB
CN7
Figure 2: Loop Activation Key Mounting
The loops consist of a positive and common and are able to source up to 500mA of current. The loops;
➢Operate in single ended and redundant configurations
➢Are monitored for over current and short circuit in single ended mode
➢Monitored for over current, short circuit and open circuit in the redundant mode.
Note: A loop test function is available via the FACP user interface.

MAN2997-2
11
4Mechanical
The basic LoopSense FACP consists of:
➢Main PCB
➢Front Panel control and indicator board
➢3Amp switch-mode power supply for the metal version;
➢2 X 12 Volt batteries connected in series.
➢Access keys
➢Loop activation key for the 2 Loop version.
4.1 Mounting the Enclosure
The panel MUST be mounted in an area that is NOT subject to conditions likely to affect its performance,
e.g. damp, salt-air, water ingress, extremes of temperature, abuse etc. is at an easily accessible height and
such that the indicators are at eye level.
Typical locations for the panel are the first and most obvious point of contact for emergency services or a
security office that is likely to be permanently staffed.
4.1.1 Enclosure Details
LoopSense can be surface or semi-flush mounted, is supplied with a detachable door, a mountable back box
with backpan, power supply and a minimum of two separate PCBs.

MAN2997-2
12
4.1.2 Fixing the Chassis to the Wall
Taking into account the weight of the panel securely mount it by using, the three keyhole mounting holes,
suitably sized screws and plugs for the type of mounting surface.
Mounting is best achieved by positioning the box against the surface it is to be mounted to, marking the
holes, taking the box well away from the surface and then drilling the holes.
Caution: Any dust or swarf created during the fixing process must be kept out of the panel and great care is
taken not to damage any wiring or components.
Key Hole Mounting Holes
Lower Mounting Holes
Cabling Tie Points
SGD Add On
3Amp Power
Supply
Main Control PCB
METAL ENCLOSURE
240VAC I/P
Ferrite Core
The Mains I/P Cable MUST
pass through this core
Figure 3: Typical Layout and Location of Keyholes for the Metal Enclosure

MAN2997-2
13
4.1.3 PCB Removal / Replacement
If the PCB’s have to be removed the following precautions should be observed;
➢Removing the door will provide better access to the boards and ensure the hinges are not
accidentally stressed.
➢Personal anti- static procedures must be followed.
➢When disconnecting the 20 way connecting cable from the PCB, make sure that the cable remains
connected to at least one board to prevent it being misplaced.
Note: Care should be taken when detaching this connector as it is necessary to depress the small locking
tab to unlock the connector from its base. To reconnect the cable the connector must first be correctly
aligned then pushed into the socket so it locks into position.
➢Carefully remove the retaining screws at each corner of the board taking care not to damage any of
the components.
➢Place each board into anti- static storage once removed.
Push Tab Inwards
and Gently Pull
the Connector
From the Socket
Connector
4.1.4 Removing the Knockouts
Carefully decide how the wiring will be brought into the panel then remove the required knock-outs for the
bushes and cables.
The knock-outs should be removed with a sharp tap in the rim of the knock-out using a flat broad-bladed
screwdriver. Use of excessive force could damage the enclosure around the knock-out.
REMOVING
KNOCKOUTS
Always ensure if a knock-out is removed, the hole is filled with a good quality cable gland. Any unused
knock-outs must be securely blanked off.

MAN2997-2
14
5Electrical
5.1 Primary Power Supply
The LoopSense Power Supply PCB combines the functions of;
A Mains to DC. switch mode power supply unit that operates from a supply of; 204 - 264VAC @ 47 –63Hz
supplying the system while all zones are in alarm
A battery charging and monitoring unit
A mains fail is detected when the PSU voltage drops below 24V.
5.1.1 Mains wiring
The requirement for the mains supply to the FACP is fixed wiring, using three core cable (no less than
0.75mmand no more than 2.5mm) or a suitable three conductor system, fed from an isolating switch
fuse spur, fused at 3A. This should be secured from unauthorised operation and be marked 'FIRE ALARM:
DO NOT SWITCH OFF. The Mains supply must be exclusive to the FACP.
5.1.2 Connecting the Panel
Connecting LoopSense internal connections and PCBs is best undertaken immediately prior to
commissioning. Before beginning ensure all devices on the circuits are correctly connected and that cable
integrity is verified throughout the installation.
Important: DO NOT use an insulation tester ('Megger') with any electronic devices connected. Faults
occurring in the wiring which are not picked up at this stage will almost certainly result in spurious and
intermittent faults when the equipment is energised.
Important: Under no circumstances should the LoopSense panel be operated without the Power
Supply PCB correctly mounted in the enclosure and the retaining screws securely tightened.

MAN2997-2
15
5.1.3 Connecting the Mains
The technician should NOT attempt to connect Mains to the Panel until fully conversant with the
layout and features of the Power Supply PCB.
The incoming Mains cable should be brought into the Panel at the top right hand side of the enclosure, fed
through the ferrite core and correctly terminated on the Chassis Earth Terminal and then to the Power
Supply connector block.
Note: Fuse F1 (2Amp (3A supply) 250VAC M205) is field replaceable
Before switching on the Power Supply the Earth MUST be connected to the chassis earth terminal.
➢All earth cabling must be terminated to the Panel Chassis Earth Terminal in a Star configuration.
➢The earth cable closest to the cabinet body must have an M4 SPW beneath the lug then an M4 SPW
and M4 nut.
➢Each additional earth cable must be terminated with an M4 SPW and M4 nut.
➢An additional M4 nut and M4SPW are fitted to the earth terminal for installers to connect the mains
earth
Chassis Earth Terminal
Earth Cable
Earth Cable
M4 Shake Proof Washer *
M4 Nut *
Note:
* Extra M4 Nut and M4 SPW are
provided finger tight on the Earth bolt.
Figure 4: Chassis Earth Terminal Connection
5.1.4 Earth & Earth Fault
If a resistance of <50Ω exists between 0V and the building earth a fault indication will be indicated.
Resistance to Earth
Status
< 50Ω
Earth Fault
50 ≤ to ≤ 500 KΩ
Indeterminate
> 500 KΩ
Normal

MAN2997-2
16
5.2 Battery Charger
The battery charger is an integral part of the Power Supply and is capable of
➢Recharging standard sized system batteries within 24 hours
➢Detecting a missing, damaged or undercharged battery
➢Protecting the battery against reverse or a short circuit condition
➢Charging batteries in line with Sealed Lead Acid battery manufacturers circuit temperature
compensation guidelines
The following table contains the thresholds for the corresponding battery faults:
Battery Voltage
Battery Fault Condition
VBATT < 23.5V
BATTERY LOW
VBATT < 20V
BATTERY MISSING
*VBATT < 22V
BATTERY DAMAGED
Note: Battery disconnect has been incorporated to prevent the battery from discharging through the
battery charger should the charging voltage be less than the battery voltage.
CHASSIS EARTH
TERMINAL
EARTH ( GREEN )
ACTIVE ( BROWN )
NEUTRAL ( BLUE )
NOTE: MAINS CABLE
SHOULD BE NO LESS
THAN 0.75mm
CABLED TO THE MAIN
BOARD
+BATT-
FOR CONTINUED PROTECTION
AGAINST RISK OF FIRE REPLACE
ONLY WITH SAME TYPE 2A FUSE
O
F
F
O
N
METAL
COVER
DC OUTPUT
OV
+27V
CAUTION:
ETH
SNS
1
12
6
8
4
3
5
7
(AC IN)
TO THERMISTOR
EXTENSIONS OF PIN 1
(TEMPSENSE RTN) AND PIN 6
(TEMPSENSE) OF RJ45
RJ 45 PINOUT CONNECTIONS
1.TEMP SENSE RTN
2.SUPPLY SENSE
3.PSU V ADJ
4.CHARGER ON
5.LOAD ON
6.TEMPSENSE
7.BATTERY V SENSE
8.OV
1 2 3
CN2
CN5
CN5
CN2
TB2
TB1
SW1
F1: 2A
Fuse
Battery 2
12Volts
Battery 1
12 Volts
+
--+
2
27V TO THE MAIN CARD
A
DC ON
LED
DANGER
N
MAINS CABLE
FERRITE CORE
COMBINED MAINS SWITCH
& MAINS ON INDICATION
HIGH VOLTAGE PRESENT
INDICATOR UNDER CAGE
Figure 5: Power Supply Battery Charger Wiring (3A PSU SHOWN)

MAN2997-2
17
5.2.1 Connecting the Stand-By Batteries
The capacity of the batteries to be installed depends on the panel configuration and required stand-by time.
To calculate the required AH capacity of the batteries refer to the calculation guide located in the rear of
this manual.
Two new, good quality and fully charged 12V Sealed Lead Acid batteries are required as the emergency
stand-by power supply for the Panel. They are to be mounted in the bottom of the cabinet. In the ABS
version a protective tray is supplied in the packaging.
The batteries should be connected in series using the series link wire provided and located within the panel
enclosure. The red and black battery leads from the Power Supply (TB2) should be run to the batteries in
such a way that there is no risk of them being damaged, and then connect the red wire to the positive
terminal and the black wire to the negative terminal.
The panel's sophisticated battery monitoring protects the batteries against deep discharge by activating a
cut off circuit when the stand-by supply voltage reaches approx 21 volts. If batteries are not fitted, are
discharged or in poor condition, the “FAULT" LED will be illuminated.
5.2.2 Battery Cable Test
Battery cable fault detection is only available when using the PSU 2397 3 Ampere power supply.
A “BATTERY CABLE FAULT” is registered when the combined internal resistance of the battery and the
resistance of the battery leads exceed approximately 1.2Ω. This test is conducted every 8 seconds in
conjunction with the check for battery missing.
5.2.3 Battery Capacity Test
This test is conducted every 36 hours for duration of 36 minutes provided the system is not in the Fire
condition.
During the test, the charger is turned off and the PSU dummy load is engaged; if the battery voltage drops
below 24.4V during this time, the load shall be disengaged and a “BATT CAPACITY FAULT” shall be reported
and latched for the remaining duration of the test.
If the system enters the Fire condition during the test, the test shall be aborted and if the system is in Fire
prior to the test commencing, the test shall suspended until the Fire condition is reset.
Note: While the Battery Capacity test is in progress, the Battery Cable Fault and Charger Fault tests are
suspended as they cannot be conducted concurrently.

MAN2997-2
18
5.2.4 Charger Voltage Test
A charger low condition is recognized when the charger voltage drops less than 0.8V below the optimal
charger voltage for a given temperature. A charger high condition is recognized when the charger voltage is
more than 0.8V above the optimal charger voltage for a given temperature.
Temperature
(°C)
Optimal Voltage
(VC)
Charger Low
(VC- 0.8V)
Charger High
(VC+ 0.8V)
-8
28.2
27.4
29.0
-4
28.1
27.3
28.9
0
28.0
27.2
28.8
4
27.8
27.0
28.6
8
27.7
26.9
28.5
12
27.5
26.7
28.3
16
27.4
26.6
28.2
20
27.3
26.5
28.1
24
27.2
26.4
28.0
28
27.0
26.2
27.8
32
26.9
26.1
27.7
36
26.7
25.9
27.5
40
26.6
25.8
27.4
44
26.5
25.7
27.3
48
26.4
25.6
27.2

MAN2997-2
19
5.2.5 Charger Fault Test
A Charger fault test is performed every 14 minutes for duration of approximately 10.5 seconds. It effectively
confirms if the charger is able to recharge the battery by discharging the battery slightly using the PSU
dummy load then attempting to recharge the battery. If the charger has successfully recharged the battery
(Delta V > 100mV) then no fault is reported, otherwise a charger fault is reported.
5.3 Cable Types and Limitations
All System wiring should be installed in accordance with the national wiring regulations where the panel is
being installed.
To comply with EMC (Electro Magnetic Compatibility) regulations and to reduce the risk of electrical
interference in the system wiring, we recommend the use of Fire-resistant screened cables throughout the
installation, examples of which include the following:

MAN2997-2
20
6Front Panel Control Card
The Front Panel Control Card interfaces to the Main Control Board by way of CN5, and supports;
➢All the controls and functional indicators
➢The FACP Reset
➢The Configuration (CONFIG) control
Figure 6: Front Panel Layout
6.1 Levels of Access
The FACP supports three levels of access.
Access Level 1 (Untrained User):
The FACP is in Access Level 1 by default.
Only the OVERRIDE, PREVIOUS, NEXT, SILENCE BUZZER and LAMP TEST controls are active.
Access Level 2 (Authorised User):
The key switch is optional. If the key switch is not used, then a pass-code is entered (using the alpha
numeric keys) to gain access to level 2 or 3.
To enter Access Level 2 the user has to enter a password using the alpha numeric keys. The password entry
screen will be presented if any higher access level key is pressed. Alternatively turning the Keyswitch to the
ON position will force the panel into access level 2. The user is able to navigate through the menu system in
access level 2 however the ENTER PASSWORD menu item will be displayed in place of the PROGRAMMING
and SETUP menus.
Note: PROGRAMMING and SETUP menus are not accessible during a Fire condition
If ENTER PASSWORD is selected, the password entry screen will be presented allowing the user to enter the
access level 3 password. The user is able to enter the password when the password screen is presented.
The access level 1 controls are active as well as SILENCE RESOUND, RESET, EVACUATE and MENU ENTER
controls. All menu items are active apart from the programming menu.
The Door switch if fitted can facilitate entry into access level 2.
Other manuals for Ampac LoopSense
1
Table of contents
Other Halma Control Panel manuals

Halma
Halma SENSITRON MULTISCAN++ PK-32 User manual

Halma
Halma Ampac ZoneSense Plus Instruction Manual

Halma
Halma Ampac LoopSense Operating instructions

Halma
Halma Ampac FireFinder Guide

Halma
Halma SENSITRON GALILEO 32 User manual

Halma
Halma ZoneSense Plus AS User manual

Halma
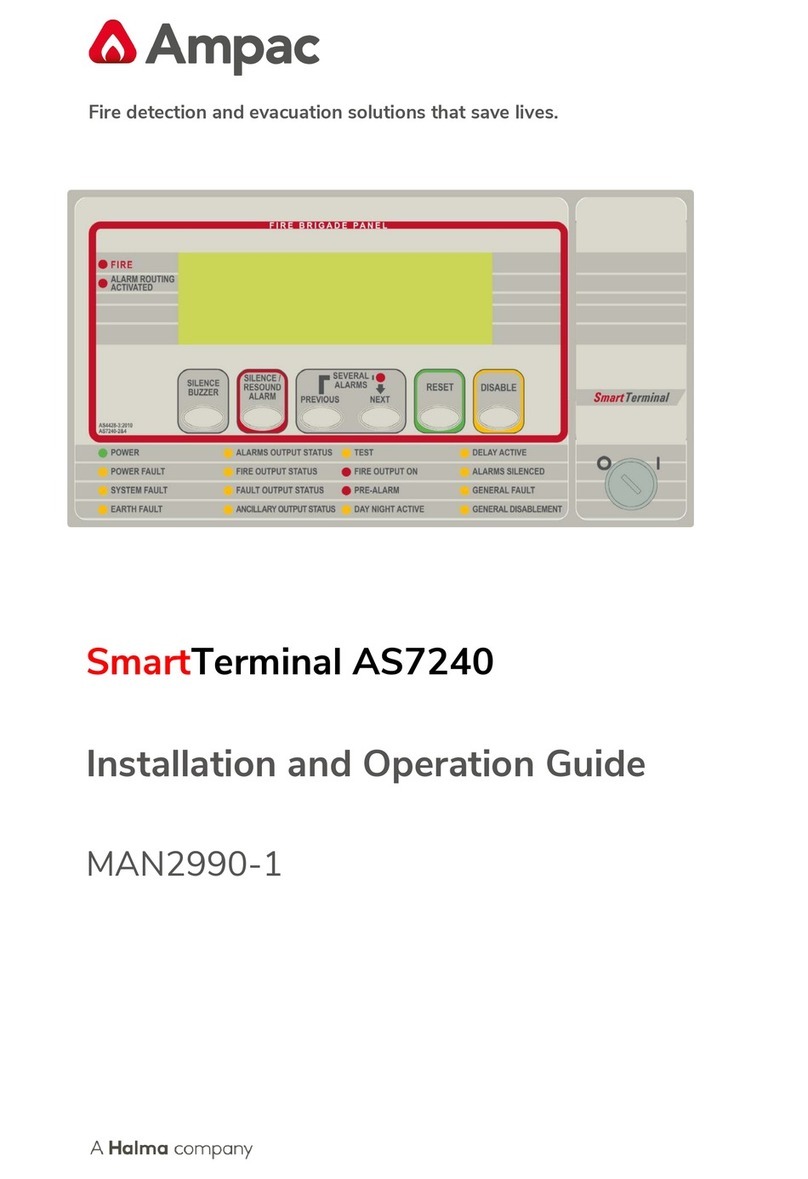
Halma Ampac SmartTerminal AS7240 Operating instructions