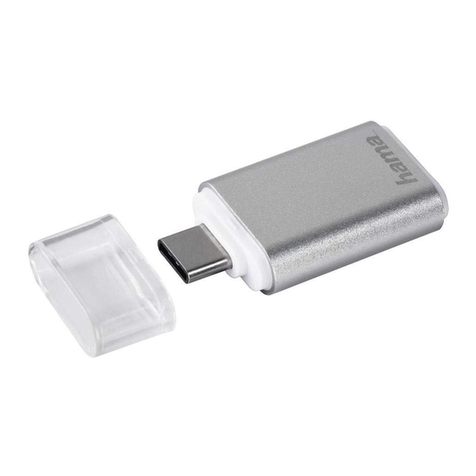
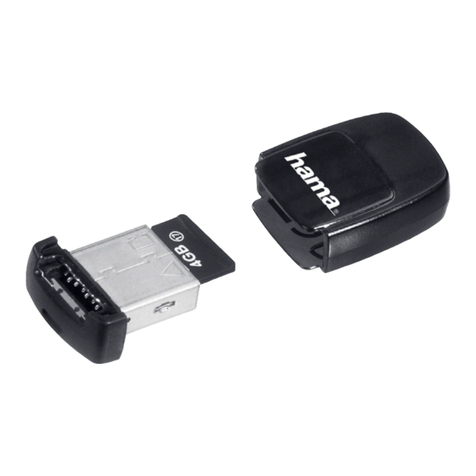
Hama 00123937 User manual

00123937
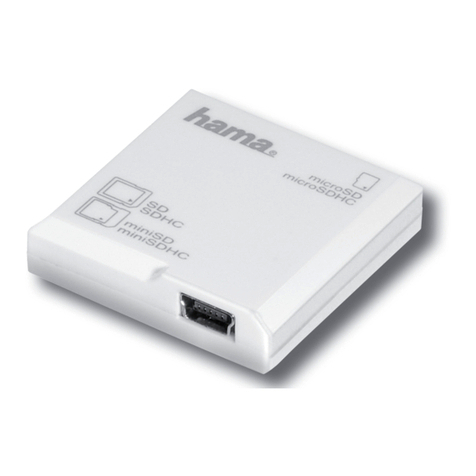
Save2Data miniCard Reader
microSD
D
GB
Operating Instructions
Bedienungsanleitung

4
Content
1. Explanation of Warning Symbols and Notes ................................................................Page 5
2. Package Contents .........................................................................................................Page 5
3. Safety Instructions.........................................................................................................Page 5
4. Technical Data ...............................................................................................................Page 6
5. Starting up the Save2Data mini....................................................................................Page 6
5.1 Explanation of the most important symbols and icons of the Save2Data app...............Page 7/ 8
6. Playback and transfer of pictures, videos and music
6.1 Playback and transfer of pictures
6.1.1 Playback of pictures..........................................................................................Page 8 / 9
6.1.2 Transferring pictures .........................................................................................Page 9/ 10
6.1.3 Additional options in the context menu.............................................................Page 10 / 11
6.2 Playback and transfer of videos
6.2.1 Playback of videos............................................................................................Page 11
6.2.2 Transferring videos............................................................................................Page 12
6.2.3 Additional options in the context menu.............................................................Page 12
6.3 Playback and transfer of music
6.3.1 Music playback.................................................................................................Page 12
6.3.2 Transferring music ............................................................................................Page 13
6.3.3 Additional options in the context menu.............................................................Page 13
7. Backing up data and contacts
7.1 Backing up data ........................................................................................................Page 13
7.2 Backing up and restoring contacts .............................................................................Page 14
8. File management via folder structure............................................................................Page 14
9. Taking pictures with the Save2Data app.......................................................................Page 15
10. Additional settings of the Save2Data app ....................................................................Page 15
11. Warranty Disclaimer ......................................................................................................Page 15
12. Service and Support.......................................................................................................Page 15
Disposal Instructions.....................................................................................................Page 30
GOperating instruction

5
Thank you for choosing a Hama product.
Take your time and read the following instructions and information completely. Please keep these
instructions in a safe place for future reference. If you sell the device, please pass these operating
instructions on to the new owner.
1. Explanation of Warning Symbols and Notes
Warning
This symbol is used to indicate safety instructions or to draw your attention to specic hazards
and risks.
Note
This symbol is used to indicate additional information or important notes.
2. Package Contents
•“Save2Data mini“ Lightning Card Reader
3. Safety Instructions
•The product is intended for private, non-commercial use only.
•Protect the product from dirt, moisture and overheating, and only use it in a dry environment.
•Do not use the product in the immediate vicinity of heaters or other heat sources or in direct sunlight.
•Do not drop the product and do not expose it to any major shocks.
•Do not attempt to service or repair the product yourself. Leave any and all service work to qualied
experts.
•Do not open the device or continue to operate it if it becomes damaged.
•Dispose of packaging material immediately according to locally applicable regulations.
•Do not modify the product in any way. Doing so voids the warranty.
•Keep this product, as all electrical products, out of the reach of children!

6
4. Technical Data
“Save2Data mini“ Lightning Card Reader
Power supply 3,3V max.100mA
Memory Card microSD/microSDHC/microSDXC
Connections Lightning(8-pin connector)
Operating systems •iOS 7.0 or higher
•Requires: Installation of the Hama Save2Data app
5. Starting up the Save2Data mini
Note – microSD/ microSDHC/ microSDXC memory cards
•The inserted memory card has to be formatted into FAT32 for an easy use.
•To transfer your data/les optimally the use of memory cards from class 10 is recommended.
•Download Hama’s Save2Data app from the Apple App Store.
•Plug your microSD card into the appropriate slot of the Save2Data mini.
•Connect the Save2Data mini card reader to your terminal device (iPhone/iPad) using the Lightning
connector.
•Start the Save2Data app.
Note – Symbol
This symbol is used to indicate when you must tap the screen at a particular place in order to
perform an action or open a menu.

7
5.1 Explanation of the most important
symbols and icons of the Save2Data app
Main menu
Menu for displayingand
transferring pictures
Menu for playing back and
transferring videos
Menu for playing back music
Menu for backing up and restoring
data and contacts
Menu for accessing the directory
structure of the microSD card and
the terminal device
Menu for system settings
Allows access to the data saved on
the terminal device
Displays the amount of storage
used and free on the terminal
device
Allows access to the data saved on
the microSD card
Displays the amount of storage
used and free on the microSD card
Opens the camera option of the
Save2Data app
Additional symbols/icons
Return to previous view
Return to the main menu
When accessing the Save2Data
mini (microSD card): Opens the
menu for changing the display and
sorting of the data
When accessing the terminal
device: List view of the data
List view of the stored data
(Save2Data mini (microSD
card) only)
Preview (thumbnail) of the stored
data
/Change between the storage of the
Save2Data mini (microSD card)
and that of the terminal device
Red = active storage
Grey = inactive storage
/
Create a new folder in the Files
menu (only when accessing the
Save2Data mini (microSD card))
/Select les/folders on which to use
the options in the context menu
Copy the selected les

8
Delete the selected les
Share: Opens the context menu of
the terminal device
More: Opens the menu for moving
or renaming (only when accessing
the Save2Data mini (microSD
card)) the selected le(s)
Note – App permissions
•Some features of Hama’s Save2Data app
require certain permissions on your terminal
device (such as backing up/restoring contact
info, backing up pictures, etc.)
•If the app does not have the necessary
permissions, a message is displayed when
the function is executed.
•To allow access, select Hama’s Save2Data
app in the settings of your terminal device
and slide the corresponding switch to green.
6. Playback and transfer of pictures,
videos and music
6.1 Playback and transfer of pictures
6.1.1 Playback of pictures
•Photos
•By default, the pictures stored on the
Save2Data mini (microSD card) are displayed.
•Choose whether the pictures from the
Save2Data (microSD card) or your
terminal device should be shown.
•Tap the picture which is to be displayed.
•The picture is displayed in playback mode.
•Various options are available.
•/
Choose whether automatic playback is to stop
after showing the last picture or repeat from the
beginning.

9
•/
Start and pause the automatic playback.
Note: After a few seconds, automatic playback
switches into full-screen mode. If you tap
the screen, automatic playback is paused
immediately.
•/
Start and pause the background music.
Note: To enable the background music, rst go
to the Music menu and start playing a track.
Then switch back to the Photos menu and start
playback mode. The music continues playing in
the background
•
Save the currently displayed picture directly on
the terminal device (only during playback from
the Save2Data mini (microSD card) ash drive).
•
Opens the context menu of the terminal device
with various options.
6.1.2 Transferring pictures
•Photos
•By default, the pictures stored on the
Save2Data mini (microSD card) are displayed.
•Choose whether the pictures from the
Save2Data (microSD card) or your
terminal device should be transferred.
•If prompted, conrm that the app has permission
to access your photos.
•Select in the top-right corner of
the display.
•
Use the circle at the left edge of the display to
select the picture(s) that you wish to transfer. On
successful selection, the circle turns red with a
white check mark
•To select all pictures at once, tap Select all at
the top-left corner of the display.
•The menu items displayed at the bottom become
available once a selection is made.
•Various options are available
•Copy (le remains in the source storage)
•Move (picture is removed from the source
storage) (nd the Move option under the
menu item More)
•Once you have selected one of the options
named above, the other (target) storage location
opens.

10
•At the top-middle edge of the display, you can
choose between internal storage (terminal
devices) and external storage (microSD card).
This allows you to, for example, copy or move
pictures into a sub-folder of your microSD card.
•Choose the folder in which the copied pictures
are to be saved.
Note – Transferring pictures
and videos
•Be advised that when transferring pictures
or videos from the Save2Data mini
(microSD card) to your terminal device, they
can only be saved in the
Photos Pictures folder.
•These pictures and videos can then be found
in the gallery on your terminal device.
Note – Save2Data folder
•When you transfer data from the Save2Data
mini (microSD card) to your terminal device,
a folder is created in the internal storage
called Save2Data.
•This folder can only be accessed by the
Save2Data app.
•Please note that if you remove the app from
your terminal device, the les in this folder
will be deleted.
•Before saving the le you may create a new
folder (only on the Save2Data mini (microSD
card), not on the terminal device).
•To do this, choose the option Create folder in
the bottom-left corner of the display and enter a
name for the folder.
•After selecting the desired target folder, save
the le(s) by selecting the Paste option in the
bottom-right corner of the display.
•Then the transfer window opens to show the
progress of the transfer.
•Successfully transferred data are listed under the
Succeeded tab.
•If the transfer is interrupted, the les affected are
listed under the Failed tab.
•
You are returned to the folder in which you
selected the pictures to be transferred.
Note – Transferring data
Since the procedure for transferring videos,
documents, etc. is identical, the corresponding
sections of these instructions refer to this
section.
Note – Transferring from and to the
same storage device
It is possible to transfer les from and to the
same storage device (for example, pictures and
videos from the Save2Data mini (microSD
card) into a sub-folder).
6.1.3 Additional options in the context menu
•Photos
•By default, the pictures stored on the
Save2Data mini (microSD card) are displayed.

11
•Choose whether the pictures from the
Save2Data (microSD card) or your
terminal device should be shown.
•Select in the top-right corner of
the display
•
Use the circle at the left edge of the display to
select the picture(s) that you wish to transfer. On
successful selection, the circle turns red with a
white check mark
•To select all pictures at once, tap Select all at
the top-left corner of the display.
•Aside from the options to copy and move, the
context menu at the bottom edge of the display
also provides other options.
•Delete: Deletes the selected file(s) from the
storage location.
•Share: Opens the context menu of the
terminal device.
•More: The Rename option is displayed. This
option is only available for storage locations
on the Save2Data mini (microSD card) and
with a single file selected. Enter a new file
name and confirm with OK.
Note – Additional option
•The New folder and Rename options
are only available in the storage of the
Save2Data mini (microSD card).
•Since the procedures for these additional
options are identical for videos, documents,
etc., the corresponding sections of these
instructions refer to this section.
6.2 Playback and transfer of videos
6.2.1 Playback of videos
•Videos
•By default, the videos stored on the Save2Data
mini (microSD card) are displayed.
•Choose whether the video from the
Save2Data (microSD card) or your
terminal device should be play.
•Tap the video which is to be played.
•The video is displayed in playback mode and
playback begins automatically.
•Various options are available.
•
Switch between full-screen and window modes
•
Play the previous video
•/
Start/pause playback
•
Play the next video

12
6.2.2 Transferring videos
Note – Transferring videos
•See section 6.1.2
•Procedure identical to transferring pictures
6.2.3 Additional options in the
context menu
Note – Additional options
•See section 6.1.3
•Options identical to context menu for pictures
6.3 Playback and transfer of music
6.3.1 Music playback
•Music
•By default, the tracks stored on the Save2Data
mini (microSD card) are displayed.
•Choose whether the music from the
Save2Data (microSD card) or your
terminal device should be played.
•Tap the track which is to be played.
•The track is displayed in playback mode and
playback begins automatically.
•Various options are available.
•
Opens a list of all tracks stored on the
Save2Data mini (microSD card) or terminal
device.
•/ / /
Play tracks in order / Repeat entire playlist /
Repeat single track / Play tracks in random
order (shue)
•
Play the previous track
•/
Start/pause playback
•
Play the next track
•
Opens the context menu of the terminal device
•
Adjust volume

13
6.3.2 Transferring music
Note – Transferring music
•See section 6.1.2
•Procedure identical to transferring pictures
•Music can only be transferred from the
terminal device to the Save2Data mini
(microSD card), not the other way.
•Alternatively, you may save music in the
app’s folder, called Save2Data. Music saved
in this folder may only be accessed using the
Save2Data app.
6.3.3 Additional options in the
context menu
Note – Additional options
•See section 6.1.3
•Options identical to context menu for pictures
7. Backing up data and contacts
7.1 Backing up data
Note – Backing up data
•This menu only backs up pictures and video
from your terminal device.
•Music must be transferred manually.
•Backup
•On the left, two options are available: Data
Backup and Backup Contacts.
•By default, Back up data is selected.
•Starting Backup
•All pictures and videos stored on the terminal
device are automatically saved on the
Save2Data mini (microSD card).
•Files already present are not saved again.
•A folder called Backup is created on the
Save2Data mini (microSD card).
•The sub-folder called Phone Backup contains
all saved pictures and videos.
•Once the backup is completed, an overview
is shown of the number of les successfully
backed up and the number of les for which the
backup failed.

14
7.2 Backing up and restoring contacts
•Backup
•On the left, two options are available: Data
Backup and Backup Contacts.
•By default, Back up data is selected.
•Backup Contacts
•A new menu opens on the right side with which
you can either begin the backup or import
contacts.
•Starting Backup
•All contacts on the terminal device are stored
in .vcf format.
•Once the backup is complete, a message shows
the backup location.
•Import Contacts
•All available contact backups (.vcf les) are
displayed.
Note – Importing contacts
•The le names of saved contact backups are
composed of the date of the backup with no
separators.
•on the desired backup le
•Restoring of the contacts begins.
8. File management via folder structure
•Files
•Then the Save2Data mini (microSD card) is
connected, you automatically access its storage.
•Choose whether to access the folder structure
of the Save2Data (microSD card) or
your terminal device.
•Then you can exchange, move, rename or delete
les between the two storage devices.
•The procedure for transferring les is identical to
transferring pictures (see section 6.1.2).
•Aside from data transfers, this menu also allows
you to create new folders.
•
•Enter a folder name and conrm with OK.
Note – Transferring documents
•This menu allows you to open and transfer
documents (such as .pdf documents, tables,
etc.).
•Transferring documents directly to the
terminal device is not possible. You can save
documents only in the Save2Data folder in
the terminal device view.
•This folder is bound to the Save2Data app.
You can access this folder only using the app.
•If you delete the Save2Data app, any les
contained within the Save2Data folder are
also deleted.

15
9. Taking pictures with the Save2Data app
•in the main menu
Note – Camera feature
•The camera feature appears in the app only
if the Save2Data mini (microSD card) is
connected to your terminal device.
•If prompted, conrm that the app has permission
to access your camera and/or microphone.
•At the top edge of the display, you can choose
between photo and video recording.
•If your terminal device is equipped with a ash,
you can enable it.
•
•You also have the option to choose between the
front camera and the main camera of your
terminal device.
Note – Saving photos
Photos that you take are saved directly on the
Save2Data mini (microSD card) in a separate
folder (Camera or Video).
10. Additional settings of the Save2Data app
•System
•Cache: Allows you to empty the cache (buffer)
or adjust its size.
•Language: Allows you to set the language of
the app.
•Third-party player settings: Choose a
standard player for playback of le formats that
are not supported by iOS but can be played by
third-party players.
Five different players are available for selection.
To use one of these players, it must be installed
via the Apple App Store.
•About: Displays information about the app and
its publisher.
11. Warranty Disclaimer
Hama GmbH & Co. KG assumes no liability and
provides no warranty for damage resulting from
improper installation/mounting, improper use of
the product or from failure to observe the operating
instructions and/or safety notes.
12. Service and Support
Please contact Hama Product Consulting if you
have any questions about this product.
Hotline: +49 9091 502-115 (German/English)
Further support information can be found here:
www.hama.com

16
Inhaltsverzeichnis
1. Erklärung von Warnsymbolen und Hinweisen..............................................................Seite 17
2. Packungsinhalt .............................................................................................................Seite 17
3. Sicherheitshinweise.......................................................................................................Seite 17
4. Technische Daten...........................................................................................................Seite 18
5. Inbetriebnahme des Save2Data mini............................................................................Seite 18
5.1 Erläuterung der wichtigsten Symbole/Icons der Save2Data App ..................................Seite 19
6. Wiedergabe und Übertragung von Bildern, Videos oder Musik
6.1 Wiedergabe und Übertragung von Bildern
6.1.1 Wiedergabe von Bildern....................................................................................Seite 20 /21
6.1.2 Übertragung von Bildern...................................................................................Seite 21-23
6.1.3 Weitere Optionen des Kontextmenüs.................................................................Seite 23
6.2 Wiedergabe und Übertragung von Videos
6.2.1 Wiedergabe von Videos ....................................................................................Seite 24
6.2.2 Übertragung von Videos ...................................................................................Seite 24
6.2.3 Weitere Optionen des Kontextmenüs.................................................................Seite 24
6.3 Wiedergabe und Übertragung von Musik
6.3.1 Wiedergabe von Musik.....................................................................................Seite 24/ 25
6.3.2 Übertragung von Musik ....................................................................................Seite 25
6.3.3 Weitere Optionen des Kontextmenüs.................................................................Seite 25
7. Sicherung von Daten und Kontakten
7.1 Sicherung von Daten .................................................................................................Seite 26
7.2 Sicherung und Wiederherstellung von Kontakten........................................................Seite 26
8. Dateiverwaltung über die Ordnerstruktur.....................................................................Seite 27
9. Aufnahme von Bildern mit der Save2Data App ............................................................Seite 27 /28
10. Weitere Einstellungen der Save2Data App ...................................................................Seite 28
11. Haftungsausschluss .......................................................................................................Seite 28
12. Service und Support.......................................................................................................Seite 28
Entsorgungshinweise ....................................................................................................Seite 30
DBedienungsanleitung

17
Vielen Dank, dass Sie sich für ein Hama Produkt entschieden haben!
Nehmen Sie sich Zeit und lesen Sie die folgenden Anweisungen und Hinweise zunächst ganz durch.
Bewahren Sie diese Bedienungsanleitung anschließend an einem sicheren Ort auf, um bei Bedarf darin
nachschlagen zu können. Sollten Sie das Gerät veräußern, geben Sie diese Bedienungsanleitung an den
neuen Eigentümer weiter.
1. Erklärung von Warnsymbolen und Hinweisen
Warnung
Wird verwendet, um Sicherheitshinweise zu kennzeichnen oder um Aufmerksamkeit auf
besondereGefahrenundRisiken zu lenken.
Hinweis
Wird verwendet, um zusätzlich Informationen oder wichtige Hinweise zu kennzeichnen.
2. Packungsinhalt
•Lightning Kartenleser „Save2Data mini“
3. Sicherheitshinweise
•Das Produkt ist für den privaten, nicht-gewerblichen Haushaltsgebrauch vorgesehen.
•Schützen Sie das Produkt vor Schmutz, Feuchtigkeit und Überhitzung und verwenden Sie es nur in
trockenen Räumen.
•Betreiben Sie das Produkt nicht in unmittelbarer Nähe der Heizung, anderer Hitzequellen oder in
direkter Sonneneinstrahlung.
•Lassen Sie das Produkt nicht fallen und setzen Sie es keinen heftigen Erschütterungen aus.
•Versuchen Sie nicht, das Produkt selbst zu warten oder zu reparieren. Überlassen Sie jegliche
Wartungsarbeit dem zuständigen Fachpersonal.
•Öffnen Sie das Produkt nicht und betreiben Sie es bei Beschädigungen nicht weiter.
•Entsorgen Sie das Verpackungsmaterial sofort gemäß den örtlich gültigen Entsorgungsvorschriften.
•Nehmen Sie keine Veränderungen am Produkt vor. Dadurch verlieren sie jegliche
Gewährleistungsansprüche.
•Dieses Produkt gehört, wie alle elektrischen Produkte, nicht in Kinderhände!

18
4. Technische Daten
Lightning Kartenleser „Save2Data mini“
Stromversorgung 3,3 V max. 100mA
Speicherkarten microSD/microSDHC/microSDXC
Anschlüsse Lightning(8 Pin-Anschluss)
Betriebssysteme •iOS 7.0 oder neuere Versionen
•Voraussetzung: Installation der Hama App Save2Data
5. Inbetriebnahme des Save2Data mini
Hinweis – microSD-/ microSDHC-/ microSDXC-Speicherkarten
•Um die eingesetzte Speicherkarte problemlos verwenden zu können, ist eine Formatierung in dem
Dateiformat FAT32 notwendig.
•Für eine optimale Übertragung Ihrer Daten/ Dateien wird eine Verwendung von Speicherkarten ab
Class10 empfohlen.
•Laden Sie die Hama App Save2Data aus dem Apple App Store herunter.
•Stecken Sie Ihre microSD Karte in den entsprechenden Slot des Save2Data mini Kartenlesers.
•Schließen Sie den Save2Data mini Kartenleser mit Hilfe des Lightning Anschlusses an Ihr Endgerät
(iPhone/iPad) an.
•Öffnen Sie die App Save2Data.
Hinweis – Symbol
Dieses Symbol wird verwendet, wenn Sie den Bildschirm an einer bestimmten Stelle berühren
müssen, um eine Aktion durchzuführen oder ein Menü zu öffnen.

19
5.1 Erläuterung der wichtigsten Symbole/
Icons der Save2Data App
Hauptmenü
Menü zur Betrachtung und
Übertragung von Bildern
Menü zur Wiedergabe und
Übertragung von Videos
Menü zur Wiedergabe von Musik
Menü zum Sichern und
Wiederherstellen von Daten und
Kontakten
Menü zum Zugriff auf die
Ordnerstruktur der microSD Karte
und Endgeräts
Menü für Systemeinstellungen
Ermöglicht Zugriff auf die auf dem
Endgerät gespeicherten Daten
Anzeige des belegten und
verfügbaren Speichers des
Endgerätes
Ermöglicht Zugriff auf die auf
der microSD Karte gespeicherten
Daten
Anzeige des belegten und
verfügbaren Speichers der microSD
Karte
Öffnet die Kameraoption der
Save2Data App
Weitere Symbole/Icons
Zurück zur vorherigen Ansicht
Zurück in das Hauptmenü
Bei Zugriff auf den Save2Data
mini (microSD Karte): Öffnet
Menü zur Änderung der Ansicht
und Sortierung der Daten.
Bei Zugriff auf das Endgerät:
Listenansicht der Daten
Listenansicht der gespeicherten
Daten (nur Save2Data mini
(microSD Karte))
Vorschauansicht (Thumbnail) der
gespeicherten Daten
/Wechsel zwischen dem Speicher
des Save2Data mini (microSD
Karte) und dem Speicher des
Endgerätes
Rot = aktiver Speicher
Grau = inaktiver Speicher
/
Neuen Ordner im Menü Dateien
erstellen (nur bei Zugriff auf
Save2Data mini (microSD Karte))
/
Auswahl von Dateien/Ordnern
zur Verwendung der Optionen im
Kontextmenü
Kopieren der ausgewählten
Datei(en)

20
Löschen der ausgewählten
Datei(en)
Teilen: Öffnet das Kontextmenü
des Endgerätes
Mehr: Öffnet Menü zum
Verschieben oder Umbenennen
(nur bei Zugriff auf Save2Data
mini (microSD Karte)) der
ausgewählten Datei(en)
Hinweis – App Berechtigung
•Die Hama App Save2Data benötigt für
einige Funktionen die Berechtigung zum
Zugriff auf Ihr Endgerät (z.B. Kontaktdaten
sichern/ wiederherstellen, Bilder sichern, etc.)
•Sollte die App keine Berechtigung haben,
erhalten Sie bei Ausführung einer solchen
Funktion eine entsprechende Meldung.
•Um den Zugriff zu erlauben, wählen Sie die
Hama App Save2Data in den Einstellungen
Ihres Endgerätes aus und schieben den
entsprechenden Regler auf grün.
6. Wiedergabe und Übertragung von
Bildern, Videos oder Musik
6.1 Wiedergabe und Übertragung von
Bildern
6.1.1 Wiedergabe von Bildern
•Fotos
•Standardmäßig werden die auf dem Save2Data
mini (microSD Karte) gespeicherten Bilder
angezeigt.
•Wählen Sie, ob die Bilder von Save2Data
(microSD Karte) oder von Ihrem Endgerät
wiedergegeben werden sollen.
•Berühren Sie das Bild, welches
wiedergegeben werden soll.
•Das Bild wird im Wiedergabemodus angezeigt.
•Sie erhalten verschieden Optionen.
•/
Wählen Sie, ob die automatische Wiedergabe
nach Anzeige des letzten Bildes stoppt oder
erneut beginnen soll.

21
•/
Starten oder pausieren Sie die automatische
Wiedergabe.
Hinweis: nach wenigen Sekunden wechselt die
automatische Wiedergabe in den Vollbildmodus.
Wenn Sie den Bildschirm berühren, wird die
automatische Wiedergabe umgehend pausiert.
•/
Starten oder pausieren Sie die Hintergrundmusik.
Hinweis: Um die Hintergrundmusik zu aktivieren,
gehen Sie zuerst in das Menü Musik und starten
Sie die Wiedergabe eines Titels. Wechseln Sie
nun wieder in das Menü Fotos und starten Sie
den Wiedergabemodus. Die Musik wird im
Hintergrund weiter spielen.
•
Speichert das wiedergegebene Bild direkt
auf dem Endgerät (nur bei Wiedergabe vom
Save2Data mini (microSD Karte)).
•
Öffnet das Kontextmenü des Endgerätes mit
verschiedenen Optionen.
6.1.2 Übertragung von Bildern
•Fotos
•Standardmäßig werden die auf dem Save2Data
mini (microSD Karte) gespeicherten Bilder
angezeigt.
•Wählen Sie, ob die Bilder vom Save2Data
(microSD Karte) oder von Ihrem Endgerät
übertragen werden sollen.
•Bestätigen Sie ggf., dass die App auf Ihre Fotos
zugreifen darf.
•Auswählen in der rechten oberen
Display-Ecke.
•
Wählen Sie über den Kreis am linken Displayrand
das oder die Bilder aus, die Sie übertragen
möchten. Nach erfolgreicher Auswahl färbt sich
der Kreis rot mit einem weißen Haken
•Wenn Sie alle Bilder auf einmal markieren
möchten, wählen Sie Alles wählen in der linken
oberen Display-Ecke.
•Die unten angezeigten Menüpunkte werden
nach erfolgter Auswahl verfügbar.
•Sie erhalten verschiedene Optionen
•Kopieren (Datei bleibt auf dem
ursprünglichen Speicher erhalten)
•Verschieben (Bild wird vom ursprünglichen
Speicher entfernt) (Sie nden die Option
Verschieben in dem Menüpunkt Mehr)

22
•Nachdem Sie eine der oben genannten Optionen
gewählt haben, öffnet sich der jeweils andere
Zielspeicherort.
•Am Displayrand Mitte/oben können Sie zwischen
Interner Speicher (Endgeräte) und Externer
Speicher (ihrer microSD Karte) wählen. So
können Sie z.B. Bilder in einen Unterordner ihrer
microSD Karte kopieren oder verschieben.
•Wählen Sie den Ordner in den die kopierten
Bilder eingefügt werden sollen.
Hinweis – Übertragung von Bildern
und Videos
•Beachten Sie, wenn Sie Bilder oder Videos
vom Save2Data mini (microSD Karte) auf
Ihr Endgerät überspielen, können Sie diese
nur in den Ordner Photos Aufnahmen
einfügen.
•Diese Bilder und Videos sind dann auch in
der Galerie Ihres Endgerätes zu nden.
Hinweis – Ordner Save2Data
•Beim Übertragen von Dateien vom
Save2Data mini (microSD Karte) auf Ihr
Endgerät steht Ihnen im internen Speicher
der Ordner Save2Data zur Verfügung.
•Auf diesen Ordner kann nur über die
Save2Data App zugegriffen werden.
•Beachten Sie, dass die Dateien in diesem
Ordner gelöscht werden, sollten Sie die App
von Ihrem Endgerät entfernen.
•Vor dem Einfügen haben Sie die Möglichkeit,
einen neuen Ordner zu erstellen (nur auf dem
Save2Data mini (microSD Karte), nicht auf
dem Endgerät).
•Wählen Sie dazu die Option Ordner erstellen
in der linken unteren Display-Ecke aus und
geben Sie einen Ordnernamen ein.
•Wenn Sie den gewünschten Ordner gewählt
haben, fügen Sie die Datei(en) über die Option
Einfügen in der rechten unteren Display-Ecke
ein.
•Im Anschluss öffnet sich das Transferfenster, in
welchem Sie die Übertragung nachverfolgen
können.
•Die erfolgreich übertragenen Daten nden Sie
unter dem Reiter Erfolgreich.
•Sollte die Übertragung nicht fehlerfrei ablaufen,
werden die entsprechenden Dateien unter dem
Reiter Fehlgeschlagen angezeigt.
•
Sie gelangen zurück in den Ordner, in dem die zu
übertragenden Bilder ausgewählt wurden.
Hinweis – Übertragung von Daten
Da die Übertragung von z.B. Videos oder
Dokumenten auf die gleiche Weise abläuft,
wird an den entsprechenden Stellen auf dieses
Kapitel verwiesen.
This manual suits for next models
1
Table of contents
Languages:
Other Hama Card Reader manuals

Hama
Hama 91066 User manual

Hama
Hama Save2Data mini User manual

Hama
Hama 114836 User manual

Hama
Hama TravelDrive 8in1 USB User manual

Hama
Hama 91092 User manual

Hama
Hama 00055349 User manual

Hama
Hama 00114836 User manual

Hama
Hama 00049241 User manual

Hama
Hama Photo Player User manual

Hama
Hama 14978 User manual
Popular Card Reader manuals by other brands

ACS
ACS ACR30 Reference manual

IDENTEC SOLUTIONS
IDENTEC SOLUTIONS i-MARK 2 Installation and Hardware Manual

Controlsoft
Controlsoft CS-AC-1100-BK installation instructions

JARLTECH
JARLTECH 1260A Operation manual

Cansec
Cansec CanProx One installation instructions

Eelectron
Eelectron TR22A01KNX Product handbook