No burrs allowed
Break sharp edges: Rmax:0.3 mm / 0.3 mmx 45degrees
Replaces drawing/part number (Linido Part No)
Unless otherwise stated, general tolerances according to ISO 2768-m
Omitted dimensions according to
[90003465_06_Carina350EM.dwg/step]
REVISION HISTORY
REV.
POS.
DESCRIPTION
DATE
DRAWN BY
Art. no.
extension
RAL code
Color
00
Stainless steel polished
Blanc
02
RAL 9010
White
03
RAL9005
Black
04
RAL3003
Red
07
RAL5002
Blue
08
RAL9001
Créme white
09 (special)
Divers
Color
D
E
F
C
1
2
3
4
B
A
3
2
1
5
C
D
4
6
7
8
A
B
This drawing and any information or descriptive matter set out hereon are the confidential and copyright property of Handicare
and must not be disclosed, loaned, copied or used for manufacturing, tendering or any other purpose without their written permission.
06
SCALE
PROJECTION
Material <not specified>
MATERIAL SPECIFICATION:
A3
2015-03-05
32312.24 g
90003465
Carina350EM
Released
SIZE
MATERIAL:
TITLE
STATUS
WEIGHT:
SHEET 1 OF 1
CREATED
DATE
NAME
REV.
DWG. NO.
1:20
5
6
E
hc-laek
1
2
No burrs allowed
Break sharp edges: Rmax:0.3 mm / 0.3 mmx 45degrees
Replaces drawing/part number (Linido Part No)
Unless otherwise stated, general tolerances according to ISO 2768-m
Omitted dimensions according to
[90003465_06_Carina350EM.dwg/step]
REVISION HISTORY
REV.
POS.
DESCRIPTION
DATE
DRAWN BY
Art. no.
extension
RAL code
Color
00
Stainless steel polished
Blanc
02
RAL 9010
White
03
RAL9005
Black
04
RAL3003
Red
07
RAL5002
Blue
08
RAL9001
Créme white
09 (special)
Divers
Color
D
E
F
C
1
2
3
4
B
A
3
2
1
5
C
D
4
6
7
8
A
B
This drawing and any information or descriptive matter set out hereon are the confidential and copyright property of Handicare
and must not be disclosed, loaned, copied or used for manufacturing, tendering or any other purpose without their written permission.
06
SCALE
PROJECTION
Material <not specified>
MATERIAL SPECIFICATION:
A3
2015-03-05
32312.24 g
90003465
Carina350EM
Released
SIZE
MATERIAL:
TITLE
STATUS
WEIGHT:
SHEET 1 OF 1
CREATED
DATE
NAME
REV.
DWG. NO.
1:20
5
6
E
hc-laek
4
REVISION HISTORY
REV.
DESCRIPTION
DATE
APPROVED
B
C
D
1
2
A
3
2
1
4
B
A
5
6
C
3
SCALE:1:5
DWG. NO.
REV.
NAME
DATE
DRAWN
APPROVED BY
SHEET 1 OF 1
WEIGHT:
COMMENTS:
STATUS:
TITLE
MATERIAL:
SIZE
139402makn@z40
g
2014-09-26
A4
Unless otherwise stated,
general tolerances
according to ISO 2768-m
This drawing and any information or descriptive matter set out hereon are the confidential and copyright property of Handicare
and must not be disclosed, loaned, copied or used for manufacturing, tendering or any other purpose without their written permission.
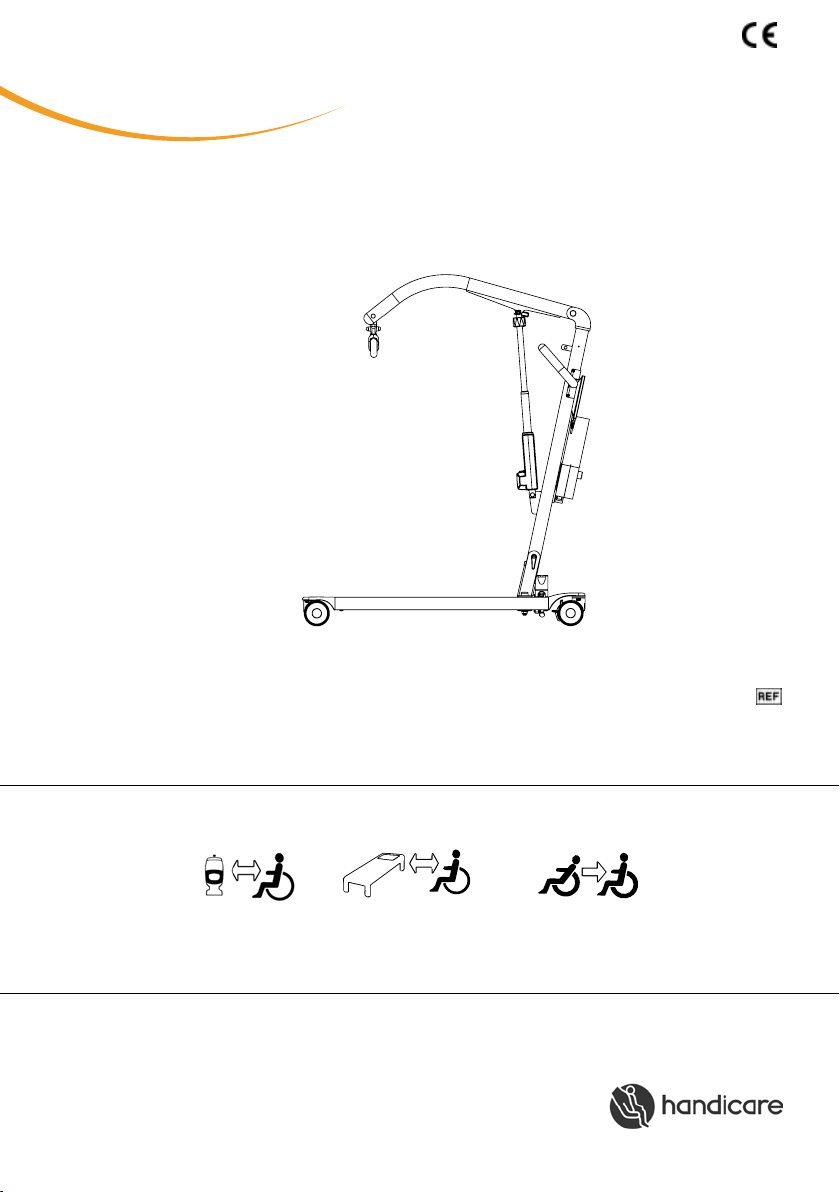
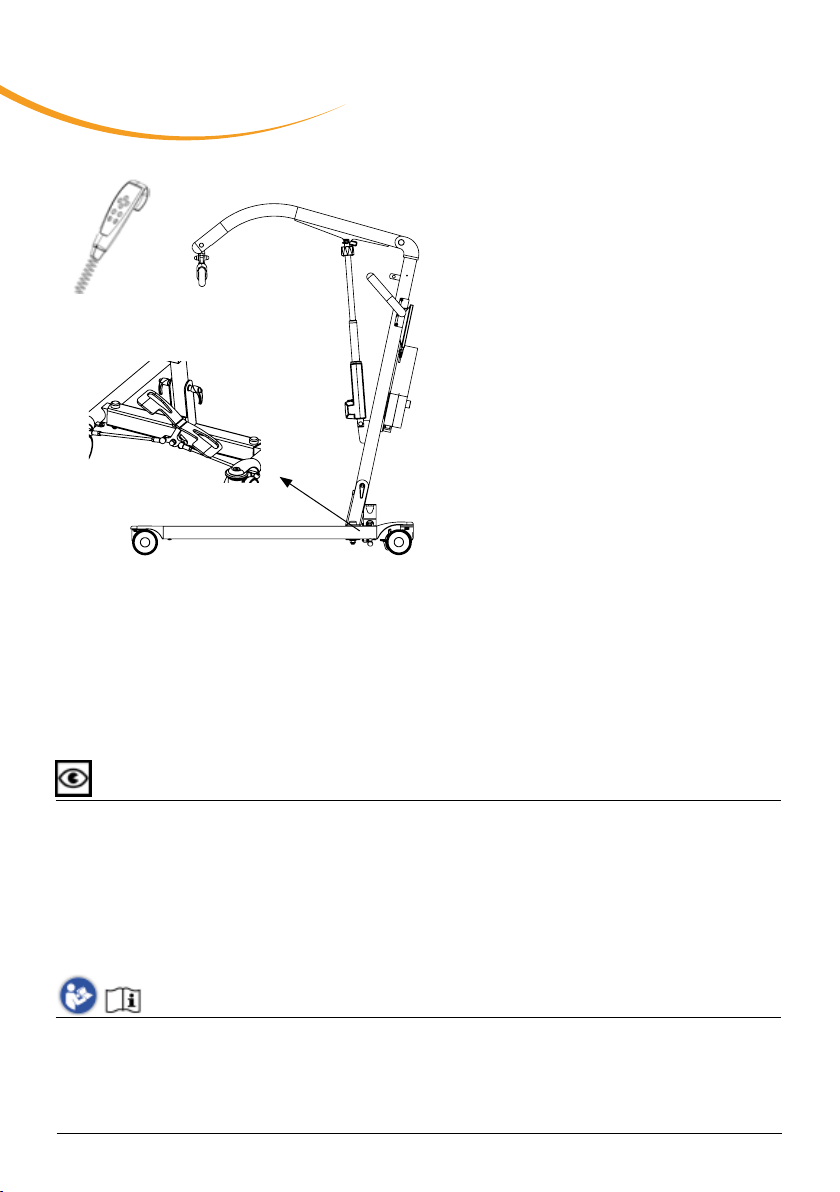
The lift is collapsed when delivered. Set up the lift, according to the following instructions
(no tools required)
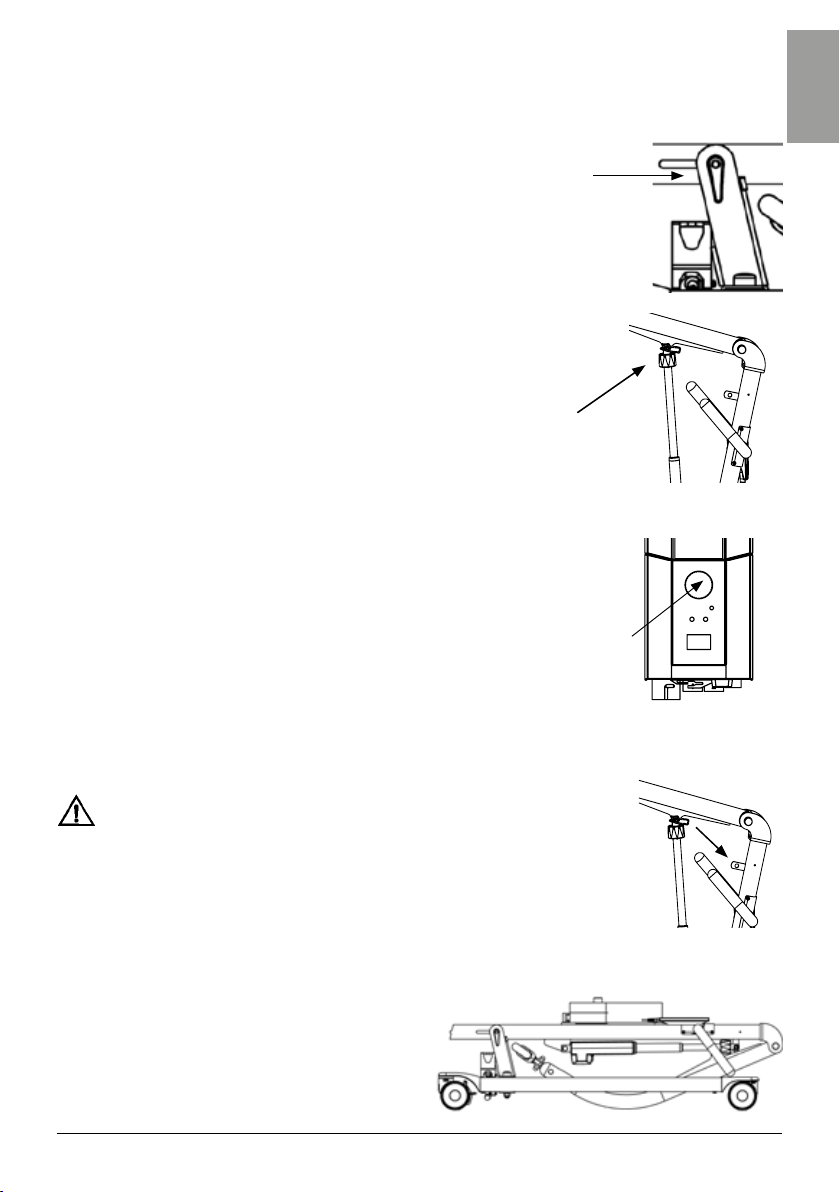
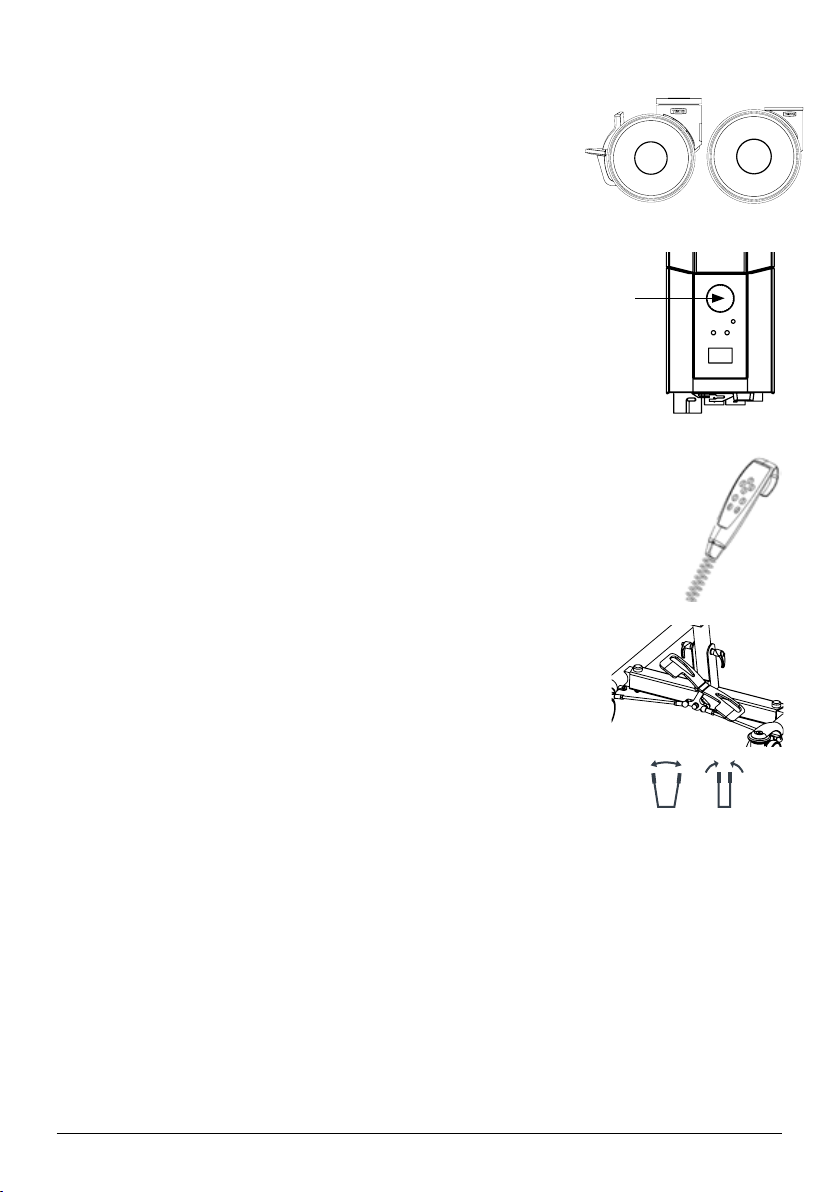
1. Lock castor brakes.
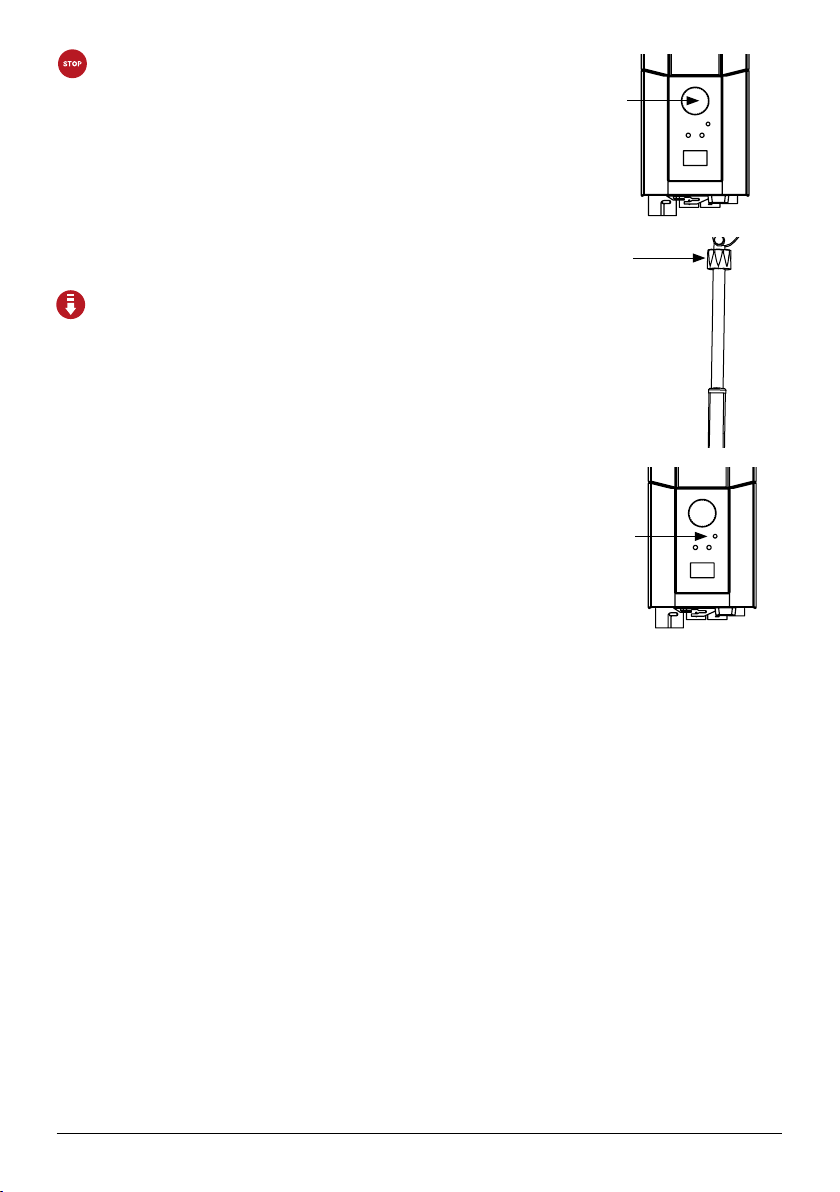
2. Loosen the locking handle at the base of the mast (image 1).
3. Pull the mast forward, lift it up and place it in the base.
4. Tighten locking handle (image 1).
5. Loosen the tension strap that holds the lift arm and lift up the lift arm.
6. Remove the actuator from the mount on the mast and move it to the mount on
the lift arm (image 2).
7. Check all mounting fixtures and locking handles (images 1 and 2).
8. Deactivate the emergency stop (image 3) and perform a final inspection (see Final
inspection).
To collapse the lift, follow the instructions below
1. Lock castor brakes.
2. Run the lift arm to the lowest position, and then press in the emergency stop.
3. Remove the actuator from the lift arm by freeing the quick-connecting locking pin
and moving it to the mount on the mast (diagram 4). Make sure the pin is facing the
right way up.
4. Lower the lift arm and secure it to the link on the sling bar with the tension strap.
NOTE! Warning for risk of pinching (between boom and mast).
5. Loosen the locking handle at the base of the mast (image 1). The locking handle
doesn´t need to be removed.
6. Lift up on the mast and lower it towards the undercarriage.
7. Pull the mast back and tighten the locking handle (image 1)
Assembly
Check to ensure that the following components are included
Mast with lift arm, lift motor, sling bar and control box.
Undercarriage with base-width adjustment pedals.
Quick-connecting locking pin for mounting actuator.
Hand control and cord.
Locking handle for mounting mast on undercarriage.
User manual.
Charging cord.
English
3
5
MANUAL
SystemRoMedicTM