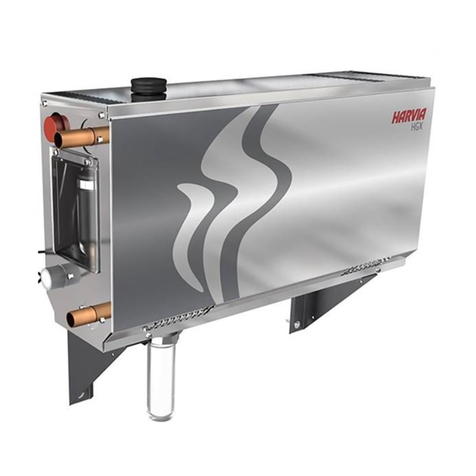
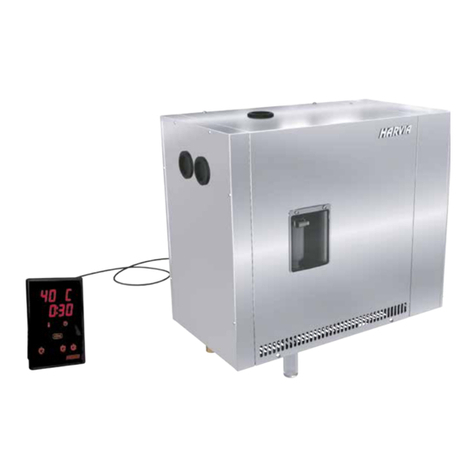
Harvia HGS45 User manual

24082007
Instructions for Installation and Use of Steam Generator
Gebrauchs- und Montageanleitung des Dampfgenerators
HGS45, HGS60, HGS90, HGS11
EN
DE

These instructions for installation and use are
intended for owners of steam rooms and steam
generators, persons in charge of managing steam
rooms and steam generators, and for electricians
responsible for installing steam generators.
Once the steam generator is installed, these
instructions for installation and use are handed
over to the owner of the steam rooms and the
steam generator, or to the person in charge of
maintaining them. Congratulations on making an
excellent choice!
STEAM
Steam generator's purpose of use: The Steam
steam generator is meant for warming the steam
room to a bathing temperature. It is not to be
used for any other purpose.
The guarantee period for steam generators and
control equipment used by families is two (2)
years. The guarantee period for steam generators
and control equipment used in community steam
rooms is one (1) year. The guarantee period for
steam generators and control equipment used by
institutions is three (3) months.
The guarantee does not apply if the requirements
for water quality presented in table 1 are not met,
if the device is not serviced as defined in chapter
1.4., and/or if the device is not installed as defined
in chapter 2.
EN
INHALT
DE
Diese Montage- und Gebrauchsanleitung
richtet sich an Besitzer von Dampfkabinen und
Dampfgeneratoren, an Personen, die für den
Betrieb von Dampfkabinen und Dampfgeneratoren
verantwortlich sind, sowie an Elektromonteure, die
mit der Montage von Dampfgeneratoren betraut
sind. Nach der Montage des Dampfgenerators
ist diese Montage- und Gebrauchsanleitung
dem Besitzer der Dampfkabinen und des
Dampfgenerators oder der für die Wartung der
Anlagen zuständigen Person auszuhändigen. Wir
beglückwünschen Sie zu Ihrer guten Wahl!
STEAM
Verwendungszweck des Dampfgenerators:
Der Dampfgenerator dient zum Erwärmen von
Dampfkabinen auf die Dampfbadtemperatur. Er
darf nicht für andere Zwecke verwendet werden.
Die Garantiezeit von Dampfgeneratoren und
Steuergeräten für den Heimgebrauch beträgt zwei
(2) Jahre. Die Garantiezeit von Dampfgeneratoren
und Steuergeräten, die in Gemeinschafts-
Dampfkabinen verwendet werden, beträgt ein (1)
Jahr. Die Garantiezeit von Dampfgeneratoren und
Steuergeräten, die in öffentlichen Dampfkabinen
verwendet werden, beträgt drei (3) Monate.
Diese Garantie gilt nicht, wenn die Anforderungen
an die Wasserqualität gemäß Tabelle 1 nicht
erfüllt werden, das Gerät nicht wie in Kapitel 1.4.
beschrieben gewartet und/oder das Gerät nicht
wie in Kapitel 2 beschrieben installiert wird.
CONTENTS
1. INSTRUCTIONS FOR USE.................................. 3
1.1. Steam Generator System Components ......... 3
1.2. Using the Steam Generator......................... 4
1.3. Using Accessories ..................................... 4
1.3.1. Fragrance Pump (optional).................... 4
1.3.2. Lighting ............................................. 6
1.3.3. Ventilation ......................................... 6
1.4. Steam Generator Maintenance ....................6
1.4.1. Surface Sensor Maintenance ................ 6
1.4.2. Decalcification.................................... 7
1.4.3. Cleaning the Steam Nozzles ................. 7
1.5. Warnings.................................................. 7
1.6. Troubleshooting ........................................ 8
2. INSTRUCTIONS FOR INSTALLATION .................. 9
2.1. Prior to Installation..................................... 9
2.2. Installation Place and Fastening the Steam
Generator........................................................ 9
2.3. Electrical Connections .............................. 10
2.4. Connecting the Steam Generator to the
Water System................................................ 10
2.5. Steam Pipes............................................ 10
2.6. Installing the Steam Nozzles ..................... 11
2.7. Installing the Fragrance Pump ................... 12
2.8. Installing the Automatic Discharge Valve .... 12
2.9. Installation Place and Fastening the
Control Panel ................................................. 12
2.10. Installing the Temperature Sensor............ 12
2.11. Resetting the Overheat Protector ............. 13
3. SPARE PARTS ............................................... 13
1. ANLEITUNG FÜR DEN BENUTZER....................... 3
1.1. Komponenten des Dampfgeneratorsystems... 3
1.2. Verwendung des Dampfgenerators .............. 4
1.3. Verwendung des Zubehörs .........................4
1.3.1. Duftkonzentratpumpe (optional) ............ 4
1.3.2. Beleuchtung ....................................... 6
1.3.3. Belüftung ........................................... 6
1.4. Wartung des Dampfgenerators .................... 6
1.4.1. Wartung des Oberflächenfühlers ........... 6
1.4.2. Entkalkung ......................................... 7
1.4.3. Reinigung der Dampfdüsen................... 7
1.5. Warnhinweise ........................................... 7
1.6. Störungsbeseitigung .................................. 8
2. ANLEITUNG FÜR DEN INSTALLATEUR................9
2.1. Vor der Montage ....................................... 9
2.2. Aufstellort und Befestigung des
Dampfgenerators.............................................. 9
2.3. Elektrische Anschlüsse ............................. 10
2.4. Anschließen des Dampfgenerators an die
Wasserversorgung.......................................... 10
2.5. Dampfrohre ............................................ 10
2.6. Montage der Dampfdüsen......................... 11
2.7. Montage der Duftkonzentratpumpe ............ 12
2.8. Montage des automatischen Auslassventils 12
2.9. Montageposition und Befestigung
des Bedienfelds.............................................. 12
2.10. Installieren des Temperaturfühlers............ 12
2.11. Zurücksetzen des Überhitzungsschutzes ... 13
3. ERSATZTEILE ................................................ 13

EN DE
3
1
10
12
6
7
95
11
3
13
9
2
4
Figure 1. Steam generator system components
Abbildung 1. Komponenten des Dampfgeneratorsystems
Figure 2. The control panel
Abbildung 2. Bedienfeld
8
Open
Auf
Closed
Zu
Steam room
Dampfkabine
1. INSTRUCTIONS FOR USE
1.1. Steam Generator System Components
1. Control panel
2. Temperature sensor
3. Steam pipe
4. Steam nozzle
5. Water supply pipe
6. Water supply pipe valve
7. Discharge water pipe
8. Discharge valve
9. Floor drain
10. Overpressure valve
11. Connection cable
12. Junction box
13. Fragrance pump
Manual
Manuell
Automatic
Automatisch
1. ANLEITUNG FÜR DEN BENUTZER
1.1. Komponenten des Dampfgeneratorsystems
1. Bedienfeld
2. Temperaturfühler
3. Dampfrohr
4. Dampfdüse
5. Wasserzuleitung
6. Wasserzuleitungsventil
7. Wasserabflussrohr
8. Auslassventil
9. Bodenabfluss
10. Überdruckventil
11. Anschlusskabel
12. Anschlusskasten
13. Duftkonzentratpumpe
Indicator lights
Menu and navigation buttons
Operating buttons
Display
Temperature
Rinsing in progress
On time
Value decrease
Mode change
Value increase
Steam generator on/off
Fragrance pump on/off
Lighting on/off
Fan on/off
Kontrolllampen
Menü- und Navigationstasten
Bedientasten
Anzeige
Temperatur
Spülung läuft
Einschaltzeit
Wert verringern
Modus wechseln
Wert erhöhen
Dampfgenerator ein/aus
Duftkonzentratpumpe ein/aus
Beleuchtung ein/aus
Belüftung ein/aus

EN DE
4
1.2. Using the Steam Generator
Before starting the device, make sure that there are
no objects in the steam room that do not belong
there. Make sure that the steam vents freely from
the nozzle. Open the water supply pipe valve.
If the device has a manual discharge valve, empty
the water reservoir before using the device. Open
the discharge valve, let the reservoir drain and close
the valve before turning the device on.
Start the steam generator by pressing
the I/O button on the control panel.
When the device starts, the top row of the display
will show the set temperature and the bottom
row will show the set on time for five seconds.
If the device has an automatic discharge valve
(optional), it will first empty the water reservoir
(takes about 2 minutes) and then refill the reservoir
with fresh water (takes about 10 seconds).
When the water reaches the upper limit, the
heating elements will start to heat the water.
The heating elements are turned off when the
desired temperature has been reached in the
steam room or when the set on time runs out.
An error condition or pressing the I/O button will
also turn the heating elements off.
If there is still on time left and there are no error
conditions, the control system will turn the heating
elements on and off periodically to maintain the
desired temperature. The device will refill the
water reservoir during the use, when necessary.
The steam generator will turn off when the set on
time runs out or the I/O button is pressed. Turning
off the steam generator will also stop the fragrance
pump. Other accessories must be started and shut
down separately from their own operating buttons.
If the device has an automatic discharge valve,
the valve will open for 5 minutes after the steam
generator has turned off. The rinsing indicator
light glows and the display shows the decrease of
time.
Changing the remaining on time and the steam
room temperature is shown in figure 3. Changing
the factory set maximum on time, rinsing interval
and memory settings is shown in figure 3.
1.3. Using Accessories
1.3.1. Fragrance Pump (optional)
When turned on, the fragrance pump will feed
fragrance to the steam pipe.
Fill the fragrance container and attach the pump's
suction hose to the container before starting the
steam generator.
Start the fragrance pump by pressing the
control panel button.
1.2. Verwendung des Dampfgenerators
Bevor Sie das Gerät einschalten, stellen Sie sicher,
dass sich keine Fremdgegenstände in der Dampf-
kabine befinden. Vergewissern Sie sich, dass der
Dampf frei aus der Düse austritt. Öffnen Sie das
Sperrventil der Wasserzuleitung.
Wenn das Gerät mit einem manuellen Auslassventil
versehen ist, entleeren Sie den Wassertank, bevor Sie
das Gerät verwenden. Öffnen Sie das Auslassventil,
warten Sie, bis der Tank entleert ist, und schließen Sie
das Ventil, bevor Sie das Gerät einschalten.
Drücken Sie die I/O-Taste auf dem Bedien-
feld, um den Dampfgenerator einzuschalten.
Beim Einschalten des Geräts zeigt die obere Zeile
des Displays die eingestellte Temperatur, wäh-
rend die untere Zeile fünf Sekunden lang die Ein-
schaltzeit anzeigt.
Wenn das Gerät mit einem automatischen Aus-
lassventil versehen ist (optional), wird der Was-
sertank zunächst entleert (das Entleeren dauert
ca. 2 Minuten) und anschließend mit frischem
Wasser wieder aufgefüllt (das Auffüllen dauert
ca. 10 Sekunden).
Wenn das Wasser die obere Füllstandsgrenze
erreicht hat, beginnt das Heizelement das Was-
ser aufzuheizen. Die Heizelemente werden ausge-
schaltet, wenn die gewünschte Temperatur in der
Dampfkabine erreicht wurde oder die Einschaltzeit
abgelaufen ist. Wenn eine Störung auftritt oder
die I/O-Taste gedrückt wird, werden die Heizele-
mente ebenfalls ausgeschaltet.
Wenn noch Einschaltzeit verbleibt und keine
Störung vorliegt, schaltet das Steuersystem die
Heizelemente periodisch ein und aus, um die ge-
wünschte Temperatur aufrechtzuerhalten. Das
Gerät füllt den Wassertank während des Ge-
brauchs bei Bedarf automatisch auf.
Der Dampfgenerator schaltet sich aus, wenn die
Einschaltzeit abläuft oder die I/O-Taste gedrückt
wird. Beim Ausschalten des Dampfgenerators wird
die Duftkonzentratpumpe ebenfalls ausgeschaltet.
Sonstiges Zubehör muss mit den jeweiligen Tasten
separat ein- und ausgeschaltet werden.
Ist der Dampfgenerator mit einem automatischen
Auslassventil versehen, bleibt das Ventil nach dem Aus-
schalten des Generators für fünf Minuten geöffnet. Auf
dieser Weise leuchtet das Signallämpchen für die Spü-
lung und die Zeit wird unter auf dem Display angezeigt.
Das Ändern der verbleibenden Einschaltzeit und
der Dampfkabinentemperatur ist in Abbildung 3 dar-
gestellt. Das Ändern der Werkseinstellungen für die
Einschaltzeit, das Spülintervall und die Speicherein-
stellungen ist ebenfalls in Abbildung 3 dargestellt.
1.3. Verwendung des Zubehörs
1.3.1. Duftkonzentratpumpe (optional)
Wenn die Duftkonzentratpumpe eingeschaltet ist,
gibt Sie Duftstoffe an das Dampfrohr ab.
Füllen Sie den Duftkonzentratbehälter und
befestigen Sie den Ansaugschlauch der Pumpe am
Behälter, bevor Sie den Dampfgenerator starten.
Schalten Sie die Duftkonzentratpumpe
ein, indem Sie die Taste auf dem Bedien-
feld drücken.
EN DE
5
Figure 3. Steam generator settings
Abbildung 3. Einstellungen für den Dampfgenerator
*) Only devices with automatic discharge valve (optional) / Nur Geräte mit automatischem Auslassventil (optional)
**) Factory setting / Werkseinstellung
Open the settings menu by simultaneously
pressing the control panel buttons –,
MENU, and +. Press for 5 seconds.
Öffnen Sie das Einstellungsmenü, indem Sie auf
dem Bedienfeld gleichzeitig die Minustaste (–),
die MENU-Taste und die Plustaste (+) drücken.
Halten Sie die Tasten 5 Sekunden lang gedrückt.
The maximum on time can be changed
with the – and + buttons. The options
are 6 (**, 12, and 18 hours.
Die maximale Einschaltzeit kann mit der Plusta-
ste (+) und der Minustaste (–) geändert werden.
Es kann zwischen 6 (**, 12 und 18 Stunden
gewählt werden.
Press the MENU button. Drücken Sie die MENU-Taste.
The memory for power failures can be
turned (ON (**) or (OFF). The safety
regulations for memory usage vary from
region to region.
Der Speicher für Stromausfälle kann ein- oder
ausgeschaltet werden (ON (** oder OFF). Die
Sicherheitsvorschriften für die Verwendung des
Speichers können je nach Region variieren.
Press the MENU button. Drücken Sie die MENU-Taste.
Activate the automatic discharge valve.
Automatic discharge valve: ON
Manual discharge valve: OFF
•
•
Aktivierung des automatischen Auslassventils.
Automatisches Auslassventil: ON
Manuelles Auslassventil: OFF
•
•
Press the MENU button. Drücken Sie die MENU-Taste.
The rinsing interval (* can be changed
with the – and + buttons. The options
are 0.5, 1, 2 (**, and 4 hours.
Das Spülintervall (* kann mit der Plustaste (+)
und der Minustaste (–) geändert werden. Es
kann zwischen 0,5, 1, 2 (** und 4 Stunden
gewählt werden.
Return to basic mode by pressing the
MENU button.
Kehren Sie in den Basis-Modus zurück, indem
Sie die MENU-Taste drücken.
Press the MENU button. Drücken Sie die MENU-Taste.
The remaining on time can be changed with
the – and + buttons. The time changes in
10 minute steps. If the remaining time is
less than an hour, it can not be decreased
any more.
Die verbleibende Einschaltzeit kann mit der Plusta-
ste (+) und Minustaste (–) geändert werden. Die
Zeit kann in 10-Minuten-Schritten geändert werden.
Wenn die verbleibende Zeit weniger als eine Stunde
beträgt, kann sie nicht weiter verringert werden.
Press the MENU button. Drücken Sie die MENU-Taste.
The steam room temperature setting can
be changed with the – and + buttons. The
range is 30–55 0C.
Die Dampfkabinentemperatur kann mit der Plusta-
ste (+) und Minustaste (–) geändert werden. Der
Einstellbereich beträgt 30 bis 55 °C.
Return to basic mode by pressing the
MENU button.
Kehren Sie in den Basis-Modus zurück, indem Sie
die MENU-Taste drücken.
Changing the settings: remaining on time, steam room temperature setting
Ändern der Einstellungen: verbleibende Einschaltzeit, Einstellung für die Dampfkabinentemperatur
Changing the settings: maximum on time, rinsing interval (*, memory for power failures
Ändern der Einstellungen: maximale Einschaltzeit, Spülintervall (*, Speicher für Stromausfälle
Basic mode. The top row shows the steam
room temperature. The bottom row shows
the remaining on time.
Basis-Modus. Die obere Zeile zeigt die
Dampfkabinentemperatur an. Die untere Zeile zeigt
die verbleibende Einschaltzeit an.
This manual suits for next models
3
Table of contents
Other Harvia Iron manuals

Harvia
Harvia HGX45 User manual

Harvia
Harvia HGP22 User manual

Harvia
Harvia HGX60 User manual

Harvia
Harvia HGX20XW Guide

Harvia
Harvia HGP220XW User manual

Harvia
Harvia HGD45 User manual

Harvia
Harvia HGX2 User manual

Harvia
Harvia HGD45XW User manual

Harvia
Harvia HGX20XW User manual

Harvia
Harvia HGD45XW User manual