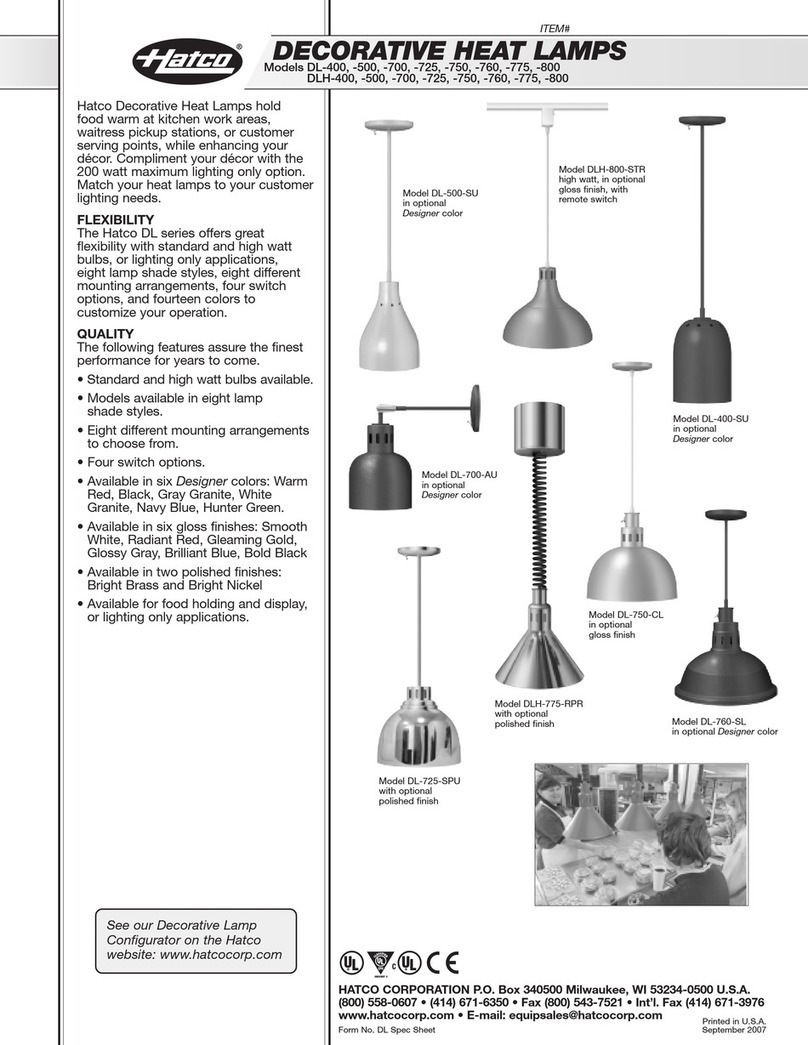
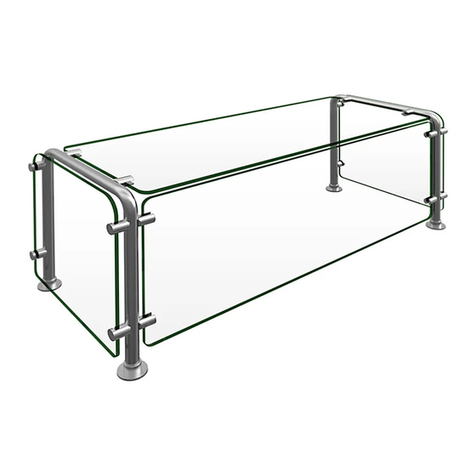
Hatco DL-400 User manual

31=@/B7D33/B /;>A
'3@73A
<AB/::/B7=</<2#>3@/B7<5!/<C/:
I&W #07.05.147.00
© 2010 atco Corporation
=<=B=>3@/B3B67A3?C7>;3<BC<:3AAG=C6/D3
@3/2/<2C<23@AB==2B631=<B3<BA=4B67A;/<C/:
/7:C@3B=4=::=EB637<AB@C1B7=<A1=<B/7<327<B67A
;/<C/:;/G@3AC:B7<A3@7=CA7<8C@G=@23/B6(67A
;/<C/: 1=<B/7<A 7;>=@B/<B A/43BG 7<4=@;/B7=<
1=<13@<7<5B63;/7<B3</<13CA3/<2=>3@/B7=<
=4B67A>@=2C1B4G=CQ@3C</0:3B=C<23@AB/<2B63
1=<B3<BA=4B67A;/<C/:>:3/A30@7<57BB=B63
/BB3<B7=<=4G=C@AC>3@D7A=@33>B67A;/<C/:7<
/A/43:=1/B7=<4=@4CBC@3@343@3<13
"==>3@33AB33?C7>=/:;3<=A?C36/G/:3J2=G
1=;>@3<272= 3: 1=<B3<72= 23 3AB3 ;/<C/:
C/:?C73@ 4/::/ 3< 3: A35C7;73<B= 23 :/A
7<AB@C117=<3A1=<B3<72/A3<3AB3;/<C/:>C323
@3AC:B/@3<C<A3@7=:3A7K<=;C3@B3AB3;/<C/:
1=<B73<37;>=@B/<B37<4=@;/17K<A=0@3A35C@72/2
1=<13@<73<B3/:;/<B3<7;73<B=CA=G=>3@/17K<
233AB3>@=2C1B='7CAB32<=>C3233<B3<23@3:
1=<B3<72=233AB3;/<C/:>=@4/D=@>@35C<B3/AC
AC>3@D7A=@ :;/13</@ 3AB3 ;/<C/: 3< C</
:=1/:7H/17K<A35C@/>/@/:/@343@3<17/4CBC@/
400 500 600 700 725 750 760 775 800
&357AB3@G=C@C<7B=<:7<3
See IMPORTANT OWNER INFORMATION section for details.

#"("('
2Form No. D LM-1010
;>=@B/<B#E<3@<4=@;/B7=<
<B@=2C1B7=<
;>=@B/<B'/43BG<4=@;/B7=<
!=23:3A1@7>B7=<
'>317471/B7=<A
Electrical Rating Chart.....................................................4
Dimensions — Lamp Shade............................................4
!=23:3A75</B7=<
<AB/::/B7=<
General............................................................................6
Assembly .........................................................................7
Installing A, C, P, S, and R Mount Units..........................8
Installing TS Mount Units (UL Recognized) ....................8
Installing Track Mount Units (CT, ST, and RT) ................8
#>3@/B7=<
General ..........................................................................11
!/7<B3</<13
General..........................................................................12
Daily Cleaning ...............................................................12
Replacing a eat Bulb...................................................12
(@=C0:3A6==B7<5C723
#>B7=<A/<2113AA=@73A
7;7B32+/@@/<BG
CB6=@7H32$/@BA7AB@70CB=@A/19=D3@
!$#&("(#+"&"#&!(#"
Record the model number, serial number (specification label
located inside the lamp shade), voltage, and purchase date of
the unit in the spaces below. Please have this information
available when calling atco for service assistance.
Model No. ____________________________________
Serial No. ____________________________________
Voltage ______________________________________
Date of Purchase ______________________________
&357AB3@G=C@C<7B
Completing online warranty registration will prevent delay in
obtaining warranty coverage. Access the atco website at
EEE6/B1=1=@>1=;, select the Parts & Service pull-down
menu, and click on “Warranty Registration”.
Business 8:00 AM to 5:00 PM
ours: Central Standard Time (C.S.T.)
(Summer ours: June to September –
8:00 AM to 5:00 PM C.S.T.
Monday through Thursday
8:00 AM to 2:30 PM C.S.T. Friday)
Telephone: (800) 558-0607; (414) 671-6350
E-mail: part[email protected]
Fax: (800) 690-2966 (Parts and Service)
(414) 671-3976 (International)
Additional information can be found by visiting our web site at
EEE6/B1=1=@>1=;.
24 Hour 7 Day Parts and Service
Assistance available in the United States
and Canada by calling (800) 558-0607.
"(&#)(#"
atco Decorative eat Lamps are designed to hold food at
serving temperatures as well as enhance restaurant decor.
Decorative eat Lamps heat and light is focused directly below,
providing effective insulation for prolonged serving times. A
“Luminaire” option (lighting only) is available for applications
that do not require heat but would benefit from the style and
focus of a Decorative eat Lamp.
Decorative eat Lamps are quality built to meet the demands
of foodservice operations and provide years of trouble-free
performance.
atco Decorative eat Lamps are products of extensive
research and field testing. The materials used were selected for
maximum durability, attractive appearance, and optimum
performance. Every unit is inspected and tested thoroughly prior
to shipment.
This manual provides the installation, safety, and operating
instructions for Decorative eat Lamps. atco recommends all
installation, operating, and safety instructions appearing in this
manual be read prior to installation or operation of a unit.
+&""7<271/B3A/6/H/@2=CAA7BC/B7=<E671674<=B
/D=72321=C:2@3AC:B7<23/B6=@A3@7=CA7<8C@G
)(#" 7<271/B3A / 6/H/@2=CA A7BC/B7=< E6716 74 <=B
/D=72321=C:2@3AC:B7<;7<=@=@;=23@/B37<8C@G
"#( 7A CA32 B= /22@3AA >@/1B713A <=B @3:/B32 B=
>3@A=</:7<8C@G
WARNING
NOTICE
CAUTION

!$#&("('(-"#&!(#"
Form No. D LM-1010 3
(&'#.&
L )<7B ;CAB 03 7<AB/::32 0G / ?C/:74732 3:31B@717/<
<AB/::/B7=<;CAB1=<4=@;B=/:::=1/:3:31B@71/:1=23A
<AB/::/B7=<0GC<?C/:74732>3@A=<<3:E7::D=72B63C<7B
E/@@/<BG/<2;/G:3/2B=3:31B@71A6=19=@0C@</AE3::
/A2/;/53B=C<7B/<2=@7BAAC@@=C<27<5A
L (C@< >=E3@ # /B ;=C<B7<5 :=1/B7=< 034=@3
7<AB/::/B7=<=4C<7B
L /7:C@3B=5@=C<2C<7B>@=>3@:G1=C:2@3AC:B7<A3@7=CA
>3@A=</:7<8C@G=@23/B6
L (C@< >=E3@ # /B 4CA32 27A1=<<31B AE7B1617@1C7B
0@3/93@/<2/::=EC<7BB=1==:034=@3>3@4=@;7<5/<G
;/7<B3</<13/28CAB;3<BA=@1:3/<7<5
L #"#(AC0;3@53=@A/BC@/B3E7B6E/B3@)<7B7A<=B
E/B3@>@==4=<=B=>3@/B374C<7B6/A033<AC0;3@532
=@A/BC@/B32E7B6E/B3@
L )<7B7A<=BE3/B63@>@==4 =1/B3B63C<7B7<2==@A
L =<=BAB3/;1:3/<=@CA33F13AA7D3E/B3@=<C<7B
L (67AC<7B7A<=BO83B>@==4P1=<AB@C1B7=<=<=BCA383B
1:3/<A>@/GB=1:3/<B67AC<7B
L (67AC<7B;CAB03A3@D71320G?C/:74732>3@A=<<3:=<:G
'3@D7130GC<?C/:74732>3@A=<<3:;/G:3/2B=3:31B@71
A6=19=@0C@<
L )A3 =<:G 3<C7<3 /B1= &3>:/13;3<B $/@BA E63<
A3@D713 7A @3?C7@32 /7:C@3 B= CA3 3<C7<3 /B1=
&3>:/13;3<B $/@BA E7:: D=72 /:: E/@@/<B73A /<2 ;/G
AC0831B =>3@/B=@A =4 B63 3?C7>;3<B B= 6/H/@2=CA
3:31B@71/:D=:B/53@3AC:B7<57<3:31B@71/:A6=19=@0C@<
3<C7<3 /B1= &3>:/13;3<B $/@BA /@3 A>3174732 B=
=>3@/B3A/43:G7<B633<D7@=<;3<BA7<E6716B63G/@3
CA32'=;3/4B3@;/@93B=@53<3@71@3>:/13;3<B>/@BA
2=<=B6/D3B6316/@/1B3@7AB71AB6/BE7::/::=EB63;B=
=>3@/B3A/43:G7</B1=3?C7>;3<B
&.&
L =1/B3C<7B/;7<7;C;=4R;;4@=;1=;0CAB70:3
E/::A /<2 ;/B3@7/:A 4 A/43 27AB/<13A /@3 <=B
;/7<B/7<3227A1=:=@/B7=<=@1=;0CAB7=<1=C:2=11C@
L AB/<2/@2 E/BB 63/B :/;>A + 0C:0 /<2
:C;7</7@3A + 0C:0 ;/F7;C; ;CAB 6/D3 /
;7<7;C;=4R;;/0=D3/1=;0CAB70:3AC@4/13
=@;7<7;C;1:3/@/<13=4R;;/0=D3/<=<
1=;0CAB70:3 AC@4/13 4 A/43 27AB/<13A /@3 <=B
;/7<B/7<3227A1=:=@/B7=<=@1=;0CAB7=<1=C:2=11C@
L 6756E/BB63/B:/;>A+0C:0;CAB6/D3/
;7<7;C;=4R;;/0=D3/1=;0CAB70:3AC@4/13
=@;7<7;C;1:3/@/<13=4R;;/0=D3/<=<
1=;0CAB70:3 AC@4/13 4 A/43 27AB/<13A /@3 <=B
;/7<B/7<3227A1=:=@/B7=<=@1=;0CAB7=<1=C:2=11C@
L =<=B7<AB/::/+63/B0C:07<B=/ AB/<2/@2E/BB
63/B:/;>=@/:C;7</7@3C<7B
/B1==@>=@/B7=<7A<=B@3A>=<A70:34=@B63/1BC/:4==2
>@=2C1BA3@D7<5B3;>3@/BC@3B7AB63@3A>=<A707:7BG=4B63
CA3@B=3<AC@3B6/BB634==2>@=2C1B7A63:2/<2A3@D32/B
/A/43B3;>3@/BC@3
!/93AC@3/::=>3@/B=@A6/D3033<7<AB@C1B32=<B63A/43
/<2>@=>3@CA3=4B63C<7B
WARNING
(67AC<7B7A<=B7<B3<2324=@CA30G167:2@3<=@>3@A=<A
E7B6 @32C132 >6GA71/: A3<A=@G =@ ;3<B/: 1/>/07:7B73A
<AC@3>@=>3@AC>3@D7A7=<=4167:2@3</<2933>B63;/E/G
4@=;B63C<7B
(67A C<7B 6/A <= OCA3@A3@D713/0:3P >/@BA 4 A3@D713 7A
@3?C7@32=<B67AC<7B1=<B/1B/<CB6=@7H32/B1='3@D713
53<B=@1=<B/1BB63/B1='3@D7133>/@B;3<B/B
=@4/F=@<B3@</B7=</:4/F
)&".&'=;33FB3@7=@AC@4/13A=<C<7BE7::53B
6=B)A31/CB7=<E63<B=C167<5B63A3/@3/A
=1/B3B63C<7B/BB63>@=>3@1=C<B3@63756B7</</@3/B6/B
7A1=<D3<73<B4=@CA3
+63<7<AB/::7<5B@/19:756B7<5AGAB3;ACA3=<:G47FBC@3
/AA3;0:73A ;/@932 4=@ CA3 E7B6 #M(@/1 /<2 (@/1
7BB7<5A;/@9324=@CA3E7B6 '3@73A(@/1
$=E3@(@/1AGAB3;A/@3<=B7<B3<2324=@CA3E7B6/>=E3@
AC>>:G1=@2=@1=<D3<73<13@313>B/1:3/2/>B3@
(63 ;/F7;C; 1/>/17BG =4 $=E3@(@/1 B@/19 :756B7<5
AGAB3;A 7A >3@ 17@1C7B 6319 4CA3A /<2 17@1C7BA
1/@34C::G034=@37<AB/::7<5(63;/F7;C;7<1:C23A/::
:756BA /<2 />>:7/<13A 1=<<31B32 B= 17@1C7B * =<:G
;/F7;C;+>3@/<G:3<5B6B@/19
)A31/CB7=<E63<2@7::7<52C@7<5(@/17<AB/::/B7=<B=/D=72
2/;/57<50CAA0/@7<AC:/B=@A47<AC:/B=@A/@32/;/532
27A1/@2B63A31B7=<#"#( CA3
=@ <=< C<7BA "#( 3?C7>>32 E7B6 / /B1=AC>>:732
AE7B16/?C/:747323:31B@717/<;CAB16==A3/</>>@=>@7/B3
AE7B164=@B63/>>:71/B7=<0/A32=</;>3@/53/<27<@CA6
@/B7<5=4B63AE7B16
=@/::C<7BA/?C/:747323:31B@717/<;CAB16==A3/<2
7<AB/::/</>>@=>@7/B32=C0:3>=:3AE7B164=@B63/>>:71/B7=<
0/A32=</;>3@/53/<27<@CA6@/B7<5=4B63AE7B16
::1/<=>G;=C<BC<7BA/@323A75<32B=47B/AB/<2/@2R
;;=1B/5=</:8C<1B7=<0=FC<1B7=<0=F;CAB03
/<16=@32A31C@3:GB=0C7:27<5AB@C1BC@3
!C:B7>:37<AB/::/B7=<A=431=@/B7D33/B /;>A;CAB6/D3
/;7<7;C;1:3/@/<13=4;;=<13<B3@=4A6/23
03BE33<3/16C<7B
/;/53B=1=C<B3@B=>;/B3@7/:AC16/A=@7/<M/<2A7;7:/@
>@=2C1BA1/CA320G63/B53<3@/B324@=;/B1=3?C7>;3<B
7A <=B 1=D3@32 C<23@ B63 /B1= E/@@/<BG =<B/1B B63
;/<C4/1BC@3@=4B631=C<B3@B=>;/B3@7/:4=@/>>:71/B7=<
7<4=@;/B7=<
/B1= 63/B:/;>A/@30C7:BB=47B #M0@/<2
/<2 $=E3@(@/1B@/19:756B7<5AGAB3;A=<:G=
<=B/BB3;>BB=CA3=</<G=B63@B@/19:756B7<5AGAB3;
)A3<=</0@/A7D31:3/<3@A=<:G0@/A7D31:3/<3@A1=C:2
A1@/B16B6347<7A6=4B63C<7B;/@@7<57BA/>>3/@/<13/<2
;/97<57BACA13>B70:3B=A=7:/11C;C:/B7=<
WARNING
NOTICE
CAUTION
&3/2B634=::=E7<57;>=@B/<BA/43BG7<4=@;/B7=<034=@3CA7<5B67A3?C7>;3<BB=/D=72A3@7=CA7<8C@G=@23/B6/<2
B=/D=722/;/53B=3?C7>;3<B=@>@=>3@BG

!# '&$(#"
'$(#"'
4Form No. D LM-1010
::!=23:A
All Decorative eat Lamps are constructed of aluminum and
steel and include heavy-duty mounting hardware. Each
Decorative eat Lamp is available with a heat bulb contained
in a vented shade (Luminaire bulb not available from atco).
The shade is available in powdercoated Designer colors, gloss
finishes, or plated finishes.
!=23:A'B/<2/@2+/BB/53
Standard wattage models (DL) use a 250 W bulb and include a
built-in ON/OFF switch located at the stem or canopy for
independent heat control. DL units may be ordered with the
optional remote switch (REM) or with no switch.
A Luminaire option is available for DL Models for lighting only
(no heat). The Luminaire model uses a maximum of a 200 W
bulb (Luminaire bulb not available from atco).
!=23:A756+/BB/53
igh wattage models (DL ) use a 375 W bulb and are available
with either the remote switch (REM) or with no switch.
=@ <=< C<7BA "#( 3?C7>>32 E7B6 / /B1=AC>>:732
AE7B16/?C/:747323:31B@717/<;CAB16==A3/</>>@=>@7/B3
AE7B164=@B63/>>:71/B7=<0/A32=</;>3@/53/<27<@CA6
@/B7<5=4B63AE7B16
=@/::C<7BA/?C/:747323:31B@717/<;CAB16==A3/<2
7<AB/::/</>>@=>@7/B32=C0:3>=:3AE7B164=@B63/>>:71/B7=<
0/A32=</;>3@/53/<27<@CA6@/B7<5=4B63AE7B16
Accessories are available for the Decorative eat Lamps.
Refer to the OPTIONS AND ACCESSORIES section in this
manual for details.
CAUTION
A
DL-400 DL-500
DL-700
B
A
DL-725
B
A
DL-750
B
A
B
DL-600
A
B
A
B
A
DL-760 DL-775 DL-800
B
A
B
A
B
Figure 1. Lamp Shade Dimensions
:31B@71/:&/B7<56/@B
NOTE: The specification label is located inside the lamp shade.
See the label for the serial number and verification of
unit electrical information.
NOTE: The height dimension of the shade increases by 2" (51 mm) when utilizing the “L” lower switch location.
The shaded areas contain electrical information for <B3@</B7=</:;=23:A=<:G.
!=23: *=:BA +/BBA ;>A
DL Series 120 250 2.1
240 (CE) 250 1.1
DL Series 120 375 3.2
240 (CE) 375 1.6
7;3<A7=<AN /;>'6/23
/;>'6/23 +72B6 3>B6
'BG:3
DL-400 6-1/8″ 8-1/2″
(156 mm) (216 mm)
DL-500 6-1/8″ 8-1/2″
(156 mm) (216 mm)
DL-600 6-1/4″ 8-1/2″
(159 mm) (216 mm)
DL-700 6-1/2″ 8-1/2″
(165 mm) (216 mm)
DL-725 9-1/2″ 8-1/2″
(241 mm) (216 mm)
DL-750 11″ 8-1/2″
(279 mm) (216 mm)
DL-760 12-1/2″ 8-1/2″
(318 mm) (216 mm)
DL-775 10-1/2″ 8-1/2″
(267 mm) (216 mm)
DL-800 11″ 8-1/2″
(279 mm) (216 mm)
!=23: *=:BA +/BBA ;>A
DL Luminaire 120 200 1.7

!# '"(#"
Form No. D LM-1010 5
D L H - 700 - S T U
Mounting Style
R Mount
Lamp mounts with
adjustable cord. Cord
adjusts up-down from
31″ (787 mm) to
69-1/2″ (1765 mm).
ST Mount
Lamp mounts with
rigid stem to track adapter.
Overall length from
17″ (432 mm) to
71″ (1803 mm).
P Mount
Lamp mounts with
rigid stem to canopy
with adjustable pivot
adjacent to canopy.
Overall length from
14″ (356 mm) to
71″ (1803 mm).
A Mount
Lamp mounts with
rigid stem to canopy
with adjustable pivot
adjacent to lamp.
Overall horizontal length
from 7″ (178 mm) to
20″ (508 mm). Vertical
drop length to bottom of
shade 10-1/4″ (260 mm).
TS Mount
Lamp mounts with
threaded stem
to fixture above
(fixture supplied by others).
Threaded stem mount is
available only as a
UL recognized (UR)
component.
RT Mount
Lamp mounts with
adjustable cord to track
adapter. Cord adjusts
up-down from
33-3/8″ (848 mm) to
71-7/8″ (1826 mm).
C Mount
Lamp mounts with
cord to the canopy.
Overall length from
17″ (432 mm) to
any length.
CT Mount
Lamp mounts with
cord to track adapter.
Overall length from
17″ (432 mm) to
any length.
S Mount
Lamp mounts with
rigid stem to canopy.
Overall length from
14″ (432 mm) to
71″ (1803 mm).
Switch Location:
U = Upper ON/OFF Switch
(not available with High Watt,
Trac Mount, or R Mount)
L = Lower ON/OFF Switch
(not available with High Watt
or A Mount)
N = None (supplied by installer)
Decorative Lamp
(Heat Lamp or Luminaire)
High Wattage
Shade Style
400 500 600 700 725
750 760 775 800
R = Remote ON/OFF Switch
(switch plate not included
with 120 V switch)
(120 V) (240 V)
Figure 2. Model Designation
NOTE: Track mount units are not available in 240 V.
NOTE: The height dimension of the shade increases by
2″ (51 mm) when utilizing the “L” lower switch location.
NOTE: For 120 V units, the remote ON/OFF switch is capable
of handling up to nine 200 luminaires, seven 250
heat lamps, or five 375 heat lamps.
For 240 V units, the remote ON/OFF switch is capable
of handling up to four 250 heat lamps or three
375 heat lamps.

"'( (#"
6Form No. D LM-1010
3<3@/:
Use the following information and procedures to install
Decorative eat Lamps.
(&'#.&
L )<7B ;CAB 03 7<AB/::32 0G / ?C/:74732 3:31B@717/<
<AB/::/B7=<;CAB1=<4=@;B=/:::=1/:3:31B@71/:1=23A
<AB/::/B7=<0GC<?C/:74732>3@A=<<3:E7::D=72B63C<7B
E/@@/<BG/<2;/G:3/2B=3:31B@71A6=19=@0C@</AE3::
/A2/;/53B=C<7B/<2=@7BAAC@@=C<27<5A
L (C@< >=E3@ # /B ;=C<B7<5 :=1/B7=< 034=@3
7<AB/::/B7=<=4C<7B
L /7:C@3B=5@=C<2C<7B>@=>3@:G1=C:2@3AC:B7<A3@7=CA
>3@A=</:7<8C@G=@23/B6
L )<7B7A<=BE3/B63@>@==4 =1/B3B63C<7B7<2==@A
&.&
L =1/B3C<7B/;7<7;C;=4R;;4@=;1=;0CAB70:3
E/::A /<2 ;/B3@7/:A 4 A/43 27AB/<13A /@3 <=B
;/7<B/7<3227A1=:=@/B7=<=@1=;0CAB7=<1=C:2=11C@
L AB/<2/@2 E/BB 63/B :/;>A + 0C:0 /<2
:C;7</7@3A + 0C:0 ;/F7;C; ;CAB 6/D3 /
;7<7;C;=4R;;/0=D3/1=;0CAB70:3AC@4/13
=@;7<7;C;1:3/@/<13=4R;;/0=D3/<=<
1=;0CAB70:3 AC@4/13 4 A/43 27AB/<13A /@3 <=B
;/7<B/7<3227A1=:=@/B7=<=@1=;0CAB7=<1=C:2=11C@
L 6756E/BB63/B:/;>A+0C:0;CAB6/D3/
;7<7;C;=4R;;/0=D3/1=;0CAB70:3AC@4/13
=@;7<7;C;1:3/@/<13=4R;;/0=D3/<=<
1=;0CAB70:3 AC@4/13 4 A/43 27AB/<13A /@3 <=B
;/7<B/7<3227A1=:=@/B7=<=@1=;0CAB7=<1=C:2=11C@
L =<=B7<AB/::/+63/B0C:07<B=/ AB/<2/@2E/BB
63/B:/;>=@/:C;7</7@3C<7B
!C:B7>:37<AB/::/B7=<A=431=@/B7D33/B /;>A;CAB6/D3
/;7<7;C;1:3/@/<13=4;;=<13<B3@=4A6/23
03BE33<3/16C<7B
::1/<=>G;=C<BC<7BA/@323A75<32B=47B/AB/<2/@2R
;;=1B/5=</:8C<1B7=<0=FC<1B7=<0=F;CAB03
/<16=@32A31C@3:GB=0C7:27<5AB@C1BC@3
=1/B3B63C<7B/BB63>@=>3@1=C<B3@63756B7</</@3/B6/B
7A1=<D3<73<B4=@CA3
=@ <=<C<7BA"#( 3?C7>>32 E7B6 / /B1=AC>>:732
AE7B16/?C/:747323:31B@717/<;CAB16==A3/</>>@=>@7/B3
AE7B164=@B63/>>:71/B7=<0/A32=</;>3@/53/<27<@CA6
@/B7<5=4B63AE7B16
=@/::C<7BA/?C/:747323:31B@717/<;CAB16==A3/<2
7<AB/::/</>>@=>@7/B32=C0:3>=:3AE7B164=@B63/>>:71/B7=<
0/A32=</;>3@/53/<27<@CA6@/B7<5=4B63AE7B16
/;/53B=1=C<B3@B=>;/B3@7/:AC16/A=@7/<M/<2A7;7:/@
>@=2C1BA1/CA320G63/B53<3@/B324@=;/B1=3?C7>;3<B
7A <=B 1=D3@32 C<23@ B63 /B1= E/@@/<BG =<B/1B B63
;/<C4/1BC@3@=4B631=C<B3@B=>;/B3@7/:4=@/>>:71/B7=<
7<4=@;/B7=<
NOTICE
CAUTION
WARNING
1. Remove the decorative lamp assembly from the carton.
2. Remove tape and protective packaging from all surfaces
of unit. Remove literature from the carton.
NOTE: To prevent delay in obtaining warranty coverage,
complete online warranty registration. See the
IMPORTANT OWNER INFORMATION section for
details.
3. Make sure the installation site provides the proper
installation clearances for the unit (see below).
NOTE: For even heating, install multiple units a distance of 12″
on center of shade between units.
NOTE: Non-CE Decorative Heat Lamps can be installed over
a steam table. Follow the clearance requirements
appropriate for the installation.
Figure 3. Safe Mounting Distances
NOTE: For 120 V units, the remote ON/OFF switch is capable
of handling up to nine 200 luminaires, seven 250
heat lamps, or five 375 heat lamps.
For 240 V units, the remote ON/OFF switch is capable
of handling up to four 250 heat lamps or three
375 heat lamps.
Minimum of 12″
(305 mm) on
center of shade
between units.
Minimum of 1″ (25 mm)
from combustible
walls and materials.
Minimum height above
combustible surface:
DL and Luminaire = 16″ (406 mm)
DLH = 27″ (686 mm)
Minimum height above
non-combustible surface:
DL and Lumimaire = 5″ (127 mm)
DLH = 5″ (127 mm)
Countertop

"'( (#"
Form No. D LM-1010 7
AA3;0:G
Models with Mounting Styles C, CT, R, and RT are cord hung
fixtures and are shipped fully assembled and ready for
installation.
All other models will require some assembly before mounting.
Refer to the appropriate assembly procedure below for each
Mounting Style.
NOTE: If the shade comes equipped with plastic nut and nipple
in stem mounting hole, both nut and nipple must be
removed before installing stem to shade.
(C@<>=E3@#/B;=C<B7<5:=1/B7=<034=@37<AB/::/B7=<=4
C<7B
AA3;0:7<5/<'(!=C<B)<7B
1. Feed the wires from the lamp through the stem. Screw the
stem into the coupling on the lamp. Tighten securely.
2. Open the track pendant side access panel and feed the
wires up into the pendant enclosure.
3. Screw the stem into the track pendant and tighten securely.
The stem should not rotate after it is tightened.
4. Following the instructions supplied with the pendant,
connect together the white wire leads, connect together
the black wire leads, and connect together the green
ground wires using the provided wire nuts.
Figure 4. Assembling an ST Mount Unit
Track Pendant
Wires
Stem
Coupling
WARNING
AA3;0:7<5/<$=@'!=C<B)<7B
1. Feed the wires from the lamp through the stem. Screw the
stem into the coupling on the lamp and tighten securely. If
the unit is equipped with a pivot mount, straighten the pivot
to help ease feeding the wires.
2. Place the canopy on the stem.
3. Thread one jam nut onto the stem and tighten until it
bottoms out on the threads. Place the mounting bracket on
the stem until it rests on the jam nut. Thread the second
jam nut onto the stem and tighten it against the mounting
bracket.
4. If the unit is equipped with an upper switch, connect the
black wire from the lamp to one of the black wires on the
switch. Use the included wire nut.
Figure 5. Assembling A and P Mount Units
Figure 6. Assembling an S Mount Unit
Mounting
Bracket
Canopy
Leave 1/4″
exposed for
canopy mounting.
Jamnut
Wire Leads
Jamnut
Stem
Coupling
Stem
Pivot (”A” mount
shown, “P” mount
pivot is at canopy.)
Mounting
Bracket
Wire
Leads
Loosen screw
to adjust pivot.
Leave 1/4″ exposed
for canopy mounting.
Canopy
Jamnut Jamnut

"'( (#"
8Form No. D LM-1010
<AB/::7<5$'/<2&!=C<B)<7BA
(C@<>=E3@#/B;=C<B7<5:=1/B7=<034=@37<AB/::/B7=<=4
C<7B
1. Mount the top bracket to a 4" (102 mm) octagon junction
box using the two screws provided with the junction box.
2. Make sure all power is OFF, and connect supply lead L1 to
the black lamp lead. Connect neutral to the white lamp
lead.
If the lamp is equipped with three wires, connect ground to
the green lead. If lamp is equipped with two wires, make
proper ground wire connections from junction box. Tuck
excess wires into junction box.
3. Slide the canopy cover or cord housing up until it rests
against the ceiling and install the two ball cap nuts until
snug to the ceiling.
Figure 7. Mounting to a Junction Box
<AB/::7<5('!=C<B)<7BA) &31=5<7H32
(C@<>=E3@#/B;=C<B7<5:=1/B7=<034=@37<AB/::/B7=<=4
C<7B
1. Drill a 7/16" (11 mm) hole through mounting fixture.
2. Pass wires from the Decorative eat Lamp through hole in
fixture.
3. Secure Decorative eat Lamp to fixture with nut.
4. Make sure all power is OFF, and connect supply lead L1 to
the black lamp lead. Connect neutral to the white lamp lead
and the ground to the green lead.
WARNING
A, C, P, and S Mount
Junction Box
R Mount
Ball Cap Nuts
Canopy
Adjustable Cord
Housing
WARNING
<AB/::7<5(@/19!=C<B)<7BA('(/<2&(
(63 ;/F7;C; 1/>/17BG =4 $=E3@(@/1 B@/19 :756B7<5
AGAB3;A 7A >3@ 17@1C7B 6319 4CA3A /<2 17@1C7BA
1/@34C::G034=@37<AB/::7<5(63;/F7;C;7<1:C23A/::
:756BA /<2 />>:7/<13A 1=<<31B32 B= 17@1C7B * =<:G
;/F7;C;+>3@/<G:3<5B6B@/19
$=E3@(@/1AGAB3;A/@3<=B7<B3<2324=@CA3E7B6/>=E3@
AC>>:G1=@2=@1=<D3<73<13@313>B/1:3/2/>B3@
+63<7<AB/::7<5B@/19:756B7<5AGAB3;ACA3=<:G47FBC@3
/AA3;0:73A ;/@932 4=@ CA3 E7B6 #M(@/1 /<2 (@/1
7BB7<5A;/@9324=@CA3E7B6 '3@73A(@/1
/B1= 63/B:/;>A/@30C7:BB=47B #M0@/<2
/<2 $=E3@(@/1B@/19:756B7<5AGAB3;A=<:G=
<=B/BB3;>BB=CA3=</<G=B63@B@/19:756B7<5AGAB3;
The Trac system is to be supplied by a single branch circuit
120 V, 60 z, 20 A.
NOTE: A maximum of nine 200 luminaire units, seven 250
heat lamp units, or five 375 heat lamp units may be
installed per each 120 V, 20 A track bar circuit. The
Installer is responsible for properly sizing the supply
circuit with the lamp load.
atco provides track kits in three different lengths:
• L651 — 4 ft. (1219 mm)
• L652 — 8 ft. (2438 mm)
• L653 — 12 ft. (3658 mm)
When installing or using this Trac system, the following basic
safety precautions should always be followed:
• Read all of these installation instructions before installing
the Trac system.
• Save these instructions and refer to them when additions
to or changes in the Trac configuration are made.
• Do not install this Trac in damp or wet locations.
• Do not install any part of a Trac system less than 5 feet
(1524 mm) above the floor.
• Do not install any fixture assembly closer than 1" (25 mm)
along the sides from any curtain or similar combustible
material.
• Disconnect electrical power before adding to or changing
the configuration of the Trac.
• Do not attempt to energize anything other than Trac lighting
fixtures on the Trac. To reduce the risk of fire and electric
shock, do not attempt to connect power tools, extension
cords, appliances, etc. to the Trac.
NOTICE
CAUTION

"'( (#"
Form No. D LM-1010 9
The Trac system must be mounted using the appropriate
fasteners in the pre-drilled mounting holes as follows:
•4==B;;(@/1— two places, one at each end of
Trac.
•4==B;;(@/1— three places, one in the center
and one in each end of the Trac.
•4==B;;(@/1— four places, one at each end
of Trac and one four feet from each end.
If Trac requires field cutting, refer to the “Cutting Trac to Special
Lengths” procedure. If Trac does not require field cutting,
proceed to “Installing the Trac.”
CBB7<5(@/1B='>317/: 3<5B6A
NOTE: Cutting should be done from the dead end of the Trac.
1. Remove the dead end fitting and push the copper buss
bars and insulators flush with the live end of the Trac.
Measure length from the live end and mark the cut line.
2. Using a hacksaw, cut to desired length. Be sure to allow
1/8" (3 mm) for dead end fitting which must be reinstalled
to the Trac end.
3. Remove all burrs from the Trac, insulators, and copper
buss bars.
4. Push the copper buss bars into the insulators 1/2" (13 mm)
from the end of the Trac.
NOTE: After completing the above step, the buss bar
insulators should be flush with the Trac channel ends,
and the copper buss bars should be cut back from
each end of the Trac a minimum of 7/16" (11 mm) to a
maximum of 1/2" (13 mm). If this is not the case, make
appropriate modifications.
5. Reinstall the dead end fitting and tighten the screw.
If additional mounting openings are required, follow
this procedure in drilling holes:
1. Locate desired mounting holes on the inside center line of
the Trac section.
2. Drill a 3/16" hole through the Trac channel.
)A31/CB7=<E63<2@7::7<52C@7<5(@/17<AB/::/B7=<B=/D=72
2/;/57<50CAA0/@7<AC:/B=@A47<AC:/B=@A/@32/;/532
27A1/@2B63A31B7=<#"#( CA3
3. Remove all burrs and proceed to Installing the Trac.
CAUTION
!$#&("("#(
After Trac has been field cut, make sure that each 4’ (1219
mm) section or less in length has one mounting hole spaced
a maximum of 6" (152 mm) from each Trac end section. A
single section of Trac that is greater than 4' (1219 mm) in
length must have the mounting hole located a maximum of
12" (305 mm) from each end of the Trac with additional
mounting holes located a minimum of every 4' (1219 mm)
along the length of the Trac section. Additional mounting holes
may be drilled as needed.
Live End Fitting
Dead End Fitting
(To remove,
loosen screw and
slide out fitting.)
Drill mounting holes
where required.
Measure the desired length from the live end.
NOTE: The dead end fitting will add 1/8″ to this length.
New cut must be at an
exact right angle (90°).
Figure 8. Cutting the Trac to Special Lengths

"'( (#"
10 Form No. D LM-1010
<AB/::7<5B63(@/1
(C@<>=E3@#/B;=C<B7<5:=1/B7=<034=@37<AB/::/B7=<=4
C<7B
1. Punch out the proper knockout holes in the ceiling plate.
=<=B2/;/53B63A>317/:A;==B6>:/AB7147<7A6>7313=<
;3B/:137:7<5>:/B3E63<23B3@;7<7<5:=1/B7=<=4>@=>3@
9<=19=CB6=:3A
2. Remove the flat head screw(s) from the back of the live
end fitting and use them to fasten the ceiling plate to the
live end fitting.
3. Remove the cover from the live end fitting. Place Trac with
the ceiling plate attached over the junction box and mark
the position of the Trac mounting holes on the ceiling or
wall.
4. Drill the mounting holes in the ceiling or wall large enough
for the supplied toggle bolts and install the Trac using the
toggle bolts. If Trac is to be mounted on a solid surface,
use #8 screws (not supplied) instead of toggle bolts.
NOTICE
WARNING
5. Fasten the ceiling plate to the junction box with two screws.
Pull the wires from the junction box through the open hole
in the live end.
6. Cut and strip the wire leads (3/8” strip) and fasten to the
screw terminals in the live end fitting. Push the excess
wires back into the junction box and fasten the ground wire
to the green ground screw.
7. Replace the cover on the live end and tighten the screw.
8. Install the lamp(s) in the desired location(s) along the Trac.
To install the lamp(s):
a. Pull back the locking tab on the track pendant and insert
the pendant into the Trac.
b. Rotate the pendant approximately 90° until the pendant
locks into position.
Live End Cover
Setscrew
Ground Contactor
Slide
Black Wire L1
(Hot)
White Wire
(Neutral)
Green Wire
(Ground)
Ceiling Plate
Dead End
Fitting
Nickel Plated
Terminal
Green
Ground
Screw
Junction Box
Mounting
Screw
Flat Head Screw
(Ceiling Plate to Live End Cover)
Junction Box Brass
Terminal To mount Trac: Drill holes in ceiling or wall.
Attach Trac with toggle bolts (or screws if
surface is solid material).
Figure 9. Installing the Trac

#$&(#"
Form No. D LM-1010 11
3<3@/:
Use the following procedures to operate a Decorative eat
Lamp.
&3/2 /:: A/43BG ;3AA/53A 7< B63 ;>=@B/<B '/43BG
<4=@;/B7=<A31B7=<034=@3=>3@/B7<5B67A3?C7>;3<B
/B1==@>=@/B7=<7A<=B@3A>=<A70:34=@B63/1BC/:4==2
>@=2C1BA3@D7<5B3;>3@/BC@3B7AB63@3A>=<A707:7BG=4B63
CA3@B=3<AC@3B6/BB634==2>@=2C1B7A63:2/<2A3@D32/B
/A/43B3;>3@/BC@3
'B/@BC>
1. Move the ON/OFF Switch to the ON position. The heat
lamp/luminaire will illuminate.
• eat lamps are up to temperature and ready to hold
food product immediately.
)&".&'=;33FB3@7=@AC@4/13A=<C<7BE7::53B
6=B)A31/CB7=<E63<B=C167<5B63A3/@3/A
'6CB2=E<
1. Move the ON/OFF Switch to the OFF position. The heat
lamp/luminaire will shut off.
WARNING
CAUTION
Figure 10. ON/OFF Switches
U = Upper ON/OFF Switch
L = Lower On/OFF Switch
R = Remote ON/OFF Switch
(switch plate not included
with 120 V switch)
(120 V) (240 V)

!"(""
12 Form No. D LM-1010
3<3@/:
atco Decorative eat Lamps are designed for maximum
durability and performance, with minimum maintenance.
(&'#.&
L (C@< >=E3@ # /B 4CA32 27A1=<<31B AE7B1617@1C7B
0@3/93@/<2/::=EC<7BB=1==:034=@3>3@4=@;7<5/<G
;/7<B3</<13/28CAB;3<BA=@1:3/<7<5
L #"#(AC0;3@53=@A/BC@/B3E7B6E/B3@)<7B7A<=B
E/B3@>@==4=<=B=>3@/B374C<7B6/A033<AC0;3@532
=@A/BC@/B32E7B6E/B3@
L =<=BAB3/;1:3/<=@CA33F13AA7D3E/B3@=<C<7B
L (67AC<7B7A<=BO83B>@==4P1=<AB@C1B7=<=<=BCA383B
1:3/<A>@/GB=1:3/<B67AC<7B
(67A C<7B 6/A <= OCA3@A3@D713/0:3P >/@BA 4 A3@D713 7A
@3?C7@32=<B67AC<7B1=<B/1B/<CB6=@7H32/B1='3@D713
53<B=@1=<B/1BB63/B1='3@D7133>/@B;3<B/B
=@4/F=@<B3@</B7=</:4/F
:3/< C<7B 2/7:G B= /D=72 ;/:4C<1B7=<A /<2 ;/7<B/7<
A/<7B/@G=>3@/B7=<
)A3<=</0@/A7D31:3/<3@A=<:G0@/A7D31:3/<3@A1=C:2
A1@/B16B6347<7A6=4B63C<7B;/@@7<57BA/>>3/@/<13/<2
;/97<57BACA13>B70:3B=A=7:/11C;C:/B7=<
/7:G:3/<7<5
1. Move the ON/OFF Switch to the OFF position and allow
the unit to cool completely.
2. Wipe down the lamp shade with a clean, soft, damp cloth.
Stubborn stains can be removed with a mild, non-abrasive
cleanser.
NOTICE
WARNING
&3>:/17<5/3/BC:0
Each standard wattage Decorative eat Lamp (DL) holds one
infrared heat bulb rated at 250 W. Each high wattage Decorative
eat Lamp (DL ) holds one infrared heat bulb rated at 375 W.
If desired, 250 W bulbs also may be used in DL units.
&.&=<=B7<AB/::/+63/B0C:07<B=/
AB/<2/@2E/BB63/B:/;>
)A3=<:G3<C7<3/B1=&3>:/13;3<B$/@BAE63<A3@D713
7A@3?C7@32 /7:C@3B=CA3 3<C7<3/B1=&3>:/13;3<B
$/@BAE7::D=72/::E/@@/<B73A/<2;/GAC0831B=>3@/B=@A=4
B633?C7>;3<BB=6/H/@2=CA3:31B@71/:D=:B/53@3AC:B7<57<
3:31B@71/:A6=19=@0C@<3<C7<3/B1=&3>:/13;3<B$/@BA
/@3A>3174732B==>3@/B3A/43:G7<B633<D7@=<;3<BA7<E6716
B63G/@3CA32'=;3/4B3@;/@93B=@53<3@71@3>:/13;3<B
>/@BA2=<=B6/D3B6316/@/1B3@7AB71AB6/BE7::/::=EB63;
B==>3@/B3A/43:G7</B1=3?C7>;3<B
1. To replace a bulb, move the ON/OFF switch in the OFF
position and allow the bulb to cool completely.
2. Bulbs have a threaded base. Unscrew the heat bulb from
the unit and replace with a new bulb.
The following replacement bulbs are available from the factory
or a atco Authorized Parts Distributor.
AB/<2/@2E/BB/53
250 W, 120 V, Red Coated 02.30.068.00
250 W, 120 V, Clear Coated 02.30.069.00
250 W, 120 V, Red Uncoated 02.30.070.00
250 W, 120 V, Clear Uncoated 02.30.071.00
250 W, 240 V (CE), Clear Coated 02.30.100.00
250 W, 240 V (CE), Clear Uncoated 02.30.083.00
6756E/BB/53
375 W, 120 V, Clear Uncoated 02.30.093.00
375 W, 120 V, Red Uncoated 02.30.094.00
375 W, 120 V, Clear Coated 02.30.097.00
375 W, 120 V, Red Coated 02.30.098.00
NOTE: Luminaire bulbs not available from Hatco.
WARNING

'G;>B=; $@=0/0:3/CA3 =@@31B7D31B7=<
Unit is not working at all. Unit not turned on. Place ON/OFF switch, if equipped, in the ON position.
ON/OFF switch is not functioning. Contact Authorized Service Agent or atco for
assistance.
Bulb has burned out. Replace bulb.
Unit is turned on but there is no
light.
No power to unit. Check circuit breaker and reset as necessary.
Switch is defective. Contact Authorized Service Agent or atco for
assistance.
Bulb has burned out. Replace bulb.
eat is inadequate. Unit mounted too high above
target area.
Lower unit, putting effective heat closer to target.
Excessive air movement around
Decorative eat Lamp target
area.
Restrict or redirect air movement (i.e. air conditioning
duct or exhaust fan) away from unit.
Incorrect heat bulb wattage. Verify heat bulb wattage and replace with the correct
wattage bulb. +&"" #"#( 3F1332 ;/F7;C;
0C:0E/BB/53@/B7<5=<A>317471/B7=<>:/B3
Incorrect power supply (low). Check power supply to unit, making sure it matches
rating on the unit. If power supply is incorrect, change to
match rating on unit.
eat is excessive. Unit mounted too close to target
area.
Check to see that installation is within specifications for
type/model. Increase mounting height if too close.
eat bulb wattage too high. Check bulb wattage and replace with lower wattage bulb,
if available.
Voltage supply too high. Check power supply to unit, making sure it matches
rating on unit. If power supply is incorrect, change to
match rating.
Control switches burn-out
rapidly.
Switches used are not atco
supplied.
Genuine atco components are specified to operate
safely and properly in the environment in which they are
used. Replace switches with Genuine atco Parts if
switches are aftermarket or generic.
(&#) '##(")
Form No. D LM-1010 13
(67AC<7B;CAB03A3@D71320G?C/:74732>3@A=<<3:=<:G
'3@D713 0G C<?C/:74732 >3@A=<<3: ;/G :3/2 B= 3:31B@71
A6=19=@0C@<
WARNING
(& '# .& (C@< >=E3@ # /B 4CA32
27A1=<<31BAE7B1617@1C7B0@3/93@/<2/::=EC<7BB=1==:
034=@3 >3@4=@;7<5 /<G ;/7<B3</<13 /28CAB;3<BA =@
1:3/<7<5
WARNING

#$(#"'"''#&'
14 Form No. D LM-1010
3/BC:0A
The following heat bulbs are available for use in atco
Decorative eat Lamps.
AB/<2/@2E/BB/53
250 W, 120 V, Red Coated 02.30.068.00
250 W, 120 V, Clear Coated 02.30.069.00
250 W, 120 V, Red Uncoated 02.30.070.00
250 W, 120 V, Clear Uncoated 02.30.071.00
250 W, 240 V (CE), Clear Coated 02.30.100.00
250 W, 240 V (CE), Clear Uncoated 02.30.083.00
6756E/BB/53
375 W, 120 V, Clear Uncoated 02.30.093.00
375 W, 120 V, Red Uncoated 02.30.094.00
375 W, 120 V, Clear Coated 02.30.097.00
375 W, 120 V, Red Coated 02.30.098.00
NOTE: Luminaire bulbs not available from Hatco.
(@/19/@!=C<B
Track Bar Mounts are available for track mount units (CT, ST,
and RT mounting style) and can be ordered in 4' (1219 mm), 8'
(2438 mm), or 12' (3658 mm) track lengths. The color options
are black or white. The track bar can be cut down in the field.
NOTE: A maximum of nine 200 luminaire units, seven 250
heat lamp units, or five 375 heat lamp units may be
installed per each 120 V, 20 A track bar circuit. The
Installer is responsible for properly sizing the supply
circuit with the lamp load.
NOTE: Non-track mount units cannot be retrofitted to become
track mount units.

!(+&&"(-
Form No. D LM-1010 15
$&#)(+&&"(-
atco warrants the products that it manufactures (the
“Products”) to be free from defects in materials and
workmanship, under normal use and service, for a period of
one (1) year from the date of purchase when installed and
maintained in accordance with atco’s written instructions or
18 months from the date of shipment from atco. Buyer must
establish the Product’s purchase date by returning atco’s
Warranty Registration Card or by other means satisfactory to
atco in its sole discretion.
atco warrants the following Product components to be free
from defects in materials and workmanship from the date of
purchase (subject to the foregoing conditions) for the period(s)
of time and on the conditions listed below:
/ #<3-3/@$/@BA/<2 /0=@$ )'#<3
227B7=</:-3/@$/@BA#<:G+/@@/<BG
Conveyor Toaster Elements (metal sheathed)
Drawer Warmer Elements (metal sheathed)
Drawer Warmer Drawer Rollers and Slides
Food Warmer Elements (metal sheathed)
Display Warmer Elements (metal sheathed air heating)
olding Cabinet Elements (metal sheathed air heating)
Built-In eated Well Elements — WB and WBI Series
(metal sheathed)
0 #<3-3/@$/@BA/<2 /0=@$ )'=C@
-3/@A$/@BA#<:G+/@@/<BG=<
>@=@/B32B3@;AB6/B/B1=E7::3F>:/7<
/BCG3@QA@3?C3AB
3CS and FR Tanks
1 #<3-3/@$/@BA/<2 /0=@$ )'"7<3
-3/@A$/@BA#<:G+/@@/<BG=<
Electric Booster eater Tanks
Gas Booster eater Tanks
2 "7<3BG/G$/@BA#<:G+/@@/<BG
Replacement Parts
T E FOREGOING WARRANTIES ARE EXCLUSIVE AND IN
LIEU OF ANY OT ER WARRANTY, EXPRESSED OR
IMPLIED, INCLUDING BUT NOT LIMITED TO ANY IMPLIED
WARRANTY OF MERC ANTABILITY OR FITNESS FOR A
PARTICULAR PURPOSE OR PATENT OR OT ER
INTELLECTUAL PROPERTY RIG T INFRINGEMENT.
Without limiting the generality of the foregoing, SUC
WARRANTIES DO NOT COVER: Coated incandescent light
bulbs, fluorescent lights, heat lamp bulbs, coated halogen light
bulbs, halogen heat lamp bulbs, glass components, and fuses;
Product failure in booster tank, fin tube heat exchanger, or other
water heating equipment caused by liming, sediment buildup,
chemical attack, or freezing; or Product misuse, tampering or
misapplication, improper installation, or application of improper
voltage.
!((#"#&!'"!'
atco’s liability and Buyer’s exclusive remedy hereunder will
be limited solely, at atco’s option, to repair or replacement
using new or refurbished parts or Product by atco or a atco-
authorized service agency (other than where Buyer is located
outside of the United States, Canada, United Kingdom, or
Australia, in which case atco’s liability and Buyer’s exclusive
remedy hereunder will be limited solely to replacement of part
under warranty) with respect to any claim made within the
applicable warranty period referred to above. atco reserves
the right to accept or reject any such claim in whole or in part.
In the context of this Limited Warranty, “refurbished” means a
part or Product that has been returned to its original
specifications by atco or a atco-authorized service agency.
atco will not accept the return of any Product without prior
written approval from atco, and all such approved returns shall
be made at Buyer’s sole expense. ATCO WILL NOT BE
LIABLE, UNDER ANY CIRCUMSTANCES, FOR
CONSEQUENTIAL OR INCIDENTAL DAMAGES, INCLUDING
BUT NOT LIMITED TO LABOR COSTS OR LOST PROFITS
RESULTING FROM T E USE OF OR INABILITY TO USE T E
PRODUCTS OR FROM T E PRODUCTS BEING
INCORPORATED IN OR BECOMING A COMPONENT OF
ANY OT ER PRODUCT OR GOODS.

Printed in U.S.A. October 2010 P/N 07.04.371.00 Form No. D LM-1010
HATCO CORPORATION
P.O. Box 340500
Milwaukee, WI 53234-0500 U.S.A.
(800) 558-0607 (414) 671-6350
Parts and Service Fax (800) 690-2966
International Fax (414) 671-3976
www.hatcocorp.com
(#)(#&.$&(''(&)(#&'
&357AB3@G=C@C<7B=<:7<3
See IMPORTANT OWNER INFORMATION
section for details.
!
Jones McLeod Appl. Svc.
Birmingham 205-251-0159
&.#"
Service Solutions Group
Phoenix 602-234-2443
Byassee Equipment Co.
Phoenix 602-252-0402
#&"
Industrial Electric
Commercial Parts & Service, Inc.
untington Beach 714-379-7100
Chapman Appl. Service
San Diego 619-298-7106
P & D Appliance
Commercial Parts & Service, Inc.
S. San Francisco 650-635-1900
# #&#
awkins Commercial Appliance
Englewood 303-781-5548
#&
Whaley Foodservice Repair
Jacksonville 904-725-7800
3Wire Nass Service Co., Inc.
Orlando 407-425-2681
B.G.S.I.
Pompano Beach 954-971-0456
Comm. Appliance Service
Tampa 813-663-0313
#&
TWC Services
Mableton 770-438-9797
eritage Service Group
Norcross 866-388-9837
Southeastern Rest. Svc.
Norcross 770-446-6177
+
Burney’s Comm. Service, Inc.
onolulu 808-848-1466
Food Equip Parts & Service
onolulu 808-847-4871
"#'
Parts Town
Lombard 708-865-7278
Eichenauer Elec. Service
Decatur 217-429-4229
Midwest Elec. Appl. Service
Elmhurst 630-279-8000
Cone’s Repair Service
Moline 309-797-5323
""
GCS Service
Indianapolis 317-545-9655
#+
Electric Motor Service Co.
Davenport 319-323-1823
Goodwin Tucker Group
Des Moines 515-262-9308
"()-
Service Solutions Group
Lexington 859-254-8854
Service Solutions Group
Louisville 502-451-5411
#)'"
Chandlers Parts & Service
Baton Rouge 225-272-6620
!&- "
Electric Motor Service
Baltimore 410-467-8080
GCS Service
Silver Spring 301-585-7550
!'')'(('
Ace Service Co., Inc.
Needham 781-449-4220
!"
Bildons Appliance Service
Detroit 248-478-3320
Commercial Kitchen Service
Bay City 517-893-4561
Midwest Food Equip. Service
Grandville 616-261-2000
!""'#(
GCS Service
Plymouth 800-345-4221
!''#)&
General Parts
Kansas City 816-421-5400
Commercial Kitchen Services
St. Louis 314-890-0700
Kaemmerlen Parts & Service
St. Louis 314-535-2222
"&'
Anderson Electric
Omaha 402-341-1414
"*
Burney’s Commercial
Las Vegas 702-736-0006
i. Tech Commercial Service
N. Las Vegas 702-649-4616
"+&'-
Jay ill Repair
Fairfield 973-575-9145
Service Plus
Flanders 973-691-6300
"+-#&
Acme American Repairs, Inc.
Brooklyn 718-456-6544
Alpro Service Co.
Brooklyn 718-386-2515
Appliance Installation
Buffalo 716-884-7425
Duffy’s Equipment Services, Inc.
Buffalo 800-836-1014
3Wire Northern
Plattsburgh 800-634-5005
Duffy’s Equipment Services, Inc.
Sauquoit 800-836-1014
J.B. Brady, Inc.
Syracuse 315-422-9271
"#&(&# "
Authorized Appliance
Charlotte 704-377-4501
##
Akron/Canton Comm. Svc. Inc.
Akron 330-753-6635
Service Solutions Group
Cincinnati 513-772-6600
Commercial Parts and Service
Columbus 614-221-0057
Electrical Appl. Repair Service
Brooklyn eights 216-459-8700
E. A. Wichman Co.
Toledo 419-385-9121
# #!
agar Rest. Service, Inc.
Oklahoma City 405-235-2184
Krueger, Inc.
Oklahoma City 405-528-8883
#&#"
Ron’s Service, Inc.
Portland 503-624-0890
$""'- *"
Elmer Schultz Services
Philadelphia 215-627-5401
FAST Comm. Appl. Service
Philadelphia 215-288-4800
Appliance Installation & Service
Pittsburgh 412-809-0244
K & D Service Co.
arrisburg 717-236-9039
Electric Repair Co.
Reading 610-376-5444
&#' "
Marshall Electric Co.
Providence 401-331-1163
'#)(&# "
Whaley Foodservice Repair
W. Columbia 803-791-4420
(""''
Camp Electric
Memphis 901-527-7543
(,'
GCS Service
Fort Worth 800-433-1804
Armstrong Repair Service
ouston 713-666-7100
Cooking Equipment Specialist
Mesquite 888-866-9276
Refrigerated Specialist, Inc.
Mesquite 888-866-9276
Commercial Kitchen Repair Co.
San Antonio 210-735-2811
)(
La Monica’s Rest. Equip. Service
Murray 801-263-3221
*&"
Daubers
Norfolk 757-855-4097
Daubers
Springfield 703-866-3600
+'"(#"
3Wire Restaurant Appliance
Seattle 800-207-3146
+'#"'"
A.S.C., Inc.
Madison 608-246-3160
A.S.C., Inc.
Milwaukee 414-543-6460
"
&(
Key Food Equipment Service
Edmonton 780-438-1690
&('# )!
Key Food Equipment Service
Vancouver 604-433-4484
Key Food Equipment Service
Victoria 250-920-4888
!"(#
Air Rite, Inc.
Winnipeg 204-895-2300
"+&)"'+
EMR Services, Ltd.
Moncton 506-855-4228
#"(&#
R.G. enderson Ltd.
Toronto 416-422-5580
Choquette - CKS, Inc.
Ottawa 613-739-8458
%)I
Choquette - CKS, Inc.
Montreal 514-722-2000
Choquette - CKS, Inc.
Québec City 418-681-3944
)"("#!
Marren Group
Northants +44(0)1933 666233
Other manuals for DL-400
3
This manual suits for next models
8
Table of contents
Other Hatco Indoor Furnishing manuals
Popular Indoor Furnishing manuals by other brands

RTA
RTA TECHNI MOBILI RTA-4804L Assembly instructions

modway
modway QUEEN BED FRAME MOD-5432 Assembly instruction

Next
Next CUBE LONG JOHN Assembly instructions

Wonderland
Wonderland 342 manual

Furniture of America
Furniture of America Carlisle CM3778RT Assembly instructions

Next
Next 243423 Assembly instructions