manuals.online logo
Brands
  1. Home
  2. •
  3. Brands
  4. •
  5. Hawking
  6. •
  7. Extender
  8. •
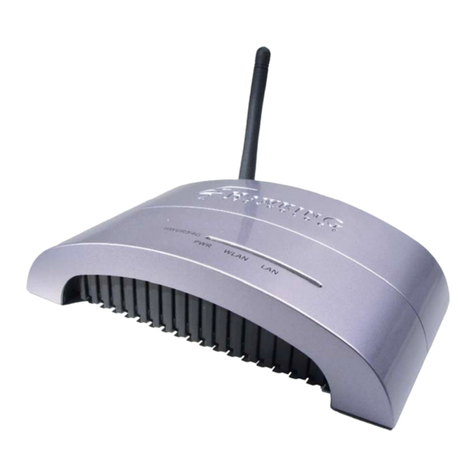
  9. Hawking HWREG1 User manual

Hawking HWREG1 User manual

1
2
3
4
1) POWER UP
After you have correctly connected your Range Extenderto an available Ethernet port
on your Network, please power on the Extender and a PC that is also on the netw ork..
2) INSERT THE SETUP CD
(Mac Use rs skip this section and view the Mac setup page in the next section)
Find the Setup-CD in your package and insert it into your CD-Rom drive of the PC
you wish to configure the Extender from. Wait for the Auto-Load Page to load. If
the page does not loa d, please click on the “My Computer” icon of you PC and find
your CD-Rom Drive. Right-Click on the CD-Rom drive icon and choose
“Explore .” Find the file titled “autorun” and execute it.
Click on the “Setup Wizard” tab to begin configuration of your Router.
5
3)SCAN FOR THEDEVICE
Once the Setup Wizard has loaded you will need to select your device from a list of
HWREG1devices in your network. If nothing appears in the box, double check all
your connections and click on “Refresh.” Once the Wizard has detected your device
click “Next” to move on to the next step.
4)SELECT A WIRELESS ID FOR YOUR RANGE EXTENDER
Select an Identification Name (SSID) for your Wireless-G Range Extender.
Computers attempting to connect to the network through the Range Extender will use
the SSID to identify which wireless network is associated to the Range Extender.
6
In this section you may also change your login password.(up to 4 characters) The
new passwordsettings will be used when accessing the web-based configuration
utility of the Range Extender (for advanced settings).
5)ASSIGN AN IPADDRESS TO YOURRANGE EXTENDER
To successfully communicate to the HWREG1, an IP Address must be assigned to the
unit. If you are on a network with a router that distributes IP Address automatically
(DHCP) you have the option to automatically configure the IP Address. However
the Extender must be connected to your network and not directly to the PC for this to
work.
You may also manually assign your IP Address (Recommended).
Note: The IP Address of the device must be in the same context/subnet of the PC it is
connected to in order to complete the setup of the device. The listed IP Address in
the Setup Wizard is the recommended IP based on the IP Address on your PC. You
may change the last number of the IP Address but it is highly recommended that you
DO NOT adjust the other numbers.
When you have selected your IP Address click “Next” to continue the setup.
7
5)SELECT A WIRELESS NETWORK TO EXTEND
This section lets you scan for networks within the wireless vicinity of your Range
Extender. Click the SCAN button to display the networks in your area. Highlight
the network that you wish to extend. (Based on the SSID of your original network)
Click NEXT when you are finished.
If the network you selected has security enabled, the Setup Wizard will take you to a
page to configure your Security settings. (The settings here MUST match the
security settings of your current wireless access point) If you are not sure what you
security settings are, contact your network administrator for the correct information.
8
5) STATUS
This screen displays the results of your settings. Please save this information
somewhere secure for future use. You will need to enter the IP address in your
web-browser for future configurations.
Click SET to confirm these settings and continue.
You may now skip the next section(Mac Users Setup) of this Installation Guide and
continue to Step 4: Position the Range Extender.
1) MAC USERS SETUP
To set up your Range Extender using a Mac computer you will need to first configure
the IP address of your computer.
In order to pull up the Web Based Configuration Menu your computer must be in the
same IP subnet as your Range Extender. To setup an IP address on a Mac:
-Select the Apple Icon on the top left of your desktop
-Select System Preferences
-Select Network
-Select either your Airport or Built-in Ethernet to configure the IP
-Select Manual IP Configuration and enter the information below:
IP: 192.168.1.2 Subnet 255.255.255.0 Gateway: 192.168.1.235
Once these values match you should be able to pull up the Web Menu.
9
Open your Web-Browser and type http://192.168.1.235 into your web address bar.
Hit Enter.
A login page should appear:
User Name: admin
Password: 1234
Select the Basic Settings Tab and fill in the information within the page according to
the diagram. Click Apply to confirm the settings.
10
After you have selected the network you wish to extend you will need to
change the IP address of your Range Extenderto match that of your
wireless network. To do this follow the steps below:
1) From the top navigation bar select Advanced Settings
2) Select System Utility from the left bar
3) Adjust the Management IP Settings so that they match your current
network’s settings.
For Example:
If the IP Address of your existing wireless network’s router is:
IP Address: 192.168.0.1
Subnet: 255.255.255.0 (Most Common)
Then the Management IP Address of your Range Extender should be:
IP Address: 192.168.0.235
Note: The last number of your IP address must be a number that is not
currently used in your network AND not the same number taken by
your router.
Subnet: 255.255.255.0
Gateway: 192.168.0.1 (IP Address of your network router)
4) Click Apply after you have set your settings.
5) After the settings have been applied you may remove the Ethernet
cable from your Range Extender and continue on with Step 4 of the
Installation Guide.
6) You will need to reset the IP Address on your Mac computer to use
it with the network again. To do this:
To reset IP address on a Mac:
-Select the Apple Icon on the top left of your desktop
-Select System Preferences
-Select Network
-Select either your Airport or Built-in Ethernet to configure the IP
-Select Using DHCP Configuration and enter the information below and click
apply.
For more advanced settings of the HWREG1 refer the Users Manual.
11
1) After you have completely configured your Range Extender you can
disconnect the Ethernet cable that connects the Extender to your network or
PC for configuration.
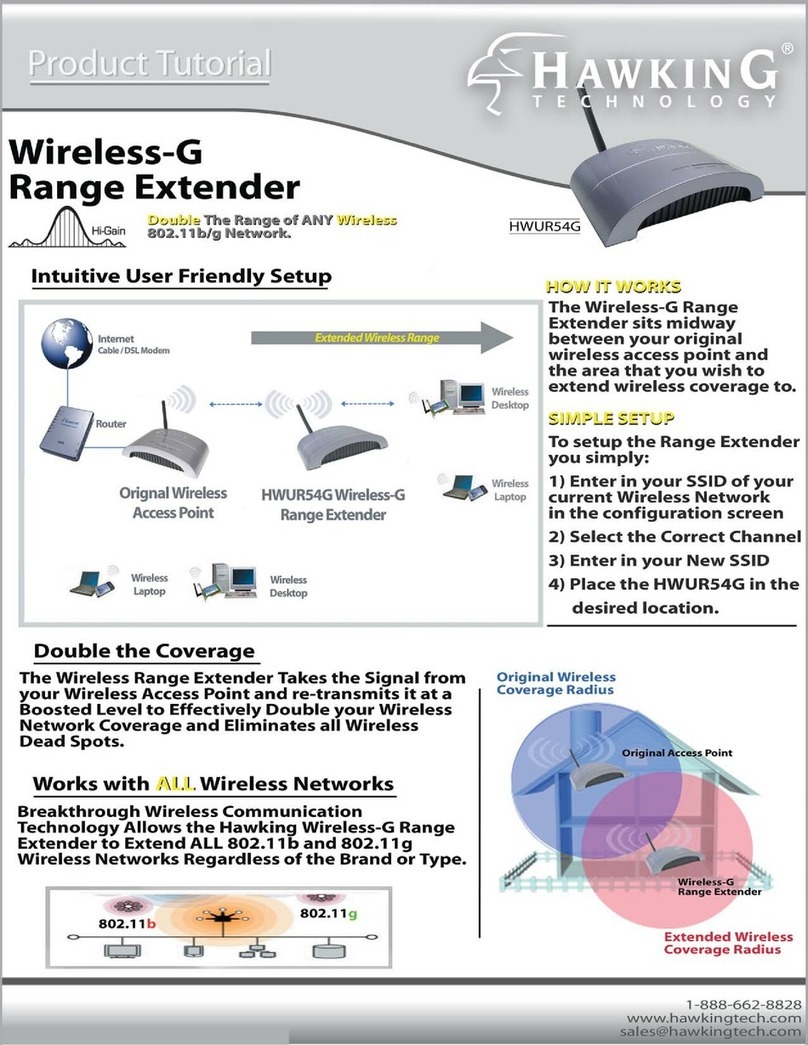
2) Take the Range Extender and Power Adapter and place the Extender in a
location half way between your original Access Point and the area that you are
extending your wireless coverage to. See the image below for more details:
3) Once you have
located a good location,
plug the power adapter
into an available power
outlet and view the
LEDs on the Range
Extender. If the
Range Extender is
working the WLAN light
should be blinking
repeatedly and the
PWR LED should
remain on constantly.
4)Test the Range Extender by connecting to it wirelessly with a wireless
enabled computer. Give the computer 15 seconds to obtain information from
the Range Extender after associating to the Range Extender’s SSID. Open
your web browser and enterwww.hawkingtech.com into the web address bar.
If the page loads your Wireless Range Extender is working correctly. If not
please check the troubleshooting section or reconfigure your Wireless Range
Extender.
12
1) I Can’t Pull up the Web Menu Screen?
In order to pull up the Web Based Configuration Menu your computer must be in
the same IP subnet as your Range Extender. For example, if your PC’s IP
configuration is the following:
IP: 192.168.0.5 Subnet 255.255.255.0 Gateway: 192.168.0.1
Then your Range Extender LAN IP address must be:
IP: 192.168.0.? (any # except 1 and 5) Subnet 255.255.255.0
Gateway: 192.168.0.1
Once these values match you should be able to pull up the Web Menu.
2) I Can’t Connect to the Wireless Repeater or the Internet
Make sure that all your settings are correct on the Range Extender.
Remember that the Original SSID must match the SSID of your original network.
The channel number of the extender must also match that of your original
network. For example, if your original network had the following settings:
SSID: HawkingAP
Channel: 6
LAN IP: 192.168.1.2
SUBNET: 255.255.255.0
DNS: 212.43.32.3
-Then the settings of your Range Extender must be:
Original SSID: HawkingAP
Channel: 6
SSIDofRangeExtender: (any SSID other than HawkingAP)
LAN IP: 192.168.1.x (any number other than 2)
SUBNET: 255.255.255.0
GATEWAY: 192.168.1.2
DNS: 212.43.32.3
After you have matched the settings check if you can connect to the internet through
the Wireless Range Extender. If you still cannot access the internet please contact
our technical support department using the number below.
13
Ethernet: A networking standard using cables (Category 5) to create a network.
NetworkAdapter: Also known as a NIC (Network Interface Card). Used to provide PC’s or laptops with an Ethernet port or
wireless access to the network.
Broadband Modem: A device that allows broadband connection to the internet. Broadband connections include speeds faster
than 56k (dial up modem speed). The two most common types of Broadband connections are DSL and Cable. Cable modem
relies on the bandwidth of cable television lines while DSL modems rely on the telephone lines operating at DSL speeds.
Router: A device used to share internet access from one user to multiple users. By taking one IP address (Addresses used by
ISP’s to assign broadband services to your computer) the Router distributes the services of your broadband access among
multiple users and IP’s.
Wireless IEEE 802.11 –Wireless Network Specifications
Access Point: A network device that connects to a wired network and adds wireless access into the existing network.
•802.11 --applies to wireless LANs (Networks) and provides 1 or 2 Mbps transmission in the 2.4 GHz band using
either frequency hopping spread spectrum (FHSS) or direct sequence spread spectrum (DSSS).
•802.11b (also referred to as 802.11 High Rateor Wi-Fi) -- an extension to 802.11 that applies to wireless LANs and
provides 11 Mbps transmission (with a fallback to 5.5, 2 and 1 Mbps) in the 2.4 GHz band. 802.11b uses only DSSS.
802.11b was a 1999 ratification to the original 802.11 standard, allowing wireless functionality comparable to
Ethernet.
•802.11g --applies to wireless LANs and provides 54 Mbps in the 2.4 GHz band. Backwards compatible with IEEE
802.11b products.
ESSID: A unique name identification for your wireless network. All wireless devices must have the same ID or else they will
not work together.
Channel: A Channel that all Wireless devices communicate on. All Wireless devices on the network must be set on the same
channel to work.
WEP/WPA: Wireless networking security protocols and standards, used to keep hackers from entering your wireless network.
14

Other manuals for HWREG1

2

Other Hawking Extender manuals

Hawking HWUR54G User manual

Hawking

Hawking HWUR54G User manual

Hawking HWUR54G User manual

Hawking

Hawking HWUR54G User manual

Hawking HWREN1 Rev 1 User manual

Hawking

Hawking HWREN1 Rev 1 User manual

Hawking Hi-Gain HWREN15 User manual

Hawking

Hawking Hi-Gain HWREN15 User manual

Hawking HSB2 User manual

Hawking

Hawking HSB2 User manual
Hawking Hi-Gain HWREN1 User manual

Hawking

Hawking Hi-Gain HWREN1 User manual

Hawking HWBA54G User manual

Hawking

Hawking HWBA54G User manual

Hawking HSB1 User manual

Hawking

Hawking HSB1 User manual

Hawking HWREG1 User manual

Hawking

Hawking HWREG1 User manual

Hawking HOW12ACM User manual

Hawking

Hawking HOW12ACM User manual

Hawking HWREN1 Rev 1 User manual

Hawking

Hawking HWREN1 Rev 1 User manual

Hawking Hi-Gain HD45X User manual

Hawking

Hawking Hi-Gain HD45X User manual

Hawking Hi-Gain HWABN25 User manual

Hawking

Hawking Hi-Gain HWABN25 User manual

Hawking Hi-Gain HWABN25 User manual

Hawking

Hawking Hi-Gain HWABN25 User manual

Hawking Hi-Gain HWREN2 User manual

Hawking

Hawking Hi-Gain HWREN2 User manual

Hawking HSB2 User manual

Hawking

Hawking HSB2 User manual

Hawking Hi-Gain HD45X User manual

Hawking

Hawking Hi-Gain HD45X User manual

Hawking HSB2 User manual

Hawking

Hawking HSB2 User manual

Hawking HWUR54G User manual

Hawking

Hawking HWUR54G User manual

Hawking HWREG1 User manual

Hawking

Hawking HWREG1 User manual

Hawking HWUR54G User manual

Hawking

Hawking HWUR54G User manual

Hawking Hi-Gain HWREN15 User manual

Hawking

Hawking Hi-Gain HWREN15 User manual

Hawking HW7ACW Assembly instructions

Hawking

Hawking HW7ACW Assembly instructions

Hawking HWREN1 Rev 1 User manual

Hawking

Hawking HWREN1 Rev 1 User manual
Popular Extender manuals by other brands

TP-Link RE580D user manual

TP-Link

TP-Link RE580D user manual

Ace USB-EX100 user manual

Ace

Ace USB-EX100 user manual

D-Link DAP-1520 Brochure & specs

D-Link

D-Link DAP-1520 Brochure & specs

Comprehensive CHE-HDBTWP242K user manual

Comprehensive

Comprehensive CHE-HDBTWP242K user manual

Network Technologies Incorporated ST-C6USB4K-HDBT user manual

Network Technologies Incorporated

Network Technologies Incorporated ST-C6USB4K-HDBT user manual

opticis HDFX-700-TR user manual

opticis

opticis HDFX-700-TR user manual

PROLED CTR-1204015 user manual

PROLED

PROLED CTR-1204015 user manual

Lindy 32576 user manual

Lindy

Lindy 32576 user manual

LINK-MI LM-K120H-4K user manual

LINK-MI

LINK-MI LM-K120H-4K user manual

Lindy 39378 user manual

Lindy

Lindy 39378 user manual

Alereon AL5740 Honolulu user guide

Alereon

Alereon AL5740 Honolulu user guide

Speaka Professional 98 92 05 operating instructions

Speaka Professional

Speaka Professional 98 92 05 operating instructions

Intercoax ECP-2601T quick start guide

Intercoax

Intercoax ECP-2601T quick start guide

Monoprice Blackbird 24279 user manual

Monoprice

Monoprice Blackbird 24279 user manual

Remotec ZXT-120 user manual

Remotec

Remotec ZXT-120 user manual

CTC Union IEXT224-4PH-L user manual

CTC Union

CTC Union IEXT224-4PH-L user manual

SureCall Fusion4Home 3.0 CA Quick install guide

SureCall

SureCall Fusion4Home 3.0 CA Quick install guide

Graco Pulse 25P363 instructions

Graco

Graco Pulse 25P363 instructions

manuals.online logo
manuals.online logoBrands
  • About & Mission
  • Contact us
  • Privacy Policy
  • Terms and Conditions

Copyright 2025 Manuals.Online. All Rights Reserved.