Hawking CS112U User manual


FCC Warning
This equipment has been tested and found to comply with the regulations for a Class B digital device,
pursuant to Part 15 of the FCC Rules. These limits are designed to provide reasonable protection against
harmful interference when the equipment is operated in a commercial environment. This equipment
generates, uses, and can radiate radio frequency energy and, if not installed and used in accordance with
this user’s guide, may cause harmful interference to radio communications. Operation of this equipment in
a residential area is likely to cause harmful interference, in which case the user will be required to correct
the interference at his/her own expense.
CE Mark Warning
This is a Class B product. In a domestic environment, this product may cause radio interference, in which case the user
may be required to take adequate measures.
VCCI Mark Warning
LIMITED WARRANTY
Hawking Technology guarantees that every CS112U KVM Switch is free from physical defects in material and
workmanship under normal use for two (2) years from the date of purchase. If the product proves defective during this
two-year warranty period, call Hawking Customer Service in order to obtain a Return Authorization number. Warranty
is for repair or replacement only. Hawking Technology does not issue any refunds. BE SURE TO HAVE YOUR
PROOF OF PURCHASE. RETURN REQUESTS CANNOT BE PROCESSED WITHOUT PROOF OF PURCHASE.
When returning a product, mark the Return Authorization number clearly on the outside of the package and include
your original proof of purchase.
IN NO EVENT SHALL HAWKING TECHNOLOGY’S LIABILTY EXCEED THE PRICE PAID FOR
THE PRODUCT FROM DIRECT, INDIRECT, SPECIAL, INCIDENTAL OR CONSEQUENTIAL
DAMAGES RESULTING FROM THE USE OF THE PRODUCT, ITS ACCOMPANYING SOFTWARE
OR ITS DOCUMENTATION. Hawking Technology makes no warranty or representation, expressed,
implied or statutory, with respect to its products or the contents or use of this documentation and all
accompanying software, and specifically disclaims its quality, performance, merchantability, or fitness for
any particular purpose. Hawking Technology reserves the right to revise or update its products, software,
or documentation without obligation to notify any individual or entity. Please direct all inquiries to:
The complete CS112U package consists of:
♦ One 2-Port CS112U USB & PS/2 KVM Switch
♦ Two Premium Quality KVM Cables
♦ One User’s Manual
Check to make sure that the unit was not damaged during shipping. If you encounter a
problem, contact your dealer.
Please read this manual thoroughly, and follow the installation and operation procedures
carefully to prevent any damage to the CS112U unit, and/or any of the devices connected
to it.
Copyright 2003 Hawking Technologies, Inc.
All brand names and trademarks are the registered property of their respective owners.
- 1 -

Overview…………………………………………………………………………………..3
Features……………………………………………………………………………………4
Hardware Requirements …………………………………………………………………..5
Technical Spececifications…………………………………………………………….…..6
Technical Specifications………………………………………………………………...6
Mac O.S. and SUN Micro Keyboard Mapping..………………………………………..7
Installation…………………………………………………………………………………8
Hardware Installation………...…………………..………………………………..……..8
Basic Input Output System (BIOS)…………………………………….………………...9
Functions…………………………………………………………………………………10
Troubleshooting….……….…..………...…………………………………………….11-13
- 2 -

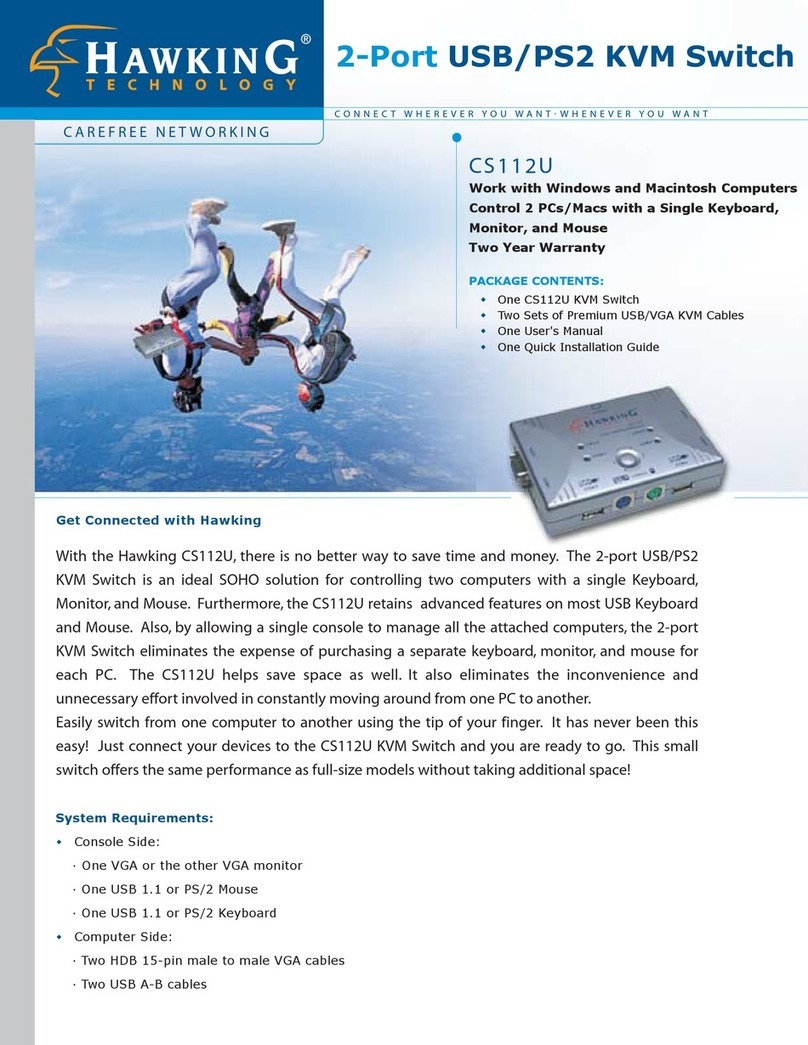
The CS112U USB & PS/2 2-Port KVM Switch is a control unit that allows access to
multiple PCs from a single console (keyboard, monitor and mouse). It supports both
USB & PS/2 plugs - USB & PS2 Mouse, USB & PS/2 Keyboard, and VGA/SVGA
Video. Before the development of the CS112U, the only way to control multiple
computer configurations from a single console was through a complex and costly
network system. Now, with the CS112U, you can easily access multiple computers in a
cost effective manner.
The CS112U unit can control up to 2 PCs, all from a single console.
Setup is fast and easy; it only requires the user to plug the cables into the appropriate
ports. There is no software to configure, so there is no need to get involved in complex
installation routines or to be concerned with incompatibility problems. Since the CS112U
intercepts keyboard input directly, it works on any hardware platform and with all
operating systems.
The CS112U provides two convenient methods to access any PC that is connected to the
system: (1) using the push button port selection switch located on top of the unit's panel;
(2) entering HotKey combinations from the keyboard. In addition, a powerful Quick
View Scan feature allows you to auto scan and monitor the activities of all operating PCs
on the installation one by one.
There is no better way to save time and money. By allowing a single console to manage
all the attached PCs, the CS112U eliminates the expense of purchasing a separate
keyboard, monitor, and mouse for each PC, and saves all the extra space as well. It also
eliminates the inconvenience and unnecessary effort involved in constantly moving
around from a PC to another.
- 3 -

♦ A compact size, 2-port USB KVM switch
♦ USB 1.1 Specification compliant
♦ Supports UHCI and OHCI USB Interface
♦ USB and PS/2 console work with Windows 98, SE, ME, 2000, XP, Window NT, HP
Unix, Linux, Sun Solaris, MAC O.S. 8.6 or later version
♦ The extra USB device ports can also be used for computer to share different USB
peripherals.
♦ Manage multiple PCs, G3/G4 Macs, iMacs from one USB or PS/2’s mouse, keyboard,
and monitor.
♦ For PS/2: Keyboard and Mouse control all PCs and real time PCs switch without Hub.
♦ For USB: Keyboard and Mouse control all computers
♦ Plug and Play: No Windows software driver needed for PS/2 Keyboard and Mouse
♦ Computer Selection via “Select” button on push button, or HotKey control
♦ LED Display For Easy Status Monitoring
♦ Buzzer sound for port switching confirmation
♦ Supports auto scan function
♦ High VGA resolution (1920 x 1440) and high bandwidth (200MHz)
♦ VGA DDC, DDC2, DDC2B Support
♦ Supports USB bus power mode
♦ Includes 2 High Quality KVM Connector Cables
♦ Independently and simultaneously access USB devices and PC Selection for PS/2
console users
♦ Hot Pluggable - add or remove PCs for maintenance without powering down the
switch
1. PS/2 compatible mouse support is for three button (wheel) mice.
2. The Logitech Mouse Ware program’s Change Device procedure does not work on
Microsoft NT systems.
- 4 -

Console
♦ One VGA or the VGA monitor
♦ A USB keyboard or PS/2 keyboard
♦ A USB mouse or PS/2 mouse
Computers
♦ Two HDB 15-pin male to male VGA cables
♦ Two USB A-B cables
- 5 -

TECHNICAL SPECIFICATIONS
Mode No. CS112U
PC Port 2 USB Type B ports
Console Port 2 USB Type A ports
2 PS/2 ports
PC Port Connector USB Type B receptacle VGA HDB 15 pin Female
USB Type A receptacle
Console Port Connector PS/2 Keyboard Mini Din 6 pin Female
PS/2 Mouse Mini Din 6 pin Female
VGA HDB 15 pin Female
PC selection Hot Key or Push Button
On Screen Display No
PC Port LED 2
Hub Port LED 2
MAX PC Connections 2
Scan Intervals 5 ~ 100 seconds (Power on: default 5 sec.)
Keyboard Conversion PS2 to USB
Mouse Conversion PS2 to USB
VGA Resolution 1920 x 1440
Bandwidth 200 MHz
Power Type Bus Power
Power Adapter Not required: bus power
Operation Temperature 0 ~ 40ºC
Storage Temperature -20 ~ 60ºC
Humidity 0 ~ 90%, non-condensing
Size Desktop
Dimension (L x W x H) 4.84” x 3.20” x 1.10” (123 x 81 x 28 mm)
Weight 6 oz (160g)
- 6 -

Mac O.S. and SUN Micro Systems Keyboard Mapping
The following diagram indexes the HotKey combination that emulates Mac O.S. and Sun Micro keyboard
commands. This feature is only available on the PS/2 keyboard attached to the KVM, and is not available
on the USB keyboard.
Left Windows Key = L_Win
Sun Microsystems
Keyboard Windows PS/2
Keyboard Mac OS
Stop L_Win & L_Alt
Props L_Win & L_Ctrl
Compose L_Win & L_Shift
Front L_Win & F1
Open L_Win & F2
Find L_Win & F3
Again L_Win & F4
Undo L_Win & F5
Copy L_Win & F6
Paste L_Win & F7
Cut L_Win & F8
Help L_Win & F11
Power L_Win & F12 Power
Mute L_Win & “1”
V_DN L_Win & “2”
V_UP L_Win & “3”
Windows Key Apple Key
Alt Option
Print Screen F13
Scroll Lock F14
Pause Break F15
- 7 -

Before you begin, please make sure that all of the devices that you are going to connect to
have power turned off.
Hardware Installation
To set up your CS112U, please follow the steps below:
For PC:
1. Connect USB A-B type cables to PC and USB KVM switch. The type A connector of
USB cable goes into the PC and the other end of USB cable is for USB KVM Switch.
2. Connect HDB 15-pin (Male to Male) cables to PC and KVM switch.
3. VGA monitor’s cable should connect into VGA port.
4. Then, connect the keyboard and mouse to console PS/2 port.
* Macs and Sun Micro Systems have the same intallation as PCs. Please follow the
procedure above.
Different arrangments for USB & PS/2 keyboard and mouse:
a. PS/2 keyboard and PS/2 mouse
b. PS/2 keyboard and USB mouse
c. USB keyboard and PS/2 mouse
d. USB keyboard and USB mouse
Note:
! After installing the PC or Mac systems with the KVM switch, there is only
one system at a time can respond to the command from the keyboard or
mouse. The PC and Mac systems do not work simultaneously.
- 8 -

Basic Input Ouput System (BIOS):
! Error message or check keyboard: If the BIOS needs to check the
keyboard to accomplish setup and the PC shows a keyboard error message
on the screen, please press the “delete” key immediately (a few times) and
you will get into BIOS setting mode.
! BIOS setup mode: after you have entered BIOS set up mode, please select
“Halt on Error” or select other Error condition. Then, select “Halt all
errors but Keyboard” or select ignore keyboard during boot up BIOS
process.
! After the system BIOS is configured, please add the power adapter to the
USB KVM switch. Switch your PC system power “on” – this will enable
Windows O.S. to identify your keyboard and mouse. The console ports
(keyboard and mouse) need to pass through all the PC ports before you
can start all PCs simultaneously.
! Other PCs are unable to see a mouse during system boot up if the BIOS
system does not boot with a keyboard connected. The Windows O.S. will
show the following or similar message:
“Windows did not detect a mouse attached to the computer. Please
safely attach a serial mouse now. To attach a mouse to a PS/2
mouse port, you must first turn the computer off.”
“Do not show this message again in the future.”
-Please select the item “Do not show this message again in the future” and
finish booting up your Windows O.S.
-9-

USAGE
The Push Button:
The USB KVM switch supports one push button. You can select PC port and USB hub
together using the push button.
- i.e. Hub and PC are selected at the same time
Keyboard:
There are two types of keyboard that can be used for this switch, PS/2 or USB type.
Mouse:
There are two types of mouse that can be used for this switch, PS/2 or USB type.
LED Indications for PC Selection:
LED is lit when you have successfully connected to a selected PC port. The LED will
flash when the selected PC is not connected or not switched on.
LED Indications for USB Hub Selection:
LED is lit when the USB hub is being occupied. Note: there are two leds presented – one
for each PC.
- 10 -

TROUBLESHOOTING
Note: If you are experiencing difficulties, first make sure that there are no problems with
the cables, and that they are all properly connected.
IBM PC or Compatible:
♦
♦
♦
♦
♦
♦
♦
PC cannot find keyboard or mouse after the boot process. Please make sure you
turn on your PC system by the PC port in order to boot Windows O.S. and for
your system to identify the keyboard and mouse type before you install this USB
KVM switch.
Keyboard or mouse does not work with or is not compatible with the PC. Please
make sure the keyboard or mouse works when it is plugged directly into a
computer. If the problem persists, please try another keyboard or mouse.
Mouse doesn not work in Auto Scan mode. You can press any key on the
keyboard or the front button on the face plate to return to standard mode and then
use the keyboard or mouse again.
When KVM switch is in Auto Scan mode, there are only VGA monitor display
and CPU alternately, but the USB Hub does not switch to Auto Scan mode: After
you press any key, the PC port will be selected the same time you see the current
PC Screen.
If a keyboard error message appears on the screen, the PC BIOS need setup.
Please refer to the Hardware Installation Procedure or upgrade to the new BIOS
so it will accept the USB to PS/2 conversion. In most cases, during the PC boot
process, most BIOS support USB to PS/2 keyboard conversion or USB keyboard.
For 4D and 5D users, it is recommended to be used with a USB hub port of the
USB KVM switch (only if the mouse supports USB type). Because the USB
conversion standard does not define PS/2 to USB converters for 4D or 5D mice,
these extra user-defined keys will lose function when users use the PS2 port of the
USB switch.
The recommended VGA cable distance is 5 meters maximum without ghosting
and degrading. Normally, the cable length is based on the driver capacity of your
VGA card. If you need longer VGA cable, please use aVGA extender to
accomplish your applictions.
- 11 -

♦
♦
♦
The reconmended keyboard or mouse cable is 10 feet maximum without
degradation. Normally, the cable length is based on the driver capacity of your
mother board. If you need longer keyboard or mouse cables, please use keyboard
or mouse extenders to get your applications.
When you switch USB Hubs from one PC to another and there are many USB
devices attached to the PC, it will take about 5 ~ 10 seconds for all USB devices
to be initialized. So, switching ports will take more time than the conventional
PS/2 KVM switches.
When you use Japanese Windows O.S. with106-key keyboards, there are some
special keys like “¥” that need a 106-key driver (Microsoft native driver in OS
CD-ROM.) Please follow the procedures below and click the mouse to add the
new driver.
- 12-

- 13 -
Other manuals for CS112U
3
Table of contents
Other Hawking Switch manuals

Hawking
Hawking PN828ES User manual

Hawking
Hawking HFS5T User manual

Hawking
Hawking UH214 User manual

Hawking
Hawking PN824ES User manual

Hawking
Hawking CS152F User manual

Hawking
Hawking CS152F User manual

Hawking
Hawking HFS16T User manual

Hawking
Hawking HKS2AU User manual

Hawking
Hawking PN1616ES User manual

Hawking
Hawking CS102U User manual

Hawking
Hawking CS164 User manual

Hawking
Hawking FX826ES User manual

Hawking
Hawking H-FS24T User manual

Hawking
Hawking CS154F User manual

Hawking
Hawking HKS112U User manual

Hawking
Hawking HKS102 User manual

Hawking
Hawking HS2G24T User manual

Hawking
Hawking GS224T User manual

Hawking
Hawking CS112U User manual

Hawking
Hawking HKS112U User manual