manuals.online logo
Brands
  1. Home
  2. •
  3. Brands
  4. •
  5. Haws
  6. •
  7. Plumbing Product
  8. •
  9. Haws 5010SS Guide

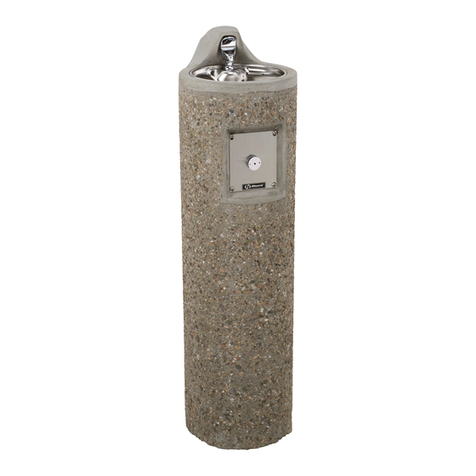
Haws 5010SS Guide

03/21 Model 5010SS Page 1 of 4
1455 Kleppe Lane Sparks, NV 89431-6467 (775) 359-4712 Fax (775) 359-7424
E-mail: [email protected]  website: www.hawsco.com
No. 0002075200 (2)
Model 5010SS
INSTALLATION, OPERATION
&
MAINTENANCE INSTRUCTIONS
LIMITED WARRANTY
HAWS warrants that this specific product is guaranteed against defective material or
poor workmanship for a period of one year from date of shipment. HAWS liability
under this warranty shall be discharged by furnishing without charge F.O.B. HAWS
Factory any goods, or part thereof, which shall appear to the Company upon
inspection to be of defective material or not of first class workmanship, provided that
claim is made in writing to Haws within a reasonable period after receipt of the
product. Where claims for defects are made, the defective part or parts shall be
delivered to the Company, prepaid, for inspection. HAWS will not be liable for the
cost of repairs, alterations or replacements, or for any expense connected therewith
made by the owner or his agents, except upon written authority from HAWS, Sparks,
Nevada. HAWS will not be liable for any damages caused by defective materials or
poor workmanship, except for replacements, as provided above. Buyer agrees that
HAWS shall not be liable for general, special, or consequential damages claimed to
arise under the contract of sale. The drinking fountain manufactured by HAWS is
warranted to function if installation and maintenance instructions provided are
adhered to. The units also must be used for the purpose for which they were
intended.
NO OTHER WARRANTIES EXPRESSED OR IMPLIED ARE AUTHORIZED,
PROVIDED OR GIVEN BY HAWS.
NOTE TO INSTALLER: Please leave this information with the Maintenance Department.
SHOULD YOU EXPERIENCE DIFFICULTY WITH THE INSTALLATION OF THIS
MODEL PLEASE CALL:
TECHNICAL SUPPORT: 1-800-766-5612
FOR CUSTOMER SERVICE: 1-888-640-4297
03/21 Model 5010SS Page 2 of 4
OPERATION & MAINTENANCE INSTRUCTIONS
FLOW ADJUSTMENT:
Step 1: Gain access to flow adjustment screw by removing cover nut and button (see
Installation Drawing).
Step 2: Adjust flow with screwdriver: clockwise for more flow, counterclockwise for
less.
Step 3: If desired flow is not obtained, clean screen located at base of valve body (see
Installation drawing page 4 of 4) and make sure screwdriver stop (not supplied)
is fully opened. Note: To remove head and gain access to screen (for
example, when used with electric water cooler), keep the inlet nipple from
turning by holding it with locking pliers inside the fountain, beneath the basin.
Step 4: Replace button and cover nut.
CARTRIDGE ASSEMBLY REPLACEMENT:
Note: Replacement cartridge, screen, and gasket is available as P/N VRK5010. To gain
access to cartridge assembly with gasket:
Step 1: Remove cover nut and button, then remove retaining nut using universal
spanner wrench (Haws part number 0006983506 –not supplied).
Step 2: Pull cartridge assembly out.
Step 3: Insert new cartridge with gasket.
oDo not remove gasket that comes with new cartridge.
oEnsure that the gasket on the new cartridge is very clean with no debris.
oMake sure there is no foreign matter in the valve body before inserting the
new cartridge assembly with gasket into the valve body.
oWhen inserting cartridge assembly with gasket, align inlet and outlet ports
on cartridge, with holes in the valve body.
oEnsure the cartridge ports are properly aligned and cartridge has
bottomed out by turning slightly into place.
Step 4: Install retaining nut until it makes contact with the cartridge, then tighten 1 1/4
turn farther.
Step 5: Replace button and cover nut.
CAUTION: When replacing cartridge assembly, damage can occur if not properly
re-installed. Read instructions carefully.
OPTIONAL PB8C (COPPER PLATED PUSH BUTTON & NUT) CLEANING & CARE:
If evidence of copper oxidation arises, simply rub surface with a soft rag and salt &
water mixture. Soft cleaning solutions may also be used on the copper button surface.
© 2021 Haws®Corporation –All Rights Reserved
HAWS® and other trademarks usedin these materials are the exclusive property of Haws Corporation.
PART BREAKDOWN
0005384011
SPOUT ASSEMBLY
WITH O-RING,
SCREEN & STREAM
STRAIGHTENER
CARTRIDGE
WASHER
SCREEN
0006983506
SPANNER WRENCH
(OPTIONAL)
0003849387
NUT COVER HEX
(CHROME PLATED)
0001333699
PUSH BUTTON
(CHROME PLATED)
VRK5010
CARTRIDGE
ASSEMBLY
APPROVED
DRAWN
PART NUMBER
DRAWING NO.
SCALE: SHEET OF
REV
DRAWING TYPE: SIZE: A
BYECN NO.
PAGE
DATE
DATE
ECN:
REVISED PER
CHKD
Haws Corporation - All Rights Reserved
HAWS and other trademarks used in these materials are the exclusive property of Haws Corporation.
C
R
MODEL(S)
1455 KLEPPE LANE
SPARKS, NEVADA 89431
(775) 359-4712 FAX (755) 359-7424
E-MAIL: HAWS@HAWSCO.COM
WEBSITE: WWW.HAWSCO.COM
THIS DOCUMENT IS TRUE AND CORRECT AT TIME OF PUBLICATION. CONTINUED PRODUCT IMPROVEMENTS
MAKE SPECIFICATIONS AND MEASUREMENTS SUBJECT TO CHANGE WITHOUT NOTICE.
WHEN ORDERING PARTS PLEASE SPECIFY MODEL NUMBER.
BW
01/14/09
15852A00 2
0002075200
5010SS
1:1
11
FV
03/02/21
4215 JL
3 of 4
PARTS BREAKDOWN
5664
2021
CHROME
PLATED
(STANDARD)
ADJUSTING
SCREW
CARTRIDGE ASSEMBLY
WITH GASKET
RETAINING NUT
BODY
SCREEN
O-RING
PB8C
COPPER
PLATED
ASSEMBLY
(OPTIONAL)
NUT COVER HEX
(COPPER PLATED)
PUSH BUTTON
(COPPER PLATED)
BUBBLER
CARTRIDGE ASSY
W/GASKET
RETAINING NUT
*HEX NUT COVER
RUBBER WASHER
2.04
3.38
1.58
VRK5010
2.63
SCREEN
ADJUSTING SCREW W/GASKET
CARTRIDGE ASSY
RUBBER WASHER
SCREEN
3/8"-18 NPS INLET
WIDE MOUTH GUARD
TO ADJUST FLOW:
1. REMOVE HEX NUT COVER AND PUSH
BUTTON COVER.
2. ADJUST WITH SCREWDRIVER: CLOCKWISE
TO INCREASE FLOW & COUNTER-
CLOCKWISE TO DECREASE FLOW.
3. IF DESIRED FLOW IS NOT OBTAINED,
CLEAN SCREEN AT INLET (SEE 5010SS
OPERATION AND MAINTENANCE MANUAL
FOR ACCESS INSTRUCTIONS.
4. REPLACE PUSH BUTTON COVER AND HEX
NUT COVER.
NOTES:
*PUSH BUTTON COVER
APPROVED:
DRAWN:
PART NUMBER
DRAWING NO.
SCALE: SHEET OF
REV
DRAWING TYPE: SIZE: A
BY:ECN NO.
DATE:
DATE:
ECN:
REVISED PER
CHK'D.:
Haws Corporation - All Rights Reserved. HAWS and other trademarks used in these materials are the exclusive property of Haws Corporation.
CR
MODEL(S)
1455 KLEPPE LANE
SPARKS, NEVADA 89431
(775) 359-4712 FAX (755) 359-7424
E-MAIL: [email protected]
WEBSITE: WWW.HAWSCO.COM
THIS DOCUMENT IS TRUE AND CORRECT AT TIME OF PUBLICATION. CONTINUED PRODUCT IMPROVEMENTS
MAKE SPECIFICATIONS AND MEASUREMENTS SUBJECT TO CHANGE WITHOUT NOTICE.
SLS
01/14/99
15851A00 2
0002075200.D
5010SS
1:1
11
FV
03/02/21
4215 JL
INSTALLATION
5664
2021
1.25
NOZZLE
ASSEMBLY
*CHROME PLATED PUSH BUTTON COVER & NUT ARE STANDARD ON
5010SS. COPPER PLATED OPTION IS AVAILABLE AS MODEL PB8C.
PAGE 4 of 4

Other Haws Plumbing Product manuals

Haws 7610 Guide

Haws

Haws 7610 Guide

Haws 7777 Guide

Haws

Haws 7777 Guide

Haws 3202 Guide

Haws

Haws 3202 Guide

Haws 3060 Guide

Haws

Haws 3060 Guide

Haws 3500 Guide

Haws

Haws 3500 Guide

Haws 8320Axion Guide

Haws

Haws 8320Axion Guide

Haws 7752WC Guide

Haws

Haws 7752WC Guide

Haws 7610 Guide

Haws

Haws 7610 Guide

Haws 7360BTWC Guide

Haws

Haws 7360BTWC Guide

Haws 5010.6427SS Guide

Haws

Haws 5010.6427SS Guide

Haws H1011.8HO User manual

Haws

Haws H1011.8HO User manual

Haws 8901B Axion Guide

Haws

Haws 8901B Axion Guide

Haws H1011.8HPSHO-1920HPSHO User manual

Haws

Haws H1011.8HPSHO-1920HPSHO User manual

Haws 8330 Guide

Haws

Haws 8330 Guide

Haws 8327FP Axion User manual

Haws

Haws 8327FP Axion User manual

Haws 8760 Guide

Haws

Haws 8760 Guide

Haws 8320 Guide

Haws

Haws 8320 Guide

Haws 5874SS Instruction manual

Haws

Haws 5874SS Instruction manual

Haws 3511 Guide

Haws

Haws 3511 Guide

Haws 7460 Guide

Haws

Haws 7460 Guide

Haws 7777 Guide

Haws

Haws 7777 Guide

Haws 7612LH Guide

Haws

Haws 7612LH Guide

Haws 1920HO User manual

Haws

Haws 1920HO User manual

Haws 8317 Axion User manual

Haws

Haws 8317 Axion User manual

Popular Plumbing Product manuals by other brands

Clou Kaldur CL/06.05.003.29.L installation instructions

Clou

Clou Kaldur CL/06.05.003.29.L installation instructions

Grohe GROHTHERM 3000 COSMOPOLITAN 19 568 manual

Grohe

Grohe GROHTHERM 3000 COSMOPOLITAN 19 568 manual

Moen L84502 Specifications

Moen

Moen L84502 Specifications

Franke SIRIUS BS323N Installation and operating instructions

Franke

Franke SIRIUS BS323N Installation and operating instructions

Glacier bay KAGAN 21-K153KCP-GB Use and care guide

Glacier bay

Glacier bay KAGAN 21-K153KCP-GB Use and care guide

Jeans Machine mose 8801/B installation instructions

Jeans Machine

Jeans Machine mose 8801/B installation instructions

brondell LumaWarm L60-RW owner's manual

brondell

brondell LumaWarm L60-RW owner's manual

ZUCCHETTI SOFT Z92094 Instruction for the installation

ZUCCHETTI

ZUCCHETTI SOFT Z92094 Instruction for the installation

Hans Grohe Axor Urquiola 11731 1 Series Installation and user instructions

Hans Grohe

Hans Grohe Axor Urquiola 11731 1 Series Installation and user instructions

Grohe EUROSMART COSMOPOLITAN E 36 328 manual

Grohe

Grohe EUROSMART COSMOPOLITAN E 36 328 manual

Artika SS1515R10-DY instruction manual

Artika

Artika SS1515R10-DY instruction manual

Sanela SLP 02PA Instructions for use

Sanela

Sanela SLP 02PA Instructions for use

Viega Advantix 4937.2 Instructions for use

Viega

Viega Advantix 4937.2 Instructions for use

Moen ELECTRONIC FAUCET 8301 user manual

Moen

Moen ELECTRONIC FAUCET 8301 user manual

ESS Easy Drain Easy Turn ET-1300 Installation advice

ESS

ESS Easy Drain Easy Turn ET-1300 Installation advice

Kohler TAUT 24572X-4A installation instructions

Kohler

Kohler TAUT 24572X-4A installation instructions

Hans Grohe Novus 70 71050000 Instructions for use/assembly instructions

Hans Grohe

Hans Grohe Novus 70 71050000 Instructions for use/assembly instructions

Sloan TRUFLUSH TRF1000 installation instructions

Sloan

Sloan TRUFLUSH TRF1000 installation instructions

manuals.online logo
manuals.online logoBrands
  • About & Mission
  • Contact us
  • Privacy Policy
  • Terms and Conditions

Copyright 2025 Manuals.Online. All Rights Reserved.