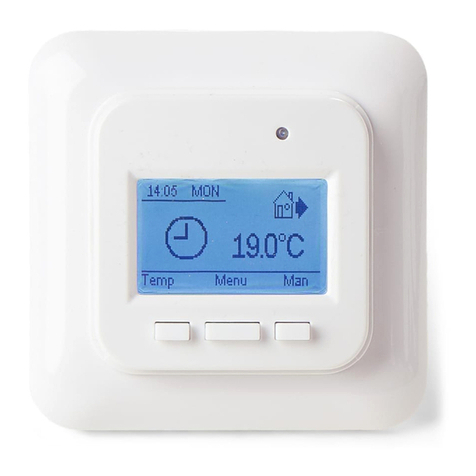
Heatcom HC70 Series User manual

1
Heatcom Thermostat HC70
Electric floor heating thermostat
Introduction
HC70 series thermostat is designed for heating systems especially floor heating, which
produced accordance with EN60730-1 and EN60730-2-9. The thermostat equipped with
matrix dot display. And it will be very easy to understand the settings and operation.
Technical data
Supply voltage
100~240VAC 50/60Hz
Maximum Load
16A
Operating temperature
0~50℃
Storage temperature
-10~60℃
Temperature range, room sensor
5~35℃
Temperature range, floor sensor
5~40℃
Control modes
Floor sensor, room sensor or room sensor with floor
sensor as a limiter
IP class
IP21
Terminals
Max. 2.5 mm2
Floor sensor with 3.5m cable
NTC, 100K / 25℃
Dimensions
82 mm×82 mm×56mm
color
Polar white RAL 9010
First time settings
The first time you switch on the thermostat, the screen shows product version number,
and then time, control mode and date must be set. You just need to follow the menu
directly.
Choose your time with the Up and Down buttons and confirm with OK.
Set the actual Hour and press the OK button. Then set the Minute. Press OK.
Set the actual date: Day. Confirm the settings with the OK button.
Operation quick reference
You now need to select the system load (0.1~3.5KW), i.e. the output of the heating system
powered by the thermostat. Select the appropriate load and press OK.
The next menu allows you to select the mode you want the thermostat to control. If the
thermostat is in the room to be heated, select Room/limit. If the thermostat is outside of
the room to be heated, select Floor. Once you have chosen the required setting, press OK.
You now need to select the actual sensor setting so that the thermostat can take this into
account during operation. Select the actual sensor setting and press OK.
The thermostat is now ready for use and your underfloor heating will operate in
accordance with the pre-programmed Event schedule. See Factory Settings for full details
of this.

2
menu
Operating table
Appearance reference
General Operation
When the thermostat has powered on, the version Number will be displayed, and hold the
menu button for 3 seconds, the thermostat will turn off, all the settings, including time and
date will be saved.
Display interface
Navigation buttons

3
Operation mode
The thermostat has three different modes of temperature control: Room Mode, Floor
Mode, Room mode with floor limits.
Auto mode
, SelectAuto if you want the temperature to be controlled automatically via the
4-event schedule Room mode with floor limits.
Hold mode
, Select Manual to cancel the programmed Event schedule (e.g. during holidays) and
to set the required temperature manually. For example, you may want to adjust the
temperature to 5℃for frost protection while you are away. Press Manual, confirm with OK
and choose the required Temperature, and it will override the auto operation.
Override operation
Selecting CO mode and ECO mode after pressing Override, then you need choose a
setpoint for heating, the system will provide you a option if you select OK or not, if so, the
Override operation will offer you CO in WEAK and RETURN event, and ECO in LEAVE
and SLEEP event, which a day has 4 different events include WEAK, LEAVE, RETURN,
SLEEP, or CO in WEAK event and ECO in SLEEP event, which a day has a two different
event; if not, system will exit menu automatically.
Stand by mode
Press and hold the center button for 4s. and the thermostat is in Stand by mode.
Exit Stand by mode by pressing the center button.
Thermostat setup options
The menu allows you to select the following options:
Event schedule
7:Allows you to choose individual programs for each day of a week.
4 events- wake, leave, return, sleep for each day.
2:Monday to Friday with the same events
setting and Saturday and Sunday with the same
setting. Typically used if you work from Monday
to Friday.
4 events- wake, leave, return, sleep for
Monday to Friday, 2 events- wake, sleep for
Saturday and Sunday

4
1:7 days of a week programs respectively.
2 events- wake, sleep for each day.
Program setting:
1. Press the OK button to activate the Program setting.
2. Choose the days for which you want to change the Settings, Mon-Fri or Sat-Sun
using the up or down Button. Press OK.
3. Now select the time and temperature for each daily event in the program. Press OK
and set the start time for the event concerned. Confirm with OK. Set the temperature for
this event and confirm with OK.
4. After setting the required events, select Exit in the menu to return to the initial display.
(Each icon for events programming
Wake
,
Leave
,
Return
,
Sleep
)
Factory settings
Preset schedule
7:
7 days
Wake
Leave
Return
Sleep
Time
Temp.
Time
Temp.
Time
Temp.
Time
Temp.
4 events
6:30
22℃
7:30
19℃
17:00
22℃
23:00
18℃
2:
Monday
to Friday
Wake
Leave
Return
Sleep
Time
Temp.
Time
Temp.
Time
Temp.
Time
Temp.
4 events
6:30
22℃
7:30
19℃
17:00
22℃
23:00
18℃
Saturday
& Sunday
Wake
Sleep

5
Time
Temp.
Time
Temp.
2 events
6:30
22℃
23:00
18℃
1:
7 days
Wake
Sleep
Time
Temp.
Time
Temp.
2 events
6:30
22℃
23:00
18℃
Time and day
Press OK and set the actual time in hours and minutes. The day will then be displayed.
Set the day and confirm with OK.
Calibration
If the actual measured temperature does not corresponding to the thermostat value, you
can adjust the thermostat by offsetting the temperature. Press OK and enter the value of
the measured temperature. Confirm with OK.
Range -4℃~4℃, Default 0℃.
Adaptive function
It is ensure that the required temperature has already been reached when you get up in
the morning or come home from work. After just a few days, according to your habit, the
adaptive function will have automatically entered CO mode while the heating must be

6
turned on. Press OK and set the function to on. Confirm with OK.
Control mode
Set the type of regular used system. There are 3 options:
Floor reg. : The thermostat regulates floor temperature only. A floor sensor must be
connected.
Room reg. : The thermostat regulates room temperature only.
Room/limit: The thermostat regulates room temperature with min. and max. limits for floor
temperature.A floor sensor must be connected.
Press OK and select the required heating system.
Limitation
Allows you to set the temperature range within which the thermostat can be set. It is then
only possible to set a temperature in this range in auto, comfort and manual mode.
Press OK to highlight Min temperature. Use the up or down button to select the minimum
permissible temperature. Press OK and select the maximum permissible temperature.
Confirm the settings with OK.
Temperature Max 20~40℃, Default 35℃; Min 5~20℃, Default 5℃.
Floor protection Max 15~27℃, Default 27℃; Floor protection Min 5~10℃, Default 5℃.
Floor protection Max/Min only works at Room/limit mode.

7
Factory Reset
Allows all the settings to be reset. Your personal settings will be erased. Press YES and
choose Reset in the menu.
Press NO and cancel the factory reset
Child lock
Allows you to lock the thermostat settings if you do not want the settings to be changed or
something. Press OK and select YES or NO to set up the child lock. Confirm with OK. The
child lock can be unlocked by pressing two side buttons simultaneously for 5 seconds.
Energy Monitor
Load: You should adjust the load (KW) that you connected, and then you can read your
weekly or daily energy consumption for the last week.

8
Exit
Returns to initial display.
Error alert
If a fault or an error occurs, the thermostat will display an error code as follows:
E1: Internal sensor E2: External sensor
defective or short- circuited. defective or short- circuited.
Wiring diagram
Table of contents
Other Heatcom Thermostat manuals
Popular Thermostat manuals by other brands
Heating Green
Heating Green Ecobee quick start guide
REMKO
REMKO ETR 1-10 Operating and installation instructions
Siemens
Siemens RDG100 Series Basic documentation
Vexve
Vexve AM40 Setup and user guide
Venstar
Venstar T1070 Owner's manual and installation instructions
Honeywell Home
Honeywell Home Lightwave DTS92E product manual
