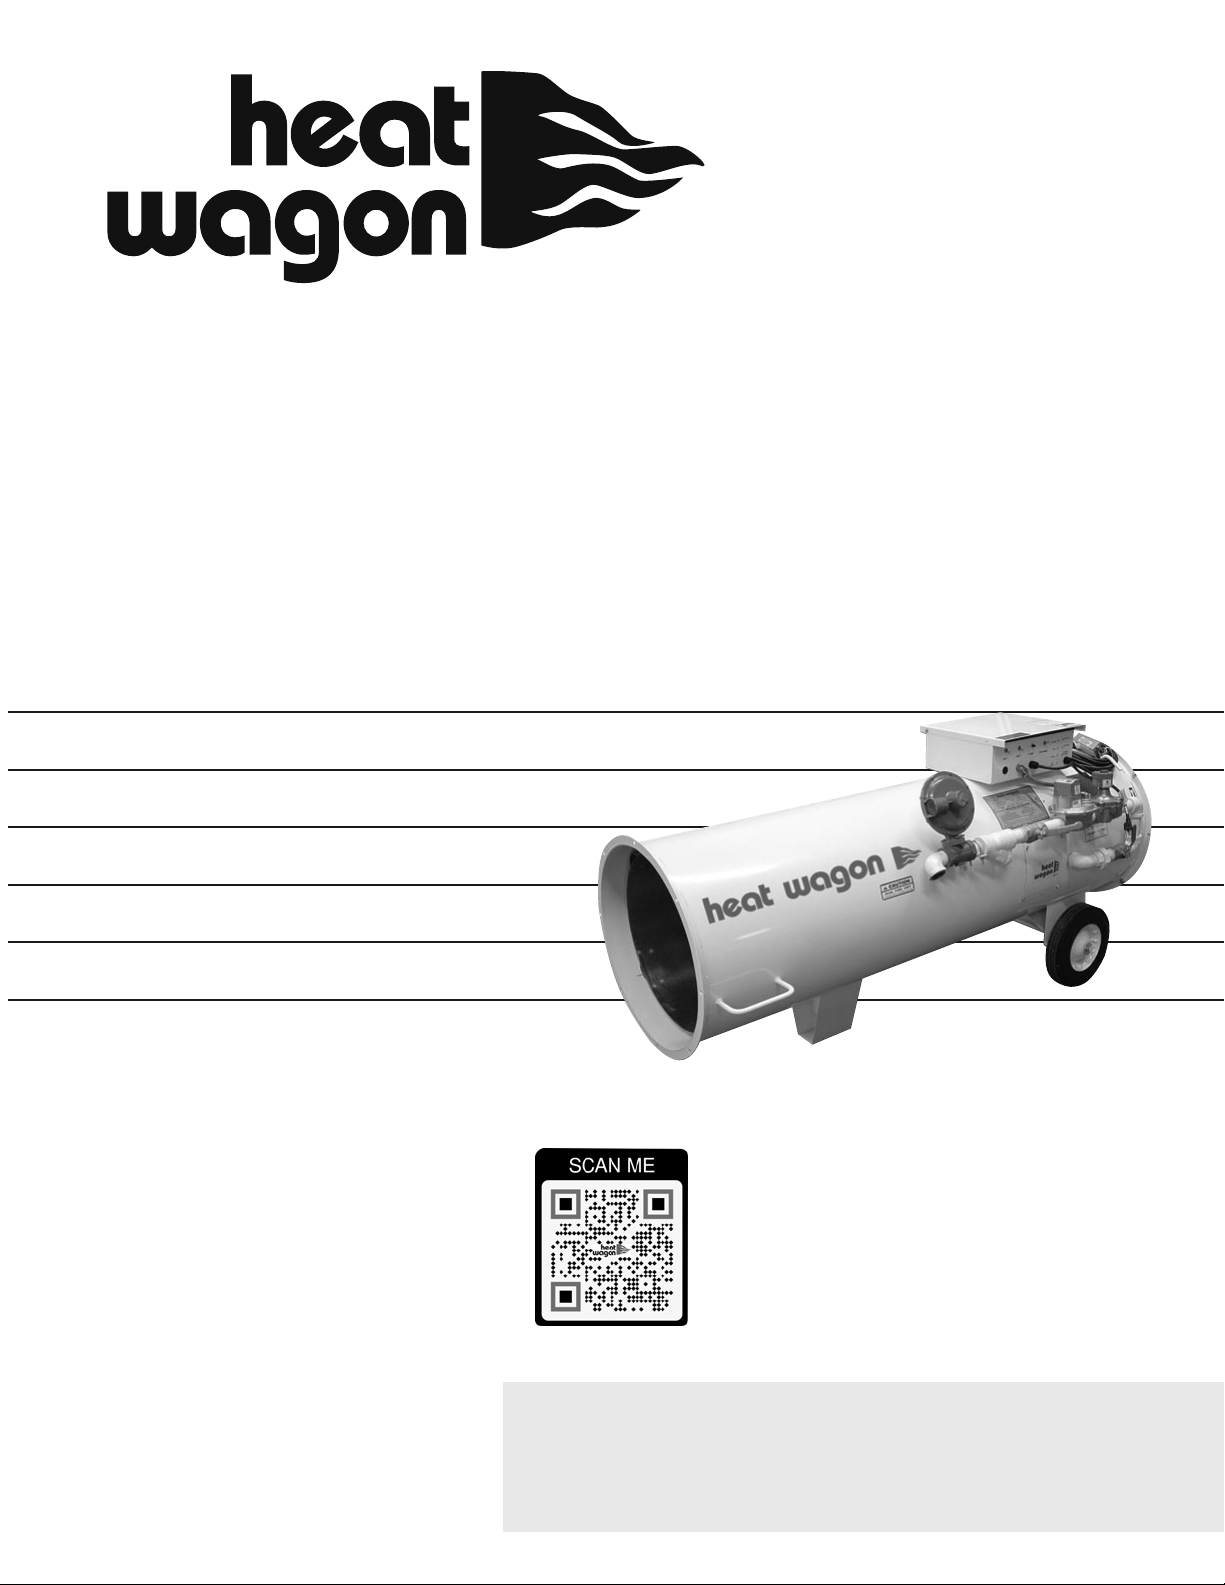
Heatwagon 750NEF Manual

750NEF (Non-Exposed Flame)
Construction
Heater
Installation and Maintenance Manual
Please retain this manual for future reference.
342 N. Co. Rd. 400 East
Valparaiso, IN 46383
219-464-8818 • Fax 219-462-7985
www.heatwagon.com
Revision 4-22
For your safety: Do not use this heater in
a space where gasoline or other liquids
having flammable vapors are stored.
This QR Code
can be found
under the
control box lid

IMPORTANT INFORMATION! READ FIRST
The heater is designed for use as a construction heater under ANSI Z83.7a-1993. Heater is not
intended for use in pest remediation. The primary purpose of construction heaters is to provide
temporary heating of buildings under construction, alteration, or repair and to provide emer-
gency heat. Properly used, the heater provides safe, economical heating. Products of combustion
are vented into the area being heated.
The heater IS NOT designed as an Unvented Gas Fired Room Heater under ANSI-Z21.11.2 and
SHOULD NOT be used in the home.
ANSI A119.2(NFPA 501C)-1987 Recreational Vehicle Standard prohibits the installation or stor-
age of LP-gas containers even temporarily inside any recreational vehicle. The standard also pro-
hibits the use of Unvented Heaters in such vehicles.
NFPA-58 1989 STANDARD FOR THE STORAGE AND
HANDLING OF LIQUEFIED PETROLEUM GASES AND THE NATURAL GAS AND PROPANE
INSTALLATION CODE, CSA B149.1
Use of the heater must be in accordance with this Standard and in compliance with all governing
state and local codes. Storage and handling of propane gas and propane cylinders must be in
accordance with standard for the storage and handling of liquified petroleum gases, ANSI/NFPA
58 and CSA B149.1, natural gas and propane installation code and all local governing codes.
We cannot anticipate every use which may be made for our heaters. CHECK WITH YOUR
LOCAL FIRE SAFETY AUTHORITY IF YOU HAVE QUESTIONS ABOUT LOCAL REGULATIONS.
Other standards govern the use of fuel gases and heat producing products in specific applica-
tions. Your local authority can advise you about these.
FOR YOUR SAFETY
DO NOT USE THIS HEATER IN A SPACE WHERE GASOLINE OR OTHER
LIQUIDS HAVING FLAMMABLE VAPORS ARE STORED OR USED.
CONSTRUCTION HEATER GENERAL HAZARD WARNING:
Failure to comply with the precautions and instructions provided with this
heater, can result in death, serious bodily injury and property loss or damage
from hazards of fire, explosion, burn, asphyxiation, carbon monoxide
poisoning, and/or electrical shock.
Only persons who can understand and follow the instructions should use or
service this heater.
If you need assistance or heater information such as an instruction manual, labels,
etc., contact your local Heat Wagon dealer or the manufacturer.
WARNING
Fire, burn, inhalation, and explosion hazard. Keep solid combustibles, such as build-
ing materials, paper or cardboard, a safe distance away from the heater as recom-
mended by the instructions. Never use the heater in spaces which do or may contain
volatile or airborne combustibles, or products such as gasoline, solvents, paint thin-
ner, dust particles or unknown chemicals.
Not for home or recreational vehicle use!
Never Use The Heater In Spaces Which Are Not Sufficiently Sized
Or Ventilated For The Heater Being Utilized.

Table of Contents:
Page
Specifications . . . . . . . . . . . . . . . . . . . . . . . . . . . . . . . . . . . . . . . . . . . . . . .4
Installation . . . . . . . . . . . . . . . . . . . . . . . . . . . . . . . . . . . . . . . . . . . . . . . . .5
Proper Set Up . . . . . . . . . . . . . . . . . . . . . . . . . . . . . . . . . . . . . . . . . . . . . . .6
Hose Sizing . . . . . . . . . . . . . . . . . . . . . . . . . . . . . . . . . . . . . . . . . . . . . . . . .6
Cord Sizing . . . . . . . . . . . . . . . . . . . . . . . . . . . . . . . . . . . . . . . . . . . . . . . . .6
Operating Instructions . . . . . . . . . . . . . . . . . . . . . . . . . . . . . . . . . . . . . . . .8
Sequence of Component Operation . . . . . . . . . . . . . . . . . . . . . . . . . . . . .9
Trouble Shooting . . . . . . . . . . . . . . . . . . . . . . . . . . . . . . . . . . . . . . . . . . .10
Preventive Maintenance . . . . . . . . . . . . . . . . . . . . . . . . . . . . . . . . . . . . . .11
Parts Breakdown . . . . . . . . . . . . . . . . . . . . . . . . . . . . . . . . . . . . . . . . .12-14
Wiring Diagrams . . . . . . . . . . . . . . . . . . . . . . . . . . . . . . . . . . . . . . . . .15-16
Installation and Maintenance Manual
Model 750NEF
Construction Heater
342 N. Co. Rd. 400 East • Valparaiso, IN 46383
219-464-8818 • 888-432-8924 • Fax 800-255-7985
www.heatwagon.com
WARRANTY
All new Heat Wagon and Sure Flame heaters and fans are guaranteed against defective materials and work-
manship for one (1) year from invoice date.
Warranty repairs may be made only by an authorized, trained and certified Heat Wagon dealer. Warranty
repairs by other entities will not be considered. Warranty claims must include model number and serial
number.
LIMITATIONS
Warrant claims for service parts (wear parts) such as spark plugs, igniters, flame rods will not be allowed.
Diagnostic parts such as voltage meters and pressure gauges are not warrantable.
Evidence of improper fuel usage, fuel pressures outside of manufacturer’s specification, poor fuel quality,
and improper electric power, misapplication or evidence of abuse may be cause for rejection of warranty
claims.
Travel time, mileage and shipping charges will not be allowed. Minor adjustments of heaters are dealers’
responsibility. Defective parts must be tagged and held for possible return to the factory for 60 days from
date of repair. The factory will provide a return goods authorization, (RGA) for defective parts to be
returned.
No warranty will be allowed for parts not purchased from Heat Wagon.

WARNING - AIR QUALITY HAZARD
• Do not use this heater for heating human living quarters.
• Use of direct-fired heaters in the construction environment can result in exposure to levels of CO, CO2 and NO2
considered to be hazardous to health and potentially life threatening.
• Do not use in unventilated areas
• Know the signs of CO and CO2 poisoning
- Headaches, stinging eyes
- Dizziness, disorientation
- Difficulty breathing, feels of being suffocated
• Proper ventilation air exchange (OSHA 29 CFR 1926.57) to support combustion and maintain acceptable air quality shall
be provided in accordance with OSHA 29 CFR Part 1926.154, ANSI A10.10 Safety Requirements for Temporary and
Portable Space Heating Devices and Equipment used in the Construction Industry or the Natural Gas and Propane
Installation Codes CSA B149.1
- Periodically monitor levels of CO, CO2 and NO2 existing at the construction site - at the minimum at the start of the
shift and after 4 hours.
- Provide ventialtion air echange, either natural or mechanical, as required to maintain acceptable indoor air quality
USA 8-Hr Time weighted average Canada 8-hr time weighted average
(OSHA 29 CFR 1926.55 App A) Worksafe BC OHS Guidelines Part 5.1
and Ontario Workplaces Reg 833
CO 50 ppm 25 ppm
CO2 5000 ppm 5000 ppm
NO2 3 ppm (Reg 833)
USA - Ceiling Limit Canada STEL (15 minutes Reg 833/1 hour
(Short Term Exposure Limit = 15 minuntes) WSBC) WorkSafe BC OHS Guidelines Part 5.1
and Ontario Workplaces Reg 833
CO 100 ppm
CO2 15000 ppm (WSBC)
30000 ppm (Reg 833)
NO2 5 ppm 1.0 ppm (WorkSafeBC)
5.0 ppm (reg 833)
• Ensure that the flow of combustion and ventilation air exchange cannot become obstructed.
• As the building “tightens up” during the construction phases ventilation may need to be increased.
SPECIFICATIONS
Model No. 750NEF
Gases: Natural or Propane
Capacity: 750,000 Btu/h maximum, 450,000 Btu/h minimum
Note: Derate input for altitude over 2000 Ft. (609.6 M) by 4% each 1000 Ft. (304.8 M) above sea level.
Orifice Size: 32 DMS (x17)
Blower: 7,000 CFM
Electrical Rating: 115V 60Hz 15 amps, single phase
Minimum Temperature Rating: Minus 20 degrees F
Gas Supply: Inlet Pressure Hi Fire Lo Fire
Max PSI Min PSI W.C. W.C.
Propane 20 1 7” 1.3”
Natural Gas 20 3 2.3” 1.3”
Inlet Connection: Maximum Duct Length Straight: 100 ft @ 24” diameter
Model 750NEF 1-1/4” FNPT SP 1” @ 5000 CFM
Weight (approximate): 325 lbs.
4

DESIGN RELATED SAFETY FEATURES
1) FLAME FAILURE
The electronic safeguard control shuts off the gas supply in .8 seconds if flame is lost to prevent raw gas from leaving
the heater.
2) OVERHEATING
The totally enclosed motor is protected by thermal overload. A high temperature limit switch is mounted in the
control box.
3) COMPLETE VISUAL/SELF DIAGNOSIS LIGHTS
4) BLOCKED AIR SUPPLY
An airflow switch detects the differential pressure in the combustion chamber and shuts off the gas flow when airflow
is insufficient.
5) LOCKING GAS SELECTOR LEVER
To avoid over firing of the heater and damage to property, make sure the lever is locked in position when using propane.
6) LOW SHELL TEMPERATURE/NO VISIBLE FLAME
The 750NEF is designed with a built-in combustion chamber to hide the flame as well as acting as a heat shield.
7) DURABLE CONSTRUCTION
The Model 750NEF uses a heavy gauge steel housing and a stainless steel burner for long life and consistent performance.
NOTE: In order to maintain the highly efficient combustion of the heater, the combustion chamber must remain as
manufactured. Any change or distortion could alter the fuel/air mixture and create excessive products of combustion.
INSTALLATION
The Heat Wagon Model 750NEF is a direct fired gas heater intended to be used primarily for the temporary heating of
building under construction, alteration, or repair. Since all the products of combustion are released into the area being
heated, it is imperative that adequate ventilation is provided. The flow of supply air and combustion gases must not be
obstructed in any way.
1. The heater is designed for indoor or outdoor installation in a horizontal position. Allow the following clearances
from any combustible material or fuel containers.
Front Outlet: 20 feet Sides: 2 feet
Intake: 2 feet Top: 4 feet
Also make sure that no flammable vapors are present in the space where the heaters is being used.
2. The heater should be inspected before each use, and at least annually by a qualified service person.
3. The hose assembly must be inspected prior to each use of the heater. If it is evident that there is excessive
abrasion or wear, or the hose is cut, it must be replaced prior to the heater being put into operation. The
replacement hose assembly shall be that specified by the manufacturer.
4. When connecting the heater to a natural gas or propane supply line ensure that the pressure at the heater inlet is
within the specified range. Excessive pressure over (14” W.C.) will damage the controls and void the warranty.
5. Connect the hose assembly to the heater gas inlet elbow. The 750NEF elbow has a 1-1/4” female NPT thread,
750NEF elbow has a 1/4” female NPT thread. Ensure that the hose assembly is protected from traffic, building
materials, and contact with hot surfaces.
6. After installation, check hose assembly for gas leaks by applying a soap and water solution to each connection.
7. Connect the heater to an adequate 115 volt electrical supply as specified
on the rating plate. For protection against shock hazard the supply cord
should be plugged directly into a properly grounded three-prong receptacle.
8. Replacement parts are available from any Heat Wagon distributor or by calling 1-888-432-8924.
5
EXTENSION CORDS:
Properly Wired and Grounded
Use #14 wire up to 100’
Use #12 wire up to 200’
Use #10 wire up to 300’

MODEL 750NEF
PROPER SET UP:
Model 750NEF is a Vapor Propane or Natural Gas
unit. When using Propane turn the fuel selector valve
(located on the lower manifold) to the Propane
position. When using Natural Gas turn the selector
valve to the Natural Gas position. This unit can be
set up indoors or out.
6
NATURAL GAS QUICK
REFERENCE HOSE
Hose Hose
Length Diameter
in Feet <1PSI 1PSI 2PSI 5PSI
10 1-1/2 1-1/4 3/4 3/4
25 21-1/4 3/4 3/4
35 21-1/4 3/4 3/4
50 21-1/4 13/4
75 21-1/4 1-1/4 3/4
100 21-1/4 1-1/4 3/4
125 2-1/2 1-1/2 1-1/4 1
150 2-1/2 1-1/2 1-1/4 1
175 2-1/2 1-1/2 1-1/4 1
200 2-1/2 1-1/2 1-1/4 1-1/4
225 2-1/2 1-1/2 1-1/4 1-1/4
VAPOR PROPANE QUICK
REFERENCE HOSE
Hose Hose
Length Diameter
in Feet 1/2PSI 10PSI
10 1-1/4 3/4
25 1-1/4 3/4
35 1-1/2 3/4
50 1-1/2 3/4
75 2 3/4
100 2 3/4
125 2 3/4
150 2 3/4
175 2 3/4
200 2 3/4
225 2 3/4

INSTALLATION USING A PROPANE SUPPLY TANK(S)
1) When installing the heater for use with propane gas, set the gas selector to “Propane”
and lock in position.
2) The propane supply system must be set up for vapor withdrawal from the operating tank(s).
Liquid Propane can cause the heater to overfire and will damage valve train components.
3) The heater must be located at least 6 ft from any LP-Gas container, and not directed toward any
LP-Gas container within 20 ft.
4) Minimum Tank Size(vapor propane) Outdoor Temperature
500 Gal. Above +25˚F
1000 Gal. +25˚F to + 10˚ F
2 x 1000 Gal. Below +10˚F
5) The installation must conform with local codes, or in the absence of local codes, with the
Standard for Storage and Handling of Liquefied Petroleum Gasses ANSI/NFPA 58.
6) Turn off the propane supply valve at the tank(s) when the heater is not in use.
7) When the heater is to be stored indoors the propane tank(s) must be disconnected from the
heater and the tank(s) stored in accordance with Chapter 5 of the above National Standard.
COMMON INSTALLATION AND OPERATIONAL PROBLEMS
1) LOW VOLTAGE AT THE HEATER
This is one of the most common problems and is usually the result of the supply cord having
too small a wire gauge for its length, or low voltage at the power source. Low voltage results in
the motor overheating, burnt relay contacts, or a relay that will not make contact. Check
voltmeter on heater before start-up.
2) SUPPLY LINE TOO SMALL
See Reference Hose Chart page 6.
3) INSUFFICIENT VAPORIZATION AT SUPPLY
Normally caused by undersized supply tank.
4) IMPROPER GAS SUPPLY PRESSURE
Usually a result of propane supply pressure being too high because of improper or lack of
regulation or too low of natural gas pressure at meter.
5) DIRTY GAS SUPPLY
Dirty gas can cause strainers to plug or form a build-up in the burner orifice.
6) LACK OF PREVENTIVE MAINTENANCE
Heaters must be cleaned as required, especially when used in a dirty environment.
7) IMPROPER SUPPLY OF FRESH AIR
It is strongly recommended that the intake air of the heater be taken from outside the enclosed
area. This provides a slight pressurization and prevents any problems associated with
recirculation of products of combustion.
7

ON-SITE SAFETY PROBLEMS
1) SHORTING OUT OF DEFECTIVE COMPONENTS
This is a very common problem which saves short term expense at the risk of a large future cost.
Any heaters found in this condition should be removed immediately.
2) IMPROPER ENCLOSURES
When heaters are installed partially to the outside for fresh air intake, strict adherence must be
made to the minimum clearance to combustibles given on the instruction plate. Wood framing
around a heater can cause a safety hazard.
3) SUPPLYING LIQUID PROPANE TO HEATER NOT EQUIPPED WITH A BUILT IN VAPORIZER
This problem has occurred upon initial start-up. To minimize the damage, shut off the gas
supply and let the heater run until all of the liquid in the lines had been consumed.
OPERATING INSTRUCTIONS
1) Set the gas selector valve for fuel being used. Check for proper gas pressure.
2) Open manual shut-off valve on heater.
3) Connect power supply (115 volt). Check voltmeter to confirm full voltage.
4) Slowly open shut-off valve at gas meter or propane tank. Check for leaks.
5) Push up the “ON” switch.
6) Set thermostat for desired room temperature.
7) To stop, turn thermostat down or push down the stop switch.
(Burner will turn off; after 10 seconds fan will turn off.)
8) Close manual shut-off valve on heater.
NOTE: “FAN ONLY” switch must be in the Off position for Heat Mode.
NOTE: If the heater will be shut down over night, close valve at fuel supply first and burn all gas
out of line.
The appliance area should be kept clear and free from combustible materials, gasoline, and other
flammable vapors and liquids.
Ensure that the flow of supply air and combustion gases is not obstructed.
The installation and operation of the heater shall comply with the code requirements specified by
the authorities having jurisdiction.
General criteria for the use of construction heaters may be found in the applicable sections of
American National Standard A-10.10-1987, Safety Requirements for Temporary and Portable Space
Heating Devises and Equipment Used in the construction industry.
THE INSTALLATION AND MAINTENANCE OF THE HEATER MUST BE ACCOMPLISHED BY A
QUALIFIED SERVICE PERSON.
8

MODEL 750NEF
SEQUENCE OF COMPONENT OPERATION
1) POWER SUPPLY
Plug the heater into a 120 Volt grounded receptacle. Power is now at the 20 amp fuse and the 3
amp circuit breaker. Power light illuminates.
2) 20 AMP FUSE & 3 AMP BREAKER
If the circuit breaker and fuse are good there will be power at the thermostat and at the motor
relay (normally open). Fuse light illuminates.
3) ON SWITCH
With the “ON” switch on, it sends power to the “OFF” switch and the control relay. (Normally
open terminal and it’s solenoid coil.)
4) CONTROL RELAY
After receiving power from the “OFF” switch, the relay closes, a loop between the 3amp breaker
and the (NC) “OFF” Switch.
5) OFF SWITCH
Power is sent from “OFF” Switch to (L1) terminal of DSI control and the (COM) terminal of
the thermostat.
6) THERMOSTAT
When the thermostat calls for heat there will be power at (TH) terminal of the DSI control and
Air Flow Switch (COM) Terminal.
7) DSI CONTROL
Sends power from (IND) terminal to coil of the motor relay.
8) MOTOR RELAY
With its coil energized it closes its contacts, sending power to the fan motor.
9) FAN MOTOR
Turns the fan blade causing the air flow switch to close.
10) AIR FLOW SWITCH’S
Received their power from the thermostat and sends the power to the indicator light and the
DSI control (PSW) terminal.
11 ) DSI CONTROL
Sends power from the (V1) post to the high limit.
12) HI TEMPERATURE LIMIT SWITCH
This switch has normally closed contacts, it sends power to the gas solenoid valves. Lo valve
and Hi valve lights illuminate.
13) GAS SOLENOID VALVE
With the coil energized, the valve opens, gas passes through to the burner and ignites.
14) FLAME SAFEGUARD CONTROL
This is now sensing flame through the flamerod and the spark stops. The heater is operating.
15) THERMOSTAT
When it is satisfied, the contacts open taking power away from the (TH) terminal of the DSI
control, the gas valve closes, and the built-in fan delay timer is activated.
16) BUILT-IN FAN DELAY TIMER ON DSI CONTROL
This will operate the fan motor for approximately 10 seconds and turns the fan off.
9

TROUBLE SHOOTING
DIRECTIONS: Find the specific symptom. refer to the Sequence of component Operation Guide.
Check the components listed with a voltmeter for proper operation as described. Replace any com-
ponents not operating correctly.
Fan will not start when ON switch & thermostat are ON.
• Check sequences 1 through 8 (Page 9).
Fan runs, no spark for ignition.
• Check sequences 10 and 11 (Page 9).
• Check continuity of igniter leads. Replace if shorted or broken.
• Check igniter for carbon buildup, gap spacing (1/8”), secure mounting.
• Replace igniter if porcelain is cracked or if electrodes are rubbery.
Have spark but no flame.
• Check sequences 11, 12 and 13 (Page 9).
• Check for gas pressure on the manifold gauge, if gas is present clean the port holes in burner.
Flame occurs but burner locks out after a few seconds.
• Check the flame rod, if the porcelain is cracked or the electrode is rubbery, replace it.
• If the 1st step checks out, replace the DSI control.
Flame occurs but small.
• Check proper pressure at manifold gauge. If yes:
A) Clean port holes in burner.
B) Check proper position of Gas selector valve (For Natural Gas).
• Not enough pressure at manifold gauge:
A) Check fuel supply.
B) Check liquid strainer for restriction (950HL).
C) Check for restriction at high pressure regulator.
D)Check for restriction at solenoid valves.
Fan does not shut off when thermostat turns off burner.
• Fan should run for 10 to 15 seconds after burner shuts off. Replace DSI control if fan runs over
30 seconds.
• Fan Only switch is on. Turn off.
Fan runs, no fuel or spark.
• Check to see if the Air Switch light is on, if not, clean or adjust the airflow switch.
• Fan Only switch is on. Turn off.
10

CONTROL BOX TROUBLESHOOTING LIGHTS
LIGHT ON LIGHT OFF
POWER Power to Unit Check Power Source
FUSE Fuse Good Replace Fuse
MOTOR Power to Motor Relay No Power to Motor Relay
AIR SWITCH Switch Closed When No Power Going Through
Fan Running Good Switch - Switch Open
Check & Adjust With
Fan Running
GAS LOW Thermostat calling for Check Thermostat
First Stage Heat and High Limit
GAS HIGH Thermostat calling High Heat Check Thermostat
BURNER FAILURE Failure to Light Burner No Problems
Check Ignitor and Flame Sensor
Check High Limit
Check Gas Pressure
Check Manifold Pressure
PREVENTATIVE MAINTENANCE
Heat Wagon Construction Heaters are built to withstand the rigors of operating on construction sites, for mining appli-
cations, and a multitude of other locations. To maintain the reliable performance required it is necessary to do a certain
amount of regular maintenance.
1) CHECK POWER CORD
A. Insulation not frayed or cracked.
B. Ground peg is there on male end.
C. Polarity is correct (Black wire on fuse, white wire on neutral block).
2) CHECK ALL WIRING FOR PROPER CONNECTIONS
3) CHECK MOTOR RELAY
A. If it buzzes, clean contacts or replace.
B. Check for voltage drop through contacts, if its more than 2 volts
replace.
4) CHECK AIR FLOW SWITCH
A. Blow out the inlet tube and negative pressure fitting.
5) CLEAN THE BURNER
A. Clean out the port holes (gas outlet).
B. Clean air mixture holes.
6) CHECK IGNITER/SENSOR
A. Move sensor probe; if rubbery, replace.
B. If stiff; clean and regap igniter at 1/8”.
7) CHECK FOR GAS LEAKS
A. Operate the heater, (with leak detector or soapy water) check all
pipe connections for leaks.
8) TIGHTEN ALL BOLTS
A. Motor mounts
B. Fan blade
C. Burner mount
D. Pipe train mounts
11

Item Part # Description
1 HWP HB1171B Burner Complete
2 HWP HB1177NEF NEF Combustion Insert
3 HWP HB950A Heater Body Shell
4 HWP HC1083 Control Box
5 HWP HC1082 Control Box Lid
6 HWP HM1050 Motor
7 HWP HP1162 Fan Blade
8 HWP HG950A 22” Fan Guard
9 HWP HC1064 Burner Access Door
10 HWP HW1065 Wheel(950H - Non-Stackable)
11 SFP 2143 Spark Plug
12 HWP HW1065D Axle(950H - Non-Stackable)
13 HWP HC1006 Flame Rod Wire Assembly
Not shown HWP HC1005 Ignition Wire Assembly
2
1
11
13
3
4
5
6
7
8
10
12
9
12
MODEL 750NEF
Spark Plug
(SFP 2143)

13
MODEL 750NEF VAPOR PIPE TRAIN BREAKDOWN
Item Part # Description
1 HWP HV1120 Gas Selector Valve 1-1/4” Locking
2 HWP HV1169 Gauge 15” W.C.
3 HWP HV1138 1-1/4” Solenoid Valve
4 ACC 11SV08 Regulator
5 HWP HV1121 1-1/4” Ball Valve
6 HWP HV1122 1-1/4” Y Strainer
7 SFP 4490 2 Stage Regulator Valve
MODEL 750NEF FLAME SENSOR
Hole Plug 5/8”

14
CONTROL BOX PARTS
Item Part # Description
1 SFP 9264 Control Relay
2 HWP HC1001D DSI Control
3 SFP S1500-710 Air Switch
4 HWP HC1123 Terminal Block (A,C)
5 SFP 2446 Hi Limit Switch
6 HWP HC1123 Terminal Block (C)
7 SFP 9264 Motor Relay
8 HWP HC1122 Fuse Block
9 HWP HC1115 Fuse 20 amp
10 HWP 44130 Light
11 HWP HC1011 Fan Only Switch
12 HWP HC1019B 3amp Breaker
13 HWP HC1150 OFF Switch
14 HWP HC1149 ON Switch
15 HWP HC1123 Terminal Block (D)
16 HWP HC1120 Thermostat (w/o cord)(not shown)
17 HWP HC1020 Power cord (not shown)
1 0
8 6 4 2

15
750NEF CONTROL BOX WIRING
Spark Plug
Igniter
or
1 0
8 6 4 2
1 0
8 6 4 2

16
MAIN CIRCUIT DIAGRAM

17

18
Accessories
0-30 PSI PRESSURE GAUGE
#HWP-HV1027
(Can be installed on HR1053
for regulating gas pressure)
REGULATOR
#HWP-HR1053
(First stage regulator for decreasing
tank pressure)
Max incoming - 300psi
Adjustable outlet pressure (3-30 psi)
HIGH TEMPERATURE DUCT
#ACC-WD2425HT
GAS HOSE
#ACC-7525 - 3/4” x 25’
#ACC-7550 - 3/4” x 50’
#ACC-1025 - 1” x 25’
#ACC-1050 - 1” x 50’
CSA certified for NG and Propane
Female Swivel Unions Included
P-O-L FITTING TO
CONNECT TO PROPANE
SUPPLY
#ACC-G1680
Other manuals for 750NEF
1
Table of contents
Other Heatwagon Heater manuals

Heatwagon
Heatwagon HVF110 Manual

Heatwagon
Heatwagon HVF110 User manual

Heatwagon
Heatwagon VG500 Manual

Heatwagon
Heatwagon S1505A Manual

Heatwagon
Heatwagon HRF115 Manual

Heatwagon
Heatwagon VF400 Manual

Heatwagon
Heatwagon VG600A Manual

Heatwagon
Heatwagon 21103000 Manual

Heatwagon
Heatwagon 950H(L) Manual

Heatwagon
Heatwagon 1800B(L) Manual

Heatwagon
Heatwagon HVF210HD Manual

Heatwagon
Heatwagon S1505 Manual

Heatwagon
Heatwagon S405 Manual

Heatwagon
Heatwagon HVF110 Manual

Heatwagon
Heatwagon 1800 Manual

Heatwagon
Heatwagon DG250 Manual

Heatwagon
Heatwagon p1800 Manual

Heatwagon
Heatwagon VG1000 Manual

Heatwagon
Heatwagon VG400 Manual

Heatwagon
Heatwagon DG250 Manual