HELLER HPAC10 User manual

Instruction Manual
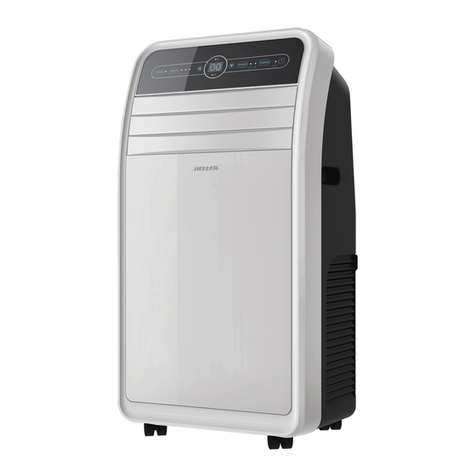
10,000 BTU Portable Air
Conditioner
Model: HPAC10
READ AND SAVE THESE INSTRUCTIONS

Please read and follow the instructions in this user manual even if you feel you are familiar with the product,
and find a place to keep it handy for future reference.
For your convenience record the complete model number (located on the product identification plate) and
the date you received the product, together with your purchase receipt and attach to the warranty and
service information. Retain in the event that warranty service is required.
NOTE: The rating of this product (as marked on the product identification plate) is based on specific loading
tests. Normal use or the use of other recommended attachments may draw significantly less power.
Important Safeguards
When using any electrically powered product, basic safety precautions should always be followed, including
the following:
PLEASE READ ALL INSTRUCTIONS CAREFULLY BEFORE USING THIS PRODUCT
WARNING!: - to reduce the risk of fire, electrical shock or injury to persons or property:
•Read all instructions.
•Always operate the product from a power source of the same voltage, frequency and rating as
indicated on the product identification plate.
•Disconnect the power plug before dismantling, assembling or before cleaning.
•Avoid touching moving parts of the appliance.
•Do not use the appliance for any other purpose other than its intended use.
•Do not operate this product with a damaged cord or plug, or after the product malfunctions, or
appears damaged in any way. If the supply cord is damaged, it must be replaced by the manufacturer
or its service agent or a similarly qualified person in order to avoid a hazard.
•This appliance is for indoor use only.
•Keep the appliance away from heat sources, and direct sunlight.
•Never insert fingers, pencils, or any other objects through the air vent guards whenever the power
plug is connected, especially while running.
•Always switch off the appliance before unplugging it.
•The appliance is not intended for use by young children or infirm persons unless they have been
adequately supervised by a responsible person to ensure that they can use the unit safely. Young
children should be supervised to ensure that they do not play with the appliance.
•This appliance is not to be used by children or persons with reduced physical, sensory or mental
capabilities, or lack of experience and knowledge unless they have been given supervision or
instruction.
•When using the appliance never leave the appliance unsupervised when in use. Switch off the
appliance if you have to leave for even a short period of time.
•Never use the mains point switch as a switch to start and turn off the air conditioning unit. Use the
On/Off switch located on the control panel.
•Do not use this appliance with an extension cord, unless it has been checked and tested by a
qualified electrician or electrical supplier.
•Always place the portable air conditioner on a dry stable surface.
•The air conditioning unit must always be stored and transported upright, otherwise you may cause
irreparable damage to the compressor; in case of any doubt after moving the appliance we suggest
to wait for at least 24 hours before you start the air-conditioning unit.
•Always unplug the appliance before cleaning or changing any parts of the appliance, or when it’s not
in use.

•Never immerse the appliance in water or any other liquid.
Special Recommendations
•Ensure that the appliance is positioned on a flat, large, dry surface without any obstacles nearby. A
minimum distance from furniture and walls is 50cm in all directions.
•The plug should be easily accessible.
•In order to maintain the function of the compressor, the appliance should always be in a vertical
position.
•Do not use the appliance near gas or other flammable liquids.
•Do not block the air outlet or the air inlet ventilation.
•Do not use spray (insecticides, paint) or any other flammable products near the appliance as the
plastic may become deformed. The unit may also sustain electrical damage.
Power Source
•The plug should be well secured and not damaged.
•Do not plug in the appliance with an adaptor.
•Plug into the wall socket before switching on the appliance, and then press the ON/OFF button.
THE MANUFACTURER WILL NOT ASSUME ANY RESPONSIBILITY FOR NON COMPLIANCE OF INSTRUCTIONS.
KEEP THIS USER MANUAL FOR FUTURE REFERENCE.
Installation
Location
Place the unit on a flat, dry surface. Leave at least 50cm of space around the unit, as per below diagram 1.
DIA 1
50cm

Assembly
Fix the exhaust pipe into the adapter, and then fix the other side of the exhaust pipe into the air outlet vent
of the unit (anti-clockwise) as per diagram 2 below.
Fix the adapter into the window slider kit, and then half open the window to meet the width of the window
slider kit. The length of the window slider kit is adjustable, as per diagram 3.
Incorrect mounting
Ensure the exhaust pipe is not twisted, as this can affect the
performance of the appliance – see diagram 4.
Take care to prevent any sharp bows or bends of the exhaust pipe.
NOTE: The exhaust air must be able to flow freely.
WARNING:The length of the exhaust pipe is specially designed according to the specification of this product.
Do not replace or extend it with your own private hose as this could cause malfunction.
WARNING: Maximum length of the exhaust pipe is 1500mm. Use the shortest possible distance between the
appliance and the window. When mounting, keep the exhaust pipe in a horizontal position.
DIA 2
DIA 3
DIA 4

Identification
Front
1. Control panel
2. LCD Display
3. On/Off button
4. Remote control receiver
5. Air outlet vent
6. Louver
7. Castor
8. Air inlet
9. Remote control
10. Handle
Back
10. Exhaust air outlet vent
11. Power cord
12. Master filter
13. Side filter
14. Draining pipe

Accessories
Control Panel
1. POWER button: press this button to turn the unit on/off.
2. SPEED button: press this button to select high/low/fan speed
3. TIMER: when in stand-by mode, press this button to set and automatic time on; for running time press this
key to set automatic time off. Increments are 30 minutes for each press.
4. DOWN button: press this button to set the temperature lower or higher when cooling; press this button to
adjust time shorter or longer when timing; to exchange Fahrenheit and Celsius press both UP and Down
button.
5. UP button: press this button to set the temperature higher when cooling; press down button to adjust
temperature (time longer when timing) and to change the temperature setting from Fahrenheit to Celsius
press up and down button at the same time.
6. MODE button: press this button to select, automatic mode, cooling, or fan mode

Remote Control
1. Power
2. Celsius and Fahrenheit exchange button
3. Fan button
4. Mode Button
5. Auto mode button
6. Temp down button
7. Temp up button
8. High fan speed button/Up
9. Low fan speed button/Down
10. Max cool button
11. Sleep Timer button
12. Timer button

Operation
Cooling mode
1. After operating the machine press the Mode button to choose Cool mode, the Cool mode indicator
will flash.
2. Press the UP or DOWN button to set room temperature between 17℃to 30℃.
3. Press FAN SPEED button (or High/Low button) to select high/low fan speed.
Fan mode
1. Press Fan button to choose Fan mode, the Fan mode indicator will flash.
2. Select the fan speed by pressing the SPEED button or press High / Low button directly.
3. This is a fan only function, the temperature cannot be set.
Automatic temp mode
1. Press the Mode button to choose the automatic setting. The automatic mode indicator light will flash.
After choosing the automatic mode, the unit running temperature will depend on the actual room
temperature. When the room temperature is higher than 25°, the unit will go into cool mode. You can
select the fan speed mode and timer mode when it is in automatic mode.
Sleep Mode (Optional Function)
1. Press this button to activate or cancel the sleep function in cooling mode. The unit will run at the low fan
speed as a default and with lower noise. The setting temperature will increase 1 degree per 2 hours
running time, and it will only increase by a maximum 2 degrees.
Max cool Mode (Optional Function)
1. Press this button to activate the Max cool mode. The unit runs cool but is not restricted by the
temperature setting of the Max cool mode. The unit is locked in high fan speed under this mode, and the
fan speed cannot be adjusted.
Timer mode
1. When the appliance is switched off, press the Timer button to set timer-on.
2. Press the Up or Down button to adjust the time from 0 to 24 hours. The Timer on indicator light will
flash.
3. When the appliance is running, press Timer button to set timer-off.
4. Press the Up or Down button to adjust time from 0 to 24 hours. The Timer off indicator will flash.
Water Drainage
This product has a self-evaporative system. The water will be recycled to cool the condenser. This not only
improves cooling efficiency, but also saves energy.
•Under certain circumstances if the inside water container is full, the display panel will display “FL”, and
the compressor will stop running.
•Please turn the machine off, and move the machine to a place where the inbuilt water tank can drain,
and then unplug the water-draining hole to let all of the water out of the tank.
•After drainage, you can power it on and the machine will run again (Gravity drain only).

Maintenance
Note: Turn off the unit and unplug it before any maintenance or repair, in order to avoid electric shock.
Cleaning
•Unplug the unit before any cleaning.
•Clean the housing with a soft damp cloth. Do not use chemical solvents (such as benzene, alcohol, or
gasoline). The surface may become damaged or deformed.
•Do not sprinkle water on the unit.
Air filter
•Clean the air filter every 2 weeks. If the air filter is blocked with dust, the efficiency will be reduced.
•Push the air filter cover upwards, and then take out the air filter.
•Wash the air filter by immersing it gently into warm (about 40°C) water with a neutral detergent, rinse
and dry thoroughly in a shaded area.
End of season
•Please drain the water.
•Run the unit on Fan mode for two hours until the inside of the unit is dry.
•Turn off the unit and unplug it.
•Clean the air filter, and after it has dried thoroughly, reinstall it.
•Remove the exhaust pipes and keep them in a safe dry place.
•Wrap the unit in a plastic bag and keep it in a dry place.

Troubleshooting
Before contacting the retailer for a replacement, please check the below to see if it can solve the problem.
Problem
Cause
Solution
The air
conditioner does
not function.
No power supply.
Connect to power supply outlet and
switch on.
“FL” flashes on the display screen
Drain water.
Timer-off is running.
You can turn the unit on three minutes
later.
The air
conditioner
restarts
frequently
In direct sunlight.
Close the curtains.
Windows or doors open, lots of
people or there is a heat source in
the room.
Close doors and windows, remove the
heat source.
Dirty filter.
Clean or replace the filter(s).
Air inlet or air outlet blocked.
Remove the blockage.
The unit is too
noisy
Unit stands on an uneven surface.
Place on an even, solid surface (less
vibration).
Compressor is
not working
Self protect of the compressor
Wait for 3 minute and restart again after
the descend of temperature
Caution: Switch off the unit and unplug it immediately if anything abnormal happens. Then contact a
qualified electrician.
The above technical parameters are subject to change without notice.
Care & Cleaning
To make cleaning easier, you can dismantle some parts of your fan.
•Your appliance must be switched OFF via the main power supply and unplugged before proceeding
with any cleaning.
•Clean the housing with a soft damp cloth.
•Never use flammable or abrasive cleaning agents such as benzene or spirits to clean the appliance.
•Never immerse the appliance in water!
•It is recommended that you clean the water tank every 2-3 weeks and the flume every week.
•Pull out the water tank before cleaning it – pull the plastic tube out of the mist cask properly, and
then take out the mist cask and water tank.
•Use a dry cloth to clean the mist cask. If there are stubborn stains on the mist cask, use a lightly
dampened cloth with mild detergent.

Specifications
Model: HPAC10
Permissible excessive operating pressure
(Suction/Discharge): 1.5MPa/5.5MPa
Cooling capacity: 2.93kW
Maximum allowable pressure (Low pressure
side/High pressure side): 1.7MPa/5.5MPa
Refrigerant/Charge: R410a/500g
Air Flow: 360m3/h
Power Supply: 220-240V/50Hz
Noise: 55dB(A)
Rated input (cooling): 1050W
Net weight: 25kg
Dimensions (WxHxD): 433 x 795 x 330mm
Gross weight: 30kg
Australian Customer Service
GAF Control (Sales) Pty Ltd
P.O Box 19
Altona North Victoria 3025
Phone: 1300 659 489
Hours: 9am-5pm (EST) Mon-Fri
www.gafcontrol.com.au
*This product may vary slightly to the product illustrated due to ongoing product development.
Table of contents
Other HELLER Air Conditioner manuals
Popular Air Conditioner manuals by other brands

rollibot
rollibot ROLLICOOL 208 user manual

Kooltronic
Kooltronic Slimkool K3NA4C4SP28L Operator's manual

Mitsubishi Electric
Mitsubishi Electric CITY MULTI CMY-Q100VBK installation manual

Toshiba
Toshiba RAC-PD1011CRU user manual

Bryant
Bryant DURAPAC PLUS 551B Installation, Start-Up and Service Instructions

Haier
Haier HSU-09LH13 installation manual

Hitachi
Hitachi RA-20HV Operation manual

Elba
Elba EACI-D1051I(WH) owner's manual

Dutch originals
Dutch originals DO-CH-ACL150DRT user manual

Daikin
Daikin FTXLS25K2V1B Operation manual

Butterfly Energy Systems
Butterfly Energy Systems BESM-24AO23 installation guide

Mitsubishi Electric
Mitsubishi Electric MSZ-GF60VE operating instructions