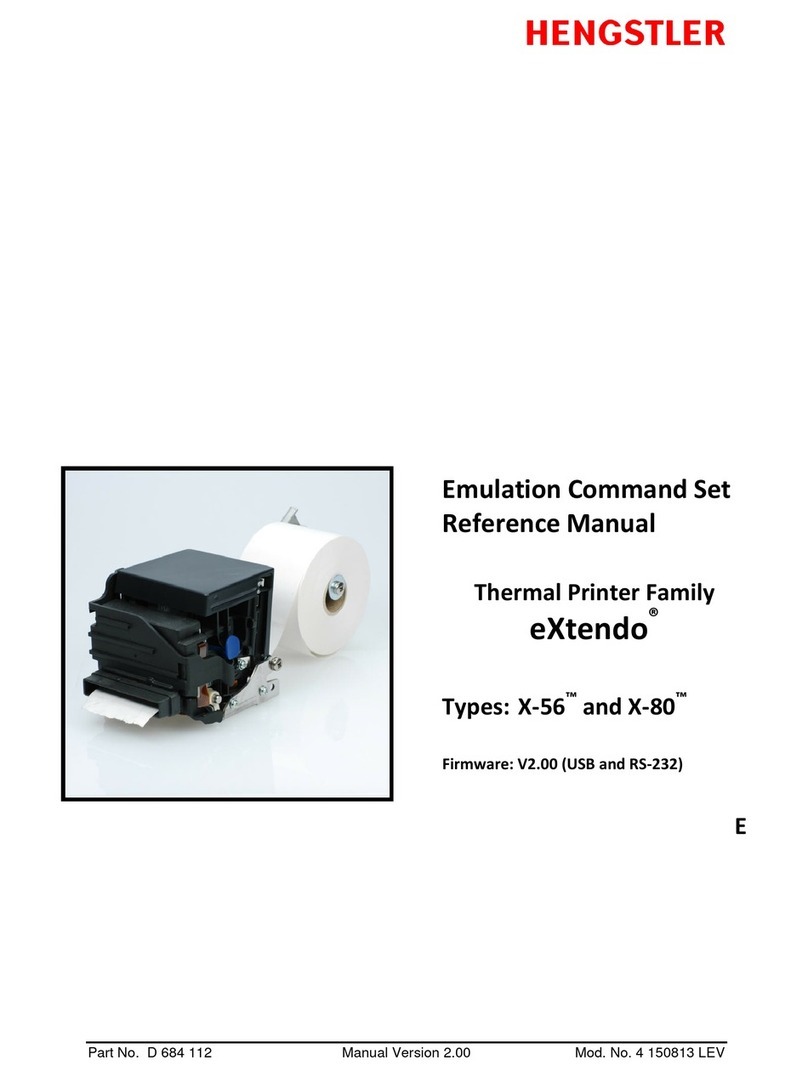
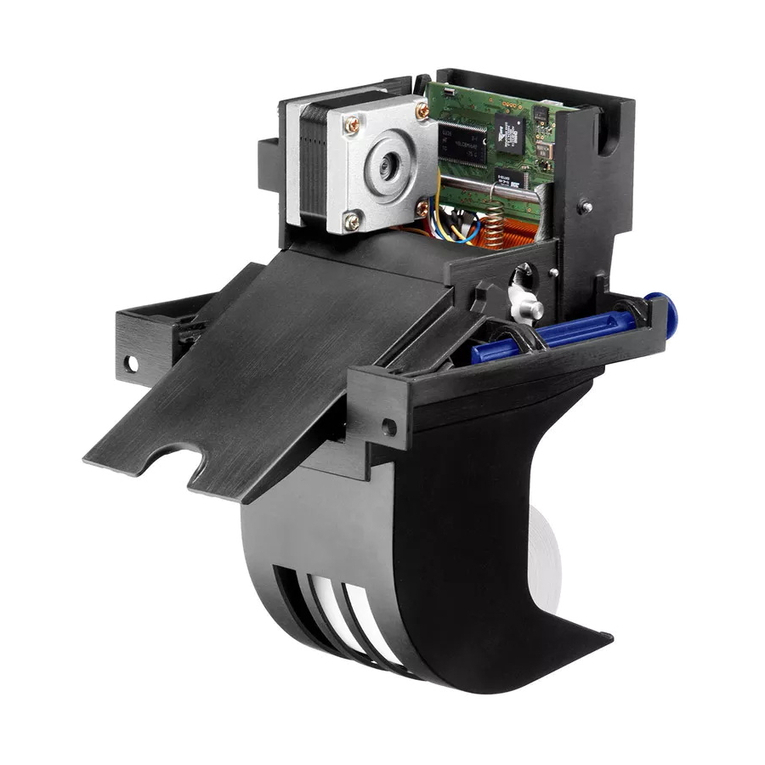
Hengstler TS-56 User manual

Operating Manual Part No. D 691 023A Version 1.03 Mod. No. 4 120912 LEV
®
Operating Manual
TwinSide TS™
Thermal Printer Family
Types: TS-56
P/N 06 1001
E

winSide S™
hermal Printer Family
HENGSTLER
Part No. D 691 023A Mod. No. 4 120912 LEV page 2 of 34
®
© 2012 by HENGSTLER
Hengstler GmbH has created the text and diagrams contained in this document with care. However,
we cannot accept responsibility for any errors or omissions. Notification regarding any errors and
suggestions for improvement are welcome. We reserve the right to make technical and/or other
changes at any time in the interest of continual product development or for other reasons.
All information contained in this manual is provided without regard to any possible patent protection.
All rights reserved. Reproduction, translation and/or distribution of this document, or extracts thereof,
are permitted only by express authorization from Hengstler GmbH. “ winSide S” is a trademark of
Hengstler GmbH. he Hengstler name and the Hengstler logo are registered trademarks of Hengstler
GmbH and the Danaher Corporation. “Windows” and “Microsoft” are registered trademarks of
Microsoft Corporation. Other brand and product names are trademarks or registered trademarks of
their respective companies.
HENGSTLER GmbH
Uhlandstrasse 49
78554 Aldingen / Germany
el. +49 (0) 7424-89 0
Fax +49 (0) 7424-89 500
eMail: info@hengstler.com
www.hengstler.com

winSide S™
hermal Printer Family
HENGSTLER
Part No. D 691 023A Mod. No. 4 120912 LEV page 3 of 34
®
Document History
Revision
Date
Init
ials
Stat
us
Description
1.00 2012 Sept 7 CBL Closed Initial version-general manual
1.01 2012 Sept 11 CBL Closed
General manual adapted to P/N 0691001
specifically. roubleshooting section expanded.
Expanded instructions for closing UPM. Corrected
print speed error in specs. Added jumper in serial
connector.
1.02 2012 Sept 11 CBL Closed Added temperature spec to duty cycle.
1.03 2012 Sept 12 CBL Closed Added ground; clarified jumper in RS-232 wiring;
corrected R S/C S; separated pinout into printer
and cable

winSide S™
hermal Printer Family
HENGSTLER
Part No. D 691 023A Mod. No. 4 120912 LEV page 4 of 34
®
Table of Contents
1. Introduction ...................................................................................................................................... 6
1.1. Additional Documentation ....................................................................................................... 7
1.2. List of Abbreviations ................................................................................................................ 7
1.3. Important Information and Safety Instructions ........................................................................ 8
1.4. Systems Specific Safety Instructions and Symbols ................................................................ 8
1.5. General Information ................................................................................................................ 8
2. Overview .......................................................................................................................................... 9
2.1. Overview of hermal Printing echnology .............................................................................. 9
2.2. Functional Views ................................................................................................................... 10
2.3. Description of Components and Operation ........................................................................... 11
2.4. Location of Controls and Connectors .................................................................................... 12
2.5. Operation of Sensors and LEDs ........................................................................................... 15
2.5.1. Paper Entrance / Black Mark Sensor ............................................................................ 15
2.5.2. Paper Pre-End (Paper Low) Sensor Option .................................................................. 16
2.5.3. LED Indicators ............................................................................................................... 16
2.5.4. UPM Status Sensor ....................................................................................................... 17
2.5.5. Chute Sensor ................................................................................................................ 17
2.6. Graphic Printing vs. Printing with Printer’s Fonts .................................................................. 18
3. Major Options ................................................................................................................................. 19
3.1. Loop Presenter ...................................................................................................................... 19
4. Unpacking ...................................................................................................................................... 20
5. Installation ...................................................................................................................................... 20
5.1. Function ................................................................................................................................. 20
5.2. Mounting the Printer .............................................................................................................. 21
5.3. Paper Guides ........................................................................................................................ 21
5.4. Wiring .................................................................................................................................... 21
5.4.1. Power ............................................................................................................................ 21
5.4.2. Interfacing ...................................................................................................................... 22
5.5. Paper Supply ......................................................................................................................... 23
5.5.1. Designing Your Own Paper Roll Holder ........................................................................ 23
5.6. Power Supply Specifications ................................................................................................. 24
6. Operation ....................................................................................................................................... 24
6.1. Loading Paper ....................................................................................................................... 24
6.2. Upper Print Mechanism Open/Service Position .................................................................... 25
6.3. Paper Advance Wheel .......................................................................................................... 25
6.4. Print Speed ............................................................................................................................ 26
6.5. Cutter Operation .................................................................................................................... 26
6.6. Software Flags ...................................................................................................................... 26
6.7. winSide S™ Digital ools ................................................................................................. 27
7. Low Current Operation................................................................................................................... 27
7.1. Print Speed ............................................................................................................................ 28
7.2. Graphics/Bar Codes .............................................................................................................. 28
7.3. Reverse Printing .................................................................................................................... 28
7.4. Dot History ............................................................................................................................. 28
7.5. Burn ime Correction ............................................................................................................ 28
7.6. Multi-Strobe Factor ................................................................................................................ 28
7.7. Print Density Adjustment ....................................................................................................... 28
8. roubleshooting ............................................................................................................................. 29
9. Maintenance .................................................................................................................................. 29
10. Repair ........................................................................................................................................ 30
11. Buying Paper ............................................................................................................................. 30
11.1. Sourcing Paper...................................................................................................................... 30
11.2. Converting Paper .................................................................................................................. 30
11.3. Black Mark Sensor Location ................................................................................................. 30
12. echnical Specifications ............................................................................................................ 32
12.1. S-56 P/N 0691001 Specifications ....................................................................................... 32
12.2. Electromagnetic Compatibility ............................................................................................... 33
12.2.1. FCC Part 15 Class A Device ......................................................................................... 33

winSide S™
hermal Printer Family
HENGSTLER
Part No. D 691 023A Mod. No. 4 120912 LEV page 5 of 34
®
12.2.2. EN55022 – Emissions ................................................................................................... 33
12.2.3. EN55024 – Electromagnetic Susceptibility ................................................................... 33
12.3. Printer Drawings .................................................................................................................... 34

winSide S™
hermal Printer Family
HENGSTLER
Part No. D 691 023A Mod. No. 4 120912 LEV page 6 of 34
®
1. Introduction
hank you for selecting the Hengstler winSide S™ thermal printer! We are proud of this feature-rich
product, which provides both the cost-savings and environmental benefits derived from the use of
2S ™ two-sided printing technology. he winSide S™ was designed using our extensive
expertise and experience, and we are confident that you will be pleased with its advanced features
and outstanding performance.
Printing on both sides of the paper offers numerous benefits, such as the ability to enhance your
customer’s specific marketing message by printing end-user-specific advertising, coupons,
promotions, etc. on the unused printout backside. Alternatively, significant cost savings occur when
long printouts are printed partly on the front and partly on the back, decreasing paper usage and
providing a positive environmental impact.
his Operator Manual is designed to help you with the proper installation, connection to your host
computer system and start-up of the winSide S™ thermal printer system. All necessary details will
be explained in the following sections. Please read this manual carefully before using the printer. If
you have any further questions, please do not hesitate to contact us.
he winSide S™ thermal printer family is intended primarily for printing and cutting documents and
receipts from continuous thermal paper. Either single-sided or two-sided (2S ™) thermal paper may
be used. he winSide S™ printers can determine which side of the paper can be printed, and can
configure itself accordingly. he S-56 version is for narrower paper (49 – 60 mm, with an optional
fixed 54 mm width). Several different paper cutters are available to handle a wide range of paper
stocks up to 250 g/m². Powerful motors allow the use of large paper rolls to maximize time between
paper replenishment. An optional presenter prevents the user from touching the paper until it is cut
from the paper roll, thereby preventing many forms of vandalism. If documents are to be printed on
preprinted forms or with a predetermined length, 'Black Mark' control is available. he horizontal and
vertical print density is 203 dpi so that graphics, such as logos etc. can be printed with good quality.
he winSide S™ printer family has been designed for use in a wide variety of applications,
including ticketing, parking, banking, transit, reverse-vending, kiosk, car wash, fuel dispensing, and
vending applications.
Available in both USB and Serial (RS-232) versions, the winSide S™ printer family is the ideal
solution for many printer applications! Driver software is available that supports the Windows 7, XP
and Linux operating systems. In addition, the printer can also be activated directly in ASCII mode
through ESC sequences; a detailed description of the different commands is contained in the
winSide S™ Emulation Command Set Reference.
We’re glad you chose the winSide S™ thermal printer family. Once you’ve used it, we’re sure you
will be, too!

winSide S™
hermal Printer Family
HENGSTLER
Part No. D 691 023A Mod. No. 4 120912 LEV page 7 of 34
®
1.1. Additional Documentation
Document No. Description
D 691 010 winSide S™ Emulation Command Set
Reference
D 691 024 winSide S™ Paper Specification
D 691 025
D 691 026
D 691 027
D 691 028
S-56 (w/paper guides) Dimensional Drawing –
wincut Cutter, with/without presenter
S-56 (w/paper guides) Dimensional Drawing –
Rotary Cutter, with/without presenter
S-56 (54 mm) Dimensional Drawing – wincut
Cutter, with/without presenter
S-56 (54 mm) Dimensional Drawing – Rotary
Cutter, with/without presenter
D 691 029 winSide S™ Maintenance Instructions
1.2. List of Abbreviations
Term Description
2S ™ Patented two-sided thermal technology
Cable side Side of the printer containing the ribbon cable
cpi Characters per inch
cpl Characters per line
dpi Dots per inch
ESD Electrostatic Discharge
Gear side Side of the printer containing the gears
lpi Lines per inch
LPM Lower Print Mechanism
lps Lines per second
MCBF Mean Cycles Between Failure
M BF Mean ime Between Failure
M BSC Mean ime Between Service Calls
M R Mean ime o Repair
PAW Paper Advance Wheel
PE Paper end
PPE Paper pre-end
pps Pulses per second
PVE Paper pre-end (from German “Papiervorende”)
Step Minimum line-feed distance
OF OF- op of Form
UPM Upper Print Mechanism
UPML Upper Print Mechanism Latch
UPMR Upper Print Mechanism Release

winSide S™
hermal Printer Family
HENGSTLER
Part No. D 691 023A Mod. No. 4 120912 LEV page 8 of 34
®
1.3. Important Information and Safety Instructions
Hengstler GmbH accepts no liability for any damages, direct, indirect or consequential, arising
from improper use of this thermal printer, and, in particular, due to non-compliance with this
operating manual or any other available documentation or due to improper handling or
maintenance. Should Hengstler GmbH choose to make technical documentation available,
this does not imply any authorization, implied or stated, for the making additions, repairs or
modifications to this printer.
his documentation may not be copied, nor shall its contents be disclosed or used
commercially unless such use has otherwise been explicitly agreed to by a duly authorized
Hengstler representative in writing.
he user is responsible for proper handling and installation of this printer. he printer should
only be shipped in its original packing.
1.4. Systems Specific Safety Instructions and Symbols
he following symbols on the system and in the manual remind you to follow the
relevant safety instructions:
General warning for cases where the user or a service person may be in danger.
General notes and hints for operating the system safely.
1.5. General Information
Hengstler GmbH accepts no liability for the safe operation of the winSide S™ thermal
printer family unless Hengstler original products are used exclusively and the following
instructions and recommendations are heeded.
Caution: Pinch Hazard!
he UPM of the winSide S-56 represents a pinch hazard
when open. Care must be taken to avoid accidental injury when the UPM is in the
raised position, and when opening or closing the UPM. ake care to avoid closing
the UPM on your fingers, and from catching any loose hair or clothing in the printer
when closing the UPM. While the UPM has a strong spring detent to hold it in the
open position, it can close rapidly if knocked out of the open detent position. Use
care whenever the UPM is not in the operating position and avoid placing your fingers
inside the printer.
Caution: Burn Hazard!
When the UPM of the winSide S-56 is in the open
position, the two thermal printheads are exposed. hese printheads can become hot
enough to cause burns in a fraction of a second. Avoid burns by not touching these
printheads with your skin or body! Also, please note that the transfer of oils from your
skin to the thermal printhead when it is touched can shorten the life of the printhead.
If unauthorized persons perform any repairs or modifications to the printer
mechanism and the controller, HENGS LER will not accept any liability and the
warranty shall be void.
Unapproved types of thermal paper may dramatically reduce the life of the print head
and may cause the guarantee to be voided. For pre-printed thermal paper make sure
that only appropriate inks are used. Detailed can be found in the Hengstler Paper
Specifications document D 691 024.

winSide S™
hermal Printer Family
HENGSTLER
Part No. D 691 023A Mod. No. 4 120912 LEV page 9 of 34
®
he DC power connector must not be plugged in or disconnected under load in order
to avoid damage to the electrical components and the thermal printhead.
Avoid strong vibration, shock and/or impact, since they may damage or destroy
sensitive electronic and mechanical components. Do not touch the surface of the
printer control board in order to prevent static electricity from damaging sensitive
components.
his thermal printer must not be used near high-frequency devices or strong
magnetic fields in order to prevent potential electromagnetic disturbance.
Do not make any attempts to service this printer (e.g. change paper) while the printer
is printing.
Installing or uninstalling the printer must only be done while using appropriate and
adequate ESD protection.
his printer is made from conductive materials, and must be properly grounded to
avoid a static charge from building up on the printed paper and interfering with paper
transport or presentation.
2. Overview
2.1. verview of Thermal Printing Technology
A brief overview of thermal printer technology might be helpful to understand how the
winSide S™ thermal printer family works. In most direct thermal printers, paper is fed over
a soft, rotating platen and under the thermal printhead. he platen acts as a roller to advance
the paper at the same time it acts as a surface against which the spring-loaded printhead
presses the paper to insure good thermal conductivity. Circuitry in the printer determines
which heating elements to activate (“fire” or “burn”) to form the next row of dots on the paper.
he thermal paper is coated with several compounds. At room temperature, these
compounds are white in color and do not react with each other. he heat from the thermal
printhead acts as a catalyst in the areas where the small printhead dots are fired, causing
these compounds to react with each other and form a new compound which is a contrasting
color, usually black. he platen then advances the paper to the position of the next dot row,
and the process is repeated.

winSide S™
hermal Printer Family
HENGSTLER
Part No. D 691 023A Mod. No. 4 120912 LEV page 10 of 34
®
In the winSide S™ family, there are two thermal printheads and two platens. One
printhead is located above the paper, and one is located a short distance away below the
paper. Both printheads print simultaneously as the paper is advanced. his offset creates a
small region on the back of the printout where printing is not possible. Printout designs
should be created according.
You may note immediately several of the advantages of thermal printing. First, since the
printing is done with heat, there is no noise from the printing process itself. hermal printing
is inherently quiet compared to most other technologies, such as impact dot matrix. Also,
there are only two moving elements in a two-sided thermal printer: the platens. his provides
increased reliability and life when compared to other technologies.
2.2. Functional Views
Figure 1

winSide S™
hermal Printer Family
HENGSTLER
Part No. D 691 023A Mod. No. 4 120912 LEV page 11 of 34
®
Figure 1a
2.3. Description of Components and peration
here are several key components or modules to the winSide S™ family of thermal
printers. (Please refer to Fig. 1 and Fig. 1a.) he thermal printheads (not shown) are
positioned above their respective platens. he platens acts as rollers to advance the paper at
the same time they act as a surface against which the spring-loaded printhead presses the
paper to insure good thermal conductivity. he interface, motor used to turn the platen (not
visible in Fig. 1), sensors, printhead, and paper cutter are all connected to the controller,
which sends commands and causes these components to function at the proper time. he
cutter separates the paper from the paper roll when instructed to do so. Several sensors
monitor progress as the printed document is created. All these items are mounted in a
conductive plastic housing to discharge any static and to provide electrical noise shielding.
he paper chute is a short chute protruding from the front of the printer. It snaps in and out
without tools when the printer is not equipped with the optional presenter. he paper chute
should be present for most normal printing applications, but it should be removed for
applications where the printed document is expected to fall freely into a chute or other
pathway. In these cases, the chute may interfere with the free fall of the printed document.
Please note that the chute sensor is located just before the chute, so removing the chute
does not interfere with the chute sensor.
When paper is inserted, the entrance sensor detects its presence and signals the controller.
he controller causes the paper advance motor to turn the platens to draw paper into the
printer. As the paper reaches the first platen, it is pulled under the first , and then the second,
printhead. he paper continues to advance and enters the paper cutter, where it passes
between the cutter blades and into the presenter, passing over the presenter entry sensor.
his signals the printer as to the location of the paper end. he paper is then reversed to the
park position. If the Coating Side detector is enabled by the configuration settings, the
winSide S-56 then attempts, by default, to print a small black mark on both sides of the
paper. It then reverses the paper and sensors detect these printed marks. From this
information, the printer determines whether 2S ™ or one-sided paper is installed, and, if one
sided, which side can be printed. If the Coating Side detector is disabled, this step will be
skipped. User printing can now begin. After paper loading, the printer will not reverse the
paper except when a printer reset command is issued. his is done to minimize possible

winSide S™
hermal Printer Family
HENGSTLER
Part No. D 691 023A Mod. No. 4 120912 LEV page 12 of 34
®
contamination of the platens. Once printing is completed, the paper is advanced and a
command sent to the cutter to cut off and present the printout. he paper then remains at the
cutter position awaiting the next printout.
When the printer runs out of paper, the entrance sensor detects the fact. he controller then
immediately stops printing and backs the paper up so it protrudes from the back of the printer.
his is to allow the operator to raise the UPM, remove the partially printed document, and
lower the UPM before loading a new roll of paper. If this were not done, it would be possible
for short pieces of paper to remain in the paper path without the operator’s knowledge,
eventually causing an obstruction and a paper jam.
he presenter sensors continually monitors whether there is paper in the presenter, and can
be read via the Status function. Please see the winSide S™ Emulation Command Set
Reference D 691 010 for details. his function is sometimes used in conjunction with the
host’s peripherals to signal the user when a printout is not taken, or to initiate a retract
command that will draw the printout back into the printer and deposit it in a reject bin.
Additionally, the presenter entry sensor is optionally monitored while first printing after a cut.
After a cut, the printer “knows” where the end of the paper is. As printing takes place, the
printer also “knows” how many paper advance steps have been made, and approximately
when the end of the paper should reach the chute sensor. If the paper does not reach the
sensor when expected, the printer assumes that a paper jam has taken place and signals this
fact via the Status command.
2.4. Location of Controls and Connectors
Please see Figures 2 through 5 below for the location of connectors, indicators and controls
on the winSide S™ series. Figure 2 shows a gear-side view of a S-56 without presenter,
while Figure 3 shows the same printer with the upper print mechanism (UPM) in the open, or
service, position. In both images, the gears protected by a cover. Figure 4 shows the
opposite, cable-side view of the printer. Figure 5 details the electrical connections to the
printer. Please note that, while P/N 0691001 comes equipped with a presenter, these figures
point out features that are common between presenter-equipped models and those without
presenter.

winSide S™
hermal Printer Family
HENGSTLER
Part No. D 691 023A Mod. No. 4 120912 LEV page 13 of 34
®
Figure 2
Figure 2a

winSide S™
hermal Printer Family
HENGSTLER
Part No. D 691 023A Mod. No. 4 120912 LEV page 14 of 34
®
Figure 3
Figure 4

winSide S™
hermal Printer Family
HENGSTLER
Part No. D 691 023A Mod. No. 4 120912 LEV page 15 of 34
®
Figure 5
2.5. peration of Sensors and LEDs
2.5.1. Paper Entrance / Black Mark Sensor
here is a sensor in the paper entrance area that serves several functions. First, it
detects paper during paper loading and signals the printer to begin the paper auto-
loading function. Similarly, when the printer is out of paper, this sensor detects the
fact and signals the printer accordingly.
he same sensor is also used to detect Black Marks, when the printer is so equipped.
Black Marks are blackened areas preprinted on the paper during the converting
process. hey are generally used, in conjunction with appropriate printer commands,
to advance the paper to a specific position after each print job. One common reason
for this is to so that preprinted information is properly located with respect to
information printed by the printer itself, for example, printing inside a preprinted box.
Black marks can be located on either the front or the back of the paper, depending
upon the location of the sensor.
he winSide S™ series of printers is designed to allow for several Paper
Entrance/Black Mark sensor locations during manufacturing. ( he location of this
sensor cannot be changed once the printer is built.) Also, two different sensor types
can be used. he most common is the reflex or reflective sensor, where the light
source and detector are located on a single chip. Basically, the light strikes the white
paper surface and reflects back into the sensor. If enough light reflects to activate the
sensor, the printer concludes that paper is present. If there is not enough light
reflected, the printer assumes that this area is black, meaning the printer is on a black
mark or the printer is out of paper. here are six (6) different possible positions for
this sensor in the S-56. Half of these positions sense the coated side of the paper,
while the other half sense the back of the paper. he positions of these sensors are
detailed in the “Black Mark Sensor” portion of this document.

winSide S™
hermal Printer Family
HENGSTLER
Part No. D 691 023A Mod. No. 4 120912 LEV page 16 of 34
®
2.5.2. Paper Pre-End (Paper Low) Sensor Option
When ordered with the Paper Pre-End Sensor option, the winSide S™ will be
shipped with a paper pre-end sensor to be mounted by the customer. he sensor is
a reflex type, meaning that it senses paper by bouncing light off the paper and
detecting its reflection. he sensor is equipped with a 300 mm long cable to allow
flexible mounting by the customer, and the sensor itself is mounted on a small printed
circuit board with a hole to be used for mounting it. Simply mount the sensor where it
will detect paper low (it is often mounted facing the side of the paper roll, so that as
the diameter of the paper roll decreases, it eventually loses the reflection of the light
and changes state), and plug the PPE sensor into the PPE connector on the control
board (see Fig. 5). While the exact distance of the sensor from the paper varies
based on the specific mechanical setup, it is typically 2-5 mm for optimal sensing.
Figure 6 below is the input circuit to the PPE (Paper Pre-End, or Paper Low) input.
he sensor connector adjacent to the PPE sensor, labeled “AUX” in Fig. 5, is for an
Auxiliary Sensor. his sensor can be mounted as desired by the customer. he
status of this sensor will be reported when the winSide S™ status is requested via
the interface.
Figure 6 shows the input circuit for these sensor connectors. (Fig. 6 represents the
circuit for either the PPE or Auxiliary Sensor; these two inputs are wired identically.)
he PPE (Paper Low) Sensor connector is designated CN6, while the Auxiliary
Sensor connector is CN18.
Figure 6
2.5.3. LED Indicators
here are two LED indicators in the winSide S™ series printers, located as shown
in Fig. 5. One LED is red, and the other is green. hese LEDs are used to signal
certain status information concerning the winSide S™ printer. he following is a
partial listing of the information supplied. However, for the most complete information
about printer status, we strongly recommend the use of the Hengstler S-56 tools,
which are supplied as part of the Windows driver package.
here are several flashing speeds used in the winSide S™ printer LEDs. hese
are 1 Hz, 2 Hz, 10 Hz, and flickering (F).
+5V
33K
Signal
Input 33Ω
+5V 180Ω
PPE / Paper
Low Conn.
CN6
or
Auxiliary
Conn. CN18
Pin 1
Pin 2
Pin 3

winSide S™
hermal Printer Family
HENGSTLER
Part No. D 691 023A Mod. No. 4 120912 LEV page 17 of 34
®
Green LED Red LED Meaning
Normal operations (such as paper loaded, out of paper, printing, cutting, presenting)
Flicker Flicker Data upload in progress (fonts, images, firmware, but not
normal data communication)
10 Hz Off Out of paper
2 Hz Off Motor on/Printing
1 Hz Off Ready to print
Operating failures (such as paper jam, cutter jam, presenter jam, printer jam, etc )
F0F On Printhead raised, printer stalled or over-voltage. (Green
LED will flicker, then go off for one second, then flicker
and repeat.)
F1F On Paper error. (Green LED will flicker, then go off for
one second, on for one second, off for one second,
then flicker again and repeat.)
F2F On Cutter error. (Same pattern as above, but off, on, off,
on, off.)
F3F On Presenter error. (Same pattern as above, but off, on, off,
on, off, on, off.)
System failures (These should never occur in normal operation )
F0F F0F Undefined initialization error
F1F F1F Board type determination failed during initialization
F2F F2F SDRAM failure detected during initialization
Off On Unintended processor halt during boot phase
On On Unintended processor halt during initialization
Please note that much more detailed information concerning the printer’s current
state can be obtained by requesting the printer’s status via the interface, or via one of
the software tools provided with the Windows driver. Please refer to the winSide
S™ Emulation Command Set Reference D 691 010 for details.
2.5.4. UPM Status Sensor
An additional sensor detects the status of the UPM, and is used to determine whether
the UPM is in the up, or “service” position (do not print) or down (ready to print)
position. Normally, most of the heat generated by thermal printing is transferred to
the paper being printed and is removed from the printer as the paper advances.
When the UPM is in the service position, the printheads are not in contact with the
paper, and no heat is being transferred to the paper. herefore, most of the heat
remains in the individual dots, allowing them to overheat if activated repeatedly.
Because this may cause permanent damage to the printer, the winSide S™
firmware will prevent printing or paper loading if the head is up.
WARNING! POTENTIAL BURN HAZARD!
It is important to note that the UPM
Status Sensor can be intentionally manually overridden. If this is done, then there is
a possibility that the printheads can heat while the UPM is open. his represents a
burn hazard that should be avoided! Never override the UPM status sensor, and
never touch the thermal printheads directly.
he status of this sensor is also available through the Query function. See the
winSide S™ Emulation Command Set Reference D 691 010 for details on
determining the UPM position and the printhead temperature.
2.5.5. Chute Sensor
he winSide S-56 chute sensor continually monitors whether there is paper in the
chute, and can be read via the Status function. (Please see the winSide S™
Emulation Command Set Reference D 691 010 for details.) his function is often
used in conjunction with the host’s peripherals to signal the user when a printout is
not taken. Examples where this is important include when the information is

winSide S™
hermal Printer Family
HENGSTLER
Part No. D 691 023A Mod. No. 4 120912 LEV page 18 of 34
®
confidential, or the printout can be redeemed for cash or items of value. his function
can also be used to prevent the host from sending a new print job until the printout
from the previous print job has been removed.
Additionally, the chute sensor is monitored while first printing after a cut. After a cut,
the printer “knows” where the end of the paper is. As printing takes place, the printer
also “knows” how many paper advance steps have been made, and approximately
when the end of the paper should reach the chute sensor. If the paper does not
reach the sensor when expected, the printer assumes that a paper jam has taken
place and signals this fact via the Status command.
Please note that the chute sensor is not used when the printer is supplied equipped
with a presenter. In this case, the presenter entry sensor serves a similar function,
plus provides additional functionality related to the presenter.
2.6. Graphic Printing vs. Printing with Printer’s Fonts
One area that causes frequent confusion with regard to printers in general is that of graphic
printing versus printing using the printer’s internal fonts. An explanation here may help clarify
this and make application of the winSide S™ easier for you.
All printers contain a set of commands that will cause the printer to perform different
functions. (For the winSide S™ family of thermal printers, these commands are
documented in the winSide S™ Emulation Command Set Reference, P/N D 691 010.) he
functions are very diverse and there are no standards for what these functions may be. his
allows printer manufacturers to innovate and build unique features into their products. hese
commands are often referred to as the printer’s “Native Commands”.
A printer’s Native Commands are of many different types, but a few are of particular interest
to us here. One is the family of commands for printing graphics. It is these commands that
allow pictures and other graphic images of any type to be printed.
Another family of commands of interest to us here is the text commands. hese commands
involve printing text in response to ASCII data sent to the printer. he printer itself contains
one or more character sets. In these character sets, one printable character corresponds to
one ASCII character. here are also commands for positioning and modifying the printout
from these character sets, such as tab and indent commands and commands to enlarge the
internal character set by some factor.
When printing from the internal character sets (we’ll call that “ASCII printing” here for
convenience), characters are sent to the printer and the corresponding characters from the
character set are printed. his has both advantages and disadvantages. he biggest
advantage is that the host need only send one character per printed character. So if 40
characters are being printed on a line, for example, only 40 bytes of data (plus any overhead
for formatting, indenting, etc.) need be transmitted over the interface. In other words, you can
print a lot of text and need send only a little data. he downside is a lack of flexibility. In
today’s Windows
®
world, we are all used to printing exactly what we see on our computer
screens, in the same font, size, etc. as we see it. But with ASCII printing, what will be printed
will be based on the printer’s internal character set.
he other type of printing we’ll call “Graphic printing”. his is what happens when you print to
an ink jet or laser printer from your PC. he information displayed on the screen is sent to a
print driver. his print driver, which is unique for each printer, translates what is on the screen
as a graphic into graphic Native Commands to be sent to the printer.
Everything printed
through a print driver prints as graphics
. It takes a lot more data to transmit graphics than
to transmit ASCII. In our 40 character example, assuming a 12 x 20 pixel character, the
Hengstler S-56 printer would require 1,600 bytes to print one line. (Please note that these
are estimates, and that various compression routines also impact the print speed.)

winSide S™
hermal Printer Family
HENGSTLER
Part No. D 691 023A Mod. No. 4 120912 LEV page 19 of 34
®
he advantage of Graphic printing, then, is the ability to print anything; pictures, text, photos,
etc. exactly as you see it on your screen. he disadvantage is that to do so, much more data
(40 times as much data in our example) must be sent over the interface.
As a practical matter, then, it comes down to this. If you are doing ASCII printing, you can
use USB or a serial interface. Both are fast enough to handle the smaller amount of data
being sent. But if you are doing Graphic printing, USB is a far better choice due to its higher
speed, and serial may increase the time to complete a printout to an unacceptably long
period.
3. Major Options
3.1. Loop Presenter
he S-56 is available with an optional loop presenter with retract function. Please note that
the presenter is standard for P/N 0691001. he loop presenter (see Fig. 1a) prevents a user
from touching the printed paper until after it is severed from the paper roll. he paper is then
presented out the front of the presenter to the user. If so configured, the presenter can
retract/reject the paper if it has not been taken, either by command or based on elapsed time.
Figure 7a Figure 7b
Figure 7a shows the loop presenter before paper reaches it. he presenter flap is essentially
horizontal, held in position by a spring. Fig. 7b shows the presenter after the loop, (from
which this type of presenter gets its name), has formed. he winSide S™ presenter forms
its loop upward. Please note that your design must allow space for this loop. If inadequate
space is allowed, the loop may catch on protuberances inside your housing and cause a
paper jam. he amount of space required depends upon the length of your printout. When
using the loop presenter, the minimum printout length depends upon the Pre-print Mode
setting. If the Pre-Print Mode is set to disabled, the minimum ticket length is 97 mm. If the
Pre-Print Mode is set to “Pre-Print Header”, then the minimum length is 111 mm. he
maximum printout length is approximately 350 mm, but this depends upon the ability of the
paper loop to support itself, which is dependent upon the paper weight. We recommend that
you test with your actual paper before finalizing a design based on this length.

winSide S™
hermal Printer Family
HENGSTLER
Part No. D 691 023A Mod. No. 4 120912 LEV page 20 of 34
®
Figure 7c Figure 7d
Figure 7c shows the printout as it exits the presenter. Figure 7d shows the printout coming
out of the bottom of the printer after it has been retracted/rejected. Allowances in your design
must also be made for an area to store the retracted/rejected printouts. his is important
because this feature is most often used to protect confidential data, or to keep untaken
printouts from littering the floor. In both cases, they must be securely stored internal to your
enclosure until they are disposed of by those responsible for maintenance of your system.
wo sensors are used in the winSide S™ presenter. he first is just outside the cutter, and
performs multiple functions, including detection of paper during paper loading, detection of
paper during printing, and the detection of retracted/rejected printouts. he second sensor is
located just inside the chute. Care must be taken in the design to avoid exposing this sensor
to strong light, particularly direct sunlight caused by a setting sun. If necessary, a shroud or
cover should be used to shade this sensor.
Please note that a small protrusion on the top of the presenter flap allows the user lift the flap.
his flap should be used in the unlikely event of a paper jam in the presenter itself.
4. Unpacking
Care should be taken when unpacking your winSide S™ printer to preserve the packing
material for possible future use. winSide S™ packing is specifically designed to protect the
printer from damage in the harsh environment of trucks and aircraft. Please be sure to use
this packing if it ever becomes necessary to reship your winSide S™ unit.
5. Installation
5.1. Function
Please note that the winSide S™ printer is a module designed to be integrated into a
system and to be operated only as a part of that system, for example, in a kiosk. All technical
specifications and instructions contained in this manual and related documentation must be
considered and complied with in order to achieve successful operation in the completed
system.
Table of contents
Other Hengstler Printer manuals
