manuals.online logo
Brands
  1. Home
  2. •
  3. Brands
  4. •
  5. Henny Penny
  6. •
  7. Fryer
  8. •
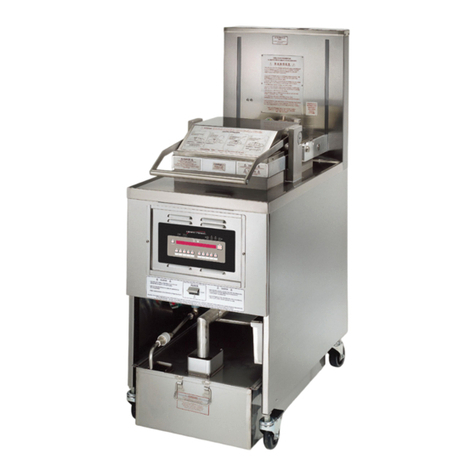
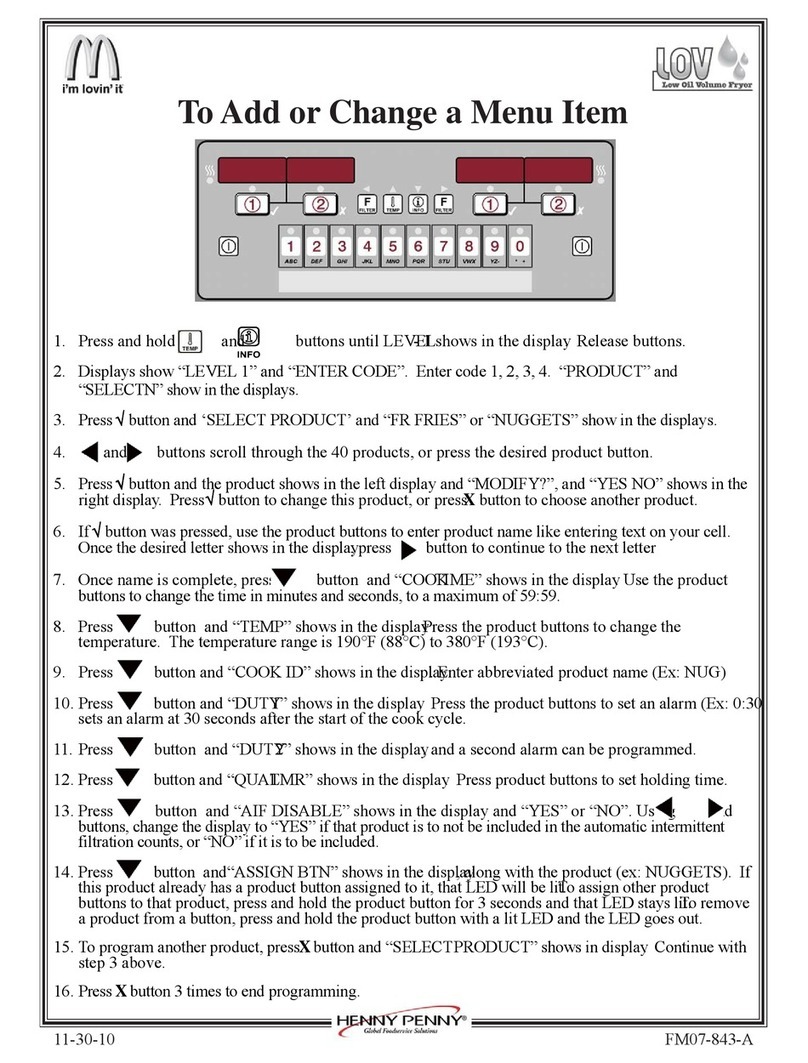
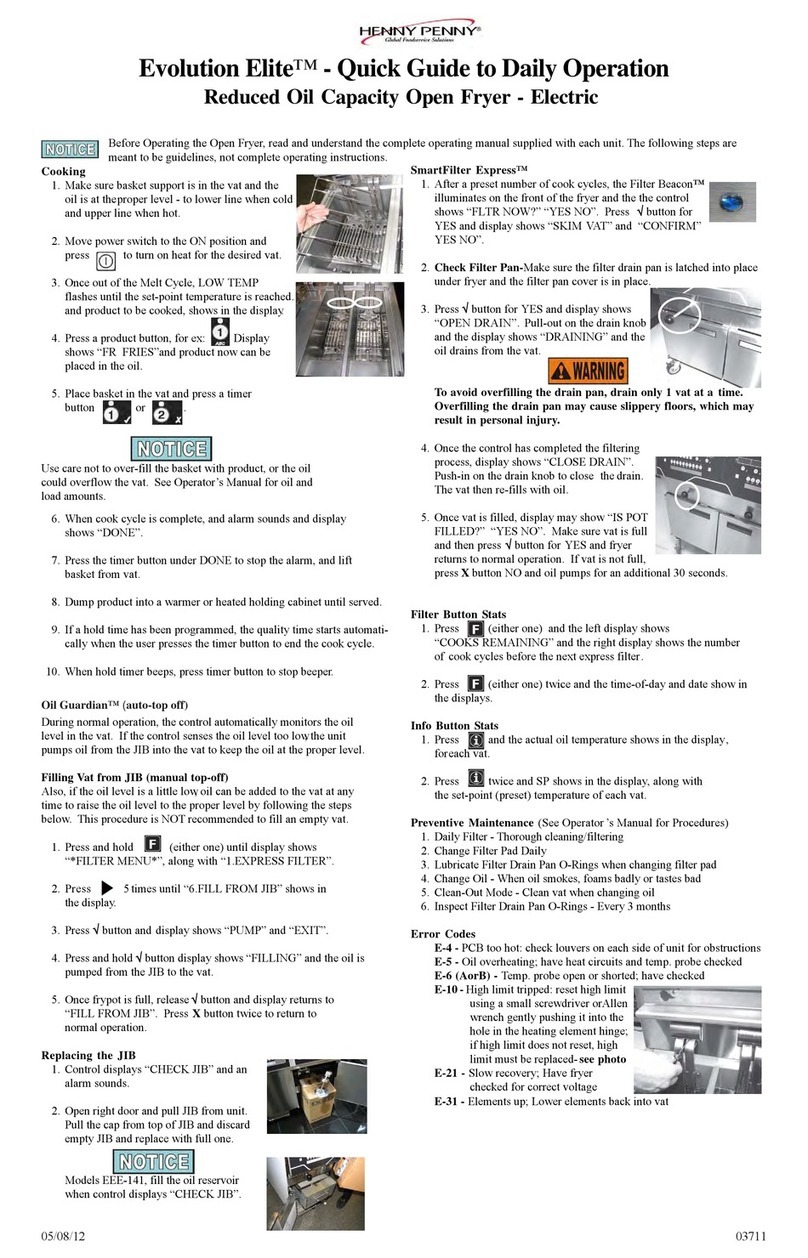
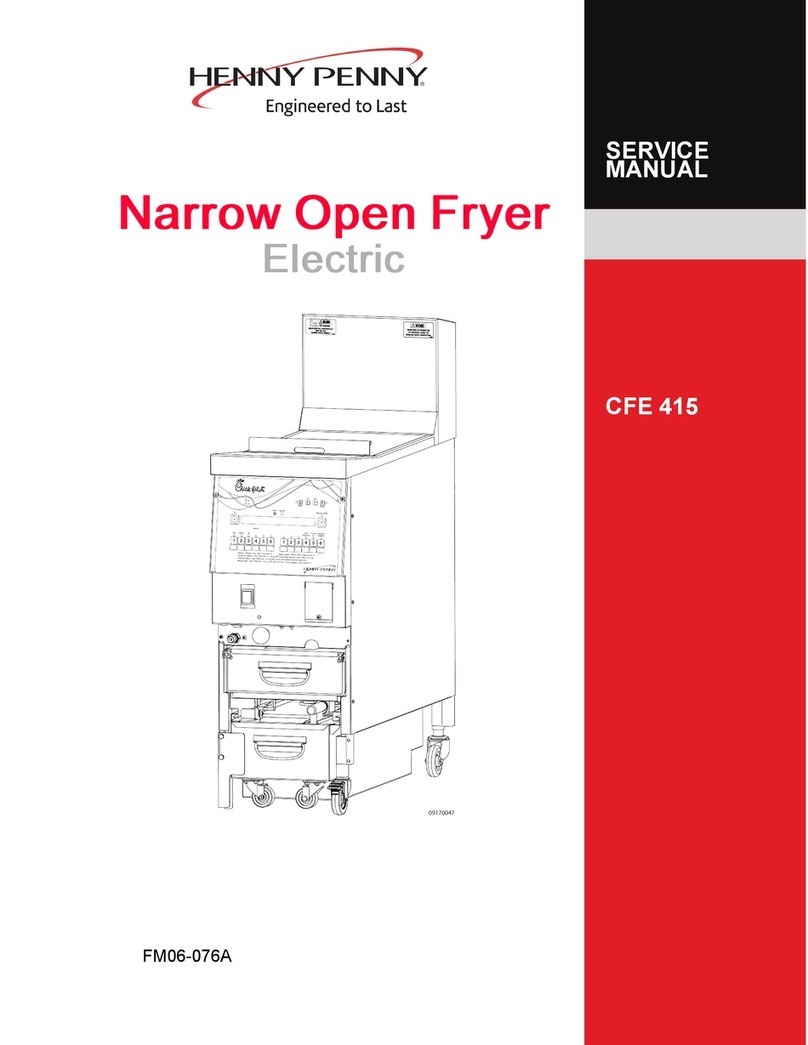
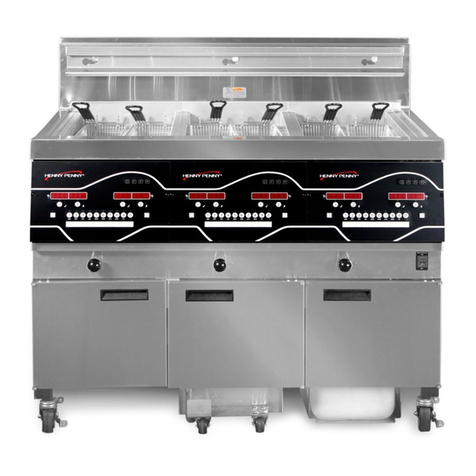
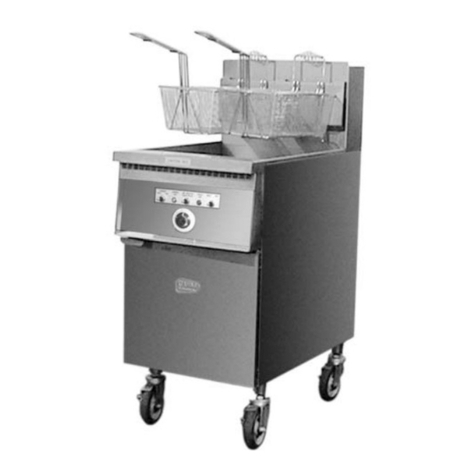
  9. Henny Penny LVE 30 Series User manual

Henny Penny LVE 30 Series User manual

FM08-719A©McDonald’s Corporation · Planned Maintenance Manual · Revised August 2020
Hazards
These icon
s alert you to a possible risk of personal injury.
Equipment alerts
Look for this icon to find information about how to avoid damaging the
equipment while doing a procedure.
Tips
Look f
or this icon to find helpful tips about how to do a procedure.
FRYERS FR 25
Henny Penny Corp.
Open Fryer - Electric
LVE 30X
Cross reference (optional)
Daily maintenance tasks
FR 25D01 Maintenance Filter
& Fryer Vat
Cleaning
Weekly maintenance tasks
FR 25W01 Clean Behind
Fryer
Quarterly maintenance tasks
FR 25Q01 Check Filter
System O-Rings
FR 25Q02 Deep Clean
Annual maintenance tasks
FR 25A1-T Inspection
Model LVE 30X
Henny Penny Corp
.Open Fryer Electric LVE 30X FR25
Maintenance Filter & Fryer Vat Cleaning Daily FR 25 D01
FM08-720A ©McDonald’s Corporation · Planned Maintenance Manual · Revised August 2020 Page 1 of 4
Why
Cleans the vat of crumbs and filters the oil thoroughly to prolong the life of the oil
Time required
5 minutes to prepare
10 minutes per vat to complete.
Time of day
During low volume hours.
Hazard icons
Tools and supplies
Heat-Resistant
Gloves, filtering
Face shield
Apron, heat-resistant
Hi-Temp Tool with Multi-Use Pad and Detail Brush
McFilteringKit for built-in
filtering system, sample
Cleanser
KAY®QSR Fryer
KAY®QSR Heavy
Duty Degreaser
So
lution
Clean, Sanitizer-soaked
towels
Bucket, soiled towels 3-Compartment Sink
- KAY®SolidSenseTM All-Purpose
Super Concentrate (APSC) Solution
Goofer Tool
Procedure
1
Put on protective gear
Use all McDonald’s approved
safety equipment, including
apron, face shield and heat-
resistant gloves.
Hot oil can cause severe
burns
2
Check filter pan
Make sure filter drain pan and
pan cover are properly in
place with the filter pipe
tightly connected.
If the filter drain pan or pan
cover is not properly
installed, an alert will display.
3
Enter the Oil and Filter menu
Make sure the oil is hot, to get
the best results from filtering.
Tap the Settings button, and
then tap to enter the Oil &
Filter menu.
4
Enter Daily Maintenance Filter
Tap Daily Filter to enter the
Daily Maintenance Filter
procedure.
Maintenance Filter & Fryer Vat Cleaning (continued)
FM08-720A ©McDonald’s Corporation · Planned Maintenance Manual · Revised August 2020 Page 2 of 4
He
nny Penny Corp.Open Fryer Electric LVE 30X
Daily
FR 25 D01
5
Start Daily Filter
Follow prompts to start the
Daily Filter.
-For split vats, choose left
or right side.
-As prompted skim the vat
to remove floating
crumbs.
- Tap Start Filter to drain
the oil. Draining displays.
-Tap X to exit the Daily
Filter screen and return to
normal operation.
6
Lift elements
Once oil has drained, remove
basket support, and use lift
tool to raise the hinged
elements from the vat.
Use heat-resistant gloves
when lifting elements or
burns could result.
Be careful not to damage high
limit probe(s) in center of
elements.
7
Scrub inside vat
Attach thePad to theHi-
Temp Pad Holder and
moisten with shortening.
Sprinkle KAY®QSRFryer
Cleanser on the Pad and scrub
the walls, corners, and bottom
oftheinside of the vat. Use
the Hi-Temp Detail Brush to
remove soil built up and
debris fromheating element
coils, corners and bottom of
vats and other hard-to-reach
areas.
Be careful not to damage the
sensing probes and DO NOT
scrub elements or breading
will stick and burn.
KAY®QSRFryer Cleanser
8
Drain complete
Once the vat is clean, Drain
Complete displays.
9
Washing
Lower the elements and then
tap the Start Wash, play
button. Washing displays. Oil
is circulated through the vat.
10
Wash complete
Once wash cycle is complete,
Wash Complete displays.
Buttons for Repeat Wash or
Start Rinse are available. If
vat is not yet clean, tap the
Repeat Wash arrow and step
9 is repeated.
11
Rinsing
If vat is clean, tap the Start
Rinse, play button. Rinsing
displays. The oil is pumped
into the vat and rinses it.
12
Rinse complete
Once completed, Rinse
Complete displays with
buttons for Repeat Rinse or
Start Polish. If vat is not yet
clean, tap the Repeat Rinse
arrow and step 11 is repeated.
13
Polishing
If vat is clean, tap the Start
Polish, play button and oil is
circulated through the filter
system for 5 minutes.
-A Skip Polish action
button is available to exit
the polish step at any
point in the process.
- Continue to step 14.
14
Refilling
Once the polish cycle is
complete, Refilling displays
and the vat fills with oil.
Maintenance Filter & Fryer Vat Cleaning (continued)
FM08-720A ©McDonald’s Corporation · Planned Maintenance Manual · Revised August 2020 Page 3 of 4
He
nny Penny Corp.Open Fryer Electric LVE 30X
Daily
FR 25 D01
15
Refill complete
Once vat is full, Refill
Complete displays.
- Tap the Start Heat play
button to begin heating
the oil.
-A Skip Heat action
button is also available to
proceed without heating
the oil.
16
Change filter pad
Open the door, pull-out the
filter drain pan assembly
using the handle on the drain
pan.
This pan could be hot!
Use heat-resistant gloves
or severe burns could
result.
17
Remove filter drain pan cover
Lift the pan cover from the
drain pan and set aside.
18
Remove crumb basket
Lift the crumb basket from
the drain pan. Wipe the oil
and crumbs from the crumb
basket and discard. Set aside.
19
Remove filter pad retaining
ring
Remove the filter pad
retaining ring set aside.
20
Remove filter pad from pan
Pull the filter pad from the
pan and discard pad.
21
Remove bottom screen
Pull the bottom screen from
pan set aside.
22
Clean drain pan
Take the removable parts to
the 3-compartment sink to
wash in KAY®SolidSenseTM
All-Purpose Super
Concentrate (APSC)
Solution and rinse
thoroughly with warm water.
Allow to air dry before
reassembling.
KAY®SolidSenseTM All-
Purpose Super
Concentrate (APSC)
23
Reassemble
Reassemble in reverse order,
placing the bottom screen into
the filter pan first, followed
by the new filter pad,
retaining ring, crumb catcher,
and then lid.
Be sure that the drain pan,
bottom screen, crumb catcher,
and the retaining ring are
thoroughly dry before placing
filter pad into pan as water
will dissolve the filter pad
24
Activate screen lock
On the control panel, swipe
up and tap the lock icon. The
screen locks for 10 seconds
for cleaning.
Maintenance Filter & Fryer Vat Cleaning (continued)
FM08-720A ©McDonald’s Corporation · Planned Maintenance Manual · Revised August 2020 Page 4 of 4
He
nny Penny Corp.Open Fryer Electric LVE 30X
Daily
FR 25 D01
25
Clean control panel
Wipe the control panel with a
clean, sanitizer-soaked towel
sprayed with KAY®
SolidSenseTM All-Purpose
Super Concentrate (APSC)
Solution.
Do not splash water on or
around controls or damage to
the control may occur.
26
Clean exterior of Fryer
Wipe down the exterior ofthe
fryer with a clean, sanitizer-
soaked towel sprayed with
KAY®QSRHeavy Duty
Degreaser Solution.Rinse
with a separate clean,
sanitizer-soaked towel.
KAY®QSRHeavy Duty Degreaser Solution
Check FilterDrain Pan O-Rings Quarterly FR 25 Q01
FM08-721A ©McDonald’s Corporation · Planned Maintenance Manual · Revised August 2020 Page 1 of 1
Henny Penny Corp
Open Fryer Electric LVE 30X
Quarterly
FR 25Q01
Why
To seal the drain pan tube and fryer plumbing connection, allowing for proper filter pump suction.
Time required
5 minutes to examine and replace if necessary
Time of day
Start of day or any time the fryer is not filtering.
Hazard icons
Tools
Small flat-head
screwdriver
Heat Resistant
Gloves
Procedure
1
Pull-out filter drain pan
Open the door and pull the
filter drain pan assembly out,
using the handle on the drain
pan.
This pan could be hot! Use
heat-resistant glovesor
severe burns could result.
2
Check O-rings
Visually check the O-rings on
the tube of the filter drain pan
for any cracks or breaks and
replace quarterly or as
necessary.
O-ring failure will cause the
filter pump to not return oil
from the pan to vats during
filter cycles.Replace
Good
3
Remove old O-rings
Using a small, flat-bladed
screwdriver, pry up on the
O-rings and pull all 3 off the
end of the tube.
Only use Henny Penny
approved replacement O-rings
which will withstand high
temperatures.
4
Install new O-rings
Roll new O-rings into the
notches on the tube.
Use cool cooking oil to aid in
O-ring lubrication during
replacement.
Vat Deep Clean Procedure Quarterly FR 25 Q02
FM08-722A ©McDonald’s Corporation · Planned Maintenance Manual · Revised August 2020 Page 1 of 5
Henny Penny Corp
Open Fryer Electric LVE 30X
Quarterly
FR 25Q02
Why
To thoroughly clean the vat by removing caramelized oil from vat
Time required
1 hour
15 minutes to prepare & complete per vat
Time of day
After close if not 24-hour store
For 24-hour restaurants: The task can be performed one
vat at a time. You will be able to serve customers with
remaining vats not immediately adjacent.
Hazard icons
Tools and supplies
Heat-Resistant
Gloves
Face shield
Apron, heat-resistant
Heat-Resistant Pail
Hi-Temp Tool with Multi-Use Pad and Detail
Brush
KAY®QSR Heavy
Duty Degreaser
Paper towels
- 3-Compartment Sink
- KAY®SolidSenseTM All-
Purpose Super Concentrate
(APSC) Solution
½ Gallon Stainless
Ste
el Pitcher
Goofer Tool
Procedure
1
Perform Filter Cycle
To get the best results from
the deep clean process,
perform a filter cycle before
proceeding to deep clean
mode. To activate a filter
cycle, tap the Oil Info icon
and then tap the Express
Filter button that appears in
the Oil Info screen.
2
Cover Vats
Cover adjoining vats to
avoid accidentally
contaminating oil with fryer
Deep Clean solution.
Do not cook product in an
adjoining vat when the Deep
Clean process is in progress
to avoid contaminating the
oil and product.
Vat Deep Clean (continued)
FM08-722A ©McDonald’s Corporation · Planned Maintenance Manual · Revised August 2020 Page 2 of 5
Henny Penny Corp
.Open Fryer Electric LVE 30X
Q
uarterly FR 25Q02
3
Put on protective gear
Use all McDonald’s
approved safety equipment,
including apron, face shield
and heat-resistant gloves.
Hot oil or water can cause
severe burns.
4
Enter Deep Clean Mode
Tap the Settings button to
display the Settings menu,
and then tapDeep Clean
toenter Deep Clean Mode.
5
Enter Code
Enter passcode 1234 by
tapping the number buttons.
6
Vat Choice (Split Vats Only)
and Warnings
For split vats, select deep
clean oneor both sides.
The display shows Deep
Clean Left Side,Deep
Clean Right Side, orDeep
Clean Both Sides.
-Tap the choice for the
deep clean to be
performed.
-Full vats do not have
this option.
Burn Risk warnings display.
-Ensure all PPE is
properly worn.
-Tap OK and Confirm to
proceed with the Deep
Clean.
-Or tap Cancel to exit.
7
Filter Drain Pan Empty
A deep clean requires an
empty filter drain pan.
Check the filter drain pan
for oil, and then tap:
-
-
No, if oil is not present
tapping No will proceed
to a draining the vat
step.
Yes,if oil is present
tapping Yes will ask the
user to re-evaluate the
filter drain pan status.
- TapNext if thefilter
drain pan is empty.
-Tap Exit if thefilter
drain pan is not empty
and the Deep Clean
mode isexited.
8
Confirm Oil in Vat
For Full Vat:
-Tap Yes if thevat has
oil in it.
-Tap No if thevat is
empty.
For Split Vat:
-Tap Yes ifthe left split
vat has oil in it.
-Tap No if theleft split
vat isempty.
If tapping:
-Yes,proceed to step 9.
-No,proceed to step 10.
9
Disposing of Oil
To dispose the oilfrom a
vat, use the Dispose the oil
to prompts.
Cart: Units without bulk oil
systems tap the Cart button.
Rear: For units with bulk
oil systems, tap the Rear
button. After the oil drains
into the pan, the door
mounted dispose switch
may be used.
Vat Deep Clean (continued)
FM08-722A ©McDonald’s Corporation · Planned Maintenance Manual · Revised August 2020 Page 3 of 5
Henny Penny Corp
.Open Fryer Electric LVE 30X
Q
uarterly FR 25Q02
10
Start Deep Clean
"Ready to start Deep
Clean" is displayed.Tap
Ready to begin the deep
clean process.
11a
Prepare Filter Pan
Empty filter drain pan of
internal filtering
components and take the
components the 3-
compartment sink to wash
and rinse. Wash with KAY®
SolidSenseTM All-Purpose
Super Concentrate (APSC)
Solution and rinse
thoroughly with warm
water. Allow to air dry.
Return theempty filter drain
pan and cover to the fryer.
Tap Next on the control to
confirm this step is
complete.
KAY®SolidSenseTM All-
Purpose Super Concentrate
(APSC) Solution
11b
Prepare Solution:
For Cleaning Full Vats:
Pour 2/3 of 1gal. (3.8L)
bottle offull-strength
KAY®QSRHeavy Duty
Degreaser into empty vat
andfill with hot water to
approximately 1” (25
mm) over the oil fill lines.
For Cleaning Split Vats:
Pour 1/3 of 1 gal.(3.8L)
bottle offull-strength
KAY®QSRHeavy Duty
Degreaser into emptyvat
and fill with hot water to
approximately 1” (25
mm) over the oil fill lines.
KAY®QSRHeavy Duty
Degreaser
Make sure the vat is filled to
1 in. (25 mm) above thetop
fill line. Then tap Next to
proceed to start the soak.
Start the soak when ready
displays.Tap the play
button to start the soak
sequence.
Add water as needed during
cleaning process to keep
solution 1 in. (25 mm) above
the top fill line.
KAY®QSRHeavy Duty
Degreaser Solution
12
Soak
"Soak in process"is
displayed along with a
countdown timer. Heat is
regulatedto 195°F (91°C)
for onehour.
Tap the button to:
-Pause
-Resume
-Stop
After the 60-minute
countdown timerexpires,
"Soak is complete"is
displayed. Tap the
checkmark button to
proceed to the Scrub the
vat step.
Attach the Pad to theHi-
Temp Pad Holder.
Frequently dip the Hi-Temp
Pad Holder into the
Degreaser Solution and
gently brush area above
solution level toremove
solution from upper portion
of vat. After scrubbing the
vat, tap NEXT.
KAY®QSRHeavy Duty
Degreaser
Vat Deep Clean (continued)
FM08-722A ©McDonald’s Corporation · Planned Maintenance Manual · Revised August 2020 Page 4 of 5
Henny Penny Corp
.Open Fryer Electric LVE 30X
Q
uarterly FR 25Q02
13
Discarding Solution
"Remove the water mix
from vat" is displayed with
adrain pan or manual
option. Tap preferred
selection to proceed.
CAUTION! Ensure the
drain pan is empty prior
to initiating.
Using a 1/2 gal. (2 liter)
stainless steel pitcher,
remove the solution from
the vat, pouringit into a
heat-resistant pail for
disposal.
Tap NEXT to confirm most
of the water mix has been
manually removed. "Lift
elements out of way" is
displayed. Use the element
lift tool to fully raise the
elements and tap NEXT.
Hot solution can cause
severe burns, wear heat-
resistant gloves and
protective gear.
KAY®QSRHeavy Duty
Degreaser Solution
14
Clean Vat
"Scrub the vat" is displayed.
Use the Hi-Temp Detail
Brush to clean heating
elements and use the Hi-
Temp Pad Holder and Pad to
clean the inside of the vat
walls, corners and top.
Use the lift tool and lift the
hinged element from the vat
as needed.
Do not scrape the electric
fryer elements or usethe
scouring pad on the
elements orbreading will
stick and burn.
Do not use steel wool, wire
brush, putty knife, other
abrasive cleaners, or
cleaners/sanitizers
containing chlorine,
bromine, iodine, or
ammonia chemicals as these
will deteriorate the
stainless-steel material and
shorten thelife ofthe unit.
Tap NEXT toproceed.
Lower the elements as
prompted and tap NEXT
again.
Vat Deep Clean (continued)
FM08-722A ©McDonald’s Corporation · Planned Maintenance Manual · Revised August 2020 Page 5 of 5
Henny Penny Corp
.Open Fryer Electric LVE 30X
Q
uarterly FR 25Q02
15
Multiple Rinse and Remove
Cleaning Solution
Using clean cool water rinse
the remaining cleaning
solution and debris.
Tap NEXT once to remove
water manually with a
container. --OR--
Tap NEXT twice to drain
water into thefilter pan.
CAUTION! Ensure the
drain pan is empty prior
to initiating.
Tap and hold the DRAIN
button to open the drain
valve. Releasing thedrain
button will close thedrain
valve.
CAUTION! Ensure the
drain pan is empty prior
to initiating.
Continue following rinse
prompts to thoroughly rinse
the vat multiple times.
CAUTION! Before
draining rinse water each
time, ensure the filter pan
is empty.
16
Purge Oil Lines
To purge oil lines, tap and
hold the PURGE button.
With the Purge button held
the filter pump will run.
Release the Purgebutton
when asmall amount of
clean oil begins to flow into
the vat.
Tap NEXT to continue.
17
Dry Vat
Dry vat with a paper
towel. Tap NEXT to
continue.
18
Empty and Dry Filter Drain
Pan
Remove filter drain pan and
empty into mop sink.
Rinse drain pan with clean
water and dry with a paper
towel.
Tap DONE tocontinue.
Properly assemble filter
drain pan components and
insert a new filter pad.
19
Fill Vat
"Fill vat from"is displayed
with action buttons to fill
the vat from different oil
sources.
-
-
For units with bulk oil
tap Bulk.
For units without bulk
oil tap Manual Fill.
Filling from the JIB should
only be used for vats that
are partially full and require
topping off.
Clean Behind Fryer Weekly FR 25 W01
FM08-723A ©McDonald’s Corporation · Planned Maintenance Manual · Revised August 2020 Page 1 of 2
Henny Penny Corp
Open Fryer Electric LVE 30X
Weekly
FR 25 W01
Why
To prevent grease build-up and to meet McDonald’s cleanliness standards
Time required
5 minutes to prepare
45 minutes to complete.
Time of day
End of workday
For 24-hour restaurants: Late night or early morning
when volume is low
Hazard icons
Tools and supplies
Nylon Brush
KAY®QSR Heavy
Duty Degreaser
Solution
Towels
Mop Bucket with
clean
Kay®
SolidSenseTM Floor
Care A or B Solution
Putty Knife
Clean Hi-loDeck
Brush
Clean Mop
Clean, Sanitizer-soaked
towels
Bucket, soiled towels
KAY® SolidSenseTM All-
Purpose Super
Concentrate (APSC)
Solution
Procedure
1
Switch power off
Make sure the main power
switch is in the OFF position.
2
Remove grease trap
Remove grease trough and
cup in hood and pour contents
into oil disposal shuttle
3
Release casters
Release the locks on the fryer
casters.
4
Cover fryer vats
Place vat covers on all vats.
CAUTION! Hot cooking oil
may splash when moving the
fryer.
5
Roll fryer from hood
Carefully roll the fryer from
the hood far enough to get
behind the fryer.
CAUTION! Hot cooking oil
may splash when moving the
fryer.
Clean Behind Fryer(continued)
FM08-723A ©McDonald’s Corporation · Planned Maintenance Manual · Revised August 2020 Page 2 of 2
Henny Penny Corp
.Open Fryer Electric LVE 30X
Weekl
y FR 25 W01
6
Disconnect fryer power cords
Disconnect the power cords
by pulling on the plug, not the
wire.
Verify power is disconnected
and switch OFF during all
component and wiring
inspections.
7
Clean hood
Use a putty knife to carefully
clear grease from the hood
and behind the fryer. Check
for oil on the floor.
8
Cleaning Order
Clean the area behind the
fryer with a clean, sanitizer-
soaked towel sprayed with
KAY®QSRHeavy Duty
Degreaser Solution in this
sequence:
A. Accessible parts of stack
B. Back of hood
C. Sides of hood
D. Grease filter recess
E. Sheet metal around fryer
9
Scrub
Use a nylon brush and hot
Degreaser Solution to clean
areas behind fryer.
Note: Wash, rinse and
sanitize nylon brush in 3-
compartment sink after use.
KAY®QSRHeavy Duty
Degreaser Solution
10 Towel dry
Rinse all areas with a clean,
sanitizer-soaked towel. Dry
with a paper towel. Have
manager inspect.
11
Wash casters
Use nylon brush and hot
KAY®SolidSenseTM All-
Purpose Super Concentrate
(APSC) Solution to clean
casters.
Note: Wash, rinse and
sanitize nylon brush in 3-
compartment sink after use.
KAY®SolidSenseTM All-
Purpose Super Concentrate
(APSC) Solution
12
Clean Fryer Floor Area
Place a wet floor sign in
immediate area. Use a clean
mop and hi-lo deck brush to
apply clean, hot Floor Cleaner
Solution to clean the floor
around the fryer area.
Note: Deck brush area then
mop up remaining solution.
KAY® SolidSenseTM
FloorCare A or B Solution
13 Return fryer
Reverse steps 1 - 7 to return
fryer to hood and replace
grease filters. Remove vat
covers.
CAUTION! Hot cooking oil
may splash when moving the
fryer.
Verify power is disconnected
and switch OFF during all
component and wiring
inspections.
Annual Inspection (electric fryers only) Annually FR 25A1-T
FM08-724A ©McDonald’s Corporation · Planned Maintenance Manual · Revised August 2020 Page 1 of 2
Henny Penny Open Fryer Electric Model LVE 30X
QUALIFIED TECHNICIANS ONLY
Annually
FR 25A1-T
Why
Henny Penny recommends a Factory Certified Service Agent inspect this appliance at least
annually. This will help ensure the equipment is in safe working order and operating at peak
performance.
Time required
1 hour per fryer to complete inspection
Time of day
The inspection should be scheduled by the store to ensure business is not interrupted and to give
the servicer adequate access to the equipment.
Hazard icons
Tools and supplies
Tools supplied by technician
Procedure
HENNY PENNY LOV QUALIFIED TECHNICIANS
ONLY
1
Cabinet Inspection
Inspect the cabinet, inside & out, front & rear, for
excessive oil buildup.
2
Element Inspection
Verify that heating elements are in good condition with
no carbon/caramelized oil buildup. Inspect the
elements for signs of extensive heating without oil.
Series 200: Inspect the high limit RTD probe(s)
attached to each element.
3
Tilt Inspection
Verify that the tilt mechanisms and safety switches are
working properly when lifting and lowering elements
and that the element wires are not binding and/or
chafing.
4
Check fryer recovery time
Check the fryer's most recent recovery time for all vats,
by pressing the INFO button. The most recent recovery
time should be less than 1:40 (one minute, forty
seconds).
If thefryer's recovery time is less than 1:40 (one
minute, forty seconds). The procedure is complete for
this vat. Go to step 6.
5
Inspect heat system power supply
If the fryer's recovery time is not acceptable, check the
following items on the fryer. If you find any problems,
correct them. List of items to check:
-Power plug fully connected
-Power cord is not interfering with fryer casters
-Heating element wiring to proper phases
Continue to step 6.
6
Amp-draw check
Verify the heating element amp-draw is within the
allowed range as indicated on the appliance's rating
plate.
Annual Inspection (electric fryers only) (continued)
FM08-724A ©McDonald’s Corporation · Planned Maintenance Manual · Revised August 2020 Page 2 of 2
Henny Penny Open Fryer Electric Model LVE 30X
QUALIFIED TECHNICIANS ONLY
Annually
FR 25A1-T
7
Safety / Primary contactor check
Verify the safety / primary contactor is operating
within safety limits. Refer to the technical manual for
test and replacement steps.
8
Probe check
Verify that all thermocouples are properly connected,
tightened, functioning properly and the probe guards
are present and undamaged.
9
Heating element hardware inspection
Inspect and tighten all heating element hardware and
high limit RTD probe mount(s).
10
Electrical component inspection
Verify that components (power supplies, all PCBs,
HMI enclosure, contactors, etc.) are in good condition
and free from oil buildup or other debris.
Verify power is disconnected and switch OFF during
all component and wiring inspections.
11
Wiring connection
Verify that component’s wiring connections at
contactors, terminal blocks, switches, etc. are tight and
wiring is in good condition.
Verify power is disconnected and switch OFF during
all component and wiring inspections.
12
Safety device check
Verify that all safety features (i.e. drain pan magnetic
proximity switch, high limit reset switches) are present
and functioning properly.
13
Frypot examination
Verify that all frypots are in good condition and free of
leaks and that the frypot insulation is in serviceable
condition.
14
Wiring connection inspection
Verify that all wiring harnesses and harness connectors
are tight and in good condition.
15
Oil line inspection
Inspect all oil-return and drain lines for leaks and
verify that all connections are tight.
16
Filter drain pan and pump inspection
Inspect filter drain pan assembly to make sure all parts
are present:
- The pan engages the drain pan magnetic
proximity switch properly.
- The o-rings are in good shape.
- Inspect filter pump and motor for shaft seal
leakage and oil buildup on motor.
17
Filter system component test
Verify filter system components are working properly
(i.e. drain valve, drain valve motor, selector valve,
filter pump, ATO (JIB) pump, check valves).

This manual suits for next models

1

Other Henny Penny Fryer manuals

Henny Penny FM03-681 User manual

Henny Penny

Henny Penny FM03-681 User manual

Henny Penny 500 User manual

Henny Penny

Henny Penny 500 User manual

Henny Penny LOV LVG-100 Series Guide

Henny Penny

Henny Penny LOV LVG-100 Series Guide

Henny Penny F5 User manual

Henny Penny

Henny Penny F5 User manual

Henny Penny 500 User manual

Henny Penny

Henny Penny 500 User manual

Henny Penny KFC Velocity PXE-100 Manual

Henny Penny

Henny Penny KFC Velocity PXE-100 Manual

Henny Penny OFE- 290 Instruction Manual

Henny Penny

Henny Penny OFE- 290 Instruction Manual

Henny Penny Evolution Elite EEE-153 User manual

Henny Penny

Henny Penny Evolution Elite EEE-153 User manual

Henny Penny OFE-323 User manual

Henny Penny

Henny Penny OFE-323 User manual

Henny Penny OE-30X User manual

Henny Penny

Henny Penny OE-30X User manual

Henny Penny LVE-102 User manual

Henny Penny

Henny Penny LVE-102 User manual

Henny Penny Chick-fil-A Controls 500 User manual

Henny Penny

Henny Penny Chick-fil-A Controls 500 User manual

Henny Penny COMPUTRON 7000 500 User manual

Henny Penny

Henny Penny COMPUTRON 7000 500 User manual

Henny Penny OEA-321 User manual

Henny Penny

Henny Penny OEA-321 User manual

Henny Penny 590 Guide

Henny Penny

Henny Penny 590 Guide

Henny Penny EVOLUTION ELITE EEG-241 User manual

Henny Penny

Henny Penny EVOLUTION ELITE EEG-241 User manual

Henny Penny LOV LVG-100 Series User manual

Henny Penny

Henny Penny LOV LVG-100 Series User manual

Henny Penny OE-100 User manual

Henny Penny

Henny Penny OE-100 User manual

Henny Penny LOV LVG-100 Series User manual

Henny Penny

Henny Penny LOV LVG-100 Series User manual

Henny Penny OFE-321 User manual

Henny Penny

Henny Penny OFE-321 User manual

Henny Penny 680 User manual

Henny Penny

Henny Penny 680 User manual

Henny Penny OE 301 Operating instructions

Henny Penny

Henny Penny OE 301 Operating instructions

Henny Penny KFC Velocity PXE-100 User manual

Henny Penny

Henny Penny KFC Velocity PXE-100 User manual

Henny Penny 500 Operating instructions

Henny Penny

Henny Penny 500 Operating instructions

Popular Fryer manuals by other brands

GILES GBF-D-VH Series Operation & service manual

GILES

GILES GBF-D-VH Series Operation & service manual

Rankam TF2246501-RG-00 Assembly, use and care

Rankam

Rankam TF2246501-RG-00 Assembly, use and care

FriFri 1905 DuoFil operating instructions

FriFri

FriFri 1905 DuoFil operating instructions

Tower Hobbies VORTX T17068 manual

Tower Hobbies

Tower Hobbies VORTX T17068 manual

emerio DF-107086 manual

emerio

emerio DF-107086 manual

Tramontina PRO3004 Fusion Use and care instructions

Tramontina

Tramontina PRO3004 Fusion Use and care instructions

Heinner HAF-1250BK instruction manual

Heinner

Heinner HAF-1250BK instruction manual

Optimum FT-2506 operating instructions

Optimum

Optimum FT-2506 operating instructions

Anets MX-14M Installation, user operation & maintenance manual

Anets

Anets MX-14M Installation, user operation & maintenance manual

Flama 681FL instruction manual

Flama

Flama 681FL instruction manual

Tower Hobbies T17061BLK manual

Tower Hobbies

Tower Hobbies T17061BLK manual

TEFAL cook4me manual

TEFAL

TEFAL cook4me manual

Masterbuilt 20010106 Assembly, use & care manual

Masterbuilt

Masterbuilt 20010106 Assembly, use & care manual

Lenoxx Healthy Choice AF350 manual

Lenoxx

Lenoxx Healthy Choice AF350 manual

Zanussi 200336 Specifications

Zanussi

Zanussi 200336 Specifications

Instant VORTEX PLUS 6QT manual

Instant

Instant VORTEX PLUS 6QT manual

FKI ADV Instructions for use

FKI

FKI ADV Instructions for use

Gourmia GAF-560 user manual

Gourmia

Gourmia GAF-560 user manual

manuals.online logo
manuals.online logoBrands
  • About & Mission
  • Contact us
  • Privacy Policy
  • Terms and Conditions

Copyright 2025 Manuals.Online. All Rights Reserved.