manuals.online logo
Brands
  1. Home
  2. •
  3. Brands
  4. •
  5. hepco & becker
  6. •
  7. Motorcycle Accessories
  8. •
  9. hepco & becker 6604557 01 05 User manual

hepco & becker 6604557 01 05 User manual

Other hepco & becker Motorcycle Accessories manuals

hepco & becker HONDA MSX 125 Quick start guide

hepco & becker

hepco & becker HONDA MSX 125 Quick start guide

hepco & becker 650793 01 02 User manual

hepco & becker

hepco & becker 650793 01 02 User manual

hepco & becker 730.4527 Installation guide

hepco & becker

hepco & becker 730.4527 Installation guide

hepco & becker 6617519 01 01 User manual

hepco & becker

hepco & becker 6617519 01 01 User manual

hepco & becker 6704543 00 01 User manual

hepco & becker

hepco & becker 6704543 00 01 User manual

hepco & becker 6507504 00 01 User manual

hepco & becker

hepco & becker 6507504 00 01 User manual

hepco & becker 42207568 00 01 User manual

hepco & becker

hepco & becker 42207568 00 01 User manual

hepco & becker 6307623 00 01 User manual

hepco & becker

hepco & becker 6307623 00 01 User manual

hepco & becker 5017519 00 01 User manual

hepco & becker

hepco & becker 5017519 00 01 User manual

hepco & becker Lock-it 506012-5 User manual

hepco & becker

hepco & becker Lock-it 506012-5 User manual

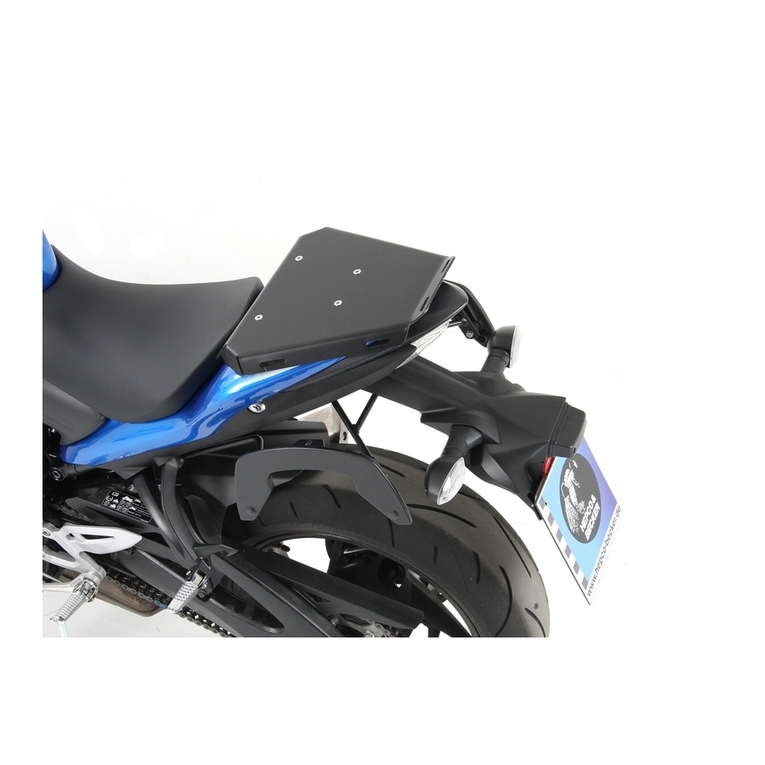
hepco & becker 6619515 01 05 User manual
hepco & becker

hepco & becker 6619515 01 05 User manual

hepco & becker TRIUMPH Bonneville T 120 User manual

hepco & becker

hepco & becker TRIUMPH Bonneville T 120 User manual

hepco & becker KTM 1190 Adventure User manual

hepco & becker

hepco & becker KTM 1190 Adventure User manual

hepco & becker Krauser 630.2516 User manual

hepco & becker

hepco & becker Krauser 630.2516 User manual

hepco & becker 506006-5 User manual

hepco & becker

hepco & becker 506006-5 User manual

hepco & becker 7007581 00 01 User manual

hepco & becker

hepco & becker 7007581 00 01 User manual

hepco & becker 650997 00 02 User manual

hepco & becker

hepco & becker 650997 00 02 User manual

hepco & becker 501.666 00 05 Installation guide

hepco & becker

hepco & becker 501.666 00 05 Installation guide

hepco & becker 503139 00 01 User manual

hepco & becker

hepco & becker 503139 00 01 User manual

hepco & becker 5017609 00 01 User manual

hepco & becker

hepco & becker 5017609 00 01 User manual

hepco & becker 630675 00 01 User manual

hepco & becker

hepco & becker 630675 00 01 User manual

hepco & becker 6306514 00 01 User manual

hepco & becker

hepco & becker 6306514 00 01 User manual

hepco & becker 630296 00 01 User manual

hepco & becker

hepco & becker 630296 00 01 User manual

hepco & becker Easyrack User manual

hepco & becker

hepco & becker Easyrack User manual

Popular Motorcycle Accessories manuals by other brands

SRC H-ADV150-04-01AL quick start guide

SRC

SRC H-ADV150-04-01AL quick start guide

DMD P1 owner's manual

DMD

DMD P1 owner's manual

GIVI Airflow AF1110 manual

GIVI

GIVI Airflow AF1110 manual

Suzuki 99143-00A1 000 Series installation instructions

Suzuki

Suzuki 99143-00A1 000 Series installation instructions

Cardo Systems FREECOM 4+ Pocket guide

Cardo Systems

Cardo Systems FREECOM 4+ Pocket guide

Shark S 700 user manual

Shark

Shark S 700 user manual

R&G CR0081 Fitting instructions

R&G

R&G CR0081 Fitting instructions

SRC B-TRK502-01-01-SL quick start guide

SRC

SRC B-TRK502-01-01-SL quick start guide

HOMCOM AA0-077 user manual

HOMCOM

HOMCOM AA0-077 user manual

SHOEI JO Instructions for use

SHOEI

SHOEI JO Instructions for use

Wunderkind Custom 106503-F15 Installation and safety

Wunderkind Custom

Wunderkind Custom 106503-F15 Installation and safety

Suzuki 57100-05881 installation instructions

Suzuki

Suzuki 57100-05881 installation instructions

SIKH HELMETS Y-61 quick start guide

SIKH HELMETS

SIKH HELMETS Y-61 quick start guide

Dräger HPS 3500 Instructions for use

Dräger

Dräger HPS 3500 Instructions for use

M-WAVE SKI manual

M-WAVE

M-WAVE SKI manual

Kuryakyn 6212 installation instructions

Kuryakyn

Kuryakyn 6212 installation instructions

Tool it PROMAX LCD 9.13G manual

Tool it

Tool it PROMAX LCD 9.13G manual

Custom Dynamics TruWrapz installation instructions

Custom Dynamics

Custom Dynamics TruWrapz installation instructions

manuals.online logo
manuals.online logoBrands
  • About & Mission
  • Contact us
  • Privacy Policy
  • Terms and Conditions

Copyright 2025 Manuals.Online. All Rights Reserved.

1
1x 700009031 Minirack Alupalette - alu palette
1x 700009622 Rohradapter links - tube adapter left
1x 700009623 Rohradapter rechts - tube adapter right
1x 700008343 Halteadapter oben links / mounting adapter top left
1x 700008344 Halteadapter oben rechts / mounting adapter top right
1x 700009625 Schraubensatz/Screw kit:
160317
4x Zylinderschraube Innensechskant M8x25
4x Zylinderschraube Innensechskant M8x35
4x Senkkopfschrauben M6x20
4x U-Scheiben ø6,4
12x U-Scheiben ø8,4
4x selbstsichernde Muttern M6
4x selbstsichernde Muttern M8
4x Aludistanz Ø18xØ9x13mm
1x Logo Hepco & Becker ø30mm
4x Verschlußstopfen Ø8 mm
4x allen screw M8x25
4x allen screw M8x40
4x countersunk screws M6x20
4x washer ø6,4
12x washer ø8,4
4x self lock nut M6
4x self lock nut M8
4x alu spacer Ø18xØ9x13mm
1x emblem Hepco & Becker
4x plastic plugs Ø8 mm
Minirack
YAMAHA MT-09
ab Baujahr 2017 / from date of manufacture 2017
Artikel Nr.: / Item-no.:
6604557 01 05 anthrazit/anthracite
Kombinierbar mit C-Bow Halter:
Combinable with C-Bow holder:
6304557 00 05
INHALT
CONTENTS
2
Minirack
YAMAHA MT-09
ab Baujahr 2017 / from date of manufacture 2017
Artikel Nr.: / Item-no.:
6604557 01 05 anthrazit/anthracite
Of course, the assembly requires a certain technical experience. If you are not sure how to execute a determined action,
you should ask your local distributor to do it. First, tighten all screws only loosely. After mounting all parts, the screws
should be tightened to the torque specified. This guarantees, that the product is mounted without tension. Observe
the tightening torques of the manufacturer! Control all screw connections after the assembling for tightness!
Die Voraussetzung für die Montage ist natürlich eine gewisse technische Erfahrung. Wenn Sie sich nicht sicher sind,
wie man eine bestimmte Arbeit ausführt, sollten Sie diese Ihrer Fachwerkstatt überlassen. Ziehen sie alle zugänglichen
Schrauben zuerst nur locker an. Nachdem alles montiert ist, werden die Schrauben dann auf das entsprechende
Anzugsmoment festgezogen. Dadurch wird sichergestellt, dass das Produkt spannungsfrei angebaut ist. Anzugsmomente
beachten! Nach der Montage alle Verschraubungen auf festen Sitz kontrollieren!
12
34
Die Sitzbank enfernen.
Die Abdeckungen unter dem
Heckkotflügel (Abb.3) sowie die seit-
lichen Verkleidungen (Abb.1+2)
entfernen und die vorgeprägten
Aussparungen ausschneiden (Abb.4).
Die demontierten Verkleidungsteile
wieder montieren.
Remove the seat.
Remove the covers under the rear
fender (Fig.3) as well as the side
panels (Fig.1+2) and cut out the pre-
embossed cutouts (Fig.4).
Reassemble the panels.
Ratsche/Ratchet
Verlängerung/extension
Set Cutter
BENÖTIGTE WERKZEUGE
TOOLS REQUIRED
WICHTIG
IMPORTANT
VORBEREITUNG
PREPARING
3
Fahrtrichtung
1
Montage Halteadapter oben links/ rechts:
Von unten durch die Aussparungen in
den freien Gewinden mit den
Zylinderschrauben M8x35 sowie
U-Scheiben Ø8,4.
Zwischen Halter und Rahmen die
Aludistanzen Ø18xØ9x13mm fügen.
Schrauben noch nicht ganz festziehen.
4x
Fastening of the mounting adapter top
left + right:
through the cut outs in the side panels
Use allen screws M8x35 with washers
Ø8,4.
Add alu spacers Ø18xØ9x13 mm between
holder and frame.
Do not fully tighten yet.
driving direction
4x 4x
Fahrtrichtung
2
Befestigung der Rohradapter oben
links und rechts:
Die Montage erfolgt an der Innenseite der
bereits montierten Halteadapter mit den
Zylinderschrauben M8x25 sowie
U- Scheiben Ø8,4 und selbstsichernden
Muttern M8.
4x 8x 4x
driving direction
Minirack
YAMAHA MT-09
ab Baujahr 2017 / from date of manufacture 2017
Artikel Nr.: / Item-no.:
6604557 01 05 anthrazit/anthracite
Fastening of the tube adapters
top left+right:
Inside the mounting adapters with allen
screws M8 x 25. Secure with washers
ø8,4 and self lock nuts M8.
Bei gleichzeitiger Montage des C-Bow
Halters wird dieser auf der Außenseite
mit den längeren Schrauben aus seinem
Schraubensatz montiert.
When the C-Bow holder is installed at the
same time, the C-Bow holder is placed on
the outside of the mounting adapter with
the longer screws from its screw set.
MONTAGEANLEITUNG
MOUNTING INSTRUCTIONS
6504557 00 05 Lock it Seitenträger, schwarz / Lock it Side carrier, black
6304557 00 05 C-Bow Taschenhalter / C-Bow sotf bag holder
5014557 00 05 Motorschutzbügel inkl. ProtectionPad/Engine guard incl. ProtectionPad
5054557 00 01 Hauptständer/Center stand
42154557 00 05 Soziusfußrasten-Tieferlegungssatz/Passenger footrest lowering set
8104557 00 91 Bugspoiler/Spoiler
4
Als weiteres Zubehör lieferbar:/ Also available:
Hepco & Becker GmbH
An der Steinmauer 6
D-66955 Pirmasens
Germany
Tel.: +49 (0)6331 - 1453 - 100
Fax: +49 (0)6331 - 1453 - 120
eMail: [email protected]
www.hepco-becker.de
Weiteres Zubehör auf unsere Homepage. More accessories: see our homepage.
3
ACHTUNG
CAUTION
Nach der Montage alle Verschraubungen auf festen Sitz kontrollieren ! Abgebaute Teile
wieder montieren. Bitte beachten Sie unsere beigefügten Serviceinformationen.
Control all screw connections after the assembling for tightness! Reassemble the
dismanteled parts. Please notice our enclosed service information.
HINWEIS: an den zusätzlichen freien Bohrungen kann unsere Sportrack
Hecktasche (Artikel-Nr. 640806 - Hecktaschenhalter inkl.)
oder unser Daypack (Artikel-Nr. 640803 - Hecktaschenhalter optional
erhältlich) sicher befestigt werden.
NOTE: Our Sportrack rear bag (item no. 640806 - lock it rear bag holder
included) or our Daypack (Item no. 640803 - lock it rear bag holder not
included) can be securely fastened at the additional free holes.
4x
4x
4x
4x
Minirack
YAMAHA MT-09
ab Baujahr 2017 / from date of manufacture 2017
Artikel Nr.: / Item-no.:
6604557 01 05 anthrazit/anthracite
Montage der Alupalette:
Auf den zuvor montierten Rohradaptern
mit den Senkkopfschrauben M6x16.
Von unten mit den selbstsichernden
Muttern M6 sowie U-Scheiben Ø6,4
verschrauben. Nun alle Teile festziehen
und Logo einkleben.
Die nicht benutzten Bohrungen mit den
Verschlussstopfen Ø8 mm verschließen.
Fastening of the alu palette:
At the tube adapters with countersunk
head screws M6x16. Secure it with self
lock nuts M6 and washers Ø6,4.
Now, screw on all bolts and nuts and stick
the logo into the cutout.
Seal up the 4 holes not in use with the
plastic plugs ø8mm.
MONTAGEANLEITUNG
MOUNTING INSTRUCTIONS