manuals.online logo
Brands
  1. Home
  2. •
  3. Brands
  4. •
  5. HETRONIC
  6. •
  7. Transmitter
  8. •
  9. HETRONIC NOVA S User manual

HETRONIC NOVA S User manual

www.hetronic.com
QUICK
REFERENCE
Local But Global
CHANGING YOUR BATTERIES
NOTE: The battery compartment is located on the
bottom of the transmitter.
ALKALINE BATTERIES
1. Remove the Battery Adapter Case from the
battery compartment and dispose of the
discharged batteries.
2. Insert 3 fresh batteries (Size AA) into the
Battery Adapter Case, and snap it into place.
RECHARGEABLE BATTERY
1. Remove the discharged battery from the
battery compartment.
2. Snap a fully-charged replacement battery into
the battery compartment.
CHARGING YOUR BATTERY
1. Confirm that your Hetronic battery charger is
powered ON.
2. Insert the discharged battery into the battery
compartment as shown and snap into place.
The CHARGE LED flashes for 2 seconds, then
stays lit.
When fully charged, the READY LED lights up
and the CHARGE LED turns OFF.
NOTE: Your battery is damaged if no LEDs light up
(open cell) or the CHARGE LED flashes
constantly (shorted cell).
CHARGE
FAST CHARGE
READY
Battery
Compartment
Rechargeable
Battery
AVOID DELAYS
To ensure that the
charging process has
begun, ALWAYS
confirm that the
battery charger is
powered ON, and the
proper CHARGE LED
lights remain lit as
noted in these
instructions.
Battery Charger & Rechargeable Battery
FAST CHARGING YOUR BATTERY
1. Insert the discharged battery into the battery
compartment and snap into place. The
CHARGE LED flashes for 2 seconds, then
stays lit.
2. Press FAST CHARGE. The FAST CHARGE
LED also lights up and stays lit. When the
READY LED lights up and the CHARGE and
FAST CHARGE LEDs turn OFF, your battery is
fully charged,
NOTE: Charging time could take up to 5 hours
depending on your battery condition.
TROUBLESHOOTING
Batteries not charging:
• No power to the Charger. Supply power.
System not initializing after normal START:
• Disengage STOP pushbutton.
• Check batteries, replace if needed.
• Confirm that the receiver is powered ON.
Transmitter is activated, but does not transmit (status
light is not flashing green):
• Check batteries, replace if needed.
• If batteries are fresh or fully charged, there may
be an internal failure (see supervisor).
Unit is transmitting, but the machine not responding:
• Out of range. Restart transmitter within range.
• Confirm that the toggle switch is in the OFF
position (this is normally the “center” position).
• Receiver is not powered ON or may have a
blown fuse. Turn ON receiver and check fuses.
• Transmitter/receiver frequency channels do not
match (see your supervisor).
• Transmitter/receiver addresses do not match
(see your supervisor).
All machine functions operate intermittently:
• Receiver antenna connection or ground loose.
• Interference.
• Connector inside receiver is loose.
Some machine functions operate intermittently:
• Machine motion wiring is loose. Check wiring
from receiver to plug, from plug to actuator.
• Connector inside receiver is loose.
NOVA-S TRANSMITTERS
QRCD_NO_004.0
www.hetronic.com
READ THIS FIRST
BEFORE OPERATION
Check the condition of your transmitter once a day,
before the start of an operation and at shift changes:
• Visually check the transmitter for any physical
wear or damage.
• Confirm that you can read and understand all of
the safety labels.
HOLDING YOUR TRANSMITTER
To reduce stress and increase safety, use the belt or
strap (if provided).
Position the transmitter upright with the front facing
away from you.
Confirm that you are able to easily read and
understand all text and symbols.
DANGER: Do not operate this transmitter
unless you have been trained in the safe and
proper operation of the radio control system
and the machinery it is to control.
Be alert to unsafe conditions and be aware
that radio remote control commands can take
place around obstacles and out of your direct
sight.
ALWAYS confirm that the machine and
remote control STOP functions work properly
BEFORE beginning any machine operation.
Turn OFF the transmitter when not in use.
WARNING: Test the STOP function. NEVER
operate the machine if the STOP function
does not work properly.
WARNING: Never operate a transmitter with
worn or damaged parts.
WARNING: Holding the transmitter
improperly while operating your machine
could result in unexpected machine response
!
!
!
!
STARTING YOUR TRANSMITTER
1. Confirm that all equipment manufacturer safety
measures have been followed.
2. Confirm batteries are fresh or fully-charged.
3. Confirm that all controls for your application are
in the OFF (neutral) position.
NOTE: This is usually the center position.
4. Turn ON the transmitter by pressing and
releasing one of the switches.
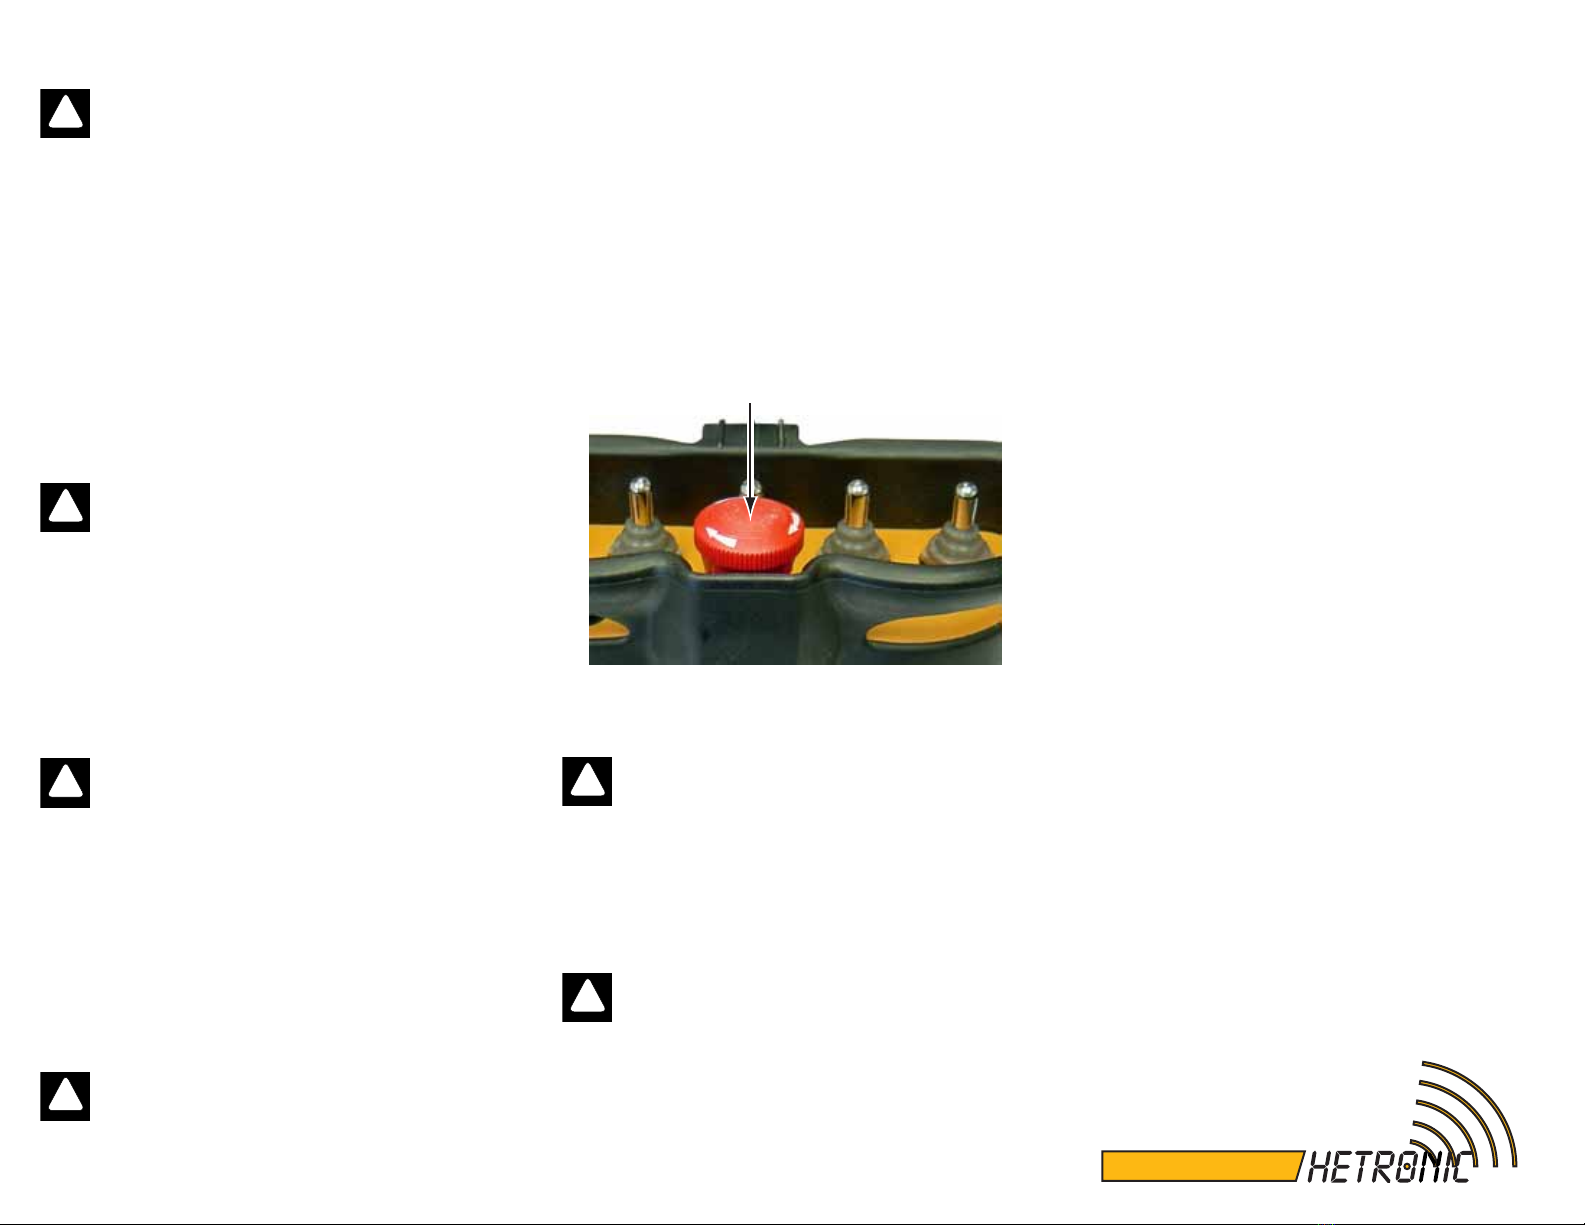
5. Twist and pull out the STOP pushbutton.
6. Test the machine functions to ensure that the
machine responds as expected.
7. Push in the STOP pushbutton and test the
machine functions again to confirm that they
DO NOT function.
DANGER: Machine functions operate during
this test. Confirm that it is safe to test the
functions and there are no obstacles near the
machine.
DANGER: If any machine functions operate
with the STOP pushbutton depressed, STOP
IMMEDIATELY,removethe batteries,and see
your supervisor for next steps.
STOP
Pushbutton
!
!
8. Twist and pull out the STOP pushbutton.
9. Turn ON the transmitter by pressing and
releasing one of the switches.
Your system is ready for operation.
STOPPING YOUR TRANSMITTER
Press the STOP pushbutton.
EMERGENCY STOPPING
Press the STOP pushbutton. Confirm that all
dangerous situations are corrected before restarting
the transmitter.
NOTE: The STOP function responds faster than any
other function. When the STOP is engaged,
the system ignores any other signal that is
transmitted
STOP must be disengaged before the
system will respond to any other signal
UNDERSTANDING THE OPERATION LED
NOTE: The Operation LED exact location is not
specified because placement varies per
application.
The Operation LED indicates the following
operational condition and status.
• Flashing Green - transmitter is operational.
• Steady Green - low battery power.
NOTE: If the battery is low, the transmitter
automatically shuts down in 30 seconds,
To restart your transmitter, replace the
discharged batteries, and see the Starting
Your Transmitter procedure for next steps.

Other HETRONIC Transmitter manuals

HETRONIC NOVA-L User manual

HETRONIC

HETRONIC NOVA-L User manual

HETRONIC NOVA XL User manual

HETRONIC

HETRONIC NOVA XL User manual

HETRONIC MINI V1 Instruction Manual

HETRONIC

HETRONIC MINI V1 Instruction Manual

HETRONIC NOVA L Instruction Manual

HETRONIC

HETRONIC NOVA L Instruction Manual

HETRONIC NOVA-L User manual

HETRONIC

HETRONIC NOVA-L User manual

HETRONIC FBTX-01 User manual

HETRONIC

HETRONIC FBTX-01 User manual

HETRONIC Pocket-MFSHL User manual

HETRONIC

HETRONIC Pocket-MFSHL User manual

HETRONIC ERGO-S User manual

HETRONIC

HETRONIC ERGO-S User manual

HETRONIC NOVA Series User manual

HETRONIC

HETRONIC NOVA Series User manual

HETRONIC ERGO-S User manual

HETRONIC

HETRONIC ERGO-S User manual

HETRONIC NOVA XL User manual

HETRONIC

HETRONIC NOVA XL User manual

HETRONIC ERGO-F 2.4 GHz User manual

HETRONIC

HETRONIC ERGO-F 2.4 GHz User manual

HETRONIC MFSHL915 User manual

HETRONIC

HETRONIC MFSHL915 User manual

HETRONIC ERGO-F 2.4 GHz User manual

HETRONIC

HETRONIC ERGO-F 2.4 GHz User manual

HETRONIC MINI User manual

HETRONIC

HETRONIC MINI User manual

HETRONIC ERGO-F 2.4 GHz Instruction Manual

HETRONIC

HETRONIC ERGO-F 2.4 GHz Instruction Manual

HETRONIC NOVA-M User manual

HETRONIC

HETRONIC NOVA-M User manual

Popular Transmitter manuals by other brands

Davis Instruments Anemometer Transmitter Kit installation manual

Davis Instruments

Davis Instruments Anemometer Transmitter Kit installation manual

GESTRA LRGT 16-3 Installation & operating manual

GESTRA

GESTRA LRGT 16-3 Installation & operating manual

brel-motors DD2773 installation manual

brel-motors

brel-motors DD2773 installation manual

FSM Feel FC instruction manual

FSM

FSM Feel FC instruction manual

ECD T90 instruction manual

ECD

ECD T90 instruction manual

Eaton xComfort CAEE-02/01 Assembly instructions

Eaton

Eaton xComfort CAEE-02/01 Assembly instructions

Spatz HDMI-GIGALAN-TX user guide

Spatz

Spatz HDMI-GIGALAN-TX user guide

RIDGID NaviTrack Battery Sonde user manual

RIDGID

RIDGID NaviTrack Battery Sonde user manual

BenQ WDAM2120 quick start guide

BenQ

BenQ WDAM2120 quick start guide

Magellan MG-DCTXP installation manual

Magellan

Magellan MG-DCTXP installation manual

Webasto Telestart T91 Operating and servicing manual

Webasto

Webasto Telestart T91 Operating and servicing manual

DMP Electronics 1103 Series installation guide

DMP Electronics

DMP Electronics 1103 Series installation guide

Siemens 8DJH Operator's guide

Siemens

Siemens 8DJH Operator's guide

Siemens SITRANS F operating instructions

Siemens

Siemens SITRANS F operating instructions

Halemeier S-Mitter installation instructions

Halemeier

Halemeier S-Mitter installation instructions

SenseAir tSENSE (Disp) T RH RL installation manual

SenseAir

SenseAir tSENSE (Disp) T RH RL installation manual

M-system 10SP instruction manual

M-system

M-system 10SP instruction manual

EMKO Pronem midi instruction manual

EMKO

EMKO Pronem midi instruction manual

manuals.online logo
manuals.online logoBrands
  • About & Mission
  • Contact us
  • Privacy Policy
  • Terms and Conditions

Copyright 2025 Manuals.Online. All Rights Reserved.