Powering Up and tarting your
Note:
Always check the transmitter for any physical
Never operate a transmitter with worn or damaged parts
1.
Ensure that all safety measures are being followed
2. Insert fully charged batterypack.
. Press button
(#12) to power ON the transmitter unit
4. Enter Access code (if enabled
5. Power ON the receiver and
Turning OFF and topping your ERGO
1.
2. Press
.
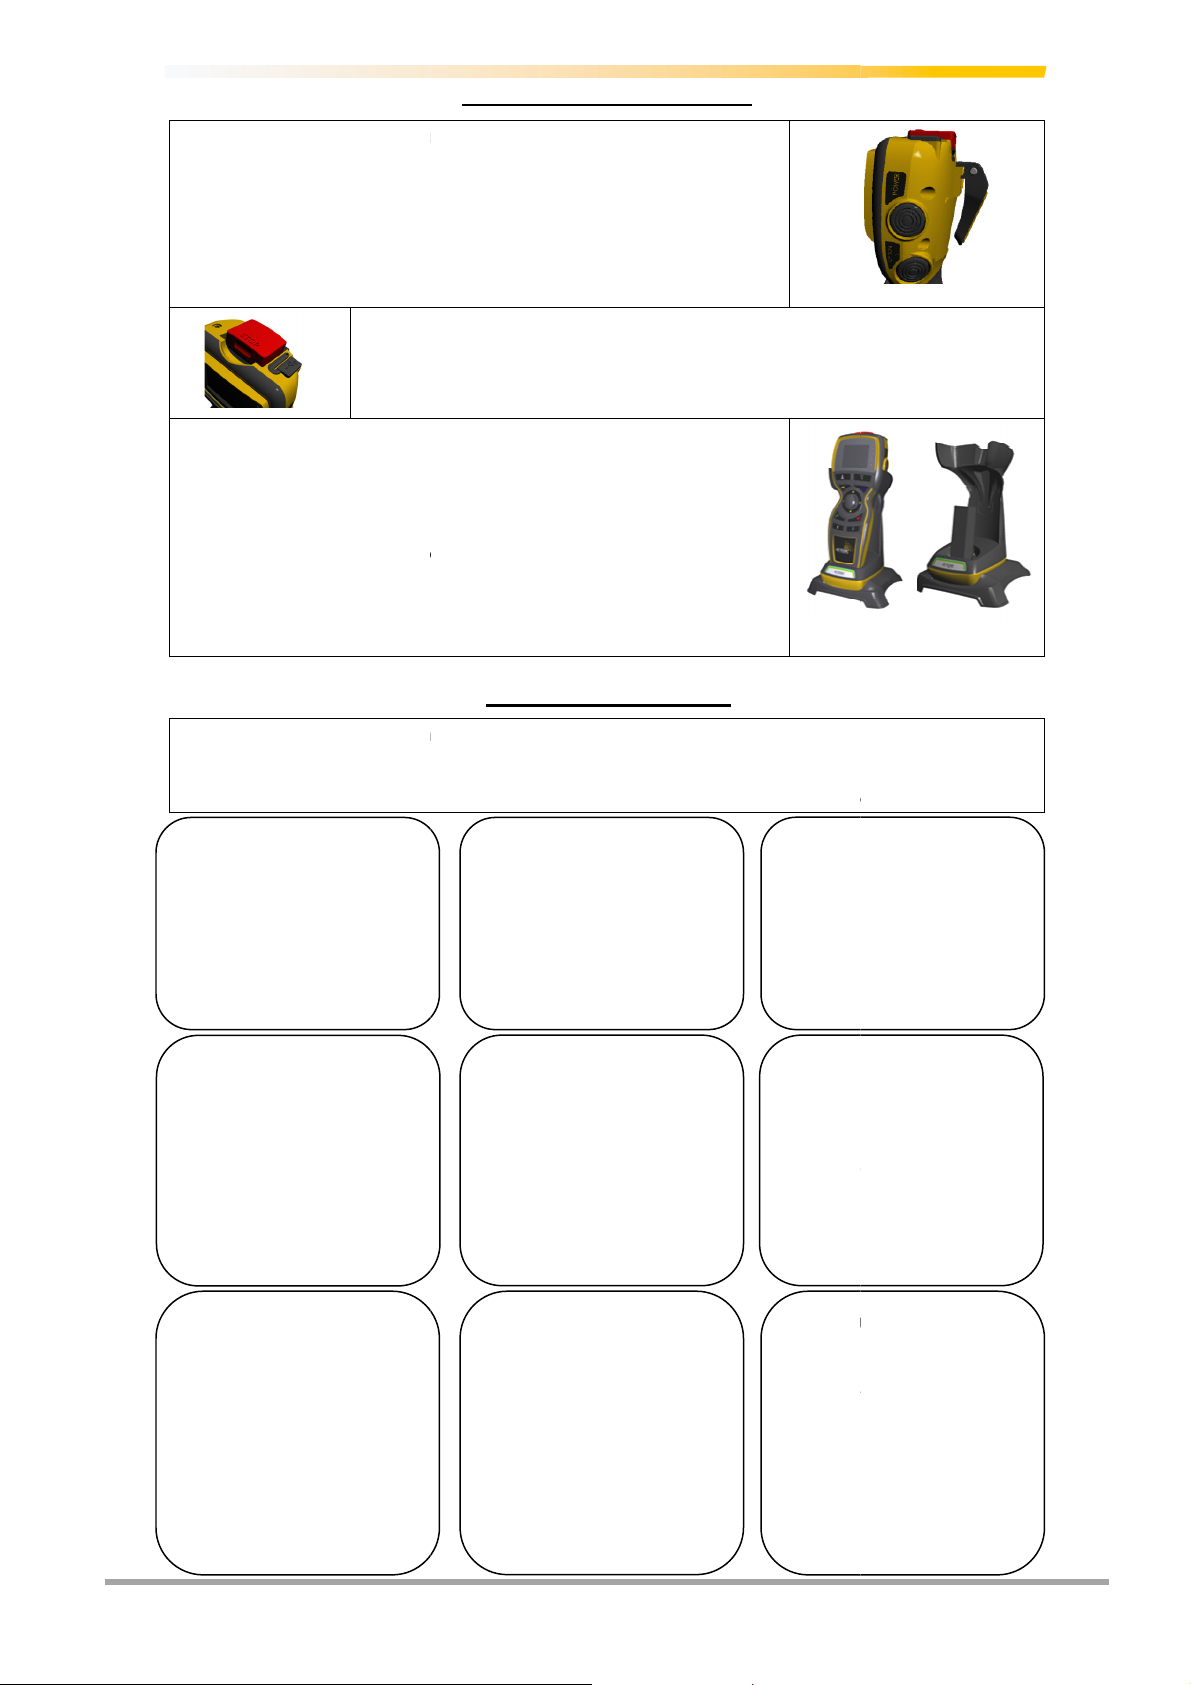
Recharging the Battery Pack
1. Switch OFF the transmitter.
2. Place the transmitter in the charger docking station OR remove battery pack
ERGO S unit
and place it in the charger
. The ‘Charge’ red LED
’s flash for two seconds then stay
process.
4. When charging is complete the
LED’s light up.
5. Battery can be left
in the charger until required
Note: If the transmitter is placed on the docking station while it is still in operation
then transmitter automatically send
Entering ervice Mode (on Transmitters equipped with TFT)
1. Ensure STOP button (#15) is
2. Keep both side buttons (#9 and
. Input "Service Access" code (if
Changing Frequency Channel
/ Group
Press #1 for Radio Settings
menu.
Press #2 to scroll through list of
channels/groups.
Press #4 to save and return to
main menu.
Press # for General Settings
menu.
Press #2 for Button Diagnostic
page.
Press any front (1-step or 2-
step) or side (1-Step) buttons to
test proper functionality.
Following instruction on display
for returning to main menu.
Press # for General Settings
menu.
Press #4 to go to next page of
General Settings menu.
Press #2 to change time (24hr
format only).
Following instruction on display
to modify time displayed.
Press #4 to confirm and return
to main menu.
Basic Operational Instructions
Transmitter
Always check the transmitter for any physical
damage before any operation.
Never operate a transmitter with worn or damaged parts
.
Ensure that all safety measures are being followed
.
(#12) to power ON the transmitter unit
.
H-Link configuration).
the transmitter unit to start.
Turning OFF and topping your ERGO
#15) and the transmitter will send the s
top telegram to the receiver
the Start button (#12). T
he shut down delay timer start
OFF when the timer elapses (
default = 2s and is configurable).
2. Place the transmitter in the charger docking station OR remove battery pack
from
and place it in the charger
.
’s flash for two seconds then stay
ON during the charging
‘Charge’ LED’s go OFF and the ‘Ready’ green
in the charger until required
.
Note: If the transmitter is placed on the docking station while it is still in operation
a stop telegram and shuts down.
Entering ervice Mode (on Transmitters equipped with TFT)
.
12) pressed during power ON sequence.
in H-link configuration). “Device Setti
Rate
Press #1 for Radio Settings
menu.
Press # to scroll through list of
baud rates.
Press #4 to save and return to
main menu.
Press # for General Settings
menu.
Press #1 to increase or #2 to
Press # to save and return to
Access Code
Press # for General Settings
menu.
Press #2 for Access Code.
Press # to increment or #4 to
decrement the highlighted digit.
Press #2 to confirm selection
and move on to next digit, then
#2 again to confirm new code.
Press # for General Settings
menu.
Press #4 to go to next page of
General Settings menu.
Press #1 to change date.
Following instruction on display
to modify date displayed.
Press #4 to confirm and return
to main menu.
Basic Transmitter Information
Press #4 for second page of
Press # for General Settings
menu.
Press #4 to go to next page of
Press #4 to confirm and return
| ERGO S
www.hetronic.com
top telegram to the receiver
.
he shut down delay timer start
s automatically.
default = 2s and is configurable).
.
Press # for General Settings
.
Press #1 to increase or #2 to
.
Press # to save and return to
.
Basic Transmitter Information
Press #4 for second page of
eturn to main menu.
Press # for General Settings
Press #4 to go to next page of
.
.
Press #4 to confirm and return
.


