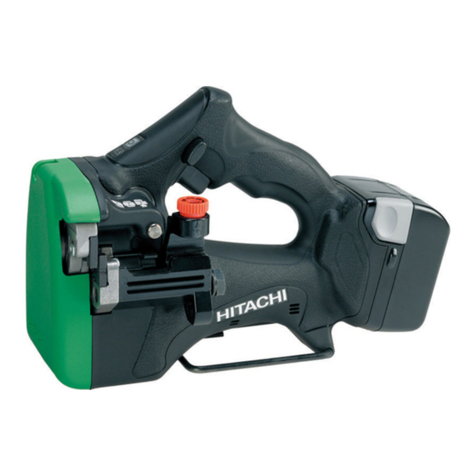
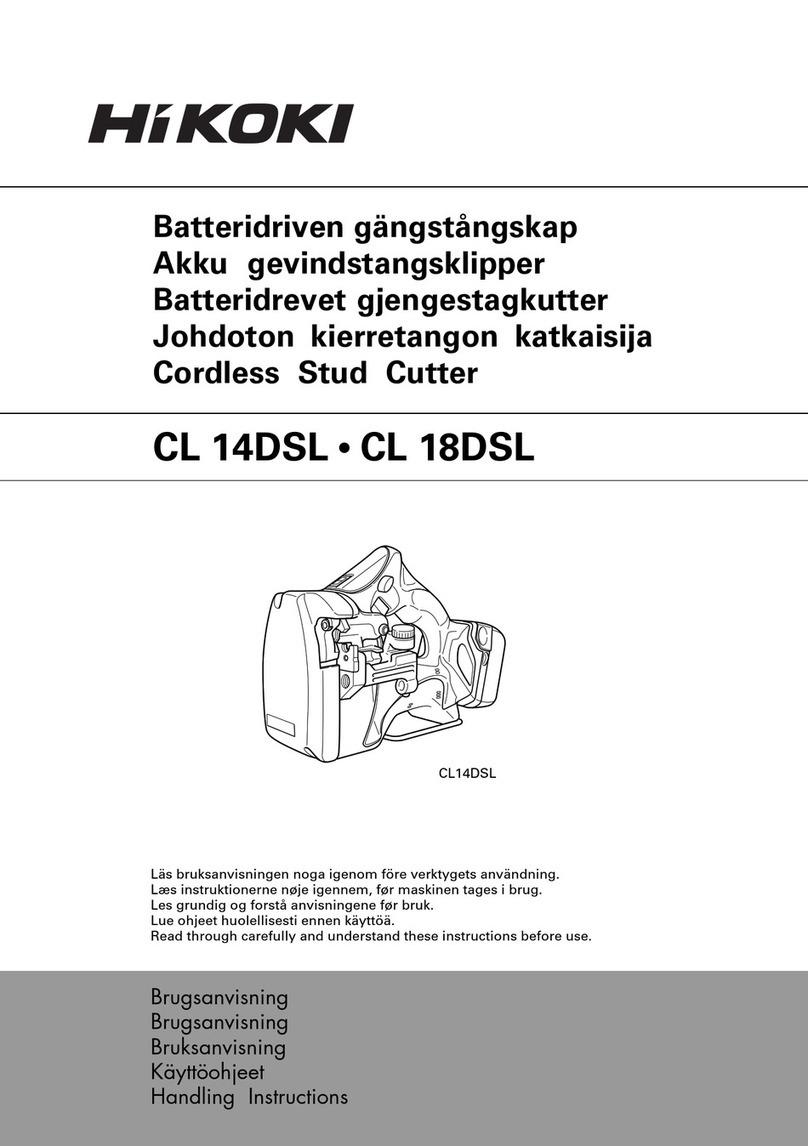
HIKOKI CL 14DSL User manual

Cordless Stud Cutter
Akku-gewindestangentrenner
Coupe tige filetee à batterie
Trancia-tondint a batteria
Snoerloze draadeind knipper
Cortadora de varilla con rosca a batteria
Cortadora de varão roscado a bateria
Read through carefully and understand these instructions before use.
Diese Anleitung vor Benutzung des Werkzeugs sorgfältig durchlesen und verstehen.
Lire soigneusement et bien assimiler ces instructions avant usage.
Prima dell’uso leggere attentamente e comprendere queste instruzioni.
Deze gebruiksaanwijzing s.v.p. voor gebruik zorgvuldig doorlezen.
Leer cuidadosamente y comprender estas instrucciones antes del uso.
Antes de usar, leia com cuidado para assimilar estas instruções.
Handling instructions
Bedienungsanleitung
Mode d’emploi
Istruzioni per l’uso
Gebruiksaanwijzing
Instrucciones de manejo
Instruções de uso
CL 14DSL ∙CL 18DSL
CL14DSL
0000BookCL14DSLWE.indb10000BookCL14DSLWE.indb1 2019/08/3012:11:412019/08/3012:11:41

1 2
3
<UC18YFSL>
4
5 6
7 8
2
0000BookCL14DSLWE.indb20000BookCL14DSLWE.indb2 2019/08/3012:11:412019/08/3012:11:41

9 10
11 12
13 14
15
3
0000BookCL14DSLWE.indb30000BookCL14DSLWE.indb3 2019/08/3012:11:422019/08/3012:11:42

English Deutsch Français Italiano
Rechargeable battery Aufladbare Batterie Batterie rechargeable Batteria ricaricabile
Latch Verriegelung Loquet Fermo
Battery cover Batterieabdeckung Couvercle de batterie Coperchio per la batteria
Terminals Anschlüsse Bornes Terminali
Ventilation holes Belüftungslöcher Orifices de ventilation Fori di ventilazione
Handle HandgriffPoignée Impugnatura
Push Drücken Pousser Spingere
Insert Einsatz Insérer Inserire
Pull out Herausziehen Tirer Estrarre
Charger Ladegerät Chargeur Caricatore
Pilot lamp Kontrollampe Lampe témoin Spie
Forward/reverse switching
button Vorwärts/Rückwärts-
Schalter Touche de direction avant/
arrière Interruttore di direzione in
avanti/indietro
Cutting Schneiden Coupe-tige Taglio
Lock Schließen Verrou Blocco
Reverse Umkehren Marche arrière Inverso
Bracket (A) (movable side)
Klammer (A) (bewegliche Seite)
Support (A) (côté mobile) Supporto (A) (lato mobile)
Hex. socket hd. bolt Sechskantkopf-schraube
Boulon à tête hexagonale
Bullone testa esagonale
Spacer (used only with M6,
M8 or M10) Distanzstück (nur mit M6,
M8 oder M10 verwendet)
Entretoise (à utiliser uniquement
avec un cutter M6, M8 ou M10)
Spaziatore (usato solo con
l’M6, l’M8 o l’M10)
Side without notch Seite ohne Kerbe Côré sans encoche Lato senza tacca
Notch side Nutenseite Côté avec l’encoche Lato con tacche
Bracket (B) (fixed side) Klammer (B) (feste seite) Support (B) (côté fixe) Supporto (B) (lato fisso)
Stud guide Stangenführung Guide de vis filetée Guida vite prigioniera
Dial Drehregler Molette Quadrante
Screw size display Stangengröße-Anzeige Dimension de la vis
Indicazione delle dimensioni della vite
Mark Markierung Marque Segno
Stud Stange Vis filetée Vite prigioniera
Guard section Schutzteil Section de protection Sezione di guardia
Cutter Schneider Cutter Fresa
Correctly mesh Richtiger EingriffCorrectement aligné Allineate correttamente
Fixed length guide
(First cut the stud to the
required length)
Feste Längenführung
(zuerst ie stange auf richtige
Länge zuschneiden)
Guide de longueur fixe
(Couper auparavant la vis filetée
selon la longueur souhaitée)
Modello lughezza fissa
(Tagliare prima la vite prigioniera all
a lughezza desiderata)
Stud attachment hole Stangenansetzloch
Orifice de fixation de la vis filetée
Foro di attacco vite prigioniera
Necessary length Erforderliche Länge Longueur nécessaire Lunghezza desiderata
Stud suspended from the ceiling An der Decke befestigte Stange Vis filetée suspendue au plafond
Vite prigioniera sospesa
Trigger switch Auslöserschalter Interrupteur à détente Interruttore
Hook Haken Crochet Gancio
Latch Verriegelung Taquet Fermo
Grip GriffPoignée Impugnatura
Entrance Einführung Entrée Entrata
Pliers Zange Pince Pinze
Remaining battery
indicator switch Ladezustand-
Anzeigeschalter Commutateur de puissance
batterie résiduelle Interruttore indicatore
batteria restante
Remaining battery
indicator lamp Ladezustand-Kontrollleuchte Témoin lumineux de
puissance batterie résiduelle Spia luminosa batteria
restante
Hex. bar wrench Sechskantschlüssel Clef à six pans Anello di fissaggio
4
0000BookCL14DSLWE.indb40000BookCL14DSLWE.indb4 2019/08/3012:11:432019/08/3012:11:43

Nederlands Español Português
Oplaadbare batterij Batería recargable Bateria de recarregável
Vergrendeling Enganche Lingüeta
Batterijdeksel Tapa de batería Tampa da bateria
Aansluitpunten Terminales Terminais
Ventilatieopeningen Orificios de ventilación Orifícios de ventilação
Handgreep Asidero Cabo
Drukken Presionar Apertar
Insteken Insertar Inserir
Uittrekken Sacar Retirar
Acculader Cargador Carregador
Controlelampje Lámpara piloto Lâmpada piloto
Voorwaarts/achterwaarts-
keuzeschakelaar Botón conmutador de
avance/retroceso Botão de comutação
avanço/retrocesso
Knippen Corte Corte
Vergrendelen Bloqueo Bloqueio
Achterwaarts Marcha atrás Retrocesso
Beugel (A) (bewegende kant)
Soporte (A) (lado móvil) Suporte (A) (lado móvel)
Inbusbout perno de cabeza hueca
hexagonal Parafuso de cabeça
cilíndrica sextavado
Vulplaatje (alleen bij knippen
van M6, M8 of M10)
Separador (utilizado solamente
con M6, M8 o M10)
Espaçador (utilizado apenas
com M6, M8 ou M10)
Kant zonder inkeping Lado sin la muesca Lado sem entalhe
Kant met inkeping Lado de la muesca Lado com entalhe
Beugel (B) (vaste kant) Soporte (B) (lado fijo) Suporte (B) (lado fixo)
Draadeind Guía de varilla roscada Perno-guia
Schaalverdeling Dial Selector
Aanduiding van de draadiameter
Indicación del tamaño del tornillo
Visualização do tamanho do parafuso
Merkteken Marca Marca
Draadeind Varilla roscada Perno
Beschermkap Sección de protección Secção de protecção
Knip-element Cortador Cortador
Goed in elkaar vallend Correctamente adaptadas Alinhar correctamente
Standaardlengte-draadeind
(het eerder op lengte
gebrachte draadeind)
Hasta la longitud deseada
(Corte en primer lugar una
varilla roscada)
Guia de comprimento fixo
(Cortar primeiro o perno
adequadamente)
Draadeind-
bevestigingsopening Orificio de fijación de la
varilla roscada Orifício de montagem do
perno
Benodigde lengte Longitud necesaria Comprimento necessário
Uit plafond stekend draadeind
Varilla roscada suspendida del techo
Perno suspenso no tecto
Hoofdschakelaar Interruptor Interruptor do gatilho
Haak Gancho Gancho
Vergrendeling Cierre Lingueta
Handgreep Empuñadura Pegas
Ingang Entrada Entrada
Tang Alicates Alicate
Indicatieschakelaar
resterende acculading Interruptor de indicador de
batería restante Interruptor de indicação da
autonomia da pilha
Indicatielampje
resterende acculading Indicador luminoso de
batería restante Luz de indicação da
autonomia da pilha
Inbussleutel Llave macho hexagonal Chave sextavada
5
0000BookCL14DSLWE.indb50000BookCL14DSLWE.indb5 2019/08/3012:11:442019/08/3012:11:44

Symbols
WARNING
The following show
symbols used for the
machine. Be sure that you
understand their meaning
before use.
Symbole
WARNUNG
Die folgenden Symbole
werden für diese Maschine
verwendet. Achten Sie
darauf, diese vor der
Verwendung zu verstehen.
Symboles
AVERTISSEMENT
Les symboles suivants sont
utilisés pour l’outil. Bien
se familiariser avec leur
signification avant d’utiliser
l’outil..
Simboli
AVVERTENZA
Di seguito mostriamo
i simboli usati per la
macchina. Assicurarsi di
comprenderne il significato
prima dell’uso.
To reduce the risk of injury,
user must read instruction
manual.
Failure to follow the warnings and
instructions may result in electric
shock, fire and/or serious injury.
Der Anwender muss die
Bedienungsanleitung lesen, um
das Risiko einer Verletzung zu
verringern.
Wenn die Warnungen und
Anweisungen nicht befolgt
werden, kann es zu Stromschlag,
Brand und/oder ernsthaften
Verletzungen kommen.
Pour réduire les risques de
blessures, l’utilisateur doit lire
le manuel d’utilisation.
Tout manquement à observer ces
avertissements et instructions peut
engendrer des chocs électriques,
des incendies et/ou des blessures
graves.
Per ridurre il rischio di lesioni,
l’utente deve leggere il manuale
delle istruzioni.
La mancata osservanza degli
avvertimenti e delle istruzioni
potrebbe essere causa di scosse
elettriche, incendi e/o gravi lesioni.
Only for EU countries
Do not dispose of electric tools
together with household waste
material!
In observance of European
Directive 2012/19/EU on
waste electrical and electronic
equipment and its implementation
in accordance with national law,
electric tools that have reached
the end of their life must be
collected separately and returned
to an environmentally compatible
recycling facility.
Nur für EU-Länder
Werfen Sie Elektrowerkzeuge
nicht in den Hausmüll!
Gemäss Europäischer
Richtlinie 2012/19/EU über
Elektro- und Elektronik-
Altgeräte und Umsetzung
in nationales Recht müssen
verbrauchte Elektrowerkzeuge
getrennt gesammelt und
einer umweltgerechten
Wiederververtung zugeführt
werden.
Pour les pays européens
uniquement
Ne pas jeter les appareils
électriques dans les ordures
ménagères!
Conformément à la directive
européenne 2012/19/UE relative
aux déchets d’équipements
électriques ou électroniques
(DEEE), et à sa transposition
dans la législation nationale, les
appareils électriques doivent être
collectés à part et être soumis
à un recyclage respectueux de
l’environnement.
Solo per Paesi UE
Non gettare le apparecchiature
elettriche tra i rifiuti domestici.
Secondo la Direttiva Europea
2012/19/UE sui rifiuti di
apparecchiature elettriche ed
elettroniche e la sua attuazione in
conformità alle norme nazionali,
le apparecchiature elettriche
esauste devono essere raccolte
separatamente, al fine di essere
reimpiegate in modo eco-
compatibile.
Symbolen
WAARSCHUWING
Hieronder staan symbolen
afgebeeld die van
toepassing zijn op deze
machine. U moet de
betekenis hiervan begrijpen
voor gebruik.
Símbolos
ADVERTENCIA
A continuación se muestran
los símbolos usados para
la máquina. Asegúrese de
comprender su significado
antes del uso.
Símbolos
AVISO
A seguir aparecem os
símbolos utilizados pela
máquina. Assimile bem
seus significados antes
do uso.
Om het risico op
verwondingen te verminderen,
moet de gebruiker de
instructiehandleiding lezen.
Nalating om de waarschuwingen
en instructies op te volgen kan in
een elektrische schok, brand en/of
ernstig letsel resulteren.
Para reducir el riesgo de
lesiones, el usuario deberá leer
el manual de instrucciones.
Si no se siguen las advertencias
e instrucciones, podría producirse
una descarga eléctrica, un
incendio y/o daños graves.
Para reduzir o risco de lesão, o
utilizador deve ler o manual de
instruções.
Se não seguir todas as instruções
e os avisos, pode provocar um
choque eléctrico, incêndio e/ou
ferimentos graves.
Alleen voor EU-landen
Geef elektrisch gereedschap niet
met het huisvuil mee!
Volgens de Europese richtlijn
2012/19/EU inzake oude
elektrische en elektronische
apparaten en de toepassing
daarvan binnen de nationale
wetgeving, dient gebruikt
elektrisch gereedschap
gescheiden te worden ingezameld
en te worden afgevoerd naar een
recycle bedrijf dat voldoet aan de
geldende milieu-eisen.
Sólo para países de la Unión
Europea
¡No deseche los aparatos
eléctricos junto con los residuos
domésticos!
De conformidad con la Directiva
Europea 2012/19/UE sobre
residuos de aparatos eléctricos
y electrónicos y su aplicación
de acuerdo con la legislación
nacional, las herramientas
eléctricas cuya vida útil haya
llegado a su fin se deberán
recoger por separado y trasladar a
una planta de reciclaje que cumpla
con las exigencias ecológicas.
Apenas para países da UE
Não deite ferramentas eléctricas
no lixo doméstico!
De acordo com a directiva
europeia 2012/19/UE sobre
ferramentas eléctricas e
electrónicas usadas e a
transposição para as leis
nacionais, as ferramentas
eléctricas usadas devem ser
recolhidas em separado e
encaminhadas a uma instalação
de reciclagem dos materiais
ecológica.
6
0000BookCL14DSLWE.indb60000BookCL14DSLWE.indb6 2019/08/3012:11:452019/08/3012:11:45
7
English
(Original instructions)
GENERAL POWER TOOL SAFETY WARNINGS
WARNING
Read all safety warnings, instructions, illustrations
and specifications provided with this power tool.
Failure to follow all instructions listed below may result in
electric shock, fire and/or serious injury.
Save all warnings and instructions for future
reference.
The term “power tool” in the warnings refers to your mains-
operated (corded) power tool or battery-operated (cordless)
power tool.
1) Work area safety
a) Keep work area clean and well lit.
Cluttered or dark areas invite accidents.
b) Do not operate power tools in explosive
atmospheres, such as in the presence of
flammable liquids, gases or dust.
Power tools create sparks which may ignite the dust
or fumes.
c) Keep children and bystanders away while
operating a power tool.
Distractions can cause you to lose control.
2) Electrical safety
a) Power tool plugs must match the outlet.
Never modify the plug in any way.
Do not use any adapter plugs with earthed
(grounded) power tools.
Unmodified plugs and matching outlets will reduce
risk of electric shock.
b) Avoid body contact with earthed or grounded
surfaces, such as pipes, radiators, ranges and
refrigerators.
There is an increased risk of electric shock if your
body is earthed or grounded.
c) Do not expose power tools to rain or wet
conditions.
Water entering a power tool will increase the risk of
electric shock.
d) Do not abuse the cord. Never use the cord for
carrying, pulling or unplugging the power tool.
Keep cord away from heat, oil, sharp edges or
moving parts.
Damaged or entangled cords increase the risk of
electric shock.
e) When operating a power tool outdoors, use an
extension cord suitable for outdoor use.
Use of a cord suitable for outdoor use reduces the
risk of electric shock.
f) If operating a power tool in a damp location
is unavoidable, use a residual current device
(RCD) protected supply.
Use of an RCD reduces the risk of electric shock.
3) Personal safety
a) Stay alert, watch what you are doing and use
common sense when operating a power tool.
Do not use a power tool while you are tired
or under the influence of drugs, alcohol or
medication.
A moment of inattention while operating power tools
may result in serious personal injury.
b) Use personal protective equipment. Always
wear eye protection.
Protective equipment such as a dust mask, non-
skid safety shoes, hard hat or hearing protection
used for appropriate conditions will reduce personal
injuries.
c) Prevent unintentional starting. Ensure the
switch is in the off-position before connecting
to power source and/or battery pack, picking
up or carrying the tool.
Carrying power tools with your finger on the switch
or energising power tools that have the switch on
invites accidents.
d) Remove any adjusting key or wrench before
turning the power tool on.
A wrench or a key left attached to a rotating part of
the power tool may result in personal injury.
e) Do not overreach. Keep proper footing and
balance at all times.
This enables better control of the power tool in
unexpected situations.
f) Dress properly. Do not wear loose clothing or
jewellery. Keep your hair and clothing away
from moving parts.
Loose clothes, jewellery or long hair can be caught
in moving parts.
g) If devices are provided for the connection of
dust extraction and collection facilities, ensure
these are connected and properly used.
Use of dust collection can reduce dust-related
hazards.
h) Do not let familiarity gained from frequent use
of tools allow you to become complacent and
ignore tool safety principles.
A careless action can cause severe injury within a
fraction of a second.
4) Power tool use and care
a) Do not force the power tool. Use the correct
power tool for your application.
The correct power tool will do the job better and
safer at the rate for which it was designed.
b) Do not use the power tool if the switch does not
turn it on and off.
Any power tool that cannot be controlled with the
switch is dangerous and must be repaired.
c) Disconnect the plug from the power source and/
or remove the battery pack, if detachable, from
the power tool before making any adjustments,
changing accessories, or storing power tools.
Such preventive safety measures reduce the risk of
starting the power tool accidentally.
d) Store idle power tools out of the reach of
children and do not allow persons unfamiliar
with the power tool or these instructions to
operate the power tool.
Power tools are dangerous in the hands of untrained
users.
e) Maintain power tools and accessories. Check
for misalignment or binding of moving parts,
breakage of parts and any other condition that
may affect the power tool’s operation.
If damaged, have the power tool repaired
before use.
Many accidents are caused by poorly maintained
power tools.
0000BookCL14DSLWE.indb70000BookCL14DSLWE.indb7 2019/08/3012:11:452019/08/3012:11:45
8
English
f) Keep cutting tools sharp and clean.
Properly maintained cutting tools with sharp cutting
edges are less likely to bind and are easier to
control.
g) Use the power tool, accessories and tool bits
etc. in accordance with these instructions,
taking into account the working conditions and
the work to be performed.
Use of the power tool for operations different from
those intended could result in a hazardous situation.
h) Keep handles and grasping surfaces dry, clean
and free from oil and grease.
Slippery handles and grasping surfaces do not
allow for safe handling and control of the tool in
unexpected situations.
5) Battery tool use and care
a) Recharge only with the charger specified by
the manufacturer.
A charger that is suitable for one type of battery
pack may create a risk of fire when used with
another battery pack.
b) Use power tools only with specifically
designated battery packs.
Use of any other battery packs may create a risk of
injury and fire.
c) When battery pack is not in use, keep it away
from other metal objects, like paper clips,
coins, keys, nails, screws or other small metal
objects, that can make a connection from one
terminal to another.
Shorting the battery terminals together may cause
burns or a fire.
d) Under abusive conditions, liquid may be
ejected from the battery; avoid contact. If
contact accidentally occurs, flush with water. If
liquid contacts eyes, additionally seek medical
help.
Liquid ejected from the battery may cause irritation
or burns.
e) Do not use a battery pack or tool that is
damaged or modified.
Damaged or modified batteries may exhibit
unpredictable behaviour resulting in fire, explosion
or risk of injury.
f) Do not expose a battery pack or tool to fire or
excessive temperature.
Exposure to fire or temperature above 130°C may
cause explosion.
g) Follow all charging instructions and do not
charge the battery pack or tool outside the
temperature range specified in the instructions.
Charging improperly or at temperatures outside
the specified range may damage the battery and
increase the risk of fire.
6) Service
a) Have your power tool serviced by a qualified
repair person using only identical replacement
parts.
This will ensure that the safety of the power tool is
maintained.
b) Never service damaged battery packs.
Service of battery packs should only be performed
by the manufacturer or authorized service providers.
PRECAUTION
Keep children and infirm persons away.
When not in use, tools should be stored out of reach
of children and infirm persons.
PRECAUTIONS FOR CORDLESS STUD
CUTTER
1. Never bring the cutter near your fingers when operating
the switch.
2. Do not use for cutting screws other than soft steel studs.
This tool is designed especially for cutting of soft steel
studs. Using this tool for brass or stainless steel screws
could cause distortions in the screw threads, thereby
preventing insertion of nuts.
Never use to cut tempered bolts, screws of differing
sizes, reinforcing rods, etc.
3. Use by changing the special cutters according to the
size of the studs. Cutting with cutters of the wrong size
could damage to the continuous thread studs or the
cutter edges.
4. Make sure that the threads on the studs and those on
the cutter are correctly meshed before starting to cut.
Cutting when the threads are not meshed could cause
damage to the studs and the cutter.
5. If the cutter has been attached in the wrong direction or
the bolt for cutter attachment is loose, this could cause
damage to the cutter edge and could lead to premature
damage to the main unit.
Be very careful to attach the cutter correctly.
6. Cutting studs at short lengths of 10 millimeters or less
will create an insufficient meshing length between the
cutter and studs, thus causing damage to the cutter.
Always cut at lengths of more than 10 millimeters.
7. When cutting studs secured to narrow locations, be
sure that there is at least 8 millimeters between the stud
and the surrounding materials.
If the distance is less than 8 millimeters the cutter could
contact the surrounding materials, thereby causing
damage to the cutter and the main unit.
8. When inspecting, cleaning or replacing the cutter, be
sure to remove the battery from the main unit. The
switch could be turned on accidentally, thereby causing
accidents.
9. When using this equipment at heights, make doubly
sure prior to use that there is no one standing in the
area immediately below you. Place the tool in a safe and
stable place when not using at the moment.
10. Always charge the battery at a temperature of 0 – 40°C.
A temperature of less than 0°C will result in over charging
which is dangerous. The battery cannot be charged
at a temperature greater than 40°C. The most suitable
temperature for charging is that of 20 – 25°C.
11. Do not use the charger continuously.
When one charging is completed, leave the charger for
about 15 minutes before the next charging of battery.
12. Do not allow foreign matter to enter the hole for
connecting the rechargeable battery.
13. Never disassemble the rechargeable battery and
charger.
14. Never short-circuit the rechargeable battery. Short-
circuiting the battery will cause a great electric current
and overheat. It results in burn or damage to the battery.
15. Do not dispose of the battery in fire.
If the battery is burnt, it may explode.
0000BookCL14DSLWE.indb80000BookCL14DSLWE.indb8 2019/08/3012:11:462019/08/3012:11:46

9
English
16. Do not insert object into the air ventilation slots of the
charger.
Inserting metal objects or inflammables into the charger
air ventilation slots will result in electrical shock hazard
or damaged charger.
17. Bring the battery to the shop from which it was
purchased as soon as the post-charging battery life
becomes too short for practical use. Do not dispose of
the exhausted battery.
18. Using an exhausted battery will damage the charger.
CAUTION ON LITHIUM-ION BATTERY
To extend the lifetime, the lithium-ion battery equips with
the protection function to stop the output.
In the cases of 1 to 3 described below, when using this
product, even if you are pulling the switch, the motor may
stop. This is not the trouble but the result of protection
function.
1. When the battery power remaining runs out, the motor
stops.
In such case, charge it up immediately.
2. If the tool is overloaded, the motor may stop. In this
case, release the switch of tool and eliminate causes of
overloading. After that, you can use it again.
3. If the battery is overheated under overload work, the
battery power may stop.
In this case, stop using the battery and let the battery
cool. After that, you can use it again.
Furthermore, please heed the following warning and
caution.
WARNING
In order to prevent any battery leakage, heat generation,
smoke emission, explosion and ignition beforehand,
please be sure to heed the following precautions.
1. Make sure that swarf and dust do not collect on the
battery.
○During work make sure that swarf and dust do not fall on
the battery.
○Make sure that any swarf and dust falling on the power
tool during work do not collect on the battery.
○Do not store an unused battery in a location exposed to
swarf and dust.
○Before storing a battery, remove any swarf and dust that
may adhere to it and do not store it together with metal
parts (screws, nails, etc.).
2. Do not pierce battery with a sharp object such as a
nail, strike with a hammer, step on, throw or subject the
battery to severe physical shock.
3. Do not use an apparently damaged or deformed battery.
4. Do not use the battery in reverse polarity.
5. Do not connect directly to an electrical outlets or car
cigarette lighter sockets.
6. Do not use the battery for a purpose other than those
specified.
7. If the battery charging fails to complete even when a
specified recharging time has elapsed, immediately
stop further recharging.
8. Do not put or subject the battery to high temperatures or
high pressure such as into a microwave oven, dryer, or
high pressure container.
9. Keep away from fire immediately when leakage or foul
odor are detected.
10. Do not use in a location where strong static electricity
generates.
11. If there is battery leakage, foul odor, heat generated,
discolored or deformed, or in any way appears abnormal
during use, recharging or storage, immediately remove
it from the equipment or battery charger, and stop use.
12. Do not immerse the battery or allow any fluids to flow
inside. Conductive liquid ingress, such as water, can
cause damage resulting in fire or explosion. Store your
battery in a cool, dry place, away from combustible and
flammable items. Corrosive gas atmospheres must be
avoided.
CAUTION
1. If liquid leaking from the battery gets into your eyes,
do not rub your eyes and wash them well with fresh
clean water such as tap water and contact a doctor
immediately.
If left untreated, the liquid may cause eye-problems.
2. If liquid leaks onto your skin or clothes, wash well with
clean water such as tap water immediately.
There is a possibility that this can cause skin irritation.
3. If you find rust, foul odor, overheating, discolor,
deformation, and/or other irregularities when using the
battery for the first time, do not use and return it to your
supplier or vendor.
WARNING
If an electrically conductive foreign object enters the
terminals of the lithium ion battery, a short-circuit may
occur resulting in the risk of fire. Please observe the
following matters when storing the battery.
○Do not place electrically conductive cuttings,
nails, steel wire, copper wire or other wire in the
storage case.
○Either install the battery in the power tool or store
by securely pressing into the battery cover until
the ventilation holes are concealed to prevent
short-circuits (See Fig. 1).
SPECIFICATIONS
POWER TOOL
Model CL14DSL CL18DSL
No-load stroke 30 min-1
Capacity: Soft steel studs
(Size of studs for cutting)
○M10 × 1.5 ○M8 × 1.25 ○M6 × 1
○W3/8" × 1.5875
Rechargeable battery
BSL1430:
Li-ion 14.4 V
(3.0 Ah 8 cells)
BSL1440:
Li-ion 14.4 V
(4.0 Ah 8 cells)
BSL1450:
Li-ion 14.4 V
(5.0 Ah 8 cells)
BSL1830:
Li-ion 18 V
(3.0 Ah 10 cells)
BSL1840:
Li-ion 18 V
(4.0 Ah 10 cells)
BSL1850:
Li-ion 18 V
(5.0 Ah 10 cells)
Weight* 2.8 – 3.1 kg 2.9 – 3.5 kg
* Weight according to EPTA-Procedure 01/2014. Depending on attached battery. The heaviest weight is measured with
BSL1460 (CL14DSL) and BSL36B18 (CL18DSL).
0000BookCL14DSLWE.indb90000BookCL14DSLWE.indb9 2019/08/3012:11:462019/08/3012:11:46

10
English
CHARGER
Model UC18YFSL
Charging voltage 14.4 V – 18 V
Weight 0.5 kg
REGARDING LITHIUM-ION BATTERY
TRANSPORTATION
When transporting a lithium-ion battery, please observe
the following precautions.
WARNING
Notify the transporting company that a package contains a
lithium-ion battery, inform the company of its power output
and follow the instructions of the transportation company
when arranging transport.
○Lithium-ion batteries that exceed a power output of
100 Wh are considered to be in the freight classification
of Dangerous Goods and will require special application
procedures.
○For transportation abroad, you must comply with
international law and the rules and regulations of the
destination country.
Wh
Power Output
2 to 3 digit number
STANDARD ACCESSORIES
CL14DSL
Charger .......................................... 1
Battery............................................ 2
Battery cover.................................. 1
Plastic case.................................... 1
Hexagon bar wrench...................... 1
M8 Cutter........................................ 2
M8 Spacer...................................... 2
M8 Trimmer .................................... 1
CL14DSL
(NN) Without charger, battery, battery cover
and plastic case
CL18DSL
Charger .......................................... 1
Battery............................................ 2
Battery cover.................................. 1
Plastic case.................................... 1
Hexagon bar wrench...................... 1
M8 Cutter or M10 Cutter................. 2
M8 Spacer or M10 Spacer............... 2
M8 Trimmer or M10 Trimmer............. 1
CL18DSL
(NN) Without charger, battery, battery cover
and plastic case
Standard accessories are subject to change without notice.
OPTIONAL ACCESSORIES (sold separately)
1. Battery
(BSL36..18)
(BSL1430, BSL1440,
BSL1450, BSL1460) (BSL1830, BSL1840,
BSL1850, BSL1860)
2. Cutter
Screw size Combining cutters and spacers
M10 × 1.5 M10 Cutter.............................2
M10 Spacer ...........................2
M8 × 1.25 M8 Cutter ..............................2
M8 Spacer.............................2
M6 × 1 M6 Cutter ..............................2
M6 Spacer.............................2
W3/8" × 1.5875 W3/8” Cutter..........................2
0000BookCL14DSLWE.indb100000BookCL14DSLWE.indb10 2019/08/3012:11:462019/08/3012:11:46

11
English
3. Trimmer
Screw size
M10 × 1.5
M8 × 1.25
M6 × 1
W3/8" × 1.5875
Optional accessories are subject to change without notice.
APPLICATIONS
○Cutting of soft steel studs.
BATTERY REMOVAL/INSTALLATION
1. Battery removal
Hold the handle tightly and push the battery latch to
remove the battery (see Figs. 1and 2).
CAUTION
Never short-circuit the battery.
2. Battery installation
Insert the battery while observing its polarities (see
Fig. 2).
CHARGING
Before using the power tool, charge the battery as follows.
1. Connect the charger’s power cord to a receptacle.
When the power cord is connected, the charger’s pilot
lamp will blink in red. (At 1-second intervals)
2. Insert the battery into the charger.
Firmly insert the battery into the charger, as shown in
Fig. 3.
3. Charging
When inserting a battery in the charger, charging will
commence and the pilot lamp will light continuously in
red.
When the battery becomes fully recharged, the pilot
lamp will blink in red. (At 1-second intervals) (See
Table 1)
(1) Pilot lamp indication
The indications of the pilot lamp will be as shown in
Table 1, according to the condition of the charger or the
rechargeable battery.
Table 1
Indications of the pilot lamp
The pilot
lamp lights
or blinks.
Before
charging Blinks
(red)
Lights for 0.5 seconds. Does not light for
0.5 seconds. (offfor 0.5 seconds)
While
charging Lights
(red)
Lights continuously
Charging
complete Blinks
(red)
Lights for 0.5 seconds. Does not light for
0.5 seconds. (offfor 0.5 seconds)
Charging
impossible Flickers
(red)
Lights for 0.1 seconds. Does not light for
0.1 seconds. (offfor 0.1 seconds) Malfunction in the battery or
the charger
Overheat
standby Blinks
(red)
Lights for 1 seconds. Does not light for
0.5 seconds. (offfor 0.5 seconds)
Battery overheated.
Unable to charge.
(Charging will commence
when battery cools)
(2) Regarding the temperatures and charging time of the battery.
The temperatures and charging time will become as shown in Table 2
Table 2
Charger UC18YFSL
Battery
Type of battery Li-ion
Temperatures at which the
battery can be recharged 0°C – 50°C
Charging voltage V14.4 18
Charging time,
approx. (At 20°C)
BSL14xx series BSL18xx series Multi volt series
(8 cells) (10 cells) (10 cells)
min.
BSL1430 : 45
BSL1440 : 60
BSL1450 : 75
BSL1460 : 90
BSL1830 : 45
BSL1840 : 60
BSL1850 : 75
BSL1860 : 90
BSL36A18: 75
BSL36B18: 120
NOTE
The charging time may vary according to temperature and power source voltage.
0000BookCL14DSLWE.indb110000BookCL14DSLWE.indb11 2019/08/3012:11:472019/08/3012:11:47

12
English
PRIOR TO OPERATION
1. Preparing and checking the work environment
Make sure that the work site meets all the conditions
laid forth in the precautions.
2. Checking the battery
Make sure that the battery is installed firmly. If it is at all
loose it could come offand cause an accident.
3. Setting the forward/reverse switching button
(1) Push the forward/reverse switching button from the
right as shown in Fig. 4 (a). Cutting is possible.
(2) By setting the forward/reverse switching button in the
lock position as shown in Fig. 4 (b), the motor will
not operate even if the trigger switch is pulled. When
carrying or storing the main unit or when stopping
operations, set the forward/reverse switching button to
the lock position (Fig. 4 (b)).
(3) Push the forward/reverse switching button from the left
as shown in Fig. 4 (c). With the button held down, pull
the trigger switch so that the cutter can be removed from
the stud. Only set to this position if the rechargeable
battery is worn out and the unit stops operating during
cutting. Immediately turn offthe switch after the cutter
has been removed from the stud.
CAUTION
Do not attempt to cut in the reverse position (Fig. 4 (c)).
If you attempt to cut in this position, there will be an
overload on the motor and cutting will not be possible.
Never apply excessive force to the main unit as this can
cause damage to the unit.
4. Check the cutter size, attachment direction,
attachment bolt and spacer
(1) The cutter size differs according to the size of the
studs to be cut. Make sure that a cutter is attached that
conforms to the size of the studs to be cut.
(2) Cutter attachment includes directionality. Make sure
that the cutter has been attached so that the side
without the notch on the cutter can be seen on bracket
(A) (movable side) when the main unit is viewed from
the front or that the notch on the cutter surface can be
seen on bracket (B) (fixed side).
(3) Use the accessory hexagonal wrench to insure that the
hex. socket hd. bolt for attaching the cutter is securely
tightened (Fig. 5). Using the equipment while the bolt is
loose could cause damage to the main unit and cutter.
(4) Depending on the size of the studs it may be necessary
to attach special spacers to the cutter.
When using the M10, M8 or M6 cutter
Check and confirm that the accessory M6, M8 or M10
spacers are correctly inserted respectively between
bracket (A) and the cutter and bracket (B) and the cutter
(Fig. 5).
CAUTION
If the spacers are not attached or if spacers of the wrong
size are used, the threads of the cutter and the studs
will not properly mesh, thereby causing damage to the
studs and the cutter edge. Be sure to attach spacers
correctly.
When using the W3/8" cutter
No spacers are required. Check and confirm that only
the cutter is attached.
For details, refer to the section on “Cutter life and
replacement”.
4. Disconnect the charger’s power cord from the
receptacle.
5. Hold the charger firmly and pull out the battery.
NOTE
After operation, pull out batteries from the charger first,
and then keep the batteries properly.
Regarding electric discharge in case of new
batteries, etc.
As the internal chemical substance of new batteries
and batteries that have not been used for an extended
period is not activated, the electric discharge might be
low when using them the first and second time. This is
a temporary phenomenon, and normal time required for
recharging will be restored by recharging the batteries
2 – 3 times.
How to make the batteries perform longer
(1) Recharge the batteries before they become completely
exhausted.
When you feel that the power of the tool becomes
weaker, stop using the tool and recharge its battery.
If you continue to use the tool and exhaust the electric
current, the battery may be damaged and its life will
become shorter.
(2) Avoid recharging at high temperatures.
A rechargeable battery will be hot immediately after
use. If such a battery is recharged immediately after
use, its internal chemical substance will deteriorate,
and the battery life will be shortened. Leave the battery
and recharge it after it has cooled for a while.
CAUTION
○When the battery charger has been continuosly used,
the battery charger will be heated, thus constituting
the cause of the failures. Once the charging has been
completed, give 15 minutes rest until the next charging.
○If the battery is recharged when it is warm due to battery
use or exposure to sunlight, the pilot lamp map light in
green.
The battery will not be recharged. In such a case, let the
battery cool before charging.
○When the pilot lamp flickers in red (at 0.2-second
intervals), check for and take out any foreign objects
in the charger’s battery installation hole. If there are no
foreign objects, it is probable that the battery or charger
is malfunctioning. Take it to your authorized Service
Center.
0000BookCL14DSLWE.indb120000BookCL14DSLWE.indb12 2019/08/3012:11:472019/08/3012:11:47

13
English
5. Correctly insert the stud guide
The stud guide is used to prevent tilting during cutting
of studs. Correctly adjust the dial calibration to the mark
() depending on the size of the stud to be cut (Fig. 6).
CAUTION
If the size of the stud and the dial position to do not
agree, the cut section may be subjected to burrs or its
shape may be distorted, which may result in damage to
the main unit.
HOW TO USE
CAUTION
○Never bring the cutter near your fingers when operating
the trigger switch.
○When cutting short studs, take caution as to not place
your fingers in the space between the short stud and
main unit, such as the guard section (see Fig. 7),
battery, etc.
○After cutting, the cut section of the stud is very sharp
and therefore dangerous. Be very careful when
handling the stud.
1. Normal Cutting Method
(1) Pull the trigger switch and move bracket (A), stopping
with the cutter in the open position shown in Fig. 7.
(2) As shown in Fig. 8, set the stud to be cut in the cutter
on the bracket (B) side, making sure that the threads
correctly mesh with each other.
(3) While maintaining the stud in a horizontal position, pull
the trigger switch all the way to cut the stud (Fig. 7).
(4) After cutting turn offthe switch with bracket (A) facing
directly upward. The unit stops with the cutter in the
open position, thus making it easier to proceed to the
next operation.
2. Number of cuttings (per battery charging)
Refer to the chart below for the number of cuttings per
battery charging.
Table 3
Battery M10 M8 M6 W3/8”
BSL1430 660 1020 1520 740
BSL1440 880 1360 2020 980
BSL1450 1100 1700 2520 1220
BSL1830 790 1220 1820 920
BSL1840 1050 1620 2420 1220
BSL1850 1310 2020 3020 1520
The number of cuttings can also vary somewhat
according to the ambient temperature, characteristics
of the battery and the condition of the cutter.
3. Cutting fixed lengths (Fig. 9)
When cutting several studs to the same length, using
the equipment in the following way will making cutting
operations more efficient.
(1) First cut one stud to the required length, and then use it
as a fixed length guide.
(2) Insert the stud used as a fixed length guide in the stud
attachment hole found on the main unit stud guide and
use the hexagonal bar wrench to tighten and secure
the hex. socket hd. bolt. Adjust at this time so that the
distance between the end of the stud used as a fixed
length and the cutter is the necessary length.
(3) Insert the stud for cutting in the cutter, aligning the end
with that of the stud used as a cutting guide, and then
cut the stud.
4. Cutting studs that are already secured (Fig. 10)
When cutting studs that are suspended from the ceiling
or secured to walls or floors.
When inserting the stud in the cutter, the meshing of
the stud thread and cutter thread is unstable. In such
a case, after inserting the stud in the cutter, lightly pull
the trigger switch to close the cutter at low speed and
then completely mesh the stud and the upper and lower
cutters. Next, pull the trigger switch all the way to cut
the stud.
CAUTION
Use your one hand to hold the stud on the side released
by cutting to insure that it does not fall unexpectedly.
5. Removing the screw from the unit during cutting
operations
If the battery wears out during cutting operations so
that the motor stops rotating, pull the trigger switch
while pushing the forward/reverse switching button to
the reverse side (Fig. 4 (c)). The motor will rotate in the
opposite direction and it will be possible to remove the
stud from the cutter (Fig. 11).
CAUTION
○When removing a stud that is suspended from
the ceiling, hold the main unit with both hands to
prevent any possibility of the stud falling.
○Immediately turn offthe switch once the cutter is
free from the stud. If you attempt to do this with the
switch turned on, the cutter might cut into the stud
again.
6. Using the hook
The hook can be used to hang up the unit temporarily
during operations (Fig. 12).
CAUTION
The hook should never be used to hang the unit on your
person.
When using the hook, check to make sure that the main
unit will not slip and fall, or become unstable by the
wind, etc.
Never hang the unit from your belt or trousers as this
could cause accidents.
NOTE
During normal use or during storage, store the hook in
the latch found on the bottom of the main unit.
7. Using the trimmer
NOTE: Use a special trimmer that is suitable for the size
of the stud.
If it is difficult for the nut to enter the cutting position,
either use a wrench to firmly tighten the nut or use the
accessory trimmer to remove the flange on the screw
thread.
Insert the stud in the hole on the grip. Use a pliers to
retain the stud and rotate the trimmer 5 or 6 times to
the right to remove the flange and then rotate in the
opposite direction to remove the trimmer (Fig. 13).
CAUTION
This trimmer is specially designed for Studs Cutter. The
flange on studs cut with a hacksaw or disc grinder is too
large for this trimmer so that the trimmer does not rotate
and it is not possible to remove flange.
0000BookCL14DSLWE.indb130000BookCL14DSLWE.indb13 2019/08/3012:11:482019/08/3012:11:48

14
English
8. About Remaining Battery Indicator
When pressing the remaining battery indicator switch,
the remaining battery indicator lamp lights and the
battery remaining power can be checked. (Fig. 14)
When releasing your finger from the remaining battery
indicator switch, the remaining battery indicator lamp
goes off. The Table 4 shows the state of remaining
battery indicator lamp and the battery remaining power.
Table 4
State of lamp Battery Remaining Power
The battery remaining power is
enough.
The battery remaining power is a half.
The battery remaining power is nearly
empty.
Re-charge the battery soonest
possible.
As the remaining battery indicator shows somewhat
differently depending on ambient temperature and
battery characteristics, read it as a reference.
NOTE
○Do not give a strong shock to the switch panel or break
it.It may lead to a trouble.
○To save the battery power consumption, the remaining
battery indicator lamp lights while pressing the
remaining battery indicator switch.
CUTTER LIFE AND REPLACEMENT
1. Cutter life
As is shown in Fig. 16, repeated cutting can cause
breaking and warping of the cutter edge. Using the
cutter in this condition can produce flange on the cutting
location of the studs so that the threads are distorted.
This will prevent clean cuts and make it impossible to
insert the nut.
Breaking Warping
Fig. 16
As is shown in Fig. 17, the edge is found on four
locations on the cutter. Use the method described
below to change the attachment direction of the cutter
to allow a total of four usages.
If the nut does not fit on the screw due to breaking and
warping of the edge, change the cutter attachment
direction to use the edge without breaking and warping
or replace with a new cutter.
Four edges
on the cutter
Fig. 17
2. Changing the cutter attachment direction or
replacing the cutter
(1) Before removing:
Pull the trigger switch and move bracket (A), stopping
with the cutter in the open position.
Set the forward/reverse switching button to the lock
position (Fig. 4 (b)).
Remove the rechargeable battery from the main unit.
(2) Removal
Use the accessory hexagonal bar wrench to remove the
hex. socket hd. bolt. It is now possible to remove the
cutter and spacer.
(3) Before attaching
There are four edges on the cutter. As shown in Fig. 18,
by changing the position of the edge it is possible to use
the blade four times.
( )
Turning to the
back side Turning to the
back side
( )
Re-insertion
( )
Turning to the
back side
( )
1st time 2nd time 3rd time 4th time
Fig. 18
There is directionality for cutter attachment in order to
change the position of the edge. Check that the cutter
has been attached so that the side without the notch on
the cutter can be seen on bracket (A) (movable side)
when seen from the main unit viewed from the front or
that the notch on the cutter surface on bracket (B) (fixed
side) can be seen (Figs. 5 and 19).
Side without notch
Notch side
DO
Fig. 19
0000BookCL14DSLWE.indb140000BookCL14DSLWE.indb14 2019/08/3012:11:482019/08/3012:11:48

15
English
If there is breakage or warping on the cutter edge or if
there are bulges on the cutter attachment surface, use
a file to the areas flat.
Use brush to remove the filings attached to the cutter
attachment groove on the bracket.
CAUTION
As shown in Fig. 20, if the cutters are combined in such
a way that both side without the notch on the cutter or
both notch sides are facing out, the pitch of the threads
on the studs and the threads on the cutter will not be in
agreement. This can cause damage to the cutter edge
or cause wear to premature damage to the main unit.
Both on
notch side Both on
side without
notch
DON’T
Fig. 20
(4) Attachment
When using an M6, M8 or M10 cutter
Insert the cutter in the cutter attachment groove on the
bracket, insert the special spacer between the cutter
and the bracket and then use the hex. socket hd. bolt to
tighten and secure.
When using the W3/8" cutter
Insert the cutter in the cutter attachment groove on the
bracket and then use the hex. socket hd. bolt to tighten
and secure.
NOTE
Spacers are not required when using the W3/8" cutter.
CAUTION
The hex. socket hd. bolt should be sufficiently tightened
with the hexagonal wrench.
Size Attachment
M10
Hex. socket hd. bolt
Bracket (A) Spacer Cutter
Cutter Spacer
Hex. socket hd. bolt
Bracket (B)
M8
M6
W3/8”
Cutter
Bracket (A)
Cutter Bracket (B)
Hex. socket hd. bolt
CAUTION
Use special cutters and spacers that conform with the size of the stud. Using cutters and spacers of the wrong size or
confusing them can lead to damage to the stud and cutter.
0000BookCL14DSLWE.indb150000BookCL14DSLWE.indb15 2019/08/3012:11:482019/08/3012:11:48

16
English
MAINTENANCE AND INSPECTION
CAUTION
Be sure to remove the rechargeable battery from the unit
during inspection and cleaning.
1. Care after use
After use, use a brush to brush offthe work area,
especially the area around the blade.
2. Inspecting the mounting screws
Regularly inspect all mounting screws and ensure that
they are properly tightened. Should any of the screws
be loose, retighten them immediately. Failure to do so
could result in serious hazard.
3. Cleaning on the outside
When the power tool is stained, wipe with a soft dry
cloth or a cloth moistened with soapy water. Do not use
chloric solvents, gasoline or paint thinner, for they melt
plastics.
4. Storage
Store the power tool in a place in which the temperature
is less than 40°C and out of reach of children.
NOTE
Storing lithium-ion batteries.
Make sure the lithium-ion batteries have been fully
charged before storing them.
Prolonged storage (3 months or more) of batteries with
a low charge may result in performance deterioration,
significantly reducing battery usage time or rendering
the batteries incapable of holding a charge.
However, significantly reduced battery usage time may
be recovered by repeatedly charging and using the
batteries two to five times.
If the battery usage time is extremely short despite
repeated charging and use, consider the batteries dead
and purchase new batteries.
CAUTION
In the operation and maintenance of power tools, the
safety regulations and standards prescribed in each
country must be observed.
Important notice on the batteries for the HiKOKI
cordless power tools
Please always use one of our designated genuine
batteries. We cannot guarantee the safety and
performance of our cordless power tool when used with
batteries other than these designated by us, or when
the battery is disassembled and modified (such as
disassembly and replacement of cells or other internal
parts).
GUARANTEE
We guarantee HiKOKI Power Tools in accordance with
statutory/country specific regulation. This guarantee does
not cover defects or damage due to misuse, abuse, or
normal wear and tear. In case of complaint, please send
the Power Tool, undismantled, with the GUARANTEE
CERTIFICATE found at the end of this Handling instruction,
to a HiKOKI Authorized Service Center.
NOTE
Due to HiKOKI’s continuing program of research and
development, the specifications herein are subject to
change without prior notice.
Information concerning airborne noise and vibration
The measured values were determined according to
EN62841 and declared in accordance with ISO 4871.
Measured A-weighted sound power level: 85 dB (A)
Measured A-weighted sound pressure level: 74 dB (A)
Uncertainty K: 1.5 dB (A).
Wear hearing protection.
Vibration total values (triax vector sum) determined
according to EN62841.
Stud cutting:
Vibration emission value ahV = 0.5 m/s2
Uncertainty K = 1.5 m/s2
The declared vibration total value has been measured in
accordance with a standard test method and may be used
for comparing one tool with another.
It may also be used in a preliminary assessment of
exposure.
WARNING
○The vibration emission during actual use of the power
tool can differ from the declared total value depending
on the ways in which the tool is used.
○Identify safety measures to protect the operator that
are based on an estimation of exposure in the actual
conditions of use (taking account of all parts of the
operating cycle such as the times when the tool is
switched offand when it is running idle in addition to the
trigger time).
0000BookCL14DSLWE.indb160000BookCL14DSLWE.indb16 2019/08/3012:11:482019/08/3012:11:48

17
Deutsch
(Übersetzung der Original-Gebrauchsanweisung)
ALLGEMEINE SICHERHEITSHINWEISE FÜR
ELEKTROGERÄTE
WARNUNG
Bitte beachten Sie sämtliche mit diesem Elektrogerät
gelieferten Sicherheitshinweise, Anweisungen,
Illustrationen und technischen Angaben.
Wenn die nachfolgenden Anweisungen nicht befolgt
werden, kann es zu Stromschlag, Brand und/oder
ernsthaften Verletzungen kommen.
Bitte bewahren Sie alle Warnhinweise und
Anweisungen zum späteren Nachschlagen auf.
Der Begriff„Elektrowerkzeug“ bezieht sich in den
Warnhinweisen auf Elektrowerkzeuge mit Netz-
(schnurgebunden) oder Akkubetrieb (schnurlos).
1) Sicherheit im Arbeitsbereich
a) Sorgen Sie für einen sauberen und gut
ausgeleuchteten Arbeitsbereich.
Zugestellte oder dunkle Bereiche ziehen Unfälle
förmlich an.
b) Verwenden Sie Elektrowerkzeuge niemals an
Orten, an denen Explosionsgefahr besteht,
wie zum Beispiel in der Nähe von leicht
entflammbaren Flüssigkeiten, Gasen oder
Stäuben.
Bei der Arbeit mit Elektrowerkzeugen kann es zu
Funkenbildung kommen, wodurch sich Stäube oder
Dämpfe entzünden können.
c) Sorgen Sie bei der Arbeit mit
Elektrowerkzeugen dafür, dass sich keine
Zuschauer (insbesondere Kinder) in der Nähe
befinden.
Wenn Sie abgelenkt werden, können Sie die
Kontrolle über das Werkzeug verlieren.
2) Elektrische Sicherheit
a) Elektrowerkzeuge müssen mit passender
Stromversorgung betrieben werden. Nehmen
Sie niemals irgendwelche Änderungen
am Anschlussstecker vor. Verwenden Sie
bei Elektrowerkzeugen mit Schutzkontakt
(geerdet) niemals Adapterstecker.
Stecker im Originalzustand und passende
Steckdosen reduzieren das Stromschlagrisiko.
b) Vermeiden Sie Körperkontakt mit geerdeten
Gegenständen wie Rohrleitungen, Heizungen,
Herden oder Kühlschränken.
Bei Körperkontakt mit geerdeten Gegenständen
besteht ein erhöhtes Stromschlagrisiko.
c) Setzen Sie Elektrowerkzeuge niemals Regen
oder sonstiger Feuchtigkeit aus.
Wenn Flüssigkeiten in ein Elektrowerkzeug
eindringen, erhöht sich das Stromschlagrisiko.
d) Verwenden Sie das Anschlusskabel
nicht missbräuchlich. Tragen Sie das
Elektrowerkzeug niemals am Stromkabel,
ziehen Sie es nicht damit heran und ziehen Sie
den Stecker nicht am Anschlusskabel aus der
Steckdose.
Halten Sie das Anschlusskabel von
Hitzequellen, Öl, scharfen Kanten und
beweglichen Teilen fern.
Beschädigte oder verdrehte Anschlusskabel
erhöhen das Stromschlagrisiko.
e) Verwenden Sie, wenn Sie ein Elektrowerkzeug
im Freien benutzen, ein für den Außeneinsatz
geeignetes Verlängerungskabel.
Ein für den Außeneinsatz geeignetes Kabel
vermindert das Stromschlagrisiko.
f) Falls sich der Betrieb des Elektrowerkzeugs
in feuchter Umgebung nicht vermeiden lässt,
verwenden Sie eine Stromversorgung mit
Fehlerstromschutzeinrichtung (Residual
Current Device, RCD).
Durch den Einsatz einer
Fehlerstromschutzeinrichtung wird das Risiko
eines elektrischen Schlages reduziert.
3) Persönliche Sicherheit
a) Bleiben Sie wachsam, achten Sie auf das, was
Sie tun, und setzen Sie Ihren Verstand ein,
wenn Sie mit Elektrowerkzeugen arbeiten.
Benutzen Sie keine Elektrowerkzeuge, wenn
Sie müde sind oder unter Einfluss von Drogen,
Alkohol oder Medikamenten stehen.
Bei der Arbeit mit Elektrowerkzeugen können
bereits kurze Phasen der Unaufmerksamkeit zu
schweren Verletzungen führen.
b) Benutzen Sie eine persönliche
Schutzausrüstung. Tragen Sie immer einen
Augenschutz.
Schutzausrüstung wie Staubmaske, rutschfeste
Sicherheitsschuhe, Schutzhelm und Gehörschutz
senken bei angemessenem Einsatz das
Verletzungsrisiko.
c) Vermeiden Sie unbeabsichtigtes Einschalten.
Achten Sie darauf, dass sich der Schalter
in der Aus- (Off-) Position befindet, ehe Sie
das Gerät mit der Stromversorgung und/
oder Batteriestromversorgung verbinden, es
aufheben oder herumtragen.
Das Herumtragen von Elektrowerkzeugen mit
dem Finger am Schalter oder das Herstellen der
Stromversorgung bei betätigtem Schalter zieht
Unfälle regelrecht an.
d) Entfernen Sie sämtliche Einstellwerkzeuge
(Einstellschlüssel), ehe Sie das
Elektrowerkzeug einschalten.
Ein an einem beweglichen Teil des
Elektrowerkzeugs angebrachter Schlüssel kann zu
Verletzungen führen.
e) Überstrecken Sie sich nicht. Achten Sie
jederzeit darauf, sicher zu stehen und das
Gleichgewicht zu bewahren.
Dadurch haben Sie das Elektrowerkzeug in
unerwarteten Situationen besser im Griff.
f) Tragen Sie geeignete Kleidung. Tragen Sie
keine lose Kleidung oder Schmuck. Halten Sie
Ihr Haar und Ihre Kleidung von beweglichen
Teilen fern.
Lose Kleidung, Schmuck oder langes Haar kann
von beweglichen Teilen erfasst werden.
g) Wenn Anschlüsse für Staubabsaug- und –
sammelvorrichtungen vorhanden sind, sorgen
Sie dafür, dass diese richtig angeschlossen
und eingesetzt werden.
Durch Entfernen des Staubes können
staubbezogene Gefahren vermindert werden.
0000BookCL14DSLWE.indb170000BookCL14DSLWE.indb17 2019/08/3012:11:492019/08/3012:11:49

18
Deutsch
h) Lassen Sie es nicht zu, dass die durch häufigen
Gebrauch von Werkzeugen erworbene
Vertrautheit Sie nachlässig macht und Sie
die Sicherheitsrichtlinien für das Werkzeug
ignorieren.
Eine unvorsichtige Handlung kann in
Sekundenbruchteilen zu schweren Verletzungen
führen.
4) Einsatz und Pflege von Elektrowerkzeugen
a) Überbeanspruchen Sie Elektrowerkzeuge
nicht. Benutzen Sie das richtige
Elektrowerkzeug für Ihren Einsatzzweck.
Das richtige Elektrowerkzeug erledigt seine Arbeit
bei bestimmungsgemäßem Einsatz besser und
sicherer.
b) Benutzen Sie das Elektrowerkzeug nicht, wenn
es sich nicht am Schalter ein- und ausschalten
lässt.
Jedes Elektrowerkzeug, das nicht mit dem Schalter
betätigt werden kann, stellt eine Gefahr dar und
muss repariert werden.
c) Ziehen Sie den Stecker der Stromversorgung
ab und/oder entfernen Sie den Akkupack vom
Elektrowerkzeug, falls abnehmbar, ehe Sie
Einstellarbeiten vornehmen, Zubehörteile
tauschen oder das Elektrowerkzeug verstauen.
Solche präventiven Sicherheitsmaßnahmen
verhindern den unbeabsichtigten Anlauf des
Elektrowerkzeugs und die damit verbundenen
Gefahren.
d) Lagern Sie nicht benutzte Elektrowerkzeuge
außerhalb der Reichweite von Kindern,
lassen Sie nicht zu, dass Personen das
Elektrowerkzeug bedienen, die nicht mit
dem Werkzeug selbst und/oder diesen
Anweisungen vertraut sind.
Elektrowerkzeuge in ungeschulten Händen sind
gefährlich.
e) Wartung von Elektrowerkzeugen und Zubehör.
Prüfen Sie sie auf Fehlausrichtungen,
Leichtgängigkeit beweglicher Teile,
Beschädigungen von Teilen und auf alle
anderen Umstände, die sich auf den Betrieb des
Elektrowerkzeugs auswirken können. Lassen
Sie das Elektrowerkzeug bei Beschädigungen
reparieren, ehe Sie es benutzen.
Viele Unfälle mit Elektrowerkzeugen sind auf
schlechte Wartung zurückzuführen.
f) Halten Sie Schneidwerkzeuge scharf und
sauber.
Richtig gewartete Schneidwerkzeuge mit scharfen
Schneiden bleiben weniger häufig hängen und sind
einfacher zu beherrschen.
g) Benutzen Sie Elektrowerkzeuge, Zubehör,
Werkzeugspitzen und Ähnliches in
Übereinstimmung mit diesen Anweisungen
– beachten Sie dabei die jeweiligen
Arbeitsbedingungen und die Art der
auszuführenden Arbeiten.
Der Gebrauch des Elektrowerkzeugs für andere
als die vorgesehenen Anwendungen kann zu
gefährlichen Situationen führen.
h) Halten Sie Handgriffe und Greifflächen trocken,
sauber und frei von Öl und Fett.
Rutschige Handgriffe und Greifflächen lassen keine
sichere Handhabung und Kontrolle des Werkzeugs
in unerwarteten Situationen zu.
5) Verwendung und Pflege der Batterie
a) Laden Sie das Gerät nur mit dem vom Hersteller
empfohlenen Ladegerät auf.
Ein Ladegerät für einen speziellen Batterietyp
kann bei Verwendung mit anderen Batterien zu
Brandgefahr führen.
b) Verwenden Sie nur die für das Elektrowerkzeug
speziell empfohlenen Akkus.
Eine Verwendung von anderen Batterien kann zu
Verletzungen und Bränden führen.
c) Ist der Akku nicht in Gebrauch, achten Sie
darauf, dass er nicht mit Metallgegenständen,
beispielsweise Büroklammern, Münzen,
Schlüsseln, Nägeln, Schrauben oder anderen
kleinen Metallgegenständen in Kontakt kommt,
da diese Gegenstände einen Kurzschluss der
Anschlüsse verursachen können.
Ein Kurzschluss der Batterieanschlüsse kann zu
Verbrennungen oder Bränden führen.
d) Im Falle von missbräuchlichen Bedingungen
kann Flüssigkeit aus dem Akku austreten.
Vermeiden Sie in diesem Fall jeglichen Kontakt.
Sollten Sie dennoch mit der Batterieflüssigkeit
in Berührung kommen, waschen Sie die
betroffene Stelle gründlich mit Wasser ab. Ist
die Flüssigkeit ins Auge geraten, suchen Sie
einen Arzt auf.
Ausgetretene Batterieflüssigkeiten können zu
Reizungen oder Verbrennungen führen.
e) Verwenden Sie keinen Akku oder kein Werkzeug,
der oder das beschädigt oder verändert ist.
Beschädigte oder veränderte Akkus können ein
unvorhersehbares Verhalten aufweisen, das zu
einem Feuer, einer Explosion oder Verletzung
führen kann.
f) Setzen Sie den Akku oder das Werkzeug keinem
Feuer oder keiner zu hohen Temperatur aus.
Die Einwirkung von Feuer oder einer Temperatur
über 130°C kann zu einer Explosion führen.
g) Befolgen Sie alle Anweisungen zum Aufladen
und laden Sie den Akku oder das Werkzeug
nicht außerhalb des Temperarturbereichs auf,
der in der Anleitung angegeben ist.
Wenn Sie den Akku falsch oder bei Temperaturen
außerhalb des angegebenen Bereichs aufladen,
kann der Akku beschädigt werden und die Gefahr
eines Brandes steigen.
6) Service
a) Lassen Sie Ihr Elektrowerkzeug durch
qualifizierte Fachkräfte und nur unter Einsatz
der passenden Originalersatzteile warten.
Dies sorgt dafür, dass die Sicherheit des
Elektrowerkzeugs nicht beeinträchtigt wird.
b) Warten Sie niemals beschädigte Akkus.
Die Wartung von Akkus ist stets vom Hersteller oder
autorisierten Dienstleistern durchzuführen.
ACHTUNG
Von Kindern und gebrechlichen Personen fernhalten.
Werkzeuge sollten bei Nichtgebrauch außerhalb der
Reichweite von Kindern und gebrechlichen Personen
aufbewahrt werden.
0000BookCL14DSLWE.indb180000BookCL14DSLWE.indb18 2019/08/3012:11:492019/08/3012:11:49

19
Deutsch
VORSICHTSMASSNAHMEN FÜR DEN AKKU-
GEWINDESTANGENTRENNER
1. Beim Betätigen des Schalters darf der Schneider nicht
im der Nähe der Hände sein.
2. Nicht zum Schneiden von anderen als
Weichstahlstangen verwenden. Dieses Werkzeug
ist speziell zum Schneiden von Weichstahlstangen
konstruiert. Wenn das Werkzeug für Bronze-oder
Edelstahlstangen verwendet wird, können deren
Gewinde deformiert werden, so daß Muttern nicht
mehr aufgeschraubt werden können. Außerdem
nicht zum von gehärteten Bolzenschrauben und
Stangen verschiedener Größen oder Eisenstäben etc.
verwenden.
3. Beim Betrieb immer den Schneider entsprechend
der Größe der zu schneidenden Stangen wählen.
Wenn Schneider falscher Größe verwendet werden,
können Gewinde oder die Schneiderkanten beschädigt
werden.
4. Sicherstellen, daß die Gewinderillen an der Stange und
die am Schneider richtig eineinander eingreifen, bevor
mit dem Schneiden begonnen wird. Wenn geschnitten
wird, während die Gewinde nicht richtig ineinander
greifen, können sowohl das Werkstück als auch der
Schneider beschädigt werden.
5. Wenn der Schneider in falscher Richtung angebracht
ist oder die Stange zur Schneiderbefestigung locker
ist, können die Schneiderkanten beschädigt werden,
und das könnte zu vorzeitiger Beschädigung des
Hauptgeräts führen. Achten Sie immer darauf, den
Schneider korrekt anzubringen.
6. Schneiden von Stangen mit kurzen Längen von
10 mm oder weniger hat unzureichende Eingriffslänge
zwischen Stange und Schneider zur Folge, wodurch
der Schneider beschädigt wird. Immer nur Stangen
schneiden, die länger als 10 mm sind.
7. Beim Schneiden von Stangen, die an engen Stellen
montiert sind, immer sicherstellen daß mindestens
8 mm Abstand zwischen Stange und dem benachbarten
Material bleiben.
Wenn der Abstand weniger als 8 mm beträgt, könnte
der Schneider das benachbarte Material berühren.
Dadurch können Schäden am Schneider und auch am
Hauptgerät verursacht werden.
8. Beim Prüfen, Reinigen oder Austauschen des
Schneiders immer sicherstellen, daß der Akku aus dem
Hauptgerät entnommen ist. Der Schalter könnte sonst
versehentlich eingeschaltet werden, was zu Unfällen
führen kann.
9. Bei Verwendung des Geräts an hohen Stellen immer
sicherstellen, daß sich niemand unter der Arbeitsstelle
befindet. Das Werkzueg an einer sicheren und stabilen
Stelle ablegen, wenn es nicht verwendet wird.
10. Die Batterie immer bei einer Temperatur von 0 – 40°C
laden. Laden bei einer Temperatur die niedriger als
0°C ist wird gefährliche Überladung verursachen. Die
Batterie kann nicht bei einer Temperatur über 40°C
geladen werden. Die beste Temperatur zum Laden
wäre von 20 – 25°C.
11. Das Ladegerät nicht fortlaufend laden.
Nach Beendung einer Ladung, lassen Sie das
Ladegerät ungefähr 15 Minuten ruhen bevor die
nächste Batterieladung unternommen wird.
12. Keine Fremdkörper durch das Anschlußloch der
Batterie eindringen lassen.
13. Niemals die Batterie und das Ladegerät
auseinandernehmen.
14. Niemals die Batterie kurzschließen.
Kurzschluß der Batterie verursacht eine zu große
Stromzufuhr und Überhitzung, wodurch Durchbrennen
oder Schaden beider Batterie entsteht.
15. Die Batterie nicht ins Feuer werfen.
Sie könnte dabei explodieren.
16. Darauf achten, daß keine Gegenstände durch
Belüftungsschlitze das Ladegeräts in das Gerät
eindringen. Wenn Metallobjekte oder entzündliche
Gegenstände durch die Belüftungsschlitze des
Ladegeräts eindringen, kann dies zu elektrischen
Schlägen führen oder das Ladegerät beschädigen.
17. Bringen Sie die Batterie zum Geschäft, wo Sie sie
gekauft haben, sobald die Lebensdauer der Batterie
zur Neige geht. Die leere Batterie nicht wegwerfen.
18. Das Benutzen einer leeren Batterie beschädigt das
Ladegerät.
WARNUNG ZUM LITHIUM-IONEN-AKKU
Um die Lebensdauer des Lithium-Ionen-Akkus zu
verlängern, ist dieser mit einer Schutzfunktion zum
Stoppen der Leistungsabgabe ausgestattet.
In den unten beschriebenen Fällen 1 bis 3 kann es
vorkommen, dass der Motor trotz Betätigung des Schalters
angehalten wird. Dies ist kein Defekt sondern das Resultat
der Schutzfunktion.
1. Wenn die verbleibende Akkuleistung nicht mehr
ausreicht, schaltet der Motor ab.
Laden Sie in einem solchen Fall den Akku umgehend
auf.
2. Wenn das Werkzeug überlastet ist, kann es zum
Abschalten des Motors kommen. Lassen Sie in diesem
Fall den Schalter des Geräts los und beseitigen Sie
die Ursache der Überlastung. Danach können Sie das
Gerät wieder verwenden.
3. Kommt es während des Betriebs zu einer Erhitzung der
Batterie, wird das Gerät unter Umständen angehalten.
Unterbrechen Sie in diesem Fall Ihre Arbeit und lassen
Sie die Batterie abkühlen.
Anschließend können Sie das Gerät wieder normal
verwenden.
WARNUNG
Zur Vermeidung einer ausgelaufenen Batterie, Erwärmung,
Rauchentwicklung, Explosionen und vorzeitiger Zündung
beachten Sie bitte die folgenden Vorsichtsmaßnahmen.
1. Stellen Sie sicher, dass sich Späne und Staub nicht auf
der Batterie ansammeln.
○Stellen Sie während der Arbeit sicher, dass Späne und
Staub nicht auf die Batterie fallen.
○Stellen Sie sicher, dass Staub und Späne, die während
der Bearbeitung auf das Elektrowerkzeug fallen, nicht
in die Batterie gelangen.
○Lagern Sie ungebrauchte Batterien nicht an Plätzen, an
denen Staub oder Späne anfallen.
○Vor dem Einlagern einer Batterie sind sämtlicher
Staub und Späne zu entfernen. Weiterhin ist zu
berücksichtigen, dass die Batterie nicht gemeinsam
mit Metallteilen (Schrauben, Nägel, usw.) zu lagern ist.
0000BookCL14DSLWE.indb190000BookCL14DSLWE.indb19 2019/08/3012:11:492019/08/3012:11:49

20
Deutsch
2. Achten Sie darauf, dass die Batterie nicht durch einen
spitzen Gegenstand, beispielsweise einen Nagel,
beschädigt wird. Vermeiden Sie Schläge mit dem
Hammer. Treten Sie nicht gegen die Batterie, werfen
Sie diese nicht, und vermeiden Sie Stöße.
3. Beschädigte oder verformte Batterien dürfen nicht
weiter verwendet werden.
4. Achten Sie auf den richtigen Anschluss der Pole.
5. Schließen Sie die Batterie nicht direkt an elektrische
Ausgänge oder Zigarettenanzünder im Auto an.
6. Verwenden Sie die Batterie nur für den angegebenen
Zweck.
7. Falls die Batterie nach Verstreichen der angegebenen
Ladezeit nicht vollständig aufgeladen ist, brechen Sie
den Ladevorgang unverzüglich ab.
8. Vermeiden Sie hohe Temperaturen und hohen Druck,
wie er beispielsweise in der Mikrowelle, einem Trockner
oder einem Hochdruckbehälter auftritt.
9. Wenn Sie ein Leck oder Rußgeruch feststellen,
vermeiden Sie jeglichen Kontakt mit Feuerstellen.
10. Vermeiden Sie eine Verwendung an Orten, an denen
starke statische Elektrizität erzeugt wird.
11. Werden ein Leck, Rußgeruch, Erwärmung,
Verfärbungen, Verformungen oder sonstige
Anomalitäten während der Verwendung, des Aufladens
oder der Lagerung festgestellt, entfernen Sie die
Batterie unverzüglich vom Gerät oder dem Ladegerät
und beenden Sie die Anwendung.
12. Tauchen Sie den Akku nicht ins Wasser und lassen
Sie keine Flüssigkeiten ins Innere gelangen. Leitfähige
Flüssigkeiten, wie z. B. Wasser, können Schäden
verursachen, die zu einem Brand oder einer Explosion
führen. Lagern Sie Ihren Akku an einem kühlen,
trockenen Ort, fern von brennbaren und entzündlichen
Gegenständen. Korrosive Gase in der Atmosphäre
müssen gemieden werden.
ACHTUNG
1. Tritt die auslaufende Flüssigkeit in Kontakt mit Ihren
Augen, reiben Sie diese nicht, sondern waschen Sie sie
mit sauberem (Leitungs-) Wasser gut aus und suchen
Sie unverzüglich einen Arzt auf.
Ohne sachgemäße Behandlung können
Augenverletzungen auftreten.
2. Wenn die ausgelaufene Flüssigkeit auf Haut oder
Kleidung trifft, waschen Sie diese unverzüglich mit
sauberem Wasser ab.
Es besteht die Gefahr von Hautreizungen.
3. Beim Auftreten von Rost, Rußgeruch, Erwärmung,
Verfärbungen, Verformungen oder sonstigen
Anomalitäten während der ersten Verwendung der
Batterie, ist diese nicht weiter zu verwenden. Bringen
Sie die Batterie zum Händler oder Verkäufer zurück.
WARNUNG
Wenn ein elektrischer Fremdkörper an die Anschlüsse
des Lithium-Ionen-Akkus gelangt, kann es zu einem
Kurzschluss und der Gefahr eines Feuers kommen.
Beachten Sie folgende Vorsichtsmaßnahmen bei der
Aufbewahrung des Akkus.
○Legen Sie keine elektrisch leitenden Späne, Nägel,
Stahldraht, Kupferdraht oder anderen Draht in den
Aufbewahrungskoffer.
○Setzen Sie den Akku entweder in das Gerät
ein oder lagern Sie ihn, um Kurzschlüsse zu
vermeiden, indem Sie ihn in die Batterieabdeckung
hineindrücken, bis die Belüftungslöcher verdeckt
sind. (Siehe Abb. 1)
TECHNISCHE DATEN
ELEKTRO-WERKZEUG
Modell CL14DSL CL18DSL
Leerlaufhubzahl 30 min-1
Kapazität:
Weichstahlstangen
(Größe der zug
schneidenden Gewindestifte)
○M10 × 1,5 ○M8 × 1,25 ○M6 × 1
○W3/8" × 1,5875
Wiederaufladbare Batterie
BSL1430:
Li-ion 14,4 V
(3,0 Ah 8 zellen)
BSL1440:
Li-ion 14,4 V
(4,0 Ah 8 zellen)
BSL1450:
Li-ion 14,4 V
(5,0 Ah 8 zellen)
BSL1830:
Li-ion 18 V
(3,0 Ah 10 zellen)
BSL1840:
Li-ion 18 V
(4,0 Ah 10 zellen)
BSL1850:
Li-ion 18 V
(5,0 Ah 10 zellen)
Gewicht* 2,8 – 3,1 kg 2,9 – 3,5 kg
* Gewicht entsprechend EPTA-Procedure 01/2014. Ist von der angeschlossenen Batterie abhängig. Das höchste Gewicht
wurde mit der BSL1460 (CL14DSL) und BSL36B18 (CL18DSL) gemessen.
LADEGERÄT
Modell UC18YFSL
Ladespannung 14,4 V – 18 V
Gewicht 0,5 kg
0000BookCL14DSLWE.indb200000BookCL14DSLWE.indb20 2019/08/3012:11:492019/08/3012:11:49
Other manuals for CL 14DSL
4
This manual suits for next models
1
Table of contents
Languages:
Other HIKOKI Cutter manuals

HIKOKI
HIKOKI CL 14DSL User manual

HIKOKI
HIKOKI CM 5SB User manual

HIKOKI
HIKOKI CL 14DSL User manual

HIKOKI
HIKOKI CM 75EAP User manual

HIKOKI
HIKOKI BENDOF DC-16MV User manual

HIKOKI
HIKOKI CL 14DSL User manual

HIKOKI
HIKOKI CM 4SB2 User manual

HIKOKI
HIKOKI CD 1805DB User manual

HIKOKI
HIKOKI CF 18DSL User manual

HIKOKI
HIKOKI VB 16Y User manual