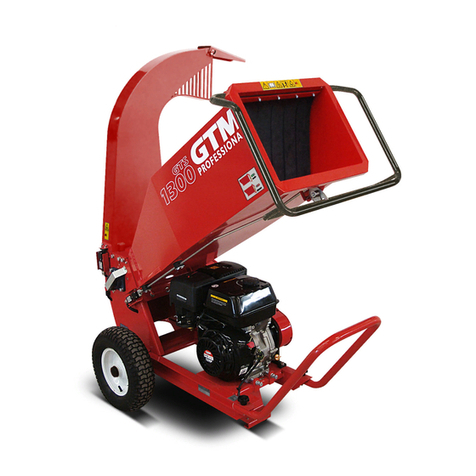
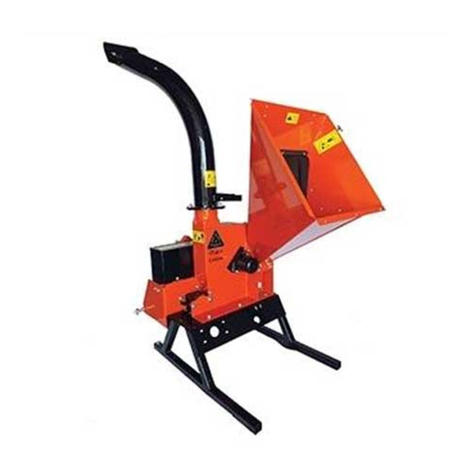
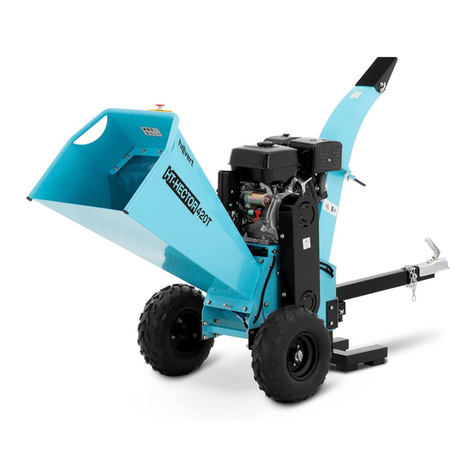
hillvert HT-HECTOR 212 User manual

expondo.de
HT-HECTOR 212
HT-HECTOR 420
BEDIENUNGSANLEITUNG
USER MANUAL
INSTRUKCJA OBSŁUGI
NÁVOD K POUŽITÍ
MANUEL D´UTILISATION
ISTRUZIONI PER L‘USO
MANUAL DE INSTRUCCIONES
PETROL GARDEN CHIPPER
PETROL WOOD CHIPPER

18.12.2018 18.12.2018
2 3
PRODUKTNAME BENZIN GARTENHÄCKSLER BENZIN HOLZHÄCKSLER
PRODUCT NAME PETROL GARDEN CHIPPER PETROL WOOD CHIPPER
NAZWA PRODUKTU RĘBAK SPALINOWY RĘBAK SPALINOWY
NÁZEV VÝROBKU BENZÍNOVÝ ZAHRADNÍ DRTIČ BENZÍNOVÝ DRTIČ VĚTVÍ
NOM DU PRODUIT BROYEUR DE VÉGÉTAUX À ESSENCE BROYEUR DE BOIS À ESSENCE
NOME DEL PRODOTTO CIPPATRICE DA GIARDINO A BENZINA TRITALEGNA A BENZINA
NOMBRE DEL PRODUCTO TRITURADORA DE JARDÍN A GASOLINA TRITURADORA DE MADERA A GASOLINA
MODELL
HT-HECTOR 212 HT-HECTOR 420
PRODUCT MODEL
MODEL PRODUKTU
MODEL VÝROBKU
MODÈLE
MODELLO
MODELO
NAME DES HERSTELLERS
EXPONDO POLSKA SP. Z O.O. SP. K.
MANUFACTURER NAME
NAZWA PRODUCENTA
NÁZEV VÝROBCE
NOM DU FABRICANT
NOME DEL PRODUTTORE
NOMBRE DEL FABRICANTE
ANSCHRIFT DES HERSTELLERS
UL. NOWY KISIELIN-INNOWACYJNA 7, 66-002 ZIELONA GÓRA | POLAND, EU
MANUFACTURER ADDRESS
ADRES PRODUCENTA
ADRESA VÝROBCE
ADRESSE DU FABRICANT
INDIRIZZO DEL FORNITORE
DIRECCIÓN DEL FABRICANTE
3
11
18
26
33
41
48
DEUTSCH
ENGLISH
POLSKI
ČESKY
FRANÇAIS
ITALIANO
ESPAÑOL
INHALT | CONTENT | TREŚĆ | OBSAH | CONTENU | CONTENUTO | CONTENIDO DEBEDIENUNGSANLEITUNG
Das Produkt erfüllt die geltenden
Sicherheitsnormen.
Gebrauchsanweisung beachten.
Recycling-Produkt.
ACHTUNG! oder WARNUNG! oder HINWEIS! um
auf bestimmte Umstände aufmerksam zu machen
(Allgemeines Warnzeichen).
Gehörschutz benutzen.
Augenschutz benutzen.
Staubschutz benutzen (Schutz der Atemwege).
Handschutz benutzen.
Fußschutz benutzen
ACHTUNG! Warnung vor elektrischer Spannung!
HINWEIS: Halten Sie einen Sicherheitsabstand zu
Personen in der Nähe ein.
ACHTUNG: Es besteht die Gefahr, dass
Fremdkörper von der Maschine ausgeworfen
werden!
ACHTUNG! Scharfe Elemente. Gefahr von
Schnittverletzungen.
ACHTUNG! Warnung vor Einzugsgefahr
Halten Sie Hände oder Körperteile vom
Einfülltrichter, Trichter und der Auswurfrutsche
fern, wenn die Maschine in Betrieb ist.
Halten Sie sich während des Betriebs der Maschine
immer vom Auswurfbereich fern.
Rauchen Sie nicht in der Nähe des Geräts. Das
Gerät enthält brennbare Stoe.
Parameter –
Beschreibung Parámetro – Valor
Produktname Benzin
Gartenhäcksler Benzin
Holzhäcksler
Modell HT-HECTOR 212 HT-HECTOR 420
Akkumulator 12V / 9 Ah
Motorleistung
[PS] 715
Motortyp 4-Takt-OHV
Anlasser Elektrisch / Häcksler
Motorleistung
[cm3]212 420
Motordrehzahl
[U/min] 3600
Blattgeschwindig-
keit [U/min] 2400
Art des
Antriebsriemens Einzelriemen
mit V-Prol
(1041mm)
2 x V-Riemen
(1727 Li, 1767 Lw)
Volumen des
Treibstotanks [l] 3,6 5
Kraftstoart Bleifreies Benzin
Kraftstoverbrauch
[l/h] 1,4 4
Volumen des
Öltanks [l] 0,6 1,1
Maximaler
Durchmesser der
im Ladetrichter
zerquetschten
Äste [mm]
Ф10 ф 100
Maximaler
Durchmesser der
im zusätzlichen
Ladetrichter
zerquetschten
Äste [mm]
Ф 70 -
Schallleistungs-
wert LWA
97 106
Schalldruckpegel
LpA
77 86
Abmessungen
[mm] 1330÷1660x890
x870 142x68x121,5
Radgröße [”] 10 13
Gewicht [kg] 78 156,5
TECHNISCHE DATEN
1. ALLGEMEINE BESCHREIBUNG
Diese Anleitung ist als Hilfe für eine sichere und zuverlässige
Nutzung gedacht. Das Produkt wurde strikt nach den
technischen Vorgaben und unter Verwendung modernster
Technologien und Komponenten sowie unter Wahrung der
höchsten Qualitätsstandards entworfen und angefertigt.
Für einen langen und zuverlässigen Betrieb des Geräts
muss auf die richtige Handhabung und Wartung
entsprechend den in dieser Anleitung angeführten
Vorgaben geachtet werden. Die in dieser Anleitung
angegebenen technischen Daten und die Spezikation sind
aktuell. Der Hersteller behält sich das Recht vor, im Rahmen
der Verbesserung der Qualität Änderungen vorzunehmen.
Unter Berücksichtigung des technischen Fortschritts und
der Geräuschreduzierung wurde das Gerät so entworfen
und produziert, dass das infolge der Geräuschemission
entstehende Risiko auf dem niedrigsten Niveau gehalten
wird.
ERLÄUTERUNG DER SYMBOLE
VOR INBETRIEBNAHME MUSS DIE ANLEITUNG
GENAU DURCHGELESEN UND VERSTANDEN
WERDEN
Die originale Anweisung ist die deutschsprachige Fassung.
Sonstige Sprachfassungen sind Übersetzungen aus der
deutschen Sprache.
HINWEIS!In der vorliegenden Anleitung sind
Beispielbilder vorhanden, die von dem tatsächlichen
Aussehen das Produkt abweichen können.

18.12.2018 18.12.2018
4 5
DEDE
f) Reparatur und Wartung von Geräten dürfen nur
von qualiziertem Fachpersonal und mit Original-
Ersatzteilen durchgeführt werden. Dadurch wird die
Sicherheit bei der Nutzung gewährleistet.
g) Um die vorgesehene Betriebsintegrität des Gerätes
zu gewährleisten, dürfen die werksmäßig montierten
Abdeckungen oder Schrauben nicht entfernt werden.
h) Beim Transport und beim Verlegen des Gerätes
vom Aufbewahrungsort zum Einsatzort sind
die Sicherheits – und Hygienevorschriften für
die manuelle Handhabung für das Land zu
berücksichtigen, in dem das Gerät verwendet wird.
i) Vermeiden Sie Situationen, in denen das Gerät bei
laufendem Betrieb unter schwerer Last stoppt. Dies
kann zu einer Überhitzung der Antriebskomponenten
und damit zu einer Beschädigung des Gerätes
führen.
j) Berühren Sie keine beweglichen Teile oder
Zubehörteile, es sei denn, das Gerät wurde vom Netz
getrennt.
k) Kippen oder transportieren Sie das Gerät nicht
während des Betriebs.
l) Lassen Sie das Gerät während des Betriebs nicht
unbeaufsichtigt. Schalten Sie die Maschine aus und
trennen Sie das Zündkerzenkabel, wenn Sie den
Einsatzbereich verlassen.
m) Das Gerät regelmäßig reinigen, damit sich kein
Schmutz auf Dauer festsetzen kann.
n) Das Gerät ist kein Spielzeug. Reinigung und Wartung
dürfen nicht von Kindern ausgeführt werden, wenn
diese nicht unter der Aufsicht von Erwachsenen
stehen.
o) Die Elemente der Entleerungsrustche oder andere
Teile nicht bei laufendem Motor einbauen, entfernen,
regulieren oder warten.
p) Halten Sie bei laufendem Motor alle Körperteile und
schweren Gegenstände vom Einfülltrichter (dem
Haupttrichter und dem zusätzlichen Trichter für HT-
HECTOR 212) sowie der Auswurfrutsche fern.
q) Stecken Sie keine Gliedmaßen bei laufender
Maschine in den Einfülltrichter und den Spanauswurf.
Gliedmaßen können eingezogen und/oder
abgetrennt werden.
r) Legen Sie kein Metall, Steine, Flaschen, Dosen und
andere Gegenstände, außer Panzen, in das Gerät.
s) Rotierende Schneidklingen in diesen Önungen
können bei Berührung schwere Verletzungen
verursachen.
t) Bleiben Sie während des Betriebs achtsam. Die
Maschine kann verarbeitetes Material aus dem
Einfülltrichter oder der Auswurfrutsche auswerfen.
u) Der Motor wird während des Betriebs sehr heiß.
Berühren Sie nicht den heißen Motor, da dies zu
Verbrennungen führen kann.
v) Halten Sie Blätter, Gras und andere brennbare
Materialien vom heißen Motor und den
Schalldämpfern fern, um die Gefahr eines Brands zu
vermeiden.
w) Arbeiten Sie nicht auf Gehwegen, Kies oder anderen
harten Oberächen, da Gegenstände abprallen und
Verletzungen verursachen können.
x) Einige Baumarten können allergische Reaktionen
auslösen. Der während der Verarbeitung austretende
Staub kann schädlich sein; treen Sie geeignete
Schutzmaßnahmen.
y) Entfernen Sie die Verriegelungen des Geräts nicht
mit den Händen.
z) Nehmen Sie das Gerät nicht auf unebenem Gelände
in Betrieb oder wenn das Gerät instabil ist.
aa) Achtung! Das verarbeitete Material kann vom
Einfülltrichter abprallen oder aus der Auswurfrutsche
ausgeworfen werden.
bb) Wenn der Motor aufgrund eines Staus zum Stillstand
gekommen ist, stellen Sie den Gashebel auf „Stopp“
oder stellen Sie den Schalter vor der Reinigung auf
„0“ (sofern ein solcher Schalter installiert ist).
cc) Wenn der Häcksler verstopft ist oder klemmt,
schalten Sie den Motor sofort aus und warten Sie,
bis alle beweglichen Teile vollständig zum Stillstand
gekommen sind, bevor Sie die Wartung durchführen.
dd) Legen Sie keine größeren Zweige als in den
technischen Daten angegeben in das Gerät ein.
ee) Stellen Sie sicher, dass der Einfülltrichter (der
Haupttrichter sowie der zusätzliche Trichter für
das Modell HT-HECTOR 212) leer ist, bevor Sie die
Maschine starten.
) Füllen Sie vor der Inbetriebnahme ausreichend Öl in
das Gerät ein. Bei zu niedrigem Ölstand startet der
Motor nicht oder stellt sich ab.
gg) Das Austreten von Serviceölen aus dem Gerät sollte
den entsprechenden Stellen gemeldet werden bzw.
halten Sie sich an die hierfür geltenden gesetzlichen
Bestimmungen.
hh) Gefahr! Gesundheitsgefährdung und
Explosionsgefahr des Verbrennungsmotors
ii) In den Motorabgasen bendet sich giftiges
Kohlenmonoxid. Ein Aufenthalt in einer
Kohlenmonoxid-Umgebung kann zu
Bewusstlosigkeit und sogar zum Tod führen. Lassen
Sie den Motor nicht in einem geschlossenen Raum
laufen.
jj) Schützen Sie den Motor vor Hitze, Funken und
Flammen. Rauchen Sie nicht in der Nähe des
Häckslers!
kk) Benzin ist leicht brennbar und explosiv. Vor dem
Auftanken sollte der Motor abgestellt werden und
abkühlen.
ll) Achtung! Gefahr von Motorschäden durch falschen
Kraftsto.
mm) Der Geräteakkumulator steht unter Strom. Berühren
Sie nicht die (Akkumulator-)Anschlüsse. Das Trennen
der Anschlüsse von dem Akkumulator sollte in der
richtigen Reihenfolge erfolgen.
b) Die Maschine darf nur durch entsprechend
geschulte, zur Bedienung geeignete und physisch
gesunde Personen bedient werden, die die
vorliegende Anleitung gelesen haben und die
Arbeitsschutzanforderungen kennen.
c) Die Maschine ist nicht dazu bestimmt, durch
Personen (darunter Kinder) mit eingeschränkten
physischen, sensorischen und geistigen Fähigkeiten
bzw. durch Personen ohne entsprechende Erfahrung
und/oder entsprechendes Wissen bedient zu
werden, es sei denn es gibt eine für ihre Aufsicht
und Sicherheit zuständige Person bzw. sie haben von
dieser Person entsprechende Hinweise in Bezug auf
die Bedienung der Maschine erhalten.
d) Seien Sie aufmerksam und verwenden Sie Ihren
gesunden Menschenverstand beim Betreiben
des Gerätes. Ein Moment der Unaufmerksamkeit
während der Arbeit kann zu schweren Verletzungen
führen.
e) Benutzen Sie persönliche Schutzausrüstung, die für
den Betrieb des Gerätes entsprechend den in Punkt 1
der Symbolerläuterungen vorgegebenen Maßgaben
erforderlich ist. Die Verwendung geeigneter
und zertizierter persönlicher Schutzausrüstung
verringert das Verletzungsrisiko.
f) Überschätzen Sie Ihre Fähigkeiten nicht. Halten Sie
Balance und Gleichgewicht während der Arbeit. Dies
gibt Ihnen eine bessere Kontrolle über das Gerät im
Falle unerwarteter Situationen.
g) Tragen Sie keine lose Kleidung oder Schmuck.
Halten Sie Haare, Kleidung und Handschuhe von
beweglichen Teilen fern. Lose Kleidung, Schmuck
oder lange Haare können durch bewegliche Teile
ergrien werden.
h) Entfernen Sie alle Einstellwerkzeuge oder Schlüssel,
bevor Sie das Gerät einschalten. Gegenstände, die
in rotierenden Teilen verbleiben, können zu Schäden
und Verletzungen führen.
i) Das Gerät ist kein Spielzeug. Kinder sollten unter
Aufsicht stehen, damit sie nicht mit dem Gerät
spielen.
2.3. SICHERE ANWENDUNG DES GERÄTS
a) Überhitzen Sie das Gerät nicht. Verwenden Sie
geeignete Werkzeuge für die entsprechende
Anwendung. Richtig ausgewählte Geräte und der
sorgsame Umgang mit ihnen führt zu besseren
Arbeitsergebnissen.
b) Benutzen Sie das Gerät nicht, wenn der EIN-/AUS-
Schalter nicht ordnungsgemäß funktioniert. Geräte,
die per Schalter nicht gesteuert werden können sind
gefährlich und müssen repariert werden.
c) Nicht verwendete Werkzeuge sind außerhalb
der Reichweite von Kindern sowie von Personen
aufzubewahren, welche weder das Gerät selbst, noch
die entsprechende Anleitung kennen. In den Händen
unerfahrener Personen können derlei Geräte eine
Gefahr darstellen.
d) Halten Sie das Gerät im einwandfreien Zustand.
Überprüfen Sie vor jeder Arbeit, ob allgemeine
Schäden vorliegen oder Schäden an beweglichen
Teilen (Bruch von Teilen und Komponenten oder
andere Bedingungen, die den sicheren Betrieb der
Maschine beeinträchtigen könnten). Im Falle eines
Schadens muss das Gerät vor Gebrauch in Reparatur
gegeben werden.
e) Halten Sie das Gerät außerhalb der Reichweite von
Kindern.
2.2. PERSÖNLICHE SICHERHEIT
a) Es ist nicht gestattet, das Gerät im Zustand der
Ermüdung, Krankheit, unter Einuss von Alkohol,
Drogen oder Medikamenten zu betreiben, wenn diese
die Fähigkeit das Gerät zu bedienen, einschränken.
Der Begri „Gerät“ oder „Produkt“ in den Warnungen und
Beschreibung des Handbuchs bezieht sich auf < Benzin
Gartenhäcksler, Benzin Holzhäcksler >. Benutzen Sie das
Gerät nicht in Räumen mit sehr hoher Luftfeuchtigkeit /
in unmittelbarer Nähe von Wasserbehältnissen! Lassen
Sie das Gerät nicht nass werden. Gefahr eines elektrischen
Schlags! Legen Sie keine Hände oder Gegenstände in das
laufende Gerät! Die Ventilationsönungen dürfen nicht
verdeckt werden!
2.1. SICHERHEIT AM ARBEITSPLATZ
a) Halten Sie Ihren Arbeitsplatz sauber und gut
beleuchtet. Unordnung oder schlechte Beleuchtung
können zu Unfällen führen. Seien Sie voraussichtig,
beobachten Sie, was getan wird und bewahren
Sie Ihren gesunden Menschenverstand bei der
Verwendung des Gerätes.
b) BenutzenSiedasGerätnichtinexplosionsgefährdeten
Bereichen, zum Beispiel in Gegenwart von
brennbaren Flüssigkeiten, Gasen oder Staub. Geräte
können unter Umständen Funken erzeugen, welche
Staub oder Dämpfe entzünden können.
c) Im Falle eines Schadens oder einer Störung sollte
das Gerät sofort ausgeschaltet und dies einer
autorisierten Person gemeldet werden.
d) Wenn Sie nicht sicher sind, ob das Gerät
ordnungsgemäß funktioniert, wenden Sie sich an
den Service des Herstellers.
e) Reparaturen dürfen nur vom Service des Herstellers
durchgeführt werden. Führen Sie keine Reparaturen
auf eigene Faust durch!
f) Zum Löschen des Gerätes bei Brand oder Feuer, nur
Pulver-Feuerlöscher oder Kohlendioxidlöscher (CO2)
verwenden.
g) Kinder und Unbefugte dürfen am Arbeitsplatz nicht
anwesend sein. (Unachtsamkeit kann zum Verlust der
Kontrolle über das Gerät führen).
h) Während des Betriebs produziert das Gerät Staub
und Schmutz. Unbeteiligte Personen müssen vor
ihren schädlichen Auswirkungen geschützt werden.
i) Im Falle einer Lebens – oder Gesundheitsgefahr,
eines Unfalls oder eines Ausfalls, stoppen Sie das
Gerät durch Drücken der NOT-STOPP-TASTE!
j) Überprüfen Sie regelmäßig den Zustand der
Sicherheitsinformationsaufkleber. Falls die Aufkleber
unleserlich sind, sollten sie ausgetauscht werden.
k) Bewahren Sie die Gebrauchsanleitung für den
weiteren Gebrauch auf. Sollte dieses Gerät
an Dritte weitergegeben werden, muss die
Gebrauchsanleitung mit ausgehändigt werden.
l) Halten Sie Kinder und andere Personen von der
Maschine fern.
m) Stellen Sie sicher, dass der Arbeitsplatz frei ist.
2. NUTZUNGSSICHERHEIT
ACHTUNG!Lesen Sie alle Sicherheitshinweise und
alle Anweisungen durch. Die Nichtbeachtung der
Warnungen und Anweisungen kann zu elektrischen
Schlägen, Feuer und / oder schweren Verletzungen
bis hin zum Tod führen.
HINWEIS!Kinder und Unbeteiligte müssen bei der
Arbeit mit diesem Gerät gesichert werden.
3. NUTZUNGSBEDINGUNGEN
Das Gerät ist für das Häckseln von Ästen, Büschen, Unkraut,
Trieben und langen Gräsern mit einem Durchmesser
bestimmt, der den in der Tabelle mit den technischen Daten
angegebenen Wert nicht überschreitet. Verwenden Sie das
Gerät nicht zum Häckseln von Bauschutt, Kunststoen,
Papierprodukten, Seilen oder Schnüren oder anderen
Materialien, die Metall enthalten können.
Achtung: Entfernen Sie alle Nägel, Seile, Schnüre oder
Steine, die an Panzen (z.B. an den Wurzeln) haften können,
bevor Sie das Material in das Gerät einführen.
Für alle Schäden bei nicht sachgemäßer Verwendung
haftet allein der Betreiber.
3.1. GERÄTEBESCHREIBUNG
ACHTUNG!Obwohl das Gerät mit dem Gedanken an
die Sicherheit entworfen wurde, besitzt es bestimmte
Schutzmechanismen. Trotz der Verwendung
zusätzlicher Sicherheitselemente besteht bei der
Bedienung immer noch ein Verletzungsrisiko. Es wird
empfohlen, bei der Nutzung Vorsicht und Vernunft
walten zu lassen.
ACHTUNG! Die Zeichnung von diesem
Produkt bendet sich auf der letzte Seite der
Bedienungsanleitung S.56.

18.12.2018 18.12.2018
6 7
DEDE
Nr. Teil Beschreibung
1Räder
2Große Unterlegscheibe
3M8x20 Schraube
4Mutter
5Unterlegscheibe
6Stützelemen
7M8x25 Schraube
8Rahmen
9Motor
10 Schneidelemente
11 Riemenabdeckung
12 Einfülltrichter
13 Auswurfrutsche
14 Achse
15 Trommelgehäuse des Schneidelements
16 Schraube
17 Unterlegscheibe
18 Mutter
Motoröl einfüllen
Stellen Sie die Maschine auf eine ebene Fläche und
schrauben Sie den Öltankdeckel ab.
3.3. ARBEIT MIT DEM GERÄT
ACHTUNG! Vor der Inbetriebnahme der Maschine Motoröl
und Kraftsto einfüllen. Das Gerät wird ohne Motoröl und
Kraftsto geliefert.
1. Stellen Sie das Gerät auf eine ebene, stabile
Oberäche, so dass die Auswurfrutsche in eine
sichere Richtung zeigt.
2. Prüfen Sie den Kraftsto – und Ölstand, bevor Sie die
Maschine in Betrieb nehmen.
3. Legen Sie den Auangbeutel auf die Auswurfrutsche
und sichern Sie ihn so, dass er nicht herunterfällt.
4. Stellen Sie sicher, dass der Haupt-Einfülltrichter
sowie der zusätzliche Einfülltrichter (betrit nicht das
Modell HT-HECTOR 420) leer sind. Bendet sich bei
Inbetriebnahme Material im Gerät, kann dies dazu
führen, dass der Anlasser plötzlich stoppt oder dass
das Gerät umkippt, was zu schweren Verletzungen
führen kann.
5. Stellen Sie die Drosselklappe auf die niedrigsten
Umdrehungen.
6. Stellen Sie sich auf die Seite des Einfülltrichters und
achten Sie auf eine stabile Position.
7. Stellen Sie das Kraftstoventil auf ON (siehe
Abbildung 4).
8. Stellen Sie den Sog-Schalthebel auf ON (siehe
Abbildung 5).
3
4 5
4.1
5.1
1. Montage des Einfülltrichters und der Auswurfrutsche
a) Setzen Sie die Radachse [14] in die Önung im
unteren Bereich des Rahmens ein und sichern Sie die
Verbindung, indem Sie die Achse mit der Schraube
festziehen, die sich in der Mitte der Önung bendet.
b) Befestigen Sie die Räder [1] mit der Schraube [3] und
der großen Unterlegscheibe [2] an der Achse [14].
c) Befestigen Sie das Stützelement [6] mit einer
Unterlegscheibe [5], einer Mutter [4] und Schrauben
[7] am Rahmen des Geräts.
2. Montage des Einfülltrichters
Um den Einfülltrichter zu montieren:
a) Führen Sie die Scharniere des Einfülltrichters [12] in
die Önungen im Gehäuse des Schneidelements [15]
ein und befestigen Sie sie mit den Schrauben auf der
anderen Seite.
b) Führen Sie die Scharniere der Auswurfrutsche [13] in
die Önungen im Gehäuse des Schneidelements [15]
ein und befestigen Sie sie mit den Schrauben auf der
anderen Seite.
3. Montage des Gris
a) Montieren Sie den Gri [16] mit Schrauben [16],
Unterlegscheiben [17] und Muttern [18] am Rahmen
[8].
1 2
1.1
1.2
2.1
3.2. VORBEREITUNG ZUM BETRIEB
ARBEITSSTELLE DES GERÄTES:
Das Gerät sollte außerhalb geschlossener Räume auf einer
stabilen, ebenen Fläche verwendet werden, vorzugsweise
auf Gras oder Erde. Stellen Sie die Maschine nicht auf Beton,
Asphalt oder andere harte Oberächen, da ausgestoßene
Späne und andere Rückstände von der Maschine abprallen
und eine Gefahr darstellen können.
Betriebsbedingung
Überprüfen Sie das zu häckselnde Material und stellen Sie
sicher, dass über dem Gerät genügend Platz zum Einlegen
des Materials vorhanden ist.
Wählen Sie Ihren Einsatzort so, dass sich dieser in der Nähe
des Ortes bendet, wo die Späne verwendet werden soll.
Dadurch wird der Transport von verarbeitetem Material auf
ein Minimum reduziert.
Halten Sie Sicherheitsabstand vom Spanauswurf. Stellen
Sie sicher, dass sich alle Unbeteiligten, Kinder, Tiere oder
Wertgegenstände in sicherem Abstand zum Spanauswurf
benden.
ACHTUNG! Starten Sie die Maschine erst dann, wenn
die Montage abgeschlossen ist. Andernfalls kann dies
zu schweren Verletzungen und Schäden am Gerät
führen. Berühren Sie während der Montage nicht die
Klingen des Geräts und halten Sie Ihre Hände nicht
in das Gerät.
b) Den Satz Räder montieren und die Verbindung mit
Schrauben sichern.
c) Bringen Sie das Gerät in eine waagerechte Position
und legen Sie die Trichterdichtung ein.
d) Setzen Sie den Einfülltrichter auf die Dichtung
und sichern Sie die Verbindung mit Schrauben,
Unterlegscheiben und Muttern.
e) Bringen Sie den Gri des Einfülltrichters an und
schrauben Sie ihn mit Unterlegscheiben und
Sicherungsschrauben fest.
f) Bringen Sie den zusätzlichen Trichter an der
seitlichen Önung des Geräts an und ziehen Sie ihn
mit Unterlegscheiben und Schrauben fest.
I
II
III
IV
V
HT-HECTOR 212
A. Einfülltrichter (ᴓ10 mm)
B. Motor
C. Auswurfrutsche
D. zusätzlicher Einfülltrichter (ᴓ70 mm)
E. Sog
F. Kraftstoventil
G. ON/OFF-Schalter / Zündschloss
H. Drosselklappe
I. Tankdeckel
J. Luftlter
K. Schalldämpfer
L. Anlassergri
M. Notschalter (im Bild nicht sichtbar)
HT-HECTOR 420
1. Gri
2. Motor
3. Abdeckung des Einfülltrichters
4. Einfülltrichter
5. Auswurfrutsche
6. Abdeckung für die Auswurfrutsche
7. Rad
8. Notausschalter
Beschreibung des Motors
A. Schalldämpfer
B. Luftlter
C. Drosselklappe
D. ON/OFF-Schalter / Zündschloss
E. Leitungsschutzschalter
F. Manueller Anlasser
G. Anlassergri
H. Kraftstohahn
I. Sog
J. Zündkerze
K. Kraftstotank
L. Tankdeckel
M. Motor des elektrischen Anlassers
N. Ölablassschraube
O. Bajonett
HT-HECTOR 212
a) Legen Sie die Geräte auf die Seite.
Achtung! Kippen Sie das Gerät nicht, wenn sich Öl
und/oder Kraftsto in den Tanks bendet, da diese
auslaufen können.
HT-HECTOR 420
ACHTUNG! Füllen Sie vor der Inbetriebnahme
des Geräts die Öl – und Kraftstotanks gemäß der
Bedienungsanleitung.
Füllen Sie das Motoröl bis zur obe-
ren Markierung am Ölmessstab auf.
Kraftsto einfüllen
Das Gerät wird von einem Viertaktmotor ange-
trieben, der mit bleifreiem Benzin betrieben wird.
Schrauben Sie den Tankdeckel ab und füllen Sie Benzin ein
(verwenden Sie einen Trichter, um Kraftsto einzufüllen).
Achten Sie darauf, dass die Flüssigkeit nicht verschüttet wird
oderder maximale Benzinstand nicht überschritten wird. Der
Tank sollte so gefüllt sein, dass der Kraftstolter sichtbar ist.
ACHTUNG! Füllen Sie vor der Inbetriebnahme
des Geräts die Öl – und Kraftstotanks gemäß der
Bedienungsanleitung.
ACHTUNG! Die Explosionszeichnungen von diesem
Produkt benden sich auf den letzten Seiten der
Bedienungsanleitung S.57.
AUFBAU DES GERÄTES

18.12.2018 18.12.2018
8 9
DEDE
Kraftstolter
Der Kraftstolter sollte nach je 150 Betriebsstunden oder
nach 3 Monaten überprüft werden. Den Kraftstolter
entfernen und reinigen. Schrauben Sie den Tankdeckel
ab, reinigen Sie ihn mit einem milden Reinigungsmittel in
Wasser, trocknen Sie ihn und setzen Sie ihn wieder auf.
• den technischen Zustand der Messer überprüfen
• den Motoröl – und Kraftstostand überprüfen
Motorwartung
Die Zündkerze sollte alle 50 Betriebsstunden einer
technischen Prüfung unterzogen werden. Überprüfen Sie
die Farbe des Rückstands am Ende der Kerze. Die Farbe
sollte braun sein. Entfernen Sie den Rückstand mit einer
harten Bürste. Überprüfen Sie den Abstand zwischen den
Elektroden und passen Sie ihn gegebenenfalls an. Der
korrekte Abstand beträgt 0,7 bis 0,8 mm.
Motoröl wechseln
Stellen Sie das Gerät auf eine ebene Fläche, schalten Sie
das Gerät ein und lassen Sie den Motor einige Minuten
warmlaufen. Schalten Sie das Gerät anschließend aus.
Schrauben Sie den Öltankdeckel ab. Stellen Sie einen
Behälter auf, um das Motoröl abzugießen. Schrauben Sie
die Ölablassschraube ab und lassen Sie alles Öl ab. Es
wird empfohlen, das Öl mithilfe eines Rohrs direkt in den
Altölbehälter zu leiten, damit kein Öl in den Geräterahmen
tropft. Ablassschraube, Dichtung, Deckel und Ring prüfen.
Falls etwas beschädigt oder abgenutzt ist, muss es ersetzt
werden. Die Ablassschraube zuschrauben. Füllen Sie nach
diesem Vorgang neues Öl bis zur oberen Markierung des
Messstabs.
Luftlter
Der Luftlter sollte auf seinen technischen Zustand
überprüft werden. Er sollte herausgedreht und gereinigt
oder durch einen neuen ersetzt werden. Der Filter sollte mit
Wasser und einem milden Reinigungsmittel gewaschen,
getrocknet und wieder angebracht werden. Den Motor
nicht mit demontierten Luftlter starten.
Akkumulatorwartung
Die in den Geräten installierten Akkumulatoren erfordern
kein Nachfüllen von Wasser und keine besondere Wartung
Es ist darauf zu achten, dass die Anschlüsse nicht von
Staub und Rost bedeckt werden. Korrosion kann dazu
führen, dass der Akkumulator unsachgemäß arbeitet und
somit ein Sicherheitsrisiko besteht. Wenn Sie Anzeichen
von Korrosion feststellen, trennen Sie die Anschlüsse vom
Akkumulator und entfernen Sie die Korrosion, indem Sie die
Anschlüsse mit Lauge reinigen. Hierbei handelt es sich um
eine Lösung aus Natron und Wasser (Natriumbicarbonat).
Fetten Sie die Anschlüsse vor dem Anschließen und
Festschrauben mit antioxidativem Fett.
Schmierung
Im Modell HT-HECTOR 420 sollten alle 50 Betriebsstunden
die Lager der Schneidelementwelle geschmiert werden.
Lagerung
Bevor Sie das Gerät lagern, sollten Sie wie folgt vorgehen:
1. Trennen Sie das Zündkerzenkabel, um ein
versehentliches Starten zu verhindern.
2. Reinigen Sie das Gerät und entsorgen Sie die Späne.
3. Lassen Sie das Gerät auf einer ebenen Fläche in
einem gut belüfteten Bereich außerhalb der direkten
Sonneneinstrahlung stehen.
4. Bewahren Sie das Gerät nicht an Orten auf, an denen
es Zündquellen gibt, wie z.B. einem Herd, einem Gas
– oder Elektroheizgerät usw.
5. Lagern Sie das Gerät nicht an Orten, an denen
Abgase und giftige Gase in die Wohnräume
gelangen können.
7. Setzen Sie die Abdeckungen auf die Einfülltrichter
und die Auswurfrutsche auf.
8. Wenn das Gerät länger als 30 Tage nicht benutzt
wird, entfernen Sie den Kraftsto aus dem Tank und
dem Vergaser.
Schrauben Sie die Zündkerze ab und gießen Sie ca.
5 ml Motoröl durch die Önung der Zylinderkerze.
Ziehen Sie den Anlasser mehrmals vorsichtig, dabei
sollte der Schalter auf OFF gestellt sein. Schrauben
Sie die Zündkerze ein und ziehen Sie am Anlasser,
bis ein Widerstand spürbar ist, und ziehen Sie nicht
weiter.
Transport
Während des Transports:
• Gerät ausschalten, Kraftstoventil schließen und
Zündkerzenkabel abziehen
• lassen Sie den gesamten Kraftsto aus dem
Kraftstotank ab
• setzen Sie die Abdeckung auf die Einfülltrichter und
die Auswurfrutsche auf
• transportieren Sie das Gerät in Betriebsposition
• transportieren Sie das Gerät zu kleinen Entfernungen,
indem Sie den Gri festhalten, das Gerät leicht
neigen und sein Gewicht auf die Räder legen.
11
11.1
12
12.1
3. Schalten Sie nach Beendigung der Arbeit die
Maschine aus, indem Sie den Motorschalter auf OFF
stellen. Entfernen Sie das Zündkerzenkabel, bevor
Sie das Gerät bewegen, den Beutel leeren, Blockaden
entfernen, Flüssigkeiten nachfüllen oder andere
Wartungs – oder Reparaturarbeiten durchführen.
10
14. Nach Abstellen des Motors sollten Sie den
Schalthebel für das Kraftstoventil auf OFF stellen.
Häckseln
ACHTUNG! Bevor Sie das Gerät starten, müssen Sie den
Gerätebetrieb ohne Material testen. Wenn das Gerät keine
verdächtigen Geräusche von sich gibt und keine Lecks
aufweist, können Sie weiterarbeiten.
1. Legen Sie das Material langsam in den Einfülltrichter
ein. Legen Sie nicht zu viel auf einmal ein. Schließen
Sie nach dem Einlegen des Materials die Abdeckung
des Einfülltrichters (gilt für das Modell HT-HECTOR
212).
2. Verwenden Sie bei Bedarf ein langes Stück des zu
häckselnden Materials, um die Ladung zu schieben.
ACHTUNG! Stecken Sie nicht Ihre Hände oder andere
Körperteile in den Einfülltrichter.
8 9
8.1 9.1
Gebrauchsanweisung
• Legen Sie das Material langsam ein. Wenn der Motor
ein ungewöhnliches Geräusch macht, wird das
Material zu schnell eingeführt.
• Wurzeln und andere schmutzige Materialien machen
die Messer stumpf und beschädigen sie.
• Späne muss häug vom Gerät entfernt werden.
Andernfalls kann sie eine Blockade verursachen.
• Vermeiden Sie das Häckseln von nassem Material, da
es das Gerät verstopfen kann. Wenn nasses Material
gehäckselt werden muss, sollte es vom trockenen
Material getrennt werden.
Material mithilfe des zusätzlichen Einfülltrichters häckseln
(nur Modell HT-HECTOR 212)
1. Kleine Zweige und Blätter entfernen. Dies erleichtert
das Einlegen des Materials in den zusätzlichen
Einfülltrichter.
2. Legen Sie das Material in den Einfülltrichter – mit
dem dickeren Ende nach unten – und lassen Sie
das Material einziehen. Das Material sollte in
Einzelstücken eingelegt werden.
3. Schalten Sie nach Beendigung der Arbeit die
Maschine aus, indem Sie den Motorschalter auf OFF
stellen.
Gebrauchsanweisung
• Legen Sie kein Material mit einem größeren
Durchmesser als in der Tabelle mit den technischen
Daten angegeben ein.
• Besser frisches, grünes Holz häckseln. Die Messer
bleiben länger scharf.
3.4. REINIGUNG UND WARTUNG
a) Vergewissern Sie sich, dass die Maschine vollständig
zum Stillstand gekommen ist und trennen Sie
das Zündkerzenkabel, bevor Sie einen Stau / eine
Verstopfung beheben, den Beutel entleeren, den
Kraftstotank auüllen oder Wartungs – oder
Reparaturarbeiten durchführen.
b) Verwenden Sie zum Reinigen der Oberäche
ausschließlich Mittel ohne ätzende Inhaltsstoe.
c) Lassen Sie nach jeder Reinigung alle Teile gut
trocknen, bevor das Gerät erneut verwendet wird.
d) Bewahren Sie das Gerät an einem trockenen, kühlen,
vor Feuchtigkeit und direkter Sonneneinstrahlung
geschütztem Ort auf.
e) Es ist untersagt die Maschine mit Wasserstrahlen zu
besprühen.
f) Man muss vermeiden, dass Wasser durch die
Belüftungsönungen am Gehäuse ins Innere
gelangt.
g) Die Belüftungsönungen sind mit Pinsel und
Druckluft zu reinigen.
h) Hinsichtlich der technischen Ezienz und eventueller
Schäden sollte eine regelmäßige Überprüfung des
Gerätes durchgeführt werden.
i) Zum Reinigen nutzen Sie bitte einen weichen
Lappen.
j) Bei einer Verschlechterung der Häckslerleistung
sollten die Klingen gedreht, geschärft oder
ausgetauscht werden.
k) Verwenden Sie eine Bürste oder einen Staubsauger,
um die auf dem Gerät und am Motor angesammelten
Späne zu entfernen.
l) Entfernen Sie nach Beendigung der Arbeiten alle
Rückstände in den Einfülltrichtern und in der
Auswurfrutsche.
Stützen Sie sich mit einer Hand am Motor ab (prüfen Sie
vorher, ob der Motor nicht heiß ist und lassen Sie ihn
ggf. abkühlen, bevor Sie diesen Schritt ausführen), ziehen
Sie mit der anderen Hand den Anlassergri langsam, bis
ein Widerstand spürbar ist, und ziehen Sie dann heftig.
Wiederholen Sie den Vorgang, wenn der Motor nicht
startet.
11. Wenn der Motor startet und ruhig läuft, stellen Sie
den Sog-Schalthebel auf OFF.
12. Bewegen Sie die Drosselklappe, um die
Motordrehzahl zu erhöhen oder zu verringern. Um
die Geschwindigkeit zu erhöhen, bewegen Sie den
Hebel in Richtung des Kaninchensymbols, um die
Geschwindigkeit zu reduzieren, bewegen Sie den
Hebel in Richtung des Schildkrötensymbols.
13. Um das Gerät auszuschalten, drehen Sie den
Motorschalter auf OFF.
9. Stellen Sie den Motorschalter auf ON oder starten
Sie den Motor mit dem Anlasser wie folgt:
67
6.1
Jedes Mal, wenn Sie das Gerät in Betrieb nehmen, sollten
Sie
• sicherstellen, dass keine losen, nicht abgeschraubten
oder beschädigten Teile vorhanden sind
• sich vergewissern, dass der Rahmen des Geräts nicht
beschädigt ist und keine Risse aufweist
13
13.1

18.12.2018 18.12.2018
10 11
DE ENUSER MANUAL
SICHERE ENTSORGUNG VON AKKUMULATOREN UND
BATTERIEN
Im Gerät werden folgende Batterien verwendet 12V / 9Ah.
Demontieren Sie verbrauchte Batterien aus dem Gerät,
indem Sie die gleiche Vorgehensweise wie bei der
Installation befolgen. Zur Entsorgung, geben Sie die
Batterien an die hierfür zuständige Einrichtung / Firma ab.
ENTSORGUNG GEBRAUCHTER GERÄTE
Dieses Produkt darf am Ende seiner Nutzungsdauer
nicht über den normalen Hausmüll entsorgt werden,
sondern muss an die Sammel – und Recyclinganlage für
Elektround Elektronikgeräte zurückgegeben werden.
Darüber informiert Sie das Symbol auf dem Produkt, auf
der Bedienungsanleitung oder der Verpackung. Die im
Gerät verwendeten Materialien sind entsprechend ihrer
Bezeichnung recyclebar. Mit der Wiederverwendung,
erneuten Nutzung von Materialien oder anderen
Formen des Gebrauchs von Gebrauchtgeräten leisten
Sie einen wichtigen Beitrag zum Schutz unserer
Umwelt. Informationen über die entsprechenden
Entsorgungspunkte erteilen Ihnen die lokalen Behörden.
The product satises the relevant safety standards.
Read instructions before use.
The product must be recycled.
WARNING! or CAUTION! or REMEMBER! Applicable
to the given situation (general warning sign).
Use ear protection. Exposure to loud noise may
result in hearing loss.
Wear protective goggles.
Wear a dust mask (respiratory tract protection).
Wear protective gloves.
Wear foot protection.
ATTENTION! Electric shock warning!
CAUTION: Observe a safe distance from nearby
bystanders.
CAUTION: There is the risk of ejection of objects
from the machine!
CAUTION! Sharp elements. Limb cut hazard.
ATTENTION! Revolving elements.
Keep hands or any body part away from the
hopper, funnel and outlet chute when the machine
is in operation.
Always stand away from the discharge zone when
operating the machine.
Do not smoke near the device. The device contains
ammable substances.
Parameter
description Parameter value
Product name Petrol Garden
Chipper Petrol Wood
Chipper
Model HT-HECTOR 212 HT-HECTOR 420
Battery 12V / 9 Ah
Engine power [hp] 715
Engine type OHV 4-stroke
Electric starter / drifting pad
Engine capacity
[cm3]212 420
Engine speed
[rpm] 3600
Blade speed [rpm] 2400
Drive belt type Single V-prole
belt 2 x V-prole belt
(1727 Li, 1767 Lw)
Fuel tank capacity
[l] 3.6 5
Fuel type Unleaded petrol
Fuel consumption
[l/h] 1.4 4
Oil tank capacity
[l] 0.6 1.1
Maximum
diameter of
shredded
branches in the
loading hopper
[mm]
Ф10 ф 100
Maximum
diameter of
shredded
branches in the
additional loading
hopper [mm]
Ф 70 -
Acoustic power
level LWA
97 106
Acoustic pressure
level LpA
77 86
Dimensions [mm] 1330÷1660x890
x870 142x68x121,5
Wheel size [”] 10 13
Weight [kg] 78 156.5
TECHNICAL DATA
1. GENERAL DESCRIPTION
The user manual is designed to assist in the safe and
trouble-free use of the device. The product is designed and
manufactured in accordance with strict technical guidelines,
using state-of-the-art technologies and components.
Additionally, it is produced in compliance with the most
stringent quality standards.
To increase the product life of the device and to ensure
trouble-free operation, use it in accordance with this user
manual and regularly perform maintenance tasks. The
technical data and specications in this user manual are
up to date. The manufacturer reserves the right to make
changes associated with quality improvement. The device
is designed to reduce noise emission risks to a minimum,
taking into account technological progress and noise
reduction opportunities.
LEGEND
DO NOT USE THE DEVICE UNLESS YOU HAVE
THOROUGHLY READ AND UNDERSTOOD THIS
USER MANUAL
The original operation manual is written in German. Other
language versions are translations from the German.
2. USAGE SAFETY
PLEASE NOTE!Drawings in this manual are for
illustration purposes only and in some details may
dier from the actual product.
ATTENTION!Read all safety warnings and all
instructions. Failure to follow the warnings and
instructions may result in electric shock, re and/or
serious injury or even death.

18.12.2018 18.12.2018
12 13
ENEN
o) Do not install, remove, adjust or service the discharge
screen of any other parts while the engine is running.
p) When the engine is running, keep all body parts and
heavy objects away from the loading hopper (main
and additional for HT-HECTOR 212) and the outlet
chute.
q) Do not insert the limbs into the loading hopper and
the chip outlet while the machine is running. It may
result in pulling in and/or cutting the limbs.
r) Do not feed metal, rocks, bottles, cans on any other
non-botanical objects into the machine.
s) Rotating cutting blades inside these openings will
cause serious personal injury if touched.
t) Be careful while working. The machine can eject
fragments of processed material from the loading
hopper or outlet chute.
u) The engine gets very hot during operation. Do not
touch the hot engine because it may cause burns.
v) In order to avoid re hazard, keep leaves, grass
and other combustible materials away from the hot
engine and muer.
w) Do not operate on pavement, gravel or other hard
surfaces since objects might ricochet and cause
injury.
x) Some tree species may cause an allergic reaction.
Dust coming out during branch processing may be
harmful, appropriate protective measures should be
taken.
y) Do not manually remove locks from the device
z) Do not operate on uneven ground or in case the unit
is unstable.
aa) Please note! The processed material may bounce
o the loading hopper or be ejected from the outlet
chute.
bb) If engine stalls because of jam, move throttle control
lever to stop position of shut o rocker to 0 if
equip¬ped before clearing.
cc) If the chipped shredder jams or becomes clogged,
shut o the engine immediately and wait for all
mo¬ving parts to stop completely before clearing.
dd) Do not insert branches larger than those specied in
the technical data into the machine.
ee) Make sure that the loading hopper (main and
additional for the HT-HECTOR 212) is empty before
starting the machine.
) Add oil till the full marking before start using the
device. If the oil level is low, engine will not start or it
might shut down.
gg) Oil leaking from the machine should be reported
to the appropriate services or comply with legal
requirements applicable in the area of use.
hh) Danger! Danger to health and the risk of explosion of
the internal combustion engine
ii) Poisonous carbon monoxide is present in the
engine exhaust. Remaining in a carbon monoxide
environment may lead to losing consciousness or
even death. Do not run the engine in a closed space.
jj) Protect the engine from heat, sparks and ame. Do
not smoke in the vicinity of the chipper!
kk) Petrol is ammable and explosive. Before refuelling
the engine should be turned o and cooled down
ll) Warning! Risk of engine damage due to wrong fuel.
mm) The battery is live. Do not touch the terminals and
battery connectors. Disconnecting the battery
connectors should be carried out in the correct
order.
3. USE GUIDELINES
The machine is designed for grinding branches, shrubs,
weeds, shoots and long grass with a diameter not
exceeding the value given in the technical data table. Do
not use the machine for grinding construction debris,
plastics, paper products, ropes or string or any material
which may contain metal.
PLEASE NOTE: Remove all nails, ropes, string or stones
which can be embedded in parts of the plant (e.g. in the
roots, etc.) before feeding the material into the machine.
The user is liable for any damage resulting from
unintended use of the device.
3.1. DEVICE DESCRIPTION
HT-HECTOR 212
A. Loading hopper (ᴓ10 mm)
B. Engine
C. Outlet chute
D. Additional loading hopper (ᴓ70 mm)
E. Choke
F. Fuel valve
G. ON/OFF switch/ignition switch
H. Throttle
I. Fuel tank cap
J. Air lter
K. Muer
L. Starter cable holder
M. Emergency switch (not in the picture)
HT-HECTOR 420
1. Handle
2. Engine
3. Loading hopper cover
4. Loading hopper
5. Outlet chute
6. Outlet chute cover
7. Wheel
8. Emergency stop switch
Description of the engine
A. Muer
B. Air lter
C. Throttle
D. ON/OFF switch/ignition switch
E. Circuit breaker
F. Manual starter
G. Starter cable holder
H. Fuel cock
I. Choke
J. Spark plug
K. Fuel tank
L. Fuel ller cap
M. Electric starter motor
N. Oil drain plug
O. Dipstick
e) Use personal protective equipment as required
for working with the device, specied in section 1
(Legend). The use of correct and approved personal
protective equipment reduces the risk of injury.
f) Do not overestimate your abilities. When using the
device, keep your balance and remain stable at all
times. This will ensure better control over the device
in unexpected situations.
g) Do not wear loose clothing or jewellery. Keep hair,
clothes and gloves away from moving parts. Loose
clothing, jewellery or long hair may get caught in
moving parts.
h) Remove all adjusting tools or spanners before
turning the device on. A tool or spanner left in the
revolving part of the device may cause injury.
i) The device is not a toy. Children must be supervised
to ensure that they do not play with the device.
2.3. SAFE DEVICE USE
a) Do not overload the device. Use the appropriate
tools for the given task. A correctly-selected device
will perform the task for which it was designed better
and in a safer manner.
b) Do not use the device if the ON/OFF switch does not
function properly (does not switch the device on and
o). Devices which cannot be switched on and o
using the ON/OFF switch are hazardous, should not
be operated and must be repaired.
c) When not in use, store in a safe place, away from
children and people not familiar with the device who
have not read the user manual. The device may pose
a hazard in the hands of inexperienced users.
d) Keep the device in perfect technical condition.
Before each use check for general damage and
especially check for cracked parts or elements and
for any other conditions which may impact the safe
operation of the device. If damage is discovered,
hand over the device for repair before use.
e) Keep the device out of the reach of children.
f) Device repair or maintenance should be carried out
by qualied persons, only using original spare parts.
This will ensure safe use.
g) To ensure the operational integrity of the device, do
not remove factory-tted guards and do not loosen
any screws.
h) When transporting and handling the device between
the warehouse and the destination, observe the
occupational health and safety principles for manual
transport operations which apply in the country
where the device will be used.
i) Avoid situations where the device stops working
during use due to excessive loading. This may result
in overheating of the drive elements and damage to
the device.
j) Do not touch articulated parts or accessories unless
the device has been disconnected from the power
source.
k) Do not tilt or transport the machine when it is in
operation.
l) Do not leave the machine unattended while it is
running. Shut down the machine and disconnect the
spark plug wire whenever you leave the work area.
m) Clean the device regularly to prevent stubborn grime
from accumulating.
n) The device is not a toy. Cleaning and maintenance
may not be carried out by children without
supervision by an adult person.
2.2. PERSONAL SAFETY
a) Do not use the device when tired, ill or under the
inuence of alcohol, narcotics or medication which
can signicantly impair the ability to operate the
device.
b) The machine may be operated by physically t
persons who are able to handle the machine, are
properly trained, who have reviewed this operating
manual and have received training in occupational
health and safety.
c) The machine is not designed to be handled by
persons (including children) with limited mental
and sensory functions or persons lacking relevant
experience and/ or knowledge unless they are
supervised by a person responsible for their safety or
they have received instruction on how to operate the
machine.
d) When working with the device, use common sense
and stay alert. Temporary loss of concentration while
using the device may lead to serious injuries.
The terms „device“ or „product“ are used in the warnings
and instructions to refer to < Petrol Garden Chipper, Petrol
Wood Chipper>. Do not use in very humid environments or
in the direct vicinity of water tanks. Prevent the device from
getting wet. Risk of electric shock! Do not put your hands
or other items inside the device while it is in use! Do not
cover the ventilation openings!
2.1. ELECTRICAL SAFETY
a) Make sure the workplace is clean and well lit. A messy
or poorly lit workplace may lead to accidents. Try
to think ahead, observe what is going on and use
common sense when working with the device.
b) Do not use the device in a potentially explosive
environment, for example in the presence of
ammable liquids, gases or dust. The device
generates sparks which may ignite dust or fumes.
c) If you discover damage or irregular operation,
immediately switch the device o and report it to
a supervisor without delay.
d) If there are any doubts as to the correct operation
of the device, contact the manufacturer‘s support
service.
e) Only the manufacturer‘s service point may repair the
device. Do not attempt any repairs independently!
f) In case of re, use a powder or carbon dioxide
(CO2) re extinguisher (one intended for use on live
electrical devices) to put it out.
g) Children or unauthorised persons are forbidden to
enter a work station. (A distraction may result in loss
of control over the device).
h) The device produces dust and debris during
operation. It is important to protect bystanders from
their harmful eects.
i) Use the EMERGENCY STOP if there is a risk of injury
or death, accident or damage.
j) Regularly inspect the condition of the safety labels. If
the labels are illegible, they must be replaced.
k) Please keep this manual available for future
reference. If this device is passed on to a third party,
the manual must be passed on with it.
l) Keep children and others away from the operation
area.
m) Make sure that the workspace is open.
REMEMBER! When using the device, protect
children and other bystanders.
ATTENTION!Despite the safe design of the device
and its protective features, and despite the use of
additional elements protecting the operator, there
is still a slight risk of accident or injury when using
the device. Stay alert and use common sense when
using the device.
ATTENTION! This product‘s view can be found on the
last pages of the operating instructions (pp. 56).

18.12.2018 18.12.2018
14 15
ENEN
Part number Description
1Wheels
2Large washer
3M8x20 screw
4Nut
5Washer
6Support
7M8x25 screw
8Frame
9Engine
10 Cutting elements
11 Belt cover
Adding engine oil to the oil tank
Place the machine on a at surface and unscrew the oil tank
cap.
3.3. DEVICE USE
PLEASE NOTE! Before starting the machine, pour motor oil
and fuel. The The machine is delivered without engine oil
or fuel.
1. Place the machine on an even, stable surface with
the outlet chute pointing in a safe direction.
2. Check the fuel and oil levels before starting the
machine.
3. Put the collecting bag on the outlet chute and secure
it so that it does not fall.
4. Make sure that the main hopper and the additional
loading hopper (not the HT-HECTOR 420 model) are
empty. If there is any material in the machine during
start-up, it may cause the starter cord to suddenly
lock or the machine may overturn, causing serious
injury.
5. Set the throttle to the lowest speed.
6. Stand on the side of the loading hopper, standing
steady.
7. Set the fuel valve to the ON position (see gure 4).
8. Set the choke lever to the ON position (see g. 5).
3
4 5
4.1
5.1
1. Loading hopper and outlet outlet chute assembly
a) Insert the wheel axle [14] into the opening in the
bottom of the frame and secure the connection by
pressing the axle with the screw in the centre of the
opening.
b) Mount the wheels [1] on the axle [14] using the screw
[3] and the large washer [2].
c) Mount the support [6] to the frame of the machine
using a washer [5], a nut [4] and screws [7].
2. Assemble the loading hopper
In order to assemble the loading hopper
a) Insert the loading hopper hinges [12] into the holes
in the housing on the cutting element [15] and x it
with screws on the other side.
b) Slide the outlet chute hinges [13] into the holes in
the cutting element housing of [15] and x it with
screws on the other side.
3. Handle assembly
a) Fix the handle [16] to the frame [8] using screws [16],
washers [17] and nuts [18].
Refuelling
The machine is driven by a four-stroke engine powered by
unleaded petrol. Unscrew the fuel tank cap and pour the
petrol (use a funnel), taking care not to spill the liquid or
exceed the maximum petrol level. The tank should be lled
to a level not blocking the fuel lter visibility.
PLEASE NOTE! Before starting the machine, ll
the oil and fuel tanks according to the operating
instructions.
Rell the engine oil up to the top level on the dipstick.
1 2
1.1
1.2
2.1
3.2. PREPARING FOR USE
APPLIANCE LOCATION
The machine should be used outside closed spaces, on
a stable, level surface, preferably on grass or on the ground.
Do not place the machine on concrete, tarmac on other
hard surfaces, because chips and other residue ejected by
the machine may bounce o and cause a hazard.
Work conditions
Inspect the material which is to be shredded and make
sure there is enough space above the machine to load the
material.
It is recommended to choose a place of work as close
as possible to the place where the chips are used. This
will reduce the need to carry the processed material to
a minimum.
Keep a safe distance from the chip discharge area. Ensure
which all bystanders, children, animals or valuables are also
at a safe distance from the chip discharge area.
ASSEMBLING THE APPLIANCE
PLEASE NOTE! Do not attempt to start the machine
until the assembly has been completed. It can cause
serious injury, and damage to the machine. During
assembly, do not touch the blades of the machine
and do not place your hands inside the machine.
b) Fit the wheel set and secure the joint with screws.
c) Put the machine in a horizontal position and put the
hopper gasket.
d) Place the loading hopper onto the gasket and secure
the connection with bolts, washers and nuts.
e) Mount the loading hopper holder and screw it on
using washers and locking screws.
f) Attach the additional hoper to the side opening of
the machine and tighten it with washers and screws.
HT-HECTOR 420
PLEASE NOTE! Before starting the machine, ll
the oil and fuel tanks according to the operating
instructions.
I
II
III
IV
V
HT-HECTOR 212
a) Lay the machine on its side.
Please note! Please note Do not tilt the machine if
oil and/or fuel are in the tanks because they can spill
out.
Part number Description
12 Loading hopper
13 Outlet chute
14 Axle
15 Cutting element drum housing
16 Screw
17 Washer
18 Nut
14. When the engine has stopped, move the fuel valve
lever to the OFF position.
Shredding
PLEASE NOTE! Before starting work with the machine, it is
necessary to test its operation without the ground material.
If the machine does not make any suspicious sounds and
there are no leaks, you can continue working.
1. Slowly insert the material into the loading hopper. Do
not put too much at the same time. After inserting
the material, close the cover on the loading hopper
(applies to the HT-HECTOR 212 model).
2. If necessary, use a long piece of shredded material to
push the batch.
PLEASE NOTE! Do not put your hands or other parts
of your body into the hopper.
8 9
8.1 9.1
9. Set the engine switch to the ON position or start the
engine with the cord, as follows:
Place your hand rmly on the engine (check beforehand
that the engine is not hot and if it is, allow it to cool before
taking this step), pull the starter cord handle slowly with the
other hand until you feel resistance, then pull the cord hard.
If the engine does not start, repeat the procedure.
11. When the engine starts and runs smoothly, move the
choke lever to the OFF position.
12. To increase or decrease the engine speed, adjust
the throttle. To increase the speed, move the grip
towards the rabbit image to reduce the speed, move
the grip towards the turtle image.
13. To turn the machine o, turn the engine switch to the
OFF position.
67
6.1
10
ATTENTION! This product’s exploded view can be
found on the last pages of the operating instructions
(pp. 57).

18.12.2018 18.12.2018
16 17
ENEN
Fuel lter
The fuel lter should be inspected after every 150 hours of
operation or after 3 months of use. Remove and clean the
fuel lter. Unscrew the fuel tank cap, clean it in water with
a mild detergent, dry and replace it.
Engine maintenance
The spark plug should undergo a technical inspection
after every 50 hours of operation. Check the colour of the
deposit at the end of the spark plug. The colour should be
brown. Remove the residue using a hard brush. Check the
distance between the electrodes and adjust it if necessary.
The correct distance is 0.7 to 0.8 mm.
Replacing the engine oil
Place the machine on a at surface, switch it on and warm
up the engine for a few minutes. Unscrew the oil tank cap.
Unscrew the oil tank cap. Place a container to collect the
waste oil underneath the engine. Remove the oil drain
screw and drain all the oil. To protect against oil dripping
into the frame of the machine, it is recommended to use
a pipe to bring the oil directly into the waste oil container.
Check the drain screw, gasket, oil plug and ring. If these
parts are damaged or worn, they must be replaced. Replace
and tighten the drain screw. After this operation, add fresh
oil to the upper level on the dipstick.
Air lter
The air lter should be inspected for technical condition. It
should be unscrewed and cleaned or replaced with a new
one. The lter should be washed with water and a mild
detergent, dried and replaced. Do not start the engine with
the air lter disassembled.
Cover the terminals with antioxidant grease before
reconnecting and tightening them.
Lubrication
In the HT-HECTOR 420 every 50 working hours, the cutting
element shaft bearings should be lubricated.
Storage
Before storing the machine, remember to do the following.
1. Disconnect the spark plug wire to prevent accidental
start.
2. Clean the machine and dispose of the chips.
3. Leave the machine on a at surface in a well-
ventilated room out of reach of direct sunlight.
4. Do not store the machine with ignition sources
present, such as a stove, gas or electric heater, etc.
5. Do not store the machine in places where exhaust or
toxic gases can enter the living quarters.
7. Put the covers on the loading hopper and outlet
chute.
8. If the machine is not to be used for more than 30
days, drain the tank and the carburettor.
Unscrew the spark plug and pour approximately 5
ml of engine oil through the cylinder plug hole. With
the switch in the OFF position, gently pull the starter
cord several times. Screw back the spark plug and
pull the starter cord until you feel resistance, and do
not pull any more.
Transport
During transport:
• switch o the machine, close the fuel valve and
disconnect the spark plug wire
• drain the fuel tank
• put the covers on the loading hopper and outlet
chute
• transport the machine in the working position
• transport the machine across small distances holding
it by the handle, slightly tilting the machine and
resting its weight on the wheels
SAFE REMOVAL OF BATTERIES AND RECHARGEABLE
BATTERIES
12V / 9Ah batteries are installed in the devices. Remove
used batteries from the device using the same procedure
by which you installed them. Recycle batteries with the
appropriate organisation or company.
DISPOSING OF USED DEVICES
Do not dispose of this device in municipal waste systems.
Hand it over to an electric and electrical device recycling
and collection point. Check the symbol on the product,
instruction manual and packaging. The plastics used
to construct the device can be recycled in accordance
with their markings. By choosing to recycle you are
making a signicant contribution to the protection of our
environment. Contact local authorities for information on
your local recycling facility.
11
11.1
12
12.1
13
13.1
3. When you have nished work, switch o the machine
by turning the engine switch to the OFF position.
Disconnect the spark plug wire before moving the
machine, emptying the bag, removing locks, relling
the uids, or other maintenance or repair work.
Directions for use
• Load the material slowly. If the engine makes an
unusual noise, it means which the material is loaded
too quickly.
• Roots and other dirty materials will dull and damage
the knives.
• Remember to frequently remove chips from the
machine. Otherwise they can cause a blockage.
• Avoid grinding wet material as it may clog the
machine. If grinding the wet material is necessary, it
should be separated from the dry material.
Grinding the material through the additional loading
hopper (HT-HECTOR 212 only)
1. Remove small twigs and leaves. This will facilitate
inserting the material into the additional hopper.
2. Insert the material into the hopper – add the thicker
end downwards and let the material get caught up.
The material should be loaded piece by piece.
3. When you have nished work, switch o the machine
by turning the engine switch to the OFF position.
Directions for use
• Do not insert material with a diameter larger than the
one given in the technical data table.
• It is better to shred crush fresh green wood. The
knives will stay sharp longer.
3.4. CLEANING AND MAINTENANCE
a) Make sure the machine has stopped completely and
disconnect the spark plug wire, before letting free
a jam or clog, emptying the bag, lling the gas tank
or performing any maintenance or repairs.
b) Use only non-corrosive cleaners to clean the surface.
c) After cleaning the device, all parts should be dried
completely before using it again.
d) Store the unit in a dry, cool place, free from moisture
and direct exposure to sunlight.
e) Never spray the device with water.
f) Do not allow water to get inside the device through
vents in the housing of the device.
g) Clean the vents with a brush and compressed air.
h) The device must be regularly inspected to check its
technical eciency and spot any damage.
i) Use a soft cloth for cleaning.
j) In case of deterioration of the eciency of grinding,
the blades should be rotated, sharpened or replaced.
k) Clean the chips which have accumulated on the
machine and around the motor with a brush or
vacuum cleaner.
l) When you have nished work, always remove all
leftovers from loading hoppers and outlet chute.
Every time you start the machine:
• Check which there are no loose, not properly
tightened or damaged parts
• Check which the frame of the machine is not
damaged and has no cracks
• Check the technical condition of the blades
• Check the condition of the engine oil and fuel
Battery maintenance
Batteries installed in the machines do not require relling or
special maintenance. Make sure that the terminals are not
covered with dust and rust. Corrosion can cause improper
battery operation and may be dangerous. If you notice
any signs of corrosion, disconnect terminals and remove
the rust cleaning the terminals and connectors with lye –
a solution of baking soda and water (sodium bicarbonate).

18.12.2018 18.12.2018
18 19
PL INSTRUKCJA OBSŁUGI PL
Produkt spełnia wymagania odpowiednich norm
bezpieczeństwa.
Przed użyciem należy zapoznać się z instrukcją.
Produkt podlegający recyklingowi.
UWAGA! lub OSTRZEŻENIE! lub PAMIĘTAJ! opisująca
daną sytuację (ogólny znak ostrzegawczy).
Stosować ochronę słuchu. Narażenie na hałas
może powodować utratę słuchu.
Założyć okulary ochronne.
Stosować maskę przeciwpyłową (ochrona dróg
oddechowych).
Stosować rękawice ochronne.
Stosować ochronę stóp.
UWAGA! Ostrzeżenie przed porażeniem prądem
elektrycznym!
UWAGA: Przestrzegać bezpiecznej odległości od
znajdujących się w pobliżu osób postronnych.
UWAGA: Istnieje ryzyko wyrzucenia ciał obcych
przez urządzenie!
UWAGA! Ostre elementy. Niebezpieczeństwo
obcięcia kończyn.
UWAGA! Wirujące elementy!
Trzymać ręce lub jakąkolwiek część ciała z dala
od leja, lejka i rynny wylotowej, gdy maszyna jest
w użyciu.
Zawsze należy trzymać się z dala od strefy
wyrzutowej w trakcie pracy maszyny.
Zakaz palenia w pobliżu urządzenia. Urządzenie
zawiera łatwopalne substancje.
Opis parametru Wartość parametru
Nazwa produktu RĘBAK SPALINOWY
Model HT-HECTOR 212 HT-HECTOR 420
Akumulator 12V / 9 Ah
Moc silnika [KM] 715
Typ silnika OHV 4-suwowy
Rozrusznik Elektryczny/szarpak
Pojemność silnika
[cm3]212 420
Prędkość
obrotowa silnika
[obr/min]
3600
Prędkość ostrzy
[obr/min] 2400
Typ paska
napędowego Pojedynczy
pasek o prolu
V (1041mm)
2 x pasek
o prolu V
(1727 Li, 1767 Lw)
Pojemność
zbiornika paliwa [l] 3,6 5
Typ paliwa Benzyna bezołowiowa
Zużycie paliwa [l/h] 1,4 4
Pojemność
zbiornika oleju [l] 0,6 1,1
Maksymalna
średnica gałęzi
rozdrabnianych
w leju
załadowczym
[mm]
Ф10 ф 100
Maksymalne
rozmiar
rozdrabnianych
gałęzi [mm]
Ф 70 -
Poziom mocy
akustycznej LWA
97 106
Poziom ciśnienia
akustycznego LpA
77 86
Wymiary [mm] 1330÷1660x890
x870 142x68x121,5
Wielkość kół [”] 10 13
Ciężar [kg] 78 156,5
Dla zapewnienia długiej i niezawodnej pracy urządzenia
należy dbać o jego prawidłową obsługę oraz konserwację
zgodnie ze wskazówkami zawartymi w tej instrukcji. Dane
techniczne i specykacje zawarte w tej instrukcji obsługi są
aktualne. Producent zastrzega sobie prawo dokonywania
zmian związanych z podwyższeniem jakości. Uwzględniając
postęp techniczny i możliwość ograniczenia hałasu,
urządzenie zaprojektowano i zbudowano tak, aby ryzyko
jakie wynika z emisji hałasu ograniczyć do najniższego
poziomu.
OBJAŚNIENIE SYMBOLI
1. OGÓLNY OPIS
Instrukcja przeznaczona jest do pomocy w bezpiecznym
i niezawodnym użytkowaniu. Produkt jest zaprojektowany
i wykonany ściśle według wskazań technicznych przy
użyciu najnowszych technologii i komponentów oraz przy
zachowaniu najwyższych standardów jakości.
Instrukcją oryginalną jest niemiecka wersja instrukcji.
Pozostałe wersje językowe są tłumaczeniami z języka
niemieckiego.
2. BEZPIECZEŃSTWO UŻYTKOWANIA
PRZED PRZYSTĄPIENIEM DO PRACY NALEŻY
DOKŁADNIE PRZECZYTAĆ I ZROZUMIEĆ NINIEJSZĄ
INSTRUKCJĘ
DANE TECHNICZNE
UWAGA! Ilustracje w niniejszej instrukcji obsługi
mają charakter poglądowy i w niektórych szczegółach
mogą różnić się od rzeczywistego wyglądu produktu.
UWAGA! Przeczytać wszystkie ostrzeżenia
dotyczące bezpieczeństwa oraz wszystkie instrukcje.
Niezastosowanie się do ostrzeżeń i instrukcji może
spowodować porażenie prądem, pożar i/lub ciężkie
obrażenia ciała lub śmierć.
o ograniczonych funkcjach psychicznych,
sensorycznych i umysłowych lub nieposiadające
odpowiedniego doświadczenia i/lub wiedzy, chyba
że są one nadzorowane przez osobę odpowiedzialną
za ich bezpieczeństwo lub otrzymały od niej
wskazówki dotyczące tego, jak należy obsługiwać
maszynę.
d) Należy być uważnym, kierować się zdrowym
rozsądkiem podczas pracy urządzeniem. Chwila
nieuwagi podczas pracy, może doprowadzić do
poważnych obrażeń ciała.
e) Należy używać środków ochrony osobistej
wymaganych przy pracy urządzeniem
wyszczególnionych w punkcie 1 objaśnienia symboli.
Stosowanie odpowiednich, atestowanych środków
ochrony osobistej zmniejsza ryzyko doznania urazu.
f) Nie należy przeceniać swoich możliwości.
Utrzymywać balans i równowagę ciała przez cały czas
pracy. Umożliwia to lepszą kontrolę nad urządzeniem
w nieoczekiwanych sytuacjach.
g) Nie należy nosić luźnej odzieży ani biżuterii. Włosy,
odzież i rękawice utrzymywać z dala od części
ruchomych. Luźna odzież, biżuteria lub długie włosy
mogą zostać chwycone przez ruchome części.
h) Należy usunąć wszelkie narzędzia regulujące lub
klucze przed włączeniem urządzenia. Narzędzie
lub klucz pozostawiony w obracającej się części
urządzenia może spowodować obrażenia ciała.
i) Urządzenie nie jest zabawką. Dzieci powinny być
pilnowane, aby nie bawiły się urządzeniem.
2.3. BEZPIECZNE STOSOWANIE URZĄDZENIA
a) Nie należy przeciążać urządzenia. Używać narzędzi
odpowiednich do danego zastosowania. Prawidłowo
dobrane urządzenie wykona lepiej i bezpieczniej
pracę dla którego zostało zaprojektowane.
b) Nie należy używać urządzenia, jeśli przełącznik ON/
OFF nie działa sprawnie (nie załącza i nie wyłącza
się). Urządzenia, które nie mogą być kontrolowane
za pomocą przełącznika są niebezpieczne, nie mogą
pracować i muszą zostać naprawione.
c) Nieużywane urządzenia należy przechowywać
w miejscu niedostępnym dla dzieci oraz osób
nieznających urządzenia lub tej instrukcji
obsługi. Urządzenia są niebezpieczne w rękach
niedoświadczonych użytkowników.
d) Utrzymywać urządzenie w dobrym stanie
technicznym. Sprawdzać przed każdą pracą czy
nie posiada uszkodzeń ogólnych lub związanych
z elementami ruchomymi (pęknięcia części
i elementów lub wszelkie inne warunki, które mogą
mieć wpływ na bezpieczne działanie urządzenia).
W przypadku uszkodzenia, oddać urządzenie do
naprawy przed użyciem.
e) Urządzenie należy chronić przed dziećmi.
f) Naprawa oraz konserwacja urządzeń powinna być
wykonywana przez wykwalikowane osoby przy
użyciu wyłącznie oryginalnych części zamiennych.
Zapewni to bezpieczeństwo użytkowania.
g) Aby zapewnić zaprojektowaną integralność
operacyjną urządzenia, nie należy usuwać
zainstalowanych fabrycznie osłon lub odkręcać śrub.
h) Przy transportowaniu i przenoszeniu urządzenia
z miejsca magazynowania do miejsca użytkowania
należy uwzględnić zasady bezpieczeństwa i higieny
pracy przy ręcznych pracach transportowych
obowiązujących w kraju, w którym urządzenia są
użytkowane.
PAMIĘTAJ! Należy chronić dzieci i inne osoby
postronne podczas pracy urządzeniem.
2.2. BEZPIECZEŃSTWO OSOBISTE
a) Niedozwolone jest obsługiwanie urządzenia
w stanie zmęczenia, choroby, pod wpływem
alkoholu, narkotyków lub leków, które ograniczają
w istotnym stopniu zdolności obsługi urządzenia.
b) Maszynę mogą obsługiwać osoby sprawne zycznie,
zdolne do jej obsługi i odpowiednio wyszkolone,
które zapoznały się z niniejszą instrukcją oraz zostały
przeszkolone w zakresie bezpieczeństwa i higieny
pracy.
c) Maszyna nie jest przeznaczona do tego, by była
użytkowana przez osoby (w tym dzieci)
Termin „urządzenie” lub „produkt” w ostrzeżeniach
i w opisie instrukcji odnosi się do < RĘBAK SPALINOWY >.
Nie należy używać urządzenia w pomieszczeniach o bardzo
dużej wilgotności / w bezpośrednim pobliżu zbiorników
z wodą! Nie wolno dopuszczać do zamoczenia urządzenia.
Ryzyko porażenia prądem! Nie wkładać rąk, przedmiotów
do wnętrza pracującego urządzenia! Nie wolno zasłaniać
otworów wentylacyjnych urządzenia!
2.1. BEZPIECZEŃSTWO W MIEJSCU PRACY
a) Utrzymywać porządek w miejscu pracy i dobre
oświetlenie. Nieporządek lub złe oświetlenie może
prowadzić do wypadków. Należy być przewidującym,
obserwować co się robi i zachowywać rozsądek
podczas używania urządzenia.
b) Nie używać urządzenia w stree zagrożenia
wybuchem, na przykład w obecności łatwopalnych
cieczy, gazów lub pyłów. Urządzenie wytwarzają
iskry, mogące zapalić pył lub opary.
c) W razie stwierdzenia uszkodzenia lub
nieprawidłowości w pracy urządzenia należy je
bezzwłocznie wyłączyć i zgłosić to do osoby
uprawnionej.
d) W razie wątpliwości czy urządzenia działa poprawnie,
należy skontaktować się z serwisem producenta.
e) Naprawy urządzenia może wykonać wyłącznie
serwis producenta. Nie wolno dokonywać napraw
samodzielnie!
f) W przypadku zaprószenia ognia lub pożaru, do
gaszenia urządzenia pod napięciem należy używać
wyłącznie gaśnic proszkowych lub śniegowych (CO2).
g) Na stanowisku pracy nie mogą przebywać dzieci
ani osoby nieupoważnione. (Nieuwaga może
spowodować utratę kontroli nad urządzeniem.)
h) Podczas pracy urządzeniem wytwarza się pył oraz
odłamki, zabezpieczyć osoby postronne przed ich
szkodliwym działaniem.
i) W przypadku zagrożenia życia lub zdrowia, wypadku
lub awarii zatrzymać urządzenie przyciskiem
WYŁĄCZNIK AWARYJNY!
j) Należy regularnie sprawdzać stan naklejek
z informacjami dotyczącymi bezpieczeństwa.
W przypadku gdy, naklejki są nieczytelne należy je
wymienić.
k) Zachować instrukcję użytkowania w celu jej
późniejszego użycia. W razie, gdyby urządzenie miało
zostać przekazane osobom trzecim, to wraz z nim
należy przekazać również instrukcję użytkowania.
l) Trzymać dzieci i inne osoby poza zasięgiem działania
maszyny.
m) Upewnić się, że miejsce pracy jest otwarte.

18.12.2018 18.12.2018
20 21
PL PL
i) Należy unikać sytuacji, gdy urządzenie podczas
pracy, zatrzymuje się pod wpływem dużego
obciążenia. Może spowodować to przegrzanie
się elementów napędowych i w konsekwencji
uszkodzenie urządzenia.
j) Nie wolno dotykać części lub akcesoriów ruchomych,
chyba że urządzenie zostało odłączone od zasilania.
k) Nie wolno przechylać ani transportować maszyny
w trakcie jej pracy.
l) Nie wolno pozostawiać urządzenia bez nadzoru
podczas pracy. Należy wyłączyć maszynę i odłączyć
przewód świecy zapłonowej zawsze, gdy obszar
roboczy ma zostać opuszczony.
m) Należy regularnie czyścić urządzenie, aby nie
dopuścić do trwałego osadzenia się zanieczyszczeń.
n) Urządzenie nie jest zabawką. Czyszczenie
i konserwacja nie mogą być wykonywane przez
dzieci bez nadzoru osoby dorosłej.
o) Nie należy instalować, usuwać, regulować ani
serwisować elementów rynny wyładowczej ani
żadnych innych części podczas pracy silnika.
p) Podczas pracy silnika wszystkie części ciała i ciężkie
przedmioty należy trzymać z dala od leja załadowczego
(głównego i dodatkowego w przypadku modelu HT-
HECTOR 212) i rynny wylotowej.
q) Nie wkładać kończyn do leja załadowczego oraz
do wylotu wiórów podczas pracy maszyny. Grozi to
wciągnięciem i/lub obcięciem kończyn.
r) Nie należy podawać do urządzenia metalu, skał,
butelek, puszek i żadnych innych przedmiotów
innych niż botaniczne.
s) Obracające się ostrza tnące wewnątrz tych otworów
mogą spowodować poważne obrażenia ciała
w przypadku dotknięcia.
t) Należy zachować uważność, podczas pracy. Maszyna
może wyrzucać kawałki obrabianego materiału z leja
załadowczego lub rynny wylotowej.
u) W trakcie pracy silnika ulega mocnemu nagrzaniu.
Nie dotykać rozgrzanego silnika ponieważ grozi to
poparzeniem.
v) Aby uniknąć ryzyka pożaru, utrzymuj liście, trawę i inne
palne materiały z dala od gorącego silnika i tłumika.
w) Nie należy pracować na chodnikach, żwirze lub
innych twardych powierzchniach, ponieważ
przedmioty mogą rykoszetować i spowodować
obrażenia.
x) Niektóre gatunki drzew mogą wywoływać reakcję
alergiczną. Pyły wydobywające się podczas obróbki
mogą być szkodliwe, należy stosować odpowiednie
środki ochronny.
y) Nie wolno usuwać blokad z urządzenia za pomocą
rąk.
z) Nie należy pracować na nierównym terenie lub
w przypadku niestabilności urządzenia.
aa) Uwaga! Przetwarzany materiał może odbić się od leja
załadowczego lub być wyrzucony z rynny wylotowej.
bb) Jeśli silnik zgaśnie z powodu zacięcia, przesunąć
dźwignię przepustnicy do pozycji „stop” lub wyłączyć
wyłącznikiem do pozycji „0” (jeśli taki wyłącznik jest
zamontowany) przed czyszczeniem.
cc) Jeśli rozdrabniacz zostanie zatkany lub zablokuje się,
natychmiast wyłączyć silnik i poczekać, aż wszystkie
ruchome części zatrzymają się całkowicie przed
czyszczeniem.
dd) Nie wolno wkładać do urządzenia gałęzi o średnicy
większej niż podana w danych technicznych.
UWAGA! Pomimo iż urządzenie zostało
zaprojektowane tak aby było bezpieczne, posiadało
odpowiednie środki ochrony oraz pomimo użycia
dodatkowych elementów zabezpieczających
użytkownika, nadal istnieje niewielkie ryzyko
wypadku lub odniesienia obrażeń w trakcie pracy
z urządzeniem. Zaleca się zachowanie ostrożności
i rozsądku podczas jego użytkowania.
UWAGA! Rysunki produktu znajdują się na końcu
instrukcji (str. 56).
3. ZASADY UŻYTKOWANIA
Urządzenie przeznaczone jest do rozdrabniania gałęzi,
krzewów, chwastów, pędów i długich traw o średnicy
nieprzekraczającej wartości podanej w tabeli danych
technicznych. Nie używać urządzenia do rozdrabniania
gruzu budowlanego, plastiku, wyrobów papierniczych, lin
czy sznurków lub jakiegokolwiek materiału, który może
zawierać metal.
UWAGA: Usunąć wszystkie gwoździe, liny, sznurki lub
kamienie, które mogą być osadzone w częściach roślin
(np. w korzeniach itp.) przed wprowadzeniem materiału do
urządzenia.
Odpowiedzialność za wszelkie szkody powstałe
w wyniku użytkowania niezgodnego z przeznaczeniem
ponosi użytkownik.
3.1. OPIS URZĄDZENIA
HT-HECTOR 212
A. Lej załadowczy
B. Silnik
C. Rynna wylotowa
D. Lej dodatkowy załadowczy
E. Ssanie
F. Zawór paliwa
G. Włącznik ON/OFF / stacyjka
H. Przepustnica
I. Korek zbiornika paliwa
ee) Należy upewnić się, że lej załadowczy (główny
i dodatkowy w przypadku modelu HT-HECTOR 212)
jest pusty przed uruchomieniem maszyny.
) Przed włączeniem urządzenia należy dodać olej do
odpowiedniego poziomu. Jeśli poziom oleju jest zbyt
niski silnik nie uruchomi się lub może się wyłączyć.
gg) Wycieku olejów eksploatacyjnych z urządzenia należy
zgłosić odpowiednim służbom lub stosować się do
wymogów prawnych obowiązujących w obszarze
użytkowania.
hh) Niebezpieczeństwo! Zagrożenie dla zdrowia i ryzyko
wybuchu silnika spalinowego
ii) W spalinach silnika zawarty jest trujący tlenek węgla.
Przebywanie w środowisku zawierającym tlenek
węgla może prowadzić do utraty przytomności
a nawet do śmierci. Nie należy uruchamiać silnika
w pomieszczeniu zamkniętym.
jj) Chronić silnik od ciepła, iskier i płomienia. Nie palić
w pobliżu rębaka!
kk) Benzyna jest bardzo łatwopalna i wybuchowa. Przed
tankowaniem silnik powinien zostać wyłączony
i ostygnąć
ll) Ostrzeżenie! Ryzyko uszkodzenia silnika przez
niewłaściwe paliwo.
mm) Akumulator urządzenia znajduje się pod napięciem.
Nie wolno dotykać zacisków i złączy akumulatora.
Odłączanie złączy od akumulatora należy
przeprowadzać w odpowiedniej kolejności.
3.2. PRZYGOTOWANIE DO PRACY
UMIEJSCOWIENIE URZĄDZENIA
Urządzenie należy użytkować poza zamkniętymi
pomieszczeniami na stabilnym, poziomym, równym
podłożu, a najlepiej na trawie lub ziemi. Nie ustawiać
maszyny na batonie, asfalcie innych twardych
powierzchniach, ponieważ wióry oraz inne pozostałości
wyrzucone przez maszynę mogą odbić się od nich
i spowodować zagrożenie.
Warunku pracy
Przejrzeć materiał, który przeznaczony jest do rozdrabniania
i upewnić, że nad urządzeniem jest odpowiednio dużo
miejsca, aby ładować materiał. Zaleca się wybrać miejsce
pracy jak najbliżej miejsca wykorzystania wiórów. Ograniczy
to konieczność dźwigania materiału przerobionego do
minimum.
Należy utrzymywać bezpieczny dystans od strefy wyrzutu
wiórów. Upewnić się, że wszystkie osoby postronne, dzieci,
zwierzęta lub wartościowe przedmioty również znajdują się
w bezpiecznej odległości od strefy wyrzutu wiórów.
MONTAŻ URZĄDZENIA
UWAGA! Nie wolno próbować uruchamiać maszyny,
dopóki montaż nie został całkowicie zakończony.
Może to spowodować poważne obrażenia ciała
i uszkodzenie urządzenia. W trakcie montażu nie
dotykać ostrzy urządzenia oraz nie władać rąk do
wnętrza urządzenia.
HT-HECTOR 212
a) Położyć urządzenia na boku.
Uwaga! Nie przechylać urządzenia, jeżeli olej i/lub
paliwo znajdują się w zbiornikach, ponieważ mogą
się wylać.
b) Założyć komplet kół i zabezpieczyć połącznia za
pomocą śrub.
c) Postawić urządzenie w pozycji poziomej i nałożyć
uszczelkę leja.
d) Nałożyć lej załadowczy na uszczelkę i zabezpieczyć
połączenie za pomocą śrub, podkładek, i nakrętek.
e) Nałożyć uchwyt leja załadowczego i przykręcić go za
pomocą podkładek i śrub zabezpieczających.
f) Zamocować lej dodatkowy na boczy otwór
urządzenia i dokręcić go podkładkami oraz śrubami.
HT-HECTOR 420
UWAGA! Przed uruchomieniem urządzenia zależy
napełnić zbiorniki oleju i paliwa zgodnie z instrukcją
obsługi.
UWAGA! Rysunki złożeniowe produktu znajdują się
na końcu instrukcji (str. 57).
1. Montaż kół oraz podpory
a) Wsunąć oś kół [14] do otworu w spodzie ramy
i zabezpieczyć połączenie, dociskając oś za pomocą
śruby wkręconej na środku otworu.
b) Zamontować koła [1] na osi [14] za pomocą śruby [3]
oraz dużej podkładki [2].
I
II
III
IV
V
J. Filtr powietrza
K. Tłumik
L. Uchwyt linki rozrusznika
M. Wyłącznik awaryjny (nie widoczne na zdjęciu)
HT-HECTOR 420
1. Uchwyt
2. Silnik
3. Osłona leju załadowczego
4. Lej załadowczy
5. Rynna wylotowa
6. Osłona rynny wylotowej
7. Koło
8. Wyłącznik awaryjny
Opis silnika
A. Tłumik
B. Filtr powietrza
C. Przepustnica
D. Włącznik ON/OFF / stacyjka
E. Wyłącznik obwodu
F. Rozrusznik ręczny
G. Uchwyt linki rozrusznika
H. Kurek paliwa
I. Ssanie
J. Świeca zapłonowa
K. Zbiornik paliwa
L. Korek wlewu paliwa
M. Silnik rozrusznika elektrycznego
N. Korek spustowy oleju
O. Bagnet

18.12.2018 18.12.2018
22 23
PL PL
Numer części Opis
1Koła
2Duża podkładka
3Śruba M8x20
4Nakrętka
5Podkładka
6Podpora
7Śruba M8x25
8Rama
9Silnik
10 Elementy tnące
11 Pokrywa paska
12 Lej załadowczy
13 Rynna wylotowa
14 Oś
15 Obudowa bębna elementu tnącego
16 Śruba
17 Podkładka
18 Nakrętka
Wlewanie oleju silnikowego
Postawić maszynę na płaskiej powierzchni i odkręcić korek
zbiornika oleju.
Uzupełnić olej silnikowego, aż do górnego poziom na
miarce bagnetu.
3.3. PRACA Z URZĄDZENIEM
UWAGA! Przed uruchomieniem urządzenia należy wlać
olej silnikowy oraz paliwo. Urządzenie jest dostarczane bez
wlanego oleju silnikowego jak również paliwa.
1. Ustawić urządzenie na równiej, stabilnej
powierzchni, tak by rynna wylotowa była skierowany
w bezpiecznym kierunku.
2. Sprawdzić poziom paliwa i oleju przed
uruchomieniem urządzenia.
3. Założyć worek zbierający na rynnę wylotową
i zabezpieczyć w taki sposób by nie spadł.
4. Upewnić się, że lej załadowczy główny oraz lej
załadowczy dodatkowy (nie dotyczy modelu HT-
HECTOR 420) są puste. Jeśli w urządzeniu znajduje
się jakiś materiał w trakcie uruchamiania, może
spowodować to, że linka rozrusznika nagle zatrzyma
się lub urządzenie przewróci się powodując poważne
uszkodzenia ciała.
5. Ustawić przepustnicę na najniższe obroty.
6. Ustawić się z boku leja załadowczego, stojąc
stabilnie.
7. Ustawić zawór paliwa w paliwa w pozycję ON (patrz
rys. 4).
8. Ustawić dźwignie ssania w pozycję ON (patrz rys. 5).
9. Ustawić włącznik silnika w pozycję ON lub włączyć
silnik za pomocą linki, według poniższej instrukcji:
Zaprzeć się o silnik mocno jedną ręką (należy wcześniej
upewnić się, że silnik nie jest gorący, a jeśli tak jest to
należy odczekać aż ostygnie przed podjęcie tego kroku),
drugą ręką pociągnąć powoli uchwyt linki rozrusznika aż
do wyczucia oporu, a następnie szarpnąć gwałtownie. Jeśli
silnik się nie uruchomi należy powtórzyć procedurę.
3
4 5
4.1
5.1
67
6.1
1 2
1.1
1.2
2.1
UWAGA! Przed uruchomieniem urządzenia zależy
napełnić zbiorniki oleju i paliwa zgodnie z instrukcją
obsługi.
c) Zamontować podporę [6] do ramy urządzenia za
pomocą podkładki [5], nakrętki [4] oraz śrub [7].
2. Zamontować lej załadowczy
W celu zamontowania leju załadowczego:
a) Wsunąć zawiasy leja załadowczego [12] w otwory na
obudowie elementu tnącego [15] i przykręcić go za
pomocą śrub z drugiej strony.
b) Wsunąć zawiasy rynny wylotowej [13] w otwory na
obudowie elementu tnącego [15] i przykręcić go za
pomocą śrub z drugiej strony.
3. Montaż uchwytu
a) Zamontować uchwyt [16] do ramy [8] za pomocą
śrub [16], podkładek [17] i nakrętek [18].
Wlewanie paliwa
Urządzenie napędzane jest za pomocą silnika
czterosuwowego zasilanego benzyną bezołowiową.
Odkręcić korek zbiornika paliwa i wlać benzynę (do
wlania paliwa należy użyć lejka), zwracając uwagę aby nie
rozlać płynu lub nie przekroczyć maksymalnego poziomu
benzyny. Zbiornika powinien być napełniony do takiego
poziomu aby ltr paliwa był widoczny.
3. Po zakończonej pracy wyłączyć maszynę ustawiając
włącznik silnika w pozycje OFF.
Należy odłączyć przewód świecy zapłonowej
przed przesuwaniem urządzenia, opróżnieniem
worka, usuwaniem blokad, uzupełnianiem płynów
eksploatacyjnych lub innymi czynnościami
konserwacyjnymi czy naprawczymi.
Wskazówki użytkowania
• Materiał należy ładować powoli. Jeśli silnik wydaje
nietypowy odgłos oznacza to, że materiał jest
ładowany zbyt szybko.
• Korzenie oraz inne brudne materiały będą tępić
i uszkadzać noże.
• Należy często usuwać wióry z urządzenia.
W przeciwnym wypadku mogą spowodować
blokadę.
• Należy unikać rozdrabniania mokrego materiału
ponieważ może on spowodować zapchanie
urządzenia. Jeśli rozdrabnianie mokrego materiału
jest konieczne należy oddzielić go od suchego
materiału.
10
11. Gdy silnik się uruchomi i będzie płynnie działał,
należy przesunąć dźwignię ssania do pozycji OFF.
12. Aby zwiększyć lub zmniejszyć prędkość obrotową
silnika należy przesunąć przepustnicę. Aby zwiększyć
obroty, przesunąć manetkę w stronę symbolu zająca,
aby zmniejszyć obroty, przesunąć manetkę w stronę
symbolu żółwia.
13. Aby wyłączyć urządzenie należy przekręcić włącznik
silnika w pozycję OFF.
14. Po zatrzymaniu się silnika należy przesunąć dźwignię
zaworu paliwa w pozycję OFF.
Rozdrabnianie
UWAGA! Przed rozpoczęciem pracy z urządzeniem
należy przetestować działanie urządzenie bez materiału
rozdrabnianego. Jeśli urządzenie nie wydaje żadnych
podejrzanych dźwięków oraz ni występują żadne wycieki,
można kontynuować pracę.
1. Powoli włożyć materiał do leja załadowczego.
Nie wkładać zbyt dużej ilości na raz. Po włożeniu
materiału przymknąć osłonę znajdującą się leju
załadowczym (dotyczy modelu HT-HECTOR 212).
2. Jeśli to konieczne należy użyć długiego kawałka
materiału rozdrabnianego do popchnięcia wsadu.
UWAGA! Nie wolno wkładać rąk ani innych części
ciała do leja załadowczego.
8 9
8.1 9.1
3. Po zakończonej pracy wyłączyć maszynę ustawiając
włącznik silnika w pozycje OFF.
Należy odłączyć przewód świecy zapłonowej
przed przesuwaniem urządzenia, opróżnieniem
worka, usuwaniem blokad, uzupełnianiem płynów
eksploatacyjnych lub innymi czynnościami
konserwacyjnymi czy naprawczymi.
Wskazówki użytkowania
• Materiał należy ładować powoli. Jeśli silnik wydaje
nietypowy odgłos oznacza to, że materiał jest
ładowany zbyt szybko.
• Korzenie oraz inne brudne materiały będą tępić
i uszkadzać noże.
• Należy często usuwać wióry z urządzenia.
W przeciwnym wypadku mogą spowodować
blokadę.
• Należy unikać rozdrabniania mokrego materiału
ponieważ może on spowodować zapchanie
urządzenia. Jeśli rozdrabnianie mokrego materiału
jest konieczne należy oddzielić go od suchego
materiału.
Rozdrabnianie materiału za pomocą lej załadowczego
dodatkowego (tylko model HT-HECTOR 212)
1. Usunąć małe gałązki i liście. Ułatwi to włożenie
materiału do leja załadowczego dodatkowego.
2. Włożyć materiał do leja załadowczego –
dodatkowego grubszym końcem w dół i pozwolić
aby materiał został wciągnięty. Materiał należy
wsadzać pojedynczymi sztukami.
3. Po zakończonej pracy wyłączyć maszynę ustawiając
włącznik silnika w pozycje OFF.
Wskazówki użytkowania
• Nie wkładać do urządzenia materiału o średnicy
większej niż podana w tabeli danych technicznych.
• Lepiej rozdrabniać świeże, zielone drewno. Noże
pozostaną dłużej ostre.
3.4. CZYSZCZENIE I KONSERWACJA
a) Przed odblokowaniem / odetkaniem maszyny,
opróżnianiem worka, napełnianiem zbiornika paliwa
lub przed wykonywaniem konserwacji lub naprawy
zawsze należy upewnić się, że maszyna całkowicie
się zatrzymała a przewód świecy zapłonowej jest
odłączony.
b) Do czyszczenia powierzchni należy stosować
wyłącznie środki niezawierające substancji żrących.
c) Po każdym czyszczeniu wszystkie elementy należy
dobrze wysuszyć, zanim urządzenie zostanie
ponownie użyte.
d) Urządzenie należy przechowywać w suchym
i chłodnym miejscu chronionym przed wilgocią
i bezpośrednim promieniowaniem słonecznym.
e) Zabrania się spryskiwania urządzenia strumieniem
wody.
f) Należy pamiętać, aby przez otwory wentylacyjne
znajdujące się w obudowie nie dostała się woda.
g) Otwory wentylacyjne należy czyścić pędzelkiem
i sprężonym powietrzem.
h) Należy wykonywać regularne przeglądy urządzenia
pod kątem jego sprawności technicznej oraz
wszelkich uszkodzeń.
i) Do czyszczenia należy używać miękkiej ściereczki.
j) W przypadku pogorszenia efektywności
rozdrabniania należy obrócić, naostrzyć lub wymienić
noże

18.12.2018 18.12.2018
24 25
PL PL
USUWANIE ZUŻYTYCH URZĄDZEŃ.
Po zakończeniu okresu użytkowania nie wolno usuwać
niniejszego produktu poprzez normalne odpady komunalne,
lecz należy go oddać do punktu zbiórki i recyklingu
urządzeń elektrycznych i elektronicznych. Informuje o tym
symbol, umieszczony na produkcie, instrukcji obsługi lub
opakowaniu. Zastosowane w urządzeniu tworzywa nadają
się do powtórnego użycia zgodnie z ich oznaczeniem.
Dzięki powtórnemu użyciu, wykorzystaniu materiałów lub
innym formom wykorzystania zużytych urządzeń wnoszą
Państwo istotny wkład w ochronę naszego środowiska.
Informacji o właściwym punkcie usuwania zużytych
urządzeń udzieli Państwu lokalna administracja.
INSTRUKCJA BEZPIECZNEGO USUNIĘCIA AKUMULATORÓW
I BATERII
W urządzeniach zamontowane są baterie 12V / 9Ah. Zużyte
baterie należy zdemontować z urządzenia postępując
analogicznie do ich montażu. Baterie przekazać komórce
odpowiedzialnej za utylizację tych materiałów.
k) Wyczyścić szczotką lub odkurzaczem wióry, które
zebrały się na urządzeniu oraz wokół silnika.
l) Każdorazowo po zakończonej pracy usunąć
wszystkie pozostałości z lejów załadowczych oraz
rynny wylotowej.
Prze każdym uruchomieniem urządzenia należy
• sprawdzić czy nie ma luźnych, nieodkręconych lub
uszkodzonych
• sprawdzić czy rama urządzenia nie jest uszkodzona
lub nie posiada pęknięć
• sprawdzić stan techniczny noży
• sprawdzić stan oleju silnikowego orz paliwa
Konserwacja silnika
Świeca zapłonowa powinna przechodzić przegląd
techniczny po każdych 50 godzinach pracy urządzenia.
Należy sprawdzić kolor osadu na końcówce świecy. Kolor
powinien być brązowy. Usunąć osad używając twardej
szczotki. Sprawdzić odstęp po między elektrodami
i wyregulować go jeśli jest taka potrzeba. Prawidłowy
odstęp to 0,7 do 0,8 mm.
Wymiana oleju silnikowego
Postawić urządzenie na płaskiej powierzchni, włączyć
urządzenie i rozgrzać silnik przez kilka minut. Następnie
wyłączyć urządzenie. Odkręcić korek zbiornika oleju.
Podłożyć pojemnik do zlania oleju pod silnik. Odkręcić
śrubę spustową oleju i spuścić cały olej. Aby zabezpieczyć
przed wciekaniem oleju do ramy urządzenia zaleca się
użycie rury w celu sprowadzenia oleju bezpośrednio do
pojemnika na zużyty olej. Sprawdzić śrubę spustową,
uszczelkę, korek oleju i pierścień. Jeśli są uszkodzone lub
zużyte należy je wymienić. Zakręcić śrubę spustową. Po tej
operacji należy dolać nowy olej do górnego poziomu na
miarce bagnetu.
Filtr powietrza
Filtr powietrza powinien zostać poddany przeglądowi
stanu technicznego. Należy go wykręcić i wyczyścić lub
wymienić na nowy. Filtr należy umyć wodą z delikatnym
detergentem, wysuszyć i założyć z powrotem. Nie wolno
uruchamiać silnika ze zdemontowanym ltrem powietrza.
Filtr paliwa
Filtr paliwa powinien zostać poddany przeglądowi stanu
technicznego po każdych 150 godzinach pracy lub 3
miesiącach użytkowania. Wyjąc i wyczyścić ltr paliwa.
Odkręcić korek zbiornika paliwa, wyczyścić w wodzie
z delikatnym detergentem, osuszyć i założyć z powrotem.
Konserwacja akumulatorów
Akumulatory zamontowane w urządzeniach nie wymagają
uzupełniania wody oraz szczególnej konserwacji. Należy
pilnować aby złącza nie pokryły się pyłem i rdzą. Korozja
może powodować niepowołane działanie akumulatora i tym
samym nieść ryzyko niebezpieczeństwa. Jeśli zauważalne
będą ślady korozji, należy odłączyć złącza od akumulatora
i usunąć efekt korozji czyszcząc zaciski oraz złącza ługiem –
roztworem sody oczyszczonej i wody (dwuwęglan sodowy).
Złącza należy nasmarować antyoksydacyjnym tłuszczem
przed podłączeniem i przykręceniem.
Smarowanie
W modelu HT-HECTOR 420 co 50 roboczo godzin należy
nasmarować łożyska wału elementu tnącego.
Przechowywanie
Przed przechowywaniem urządzenia należy wykonać
następujące czynności.
1. Odłączyć przewód świecy zapłonowej by zapobiec
przypadkowemu uruchomieniu.
2. Wyczyścić urządzenie i pozbyć się wiórów.
3. Urządzenie pozostawić na płaskiej powierzchni
w dobrze wentylowanym pomieszczeniu poza
zasięgiem promieni słonecznych.
4. Nie przechowywać urządzenia miejscach gdzie
występują źródła zapłonu takie jak piecyk,
nagrzewnica gazowa lub elektryczna itp.
5. Nie przechowywać urządzenia w miejscach gdzie
spaliny i toksyczne gazy mogą przedostać się do
pomieszczeń mieszkalnych.
7. Nałożyć osłony na leje załadowcze oraz rynnę
wylotową.
8. Jeśli urządzenie nie będzie używane przez
dłużej niż 30 dni należy zlać paliwo ze zbiornika
i gaźnika. Wykręcić świecę zapłonową i wlać około
5 ml oleju silnikowego przez otwór świecy cylindra.
Z włącznikiem w pozycji OFF delikatnie pociągnąć
kilka razy linkę rozrusznika. Wkręcić z powrotem
świecę zapłonową i pociągnąć linkę rozrusznika aż
do wyczucia oporu i nie ciągnąć więcej.
Transportowanie
W trakcie transportowania należy:
• wyłączyć urządzenie, zamknąć zawór paliwa
i odłączyć przewód świecy zapłonowej
• zlać całe paliwo ze zbiornika paliwa
• nałożyć osłony na leje załadowcze oraz rynnę
wylotową
• transportować urządzenie w pozycji roboczej
• na niewielkie dystanse urządzenie transportować
trzymając za uchwyt, lekko przechylając urządzenie
i opierając jego ciężar na kołach
11
11.1
12
12.1
13
13.1

18.12.2018 27
18.12.2018
26
CZ NÁVOD K OBSLUZE CZ
Výrobek splňuje požadavky příslušných
bezpečnostních norem.
Před použitím výrobku se seznamte s návodem.
Recyklovatelný výrobek.
UPOZORNĚNÍ! nebo VAROVÁNÍ! nebo PAMATUJTE!
popisující danou situaci (všeobecná výstražná
značka).
Používejte ochranu sluchu. Vystavení se hluku
může vést ke ztrátě sluchu.
Používejte ochranné brýle.
Používejte protiprachovou masku (ochrana
dýchacích cest).
Používejte ochranné rukavice.
Používejte ochranou obuv.
VAROVÁNÍ! Nebezpečí úrazu elektrickým proudem!
POZOR: Dodržujte bezpečnou vzdálenost od
postranních osob, které se nacházejí poblíž.
POZOR: Existuje riziko vymrštění cizích těles ze
zařízení!
UPOZORNĚNÍ! Ostré součásti. Nebezpečí
poranění končetin!
VAROVÁNÍ! Rotující díly!
Během provozu zařízeni držte ruce a jakoukoli další
část těla mimo plnící zásobník, trychtýře a výstupní
otvor.
Během provozu zařízení vždy zůstaňte mimo oblast
vyhazování zpracovaného materiálu.
V blízkosti zařízení je zakázáno kouřit. V zařízení se
nacházejí hořlavé látky.
Popis parametru Hodnota parametru
Nazwa produktu Benzínový
zahradní drtič Benzínový drtič
větví
Model HT-HECTOR 212 HT-HECTOR 420
Akumulátor 12V / 9 Ah
Výkon motoru [k] 715
Typ motoru OHV 4-taktní
Startér Elektrický/startovací lanko
Objem motoru
[cm3]212 420
Otáčky motoru
[ot./min] 3600
Rychlost ostří
[ot./min] 2400
Typ hnacího
řemenu Jednoduchý
řemen
s V prolem
V (1041mm)
2 x řemen
s V prolem (1727
Li, 1767 Lw)
Objem palivové
nádrže [l] 3,6 5
Typ paliva Bezolovnatý benzín
Spotřeba paliva
[l/h] 1,4 4
Objem nádrže na
olej [l] 0,6 1,1
Maximální průměr
větví drcených
v násypce [mm]
Ф10 ф 100
Maximální průměr
větví drcených
v doplňkové
násypce [mm]
Ф 70 -
Hladina
akustického
výkonu LWA
97 106
Hladina
akustického tlaku
LpA
77 86
Rozměry [mm] 1330÷1660x890
x870 142x68x121,5
Velikost kol ["] 10 13
Hmotnost [kg] 78 156,5
TECHNICKÉ ÚDAJE f) Nepřeceňujte své schopnosti. Udržujte stabilní postoj
a rovnováhu po celou dobu práce. To vám umožní
lépe ovládat zařízení v neočekávaných situacích.
g) Nenoste volné oblečení nebo šperky. Vlasy, oděv
a rukavice udržujte v bezpečné vzdálenosti od
rotujících dílů. Volný oděv, šperky nebo dlouhé vlasy
mohou zachytit rotující díly.
h) Odstraňte veškeré seřizovací nástroje nebo klíče před
zapnutím zařízení. Nástroje nebo klíče ponechané
v rotujících dílech zařízení mohou způsobit vážný úraz.
i) Zařízení není hračka. Dohlížejte na děti, aby si nehrály
se zařízením.
2.3. BEZPEČNÉ POUŽÍVÁNÍ ZAŘÍZENÍ
a) Zařízení nepřetěžujte. Pro daný úkol používejte
vždy správný typ nářadí. Správně zvolené nářadí
lépe a bezpečněji provede práci, pro kterou bylo
navrženo.
b) Zařízení nepoužívejte, pokud spínač pro zapnutí
a vypnutí zařízení nefunguje správně. Zařízení, které
nelze ovládat spínačem, je nebezpečné a musí být
opraveno.
c) Nepoužívaná zařízení uchovávejte mimo dosah
dětí a osob, které nejsou seznámeny se zařízením
nebo návodem k obsluze. Zařízení jsou nebezpečná
v rukou nezkušených uživatelů.
d) Zařízení udržujte v dobrém technickém stavu.
Kontrolujte před každou prací jeho celkový stav
i jednotlivé díly a ujistěte se, že je vše v dobrém
stavu, a uživateli tak při práci se zařízením nehrozí
žádné nebezpečí. V případě, že zjistíte poškození,
nechte zařízení opravit.
e) Udržujte zařízení mimo dosah dětí.
f) Opravu a údržbu zařízení by měly provádět
pouze kvalikované osoby za výhradního použití
originálních náhradních dílů. Zajistí to bezpečné
používání zařízení.
g) Pro zachování navržené mechanické integrity
zařízení neodstraňujte předem namontované kryty
nebo neuvolňujte šrouby.
h) Při přemisťování zařízení z místa skladování na místo
používání berte v úvahu pracovní zásady bezpečnosti
a ochrany zdraví v rámci přenášení břemena platné
v zemi, ve které se zařízení používá.
i) Zabraňte situaci, kdy se zapnuté zařízení zastaví
vlivem velkého zatížení. Může to způsobit přehřátí
hnacích součástí a v následku poškození zařízení.
j) Pokud zařízení nebylo odpojeno od napájení,
nedotýkejte se rotujících dílů ani součástí.
k) Zařízení během práce nenaklánějte ani nepřepravujte.
l) Během provozu zařízení nenechávejte toto zařízení
bez dozoru. Vypněte stroj a odpojte kabel zapalovací
svíčky vždy, když chcete opustit pracovní prostor.
m) Pravidelně čistěte zařízení, aby nedošlo k trvalému
usazovaní nečistot.
n) Zařízení není hračka. Čištění a údržbu nesmí provádět
děti bez dohledu dospělé OSOBY.
o) Neinstalujte, nevyjímejte, nenastavujte ani
neopravujte části výstupního otvoru ani žádné jiné
části zařízení, pokud je motor v chodu.
p) Pokud je motor v chodu, držte všechny části těla
a těžké předměty mimo plnícího zásobníku (v případě
modelu HT-HECTOR 212 hlavního i přídavného) i od
výstupního otvoru.
q) Nevkládejte končetiny do plnícího zásobníku ani do
výstupního otvoru, když je stroj v chodu. To může
vést k jejich vtažení a/nebo uřezání končetin.
r) Nevkládejte do zařízení kovy, skály, láhve, plechovky
a ani jiné předměty než předměty rostlinného
původu.
PAMATUJTE! Při práci se zařízením chraňte děti
a jiné nepovolané osoby.
2.2. OSOBNÍ BEZPEČNOST
a) Zařízení nepoužívejte, jste-li unaveni nebo pod
vlivem drog, alkoholu nebo léků, které významně
snižují schopnost zařízení ovládat.
b) Zařízení smí obsluhovat fyzicky zdatné osoby, které
s ním umí zacházet, byly příslušně vyškoleny k jeho
obsluze, seznámily se s tímto návodem a byly také
proškoleny v oblasti bezpečnosti a ochrany zdraví při
práci.
c) Zařízení není určeno k tomu, aby jej používaly osoby
(včetně dětí) s omezenými psychickými, smyslovými
nebo duševními schopnostmi nebo osoby bez
příslušných zkušeností anebo znalostí, ledaže
jsou pod dohledem osoby zodpovědné za jejich
bezpečnost nebo od ní obdržely pokyny, jak zařízení
obsluhovat.
d) Při práci se zařízením buďte pozorní, řiďte se
zdravým rozumem. Chvilka nepozornosti při práci
může vést k vážnému úrazu.
e) Používejte osobní ochranné pomůcky
vyžadované pro práci se zařízením, specikované
v bodě 1 vysvětlením symbolů. Používání vhodných,
atestovaných osobních ochranných prostředků
snižuje nebezpečí úrazu.
2.1. BEZPEČNOST NA PRACOVIŠTI
a) Na pracovišti udržujte pořádek a mějte dobré
osvětlení. Nepořádek nebo špatné osvětlení mohou
vést k úrazům. Buďte předvídaví a sledujte, co se
během práce kolem vás děje. Při práci se zařízením
vždy zachovávejte zdravý rozum.
b) Se zařízením nepracujte ve výbušném prostředí,
například v přítomnosti hořlavých kapalin, plynů
nebo prachu. Zařízení vytváří jiskření, skrze které
může dojít ke vznícení prachu nebo výparů.
c) Pokud zjistíte, že zařízení nepracuje správně, nebo
je poškozeno, ihned jej vypněte a poruchu nahlaste
autorizované osobě.
d) Pokud máte pochybnosti o tom, zda zařízení funguje
správně, kontaktujte servis výrobce.
e) Opravy zařízení může provádět pouze servis výrobce.
Opravy neprovádějte sami!
f) V případě vzniku požáru k hašení zařízení pod
napětím používejte pouze práškové nebo sněhové
hasicí přístroje (CO2).
g) Na pracovišti se nesmí zdržovat děti a nepovolané
osoby. (Nepozornost může způsobit ztrátu kontroly
nad zařízením.)
h) Při práci se zařízením vzniká velké množství prachů
a úlomků, chraňte přihlížející osoby proti jejich
škodlivému vlivu.
i) V případě ohrožení života nebo zdraví, úrazu nebo
poruchy, zastavte zařízení tlačítkem NOUZOVÉ
ZASTAVENÍ!
j) Je třeba pravidelně kontrolovat stav etiket
s bezpečnostními informacemi. V případě, že jsou
nečitelné, je třeba etikety vyměnit.)
k) Návod k obsluze uschovejte za účelem jeho
pozdějšího použití. V případě předánání zařízení
třetím osobám musí být spolu se zařízením předán
rovněž návod k obsluze.
l) Držte děti a další osoby mimo dosah pracujícího
zařízení.
m) Ujistěte se, že místo práce je na otevřeném
prostranství.
PŘED ZAHÁJENÍM PRÁCE SI DŮKLADNĚ PŘEČTĚTE
TENTO NÁVOD A UJISTĚTE SE, ŽE JSTE POCHOPILI
VŠECHNY POKYNY.
1. VŠEOBECNÝ POPIS
Návod slouží jako nápověda pro bezpečné a spolehlivé
používání výrobku. Výrobek je navržen a vyroben přesně
podle technických údajů za použití nejnovějších technologií
a komponentů a za dodržení nejvyšších jakostních norem.
Pro zajištění dlouhého a spolehlivého fungování zařízení
pravidelně provádějte revize a údržbu v souladu s pokyny
uvedenými v tomto návodu. Technické údaje a specikace
uvedené v návodu jsou aktuální. Výrobce si vyhrazuje právo
provádět změny za účelem zvýšení kvality.
VYSVĚTLENÍ SYMBOLŮ
POZOR! Obrázky v tomto návodu jsou ilustrační.
V některých detailech se od skutečného vzhledu
zařízení mohou lišit.
POZNÁMKA! Přečtěte si tento návod včetně všech
bezpečnostních pokynů. Nedodržování návodu
a pokynů může vést k úrazu elektrickým proudem,
požáru anebo těžkému úrazu či smrti.
Originálním návodem je německá verze návodu. Ostatní
jazykové verze jsou překladem z německého jazyka.
2. BEZPEČNOST POUŽÍVÁNÍ
Pojem „zařízení“ nebo „výrobek“ v bezpečnostních
pokynech a návodu se vztahuje na < Benzínový zahradní
drtič, Benzínový drtič větví >. Zařízení nepoužívejte
v prostředí s velmi vysokou vlhkostí / v přímé blízkosti
nádrží s vodou! Zařízení nenořte do vody. Hrozí nebezpečí
úrazu elektrickým proudem! Pokud je zařízení v provozu,
nevkládejte do něj ruce ani žádné předměty! Nezakrývejte
větrací otvory!

18.12.2018 18.12.2018
28 29
CZ CZ
s) Otáčející se ostří uvnitř těchto otvorů může v případě
doteku způsobit vážná zranění těla.
t) Při práci buďte opatrní. Zařízení může vyhazovat
části drceného materiálu ze vstupního zásobníku
nebo z výstupního otvoru.
u) Motor se během provozu velmi zahřívá. Nedotýkejte
se horkého motoru, může to způsobit popáleniny.
v) Abyste předešli riziku vzniku požáru, držte listy,
trávu a jiné hořlavé materiály mimo dosah horkého
motoru a tlumiče hluku.
w) Nepracujte na chodníku, štěrku nebo na jiném
tvrdém povrchu, protože předměty se můžou odrazit
a způsobit zranění.
x) Některé druhy dřevin mohou způsobit alergickou
reakci. Prach vznikající během zpracování může
být škodlivý, je třeba přijmout vhodná ochranná
opatření.
y) Materiál, který zablokoval zařízení, neodstraňujte
rukama.
z) Nepracujte na nerovném povrchu nebo když je
zařízení nestabilní.
aa) Pozor! Materiál, určený ke zpracování, se může
odrazit od vstupního otvoru nebo může být
vyhazován z výstupního otvoru.
bb) Když se zpracovávaný materiál zasekne a motor
z tohoto důvodu zhasne, před čištěním přesuňte
páčku škrticí klapky do polohy „stop“ nebo přepněte
přepínač do polohy „0“ (je-li takový přepínač
nainstalován).
cc) Pokud se drtič ucpe nebo se zablokuje, okamžitě
vypněte motor a před čištěním počkejte, dokud se
úplně nezastaví všechny pohyblivé části.
dd) Do zařízení nevkládejte větve o průměru větším, než
je uvedeno v technických specikacích zařízení.
ee) Ujistěte se, že před spuštěním zařízení je plnící
zásobník (v případě modelu HT-HECTOR 212 hlavní
i přídavný) prázdný.
) Před zapnutím zařízení doplňte olej na požadovanou
úroveň. Pokud je hladina oleje příliš nízká, motor se
nespustí nebo se může vypnout.
gg) Únik provozních olejů ze zařízení musí být nahlášen
na příslušných místech nebo se musí postupovat
podle zákonných předpisů platných v oblasti použití.
hh) Nebezpečí! Hrozí poškození zdraví a riziko výbuchu
spalovacího motoru.
ii) Výfukové plyny motoru obsahují jedovatý oxid
uhelnatý. Pobyt v prostředí s obsahem oxidu
uhelnatého může vést k bezvědomí nebo ke smrti.
Nezapínejte motor zařízení v uzavřeném prostoru.
jj) Chraňte motor před teplem, jiskrami a plamenem.
V blízkosti zařízení nekuřte!
kk) Benzín je velmi hořlavý a výbušný. Před doplňováním
paliva je třeba motor vypnout a ochladit.
ll) Upozornění! Při použití nesprávného paliva hrozí
riziko poškození motoru.
mm) Akumulátor zařízení je pod napětím. Nedotýkejte
se svorek a konektorů akumulátoru. Odpojení
konektorů od akumulátoru musí probíhat ve
správném pořadí.
POZNÁMKA! I když zařízení bylo navrženo tak, aby
bylo bezpečné, tedy má vhodné bezpečnostní prvky,
tak i přes použití dodatečné ochrany uživatelem při
práci se zařízením nadále existuje malé riziko úrazu
nebo poranění. Doporučuje se zachovat opatrnost
a zdravý rozum při jeho používání.
POZNÁMKA! Nákres tohoto produktu naleznete na
konci návodu na str. 56.
3. ZÁSADY POUŽÍVÁNÍ
Přístroj je určen k drcení větví, keřů, plevelů, výhonků
a dlouhých trav o průměru nepřesahujícím hodnotu
uvedenou v technických specikacích.
Zařízení nepoužívejte k drcení stavebního odpadu, plastů,
papírových výrobků, lan či provazů nebo jakéhokoliv
materiálu, který může obsahovat kov.
POZOR: Před vložením materiálu do zařízení odstraňte
všechny hřebíky, lana, provazy nebo kameny, které mohou
být mezi částmi rostlin (např. mezi kořeny apod.).
Odpovědnost za veškeré škody vzniklé v důsledku
použití zařízení v rozporu s určením nese uživatel.
3.1. POPIS ZAŘÍZENÍ
HT-HECTOR 212
A. Plnící zásobník
B. Motor
C. Výstupní otvor
D. Přídavný zásobník
E. Sání
F. Palivový ventil
G. Přepínač ON/OFF / spínač zapalování
H. Škrtící klapka
I. Uzávěr palivové nádrže
J. Vzduchový ltr
K. Tlumič hluku
L. Držák lanka startéru
M. Nouzový vypínač (na obrázku není zobrazen)
HT-HECTOR 420
1. Rukojeť
2. Motor
3. Kryt vstupního zásobníku
4. Vstupní zásobník
5. Výstupní trychtýř
6. Kryt výstupního otvoru
7. Kolo
8. Nouzový vypínač
Popis motoru
A. Tlumič hluku
B. Vzduchový ltr
C. Škrtící klapka
D. Přepínač ON/OFF / spínač zapalování
E. Pojistka
F. Ruční startér
G. Držák lanka startéru
H. Palivový kohout
I. Sání
J. Zapalovací svíčka
K. Palivová nádrž
L. Uzávěr palivové nádrže
M. Elektrický startér
N. Vypouštěcí šroub oleje
O. Měrka oleje
3.2. PŘÍPRAVA K PRÁCI
UMÍSTĚNÍ ZAŘÍZENÍ
Zařízení používejte mimo uzavřené prostory na stabilním,
vodorovném a rovném povrchu, nejlépe na trávě nebo
na zemi. Neumísťujte zařízení na beton, asfalt nebo na
jinou tvrdou plochu, protože třísky a jiné zbytky materiálu
vyhozené strojem se můžou odrazit a způsobit ohrožení
zdraví nebo majetku.
POZOR! Nepokoušejte se spustit zařízení, dokud
nebude kompletně smontováno. Mohlo by dojít
k vážným zraněním a poškození zařízení. Během
montáže se nedotýkejte nožů zařízení a nevkládejte
ruce dovnitř přístroje.
HT-HECTOR 212
a) Položte zařízení na bok.
Pozor! Nenaklánějte zařízení, pokud nádrže zařízení
obsahují olej nebo palivo, protože se můžou vylít.
b) Namontujte sadu kol a zajistěte spojení šrouby.
c) Postavte zařízení do vodorovné polohy a založte
těsnění zásobníku.
d) Položte vstupní zásobník na těsnění a zajistěte
spojení šrouby, podložkami a maticemi.
e) Založte držák vstupního zásobníku a upevněte ho
pomocí podložek a pojistných šroubů.
f) Namontujte přídavný zásobník na boční otvor
zařízení a utáhněte jej podložkami a šrouby.
HT-HECTOR 420
POZOR! Před uvedením zařízení do provozu naplňte
olejové a palivové nádrže podle návodu k obsluze.
POZNÁMKA! Nákres tohoto produktu naleznete na
konci návodu na str. 57.
1. Montáž vstupního zásobníku a výstupního otvoru
a) Vložte nápravu kola [14] do otvoru ve spodní části
rámu a zajistěte spojení stisknutím nápravy šroubem
našroubovaným uprostřed otvoru.
b) Namontujte kola [1] na nápravu [14] šroubem [3]
a velkou podložkou [2].
c) Nosník [6] namontujte na rám zařízení pomocí
podložky [5], matice [4] a šroubů [7].
2. Namontujte vstupní zásobník
Pro montáž vstupního zásobníku:
a Zasuňte závěsy vstupního zásobníku [12] do otvorů
na krytu drtiče [15] a upevněte je šrouby na druhé
straně.
b) Zasuňte závěsy výstupního trychtýře [13] do otvorů
na krytu drtiče [15] a upevněte je šrouby na druhé
straně.
3. Montáž držáku
a) Namontujte držák [16] na rám [8] pomocí šroubů
[16], podložek [17] a matic [18].
I
II
III
IV
V
Pracovní podmínky
Zkontrolujte materiál, který chcete rozdrtit a ujistěte se, že
je nad zařízením dostatek místa na vkládání materiálu.
Doporučujeme zvolit si takové místo práce, které by bylo co
nejblíže místu využití třísek. Tím se sníží nutnost přenášet
zpracovaný materiál na minimum.
Udržujte bezpečnou vzdálenost od oblasti výhozu třísek.
Ujistěte se, že všechny osoby v okolí, děti, zvířata nebo
cenné předměty jsou také v bezpečné vzdálenosti od
oblasti výhozu třísek.
Číslo dílu Popis
1Kola
2Velká podložka
3Šroub M8x20
4Matice
5Podložka
6Nosník
7Šroub M8x25
8Rám
9Motor
10 Sekací mechanizmus
11 Kryt řemene
12 Vstupní zásobník
13 Výstupní trychtýř
14 Náprava
15 Kryt sekacího mechanizmu
16 Šroub
17 Podložka
18 Matice

18.12.2018 18.12.2018
30 31
CZ CZ
Nalévání motorového oleje
Umístěte zařízení na rovný povrch a odšroubujte uzávěr
olejové nádrže.
Doplňte motorový olej do horní úrovně na měrce.
3.3. PRÁCE SE ZAŘÍZENÍM
POZOR! Před uvedením zařízení do provozu nalijte do
zařízení motorový olej a palivo. Zařízení je dodáváno bez
motorového oleje a bez paliva.
1. Umístěte zařízení na rovný a stabilní povrch tak, aby
výstupní otvor směřoval bezpečným směrem.
2. Před uvedením zařízeni do provozu zkontrolujte
hladinu paliva a oleje.
3. Vložte sběrný sáček do výstupního otvoru a zajistěte
ho tak, aby nevypadl.
4. Ujistěte se, že hlavní vstupní zásobník a přídavný
vstupní zásobník (netýká se modelu HT-HECTOR
420) jsou prázdné. Pokud bude v zařízení během
startování nějaký materiál, může to způsobit náhlé
zastavení startovacího lanka nebo převrácení
zařízení, což může způsobit vážné zranění.
5. Nastavte škrticí klapku na nejnižší otáčky.
6. Postavte se z boku vstupního zásobníku, stůjte
stabilně.
7. Nastavte palivový ventil do polohy ON (viz obr. x).
8. Páčku sytiče nastavte do polohy ON (viz obr. X).
9. Nastavte přepínač motoru do polohy ON nebo
motor spusťte lankem následujícím způsobem:
Silně se opřete o motor jednou rukou (předtím zkontrolujte,
zda motor není horký, a pokud tomu tak je, nechte ho před
provedením tohoto kroku vychladnout). Druhou rukou
pomalu vytáhněte rukojeť startovacího lanka, dokud
neucítíte odpor, pak silně trhněte. Pokud se motor nespustí,
tento postup zopakujte.
3
4 5
4.1
5.1
67
6.1
1 2
1.1
1.2
2.1
Nalévání paliva
Zařízení je poháněno čtyřtaktním motorem poháněným
bezolovnatým benzínem.
Odšroubujte uzávěr palivové nádrže a nalijte benzin (pro
nalévání paliva použijte nálevku). Dbejte na to, aby nedošlo
k rozlití paliva nebo k překročení maximální hladiny
benzinu. Nádrž by měla být naplněna tak, aby byl vidět
palivový ltr.
3. Po dokončení práce vypněte zařízení nastavením
přepínače motoru do polohy OFF.
Před přesunem zařízení, vyprazdňováním sáčku,
odstraňováním materiálu, který zablokoval zařízení,
doplňováním oleje nebo paliva nebo jinými
údržbářskými nebo opravárenskými pracemi odpojte
kabel zapalovací svíčky.
10
11. Když motor nastartuje a běží hladce, přesuňte páku
sytiče do polohy OFF.
12. Chcete-li zvýšit nebo snížit otáčky motoru, přesuňte
škrticí klapku. Pro zvýšení otáček přesuňte páčku
směrem k symbolu králíka, pro snížení otáček
přesuňte páčku směrem k symbolu želvy.
13. Pro vypnutí zařízení nastavte přepínač motoru do
polohy OFF.
14. Po zastavení motoru přesuňte páčku palivového
ventilu do polohy OFF.
Drcení
POZOR! Než začnete pracovat se zařízením, je nutné
provést test zařízení bez materiálu na drcení. Pokud přístroj
nevydává žádné podezřelé zvuky a nedochází k žádným
únikům oleje nebo paliva, můžete pokračovat v práci.
1. Pomalu vkládejte materiál určený k drcení do
vstupního zásobníku. Nevkládejte příliš mnoho
materiálu najednou. Po vložení materiálu přivřete
kryt na vstupním zásobníku (platí pro model HT-
HECTOR 212).
2. Je-li to nutné, pro popostrčení vloženého materiálu
použijte dlouhý kus materiálu určeného k drcení.
POZOR! Nevkládejte ruce ani jiné části těla do
vstupního zásobníku.
8 9
8.1 9.1
Údržba motoru
Zapalovací svíčka se musí podrobit technické prohlídce po
každých 50 hodinách provozu. Zkontrolujte barvu usazenin
na koncovce svíčky. Barva musí být hnědá. Zbytky usazenin
odstraňte pomocí tvrdého kartáče. Zkontrolujte vzdálenost
mezi elektrodami svíčky a v případě potřeby ji upravte.
Správná vzdálenost je 0,7 až 0,8 mm.
POZOR! Před uvedením zařízení do provozu naplňte
olejové a palivové nádrže podle návodu k obsluze. Návod k použití
• Materiál vkládejte do zařízení pomalu. Pokud motor
vydává neobvyklé zvuky, znamená to, že je materiál
vkládán příliš rychle.
• Kořeny a jiné materiály obsahující nečistoty otupují
a poškozují nože.
• Třísky odebírejte ze zařízení často, v opačném
případě mohou způsobit ucpání a zablokování
zařízení.
• Nedrťte vlhký materiál, protože by mohlo dojít
k ucpání zařízení. Je-li drcení vlhkého materiálu
nutné, musíte ho oddělit od suchého materiálu.
Drcení materiálu pomocí přídavného vstupního zásobníku
(platí pouze pro HT-HECTOR 212)
1. Odstraňte malé větvičky a listy. To usnadní vkládání
materiálu do přídavného vstupního zásobníku.
2. Vložte materiál do přídavného vstupního zásobníku
silnějším koncem dolů a nechte materiál vtahovat.
Materiál vkládejte po jednotlivých kusech.
3. Po dokončení práce vypněte zařízení nastavením
přepínače motoru do polohy OFF.
Návod k použití
• Do zařízení nevkládejte větve o průměru větším, než
je uvedeno v technických specikacích zařízení.
• Je lepší drtit dřevo, které je čerstvé. Nože zůstanou
ostré delší dobu.
3.4. ČIŠTĚNÍ A ÚDRŽBA
a) Před odblokováním / čištěním zařízení, vyprázdněním
pytle, naplněním palivové nádrže nebo před
prováděním údržby nebo opravy se vždy ujistěte, že
zařízení je vypnuté a že je odpojen kabel zapalovací
svíčky.
b) K čištění povrchu zařízení používejte výhradně
prostředky neobsahující žíravé látky.
c) Po každém čištění je nutno všechny prvky dobře
osušit, než bude zařízení opět použito.
d) Zařízení skladujte na suchém a chladném místě,
chráněném proti vlhkosti a přímému slunečnímu
svitu.
e) V žádném případě přístroj nelze mýt vodou.
f) Dávejte pozor, aby se ventilačními otvory
nacházejícími se na krytu zařízení nedostala dovnitř
voda.
g) Ventilační otvory čistěte pomocí štětečku
a stlačeného vzduchu.
h) Pravidelně provádějte revize zařízení a kontrolujte,
zda je technicky způsobilé a není poškozeno.
i) K čištění používejte měkký hadřík.
j) V případě zhoršení účinnosti drcení je třeba nože
otočit, naostřit nebo vyměnit.
k) K čištění třísek, které se nahromadily na zařízení
a kolem motoru, použijte štětec nebo vysavač.
l) Po dokončení práce vždy odstraňte všechny nečistoty
ze vstupních zásobníků a výstupního otvoru.
Před každým spuštěním zařízení musíte
• zkontrolovat, jestli některé části zařízení nejsou
uvolněné, nedotažené nebo poškozené
• zkontrolovat, jestli není rám zařízení poškozen nebo
se na něm nevyskytují praskliny
• zkontrolovat technický stav nožů
• zkontrolovat stav motorového oleje a paliva
Výměna motorového oleje
Umístěte zařízení na rovnou plochu, zapněte ho
a několik minut zahřívejte motor. Potom zařízení vypněte.
Odšroubujte uzávěr olejové nádrže. Pod motor umístěte
nádobu pro zachycení vytékajícího motorového oleje.
Vyšroubujte vypouštěcí šroub oleje a vypusťte veškerý olej.
Abyste zabránili vniknutí oleje do rámu zařízení, k odvádění
oleje přímo do nádoby na použitý olej doporučujeme
použít rourku. Zkontrolujte vypouštěcí šroub, těsnění,
olejovou zátku a kroužek. Pokud jsou poškozené nebo
opotřebované, musí být vyměněny. Zavřete vypouštěcí
šroub. Po této operaci dolijte nový olej do horní úrovně
na měrce.
Vzduchový ltr
Vzduchový ltr se musí podrobit technické prohlídce.
Musí být odšroubován a vyčištěn nebo nahrazen novým.
Filtr se musí umýt vodou s jemným čisticím prostředkem
(detergentem), vysušit a vrátit zpět. Nestartujte motor
s demontovaným vzduchovým ltrem.
11
11.1
Palivový ltr
Palivový ltr musí být podroben technické prohlídce
po každých 150 hodinách provozu nebo po 3 měsících
používání. Vyjměte a vyčistěte palivový ltr. Odšroubujte
uzávěr palivové nádrže, vyčistěte jej ve vodě s jemným
čisticím prostředkem (detergentem), osušte jej a znovu jej
založte.
12
12.1
13
13.1
Údržba akumulátoru
Akumulátor instalovaný v zařízení nevyžaduje doplňování
vody a speciální údržbu. Je třeba zajistit, aby konektory
a svorky nebyly pokryty prachem a rzí.

18.12.2018 18.12.2018
32 33
CZ FRMANUEL D‘UTILISATION
Koroze může způsobit nesprávné fungování akumulátoru
a tím i riziko nebezpečí. Pokud zjistíte jakékoliv známky
koroze, odpojte svorky od baterie a odstraňte korozi
vyčištěním svorek a konektorů louhem – roztokem
jedlé sody a vody (hydrogenuhličitanem sodným).
Před připojením a našroubováním ošetřete spojení
antioxidačním tukem.
Mazání
U modelu HT-HECTOR 420 je nutné po každých 50
pracovních hodinách promazat ložiska hřídele řezného
prvku.
Skladování
Před uskladněním zařízení proveďte následující kroky.
1. Odpojte kabel zapalovací svíčky, aby nedošlo
k náhodnému spuštění motoru.
2. Vyčistěte zařízení a odstraňte třísky.
3. Zařízení uložte na rovném povrchu v dobře větraném
prostoru mimo dosah přímého slunečního záření.
4. Neskladujte zařízení na místech, kde jsou tepelné
zdroje, jako je sporák, plynový nebo elektrický
ohřívač atd. a kde proto hrozí nebezpečí požáru.
5. Neskladujte přístroj na místech, kde můžou spaliny
a toxické plyny proniknout do obytných prostorů.
7. Zakryjte vstupní zásobník a výstupní otvor.
8. Pokud se zařízení nepoužívá déle než 30 dní, vylijte
palivo z nádrže a karburátoru.
Odšroubujte zapalovací svíčku a přes otvor
nalijte do válců přibližně 5 ml motorového oleje.
Se přepínačem v poloze OFF několikrát jemně
potáhněte za startovací lanko. Zašroubujte
zapalovací svíčku zpátky, zatáhněte za startovací
lanko, dokud neucítíte odpor a dál už netahejte.
Přeprava
Během přepravy musíte:
• vypnout zařízení, zavřít palivový ventil a odpojit
kabel zapalovací svíčky
• vylít veškeré palivo z palivové nádrže
• umístit kryty na vstupní zásobník a výstupní otvor
• přepravovat zařízení v pracovní poloze
• na malé vzdálenosti přepravujte zařízení držením za
rukojeť, mírným naklopením a přenesením jeho váhy
na kola.
NÁVOD K BEZPEČNÉMU ODSTRANĚNÍ AKUMULÁTORŮ
A BATERIÍ.
V zařízení se používají baterie 12V / 9Ah. Vybité baterie ze
zařízení vyjměte, postupujte v opačném pořadí než při jejich
vkládání. Pro zajištění vhodné likvidace baterie vyhledejte
příslušné místo/obchod, kde je můžete odevzdat.
LIKVIDACE OPOTŘEBENÝCH ZAŘÍZENÍ
Po ukončení doby používání nevyhazujte tento výrobek
společně s komunálním odpadem, ale odevzdejte jej
k recyklaci do sběrny elektrických a elektronických zařízení.
O tom informuje symbol umístěný na zařízení, v návodě
k obsluze nebo na obalu. Komponenty použité v zařízení
jsou vhodné pro zužitkování v souladu s jejich označením.
Díky zužitkování, recyklaci nebo jiným způsobům využití
opotřebených zařízení významně přispíváte k ochraně
životního prostředí. Informace o příslušné sběrně
opotřebených zařízení poskytne místní obecný nebo
městský úřad.
Le produit est conforme aux normes de sécurité en
vigueur.
Respectez les consignes du manuel.
Collecte séparée.
ATTENTION!, AVERTISSEMENT! et REMARQUE
attirent l’attention sur des circonstances spéciques
(symboles d’avertissement généraux).
Portez une protection auditive.
Portez une protection oculaire.
Portez une protection contre la poussière
(protection des voies respiratoires).
Portez des protections pour les mains.
Portez des protections pour les pieds.
ATTENTION! Mise en garde liée à la tension
électrique!
ATTENTION: Tenez-vous à une distance sécuritaire
des tiers se trouvant à proximité.
ATTENTION: Des corps étrangers peuvent être
éjectés par la machine!
ATTENTION! Éléments tranchants. Risque de
coupures.
ATTENTION! Mise en garde liée au risque
d’entraînement.
Tenez les mains et toutes les parties du corps
à l'écart de la trémie, de l'entonnoir et de la
goulotte de sortie lorsque la machine est en cours
d'utilisation.
Restez toujours à l’écart de la zone d’éjection
lorsque la machine est en marche.
Ne fumez pas à proximité de l’appareil. L’appareil
contient des substances inammables.
Description des
paramètres Valeur des paramètres
Nom du produit Broyeur de
végétaux
à essence
Broyeur de bois
à essence
Modèle HT-HECTOR 212 HT-HECTOR 420
Batterie 12V / 9 Ah
Puissance du
moteur [CH] 715
Type de moteur Moteur à soupapes en tête 4 temps
Démarreur Électrique / Lanceur à rappel
Cylindrée [cm3]212 420
Régime moteur
[tr/min] 3600
Vitesse de coupe
des lames [tr/min] 2400
Type de courroie 2x courroie
prolée en
V (1041mm)
2x courroie
prolée en
V (1727 Li, 1767
Lw)
Volume du
réservoir
à carburant [l]
3,6 5
Type de carburant Essence sans plomb
Consommation de
carburant [l/h] 1,4 4
Volume du
réservoir d’huile [l] 0,6 1,1
Diamètre maximal
des branches
pouvant être
insérées dans
la trémie de
chargement [mm]
Ф10 ф 100
Diamètre maximal
des branches
pouvant être
insérées dans
la trémie de
chargement
supplémentaire
[mm]
Ф 70 -
Valeur de
puissance sonore
LWA
97 106
Niveau de
pression sonore
LpA
77 86
Dimensions [mm] 1330÷1660x890
x870 142x68x121,5
Taille des roues
[pouces] 10 13
Poids [kg] 78 156,5
DÉTAILS TECHNIQUES
An de garantir le fonctionnement able et durable de
l'appareil, il est nécessaire d'utiliser et d'entretenir ce
dernier conformément aux consignes gurant dans le
présent manuel. Les caractéristiques et les spécications
contenues dans ce document sont à jour. Le fabricant se
réserve le droit de procéder à des modications à des ns
d’amélioration du produit. L'appareil a été mis au point et
fabriqué en tenant compte des progrès techniques et de la
réduction de bruit an de réduire au maximum les risques
liés aux émissions sonores.
SYMBOLES
1. DESCRIPTION GÉNÉRALE
L'objectif du présent manuel est de favoriser une utilisation
sécuritaire et able de l'appareil. Le produit a été conçu
et fabriqué en respectant étroitement les directives
techniques applicables et en utilisant les technologies et
composants les plus modernes. Il est conforme aux normes
de qualité les plus élevées.
LISEZ ATTENTIVEMENT LE PRÉSENT MANUEL ET
ASSUREZ-VOUS DE BIEN LE COMPRENDRE AVANT
LA PREMIÈRE UTILISATION

18.12.2018 18.12.2018
34 35
FR FR
2.2. SÉCURITÉ DES PERSONNES
a) N‘utilisez pas l‘appareil lorsque vous êtes fatigué,
malade, sous l‘eet de drogues ou de médicaments
et que cela pourrait altérer votre capacité à utiliser
l‘appareil.
b) Seules des personnes ayant suivi une formation
appropriée, qui sont aptes à se servir de l‘appareil et
en bonne santé physique peuvent utiliser la machine.
En outre, ces personnes doivent avoir lu le présent
manuel et connaître les exigences liées à la santé et
à la sécurité au travail.
c) Cette machine n‘est pas conçue pour être utilisée
par les personnes dont les facultés physiques,
sensorielles ou mentales sont limitées (enfants
y compris), ni par des personnes sans expérience
ou connaissances adéquates, à moins qu‘elles se
trouvent sous la supervision et la protection d‘une
personne responsable ou qu‘une telle personne leur
ait transmis des consignes appropriées en lien avec
l‘utilisation de la machine.
d) Soyez attentif et faites preuve de bon sens lors que
vous utilisez l’appareil. Un moment d‘inattention
pendant le travail peut entraîner des blessures
graves.
e) Utilisez l‘équipement de protection individuel
approprié pour l‘utilisation de l‘appareil,
conformément aux indications faites dans le
tableau des symboles, au point 1. L‘utilisation de
l‘équipement de protection individuel adéquat
certié réduit le risque de blessures.
f) Ne surestimez pas vos capacités. Adoptez toujours
une position de travail stable vous permettant de
garder l‘équilibre. Vous aurez ainsi un meilleur
contrôle en cas de situations inattendues.
g) Ne portez ni vêtements amples ni bijoux. Tenez vos
cheveux, vos vêtements et vos gants à l‘écart des
pièces mobiles. Les vêtements amples, les bijoux et
les cheveux longs peuvent être happés par les pièces
mobiles.
h) Avant de démarrer l‘appareil, enlevez tous les outils
de réglage et toutes les clés utilisées. La présence
d‘objet au niveau des pièces en rotation peut causer
des dommages et des blessures.
i) Cet appareil n‘est pas un jouet. Les enfants doivent
demeurer sous la supervision d’un adulte an qu’ils
ne jouent pas avec l’appareil.
2.3. UTILISATION SÉCURITAIRE DE L‘APPAREIL
a) Ne faites pas surchauer l‘appareil. Utilisez les outils
appropriés pour l‘usage que vous en faites. Le choix
d‘appareils appropriés et l‘utilisation soigneuse de
ceux-ci produisent de meilleurs résultats.
b) N’utilisez pas l’appareil si l’interrupteur MARCHE/
ARRÊT ne fonctionne pas correctement. Les appareils
qui ne peuvent pas être contrôlés à l‘aide d‘un
interrupteur sont dangereux et doivent être réparés.
c) Les outils qui ne sont pas en cours d‘utilisation
doivent être mis hors de portée des enfants et des
personnes qui ne connaissent ni l‘appareil, ni le
manuel d‘utilisation s‘y rapportant. Entre les mains
de personnes inexpérimentées, ce genre d‘appareils
peut représenter un danger.
Les notions d‘« appareil », de « machine » et de « produit »
gurant dans les descriptions et les consignes du manuel se
rapportent à/au < Broyeur de végétaux à essence, Broyeur
de bois à essence >. N‘utilisez pas l‘appareil dans des
pièces où le taux d‘humidité est très élevé, ni à proximité
immédiate de récipients d‘eau! Ne mouillez pas l‘appareil.
Risque de chocs électriques! N‘insérez ni les mains, ni tout
autre objet dans l‘appareil lorsqu‘il fonctionne! Ne couvrez
pas les orices de ventilation!
2.1. SÉCURITÉ AU POSTE DE TRAVAIL
a) Veillez à ce que votre poste de travail soit toujours
propre et bien éclairé. Le désordre ou un éclairage
insusant peuvent entraîner des accidents. Soyez
prévoyant, observez les opérations et faites preuve
de bon sens lorsque vous utilisez l’appareil.
b) N‘utilisez pas l‘appareil dans les zones à risque
d‘explosion, par exemple à proximité de liquides,
de gaz ou de poussières inammables. Certains
appareils peuvent produire des étincelles
susceptibles d’enammer la poussière et les vapeurs.
c) En cas de dommages ou de mauvais fonctionnement,
l’appareil doit être mis hors tension immédiatement
et la situation doit être rapportée à une personne
compétente.
d) En cas d’incertitude quant au fonctionnement correct
de l’appareil, contactez le service client du fabricant.
e) Seul le service du fabricant peut eectuer des
réparations. Ne tentez aucune réparation par vous-
même!
f) En cas de feu ou d’incendie, utilisez uniquement des
extincteurs à poudre ou au dioxyde de carbone (CO2)
pour étouer les ammes sur l’appareil.
g) Aucun enfant ni personne non autorisée ne doit se
trouver sur les lieux de travail. (Le non-respect de
cette consigne peut entraîner la perte de contrôle
sur l‘appareil).
h) Durant le fonctionnement, l‘appareil produit de la
poussière et de la saleté. Les personnes qui n‘utilisent
pas l‘appareil doivent être protégées contre les eets
néfastes de celui-ci.
i) En cas de risque pour la santé ou de danger de
mort, de panne ou d‘accident, arrêtez l‘appareil en
appuyant sur le BOUTON D‘ARRÊT D‘URGENCE!
j) Vériez régulièrement l‘état des autocollants portant
des informations de sécurité. S’ils deviennent
illisibles, remplacez-les.
k) Conservez le manuel d’utilisation an de pouvoir
le consulter ultérieurement. En cas de cession de
l’appareil à un tiers, l’appareil doit impérativement
être accompagné du manuel d’utilisation.
l) Éloignez les enfants et les autres personnes de la
zone de travail de la machine.
m) Assurez-vous que le lieu de travail est ouvert.
REMARQUE! Les illustrations contenues dans le
présent manuel sont fournies à titre explicatif. Votre
appareil peut ne pas être identique.
La version originale de ce manuel a été rédigée en
allemand. Toutes les autres versions sont des traductions
de l'allemand.
2. CONSIGNES DE SÉCURITÉ
ATTENTION! Veuillez lire attentivement toutes les
consignes de sécurité et toutes les instructions. Le
non-respect des avertissements et des consignes
de sécurité peut entraîner des chocs électriques, un
incendie, des blessures graves ou la mort.
REMARQUE! Veillez à ce que les enfants et les
personnes qui n'utilisent pas l'appareil soient en
sécurité durant le travail.
d) Maintenez l‘appareil en parfait état de marche. Avant
chaque utilisation, vériez l’absence de dommages
en général et au niveau des pièces mobiles (assurez-
vous qu’aucune pièce ni composant n’est cassé et
vériez que rien ne compromet le fonctionnement
sécuritaire de l’appareil). En cas de dommages,
l’appareil doit impérativement être envoyé en
réparation avant d’être utilisé de nouveau.
e) Tenez l‘appareil hors de portée des enfants.
f) La réparation et l‘entretien des appareils doivent
être eectués uniquement par un personnel qualié,
à l‘aide de pièces de rechange d‘origine. Cela
garantit la sécurité d’utilisation.
g) Pour garantir l‘intégrité opérationnelle de l‘appareil,
les couvercles et les vis posés à l‘usine ne doivent pas
être retirés.
h) Lors du transport, de l’installation et de l’utilisation
de l’appareil, respectez les dispositions d‘hygiène et
de sécurité en vigueur dans le pays d‘utilisation.
i) Évitez de soumettre l‘appareil à une charge excessive
entraînant son arrêt. Cela peut causer une surchaue
des composants d‘entraînement et endommager
l‘appareil.
j) Ne touchez ni les pièces mobiles, ni les accessoires
à moins que l’appareil n‘ait été préalablement
débranché.
k) N‘inclinez pas et ne transportez pas la machine
lorsqu‘elle est en marche.
l) Ne laissez pas l‘appareil sans surveillance pendant le
fonctionnement. Éteignez la machine et débranchez
le l de la bougie d‘allumage chaque fois que vous
devez quitter la zone de travail.
m) Nettoyez régulièrement l‘appareil pour en prévenir
l’encrassement.
n) Cet appareil n‘est pas un jouet. Le nettoyage et
l’entretien ne doivent pas être eectués par des
enfants, à moins qu’ils se trouvent sous la supervision
d’un adulte responsable.
o) N‘installez, n‘enlevez, n‘ajustez ou n‘entretenez pas
les composants de la goulotte d’éjection ni toute
autre pièce lorsque le moteur tourne.
p) Lorsque le moteur tourne, maintenez toutes les
parties du corps et les objets lourds à l’écart de
la trémie de chargement (trémie principale et
également tube de broyage pour le HT-HECTOR 212)
et de la goulotte d’éjection.
q) N‘insérez pas les membres dans la trémie et dans
la goulotte d’éjection lorsque la machine est en
marche. Cela peut entraîner l’arrachement et/ou la
coupure des membres.
r) N’insérez jamais de métal, de cailloux, de bouteilles,
de canettes ou d’autres chose que des plantes dans
l’appareil.
s) La rotation des lames de coupe situées à l‘intérieur
de ces orices peut causer des blessures graves en
cas de contact.
t) Soyez prudent lorsque vous travaillez. La trémie de
chargement et la goulotte d’éjection de la machine
peuvent éjecter des éléments en train d’être broyés.
u) Pendant le fonctionnement, le moteur devient très
chaud. Ne touchez pas le moteur chaud, car cela
peut provoquer des brûlures.
v) Pour éviter tout risque d’incendie, maintenez les
feuilles, l’herbe et autres matières combustibles
à l‘écart du moteur et du silencieux. Ceux-ci
deviennent chauds pendant l’utilisation.
3. CONDITIONS D’UTILISATION
La machine est conçue pour broyer des branches, des
arbustes, des mauvaises herbes, des pousses et des
herbes longues d‘un diamètre ne dépassant pas la valeur
indiquée dans le tableau des détails techniques. N‘utilisez
pas la machine pour broyer des débris de construction, du
plastique, des produits en papier, de câbles ou des cordes,
ni tout autre matériau pouvant contenir du métal.
w) Ne travaillez pas sur les trottoirs, le gravier ou
d‘autres surfaces dures, car les objets peuvent
ricocher et causer des blessures.
x) Certaines espèces de végétaux peuvent provoquer
des réactions allergiques. La poussière produite
pendant le traitement peut être nocive, des mesures
de protection appropriées doivent être prises.
y) Ne retirez pas les verrous de la machine à la main.
z) Ne travaillez pas sur un terrain accidenté ou avec un
appareil instable.
aa) Attention! Le matériau traité peut rebondir de la
trémie de chargement ou être éjecté de la goulotte
d’éjection.
bb) Si le moteur cale en raison d‘un bourrage, déplacez le
levier d‘accélérateur en position « arrêt » ou mettez
l‘interrupteur en position « 0 » (sur les appareils
équipés d’un interrupteur) avant de procéder au
nettoyage.
cc) En cas de colmatage ou de blocage du broyeur,
arrêtez immédiatement le moteur et attendez que
toutes les pièces mobiles soient complètement
arrêtées avant de procéder au nettoyage.
dd) Il est interdit d‘insérer des branches de diamètre
supérieur à celui indiqué dans les détails techniques.
ee) Assurez-vous que la trémie de chargement et le tube
de broyage (HT-HECTOR 212) sont vides avant de
démarrer la machine.
) Avant d‘allumer l‘appareil, ajoutez de l‘huile jusqu‘au
niveau approprié. Si le niveau d‘huile est trop bas, le
moteur ne démarrera pas ou pourra s‘éteindre.
gg) Les fuites d‘huile doivent être signalées aux services
appropriés ou être conformes aux exigences légales
en vigueur dans la zone d‘utilisation.
hh) Danger! Menace pour la santé et risque d‘explosion
du moteur à combustion interne.
ii) Les gaz d‘échappement du moteur contiennent du
monoxyde de carbone, une substance toxique. La
présence de monoxyde de carbone peut entraîner la
perte de connaissance et même la mort. Ne faites
pas tourner le moteur dans les pièces fermées.
jj) Protégez le moteur contre la chaleur, les étincelles et
les ammes. Ne fumez pas près du broyeur!
kk) L‘essence est hautement inammable et explosive.
Avant de faire le plein, le moteur doit être éteint et
froid.
ll) Attention! Utiliser le mauvais carburant risque
d‘endommager le moteur.
mm) La batterie de la machine est sous tension. Ne
touchez pas les bornes et les connecteurs de la
batterie. La déconnexion des connecteurs de la
batterie doit être eectuée dans le bon ordre.
ATTENTION! Bien que l‘appareil ait été conçu en
accordant une attention spéciale à la sécurité et qu‘il
comporte des dispositifs de protection, ainsi que
des caractéristiques de sécurité supplémentaires,
il n’est pas possible d’exclure entièrement tout
risque de blessure lors de son utilisation. Nous
recommandons de faire preuve de prudence
et de bon sens lorsque vous utilisez l’appareil.

18.12.2018 18.12.2018
36 37
FR FR
3.2. PRÉPARATION À L‘UTILISATION
CHOIX DE L’EMPLACEMENT DE L’APPAREIL:
La machine doit être utilisée dans un lieu ouvert, sur une
surface stable et plane, de préférence sur du gazon ou de la
terre. Ne placez pas la machine sur du béton, de l’asphalte
ou sur toute autre surface dure, car les copeaux et autres
résidus éjectés par la machine risquent de rebondir et de
constituer un danger.
Conditions de travail
Passez en revue le matériau à déchiqueter et assurez-vous
qu‘il y a susamment d‘espace au-dessus de la machine
pour charger le matériau. Il est recommandé de choisir un
lieu de travail aussi proche que possible du lieu d‘utilisation
des copeaux.
ATTENTION! Ne tentez pas de démarrer la machine
tant que le montage de celle-ci n‘est pas terminé.
Cela peut causer de graves blessures et endommager
la machine. Pendant le montage, ne touchez pas les
lames de la machine et ne placez pas vos mains
à l‘intérieur de celle-ci.
b) Installez le jeu de roues et xez-les avec des vis.
c) Placez la machine en position horizontale et posez le
joint d‘étanchéité de la trémie.
d) Posez la trémie de chargement sur le joint et xez
l’assemblage avec des vis, des rondelles et des
écrous.
e) Montez la poignée de la trémie de chargement et
xez-la à l‘aide de vis et d’écrous.
f) Montez le tube de broyage au niveau de l’orice
latéral de la machine et serrez-le l‘aide de vis et
d’écrous.
I
II
III
IV
HT-HECTOR 212
A. Trémie de chargement (ᴓ10 mm)
B. Moteur
C. Goulotte d’éjection
D. Tube de broyage (ф70 mm)
E. Aspiration
F. Soupape de carburant
G. Interrupteur ON/OFF / contact
H. Accélérateur
I. Bouchon du réservoir à carburant
J. Filtre à air
K. Silencieux
L. Poignet du lanceur à rappel
M. Bouton d‘arrêt d‘urgence (non visible sur l‘image)
HT-HECTOR 420
1. Poignée
2. Moteur
3. Couvercle de la trémie de chargement
4. Trémie de chargement
5. Goulotte d’éjection
6. Couvercle de la goulotte d’éjection
7. Roue
8. Bouton d‘arrêt d‘urgence
Description du moteur
A. Silencieux
B. Filtre à air
C. Accélérateur
D. Interrupteur ON/OFF / contact
E. Disjoncteur
F. Démarreur manuel
G. Porte-câble du lanceur à rappel
H. Soupape de carburant
I. Aspiration
J. Bougie d‘allumage
K. Réservoir à carburant
L. Bouchon de remplissage
M. Démarreur électrique
N. Bouchon de vidange d‘huile
O. Jauge
HT-HECTOR 212
a) Couchez la machine sur le côté.
Attention! N‘inclinez pas la machine si de l‘huile et/
ou du carburant se trouvent dans les réservoirs, car
ceux-ci risquent de déborder.
ATTENTION: Enlevez tous les clous, câbles, cordes ou
pierres pouvant être entortillés dans les plantes ou
s’y trouver (par exemple, dans les racines, etc.) avant de
charger la machine.
L’utilisateur porte l’entière responsabilité pour
l’ensemble des dommages attribuables à un usage
inapproprié.
3.1. DESCRIPTION DE L'APPAREIL
Cela réduira au minimum le besoin de transporter le
matériau traité. Respectez une distance de sécurité par
rapport à la zone d’éjection des copeaux.
Assurez-vous que tous les passants, enfants, animaux ou
objets de valeur se trouvent également à une distance
sécuritaire de la zone d’éjection des copeaux.
No de pièce Description
1Roues
2Grande rondelle
3Vis M8x20
4Écrou
5Rondelle
6Pied
7Vis M8x25
8Bâti
9Moteur
10 Élément de coupe
11 Carter de la courroie
12 Trémie de chargement
13 Goulotte d’éjection
14 Essieu
15 Bâti de l’élément de coupe
16 Vis
17 Rondelle
18 Écrou
3.3. UTILISATION DE L‘APPAREIL
ATTENTION! Avant de démarrer la machine, faites le plein
en l‘huile moteur et en carburant. La machine est livrée
sans huile ni carburant dans les réservoirs.
1. Placez la machine sur une surface plane et stable de
sorte que la goulotte d’éjection soit dirigée dans une
direction sûre.
2. Vériez le niveau de carburant et d‘huile avant de
démarrer la machine.
3. Placez le sac de collecte sur la goulotte d’éjection et
xez-le de sorte qu‘il ne tombe pas.
4. Assurez-vous que la trémie de chargement et le tube
de broyage (ne concerne pas le modèle HT-HECTOR
420) sont vides. S‘il y a un matériau dans la machine
pendant la mise en marche, le lanceur à rappel du
démarreur risque de s‘arrêter brusquement et la
machine peut se renverser, provoquant de graves
blessures.
5. Réglez l’accélérateur au régime le plus bas.
6. Tenez-vous de façon stable sur le côté de la trémie
de chargement.
7. Réglez la soupape de carburant en position ON (voir
g. 4).
8. Réglez le levier d’aspiration en position ON (voir g. 5).
3
4 5
4.1
5.1
1. Montage de la trémie de chargement et de la
goulotte d’éjection
a) Insérez l’essieu de la roue [14] dans le trou situé
au niveau du bâti et xez l’assemblage en serrant
l’essieu à l’aide de la vis située au centre du trou.
b) Montez les roues [1] sur l’essieu [14] à l‘aide d’une vis
[3] et d’un écrou [2].
c) Montez le pied [6] sur le bâti de la machine à l‘aide
d‘une rondelle [5], d‘un écrou [4] et de deux vis [7].
2. Montage de la trémie de chargement
Pour monter la trémie de chargement:
a) Insérez les charnières de la trémie de chargement
[12] dans les orices du bâti de l’élément de
coupe[15] et xez-les à l’aide de vis de l‘autre côté.
b) Insérez les charnières de la goulotte d’éjection[13]
dans les orices du bâti de l’élément de coupe [15]
et xez-les à l’aide de vis de l‘autre côté.
3. Montage de la poignée
a) Montez la poignée [16] sur le bâti [8] à l‘aide de vis
[16], de rondelles [17] et d’écrous [18].
Appoint en carburant
La machine est entraînée par un moteur à quatre temps
pour essence sans plomb. Dévissez le bouchon du
réservoir à carburant et versez de l‘essence (utilisez un
entonnoir pour verser le carburant) en prenant soin de ne
pas renverser de liquide et de ne pas dépasser le niveau
maximal d‘essence. Le réservoir doit être rempli à un
niveau tel que le ltre à carburant soit visible.
Remplissez l’huile moteur jusqu’au niveau supérieur de la
jauge.
1 2
1.1
1.2
2.1
HT-HECTOR 420
ATTENTION! Avant de mettre la machine en marche,
remplissez les réservoirs d‘huile et de carburant
conformément aux instructions d‘utilisation.
VATTENTION! Avant de mettre la machine en marche,
remplissez les réservoirs d‘huile et de carburant
conformément aux instructions d‘utilisation.
Appoint en huile moteur
Placez la machine sur une surface plane et dévissez le
bouchon du réservoir d‘huile.
ATTENTION! Le plan de ce produit se trouve à la
dernière page du manuel d‘utilisation, p. 56.
ATTENTION! Les vues éclatées de ce produit se
trouvent aux dernières pages du manuel d‘utilisation
p. 57.

18.12.2018 18.12.2018
38 39
FR FR
3. Une fois le travail terminé, éteignez la machine en
tournant l’interrupteur du moteur en position OFF.
Débranchez le câble de la bougie d’allumage avant
de déplacer la machine, de vider le sac, de remplir de
nouveau les uides moteurs ou de procéder à toute
autre tâche d‘entretien ou de réparation.
10
14. Une fois le moteur arrêté, placez la soupape de
carburant en position OFF.
Broyage, déchiquetage
ATTENTION! Avant de commencer le travail, il est nécessaire
de tester son fonctionnement la machine sans broyer de
matériau. Si la machine ne produit aucun son suspect et
qu‘il n‘y a pas de fuite, vous pouvez continuer le travail.
1. Insérez lentement le matériau dans la trémie de
chargement. N’insérez pas de grandes quantités
de matériau en même temps. Après avoir inséré
le matériau, fermez le couvercle de la trémie de
chargement (s’applique au modèle HT-HECTOR 212).
2. Si nécessaire, utilisez un long morceau de matériau
à broyer pour pousser le contenu de la trémie.
ATTENTION! Ne mettez ni vos mains ni toute autre
partie de votre corps dans la trémie de chargement.
8 9
8.1 9.1
Consignes d’utilisation
• Chargez le matériau lentement. Si le moteur émet
des bruits inhabituels, cela signie que le matériau
est chargé trop rapidement.
• Les racines et autres matériaux sales émousseront et
endommageront les couteaux.
• Retirez régulièrement les copeaux de la machine.
Dans le cas contraire, ils peuvent provoquer un
blocage.
• Évitez de déchiqueter les matériaux humides, car
ils peuvent obstruer la machine. S’il est nécessaire
de broyer des matériaux humides, séparez-les des
matériaux secs.
Broyage de matériau à l‘aide du tube de broyage (HT-
HECTOR 212 uniquement)
1. Enlevez les petites branches et les feuilles. Cela
facilitera l‘insertion du matériau dans le tube de
broyage.
2. Insérez le matériau dans le tube de broyage, en
orientant l‘extrémité la plus épaisse vers le bas, et
laissez-le être aspiré. Ne placez qu’un seul morceau
à la fois.
3. Une fois le travail terminé, éteignez la machine en
tournant l’interrupteur du moteur en position OFF.
Consignes d’utilisation
• Il est interdit d‘insérer des branches d’un diamètre
supérieur à celui indiqué dans les détails techniques.
• Il est préférable de déchiqueter du bois vert frais. Les
lames resteront tranchantes plus longtemps.
3.4. NETTOYAGE ET ENTRETIEN
a) Avant de débloquer / désobstruer la machine, de
vider le sac, de remplir le réservoir de carburant
ou d’eectuer des travaux d’entretien ou de
réparation, assurez-vous toujours que la machine
est complètement arrêtée et que le l de la bougie
d‘allumage est débranché.
b) Pour nettoyer les diérentes surfaces, n‘utilisez que
des produits sans agents corrosifs.
c) Laissez bien sécher tous les composants après
chaque nettoyage avant de réutiliser l’appareil.
d) Conservez l‘appareil dans un endroit propre, frais et
sec, à l‘abri de l‘humidité et des rayons directs du
soleil.
e) Il est défendu d‘asperger l‘appareil à l‘aide d‘un jet
d‘eau.
f) Évitez que de l’eau ne pénètre à l’intérieur de
l’appareil par l’intermédiaire des orices de
ventilation du boîtier.
g) Nettoyez les orices de ventilation à l‘aide d‘un
pinceau et d‘air comprimé.
h) Contrôlez régulièrement l‘appareil pour vous assurer
qu‘il fonctionne correctement et ne présente aucun
dommage.
i) Utilisez un chion doux lors du nettoyage.
j) En cas de diminution de l‘ecacité de déchiquetage,
retournez les lames, aûtez-les ou remplacez-les.
k) Utilisez une brosse ou un aspirateur pour nettoyer
les copeaux qui se sont accumulés sur la machine et
autour du moteur.
l) Après chaque utilisation, éliminez tous les résidus
présents dans la trémie de chargement et la goulotte
d’éjection.
9. Réglez l’interrupteur du moteur sur ON ou démarrez
le moteur avec le lanceur à rappel comme suit:
Tenez fermement le moteur d’une main (vériez au
préalable que le moteur n’est pas chaud et, le cas échéant,
laissez-le refroidir avant de prendre cette mesure), tirez
doucement sur la poignée du lanceur à rappel jusqu’à sentir
une résistance, puis tirez violemment. Si le moteur ne
démarre pas, répétez la procédure.
11. Lorsque le moteur démarre et tourne régulièrement,
déplacez le levier d’aspiration en position OFF.
12. Pour augmenter ou diminuer le régime moteur,
déplacez l‘accélérateur. Pour augmenter le régime,
déplacez la poignée vers le symbole du lapin,
pour réduire le régime, déplacez la poignée vers le
symbole de la tortue.
13. Pour éteindre la machine, placez l’interrupteur du
moteur en position OFF.
67
6.1
Filtre à carburant
Inspectez ltre à carburant toutes les 150 heures de
fonctionnement ou tous les 3 mois d‘utilisation. Retirez
et nettoyez le ltre à carburant. Dévissez le bouchon
du réservoir de carburant, nettoyez-le à l’eau avec un
détergent doux, séchez-le et remettez-le en place.
Lors de la mise en service de l‘appareil, respectez les points
suivants:
• Vériez qu’il n’y a pas d’éléments desserrés, tordus
ou endommagés
• Vériez que le bâti de la machine n‘est pas
endommagé ou ssuré
• Vériez l‘état technique des lames
• Vériez l‘état de l‘huile moteur et du carburant
Entretien du moteur
Contrôlez l’état technique de la bougie d’allumage toutes
les 50 heures de fonctionnement de la machine. Vériez la
couleur du dépôt à l’extrémité bougie. Elle doit être marron.
Enlevez les résidus à l‘aide d‘une brosse dure. Vériez la
distance entre les électrodes et ajustez-la si nécessaire. La
distance correcte est de 0,7 à 0,8 mm.
Vidange de l‘huile moteur
Placez la machine sur une surface plane, allumez-la et faites
chauer le moteur pendant quelques minutes. Ensuite,
éteignez la machine.
Dévissez le bouchon du réservoir d‘huile. Placez un
récipient pour vidanger l‘huile moteur.
Retirez le bouchon de vidange d‘huile et videz toute l‘huile.
An d‘éviter l‘inltration d‘huile dans le bâti de l‘appareil,
il est recommandé d‘utiliser un tuyau pour diriger l‘huile
directement dans le récipient d‘huile usée.
Contrôlez le bouchon de vidange, le joint d‘étanchéité, le
bouchon d‘huile et la bague.
S‘ils sont endommagés ou usés, remplacez-les. Revissez le
bouchon de vidange.
Après cette opération, remplissez le réservoir d‘huile neuve
jusqu‘au niveau supérieur de la jauge.
Filtre à air
Contrôlez l’état technique du ltre à air. Dévissez-le et
nettoyez ou remplacez-le par un neuf. Pour le nettoyer,
utilisez de l’eau et un détergent doux, puis laissez-le sécher
et remettez-le en place. Ne démarrez pas le moteur lorsque
le ltre à air est démonté.
Entretien des batteries
Les batteries rechargeables installées dans les machines
ne nécessitent ni plein en eau ni entretien particulier.
Assurez-vous que les connecteurs ne sont pas recouverts
de poussière et de rouille. La corrosion peut entraîner un
dysfonctionnement de la batterie et poser un danger. Si
vous remarquez des signes de corrosion, débranchez
les connecteurs de la batterie et enlevez la corrosion en
nettoyant les bornes et les connecteurs – avec une solution
de bicarbonate de soude et d‘eau (bicarbonate de sodium).
Graissez les connecteurs avec de la graisse antioxydante
avant de les remettre en place.
Graissage
Sur le modèle HT-HECTOR 420, les roulements de l’arbre
de l’élément de coupe doivent être graissés toutes les 50
heures de fonctionnement.
Stockage
Avant de stocker la machine, procédez comme suit:
1. Débranchez le l de la bougie pour éviter tout
démarrage accidentel.
2. Nettoyez la machine et jetez les copeaux.
3. Laissez la machine sur une surface plane dans un
endroit bien ventilé, à l’abri du rayonnement solaire.
4. N’entreposez pas la machine dans un endroit où se
trouve une source de chaleur comme un réchaud, un
radiateur à gaz ou électrique, etc.
5. Ne stockez pas la machine dans un endroit où des
gaz d’échappement ou des gaz toxiques risquent
pénétrer dans les locaux d‘habitation.
7. Placez les couvercles sur la trémie de chargement et
la goulotte d’éjection.
8. Si la machine ne doit pas être utilisée pendant plus
de 30 jours, videz le carburant se trouvant dans le
réservoir et le carburateur. Dévissez la bougie et
versez environ 5 ml d’huile moteur dans l’orice
de la bougie. Assurez-vous que l’interrupteur est
en position OFF, puis tirez délicatement sur le
lanceur à rappel à plusieurs reprises. Revissez la
bougie d’allumage et tirez sur le câble du lanceur
jusqu’à sentir une résistance. Ne tirez plus.
Transport
Pour le transport, respectez les consignes suivantes:
• Éteignez la machine, fermer la soupape d‘essence et
débranchez le l de la bougie d’allumage
• Videz le carburant du réservoir
• Posez les couvercles sur la trémie de chargement et
la goulotte d’éjection
• Transportez la machine dans sa position de travail
• Transportez la machine en tenant la poignée, en
l‘inclinant légèrement et en plaçant son poids sur
les roues.
11
11.1
12
12.1
13
13.1
This manual suits for next models
1
Table of contents
Languages:
Other hillvert Chipper manuals

hillvert
hillvert HT-HECTOR 212S User manual

hillvert
hillvert HT-HECTOR-100A User manual

hillvert
hillvert HT-HECTOR 420T User manual

hillvert
hillvert HT-HECTOR 420T User manual

hillvert
hillvert HT-HECTOR-100B User manual

hillvert
hillvert HT-HECTOR-1200B User manual

hillvert
hillvert HT-HECTOR-6600 User manual