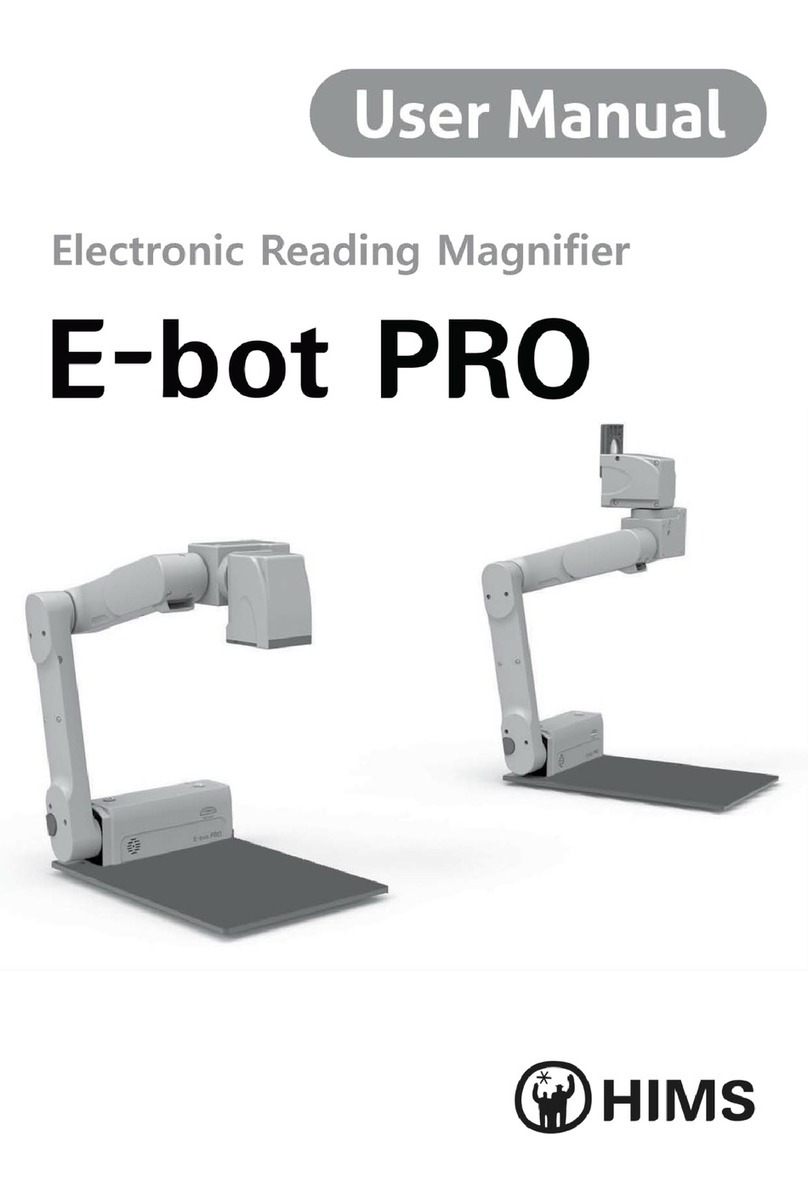
HIMS E-bot PRO User manual


2 | P a g e
E-bot PRO offers a variety of powerful features for low vision
students and users of all ages including the following:
1) Easy To Use
Easily set up and transport from classroom to classroom,
work to home, etc. ▶page 13 ~ 17
Easily and intuitively control camera movement with just a
light touch of the Joystick on the Wireless Controller. ▶
page 37 ~ 40
2) HD Quality
Sharp HD image quality ensures a crystal clear view of the
material and reduces eye fatigue.
3) Flexible viewing
Adjust color, contrast and magnification levels for best
viewing for your visual condition ▶page 42 ~47
4) Near view and Distance view
View images on the included reading table in front of you
or on a whiteboard at a distance. ▶page 40 ~42
5) Connectivity to a variety of devices
Connectivity to DVI/HDMI Monitor ▶page 20 ~21
Connectivity to PC or Mac ▶page 21 ~31
Connectivity to iPad or Android Tablet ▶page 31 ~33
6) Flexible, Versatile Control
Manipulate image viewing in a variety of ways including
using the Wireless Controller, the keyboard and mouse of
your computer, or the touch screen of your iPad or Android
tablet
▶page 37 ~50 for the Wireless Controller
▶page 87 ~91 for the iPad or Android tablet
▶page 92 ~95 for the PC or Mac

P a g e | 3
7) OCR
Capture images and use OCR to recognize the text, and
read it using the built-in Text-To-Speech voices. ▶page
58 ~66
Save OCR images and results to an SD card for later viewing
▶page 49

4 | P a g e
Safety Precautions
For your safety and protection of the E-bot PRO, please read and
abide by the following important safety precautions.
1) Do not plug the AC adapter into a faulty electrical outlet.
This is to prevent electrical shock or fire.
2) Do not touch the AC adapter with wet hands.
3) Use only the AC adapter provided with the E-bot PRO. Using
another AC adapter may damage the device. Be advised that
damage caused by misuse is not covered by the warranty.
4) Do not attempt to disassemble or repair the E-bot PRO yourself.
Serious damage may occur to the device and the warranty will be
voided.
5) Do not use the E-bot PRO in a moisture-rich environment such
as a bathroom, shower or a wet kitchen counter as moisture
may get inside the unit and damage the components.
6) Do not use E-bot PRO in extreme high or low temperatures. We
recommend that you do not use this device in environments
below 0°C or above 40°C, as the image may display
inaccurately.
7) Always turn off the power before moving the product to another
location.
8) Please do not simply drop the arm of E-bot PRO or do not lean
on or against the arm of E-bot PRO as it will cause impact
damage to the unit.
9) The battery is consumable and its life may be reduced after 1
year of use

P a g e | 5
Table of Contents
1. Package Contents...........................................................................................................................................8
2. E-bot PRO Orientation................................................................................................................................9
2.1 Overview of E-bot PRO ............................................................................................................................9
2.2 Back Side of E-bot PRO..........................................................................................................................9
2.3 Right Side of E-bot PRO..................................................................................................................... 10
2.4 Front of E-bot PRO................................................................................................................................ 11
2.5 Front of Wireless Controller ......................................................................................................... 11
2.6 Back Side of Wireless Controller ................................................................................................ 11
3. Setup E-bot PRO .......................................................................................................................................... 13
3.1 Unfolding the E-bot PRO..................................................................................................................... 13
3.2 Folding the E-bot PRO ......................................................................................................................... 15
3.3 Inserting the Battery ......................................................................................................................... 17
3.4 Removing the Battery............................................................................................................................ 17
3.5 Charging the E-bot PRO....................................................................................................................... 18
4. How to Connect to Display Devices ................................................................................................. 20
4.1 Connecting a Monitor via HDMI ....................................................................................................... 20
4.2 Connecting a Portable monitor....................................................................................................... 21
4.3 Connecting a PC or Mac....................................................................................................................... 21
4.4 Connecting an iPad or Android Tablet via Wi-Fi ...................................................................... 31
5. Using the Control Panel on the Main Body ................................................................................. 33
5.1 Power On/Off.............................................................................................................................................. 33
5.2 Light On/Off.............................................................................................................................................. 34
5.3 Pairing the Main Body with the Wireless Controller ....................................................... 35
5.4 Volume Up/Down ......................................................................................................................................... 35

6 | P a g e
5.5 Turning Wi-Fi On/Off............................................................................................................................ 36
6. Using the Wireless Controller .......................................................................................................... 36
6.1 Inserting the Batteries..................................................................................................................... 36
6.2 Power On / Off ......................................................................................................................................... 36
6.3 Pairing the Wireless Controller with the Main Body ....................................................... 37
6.4 Using the basic buttons..................................................................................................................... 38
6.5 Changing the Camera Modes ................................................................................................................ 39
6.6 Magnification ........................................................................................................................................... 41
6.7 Changing the Color Mode..................................................................................................................... 41
6.8 Contrast....................................................................................................................................................... 42
6.9 Focus Lock .................................................................................................................................................. 43
6.10 Finding your current Reading Position................................................................................. 44
6.11 OCR.............................................................................................................................................................. 45
6.12 Auto Scroll............................................................................................................................................ 46
6.13 Save............................................................................................................................................................ 48
6.14 Line Feed ................................................................................................................................................ 48
7. Advanced features...................................................................................................................................... 50
7.1 Using the menu ......................................................................................................................................... 50
7.2 Color Mode Settings.............................................................................................................................. 50
7.3 Markers ......................................................................................................................................................... 54
7.4 OCR .................................................................................................................................................................. 57
7.5 Auto Scroll................................................................................................................................................ 66
7.6 Finding & Deleting saved Files..................................................................................................... 67
8. Preferences ................................................................................................................................................... 72
8.1 Using Headphones..................................................................................................................................... 72

P a g e | 7
8.2 Voice Guide................................................................................................................................................ 72
8.3 E-bot PRO Operating Language ......................................................................................................... 78
8.4 Set Preferred Camera Position....................................................................................................... 79
8.5 Set the Camera Direction .................................................................................................................. 79
8.6 Joystick Sensitivity............................................................................................................................ 81
8.7 Initialization ......................................................................................................................................... 82
8.8 Wi-Fi Password Change ......................................................................................................................... 83
8.9 Information................................................................................................................................................ 85
9. Tablet Viewer Gestures .......................................................................................................................... 86
10. Quick Guide to PC or Mac operations ......................................................................................... 91
11. Trouble shooting..................................................................................................................................... 95
Warranty ................................................................................................................................................................... 97
Customer Support ................................................................................................................................................. 97
FCC warning............................................................................................................................................................. 98

8 | P a g e
1. Package Contents
When you receive your E-bot PRO, please make sure that the
following items are included with your package.
1) E-bot PRO
2) E-bot PRO Battery
3) Wireless Controller
4) 2 AAA Batteries for the Wireless Controller
5) AC Adapter
6) Cables (USB 3.0, HDMI)
7) HDMI to DVI Gender adapter
8) Carrying Case
9) Headphones
10) SD Card 16GB
11) User Guide
12) PC and Mac installation CD

P a g e | 9
2. E-bot PRO Orientation
2.1 Overview of E-bot PRO
2.2 Back Side of E-bot PRO
Close-up Lens
Camera
Camera Handle
Camera arm
Control
Panel
Arm Lock button
Reading Table
SD Card
Wireless
Controller
Secondary Camera

10 | P a g e
2.3 Right Side of E-bot PRO
USB 3.0 port
HDMI port
Battery Unlock button
DC OUT port
Channel switch
DC IN port
Volume dial
Wi-Fi switch
Headphones jack
Battery

P a g e | 11
2.4 Front of E-bot PRO
2.5 Front of Wireless Controller
2.6 Back Side of Wireless Controller
Power button
Light
button
Wi-Fi
Indicator
Power Indicator
Near View button
Joystick
(Navigation)
Zoom In/Out button
OCR button
Distance View
button
Enter button
Mode button
Play/Pause
button
Menu button
Auto Scroll
button
Transmit
Indicator

12 | P a g e
Batterie
s
Battery cover
Power switch
Channel switch

P a g e | 13
3. Setup E-bot PRO
3.1 Unfolding the E-bot PRO
Follow the instructions below to setup the E-bot PRO.
①Grip the camera handle and unfold it upward.
②Continue to unfold the camera until it lays flat on
the desk or table top.
③Press and hold the Arm Lock button on the left side
of the E-bot PRO. While holding the Arm Lock button,

14 | P a g e
unfold the longer arm upward until it clicks in to
place.
④The Camera arm should be at a 90 degree angle as shown

P a g e | 15
in the illustration. The E-bot PRO is ready for use.
3.2 Folding the E-bot PRO
①Press the Power button briefly to power off E-bot PRO.
②The camera automatically rotates counterclockwise.
③The camera is automatically flipped to fold in to the
arm.

16 | P a g e
④Press the Arm Lock button, and fold the longer arm
down.

P a g e | 17
⑤Flip the camera piece and fold it inside as well.
※Note: Please do not simply drop the arm of E-bot PRO
※Note: You must fold the E-bot PRO while in the Near
View mode. (For information on the Near View mode, please
refer to section “6.5 Changing the Camera Modes”)
3.3 Inserting the Battery
①Grip the E-bot PRO’s Main Body, and insert the
Battery.
②When the Battery is fully inserted, you will feel and
hear it click in to place.
3.4 Removing the Battery

18 | P a g e
①Lift the Battery Unlock button on the back side of
the unit.
②While lifting the Battery Unlock button, pull the
battery out of the compartment.
3.5 Charging the E-bot PRO
3.5.1 Charging via the AC Adapter
①The DC jack is located on the back side of the E-bot
PRO.
②When E-bot PRO is connected to the AC adapter, the
Battery is being charged.
※Note: if the unit is powered off when the battery
status is below 5%, please charge E-bot for more than
4 hours before use.
※ Note: Please charge the battery for more than 24
hours if the E-bot is left for 3 months of disuse with
a charge below 5%
.
①
②

P a g e | 19
3.5.2 Charging via USB
①Connect the flatter end of the USB 3.0 cable to the
USB port on your PC.
②Connect the larger end of the USB 3.0 cable to the
USB port on the back side of the E-bot PRO.
※Note: If you connect the E-bot PRO to a computer
via USB while E-bot PRO is powered off, the E-bot
PRO’s battery is charged. However, USB charging is
quite slow. We recommend a minimum of 25 hours or more
to charge.
3.5.3 The Power Indicator
The Power Indicator is located on the top right of the
Control Panel of the Main Body. The Power Indicator
indicates status as follows:
When the Battery is being charged, the Power Indicator
appears red.
When the Battery is fully charged while E-bot PRO is turned
on, the Power Indicator color is changed to green.
When the Battery is fully charged while E-bot PRO is turned
off, the Power Indicator is not lit.

20 | P a g e
4.How to Connect to Display Devices
E-bot PRO is compatible with various types of display devices,
such as desktop video monitors, laptop computers, iPad and
Android tablets.
4.1 Connecting a Monitor via HDMI
①Plug the monitor's power cord into a power outlet.
②Connect the HDMI cable to the HDMI port on the monitor.
③Connect the opposite end of the HDMI cable to the HDMI
port on the back side of the E-bot PRO.
※Note: If the monitor has no HDMI port, but has a DVI
port, please use the included HDMI to DVI gender adapter.
※Note: When connecting an HDMI monitor, the resolution
of video output is 1280x720P regardless of the monitor’s
resolution.
Other manuals for E-bot PRO
1
Table of contents
Other HIMS Magnifier manuals

HIMS
HIMS Candy 4HD User manual

HIMS
HIMS LifeStyle Candy Grip User manual

HIMS
HIMS E-bot PRO User manual

HIMS
HIMS E-bot User manual

HIMS
HIMS SenseView DUO User manual

HIMS
HIMS GOVISION User manual

HIMS
HIMS LifeStyle HD HD730 User manual

HIMS
HIMS GoVision GV100 User manual

HIMS
HIMS candy5 hd II User manual

HIMS
HIMS lifestyle candy User manual
Popular Magnifier manuals by other brands

Eschenbach
Eschenbach varioLED + user manual

Eurotops
Eurotops 1100047 instruction manual

Ash Technologies
Ash Technologies Liberty Scholar 2 user manual

Spectro-UV
Spectro-UV SPECTROLINE QZ-Series Operator's manual

VisionAid
VisionAid Helix HD user manual

SELVAS Healthcare
SELVAS Healthcare HIMS GoVision PRO user manual