5
ENGLISH
1
PMML0277A - rev.0 - 12/2012
4.4 PIPING CONNECTION
INSTALLATION MANUAL FOR
MULTI-KITS
1 When the branched pipe size is smaller than 22.2mm of in-
ner diameter, a mini pipe cutter (eld-supplied) as follow is
required.
(mm)
Recommended mini pipe cutter Cleavable
size
Rotating
radius
(21)
(43)
(70)
less than 70mm
Ø5 - 28 (50)
2 Use clean copper pipes without any moisture or foreign mate-
rials on inner surface of pipes. When connecting refrigerant
pipe, cut the copper pipes with a pipe cutter as shown below.
Also blow the pipes with nitrogen or air to remain no dust insi-
de the pipe. Do NOT use a saw, a grindstone or others which
causes a large amount of cutting powder.
Pipe cutter
Pipe
Burring
Connection part
3 When cutting the pipe, secure the adequate depth for brazing
as shown in the following table.
(mm)
A: Outer diameter B: Minimum
depth
A
Over 5, Below 8 6
Over 8, Below 12 7
Over 12, Below 16 8
Over 16, Below 25 10
Over 25, Below 35 12
Over 35, Below 45 14
• Caution for Refrigerant Piping
When installing pipe through the wall, secure a cap at the end of
the pipe. INCORRECT
CORRECT
Attach a cap
or vinyl tape.
Hole
Do NOT place the pipe directly on the ground.
Attach a cap
or vinyl tape.
CORRECT INCORRECT
Attach a cap or
vinyl tape with
rubber band.
Rain water
can enter.
INCORRECT
CORRECT
4 Make sure that all stop valves of the outdoor unit are closed
completely.
5 Blow the inside of the pipes with nitrogen gas when brazing.
DANGER
Make sure that the refrigerant leakage test should be per-
formed. Refrigerant (Fluorocarbon) for the indoor unit is
non-ammable, non-toxic and odorless. However, if the re-
frigerant is leaked and is contacted with re, toxic gas will
generate. Also, because the uorocarbon is heavier than
air, the oor surface will be lled with it, which could cause
suffocation.
6 The air tight test pressure of this product is 4.15MPa.
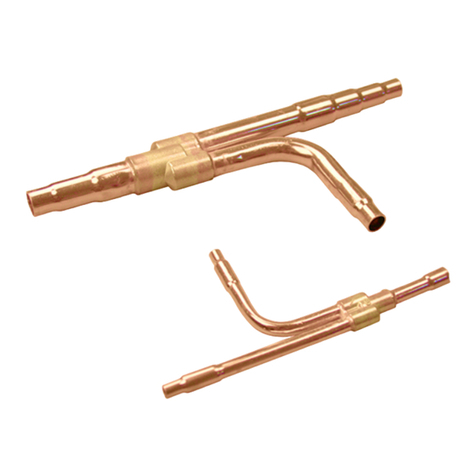
7 Apply the insulation supplied with this multi-kits to each
branch (liquid side and gas side) with a tape. Also apply the
eld-supplied insulation to the eld-supplied pipes.
NOTE
When polyethylene foam is applied, a thickness of 10mm for li-
quid piping and 15mm to 20mm for gas piping is recommended.
(Use the insulation with heat resistance of 100oC for gas piping.)
Wrap the insultation tape without gap between
accessory insulation and eld-supplied insulation.
Insulation tape
(Field-Supplied)
Insulation for gas and
liquid line (Accessory)
Insulation (Field-Supplied)
Do NOT leave a
gap between the
insulation.
Fix the insulation with tape
(accessory) completely
after taping temporary.
CAUTION
• Perform the insulation work when the pipe surface tempera-
ture decreases to the room temperature. If insulation work
is performed immediately after brazing, insulation may melt.
• If the ends of pipe are open to the atmosphere for a while after
performing piping work, securely put caps or plastic bags over
the pipe ends for avoiding moisture or dust.
After installation, it is recommended to keep this manual by a
customer.
