Hitech Cloud- User manual

Thank you for choosing our Cloud9 hosted phone solution.
This user guide will provide everything you need to know in
how to use your new system with the Polycom Soundpoint
331/335 desktop phone unit.
User Guide.

Your Polycom Soundpoint IP335 HD Voice
Checking Voicemail
You will know that you have a new voicemail message if the light at the top right of on your phone is ashing red.
From Handset
- Dial destination number
- Pick up handset
From Handset
- Pick up the handset
From Hands-free Speaker Phone
- Dial destination number
- Press the speaker phone button
Dial
Menu
Line 1
Messages
Hold
Graphical LCD
Hookswitch
Handsfree
Speaker
Dial Key
Menu Key
Navigation Keys
Microphone Mute
Dial Pad
LED Indicator
Context-Sensitive
Soft Keys
Line 1 Key
Messages Key
LED Indicators
Hold Key
Headset Key
Speakerphone Key
Volume Up/Down Handsfree Microphone
123
456
789
0
ABC DEF
JKLGHI MNO
TUV
OPER
PQRS WXYZ
Placing a Call
Answering a Call
There are two ways to make a call on the Polycom - through the handset or through hands free.
Call Hold & Resume
- Press the Hold button, press it again to return to the call
From Hands-free Speaker Phone
- Press the speaker phone button
Hold
- Dial 8555
- Enter your password (default is your extension number)

Transfering a Call
There are two options when transferring a call - blind transfer or active transfer.
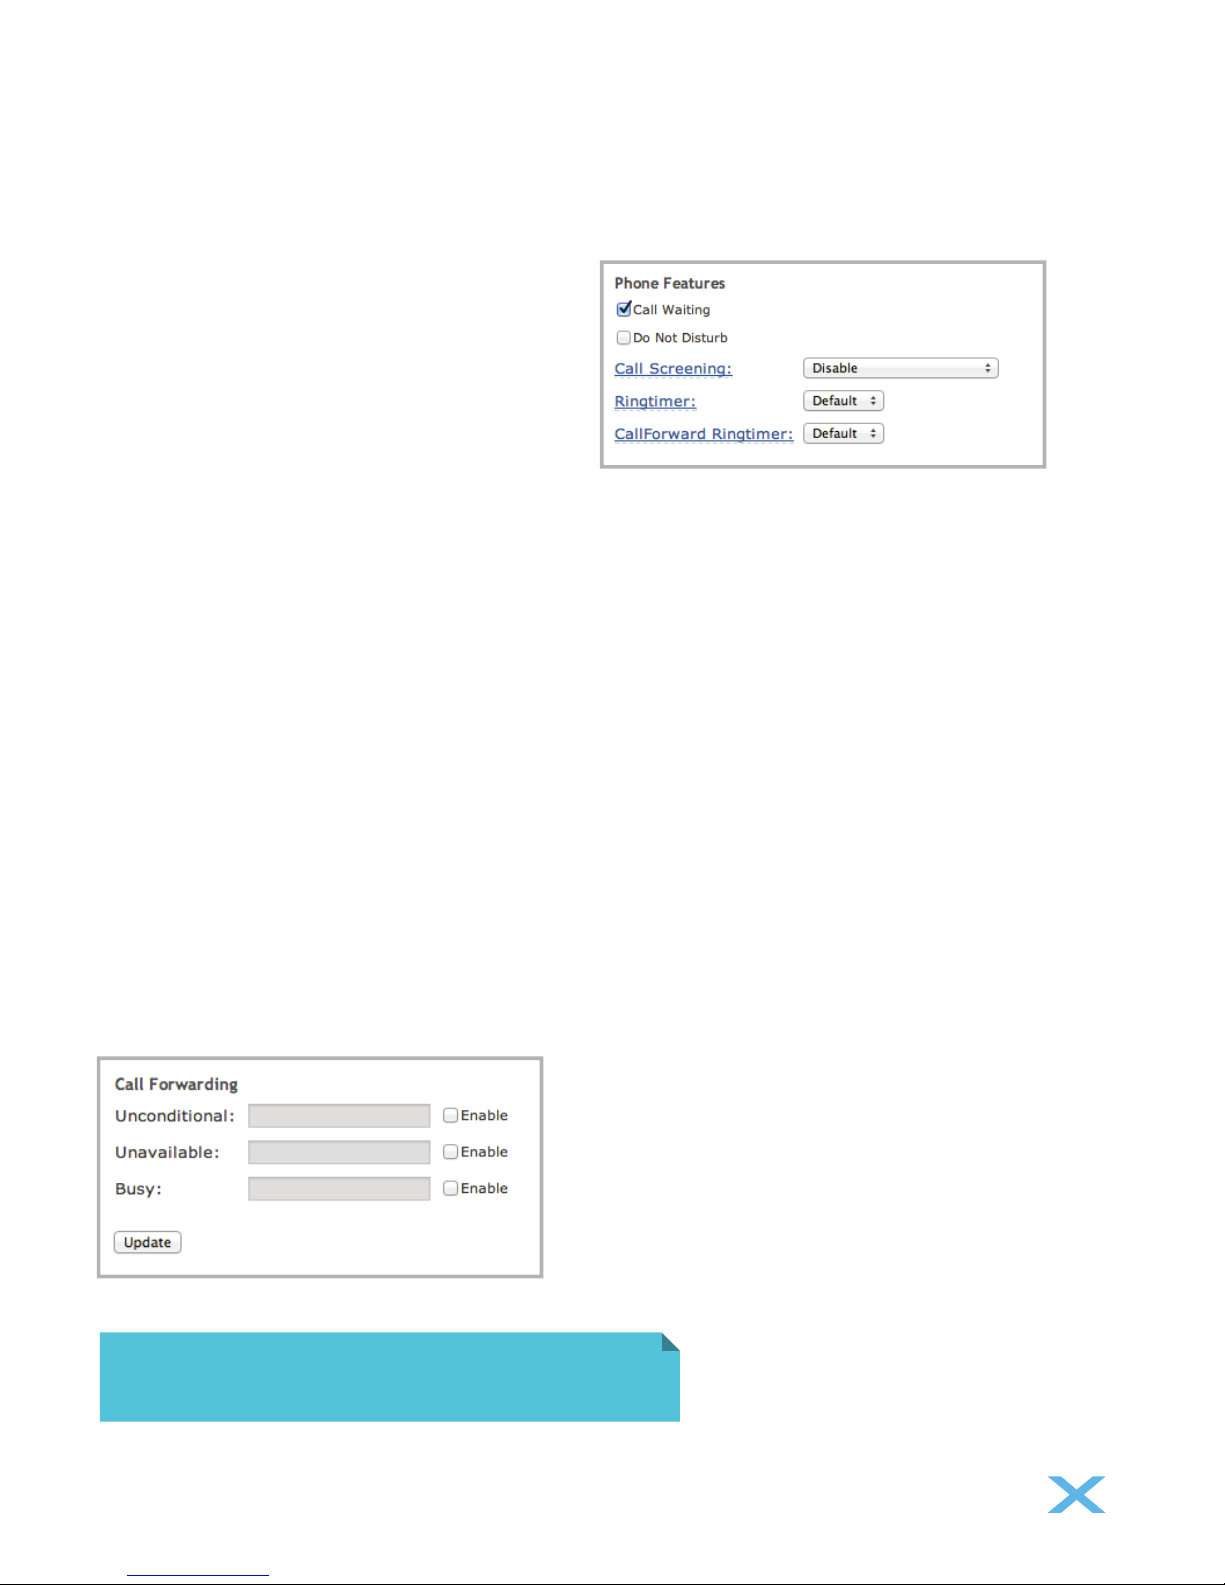
Call Forwarding
Note: Transfer may be cancelled during establishment by pressing the [Cancel] soft key. The original call is then resumed.
Blind Transfer (call is transferred without call to receiver)
- While on a call, press [Transfer] button. This puts the caller on hold
- If you wish to transfer the call without speaking to the second party, press the [Blind] soft key
- Key in the number/extension number and press the select key
Active Transfer (with call to receiver)
- While on a call, press [Transfer] button. This puts the caller on hold
- Call the number/extension to which you want to transfer the call
- After speaking with the second party press the [Trans] soft key to complete the transfer
- The call has been transferred, you may end the call.
Note: For the forwarding option of“No Answer” you can select the number of rings before the call is forwarded.
To enable call forwarding
- Press the (Menu) key and select [Features], and then navigate down to [Forward]
- Select the desired conditional forwarding option, press the select (tick) button in the navigation pad,
then enter a number to forward future calls to then press OK
- Lastly, navigate down and enable forwarding by pressing the select (tick) button to select Enabled
Do not Disturb
- Press the Menu, select [Features], select [Do Not Disturb] to prevent the phone from ringing on
incoming calls. A“Do Not Disturb”message appears to conrm that Do Not Disturb is enabled
- Repeat the above process to disable Do Not Disturb
Volume Adjustment
- Press the volume key buttons to adjust the volume required

Advanced Features of Cloud9
Logging in
To access the advance features of the Cloud9 solution, start by opening your internet browser and
enter in your Cloud9 access link and then press enter.
Voice Mailbox
Once you have logged in, the default section will be the voice mailbox page.
This is where you can listen and manage your voicemails.
- To playback through the browser click on the speaker icon
- To playback through your phone click on the phone icon
- To playback through the browser click on the speaker icon
Enter your extension
in the User Field
The Default Password will
be your extension number.

You can also forward your voicemails to other extension by selecting an extension from the below
drop down menu
Or email the voicemail le to an email address
Call Monitor
This section allows you to view the calls you have made and received from your extension.
It will show: Date & Time, Source/Destination, Duration
Follow Me
This function allows you to set up any incoming internal/external calls to your extension to automatically
forward out to another number/extension.
- To enable this, click‘Enable’
- Enter the number/extension to the FollowMe List
- Select the desired ring duration times
- Enable Use Conrmation if required
- Click ‘Update’ to save settings
Tip: Hold your mouse cursor over the function
headings to get further description.

Phone Features
Call Waiting
If a calling party places a call to the called party which is otherwise engaged and the called party has the call waiting
feature enabled, the called party is able to suspend the current telephone call and switch to the new incoming call.
Do not Disturb
The phone will not be ringed on the called party end and
the call will be forwarded to the voicemail box (providing
FollowMe is not set to forward calls).
Call Screening
With this feature enabled, the incoming external caller will be required to say their name, which will be played back to the
user and allow the user to accept or reject the call.
Ringtimer (Default Ringtimer: 20secs)
Number of seconds of ring before going to voicemail or ringing other numbers such as Forwarding if enabled.
Call Forward Ringtimer
This is the ringtime at the forwarded number before it goes to Cloud9 Voice Mail.
Please note: Typical mobile time before going to Voice Mail is 20secs
If this is set as Default it will use the ‘Ringtimers’ set above.
Call Forwarding
- Unconditional – This option when enabled will always forward all incoming calls
- Unavailable – This option when enabled will forward if the phone can not be reached
- Busy – This option will forward when
Tip: Ensure you remember to turn off your
Do not Disturb mode.

Password Settings
This panel will allow you to manage your voicemail password settings, it is recommended that you visit this once your
phone and system is running and change your password.
VmX Locator™
Voicemail Settings
When enabled this feature allows the calling party to be given forwarding options during the personal voicemail
greeting playback.
- Voicemail Instructions – By default, a system default voicemail message is used.
- Press‘0’ – By default will allow call to be transferred to the Operator
- Press‘1’ & ‘2’ allows users to customer the options to transfer the calling party to other numbers
Tip: You can also have the voicemail attached
to the notification email.
Notification Settings
To setup the voicemail notication email feature, click on ‘Enable’and enter your email address.

Quick Feature Codes
This panel will allow you to congure the way the voicemail playback in the browser.
ActionHandset Feature Code
*52
*53
*72
*73
*74
*740
*90
*91
*92
*70
*71
*21
411
*45
*0
*75
8500
8555
Call Forward No Answer / Unavailable Activate
Call Forward No Answer/Unavailable Deactivate
Call Forward All Activate
Call Forward All Deactivate
Call Forward All Prompting Deactivate
Call Forward Toggle
Call Forward Busy Activate
Call Forward Busy Deactivate
Call Forward Busy Prompting Deactivate
Call Waiting - Activate
Call Waiting - Deactivate
FindMe Follow Toggle
Phonebook dial-by-name directory
Queue Toggle
Speed dial prex
Set user speed dial
Dial Voicemail
My Voicemail
This manual suits for next models
1
Table of contents
Popular IP Phone manuals by other brands

Linksys
Linksys SPA921 - Cisco - IP Phone Product data

Avaya
Avaya 4602SW quick reference

Yealink
Yealink T4 series How to configure

AudioCodes
AudioCodes 400HD Series User's and Administrator's manual

Cisco
Cisco 6961 - Unified IP Phone Standard VoIP Quick reference card

telgo.PRO
telgo.PRO Snom 720 Quick reference guide