6 TKS-Z 400 | Version 1.01
Safety
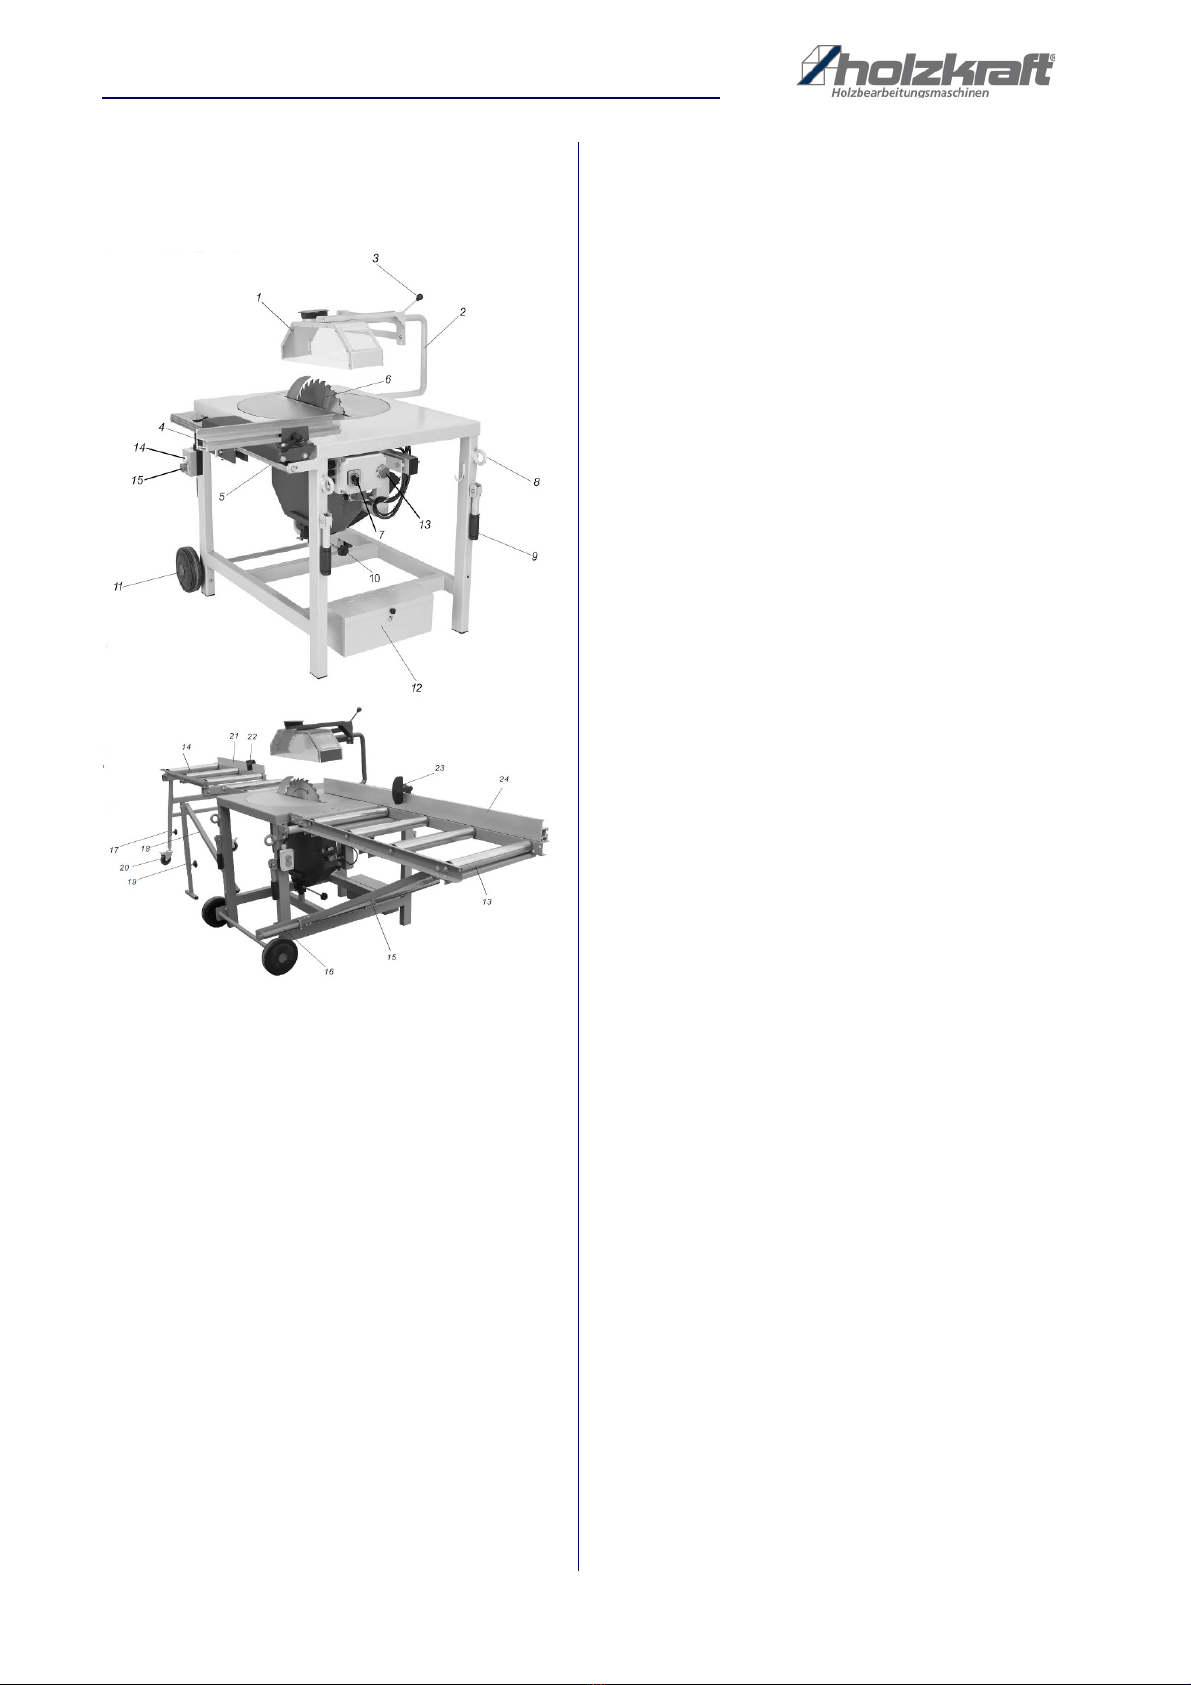
2.5 Safety labels on the Circular saw
The following safety signs are applied on the circular saw
(Fig. 1), which need to be observed and followed.
Fig. 1: Safety labels
If safety labels on the machine are damaged or missing,
this can cause errors, personal injury and material da-
mage. The safety symbols attached to the machine must
not be removed. Damaged safety symbols must be re-
placed immediately.
As soon as the signs are not clearly visible and compre-
hensible at first glance, the machine must be stopped
until new signs have been attached.
2.6 General safety information
- The circular saw may only be operated and opera-
ted by persons familiar with the table saw and
aware of the dangers of using table saws.
- Do not operate the device under the influence of
drugs, alcohol or medication.
- Do not overload the machine - use it only within the
performance range for which the machine was de-
signed.
- Make sure that no tools or loose parts remain on or
near the machine when it is switched on (eg after
maintenance work).
- Always keep the table saw and the work area of the
table saw clean and tidy. A messy work area can
lead to accidents.
- Prevent unfavorable postures, keep your feet
stable and keep your balance at all times. Use
suitable workpiece supports when cutting long ma-
terial. Persons under the age of 18 may use the ta-
ble saw only as part of a vocational training and un-
der the supervision of a trainer.
- When installing, operating, maintaining and repai-
ring the table saw, observe the European stan-
dards. For the European standards that have not
yet been transposed into the relevant national law,
the country-specific regulations still applicable
must be applied.
- Operators of table saws outside the scope of the
European standards are obliged to comply with the
safety and accident prevention regulations in force
in the country of operation. If necessary, appropri-
ate measures to comply with country-specific regu-
lations must be taken before commissioning the ta-
ble saw.
- Always disconnect the table saw from the electrical
power supply when making adjustments, inspec-
tion, cleaning or maintenance.
- Use the table saw only in the specified power
range and only for the purpose for which it is inten-
ded.
- Check the circular saw for damage before each
use. Do not use the circular saw if the on / off
switch is defective. Keep handles free of oil and
grease.
- Do not operate the device in a damp or wet env-
ironment.
- Do not use the table saw in rain or in humid env-
ironments. Ensure adequate lighting.
- Do not use the table saw near flammable liquids or
gases.
- Make sure no body parts or garments can be
caught and pulled by rotating components (no ties,
no loose-fitting garments, tie long hair under a hair-
net).
- Avoid contact of the body with earthed objects
such as heaters or pipes as soon as you work on
the machine.
- Do not use the power cord for purposes it is not in-
tended for.
- Do not operate the machine without the guards in-
stalled and always maintain a sufficient distance
from the saw blade.
- Do not try to stop the saw blade by pressing the
workpiece against the side of the saw blade.
- Before servicing, make sure the tool is dis-
connected from the power supply.
- Turn off the device when not in use.
- Wear gloves when changing the cutting tools.
- The use of blunt tools is not permitted due to the
risk of kickback, overloading the machine and
creating a poor surface during machining.
- Always work with a properly set splitting knife.
- Cut thin or thin-walled workpieces only with fine-
toothed saw blades. Always use sharp saw blades.
NOTE!
When using this machine, observe the following
safety instructions to prevent the risk of personal
injury or material damage.
Please also note the special safety instructions in the
respective chapters. If necessary, follow the legal
guidelines or regulations for the prevention of
accidents when using the carpentry table saw.