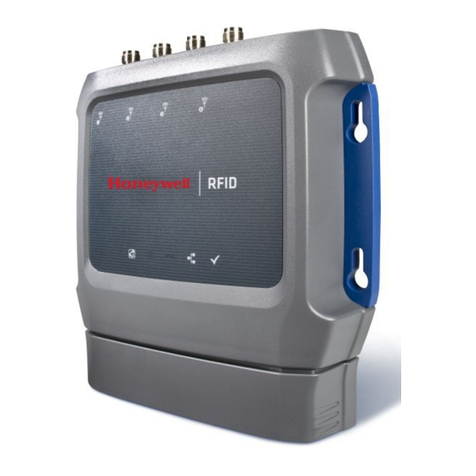
Honeywell 1026FF02F9 User manual

Leitor Fixo RFID
Honeywell IF1
A série de leitores RFID fixos oferece boa relação
custo/benefício e opções flexíveis, projetadas para
aplicações que exigem durabilidade e confiabilidade.
Aprenda como instalar, configurar e utilizar esse leitor
fixo.
www.bztech.com.br

IF1
Fixed RFID Reader Series
1026FF01, 1026FF02F9, 1026FF03F9
User Manual

ii IF1 Fixed RFID Reader Series User Manual
Disclaimer
Honeywell International Inc. (“HII”) reserves the right to make changes in specifications and
other information contained in this document without prior notice, and the reader should in all
cases consult HII to determine whether any such changes have been made. The information
in this publication does not represent a commitment on the part of HII.
HII shall not be liable for technical or editorial errors or omissions contained herein; nor for
incidental or consequential damages resulting from the furnishing, performance, or use of
this material. HII disclaims all responsibility for the selection and use of software and/or
hardware to achieve intended results.
This document contains proprietary information that is protected by copyright. All rights are
reserved. No part of this document may be photocopied, reproduced, or translated into
another language without the prior written consent of HII.
Patents
For patent information, please refer to www.hsmpats.com.
© 2014 Honeywell International Inc. All rights reserved.

IF1 Fixed RFID Reader Series User Manual iii
Contents
Before You Begin. . . . . . . . . . . . . . . . . . . . . . . . . . . . . . . . . . . . . . . . . . . . . . . . . . . vii
Safety Information . . . . . . . . . . . . . . . . . . . . . . . . . . . . . . . . . . . . . . . . . . . vii
Global Services and Support . . . . . . . . . . . . . . . . . . . . . . . . . . . . . . . . . . . vii
Warranty Information. . . . . . . . . . . . . . . . . . . . . . . . . . . . . . . . . . . vii
Web Support . . . . . . . . . . . . . . . . . . . . . . . . . . . . . . . . . . . . . . . . . vii
Send Feedback. . . . . . . . . . . . . . . . . . . . . . . . . . . . . . . . . . . . . . . viii
Telephone Support . . . . . . . . . . . . . . . . . . . . . . . . . . . . . . . . . . . . viii
Who Should Read This Manual . . . . . . . . . . . . . . . . . . . . . . . . . . . . . . . . . viii
Related Documents . . . . . . . . . . . . . . . . . . . . . . . . . . . . . . . . . . . . . . . . . . viii
1 About the RFID Reader. . . . . . . . . . . . . . . . . . . . . . . . . . . . . . . . . . . . . . . . 1
About the RFID Reader. . . . . . . . . . . . . . . . . . . . . . . . . . . . . . . . . . . . . . . . . . . . . . . 2
About the RFID Reader Ports . . . . . . . . . . . . . . . . . . . . . . . . . . . . . . . . . . . . . . . . . . 3
About the LED Indicators . . . . . . . . . . . . . . . . . . . . . . . . . . . . . . . . . . . . . . . . . . . . . 4
IF1 Accessories. . . . . . . . . . . . . . . . . . . . . . . . . . . . . . . . . . . . . . . . . . . . . . . . . . . . . 5
About the Mounting Kit Options . . . . . . . . . . . . . . . . . . . . . . . . . . . . . . . . . . . . . . . . 6
Install the Wall Mounting Kit. . . . . . . . . . . . . . . . . . . . . . . . . . . . . . . . . . . . . 6
How to Communicate with the IF1 . . . . . . . . . . . . . . . . . . . . . . . . . . . . . . . . . . . . . . 8
Assign an IP Address. . . . . . . . . . . . . . . . . . . . . . . . . . . . . . . . . . . . . . . . . . 8
Log In to the Web Browser Interface . . . . . . . . . . . . . . . . . . . . . . . . . . . . . 12
Set the Date and Time . . . . . . . . . . . . . . . . . . . . . . . . . . . . . . . . . . . . . . . . . . . . . . 13
2 Configure the Reader. . . . . . . . . . . . . . . . . . . . . . . . . . . . . . . . . . . . . . . . . 15
Configure Ethernet Settings . . . . . . . . . . . . . . . . . . . . . . . . . . . . . . . . . . . . . . . . . . 16
Ethernet Settings . . . . . . . . . . . . . . . . . . . . . . . . . . . . . . . . . . . . . . . . . . . . 17
Configure Common Network Settings . . . . . . . . . . . . . . . . . . . . . . . . . . . . 18
Common Network Settings. . . . . . . . . . . . . . . . . . . . . . . . . . . . . . . . . . . . . 18
About the Device Configuration Web Service . . . . . . . . . . . . . . . . . . . . . . . . . . . . . 19
Configure the Device Configuration Web Service . . . . . . . . . . . . . . . . . . . 20
Download the Device Configuration WSDL Document . . . . . . . . . . . . . . . 21
Configure Services . . . . . . . . . . . . . . . . . . . . . . . . . . . . . . . . . . . . . . . . . . . . . . . . . 22
Services Settings . . . . . . . . . . . . . . . . . . . . . . . . . . . . . . . . . . . . . . . . . . . . 22
About RFID Services. . . . . . . . . . . . . . . . . . . . . . . . . . . . . . . . . . . . . . . . . . . . . . . . 23
Contents

iv IF1 Fixed RFID Reader Series User Manual
Configure the BRI Server Settings. . . . . . . . . . . . . . . . . . . . . . . . . . . . . . . 24
BRI Server Settings. . . . . . . . . . . . . . . . . . . . . . . . . . . . . . . . . . . . 24
View the BRI Server Log . . . . . . . . . . . . . . . . . . . . . . . . . . . . . . . . . . . . . . 25
BRI Server Event Settings. . . . . . . . . . . . . . . . . . . . . . . . . . . . . . . 25
Configure the BRI Attribute Settings . . . . . . . . . . . . . . . . . . . . . . . . . . . . . 26
BRI Attribute Settings . . . . . . . . . . . . . . . . . . . . . . . . . . . . . . . . . . 26
Configure LLRP Settings . . . . . . . . . . . . . . . . . . . . . . . . . . . . . . . . . . . . . . 29
LLRP Settings . . . . . . . . . . . . . . . . . . . . . . . . . . . . . . . . . . . . . . . . 31
Configure Security. . . . . . . . . . . . . . . . . . . . . . . . . . . . . . . . . . . . . . . . . . . . . . . . . . 31
Change User Credentials. . . . . . . . . . . . . . . . . . . . . . . . . . . . . . . . . . . . . . 32
User Credential Settings . . . . . . . . . . . . . . . . . . . . . . . . . . . . . . . . 32
Configure the RADIUS Server . . . . . . . . . . . . . . . . . . . . . . . . . . . . . . . . . . 33
RADIUS Server Settings. . . . . . . . . . . . . . . . . . . . . . . . . . . . . . . . 33
Disable Serial Port Access. . . . . . . . . . . . . . . . . . . . . . . . . . . . . . . . . . . . . 34
About Certificates . . . . . . . . . . . . . . . . . . . . . . . . . . . . . . . . . . . . . . . . . . . . . . . . . . 34
Import a Certificate. . . . . . . . . . . . . . . . . . . . . . . . . . . . . . . . . . . . . . . . . . . 35
View Certificates . . . . . . . . . . . . . . . . . . . . . . . . . . . . . . . . . . . . . . . . . . . . 35
3 Develop and Install RFID Applications . . . . . . . . . . . . . . . . . . . . . 37
About RFID Applications. . . . . . . . . . . . . . . . . . . . . . . . . . . . . . . . . . . . . . . . . . . . . 38
About the RFID Resource Kit . . . . . . . . . . . . . . . . . . . . . . . . . . . . . . . . . . . . . . . . . 38
About .NET Support . . . . . . . . . . . . . . . . . . . . . . . . . . . . . . . . . . . . . . . . . . . . . . . . 38
About Java Support. . . . . . . . . . . . . . . . . . . . . . . . . . . . . . . . . . . . . . . . . . . . . . . . . 38
How to Execute Java Applications . . . . . . . . . . . . . . . . . . . . . . . . . . . . . . . 39
How to Execute .JAR Files. . . . . . . . . . . . . . . . . . . . . . . . . . . . . . . . . . . . . 39
How to Enable the Java Just-In-Time Compiler . . . . . . . . . . . . . . . . . . . . . 39
How to Specify the Class Path for the Java Virtual Machine . . . . . . . . . . . 40
About Java Support for Microsoft SQL Server and Sybase . . . . . . . . . . . . 40
Create an Installation Package . . . . . . . . . . . . . . . . . . . . . . . . . . . . . . . . . . . . . . . . 40
Create a Configuration File . . . . . . . . . . . . . . . . . . . . . . . . . . . . . . . . . . . . 40
Configuration File Example. . . . . . . . . . . . . . . . . . . . . . . . . . . . . . 41
Archive the Installation Files. . . . . . . . . . . . . . . . . . . . . . . . . . . . . . . . . . . . 41
How Install RFID Applications. . . . . . . . . . . . . . . . . . . . . . . . . . . . . . . . . . . . . . . . . 41
Install Applications On to the Reader. . . . . . . . . . . . . . . . . . . . . . . . . . . . . 42
How to Manage Applications. . . . . . . . . . . . . . . . . . . . . . . . . . . . . . . . . . . . . . . . . . 42
Start an Application . . . . . . . . . . . . . . . . . . . . . . . . . . . . . . . . . . . . . . . . . . 42
Stop an Application . . . . . . . . . . . . . . . . . . . . . . . . . . . . . . . . . . . . . . . . . . 43
Uninstall an Application . . . . . . . . . . . . . . . . . . . . . . . . . . . . . . . . . . . . . . . 43
Contents
IF1 Fixed RFID Reader Series User Manual v
Auto-Start an Application at Boot Time. . . . . . . . . . . . . . . . . . . . . . . . . . . . . . . . . . 43
Auto-Start an Application with the Web Browser . . . . . . . . . . . . . . . . . . . . 43
Auto-Start an Application with the Configuration File. . . . . . . . . . . . . . . . . 44
About Edgeware Applications . . . . . . . . . . . . . . . . . . . . . . . . . . . . . . . . . . . . . . . . . 44
Install or Upgrade Edgeware Applications . . . . . . . . . . . . . . . . . . . . . . . . . 45
About the Developer Tools . . . . . . . . . . . . . . . . . . . . . . . . . . . . . . . . . . . . . . . . . . . 45
Read RFID Tags Through the Demo Application. . . . . . . . . . . . . . . . . . . . 46
Send BRI Commands. . . . . . . . . . . . . . . . . . . . . . . . . . . . . . . . . . . . . . . . . 46
Run BRI Scripts . . . . . . . . . . . . . . . . . . . . . . . . . . . . . . . . . . . . . . . . . . . . . 47
4 Troubleshoot and Maintain the Reader. . . . . . . . . . . . . . . . . . . . . 49
Upgrade Firmware. . . . . . . . . . . . . . . . . . . . . . . . . . . . . . . . . . . . . . . . . . . . . . . . . . 50
View the System Log. . . . . . . . . . . . . . . . . . . . . . . . . . . . . . . . . . . . . . . . . . . . . . . . 51
Restore Default Settings . . . . . . . . . . . . . . . . . . . . . . . . . . . . . . . . . . . . . . . . . . . . . 51
Reboot the Reader . . . . . . . . . . . . . . . . . . . . . . . . . . . . . . . . . . . . . . . . . . . . . . . . . 52
View Device Information . . . . . . . . . . . . . . . . . . . . . . . . . . . . . . . . . . . . . . . . . . . . . 53
Call Product Support. . . . . . . . . . . . . . . . . . . . . . . . . . . . . . . . . . . . . . . . . . . . . . . . 53
Troubleshoot the Reader. . . . . . . . . . . . . . . . . . . . . . . . . . . . . . . . . . . . . . . . . . . . . 54
Problems While Working with RFID . . . . . . . . . . . . . . . . . . . . . . . . . . . . . . 54
Problems with Connectivity . . . . . . . . . . . . . . . . . . . . . . . . . . . . . . . . . . . . 55
5 About the GPIO Ports. . . . . . . . . . . . . . . . . . . . . . . . . . . . . . . . . . . . . . . . . 57
About the GPIO Interfaces . . . . . . . . . . . . . . . . . . . . . . . . . . . . . . . . . . . . . . . . . . . 58
How to Use the Input Interfaces . . . . . . . . . . . . . . . . . . . . . . . . . . . . . . . . . . . . . . . 58
Powered Input Example . . . . . . . . . . . . . . . . . . . . . . . . . . . . . . . . . . . . . . . 59
Isolated Input Interface Example . . . . . . . . . . . . . . . . . . . . . . . . . . . . . . . . 59
Open Collector Input Interface Example . . . . . . . . . . . . . . . . . . . . . . . . . . 60
How to Use the Output Interfaces. . . . . . . . . . . . . . . . . . . . . . . . . . . . . . . . . . . . . . 61
How to Switch the High Side with Reader Power. . . . . . . . . . . . . . . . . . . . 62
How to Switch the Low Side with Reader Power . . . . . . . . . . . . . . . . . . . . 62
How to Switch the High Side with External Power . . . . . . . . . . . . . . . . . . . 63
Drive a DC Relay to Control an AC Load. . . . . . . . . . . . . . . . . . . . . . . . . . 64
How to Use the Power Interface . . . . . . . . . . . . . . . . . . . . . . . . . . . . . . . . . . . . . . . 65
Contents

vi IF1 Fixed RFID Reader Series User Manual
A Specifications. . . . . . . . . . . . . . . . . . . . . . . . . . . . . . . . . . . . . . . . . . . . . . . . . 67
IF1 Specifications . . . . . . . . . . . . . . . . . . . . . . . . . . . . . . . . . . . . . . . . . . . . . . . . . . 68
IF1L Enhanced Specifications. . . . . . . . . . . . . . . . . . . . . . . . . . . . . . . . . . . . . . . . . 69
Optional Integrated Antenna Specifications . . . . . . . . . . . . . . . . . . . . . . . . . . . . . . 70
Port Pin Assignments . . . . . . . . . . . . . . . . . . . . . . . . . . . . . . . . . . . . . . . . . . . . . . . 71
GPIO Port. . . . . . . . . . . . . . . . . . . . . . . . . . . . . . . . . . . . . . . . . . . . . . . . . . 71
Ethernet Port . . . . . . . . . . . . . . . . . . . . . . . . . . . . . . . . . . . . . . . . . . . . . . . 72
Contents

Before You Begin
IF1 Fixed RFID Reader Series User Manual vii
Before You Begin
This section provides you with safety information, technical support
information, and sources for additional product information.
Safety Information
Your safety is extremely important. Read and follow all warnings and
cautions in this document before handling and operating Intermec
equipment. You can be seriously injured, and equipment and data can
be damaged if you do not follow the safety warnings and cautions.
Global Services and Support
Warranty Information
To understand the warranty for your Intermec product, visit the Intermec
website at www.intermec.com and click Support > Returns and
Repairs > Warranty.
Disclaimer of warranties: The sample code included in this document is
presented for reference only. The code does not necessarily represent
complete, tested programs. The code is provided “as is with all faults.” All
warranties are expressly disclaimed, including the implied warranties of
merchantability and fitness for a particular purpose.
Web Support
Visit the Intermec website at www.intermec.com to download our
current manuals (in PDF).
Visit the Intermec technical knowledge base (Knowledge Central) at
www.intermec.com and click Support > Knowledge Central to review
technical information or to request technical support for your Intermec
product.
A caution alerts you to an operating procedure, practice, condition,
or statement that must be strictly observed to prevent equipment
damage or destruction, or corruption or loss of data.
Note: Notes either provide extra information about a topic or contain
special instructions for handling a particular condition or set of
circumstances.

Before You Begin
viii IF1 Fixed RFID Reader Series User Manual
Send Feedback
Your feedback is crucial to the continual improvement of our
documentation. To provide feedback about this manual, please contact
the Technical Communications department.
Telephone Support
In the U.S.A. and Canada, call 1-800-755-5505.
Outside the U.S.A. and Canada, contact your local Intermec
representative. To search for your local representative, from the Intermec
website, click About Us > Contact Us.
Who Should Read This Manual
This document is for the person who is responsible for installing,
configuring, and maintaining the IF1.
This document provides you with information about the features of the
IF1, and how to install, configure, operate, maintain, and troubleshoot it.
Before you work with the IF1, you should be familiar with your network
and general networking terms, such as IP address.
Related Documents
The Intermec website at www.intermec.com contains our documents
(as .pdf files) that you can download for free.
To download documents
1Visit the Intermec website at www.intermec.com.
2Click the Products tab.
3Using the Products menu, navigate to your product page. For
example, to find the IF1 product page, click RFID >Fixed Readers >
IF1.
4Click the Manuals tab.
If your product does not have its own product page, click Support >
Manuals. Use the Product Category, Product Family, and Product
fields to find your documentation.

1
1
About the RFID Reader
This chapter introduces the IF1 Fixed Mount RFID Reader Series,
and includes descriptions of the reader features and basic
operation.

Chapter 1 — About the RFID Reader
2 IF1 Fixed RFID Reader Series User Manual
About the RFID Reader
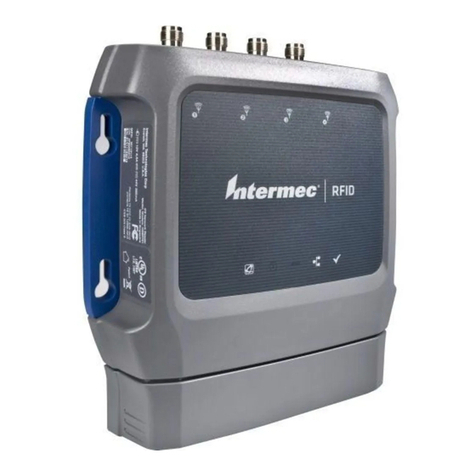
The IF1 Fixed RFID Reader is an RFID reader with integrated antenna
that provides connectivity between tag data and an enterprise system.
Features of the RFID reader include:
•integrated high-gain linear or two-antenna port options.
•64 MB of storage space for your RFID applications.
•a web browser interface for easy configuration.
•options for a second external antenna connection.
•support for EPCglobal Gen-2 tag types.
•IP66 seal rating for outdoor installations.
•support for Power Over Ethernet.
•VESA mount compatibility.
•USB and sealed Power Over Ethernet ports.
•optional GPIO port.
IF1 Fixed RFID Reader

Chapter 1 — About the RFID Reader
IF1 Fixed RFID Reader Series User Manual 3
About the RFID Reader Ports
Depending on your configuration, the ports that are available on the IF1
may be different.
IF1 Fixed RFID Reader Ports
Reader Port Descriptions
Callout Port Description
1 Ethernet 10Base/100Base-T port that connects the
reader to your Ethernet network. The
reader auto-negotiates with the server to
set the best data rate. This port uses MDI/
MDI-X auto-switching so you can connect
either a standard Ethernet cable or a
crossover cable.
The port also supports Power Over
Ethernet (POE). To power the reader, you
need an 802.3af-compliant power supply.
2GPIO
(Optional) General purpose input/output (GPIO) port
that connects the reader to industrial
controls such as relays or indicators.
1
2
3
4

Chapter 1 — About the RFID Reader
4 IF1 Fixed RFID Reader Series User Manual
About the LED Indicators
The LED indicators on the reader light up to indicate the status of the
reader during operation.
IF1 LED Indicators
3 USB Connects the reader to a desktop PC for
configuration.
4 Antenna Connects an external antenna to your
reader. The antenna port uses Reverse
TNC connectors.
Reader Port Descriptions (continued)
Callout Port Description
Professional Installation Required: Government regulatory
agencies require this RFID reader use only approved antennas and
cables. Therefore, this reader uses a custom antenna connector.
Do not use antennas not approved for use with this reader.

Chapter 1 — About the RFID Reader
IF1 Fixed RFID Reader Series User Manual 5
IF1 Accessories
You can use these accessories (sold and ordered separately) with the
IF1. To order accessories, contact your local sales representative.
LED Indicators
Icon Name Color Description
RFID
antenna Solid green RF field is active
Blinking green A tag is being interrogated.
Blinking red The readercannot output the requested RF power
level, or an RF fault is detected.
Off The reader is not powered.
Ethernet Solid green The reader is powered, an Ethernet link is
established, and the host is connected.
Flickering green Packets of information are being sent through the
Ethernet port.
Blinking green
and orange An Ethernet link is established, but there is no
host connection.
Blinking red The reader is powered, but an Ethernet link is not
established.
Off The reader is not powered.
IF1 Accessories
Accessory Description
Wall Mounting Kit The wall mounting kit allows you to mount the IF1
to a flat surface.
Ethernet Connector
Kit The Ethernet Connector Kit provides a secure
connection from your Ethernet cable to the IF1
and is required if you need to maintain the IP66
rating of the IF1.
GPIO Cable 15-pin GPIO cable to connect General Purpose
Input/Output control lines to external devices.

Chapter 1 — About the RFID Reader
6 IF1 Fixed RFID Reader Series User Manual
About the Mounting Kit Options
You can install the reader with a wall mounting kit (P/N 219-028-001) or
a VESA mounting kit. Contact your local sales representative for more
information.
Install the Wall Mounting Kit
To maintain the IP66 rating of the IF1, you must mount the IF1 correctly.
1Choose a mounting location.
2Connect an earth ground cable to the IF1.
3Secure the wall mount to the IF1 with the washers and screws
provided.
(x4)

Chapter 1 — About the RFID Reader
IF1 Fixed RFID Reader Series User Manual 7
4Secure three screws (not provided) to the wall, and place the
mounting bracket on to the screws.
5Secure three screws (not provided) to the bottom of the wall
mounting bracket.
(x3)

Chapter 1 — About the RFID Reader
8 IF1 Fixed RFID Reader Series User Manual
How to Communicate with the IF1
By default, the reader is configured to be a DHCP client and accepts
offers from any DHCP server. Therefore, the reader works out of the box
if you connect it to your network and use a DHCP server to assign it an
IP address.
If you are not using a DHCP server to assign an IP address, you need to
use a serial communications program such as HyperTerminal or Tera
Term to assign a static IP address.
After the reader has been assigned an IP address, connect it to your
network, and then complete the configuration by using the web browser
interface.
Assign an IP Address
You need to assign an IP address to the reader before you can connect
the reader to your network to use the web browser interface to complete
the configuration.
1Download the USB drivers for the reader from www.intermec.com.
2Extract the installation files that you downloaded.
3Connect a USB cable from your reader to your desktop PC.

Chapter 1 — About the RFID Reader
IF1 Fixed RFID Reader Series User Manual 9
4When the USB DriverInstallation Wizard appears, select Browse my
computer for driver software.
5In Search for driver software in this location, click Browse, select
the folder where you extracted the reader installation files, and click
OK.
6Click the Windows icon > Control Panel > Device Manager and
see which COM port the reader was assigned.
7Click Next to install the drivers.
8When the installation is finished, click Close.

Chapter 1 — About the RFID Reader
10 IF1 Fixed RFID Reader Series User Manual
9Open a serial communications program to connect to the reader.
10 Type config and press Enter, and then type config again in the
Password field and press Enter.

Chapter 1 — About the RFID Reader
IF1 Fixed RFID Reader Series User Manual 11
11 By default, DHCP is enabled and the IP address to configure the
reader appears. Use the IP address to configure the reader through
the web browser interface.
If you are not using DHCP, press D. DHCP is disabled and the
Ethernet Configuration Options screen appears.
12 To set the IP address, press 1, type in the IP address, and press
Enter.
13 To set the subnet mask, press 2, type in the subnet mask, and press
Enter.
14 To set the IP router, press 3, type in the IP address, and press Enter.
15 (Optional) To change the Ethernet link speed, press L, and choose
the link speed.
16 Press Qto close the Initial Configuration screen.
17 Remove the USB cable from the reader. The reader is ready to be
configured and connected to your network.
This manual suits for next models
3
Table of contents
Other Honeywell Card Reader manuals

Honeywell
Honeywell OmniTek OmniProx OP10 Series User manual

Honeywell
Honeywell Dolphin 9700-MSCR User manual

Honeywell
Honeywell SPR-S8EZS User manual

Honeywell
Honeywell IF2 User manual

Honeywell
Honeywell IH25-0 User manual

Honeywell
Honeywell Temaline TKL19 User manual

Honeywell
Honeywell IF2 User manual

Honeywell
Honeywell Accentic Instruction manual

Honeywell
Honeywell luminAXS Series Instruction manual

Honeywell
Honeywell OmniClass OM15 User manual