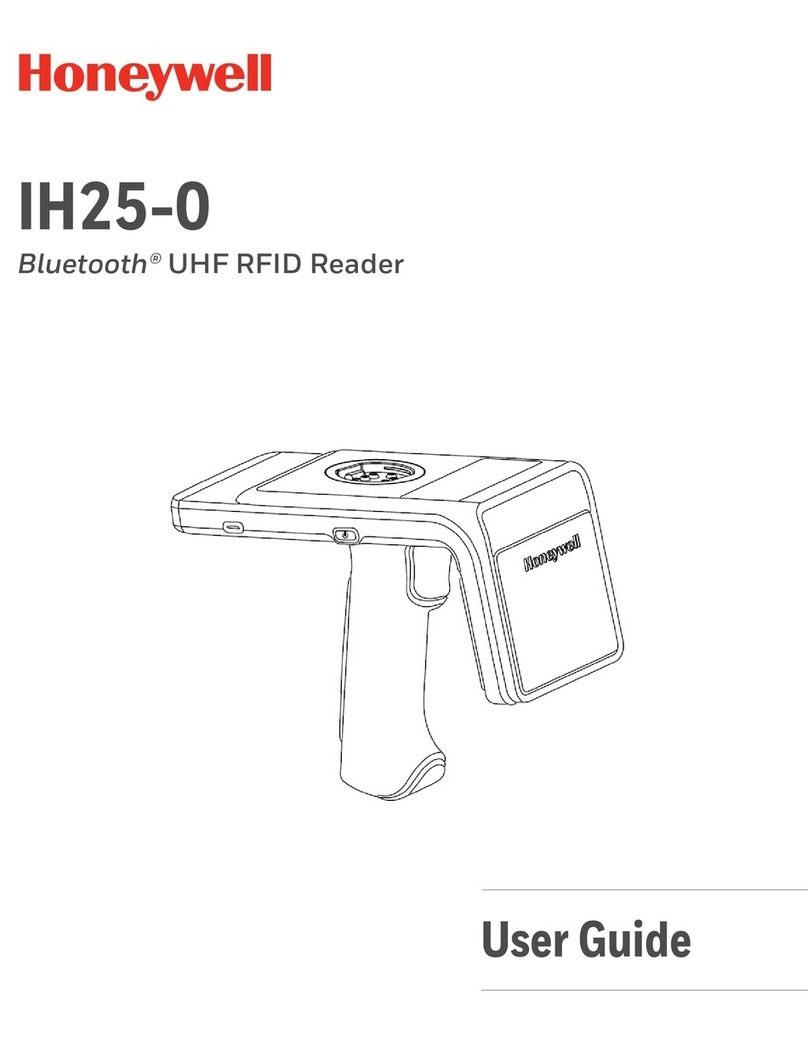
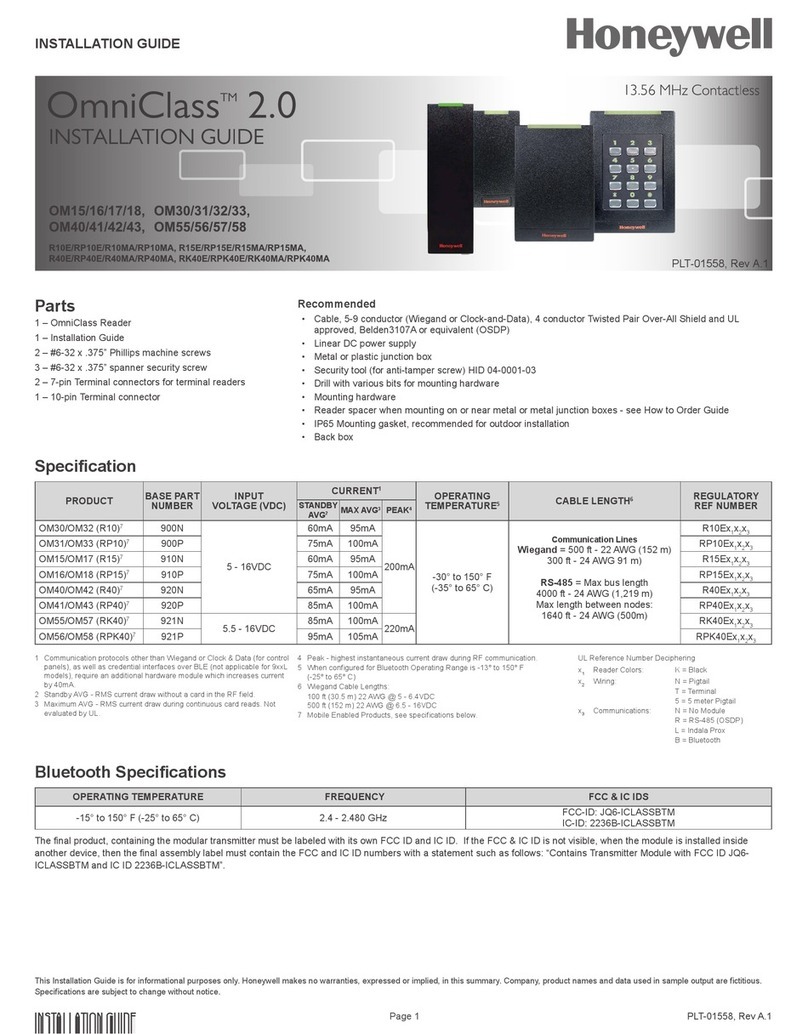
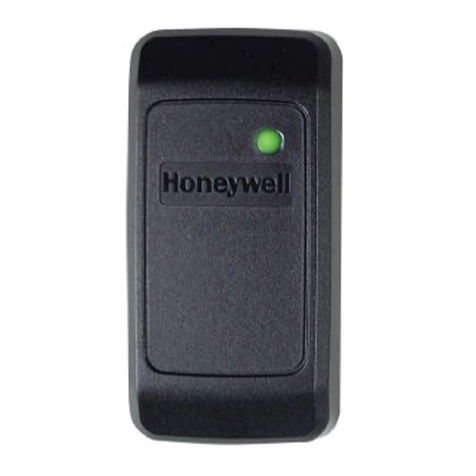
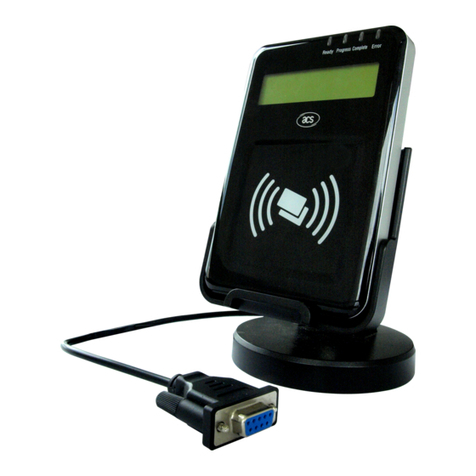
Honeywell IdentIPoint User manual

Honeywell
Honeywell IdentIPoint
Intelligent Smartcard Readers
QUICK INSTALLATION GUIDE
95-7771
1
WARNING: This equipment
generates, uses, and can radiate
radio frequency energy, and if not installed
and used in accordance with the Instructions
Manual, may cause interference with radio
communication. It has been tested and found
to comply with the limits for a Class B
computing device pursuant to Subpart J of
Part 15 of FCC Rules, that are designed to
provide reasonable protection against such
interference when operated in a residential
and commercial environment. Operation of
this equipment in a residential area is likely
to cause interference, in which case, users
at their own expense will be required to take
whatever measures may be required to
correct the interference. Any unauthorized
modification of this equipment may result in
the revocation of the owner's authority to
continue its operation.
WARNING: Fire Safety and Liability
Notice: Never connect card readers
to any critical entry, exit door, barrier,
elevator or gate without providing an
alternative exit in accordance with all fire and
life safety codes pertinent to the installation.
These fire and safety codes vary from city to
city and you must get approval from local fire
officials whenever using an electronic
product to control a door or other barrier.
Use of egress buttons, for example, may be
illegal in some cities. In most applications,
single action exit without prior knowledge of
what to do is a life safety requirement.
Always make certain that any required
approvals are obtained in writing. Verbal
approvals are not valid. Wiring of door
strikes and locks would also accordingly
follow either a fail-safe or fail-secure
configuration.
WARNING: Earth ground all
enclosures for proper installation. It is
mandatory to use body earth on the terminal
of the fingerprint reader.
WARNING: Exit switch wiring must
be completed within the protected
area or not readily accessible outside the
protected area.
WARNING: Use suppressors on all
door locks. Use 14507020-001 diode
suppression network. Honeywell
recommends only DC locks.
CAUTION: If the bus wiring enters or
exits the building, the protectors listed in
Installation Manual must be used. Bus length
for RS485 must not exceed 500m end-to-
end.
This equipment complies with FCC radiation
exposure limits set forth for an uncontrolled
environment .This equipment should be installed
and operated with minimum distance 20cm
between the radiator& your body.

Honeywell IdentIPoint Intelligent Smartcard Readers
CAUTION: Electro-static discharge
(ESD) can damage CMOS
integrated circuits and modules. T
prevent damage always follow
procedures:
o 6
these 7. Resistors – 2K (Color Code: RED-
BLACK-RED-GOLD; 0.5W axial type, 5%
tolerance) – 3
Use static shield packaging and
containers to transport all electronic
components, including completed
reader assemblies.
Handle all ESD sensitive components at
an approved static controlled
workstation.
BEFORE INSTALLATION
1. Verify the mounting locations with the job
drawings.
2. Unpack the IdentIPoint reader, IOM and
accessories and check them. Report any
damaged or missing components to a
Honeywell representative. A claim must
be filed with the commercial carrier
responsible.
Parts
Reader box
1. Intelligent Reader Unit – 1
2. Mounting Plate – 1
3. Mounting Hardware - Screws and Wall
Anchors – 6 each
4. Extra Tamper Resistant Screws – 2
5. Tool for Tamper Resistant Screw – 1
. Connector with cable – 2 (9 and 10 pin)
8. Resistors – 1K (Color Code: BROWN-
BLACK-RED-GOLD; 0.5W axial type, 5%
tolerance) – 3
9. Square ferrite clip – 1
10. Round ferrite clip – 1
11. Quick Installation Guide – 1
IOM box
1. Input / Output Module Unit – 1
2. Mounting Hardware - Screws and Wall
Anchors – 3 each
3. Extra Tamper Resistant Screws – 2
4. Tool for Tamper Resistant Screw – 1
5. Connectors for termination – 12 x 2
connections; 3 x 3 connections
6. Resistors – 2K (Color Code: RED-
BLACK-RED-GOLD; 0.5W axial type, 5%
tolerance) – 4
7. Resistors – 1K (Color Code: BROWN-
BLACK-RED-GOLD; 0.5W axial type, 5%
tolerance) – 4
8. Quick Installation Guide – 1
95-7771
2

Honeywell IdentIPoint Intelligent Smartcard Readers
ASSEMBLY, MOUNTING AND INSTALLATION
Notes:
The reader and IOM can be mounted either
on a drywall or on a concrete wall using
conduits and a gang-box.
The drywall and gang-boxes shown here
are just representations of the actual
hardware. During installation, use the
hardware as per the required dimensions
and availability.
Reader
Drywall Mounting
1. Fig.1 and Fig.2 show the parts of the
IdentIPoint reader. Use the back-plate of
the reader to mark out the position of the
reader on the drywall. Mark the positions of
the mounting screws and the opening for
routing the cables.
2. Cut the cable opening on the drywall using
suitable tools and punch an adequate
number of holes for the mounting screws. It
is advisable to use at least four screws for
fixing the reader. Use the wall anchors for
additional holding strength. See Fig.3.
3. Hold the back-plate in position on the
drywall. Align the mounting screws with
their holes and fasten the back-plate
securely on the drywall using the screws.
See Fig.3.
4. Route the field wires including the Ethernet
cable (if required) from behind the drywall
through the cable opening and bring them
to the front of the mounting surface. Clip
the square ferrite clip on the reader’s
Ethernet pigtail. See Fig.6. Connect the
field wiring to the correct Molex pigtails.
See Fig.5. For reader connection details
see Fig.10. Plug the Molex terminal(s) in
ports J9 and J10 at the back of the reader.
See Fig.6. Clip (with two turns wrapped)
the round ferrite clip on the field Ethernet
cable. See Fig.5. Plug the RJ45 connector
of the field Ethernet cable into the Ethernet
port of the reader at the end of the pigtail.
See Fig.6. Drop the excess lengths of
Molex and Ethernet wires behind the
drywall. Set the S1 DIP switch if the reader
is to be connected to an IOM via RS485.
See Fig.10 and appendix for more details.
5. Once all the connections and settings are
done, hold the reader against the back-
plate, aligning the mounting slots at the
back of the reader with their corresponding
catches on the back-plate and push it
downwards until it hooks into place firmly.
See Fig.7 and Fig.8.
6. Use the Allen wrench to tighten the tamper-
resistant screw at the bottom of the reader.
See Fig.9.
Gang-box (concrete wall) Mounting
1. Fig.1 and Fig.2 show the parts of the
IdentIPoint reader. Ensure that the correct
sized gang-box is securely embedded in
the concrete wall. The holes provided in the
gang-box for the screws should align
properly with at least two of the holes
provided in the reader back-plate for the
screws.
2. Hold the back-plate in position over the
gang-box. Align the mounting screws with
their holes and fasten the back-plate
securely on the gang-box using the screws.
See Fig.4.
95-7771
3
Honeywell IdentIPoint Intelligent Smartcard Readers
3. Route the field wiring including the Ethernet
cable (if required) from the conduits into the
gang-box. Clip the square ferrite clip on the
reader’s Ethernet pigtail. See Fig.6.
Connect the field wiring to the correct
Molex pigtails. See Fig.5. For reader
connection details see Fig.10. Route the
Molex terminal(s) through the cable
opening on the back-plate towards the front
of the mounting surface (see Fig.5) and
plug them in ports J9 and J10 at the back
of the reader. See Fig.6. Clip (with two
turns wrapped) the round ferrite clip on the
field Ethernet cable. See Fig.5. Plug the
RJ45 connector of the field Ethernet cable
into the Ethernet port of the reader
provided at the end of the pigtail.
Accommodate the Molex and Ethernet
pigtails inside the gang-box. Set the S1 DIP
switch if the reader is to be connected to an
IOM via RS485. See Fig.10 and appendix
for more details.
4. Once all the connections and settings are
done, hold the reader against the back-
plate, aligning the mounting slots at the
back of the reader with their corresponding
catches on the back-plate and push it
downwards until it hooks into place firmly.
See Fig.7 and Fig.8.
5. Use the Allen wrench to tighten the tamper-
resistant screw at the bottom of the reader.
See Fig.9.
Fig.1. Parts of IdentIPoint
reader – Front of reader and
Back-
p
late
BACK-PLATE
CATCHES FOR
HOLDING READER
ON BACK-PLATE (4)
READER
STATUS LED
KEYPAD
READER FRONT
MOUNTING SCREW
HOLES (10)
OPENING FOR
ROUTING CABLES (1)
123
456
789
0#
LCD
BACK-PLATE
CATCHES FOR
HOLDING READER
ON BACK-PLATE (4)
READER
STATUS LED
KEYPAD
READER FRONT
MOUNTING SCREW
HOLES (10)
OPENING FOR
ROUTING CABLES (1)
LCD
123
456
789
0#
123
456
789
0#
95-7771
4

Honeywell IdentIPoint Intelligent Smartcard Readers
95-7771
5
READER MOUNTING
SLOTS (4)
STATUS LEDS (3)
DIP SWITCH S1
READER BACK
10/100
Activity
Power
ETHERNET TERMINAL
(EPOXY POTTED FOR
IP65 COMPLIANCE)
FACTORY RESET
SWITCH
OPTICAL TAMPER
SENSOR
WIRING
TERMINAL
PORTS J9, J10
HOLE FOR TAMPER-
RESISTANT SCREW
CAT5 PIGTAIL
HOLE FOR HOLDING
RUBBER COVER
(SHOWN IN CALLOUT)
RJ45 TERMINAL PLUG
Model:BTSTD
IdentIPoint Standard Indoor
Power10-28 VDC, PoE
MAC ID Ether net 0040840AF33E
MAC ID Wi-fi 00408-IOAF33F
Manufactured: 2009.07.13 MADE IN CHINA
1
2
3
4
1
2
3
4
ON POSITIONON POSITION
READER MOUNTING
SLOTS (4)
STATUS LEDS (3)
DIP SWITCH S1
READER BACK
10/100
Activity
Power
ETHERNET TERMINAL
(EPOXY POTTED FOR
IP65 COMPLIANCE)
FACTORY RESET
SWITCH
OPTICAL TAMPER
SENSOR
WIRING
TERMINAL
PORTS J9, J10
HOLE FOR TAMPER-
RESISTANT SCREW
CAT5 PIGTAIL
HOLE FOR HOLDING
RUBBER COVER
(SHOWN IN CALLOUT)
RJ45 TERMINAL PLUG
Model:BTSTD
IdentIPoint Standard Indoor
Power10-28 VDC, PoE
MAC ID Ether net 0040840AF33E
MAC ID Wi-fi 00408-IOAF33F
Manufactured: 2009.07.13 MADE IN CHINA
1
2
3
4
1
2
3
41
2
3
4
1
2
3
4
1
2
3
4
ON POSITIONON POSITIONON POSITIONON POSITION
Fig.2. Parts of IdentIPoint reader – Back of reader

Honeywell IdentIPoint Intelligent Smartcard Readers
95-7771
6
Fig.4. Fixing
reader back-
plate to
concrete wall
USE THE SCREWS PROVIDED
TO FIX THE READER BACK-
PLATE TO THE EMBEDDED
GANGBOX.
NOTE: USE A MINIMUM OF 2
SCREWS IN THE HOLES
CIRCLED IN RED TO FASTEN
THE BACK-PLATE
GANGBOX EMBEDDED IN WALL
USE THE SCREWS PROVIDED
TO FIX THE READER BACK-
PLATE TO THE EMBEDDED
GANGBOX.
NOTE: USE A MINIMUM OF 2
SCREWS IN THE HOLES
CIRCLED IN RED TO FASTEN
THE BACK-PLATE
GANGBOX EMBEDDED IN WALL
Fig.3. Fixing
reader back-
plate to
drywall
USE THE SCREWS PROVIDED
TO FIX THE BACK-PLATE TO
THE DRYWALL.
NOTE: USE A MINIMUM OF 4
SCREWS IN THE HOLES
CIRCLED IN RED
CUT AN OPENING IN THE
DRYWALL FOR ROUTING THE
WIRES. THE OPENING MUST
HAVE THE SAME DIMENSIONS
AS THAT IN THE BACK-PLATE.
PUNCH AN ADEQUATE NUMBER
OF HOLES IN THE DRYWALL
FOR THE SCREWS

Honeywell IdentIPoint Intelligent Smartcard Readers
ROUTE THE RJ45 CONNECTOR
(IF REQUIRED) AND MOLEX
TERMINALS FROM BEHIND THE
DRYWALL OR THROUGH THE
CONDUITS (IN CASE OF
CONCRETE WALL) AND BRING
THEM TOWARDS THE FRONT
SIDE OF THE MOUNTING
SURFACE THROUGH THE
OPENING ON THE READER’S
BACK-PLATE.
PLUG THE RJ45 CONNECTOR
INTO THE ETHERNET PORT OF
THE READER AT THE END OF
THE PIGTAIL.
PLUG THE MOLEX TERMINALS
INTO THE J9 AND J10 PORTS
OF THE READER
CLIP ROUND FERRITE CLIP ON
THE FIELD ETHERNET CABLE
WITH TWO TURNS WRAPPED
Fig.5. Routing the wires before plugging the connectors
into the reader
95-7771
7

Honeywell IdentIPoint Intelligent Smartcard Readers
HOLD THE 9 AND 10-PIN
MOLEX TERMINALS
PERPENDICULAR TO THE
BACK OF THE READER AND
ALIGN THEM CORRECTLY
WITH PORTS J9 AND J10
PUSH THE 9 AND 10-PIN MOLEX TERMINALS
FIRMLY INTO THE READER PORTS J9 AND J10
RESPECTIVELY. ENSURE THAT ALL 9 AND 10
PINS GO INSIDE THE HOLES OF THEIR
RESPECTIVE TERMINALS AND THAT THE
SPECIAL PROTRUSIONS ON THE TERMINALS
MATE WITH THE SPECIAL SLOTS PROVIDED
ON THE PORTS. THIS ENSURES THAT THE
TERMINALS CANNOT BE PLUGGED INTO
WRONG PORTS.
PLUG RJ45
CONNECTOR (IF
REQD.) IN THE RJ45
TERMINAL PLUG
PIN 9
PIN 1
PORT
J9
PIN 1
PIN 10
PORT
J10
10/100
Activity
Power
TO PIN 9
TO PIN 1
9-PIN MOLEX
TERMINAL 10-PIN MOLEX
TERMINAL
TO PIN 1
TO PIN 10
Model: BTS TD
IdentIPoint StandardIndoor
Power10-28 VD C, PoE
MACID Ethernet 0040840AF33E
MACID Wi-fi 004 08- IOAF 33 F
Manufactured: 2009.0 7.13 MADE INCHINA
ONPOSITIONONPOSITIONONPOSITIONONPOSITION
1
2
3
41
2
3
41
2
3
41
2
3
4
1
2
3
4
CLIP SQUARE
FERRITE CLIP TO
THE PIGTAIL
BOTH MOLEX TERMINALS
SHOULD FIT FIRMLY INSIDE
THEIR RESPECTIVE PORTS
AT THE BACK OF THE
READER AS SHOWN
BOTH MOLEX TERMINALS
SHOULD FIT FIRMLY INSIDE
THEIR RESPECTIVE PORTS
AT THE BACK OF THE
READER AS SHOWN
Fig.6. Plugging the
connectors into the
IdentIPoint reade
r
ALIGN THE MOUNTING
SLOTS BEHIND THE
READER WITH THEIR
CORRESPONDING
CATCHES ON THE
BACK-PLATE
10/100
Activity
Power
Model:BTSTD
IdentIP oint St andard In door
Power10-28VDC, PoE
MACID Ethernet 0040840AF33E
MAC IDWi- f i 00408 -I OA F3 3F
Manufactured: 200 9.07.13 MADE IN CHINA
ONPO SITIONONPO SITIONONPO SITIONONPO SITION
1
2
3
4
1
2
3
41
2
3
4
1
2
3
4
1
2
3
4
Fig.7. Aligning IdentIPoint
reader with back-plate
before fixing it
95-7771
8

Honeywell IdentIPoint Intelligent Smartcard Readers
READER ASSEMBLY –
SIDE VIEW
ALIGN THE MOUNTING
SLOTS BEHIND THE
READER WITH THEIR
CORRESPONDING
CATCHES ON THE
BACK-PLATE. PUSH
THE READER
DOWNWARDS UNTIL IT
HOOKS INTO PLACE
FIRMLY
123
456
789
0 #
123
456
789
0 #
READER ASSEMBLY –
FRONT VIEW
READER ASSEMBLY –
SIDE VIEW
ALIGN THE MOUNTING
SLOTS BEHIND THE
READER WITH THEIR
CORRESPONDING
CATCHES ON THE
BACK-PLATE. PUSH
THE READER
DOWNWARDS UNTIL IT
HOOKS INTO PLACE
FIRMLY
123
456
789
0 #
123
456
789
0 #
READER ASSEMBLY –
FRONT VIEW
Fig.8. Fixing
the
IdentIPoint
reader on the
back-plate
10/100
Activity
Power
Model: BTSTD
IdentIPoint St andard Indoor
Power10-2 8 VDC, PoE
MACID Ethernet 0040840AF33E
MACID W i-fi 00408-IOAF33F
Manufactured: 2009.07.13 MADEIN CHINA
ONPOSITIONONPOSITIONONPOSITIONONPOSITION
1
2
3
4
1
2
3
41
2
3
4
1
2
3
4
1
2
3
4
USE THE ALLEN
WRENCH TO
SECURE THE
READER TO THE
BACK-PLATE WITH
THE TAMPER-
RESISTANT SCREW
123
456
789
0#
123
456
789
0#
123
456
789
0#
123
456
789
0#
Fig.9.
Securing the
IdentIPoint
reader to the
back-plate
95-7771
9

Honeywell IdentIPoint Intelligent Smartcard Readers
10/100
Activity
Power
Model:BTSTD
IdentIPoint Standard Indoor
Power 10-28 VDC, PoE
MAC ID Ethernet 0 040840AF33E
MAC ID Wi-fi 00408-IOAF33F
Manufactured: 2009.07.13 MADE IN CHINA
ON POSITIONON POSITIONON POSITIONON POSITION
1
2
3
4
1
2
3
41
2
3
4
1
2
3
4
1
2
3
4
10/100
Activity
Power
Model:BTSTD
IdentIPoint Standard Indoor
Power 10-28 VDC, PoE
MAC ID Ethernet 0 040840AF33E
MAC ID Wi-fi 00408-IOAF33F
Manufactured: 2009.07.13 MADE IN CHINA
ON POSITIONON POSITIONON POSITIONON POSITION
1
2
3
4
1
2
3
41
2
3
4
1
2
3
4
1
2
3
4
Marking Color Description
10/100 Green Onwhennetworkis100
MBit
Activity Orange Flashesonnetworkactivity
Power Blue Onifpoweron
Marking Color Description
10/100 Green Onwhennetworkis100
MBit
Activity Orange Flashesonnetworkactivity
Power Blue Onifpoweron
J9 PIN PIN J10
SAI‐1‐GND 91Power‐OUT
SAI‐182Power‐GND
SAI‐0‐GND 7 3 RS485‐A
SAI‐064RS485‐B
Relay‐NO 5 5 RS485‐GND
Relay‐NC 4 6 DO
Relay‐C37DOGnd
Power‐GND 2 8 SAI‐2
Power‐IN 19SAI‐2‐GND
10 Frame‐GND
J9 PIN PIN J10
SAI‐1‐GND 91Power‐OUT
SAI‐182Power‐GND
SAI‐0‐GND 7 3 RS485‐A
SAI‐064RS485‐B
Relay‐NO 5 5 RS485‐GND
Relay‐NC 4 6 DO
Relay‐C37DOGnd
Power‐GND 2 8 SAI‐2
Power‐IN 19SAI‐2‐GND
10 Frame‐GND
Position Effectwhen“ON”
(PositionLeft)
1RS485‐Apullup
2RS485termination
3RS485‐Bpulldown
4WifiDisable
Position Effectwhen“ON”
(PositionLeft)
1RS485‐Apullup
2RS485termination
3RS485‐Bpulldown
4WifiDisable
DIP SWITCH S1
CONNECTORS AT THE BACK
LED INDICATORS AT THE BACK
FACTORY
RESET
SWITCH
OPTICAL
ALARM
TAMPER
Fig10. Reader connections
95-7771
10

Honeywell IdentIPoint Intelligent Smartcard Readers
95-7771
11
INPUT/OUTPUT MODULE
Drywall Mounting
1. The IOM is a clamshell plastic case. The
back half of the case has the electronic
circuit board fastened to it while the front
case cover swings open to allow access to
the electronics and wiring. Pull open the
front cover. This reveals the mounting
holes and other components inside the
IOM. See Fig.11 and Fig.12.
2. Use the back half to mark out the position
of the IOM on the drywall. Also mark the
positions of the mounting screws and the
openings for routing the cables. See Fig.13.
3. Cut the two cable openings on the drywall
using suitable tools. The openings should
be aligned with the knock-out holes
provided on the back half for routing the
cables. Also punch three holes at suitable
places in the drywall for the mounting
screws. Use the wall anchors for additional
holding strength. See Fig.13.
4. Ensure that the knock-out holes on the
back half have been opened up. (Knock-
out holes are also provided on both sides
of the IOM enclosure in case field
conditions require routing the wires from
the sides.) Hold the back half in position on
the drywall. Align the mounting screws with
their holes and fasten the back half
securely on the drywall using the three
screws. See Fig.13.
5. Route the field wires from behind the
drywall through the cable opening and
bring them inside the IOM via the knock-out
holes. Connect the wire terminals to the
ends of the wires and plug the wire
terminal(s) in their correct slots on the PCB.
See Fig.15. For IOM connection details
see Fig.17. Drop the excess wire lengths
behind the drywall. Set the S1 DIP switch if
the IOM is to be connected to a reader via
RS485. See Fig.17 and appendix for more
details.
6. Set the IOM address as per Fig.17 and
appendix. Once all connections and
settings are done, close the IOM enclosure
by pressing the front case cover over the
back half. See Fig.15.
7. Use the Allen wrench to tighten the tamper-
resistant screw at the top of the IOM
enclosure. See Fig.16.
Gang-box (concrete wall) Mounting
1. The IOM is a clamshell plastic case. The
back half of the case has the electronic
circuit board fastened to it while the front
case cover swings open to allow access to
the electronics and wiring. Pull open the
front cover. This reveals the mounting
holes and other components inside the
IOM. See Fig.11 and Fig.12.
2. Ensure that the correct sized gang-box is
securely embedded in the concrete wall.
One of the holes provided in the gang-box
for the screws should align properly with at
least the top hole provided in the IOM's
back half for the screw. For the remaining
screws punch additional holes at the
correct places directly in the concrete wall.
Use the wall anchors for additional holding
strength. The gang-box itself should be
large enough to cover both the knock-out
cable holes at the back of the IOM. See
Fig.14.

Honeywell IdentIPoint Intelligent Smartcard Readers
3. Route the field wires from the conduits into
the gang-box and bring them inside the
IOM via the knock-out holes.
4. The IOM can now be mounted on the wall.
Hold the back half in position over the
gang-box and wall. Align the three
mounting screws with their holes and
fasten the back half securely on the gang-
box and wall using the screws. See Fig.14.
5. Connect the wire terminals to the ends of
the wires and plug the wire terminal(s) in
their correct slots on the PCB. See Fig.15.
For IOM connection details see Fig.17.
Accommodate any excess wire lengths
inside the gang-box. Set the S1 DIP switch
if the IOM is to be connected to a reader
via RS485. See Fig.17 and appendix for
more details.
6. Set the IOM address as per Fig.17 and
appendix. Once all connections and
settings are done, close the IOM enclosure
by pressing the front case cover over the
back half. See Fig.15.
7. Use the Allen wrench to tighten the tamper-
resistant screw at the top of the IOM
enclosure. See Fig.16.
95-7771
12

Honeywell IdentIPoint Intelligent Smartcard Readers
Power
Data
Tamper
POWER,
DATA AND
TAMPER
INDICATION
LEDS
FRONT COVER
OF THE IOM
HINGE AT THE
BOTTOM HOLDING
THE TWO PARTS
TOGETHER
BACK HALF OF
THE IOM
SIDE KNOCK-OUTS
FOR CABLE HOLES
Power
Data
Tamper
POWER,
DATA AND
TAMPER
INDICATION
LEDS
FRONT COVER
OF THE IOM
HINGE AT THE
BOTTOM HOLDING
THE TWO PARTS
TOGETHER
BACK HALF OF
THE IOM
SIDE KNOCK-OUTS
FOR CABLE HOLES
Fig.11. Outer structure of IOM – Front and side view
95-7771
13

Honeywell IdentIPoint Intelligent Smartcard Readers
PRINTED CIRCUIT
BOARD
BACK KNOCK-
OUTS FOR CABLE
HOLES (2)
WIRING
TERMINALS –
2 WIRE (13)
WIRING
TERMINALS –
3 WIRE (3)
IOM FRONT COVER - OPEN
HOLE FOR
TAMPER-
RESISTANT
SCREW
IOM BACK HALF - OPEN
HOLE FOR
TAMPER-
RESISTANT
SCREW
LIGHT GUIDES
CABLE
GUIDES (6)
COVER TAMPER
DETECTION
SWITCH
PULL OPEN THE
FRONT COVER OF
THE IOM AND ALLOW
IT TO HANG FROM
THE HINGE
MOUNTING
SCREW HOLES
(3)
Fig.12. Internal structure and components of IOM
95-7771
14

Honeywell IdentIPoint Intelligent Smartcard Readers
95-7771
15
Fig.13. Fixing the IOM on a drywall
CUT OPENINGS IN THE
DRYWALL FOR ROUTING THE
WIRES. THE OPENINGS MUST
HAVE THE SAME DIMENSIONS
AS THAT IN THE BACK HALF OF
THE IOM.
Fig.13. Fixing the IOM on a drywall
USE THE SCREWS
PROVIDED TO FIX THE
BACK HALF OF THE IOM
TO THE DRYWALL.
NOTE: USE ALL THREE
HOLES TO FASTEN THE
IOM
PUNCH THREE HOLES IN
THE DRYWALL FOR THE
SCREWS
CUT OPENINGS IN THE
DRYWALL FOR ROUTING THE
WIRES. THE OPENINGS MUST
HAVE THE SAME DIMENSIONS
AS THAT IN THE BACK HALF OF
THE IOM.
USE THE SCREWS
PROVIDED TO FIX THE
BACK HALF OF THE IOM
TO THE DRYWALL.
NOTE: USE ALL THREE
HOLES TO FASTEN THE
IOM
PUNCH THREE HOLES IN
THE DRYWALL FOR THE
SCREWS

Honeywell IdentIPoint Intelligent Smartcard Readers
USE THE SCREWS PROVIDED
TO FIX THE BACK HALF OF IOM
TO THE GANGBOX AND THE
WALL.
NOTE: USE ALL 3 SCREWS TO
FASTEN THE IOM
GANGBOX EMBEDDED IN WALL
PUNCH ADDITIONAL HOLES
IN THE WALL FOR THE
OTHER SCREWS
USE THE SCREWS PROVIDED
TO FIX THE BACK HALF OF IOM
TO THE GANGBOX AND THE
WALL.
NOTE: USE ALL 3 SCREWS TO
FASTEN THE IOM
GANGBOX EMBEDDED IN WALL
PUNCH ADDITIONAL HOLES
IN THE WALL FOR THE
OTHER SCREWS
Fig.14. Fixing the IOM on a concrete wall using gang-box and conduit
95-7771
16

Honeywell IdentIPoint Intelligent Smartcard Readers
95-7771
17
Fig.15. Routing the wires and connecting them to the IOM PCB
ROUTE THE WIRES
THROUGH THE
KNOCKED OUT HOLES
AND FIX THEM TO THE
CORRECT TERMINALS
ON THE PCB USING THE
PROVIDED WIRE
TERMINAL BLOCKS
AFTER WIRING AND
OTHER HARDWARE
CONFIGURATIONS ARE
DONE, SHUT THE FRONT
COVER OF THE IOM
ROUTE THE WIRES
THROUGH THE
KNOCKED OUT HOLES
AND FIX THEM TO THE
CORRECT TERMINALS
ON THE PCB USING THE
PROVIDED WIRE
TERMINAL BLOCKS
AFTER WIRING AND
OTHER HARDWARE
CONFIGURATIONS ARE
DONE, SHUT THE FRONT
COVER OF THE IOM
AFTER WIRING AND
OTHER HARDWARE
CONFIGURATIONS ARE
DONE, SHUT THE FRONT
COVER OF THE IOM

Honeywell IdentIPoint Intelligent Smartcard Readers
95-7771
18
Power
Data
Tamper
USE THE ALLEN
WRENCH TO
SECURE THE FRONT
COVER OF THE IOM
TO THE BACK HALF
WITH TAMPER-
RESISTANT SCREW
Power
Data
Tamper
Power
Data
Tamper
USE THE ALLEN
WRENCH TO
SECURE THE FRONT
COVER OF THE IOM
TO THE BACK HALF
WITH TAMPER-
RESISTANT SCREW
Fig.16. Securing the front cover onto the back half of the IOM

Honeywell IdentIPoint Intelligent Smartcard Readers
DIPswitch‐ S1
Position Effectwhen“ON”
(PositionUp)
1RS485‐Apullup
2RS485termination
3RS485‐Bpulldown
4Reserve
Position Effectwhen“ON”
(PositionUp)
1RS485‐Apullup
2RS485termination
3RS485‐Bpulldown
4Reserve
Switch Description
S1 RS485TerminationControlDIPswitch
S2 InitializationButton
S3 IOMAddresssetupDIPswitch
S4 Covertamperdetectionswitch
Switch Description
S1 RS485TerminationControlDIPswitch
S2 InitializationButton
S3 IOMAddresssetupDIPswitch
S4 Covertamperdetectionswitch
S2:Initialization
Button
DIPswitchS3 ‐IOMaddress
Position Description
1 Addressvalue1
2 Addressvalue2
3 Addressvalue4
4 Addressvalue8
5 Addressvalue16
6 Addressvalue32
7 Addressvalue64
8ForIOMsetup,normallysettoOFF
Position Description
1 Addressvalue1
2 Addressvalue2
3 Addressvalue4
4 Addressvalue8
5 Addressvalue16
6 Addressvalue32
7 Addressvalue64
8ForIOMsetup,normallysettoOFF
S4:Covertamper
detectionswitch
Fig.17. IOM connections
95-7771
19

Honeywell IdentIPoint Intelligent Smartcard Readers
APPENDIX
WIRING DIAGRAMS
Fig.18. Single reader with
REX and without IOM
Po wer – Mi n . 18 AW G
Power Gnd – Min.18 AWG
Eth ern et – CAT5
Power/Signal – Min. 18 AWG
Sig nal – Min. 18 AWG
LEGEND
Position Effect “O
to
RS485
when
th
N”
ht)
llup
(slideeRig
1‐
RS485
Apu
term
‐
2 RS485 ination
Bpulldown3
4WifiDisable
DC–Power
12to24V
IfPOEisnotused
2KΩ
ToDoorSensor
1KΩ
1
Power‐OUT
SAI‐1‐GND
9
2
Power‐GND
SAI‐1
8
3
RS485‐A
SAI‐0‐GND
7
4
RS485‐B
SAI‐0
6
5RS485‐GND
Relay‐NO 5
6
DO
Relay‐NC
4
7
DOGnd
Relay‐C
3
8
SAI‐2
Power‐GND
2
9
SAI‐2‐GND
Power‐IN
1
Frame‐GND
J10PINPINJ9
S1
ToDoorLockToDoorLock
ToLANToLAN Ethernet
ToREXSwitchToREXSwitch
2KΩ1KΩ
IdentIPointreader
10
95-7771
20
Other manuals for IdentIPoint
1
Table of contents
Other Honeywell Card Reader manuals

Honeywell
Honeywell OmniProx OP-95 User manual

Honeywell
Honeywell IF2 User manual

Honeywell
Honeywell SPR-S8EZS User manual

Honeywell
Honeywell luminAXS Series Instruction manual

Honeywell
Honeywell Dolphin CN80G User manual

Honeywell
Honeywell IF2B User manual

Honeywell
Honeywell Temaline TKL19 User manual

Honeywell
Honeywell 1026FF02F9 User manual

Honeywell
Honeywell Dolphin 9700-MSCR User manual

Honeywell
Honeywell Accentic 026423 User manual